This post contains affiliate links for LoveCrochet. If you make a purchase by clicking on them, I make a small commission at no extra cost to you. Thanks for your support!
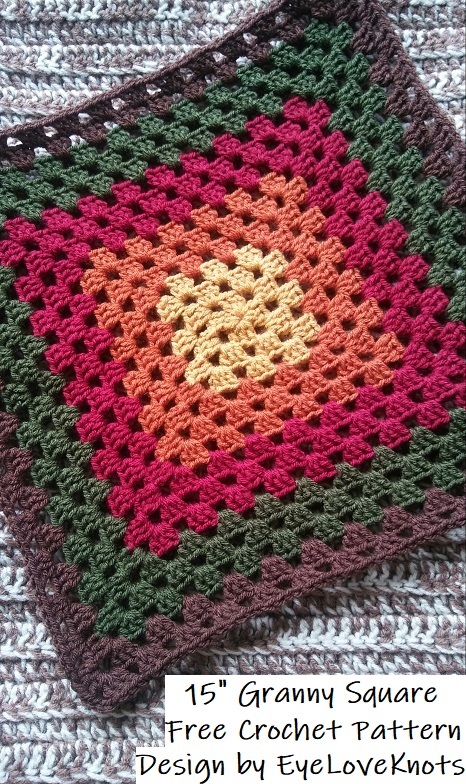
I have a fun accessory to share with you this Saturday, in which I am using this 15″ Granny Square. I will also have an inspiration photo for you in my next post, but for now, enjoy this crochet pattern! This square can be used for so many things. While working it up, I thought of a throw pillow, and an afghan. While I would LOVE to make a set for my home, right now I have a lot to do, so I am trying my best to stay on task. What else can you think of to be made with this granny square? Or share with me what color/s you’d use!
If you would like a PDF version of this post, you may get one through either my EyeLoveKnots Etsy Shop or EyeLoveKnots Craftsy Shop for a small fee. This fee is to compensate for the views lost when you no longer need to return to the blog to for the information, as you will have your own copy. Plus! It helps fund supplies for new projects to share with you!
Shop EyeLoveKnots Etsy: 15″ Granny Square.
Shop EyeLoveKnots Craftsy: 15″ Granny Square.
Are you a Raveler? Share your version of this project on Ravelry – 15″ Granny Square.
Materials:
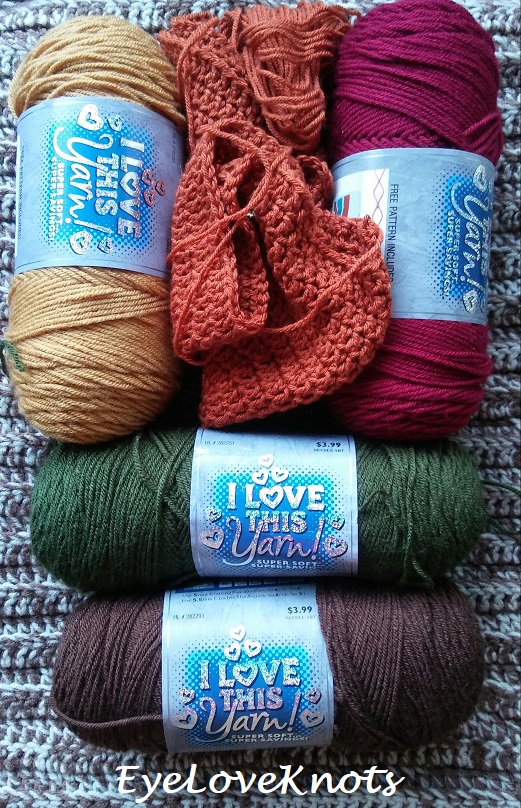
- 202 Yards of Worsted Weight Yarn – I used Hobby Lobby’s I Love This Yarn – 50 Yards of Brown, 25 Yards of Burnt Pumpkin, 2 Yards of Sungold, 75 Yards of Cranberry, and 50 Yards of Dark Olive.
- I9/5.5mm Crochet Hook
- Tapestry Needle for Weaving in Ends
Material Notes:
Yarn Alternatives: Red Heart’s With Love, Berroco’s Vintage Yarn.
Time Spent:
I finished my square up in just under two hours. If you have less color changes, you’ll finish even faster with less ends to weave in!
Measurements:
15″ Square
Gauge:
14 DC by 8 Rows = 4″ Square
Abbreviations:
- DC – Double Crochet
Pattern Notes:
Beginning chain counts towards final stitch count except in finishing.
Chain 2 in the last corner of the first round of granny square is intentional to keep a more even square with future rounds.
Join to the first stitch, not the beginning chain.
Best to weave in ends as you change colors. It’s easier to get to this way, and helps in the end for anyone (like me) who doesn’t like the weaving process.
This square will be a larger project I am working on, and my color changes were intentional. I have 5 color changes in my granny square, and will be sharing my pattern with each of these changes. If you decide to do one color, more but less than 5, work the color changes as you see fit.
To change yarn colors, slip stitch over twice after join, then insert hook into the next chain space, and pull new color through. Hold taught, and work the first cluster over the two tails. Working over tails here will keep the stitches from pulling loose while you are working, and keep the color change even. Alternatively, you can work an invisible join, and join new color in any chain space.
Pattern:
In Sungold, chain 5. Join to form a ring. Chain 2, work 2 DC into the ring, chain 3, (3 DC into the ring, chain 3) 2x, 3 DC into the ring, chain 2. Join. (12 DC)
R2: Slip stitch over to the chain 3 space. Chain 2, work 2 DC into the same chain space, chain 3, 3 DC into the same chain space, chain 1, (3 DC into the next chain space, chain 3, 3 DC into the same chain space, chain 1) 3x. Join. (24 DC)
R3: Slip stitch over to the chain 3 space. Chain 2, work 2 DC into the same chain space, chain 3, 3 DC into the same chain space, chain 1, 3 DC into the next chain space, chain 1, (3 DC into the next chain space, chain 3, 3 DC into the same chain space, chain 1, 3 DC into the next chain space, chain 1) 3x. Join. (36 DC)
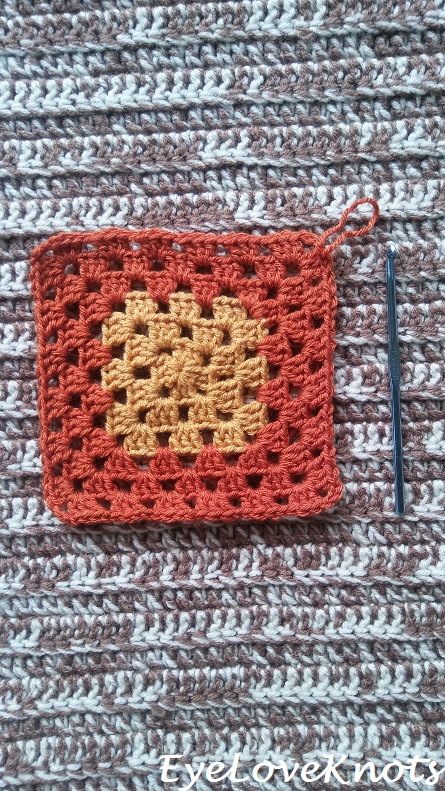
R4: Slip stitch over to the chain 3 space, and change to Burnt Pumpkin. Chain 2. Work 2 DC into the same chain space, chain 3, 3 DC into the same chain space, chain 1, (3 DC into the next chain space, chain 1) 2x, [3 DC into the next chain space, chain 3, 3 DC into the same chain space, chain 1, (3 DC into the next chain space, chain 1) 2x] 3x. Join. (48 DC)
R5: Slip stitch over to the chain 3 space. Chain 2, work 2 DC into the same chain space, chain 3, 3 DC into the same chain space, chain 1, (3 DC into the next chain space, chain 1) 3x, [3 DC into the next chain space, chain 3, 3 DC into the same chain space, chain 1, (3 DC into the next chain space, chain 1) 3x] 3x. Join. (60 DC)
R6: Slip stitch over to the chain 3 space. Chain 2, work 2 DC into the same chain space, chain 3, 3 DC into the same chain space, chain 1, (3 DC into the next chain space, chain 1) 4x, [3 DC into the next chain space, chain 3, 3 DC into the same chain space, chain 1, (3 DC into the next chain space, chain 1) 4x] 3x. Join. (72 DC)
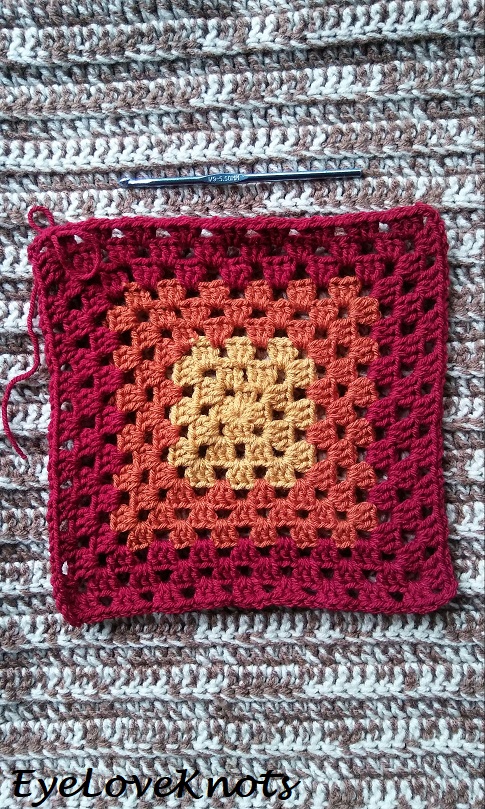
R7: Slip stitch over to the chain 3 space, and change to Cranberry. Chain 2, work 2 DC into the same chain space, chain 3, 3 DC into the same chain space, chain 1, (3 DC into the next chain space, chain 1) 5x, [3 DC into the next chain space, chain 3, 3 DC into the same chain space, chain 1, (3 DC into the next chain space, chain 1) 5x] 3x. Join. (84 DC)
R8: Slip stitch over to the chain 3 space. Chain 2, work 2 DC into the same chain space, chain 3, 3 DC into the same chain space, chain 1, (3 DC into the next chain space, chain 1) 6x, [3 DC into the next chain space, chain 3, 3 DC into the same chain space, chain 1, (3 DC into the next chain space, chain 1) 6x] 3x. Join. (96 DC)
R9: Slip stitch over to the chain 3 space. Chain 2, work 2 DC into the same chain space, chain 3, 3 DC into the same chain space, chain 1, (3 DC into the next chain space, chain 1) 7x, [3 DC into the next chain space, chain 3, 3 DC into the same chain space, chain 1, (3 DC into the next chain space, chain 1) 7x] 3x. Join. (108 DC)
R10: Slip stitch over to the chain 3 space, and change to Dark Olive. Chain 2, work 2 DC into the same chain space, chain 3, 3 DC into the same chain space, chain 1, (3 DC into the next chain space, chain 1) 8x, [3 DC into the next chain space, chain 3, 3 DC into the same chain space, chain 1, (3 DC into the next chain space, chain 1) 8x] 3x. Join. (120 DC)
R11: Slip stitch over to the chain 3 space. Chain 2, work 2 DC into the same chain space, chain 3, 3 DC into the same chain space, chain 1, (3 DC into the next chain space, chain 1) 9x, [3 DC into the next chain space, chain 3, 3 DC into the same chain space, chain 1, (3 DC into the next chain space, chain 1) 9x] 3x. Join. (132 DC)
R12: Slip stitch over to the chain 3 space. Chain 2, work 2 DC into the same chain space, chain 3, 3 DC into the same chain space, chain 1, (3 DC into the next chain space, chain 1) 10x, [3 DC into the next chain space, chain 3, 3 DC into the same chain space, chain 1, (3 DC into the next chain space, chain 1) 10x] 3x. Join. (144 DC)
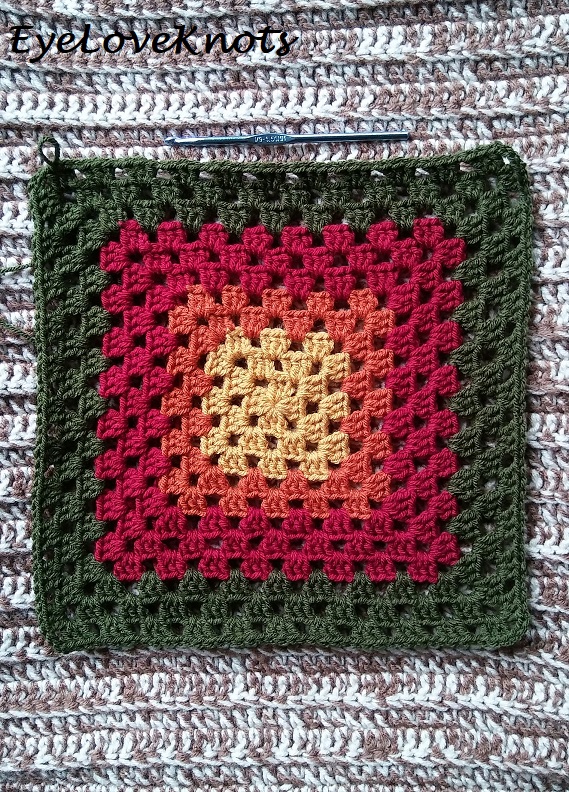
R13: Slip stitch over to the chain 3 space, and change to Brown. Chain 2, work 2 DC into the same chain space, chain 3, 3 DC into the same chain space, chain 1, (3 DC into the next chain space, chain 1) 11x, [3 DC into the next chain space, chain 3, 3 DC into the same chain space, chain 1, (3 DC into the next chain space, chain 1) 11x] 3x. Join. (156 DC)
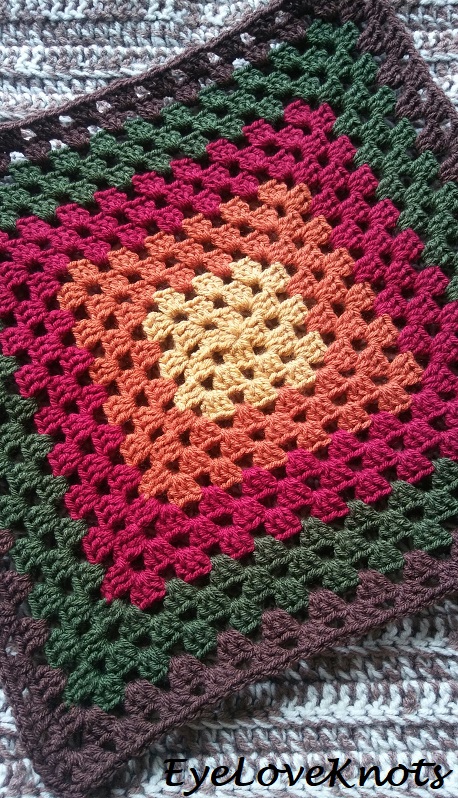
R14: Slip stitch over to the chain 3 space. Chain 2, work 2 DC into the same chain space, chain 3, 3 DC into the same chain space, chain 1, (3 DC into the next chain space, chain 1) 12x, [3 DC into the next chain space, chain 3, 3 DC into the same chain space, chain 1, (3 DC into the next chain space, chain 1) 12x] 3x. Join. (168 DC)
Fasten Off, and Weave in Remaining Ends.
I am not re-inventing the wheel here. This stitch pattern is not copyrighted, but my words and photos from this post are, and I did spend time working the math out to get this right just the right size I was looking for. DO NOT try to claim my words and photos as your own, nor should you try to sell them. DO NOT copy and paste my pattern anywhere, link to it instead.
Join the EyeLoveKnots Crafting Community on Facebook to share your creations, and see what others are up to!
Linked Up To…
Nifty Thrifty Sunday #354 – Meet Our Life
Craft Schooling Sunday – Creative Jewish Mom
Creative Mondays Linkup – Claire Justine
Handmade Monday #95 – Sum of their Stories
Merry Monday Link Party #224 – A Wonderful Thought
The Really Crafty Link Party #137 – Keeping it Real
Inspiration Monday – Scattered Thoughts of a Crafty Mom
Craftastic Monday Link Party – Sew Can Do
Ginx Woolly Linx Party October – Ginx Craft
Tutorials & Tips Link Party #368 – Home Stories A to Z
The Scoop Link Party #346 – Worthing Court Blog
441st Inspire Me Tuesday – A Stroll Thru Life
Fabulous Party #235 – Lou Lou Girls
THe Linky Ladies Party #142 – The Purple Poncho
Sew It Cook It Craft It Link Party #73 – Sew Historically
{Wow Me} Wednesday #371 – Ginger Snap Crafts
Your Whims Wednesday #375 – My Girlish Whims
The Wednesday Link Party 265 – The Stitchin’ Mommy
Hookin’ on Hump Day #176 – Petals to Picots
Talk of the Town 143 – My Repurposed Life
Pin Party #285 – Pin Junkie
Crafty Love Link Party #38 – Jessie at Home
Scrappy Stitchers Link Party #46 – Stitches’N’Scraps
Home Matters #204 – Domestic Deadline
Friday Frenzy Link Party – 10/5/18 – Kelly Lynn’s Sweets and Treats
Pretty Pintastic Link Party #229 – Sparkle Living
Best of the Weekend Link Party – B4 and Afters
Link Your Stuff – Anniemarie’s Haakblog
Snickerdoodle Create Bake Make Party #252 – Across the Boulevard
Granny-Spiration Link Up Party #10 – Atelier Marie-Lucienne
I am soooo glad to see you dont flip your granny square each row. I see so many on instagram that do that because they say it keeps it square and I have never had a problem with it going wonky. Thanks for a great tutorial
For sure! I have worked it turned before, but I don’t see the point when there isn’t a seam to worry about. All in the same direction like this one, produces a beautiful piece of fabric. Thanks for stopping by!
Love the colors.. This could be a great way to make some pillows to help decorate for fall.
Thank you for sharing at The Really Crafty Link Party. Pinned.
Yes! I wanted to make some after I finished up the square, but I had a different project in mind first, and no time for another. I will definitely be working some up for next year though.
The granny square is one of my favourite things to crochet, the colours you’ve used here are just lovely.
Thanks, Julie! It’s one of my favorites too. So versatile!
Love this Alexandra, the colours go together beautifully too 🙂
Thanks for sharing at Creative Mondays.
Hope you can join us today.
Thanks, Claire! I was a little worried about that green, but I do love how the finished piece turned out.
Love the colors of the Granny square, thanks for the inspiration. I’ll be making a Granny vest!
Oohh that sounds awesome!