This is a free crochet pattern for how-to crochet my C2C Valentine’s Envelope.
This post contains affiliate links for Yarnspirations & LoveCrafts. If you make a purchase by clicking on them, I make a small commission at no extra cost to you. Thanks for your support!

Every month, a group of bloggers are challenged by C’mon Get Crafty to create a new craft or project from their own stash of goodies! Everyone is allowed a $10 allowance for necessities to complete their project (i.e. paint brushes, glue, etc), but the bulk of it must be created from their own stash of goodies.
I first heard about this challenge last month when I was reading another designer’s challenge post, and instantly, I knew I wanted to participate too!
I have been wanting to work up a Valentine’s Day envelope for quite a few years (yikes), and I am so glad I got the kick in the butt to do it.
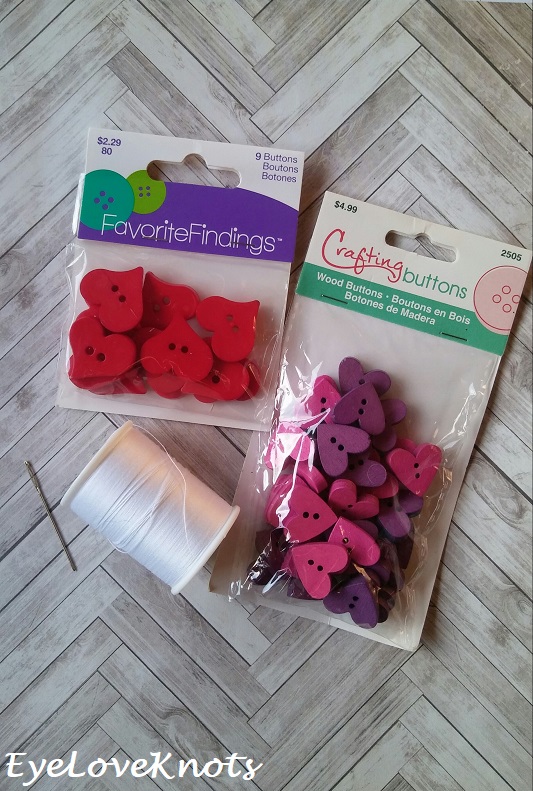
PLUS! These adorable heart buttons have been sitting in my stash for a couple years just waiting for the right project. When I decided on this pouch, I KNEW one of them would be absolutely perfect for it!
Now, let’s talk about the size real quick… So I designed this with my little cousin in mind so she could take it to school with her, and put all of her Valentine’s card in, but I also wanted it to be large enough – about 7″ wide – so that if anyone gave her a regular sized Valentine’s Day card, it would also fit. I assumed a 14″ square, cut in half would give me the 7″ I was looking for – not the case! This pouch came out about 3″ larger than I was going for, but after I finished it, I liked it even more to hold all the Valentine’s Day goodies, like candies too. If you want a smaller one, make a smaller square, but I am not sure if they will all come out 3″ smaller than the original square.
If you would like a PDF version of this post, you may get one through either my EyeLoveKnots Etsy Shop or LoveCrochet Shop for a small fee. This fee is to compensate for the views lost when you no longer need to return to the blog to for the information, as you will have your own copy. Plus! It helps fund supplies for new projects to share with you!
Shop EyeLoveKnots Etsy: COMING SOON.
Shop EyeLoveKnots LoveCrochet: COMING SOON.
Are you a Raveler? Share your version of this project on Ravelry – COMING SOON.
Materials:
- 185 Yards of Worsted Weight Yarn – I used Red Heart’s Super Saver in Shocking Pink and White
- H8/5mm Crochet Hook
- Tapestry Needle for Sewing and Weaving in Ends
- 0.75″ – 1″ Button – I used a 0.75″ purple heart from Wood Heart with Purple and Pink Buttons found at JoAnn’s
- Sewing Thread and Needle
Material Notes:
Yarn Alternatives: Caron’s One Pound, Bernat’s Super Value, Berroco’s Vintage.
You can use any yarn out of your stash with respective yarn, and just adjust the square size.
My button is almost too small for the hole I made – if I worked another, I would work the center point as a chain 2 to better fit my heart button, but if I changed up the button to a larger one (like 1″), I think I would leave the chain 3.
Time Spent:
I had my pouch ready in just over an hour and a half.
Measurements:
10.5″ Wide by 10.63″ Tall
Gauge:
5 Squares = 4.13″ Square
Abbreviations:
- DC – Double Crochet
- SC – Single Crochet
- sc3tog – Single Crochet Three Stitches Together (to decrease)
Pattern Notes:
Beginning chain 2 counts as a double crochet.
A box is comprised of four double crochet’s.
The “space under the same chain joined to” is defined as the space between the last two double crochets of the previous rows box.
Working the final double crochet into the top of the chain from the previous row helps to keep the edge more even. After completing the first box, you may also need to lightly tug on it to keep it even as well.
In Border, chain 1 does not count as a stitch, and join to the first stitch.
Pattern:
Chain 6. DC into the 4th chain, and into each of the next 2. (1 Box)
Row 2: Chain 6, and turn. DC into the 4th chain, and into each of the next 2, slip stitch into the top of the next chain 2. Chain 2, work 2 DC into the space under the same chain joined to, DC into the top of the last stitch. (2 Boxes)
Row 3: (I) Chain 6, and turn. DC into the 4th chain and into each of the next 2, slip stitch into the top of the next chain 2;
(II) Chain 2, work 3 DC into the space under the same chain joined to, skip the next 3 DC, slip stitch into the top of the next chain;
(III) Chain 2, work 2 DC into the space under the same chain joined to, DC into the top of the last stitch. (3 Boxes)
Rows 4 – 18: Using Row 3 as a base, you will continue working in the same manner repeating (II) one extra time each row to increase the number of boxes by one each row. At the end of Row 18, you will have 18 Boxes.
*At this point, if you want a larger pouch, you can easily continue increasing until you have reached your desired width. Similarly, if you wanted a small pouch, you would work less rows.
Row 19: Turn. Slip stitch into the 2nd stitch, and each of the next 2. Chain 2, work 3 DC into the space under the same chain joined to, skip the next 3 DC, slip stitch into the top of the next chain;
(IV) (chain 2, work 3 DC into the space under the same chain joined to, skip the next 3 DC, slip stitch into the top of the next chain) 15x;
Chain 2, work 2 DC into the space under the same chain joined to, skip the next 3 DC, slip stitch into the top of the last stitch. (17 Boxes)
Row 20 – 33: Using Row 19 as a base, you will continue working in the same manner repeating (IV) one less time each row to decrease the number of boxes by one each row. At the end of Row 33, you will have 3 boxes.
Row 34: Turn. Slip stitch into the 2nd stitch, and each of the next 2. Chain 2, work 3 DC into the space under the same chain joined to, skip the next 3 DC, slip stitch into the top of the next chain, chain 2, work 2 DC into the space under the same chain joined to, skip the next 3 DC, slip stitch into the top of the last stitch. (2 Boxes)
Row 35: Turn. Slip stitch into the 2nd stitch, and each of the next 2. Chain 2, work 3 DC into the space under the same chain joined to. Skip the next 3 DC, slip stitch into the top of the last stitch. (1 Box)
Border:
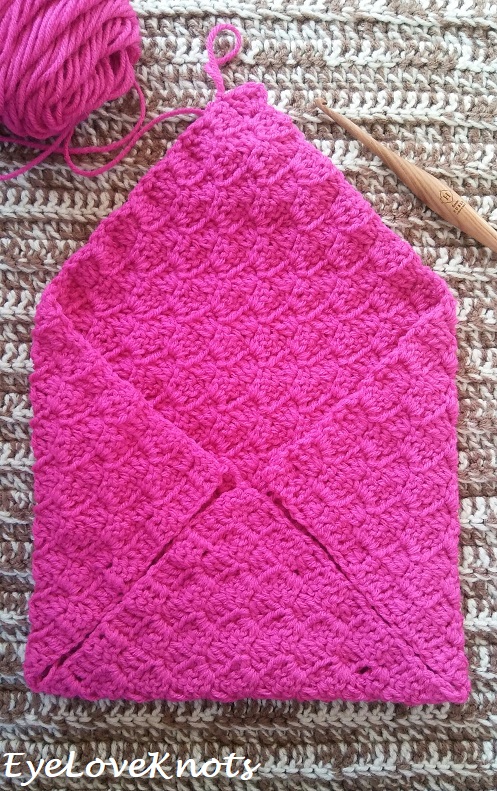
After last join, pull up a loop (so the loop doesn’t come out). Lay square like a diamond with the loop on the top. Fold in the sides, and bottom so they meet in the middle.
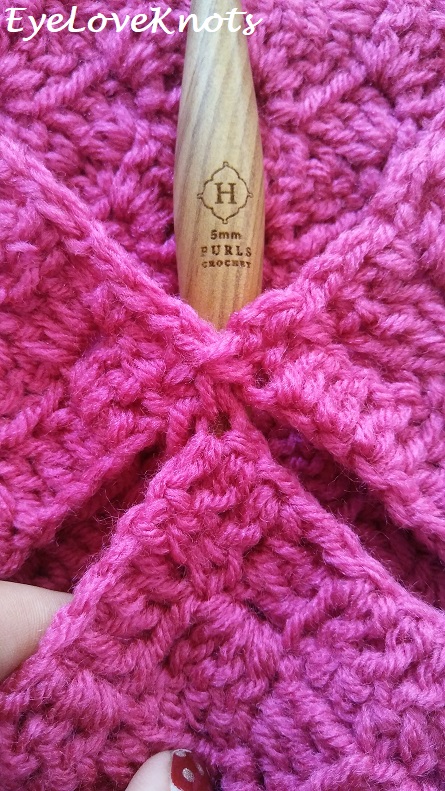
Keeping the shape, go back to the loop. Chain 1, and turn. SC into the space between the two boxes just before the current spot, chain 2, SC at the point, (chain 2, SC into the next space) 18x, chain 2, sc3tog over the last stitch of this side, the point of the bottom, and the corner of the next stitch, chain 2, (SC into the next space, chain 2) 17x. Join, and fasten off.
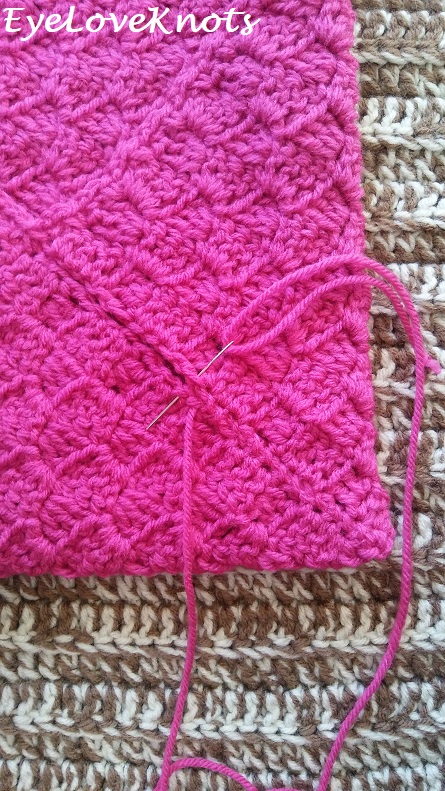
Cut a long strand, and whipstitch closed the two gaps on the sides, making sure not to catch any of the fabric underneath (that happened to me a little!). Usually, I would turn my work inside out, and sew from there, but I just worked this one on the right side – you can’t really see it.
Flap Edging – This is needed to give the overlap:
From the wrong side, attach white yarn at the corner single crochet at the top right corner. Chain 1. SC into this stitch, 2 SC into the next chain space, (SC into the next SC, 2 SC into the next chain space) 8x, 3 SC into the next SC, (2 SC into the next chain space, SC into the next SC) 9x.
R2: Chain 1, and turn. SC into the 1st SC, skip next 2, [(DC, chain 1, DC, chain 1, DC) into the next SC, skip next 2, SC into the next SC, skip next 2] 4x, DC into the next SC, chain 1, (DC, chain 3, DC) into the next SC, chain 1, DC into the next SC, skip next 2, SC into the next SC, [skip next 2, (DC, chain 1, DC, chain 1, DC) into the next SC, skip next 2, SC into the next SC] 4x.
Fasten off, and weave in ends.
Button:
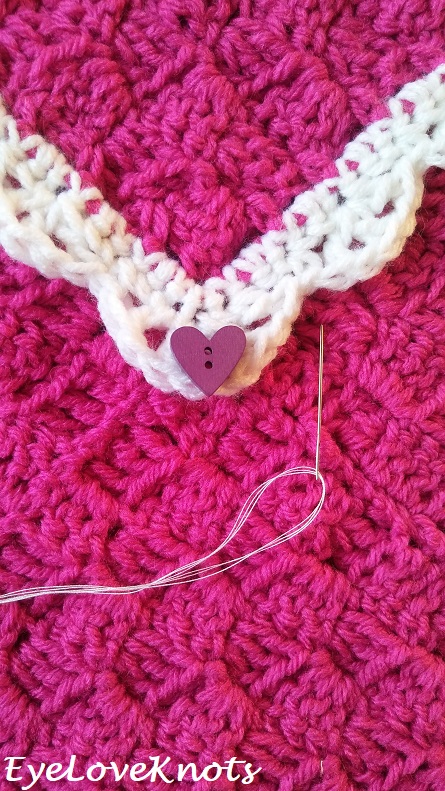
Alrighty… You will need three long strands of sewing thread threaded into the needle, and knotted down at the bottom – it should look like 6 strands. Position your button so you know where it will need to go.
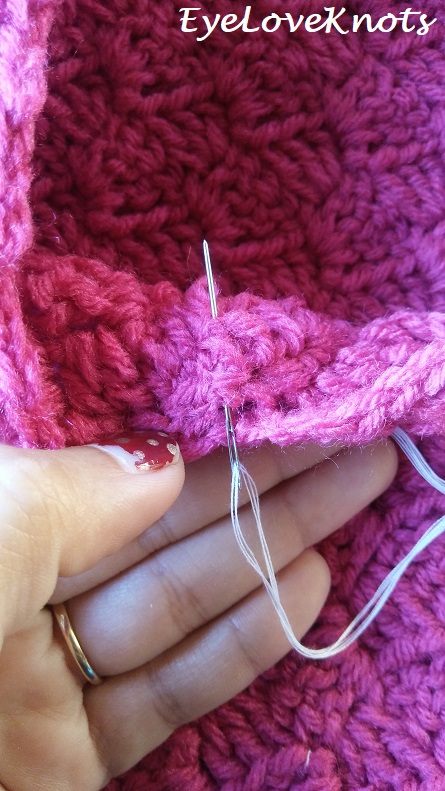
In the sewing world, you would come down from the right side to hide your knot and tail from being seen. With crocheted fabric, it’s a little harder to do because the needle and thread may just pull all the way through. What I did to secure it was first weaved in my thread end from the wrong side of the envelope until I felt it was secure.
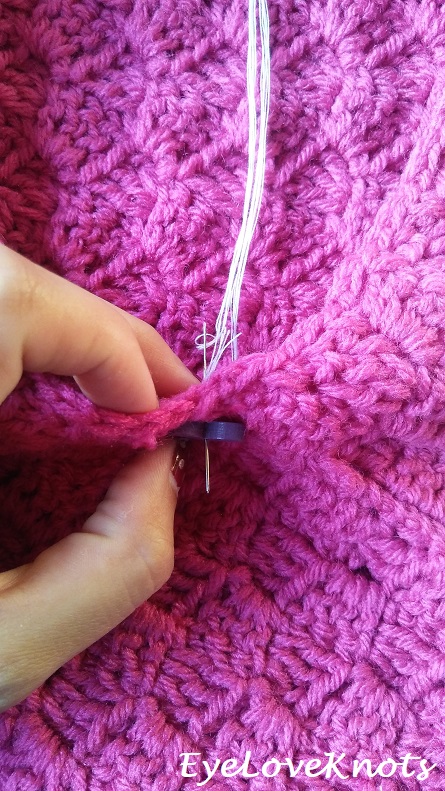
Then we are going to come from the wrong side through the top hole of the button, and down into the bottom hole.
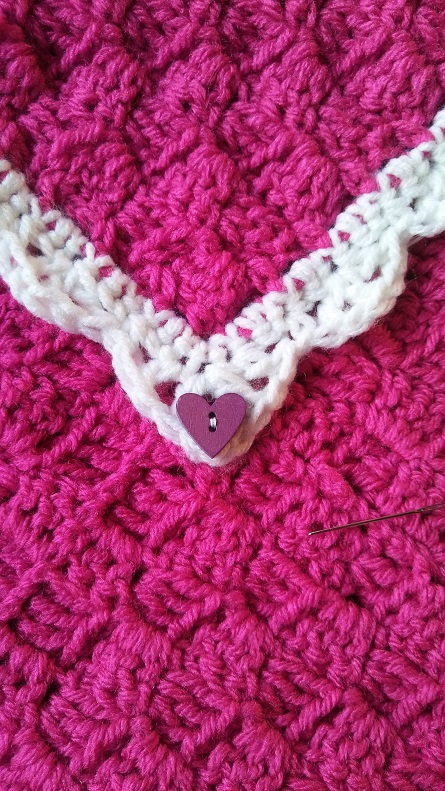
Test your button now to make sure it is in the correct spot.
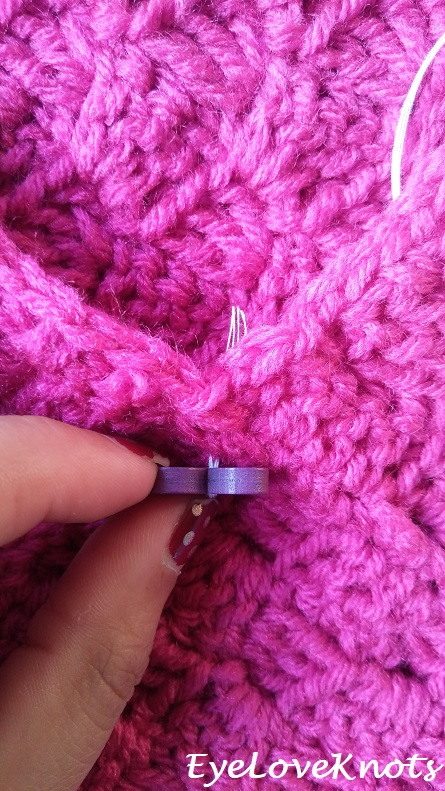
You will want to leave a little slack in your thread when you go in and out of the button holes. It’s a little hard to keep it there when you go in and out, but just stay aware of it, and work slowly. Continue going in and out of the button holes until you feel the button is secured on – I did 5 passes, ending on the wrong side.
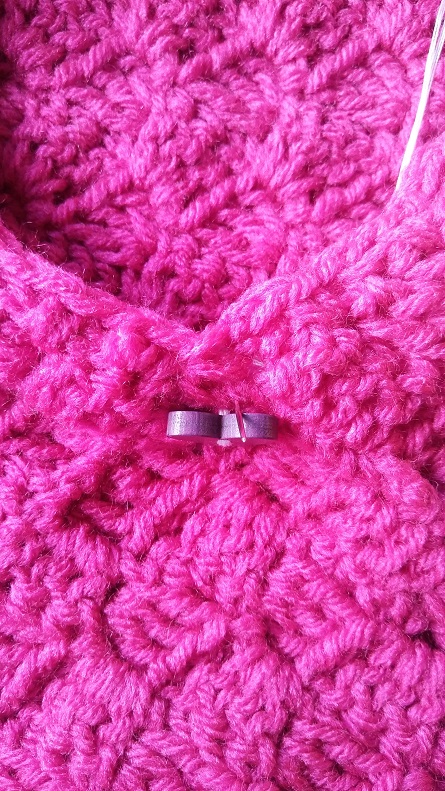
From the wrong side, insert your needle through to the right side just to the right of the top button hole, so you can’t see from the right side.
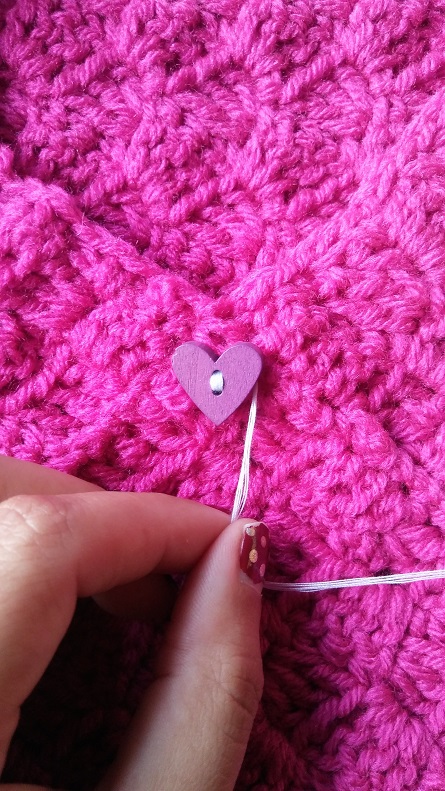
Wrap the thread around the slack you left behind the button – that slack is considered a shank, and wrapping the thread around it going to give security, and height. I wrapped mine around three times.
Take needle down to the wrong side, and weave to secure. Fasten off.
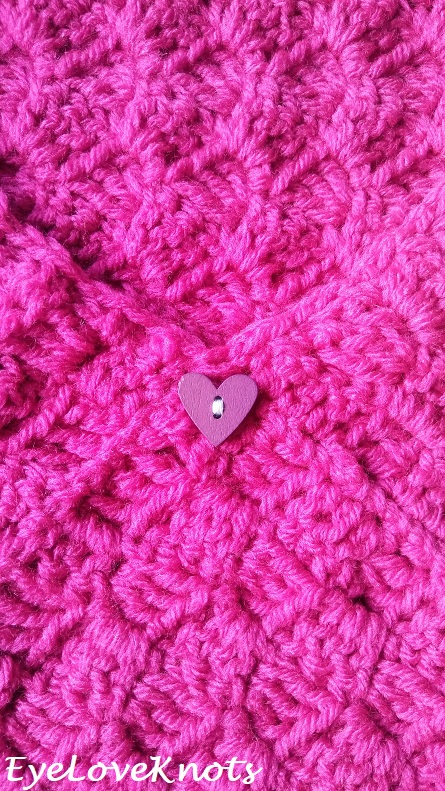
Here is your adorable little button!
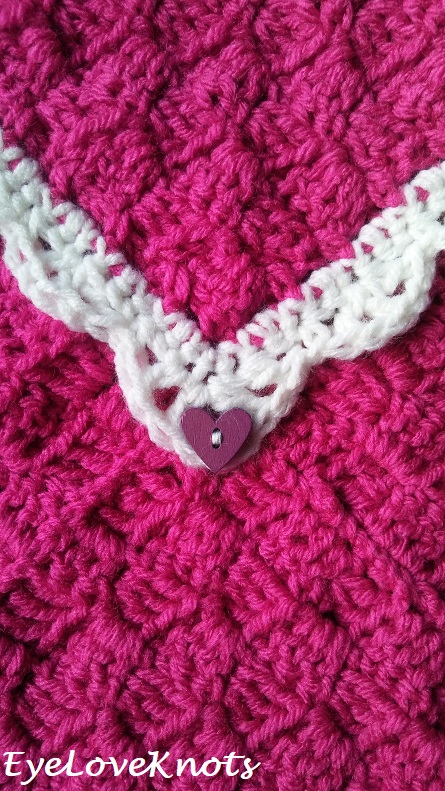
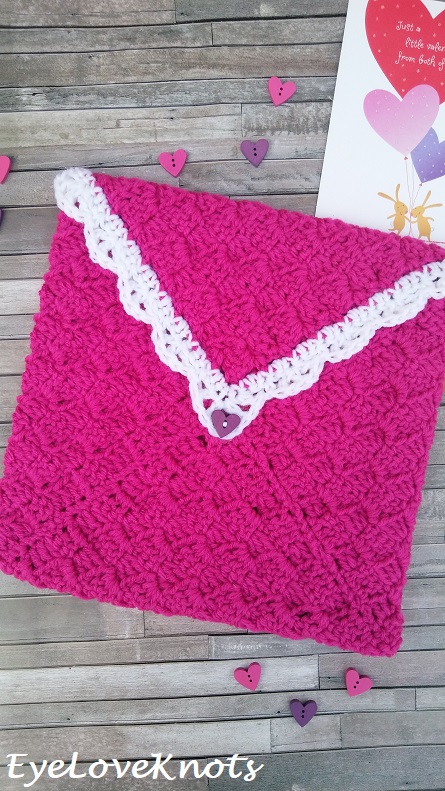
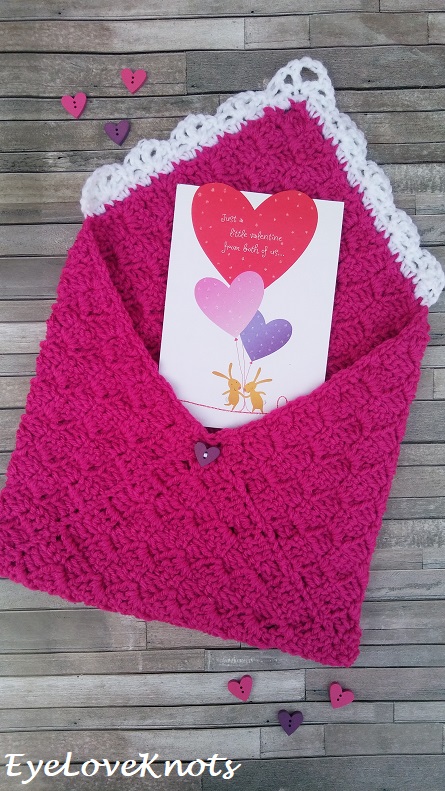
This is a special Valentine’s Day card given to me by my godparents. They have moved far away from me, and I miss them deeply. Was the perfect card to use with this envelope!
Please feel free to make and sell your own C2C Valentine’s Envelope using this pattern, but please DO NOT claim this pattern as your own nor should you sell my pattern, and DO NOT re-publish my photos as your own. DO NOT copy and paste my pattern anywhere, link to it instead.
Join the EyeLoveKnots Crafting Community on Facebook to share your creations, and see what others are up to!
Linked Up To…
In Stitches Party #28 – Nicki’s Homemade Crafts
Craft Schooling Sunday – Creative Jewish Mom
{Nifty Thrifty Sunday #370} – Meet Our Life
Sundays at Home #236 – Celebrating Everyday Life
Craftastic Monday Link Party – Sew Can Do
The Really Crafty Link Party #153 – Keeping it Real
Ginx Woolly Linx Party January 2019 – Ginx Craft
Merry Monday Link Party #238 – A Wonderful Thought
Handmade Monday #110 – Sum of their Stories
Creative Mondays Link Up – Claire Justine
Inspiration Monday – i should be mopping the floor
Totally Terrific Tuesday #212 – Sweet Parrish Place
Sew It Cook It Craft It Link Party #89 – Sew Historically
Talk of the Town 158 – My Repurposed Life
The Link Ladies Party #150 – The Purple Poncho
Fabulous Party #251 – Lou Lou Girls
485th Inspire Me Tuesday – A Stroll Thru Life
The Scoop Link Party #361 – Worthing Court
Tutorials & Tips Link Party 380 – Home Stories A to Z
Weekday Wear Linkup #03 – Away from the Blue
Confident Twosday Linkup – I do deClaire
Turning Heads Linkup – Elegantly Dressed and Stylish
{Wow Me} Wednesday #387 – Ginger Snap Crafts
Hookin’ on Hump Day #183 – Petals to Picots
Wall to Wall DIY Wednesday Link Party! Week 32 – Dabbling and Decorating
The Wednesday Link Party 279 – The Stitchin’ Mommy
Your Whims Wednesday #391 – My Girlish Whims
Pin Junkie Pin Party #300 – The Pin Junkie
Crafty Love Link Party #41 – Jessie at Home
Scrappy Stitchers Link Party #48 – Stitches n Scraps
Funtastic Friday 212 Link Party – Olives n Okra
Home Matters #217 – Domestic Deadline
Thursday Fashion Files Link Up #196 – Curly Crafty Mom
Trendy Thursday Linkup – Thirty Minus One
Weekend Wear Linkup – Mom with Style
Linkup – Lizzie in Lace
Link Your Stuff – Annemarie’s Haakblog
Snickerdoodle Create Bake Make Party – Across the Boulevard
Let’s meet this month’s bloggers!!
C’mon Get Crafty | Purple Hues and Me | Home Crafts by Ali
EyeLoveKnots | Stone Cottage Adventures | Across the Blvd
Domestic Deadline | Shoppe No 5 | Modern to Monticello
My Pinterventures | This Autoimmune Life | Sew Craft Crochet
If you would like to join our Facebook Challenge Group, just ask!
Check out some awesome creations you might be able to make from your own stash! #CraftRoomDestashChallenge
Such a cute envelope! I love the white Lacy border and the cute heart button! I’m pinning this! I was looking for crochet envelope ideas recently.
Absolutely beautiful
First off welcome to the Craft Destash Challenge. I can’t crochet but I appreciate the workmanship that goes into it. The Valentine’s Envelope is so sweet.
Thank you! I love all your upcycles! That is something I want to work on more this year – not necessarily upcycling, but crafting more.
This is such a cute project! This would be good to have as a family and put little love notes in too. Thanks for the fun idea!
That’s a sweet idea!
I love the scalloped edging on the flap! Such a fun design – thanks for the pattern! Welcome to the destash!
This is adorable, lovely idea:)))
It is sweet that you included the card from your Godparents. Beautiful project. You are very talented. Hope to see more projects on the Craft DeStash Challenge.
Thank you, Donna! My godparents and I don’t get to spend a lot of time together anymore as they live across the country, but I think of them often, and I really appreciate the cards they send me.
What a pretty envelope! Thank you for the pattern. Welcome to the de-stash challenge! I’m so glad you joined the fun! -Marci @ Stone Cottage Adventures
So happy you joined the challenge! This is a work of art, I am so envious of your talents! Wonderful creation!
Thank you for hosting this fun challenge, and allowing me to be a part!
How pretty! The details really make it unique. I love the little button. I’m always impressed by your crochet projects.
Love this envelope, and using C2C is brilliant….I have crocheted an envelope before, years ago, and even felted it, which was fun, but now I just want to make some like yours! Maybe I could get a really early start on Chanukah, ha ha, as they’d be perfect for the chocolate coins and prizes.
thanks for sharing on craft schooling Sunday!
I don’t celebrate Chanukah, but I always admire all your projects! A little envelope in blue and white would be really cute, especially with some gold chocolate coins.
Cute! I love those heart shaped buttons.
Thank you for joining The Really Crafty Link Party. Pinned.
Lovely crochet project. This crochet envelope would be such a nice way to present a Valentine’s Day gift.
I saw this featured on Handmade Monday and absolutely loved it! It is so pretty and the color is gorgeous. Pinned for a future project!
Aww, thanks, Nana! Enjoy 🙂
What a lovely idea. I think what really makes it is that lacey edging, and the cute button. Thanks for joining in Ginx Woolly Linx Party for January.