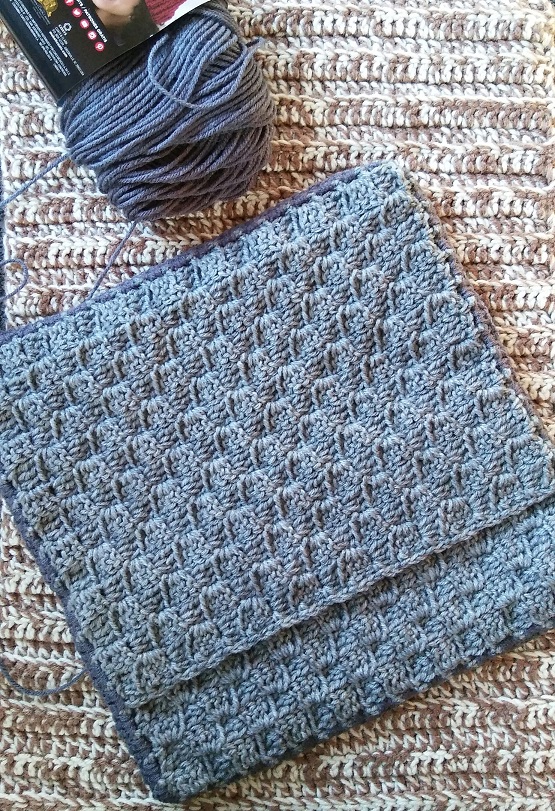
This is a free crochet pattern showing how to crochet a Basic C2C Throw Pillow with Double Crochet Boxes. It’s envelope style with 8 sizes included.
Find the free crochet pattern instructions below, or purchase a printer-friendly, ad-free PDF on Ravelry by clicking here.
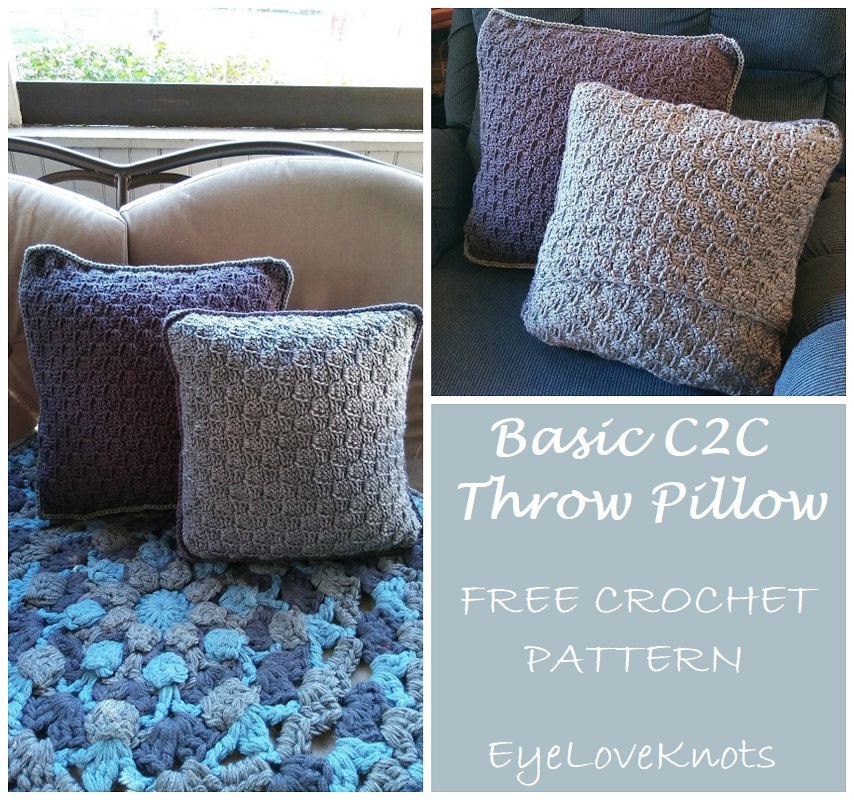
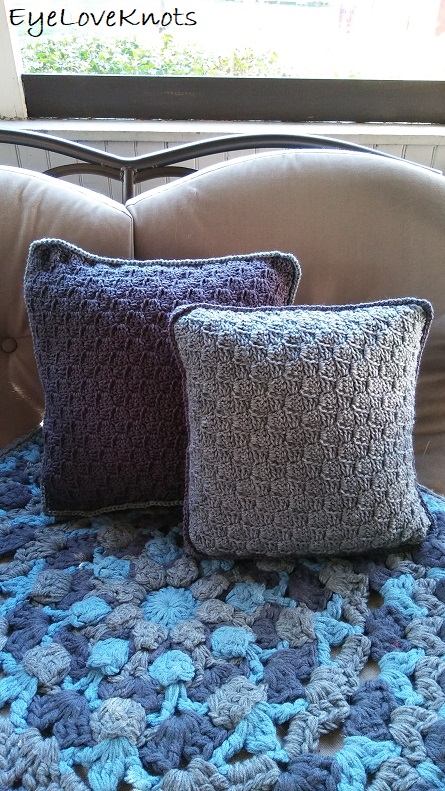
My living room is so plain, and a little mismatched. I have really been wanting to add to it, and make it a little more cohesive and home-y, so I decided after the holiday custom order madness had passed that I was going to take some time to make something for my living room, and what better than some fun throw pillows constructed using a simple, basic pattern?
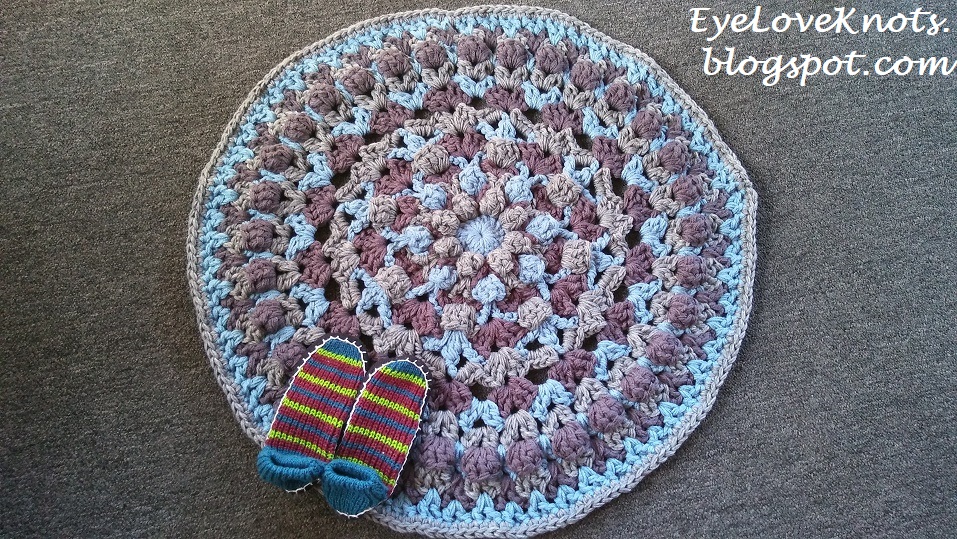
I made this Henrietta Rug (crochet pattern review/hack) January of last year, and it has been sitting on my living room floor since. It has held up surprisingly well being walked all over, thrown up on (by my cat, Shiloh), machine washed, and slept on (by Todd and Shiloh). I will say, if you look up close, it does show some wear/fuzz, but standing over it, you don’t notice.
The leftover yarn from this rug has been sitting in my stash, and so when I thought about these pillows, I decided to pull it out so the pillows would match the rug.

These throw pillows are part of the 2019 Make it for Me Event hosted by Elk Studio. If you aren’t familiar with it, basically it’s a event catered to designing something for ourselves to wear or display, and enjoy.
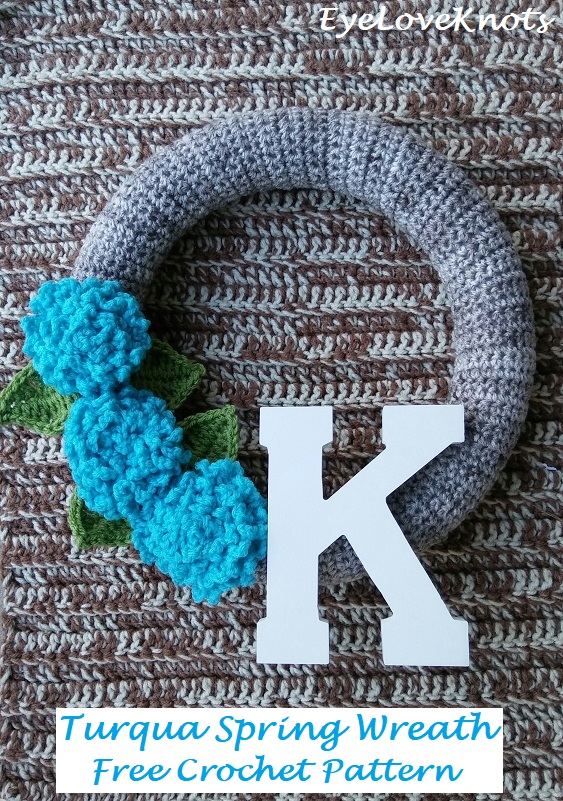
Last year, I made this Turqua Spring Wreath.
AD-FREE, PRINTER FRIENDLY PDF:
If you would like a PDF version of this post, you may get one through either my EyeLoveKnots Etsy Shop, Ravelry or LoveCrochet Shop for a small fee. This fee is to compensate for the views lost when you no longer need to return to the blog to for the information, as you will have your own copy. Plus! It helps fund supplies for new projects to share with you!
Shop EyeLoveKnots Etsy: Basic C2C Throw Pillow.
Shop EyeLoveKnots LoveCrochet: Basic C2C Throw Pillow.
Are you a Raveler? Share your version of this project on Ravelry – Basic C2C Throw Pillow.
Save this to Your Favorites on: AllFreeCrochet, FaveCrafts, Cheap Thrifty Living, DIYideaCenter, Crochet Pattern Bonanza, AllFreeHolidayCrafts, Free Crochet Tutorials, The Free Crochet Family
Materials:
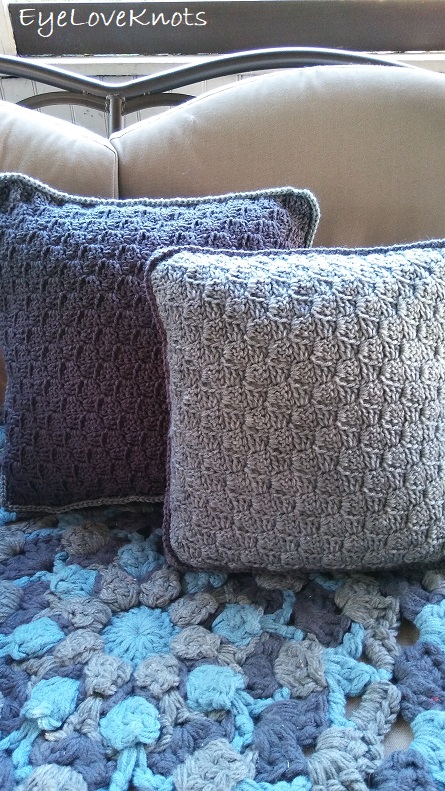
- Worsted Weight Yarn – I used Red Heart’s Super Saver in Grey Heather (lighter) and Charcoal (darker)
- H8/5mm Crochet Hook
- Tapestry Needle for Weaving in Ends
- Soft Tape Measure (if gauge is essential for your project)
Material Notes:
Yarn Alternatives: Caron’s One Pound, Bernat’s Super Value.
Really, you can use any yarn in your stash with respective crochet hook, and just make the square size to your pillow measurements, but I like Red Heart’s Super Saver for my home projects because it’s really durable, and machine washes well.
My two sample pillows were worked to fit 14″ and 16″ pillow forms, and respectively, I used 375 yards (202 grams), and 460 yards (248 grams).
Measurements:
My samples are worked to 14″ and 16″ – and will stretch to fit a pillow form one inch bigger, but I have got sizes from 12″ through 27″ below to fit a square pillow form.
Gauge:
5 Boxes = 4.25″ Wide by 4.13″ Tall
Abbreviations (US Terms):
- DC – Double Crochet (Photo Tutorial)
- SC – Single Crochet (Photo Tutorial)
Pattern Notes:
Pillow grows from the bottom corner upward.
Beginning chain 2 counts as a double crochet.
A box is comprised of four double crochet’s.
The “space under the same chain joined to” is defined as the space between the last two double crochets of the previous rows box.
Working the final double crochet into the top of the chain from the previous row helps to keep the edge more even. After completing the first box, you may also need to lightly tug on it to keep it even as well.
Instructions for smallest size – 12″ shown with 14, 16, 18, 20, 22, 24 and 27 shown in parenthesis.
In Border, chain 1 does not count as a stitch, and join to the first stitch.
There are a lot of words and numbers to this pattern, and that can seem intimidating or daunting, but basically, you are going to create a square that is the size of your pillow, then you will create a rectangle that is half the size of your pillow as the height and the same size of your pillow as the width, and then another rectangle that is 4″ taller than the other rectangle, by the same width. To assemble, scroll down to my “Assembly” instructions.
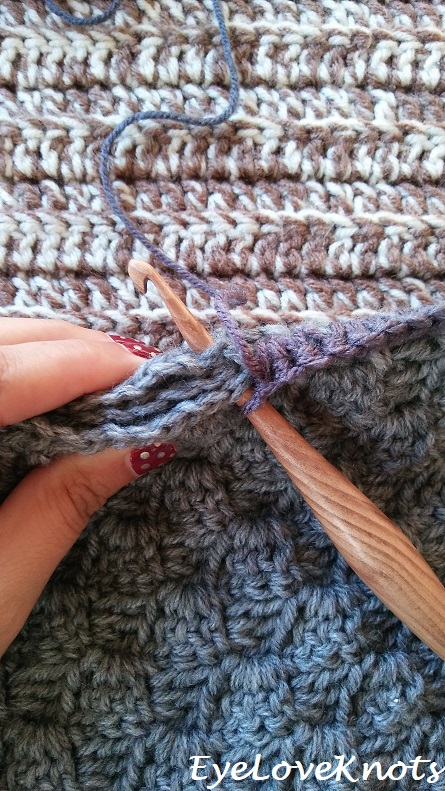
Basic C2C Afghan Square Video Tutorial – this is for the front of the pillow, and the sample is worked to 16″:
Pattern:
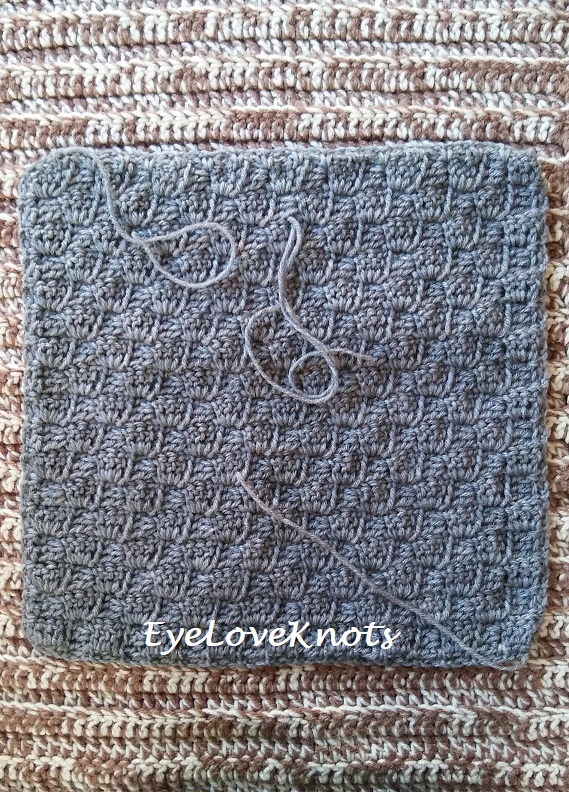
Pillow Front:
Chain 6. DC into the 4th chain, and into each of the next 2. (1 Box)
Row 2: Chain 6, and turn. DC into the 4th chain, and into each of the next 2, slip stitch into the top of the next chain 2. Chain 2, work 2 DC into the space under the same chain joined to, DC into the top of the last stitch. (2 Boxes)
Row 3: (I) Chain 6, and turn. DC into the 4th chain and into each of the next 2, slip stitch into the top of the next chain 2;
(II) Chain 2, work 3 DC into the space under the same chain joined to, skip the next 3 DC, slip stitch into the top of the next chain;
(III) Chain 2, work 2 DC into the space under the same chain joined to, DC into the top of the last stitch. (3 Boxes)
Rows 4 – 11 (18, 20, 23, 26, 27, 29, 33): Using Row 3 as a base, you will continue working in the same manner repeating (II) one extra time each row to increase the number of boxes by one each row. At the end, you will have the same number of boxes as rows.
Row 12 (19, 21, 24, 27, 28, 30, 34): Turn. Slip stitch into the 2nd stitch, and each of the next 2. Chain 2, work 3 DC into the space under the same chain joined to, skip the next 3 DC, slip stitch into the top of the next chain;
(IV) (chain 2, work 3 DC into the space under the same chain joined to, skip the next 3 DC, slip stitch into the top of the next chain) 9x (16x, 18x, 21x, 24x, 25x 27x, 31x);
Chain 2, work 2 DC into the space under the same chain joined to, skip the next 3 DC, slip stitch into the top of the last stitch. [10 (17, 19, 22, 25, 26, 28, 32) Boxes]
Row 13 (20, 22, 25, 28, 31, 35) – 3 Boxes Left: Using the previous row as a base, you will continue working in the same manner repeating (IV) one less time each row to decrease the number of boxes by one each row. Continue working until you have 3 boxes left.
2 Boxes: Turn. Slip stitch into the 2nd stitch, and each of the next 2. Chain 2, work 3 DC into the space under the same chain joined to, skip the next 3 DC, slip stitch into the top of the next chain, chain 2, work 2 DC into the space under the same chain joined to, skip the next 3 DC, slip stitch into the top of the last stitch. (2 Boxes)
1 Box: Turn. Slip stitch into the 2nd stitch, and each of the next 2. Chain 2, work 3 DC into the space under the same chain joined to. Skip the next 3 DC, slip stitch into the top of the last stitch. (1 Box)
Border: Chain 1. SC into the space just to the right, in between two boxes, (chain 2, SC into the next space in between boxes) around, working a single SC into each corner. When back around, work final chain 2, and then join to the 1st SC, and fasten off.
Pillow Back, Bottom:
Chain 6. DC into the 4th chain, and into each of the next 2. (1 Box)
Row 2: Chain 6, and turn. DC into the 4th chain, and into each of the next 2, slip stitch into the top of the next chain 2. Chain 2, work 2 DC into the space under the same chain joined to, DC into the top of the last stitch. (2 Boxes)
Row 3: (I) Chain 6, and turn. DC into the 4th chain and into each of the next 2, slip stitch into the top of the next chain 2;
(II) Chain 2, work 3 DC into the space under the same chain joined to, skip the next 3 DC, slip stitch into the top of the next chain;
(III) Chain 2, work 2 DC into the space under the same chain joined to, DC into the top of the last stitch. (3 Boxes)
Rows 4 – 8 (9, 10, 12, 13, 14, 15, 17): Using Row 3 as a base, you will continue working in the same manner repeating (II) one extra time each row to increase the number of boxes by one each row. At the end, you will have the same number of boxes as rows.
Row 9 (10, 11, 13, 14, 15, 16, 18): Turn. Slip stitch into the 2nd stitch, and each of the next 2. Chain 2, work 3 DC into the space under the same chain joined to, skip the next 3 DC, slip stitch into the top of the next chain;
(chain 2, work 3 DC into the space under the same chain joined to, skip the next 3 DC, slip stitch into the top of the next chain) 6x (7x, 8x, 10x, 11x, 12x, 13x, 15x);
Chain 2, work 2 DC into the space under the same chain joined to, skip the next 3 DC, DC into the top of the last stitch. [8 (9, 10, 12, 13, 14, 15, 17) Boxes]
Row 10 (11, 12, 14, 15, 16, 17, 19): Chain 6, and turn. DC into the 4th chain, and into each of the next 2, slip stitch into the top of the next chain 2;
(chain 2, work 3 DC into the space under the same chain joined to, skip the next 3 DC, slip stitch into the top of the next chain) 6x (7x, 8x, 10x, 11x, 12x, 13x, 15x);
Chain 2, work 2 DC into the space under the same chain joined to, skip the next 3 DC, DC into the top of the last stitch. [8 (9, 10, 12, 13, 14, 15, 17) Boxes]
In Even Rows (no increasing or decreasing): Repeat the last two rows until you have 11 (18, 20, 23, 26, 27, 29, 33) boxes wide.
1st Decrease Row: Turn. Slip stitch into the 2nd stitch, and each of the next 2. Chain 2, work 3 DC into the space under the same chain joined to, skip the next 3 DC, slip stitch into the top of the next chain;
(IV) (chain 2, work 3 DC into the space under the same chain joined to, skip the next 3 DC, slip stitch into the top of the next chain) 5x (6x, 7x, 9x, 10x, 11x, 12x, 14x);
Chain 2, work 2 DC into the space under the same chain joined to, skip the next 3 DC, slip stitch into the top of the last stitch. [7 (8, 9, 11, 12, 13, 14, 16) Boxes]
Next Decrease Row – 3 Boxes Left: Using the previous row as a base, you will continue working in the same manner repeating (IV) one less time each row to decrease the number of boxes by one each row. Continue working until you have 3 boxes left.
2 Boxes: Turn. Slip stitch into the 2nd stitch, and each of the next 2. Chain 2, work 3 DC into the space under the same chain joined to, skip the next 3 DC, slip stitch into the top of the next chain, chain 2, work 2 DC into the space under the same chain joined to, skip the next 3 DC, slip stitch into the top of the last stitch. (2 Boxes)
1 Box: Turn. Slip stitch into the 2nd stitch, and each of the next 2. Chain 2, work 3 DC into the space under the same chain joined to. Skip the next 3 DC, slip stitch into the top of the last stitch. (1 Box)
Border: Chain 1. SC into the space just to the right, in between two boxes, (chain 2, SC into the next space in between boxes) around, working a single SC into each corner. When back around, work final chain 2, and then join to the 1st SC, and fasten off.
Pillow Back, Top:
Chain 6. DC into the 4th chain, and into each of the next 2. (1 Box)
Row 2: Chain 6, and turn. DC into the 4th chain, and into each of the next 2, slip stitch into the top of the next chain 2. Chain 2, work 2 DC into the space under the same chain joined to, DC into the top of the last stitch. (2 Boxes)
Row 3: (I) Chain 6, and turn. DC into the 4th chain and into each of the next 2, slip stitch into the top of the next chain 2;
(II) Chain 2, work 3 DC into the space under the same chain joined to, skip the next 3 DC, slip stitch into the top of the next chain;
(III) Chain 2, work 2 DC into the space under the same chain joined to, DC into the top of the last stitch. (3 Boxes)
Rows 4 – 13 (14, 15, 17, 18, 19, 20, 23): Using Row 3 as a base, you will continue working in the same manner repeating (II) one extra time each row to increase the number of boxes by one each row. At the end, you will have the same number of boxes as rows.
Row 14 (15, 16, 18, 19, 20, 21, 24): Turn. Slip stitch into the 2nd stitch, and each of the next 2. Chain 2, work 3 DC into the space under the same chain joined to, skip the next 3 DC, slip stitch into the top of the next chain;
(chain 2, work 3 DC into the space under the same chain joined to, skip the next 3 DC, slip stitch into the top of the next chain) 11x (12x, 13x, 15x, 16x, 17x, 18x, 21x);
Chain 2, work 2 DC into the space under the same chain joined to, skip the next 3 DC, DC into the top of the last stitch. [13 (14, 15, 17, 18, 19, 20, 23) Boxes]
Row 15 (16, 17, 19, 20, 21, 22, 25): Chain 6, and turn. DC into the 4th chain, and into each of the next 2, slip stitch into the top of the next chain 2;
(chain 2, work 3 DC into the space under the same chain joined to, skip the next 3 DC, slip stitch into the top of the next chain) 11x (12x, 13x, 15x, 16x, 17x, 18x, 21x);
Chain 2, work 2 DC into the space under the same chain joined to, skip the next 3 DC, DC into the top of the last stitch. [13 (14, 15, 17, 18, 19, 20, 23) Boxes]
In Even Rows (no increasing or decreasing): Repeat the last two rows until you have 11 (18, 20, 23, 26, 27, 29, 33) boxes wide.
1st Decrease Row: Turn. Slip stitch into the 2nd stitch, and each of the next 2. Chain 2, work 3 DC into the space under the same chain joined to, skip the next 3 DC, slip stitch into the top of the next chain;
(IV) (chain 2, work 3 DC into the space under the same chain joined to, skip the next 3 DC, slip stitch into the top of the next chain) 10x (11x, 12x, 14x, 15x, 16x, 17x, 20x);
Chain 2, work 2 DC into the space under the same chain joined to, skip the next 3 DC, slip stitch into the top of the last stitch. [12 (13, 14, 16, 17, 18, 19, 22) Boxes]
Next Decrease Row – 3 Boxes Left: Using the previous row as a base, you will continue working in the same manner repeating (IV) one less time each row to decrease the number of boxes by one each row. Continue working until you have 3 boxes left.
2 Boxes: Turn. Slip stitch into the 2nd stitch, and each of the next 2. Chain 2, work 3 DC into the space under the same chain joined to, skip the next 3 DC, slip stitch into the top of the next chain, chain 2, work 2 DC into the space under the same chain joined to, skip the next 3 DC, slip stitch into the top of the last stitch. (2 Boxes)
1 Box: Turn. Slip stitch into the 2nd stitch, and each of the next 2. Chain 2, work 3 DC into the space under the same chain joined to. Skip the next 3 DC, slip stitch into the top of the last stitch. (1 Box)
Border: Chain 1. SC into the space just to the right, in between two boxes, (chain 2, SC into the next space in between boxes) around, working a single SC into each corner. When back around, work final chain 2, and then join to the 1st SC, and fasten off.
Weave in ends now.
Assembly:
Lay the pillow front (biggest) piece down, wrong side facing up.
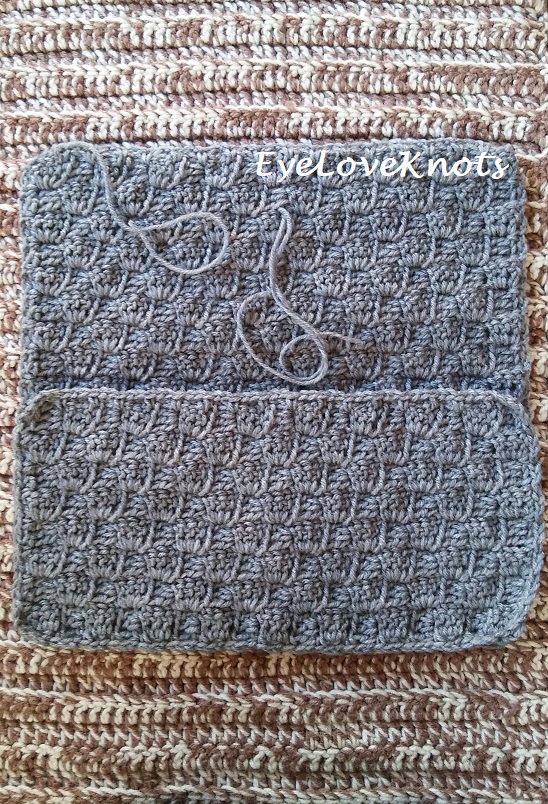
Lay the back bottom (smallest) piece down on top of the front with right side facing up. The bottom edges of both pieces should be aligned.
Lay the back top piece down on top of the front with right side facing up. The top edges of both pieces should be aligned, and it should overlap the back bottom piece.
Now, either pin in place, and just carefully flip over so the pillow front piece is facing you.
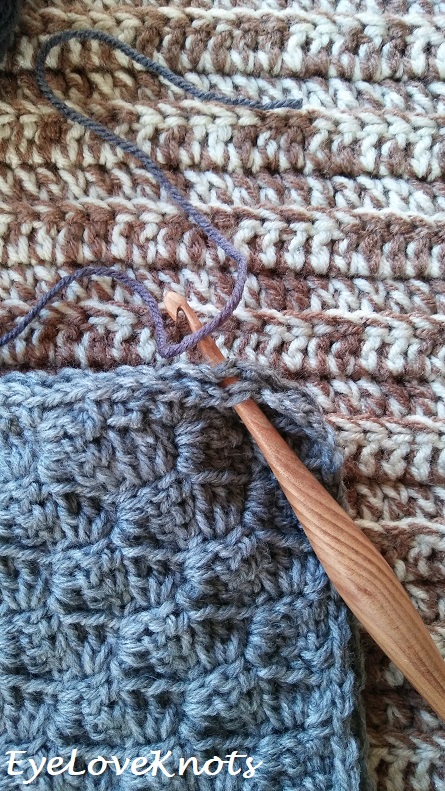
Working through both layers, insert hook into any single crochet – I did so at the top right, after the corner.
Working through both layers: Chain 1. (SC into the SC, 2 SC into the next chain space) across…
When you get to the overlapped part, you will continue working in the same pattern, but through all three layers.
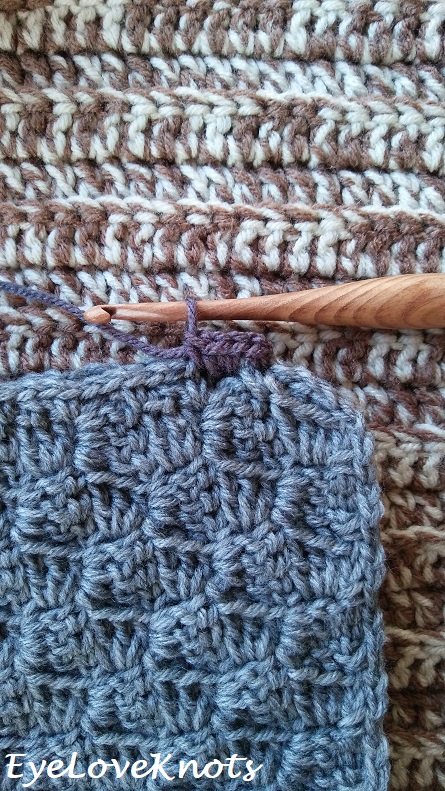
Continue in the same manner as the last two steps all the way around. When back to the beginning, slip stitch join to the 1st SC, and fasten off.
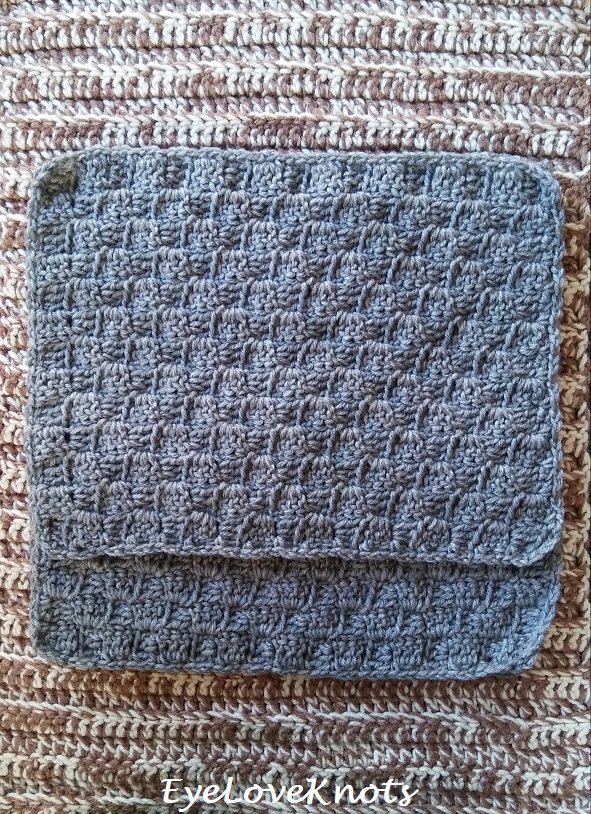
Finished back view…
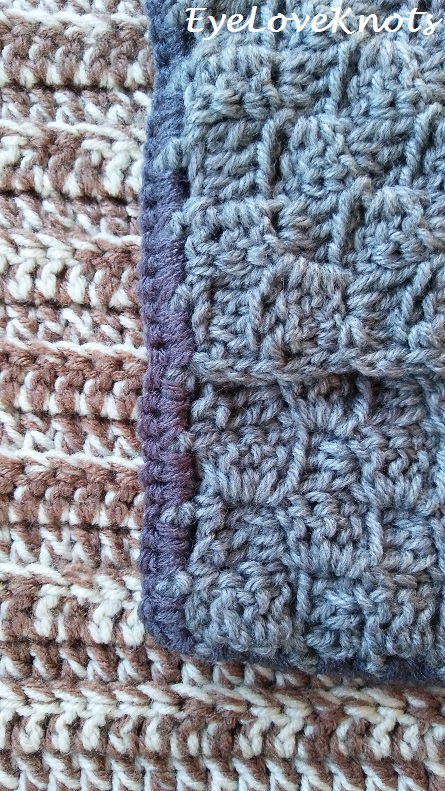
Close up of edging from the wrong side…
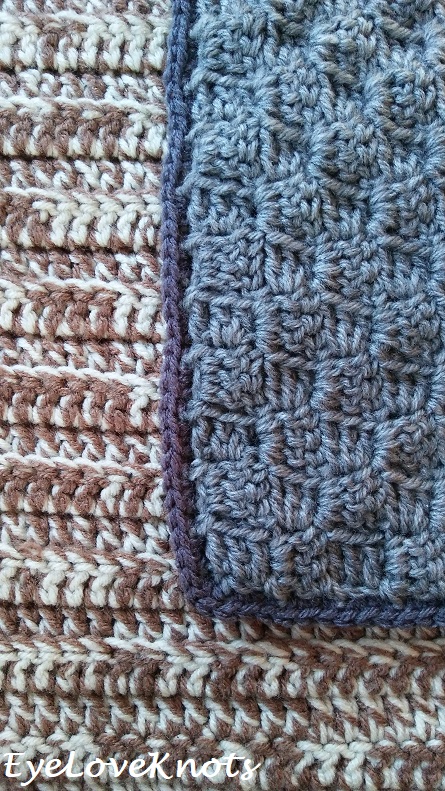
Close up of edging from the right side…
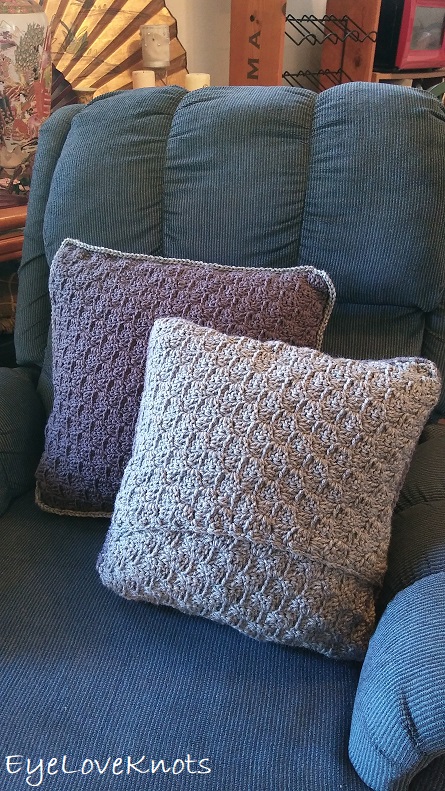
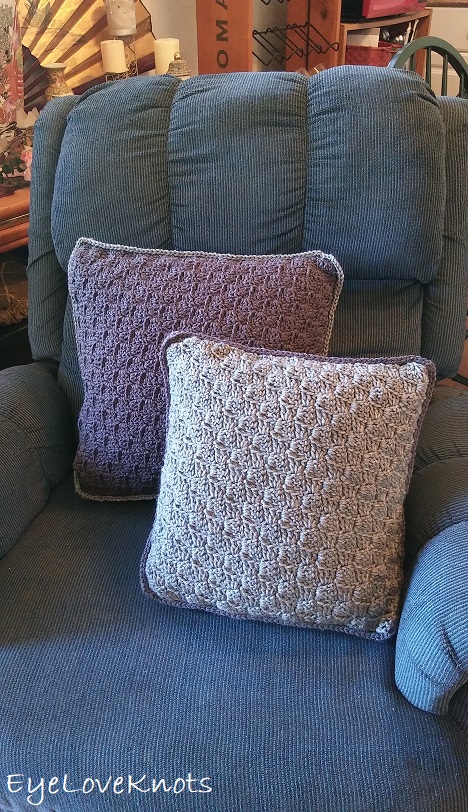
Weave remaining ends in, and then add to your favorite spot – couch, recliner, arm chair, bed…
Please feel free to make and sell your own C2C Throw Pillows using this pattern, but please DO NOT claim this pattern as your own nor should you sell my pattern, and DO NOT re-publish my photos as your own. DO NOT copy and paste my pattern anywhere, link to it instead.
Join one of our awesome Facebook groups to share your creations, and see what others are up to!
– EyeLoveKnots Crochet & DIY Community
– DIY Home On Rockwood Lane
– Alexandra Lane Lifestyle
Linked Up To…
Nifty Thrifty Sunday #371 – Meet Our Life
Crafty Schooling Sunday – Creative Jewish Mom
Inspiration Monday – i should be mopping the floor
Sundays at Home #237 – Celebrating Everyday Life
Tutorials & Tips Link Party 381 – Home Stories A to Z
Creative Mondays Linkup – Claire Justine
Merry Monday Link Party #238 – A Wonderful Thought
The Scoop Link Party #362 – Worthing Court Blog
The Really Crafty Link Party #154 – Keeping it Real
Craftastic Monday Link Party – Sew Can Do
Handmade Monday #111 – Sum of their Stories
In Stitches Party #28 – Nicki’s Homemade Crafts
486th Inspire Me Tuesday – A Stroll Thru Life
Fabulous Party #252 – Lou Lou Girls
Sew It Cook It Craft It Link Party #90 – Sew Historically
Totally Terrific Tuesday #213 – Sweet Parrish Place
{Wow Me} Wednesday #388 – Ginger Snap Crafts
Your Whims Wednesday #392 – My Girlish Whims
The Wednesday Link Party #280 – The Stitchin’ Mommy
Wall to Wall DIY Wednesday Week 33 – Dabbling and Decorating
DIY, Crafts, Recipes and More Wednesday Link Party #124 – Hazel and Gold Designs
Talk of the Town #159 – My Repurposed Life
The Linky Ladies Party #151 – The Purple Poncho
Funtastic Friday #213 – Olives n Okra
Link Your Stuff – Annemarie’s Haakblog
Your pillow look so cute! thanks for sharing the instructions and pattern! 🙂 I really like your rug too!
Hope that your week is going well so far 🙂
Away From The Blue Blog
Thanks! I LOVE my rug – one of my most favorite things I’ve made.
The pillows look lovely, thank you for sharing the pattern at The Really Crafty Link Party. Mostly, though, I ‘m fascinated by the rug you made. I’ve been thinking about making one too lately, but I’m afraid to spend a lot of time working on it to have it get ugly too quickly. It’s good to know yours has been holding out well.
Pinned.
I always worry with how the yarn will hold up to wear and machine washing (for any project). I am quite surprised actually how well it has held up being washed a bunch of times. I think a better yarn choice would be t-shirt yarn. I really want to make one in this, or a cord of some sort… Not sure
Help. I cannot figure out the numbers in(. ). Just can’t make my 83 year old mind get it.
It may help to determine your size ahead of time, and then jot down the rows needed so you don’t have to go back and do it as you work. I still do this even having this pattern worked out.