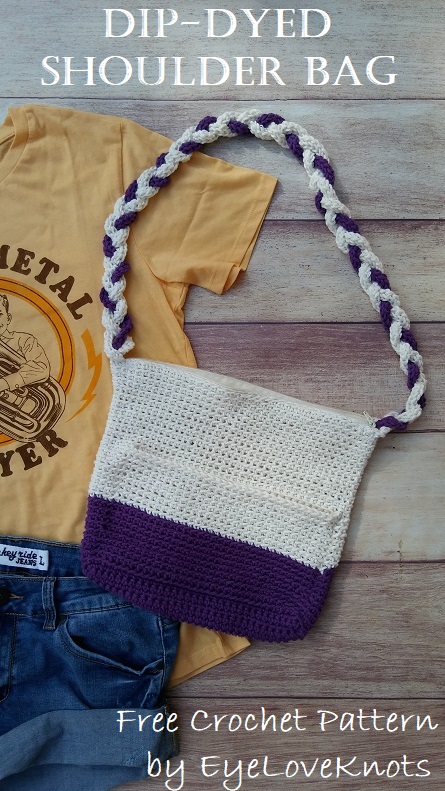
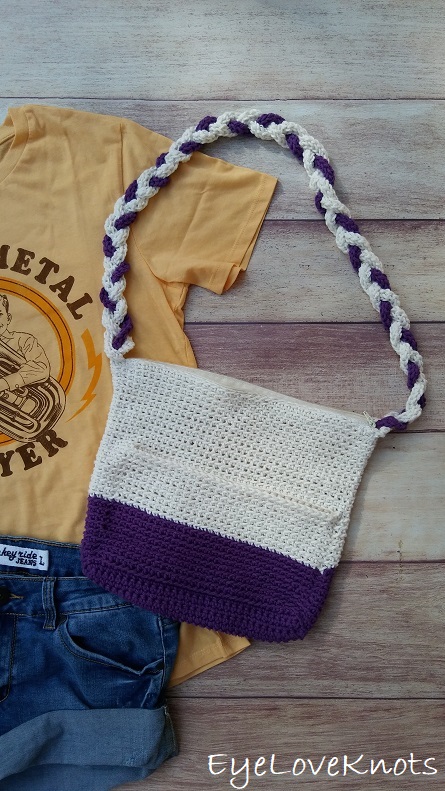
This is a free crochet pattern for how-to make my new Dip-Dyed Shoulder Bag! This bag features a fun ribbed pattern, two color blocks, a braided crochet strap, added zipper and front pocket. Don’t be afraid, it is all worked in simple stitches.
This post contains affiliate links for LoveCrochet and ModCloth. If you make a purchase by clicking on them, I make a small commission at no extra cost to you. Thanks for your support!
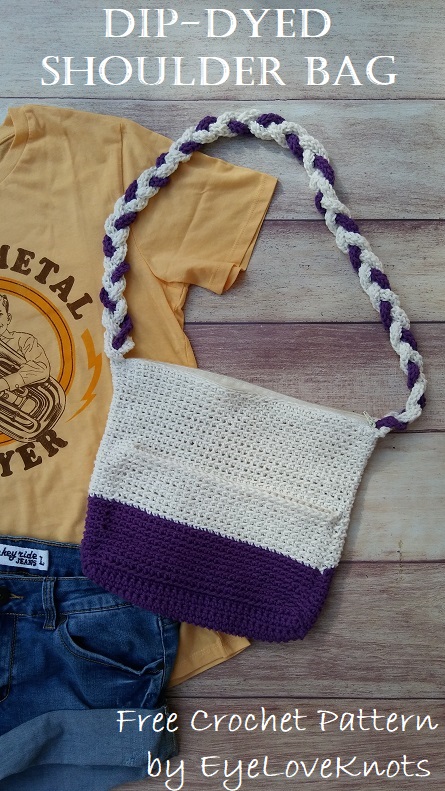
For the last pattern in my Dip-Dyed CAL, I am sharing the Dip-Dyed Shoulder Bag!
I wanted to match a similar style that I love – the kind of bag that hangs cross body from your shoulder, and the purse falls around the natural hip. The fun texture is created by working into the back loops. I created a front pocket to hold my cell phone, closed with snap buttons, and added a zipper along the top.
Two things I didn’t get around to completing yet (though it doesn’t interfere with the use of this bag), lining the bag INCLUDING the pocket, and adding the snap buttons at the pocket – which I didn’t do because I realized just before I was going to do it, that I should line the pocket.
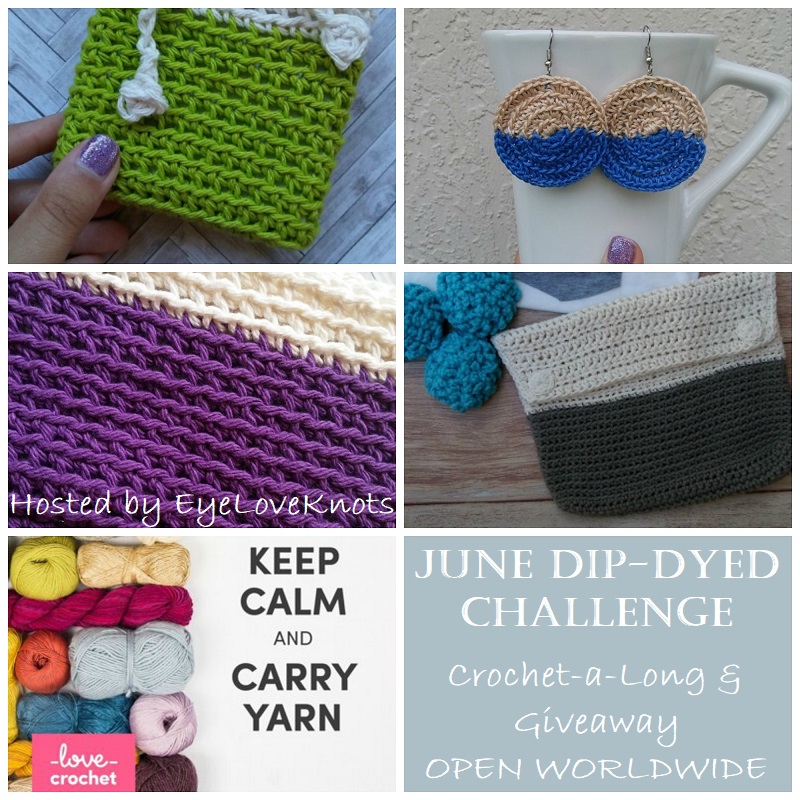
Find out more about the CAL and enter in my June Dip-Dyed Challenge & Giveaway post.
If you would like a PDF version of this post, you may get one through either my EyeLoveKnots Etsy Shop, Ravelry or LoveCrochet Shop for a small fee. This fee is to compensate for the views lost when you no longer need to return to the blog to for the information, as you will have your own copy. Plus! It helps fund supplies for new projects to share with you!
Shop EyeLoveKnots Etsy: Dip-Dyed Shoulder Bag.
Shop EyeLoveKnots LoveCrochet: Dip-Dyed Shoulder Bag.
Are you a Raveler? Share your version of this project on Ravelry – Dip-Dyed Shoulder Bag.
Materials:
- Maybe 600 Yards of Worsted Weight Yarn – I used Lily Sugar n Cream in the Ecru (maybe two skeins), and the Black Currant [Dark Purple] (less than one skein) colorways
- H8/5mm Crochet Hook
- Tapestry Needle for Weaving in Ends
- Optional, Jewelry Pliers
- Stitch Marker or Waste Yarn
- 12″ Zipper
- *2 Size 4 (5/8″) Snap Buttons (Dritz)
- Thread & #22 Tapestry Needle
- *Fabric for Lining
- Sewing Pins to Secure Zipper
- Sewing Machine (or Hand Sew)
Material Notes:
Yarn Alternatives: Bernat Handicrafter, Paintbox Yarns Cotton Aran, Rico Creative Cotton Aran, Crafter’s Secret Cotton Yarn (from Hobby Lobby)
I used yarn from my stash, and I did not measure any – yardages are estimated.
Jewelry pliers are an excellent tool to use to help weave in ends, as cotton yarn can be quite tough on the fingers when weaving in with just fingers and a tapestry needle.
Let’s talk closures real quick!
- I added a zipper to the top of my bag. The 10″ was too small, and the 12″ was too long. Better to be too long because you can always cut it down – which is what I did. Alternatively, you can work a flap over the top, and not do a zipper, or work a couple chain loops and add a button closure…
- I tried to add magnetic snap buttons to my front pocket because they are strong, but easier to use than regular snap buttons. I ended up taking them out because it was too hard on/strong for the crocheted fabric (plus the backside of them stuck out onto the front of the fabric), and I didn’t want to have to figure out how to cut the slits in my lining to match. I just decided to go with my regular snap buttons. I have a free photo tutorial available on Knotions Magazine – How to Sew a Snap Button onto Crocheted/Knitted Fabric.
As far as lining goes, it isn’t essential, but it does prevent the stretch you will experience without a lining. I did not do the lining on mine yet – I need to go fabric shopping, but I do explain how to add a lining in my Endless Summer Hydrangea Tote Bag (Free Crochet Pattern). I also plan on sewing a piece of ribbing along the inside of the strap to act as a lining – as opposed to fabric since my braided strap is pretty skinny.
I designed this bag so the top of the bag opening would lay around my natural waistline, and the actual bag would be around hip level when the strap was on crossbody wise. I planned this out knowing I would be lining my bag. The lining is optional, but keep in mind that heavier items in the bag without it lined will cause the bag to stretch A LOT. You will need to keep this in mind if you choose not to line your bag, maybe adjusting the number of rounds to the bag body, or number of rows to the strap. You can test the stretch by pinning the strap end in place, and then placing items in the bag while you wear it.
Time Spent:
Just under 5 hours (not including buttons or lining since I have not done them)
Measurements:
11.25″ Across Mid Body (where color change is); 12″ Across; 9″ Tall – my favorite size
Bag designed to hang at side, with top around natural waistline on a person 5’5”, but sizing can easily be adjusted
Gauge:
Not essential. In the round, 15 SC in the BLO = 4″
Abbreviations:
- BLO – Back Loop Only
- FLO – Front Loop Only
- SC – Single Crochet
- FSC – Foundation Single Crochet
Special Stitches:
Foundation stitches are worked sideways and include the foundation chain and respective stitch. This is a great technique to use if: 1.) You are working something in the round that needs some added flexibility within the beginning chain, such as a hat worked bottom up, wrist warmers, shirts, pants, etc; 2.) You are working a project like a scarf, but don’t know how many stitches you need. You can work the foundation stitch up until it’s long enough.
I worked in foundation single crochet because I didn’t know how many stitches I’d need to make my strap, but I also recommend it because it worked perfectly for joining.
To FSC: Chain 2 (counts as a stitch here). Insert hook into the first chain, yo, pull through (2 loops on hook), yo, pull through first loop (to create foundation chain), yo, pull through remaining. First chain and SC created. Looking at the stitch in your hand, you should see the top of the SC to the right, and parallel on the left side, it should look like the opposite side of the beginning foundation chain. You will be working in these stitches on the left. To create the next stitch and each stitch after, insert hook under both loops of the foundation chain (left side), yo, pull through (2 loops on hook), yo, pull through first loop (to create foundation chain), yo, pull through remaining.
Alternative to foundation single crochet is a regular chain (of one greater than the number of FSC), and then work in single crochet across.
Pattern Notes:
The base of the purse is worked in rows back and forth, then the body begins with the first round worked around the base of the purse. After this first round, the bag is split into a back panel worked back and forth for the front pocket, and the rest are worked in a continuous manner meaning no slip stitch joining at the end of each round – this creates the continuous ribbed pattern. Joining creates a seam, which disturbs this stitch pattern. The awesome thing is the pocket requires no sewing to attach! It’s all one piece.
Beginning chain does not count as a stitch.
To make bag more narrow or more wide, add or subtract one chain to the foundation, which will result in plus or minus two stitches.
I worked my “dip dye” pattern with the purple until I ran out of yarn – ending in Round 18, then I switched to the ecru. Later, I found some more purple in my stash, and used that for the strap. I will indicate in pattern exactly as I have worked, but feel free to change colors wherever you’d like.
Use a stitch marker or waste yarn to mark the first stitch of the round.
Pattern:
In Purple, chain 33. SC into the 2nd chain from the hook, and across. (32 SC)
R2 – 8: Chain 1, turn. SC into the 1st SC, and across. (32 SC)
R9: Chain 1, turn. SC into the 1st SC, and the next 31, work 7 SC down the side, work 32 SC across the opposite side of the foundation chain, work 7 SC up the other side. Join to the 1st SC. (78 SC)
In the next round, the FLO stitches are the front of the purse for the pocket, and the BLO stitches are the back of the purse. If you don’t want a pocket, then just continue working rounds in the BLO.
R10: Chain 1. In FLO, loosely slip stitch into the 1st SC, SC into the next 31. In BLO, SC into the next 46 stitches.
R11B: Attach Cream to the open loop behind the ribbed pattern worked into the FLO. Chain 1, and work regular SC across. (32 SC)
R12B – 26: Chain 1, turn. SC into the 1st SC, and across. (32 SC)
Fasten off Cream color.
R11A – 19: In BLO, SC into the next SC, insert hook into the next SC and the side of the back piece and complete SC, SC into the next 30 SC, insert hook into the next SC and the other side of the back piece and complete SC, SC around. SWITCH to Cream and fasten off Purple.
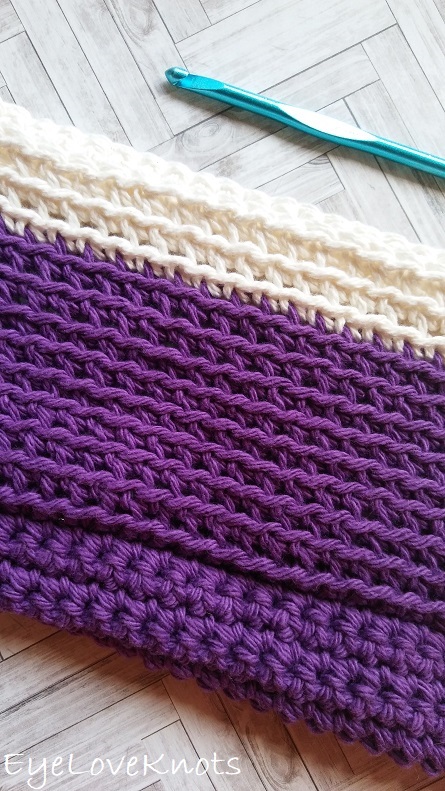
R20 – 27: In Cream and BLO, SC into the next SC, insert hook into the next SC and the side of the back piece and complete SC, SC into the next 30 SC, insert hook into the next SC and the other side of the back piece and complete SC, continuing in BLO: SC around.
The pocket is finished at this point. The remaining rounds will be worked regularly into the round.
R28: In BLO, SC into the next SC, in BLO of inner pocket: SC into the next 32 SC, and continuing in BLO: SC around.
R29 – 38: In BLO, SC around. (78 SC)
Fasten off.
Strap:
Lay bag flat. Find the center three stitches of both ends.
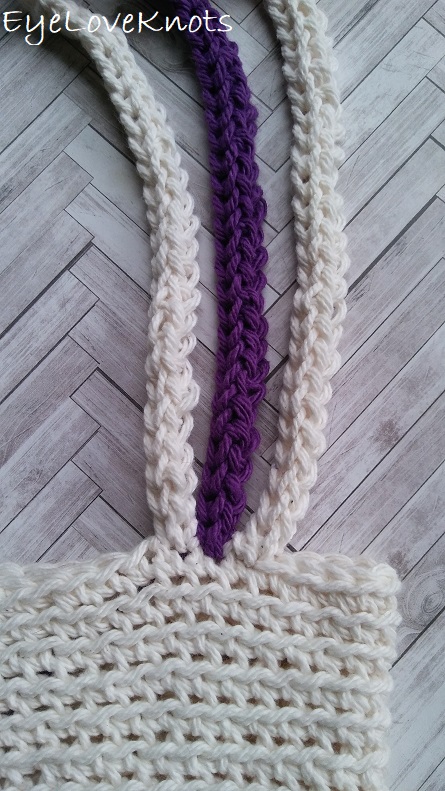
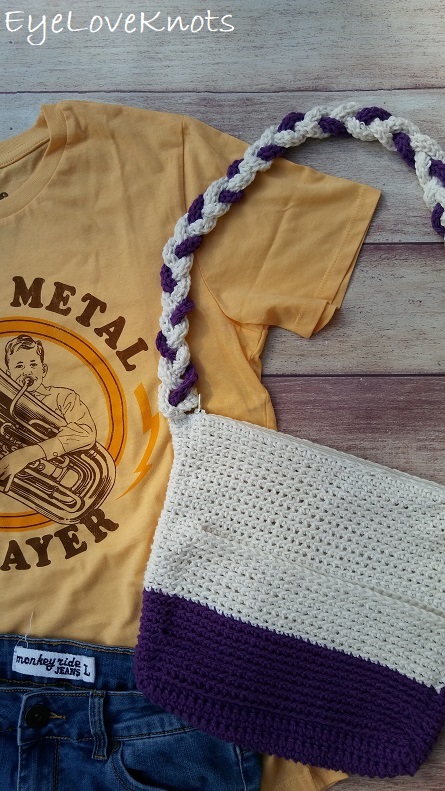
Make 3: Join yarn – I attached purple to the center, and cream on either side. Chain 1. Work 1st FSC into the stitch that you joined to on the bag, then FSC 52 more. Fasten off.
Braid three strands together, then thread end of each (separately) into tapestry needle, and attach to corresponding stitch on other side of bag.
Weave in All Ends.
Finishing:
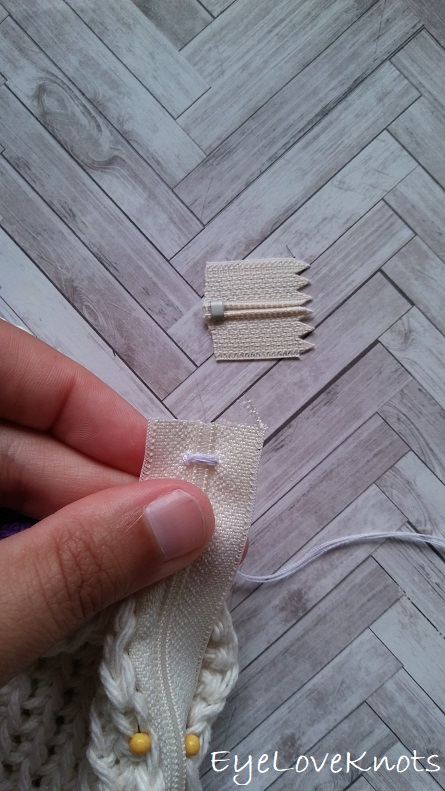
As I mentioned before, I had to shorten my 12″ zipper. I simply sewed a bartack where needed, and cut the excess.
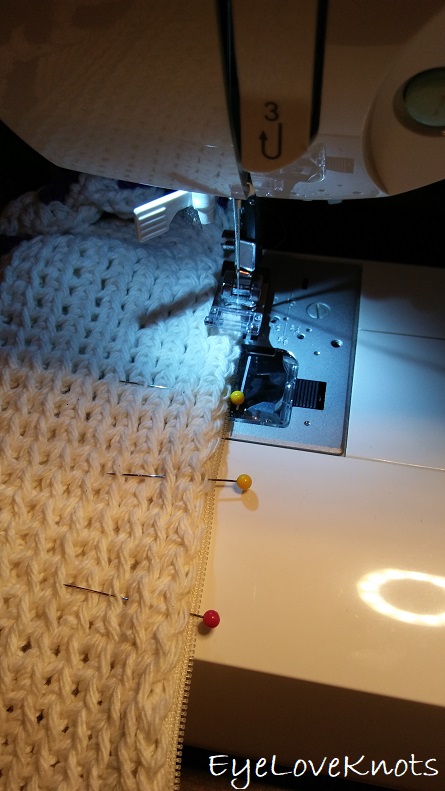
I used sewing pins to place my zipper, and then used my sewing machine to sew in place. I used a standard zipper, but a nice exposed one may have been a nicer choice. Maybe I will make another bag and use an exposed zipper.
Please feel free to make and sell your own Dip-Dyed Shoulder Bag using this pattern, but please DO NOT claim this pattern as your own nor should you sell my pattern, and DO NOT re-publish my photos as your own. DO NOT copy and paste my pattern anywhere, link to it instead.
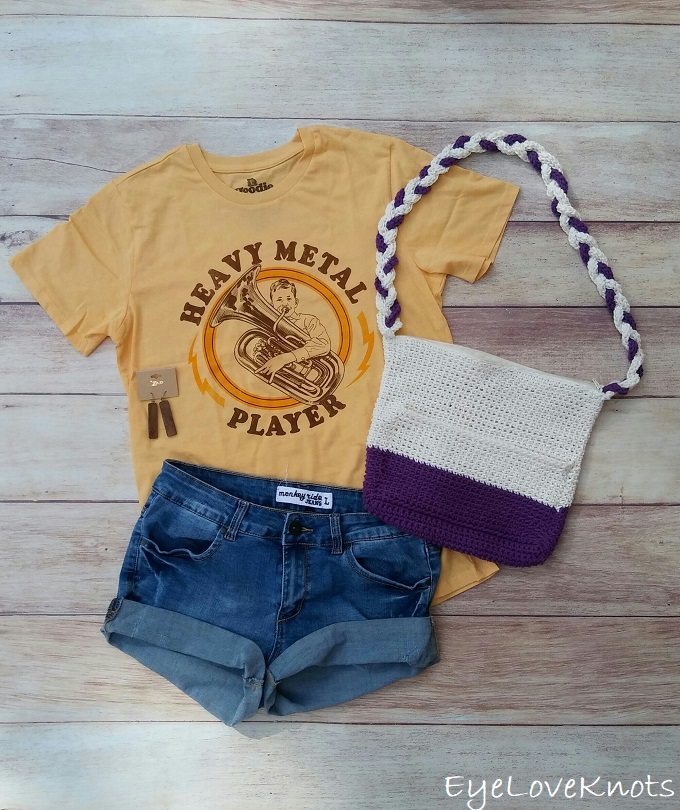
I paired my shoulder bag with my new ModCloth goodies – the tee and the earrings are not available anymore – sorry! and my favorite shorts by Monkey Ride.
Join the EyeLoveKnots Crafting Community on Facebook to share your creations, and see what others are up to!
Linked Up To…
Craft Schooling Sunday – Creative Jewish Mom
Craftastic Monday Link Party – Sew Can Do
Ginx Woolly Linx Party – Ginx Craft
Handmade Monday #131 – Sum of their Stories
Tutorials & Tips Link Party 396 – Home Stories A to Z
Creative Mondays Linkup – Claire Justine
The Really Crafty Link Party #174 – Keeping it Real
504th Inspire Me Tuesday – A Stroll Thru Life
Fabulous Party #272 – Lou Lou Girls
The Linky Ladies Party #161 – The Purple Poncho
Little Cottage Link Party #6 – Love My Little Cottage
{Wow Me} Wednesday #308 – Ginger Snap Crafts
Hookin’ on Hump Day #193 – Petals to Picots
Your Whims Wednesday #412 – Your Whims Wednesday
The Wednesday Link Party #300 – The Stitchin’ Mommy
To Grandma’s House We Go 144 – Chas’ Crazy Creations
Crochet Patterns and Anything Crochet Link Party #12 – Joy of Motion
Scrappy Stitchers Link Party #52 – Stitches N Scraps
Talk of the Town #179 – My Repurposed Life
Style Me Wednesday – Shopping My Closest
Turning Heads Linkup – Elegantly Dressed and Stylish
Confident Twosday Linkup – I do deClaire
Weekday Wear Linkup #23 – Away from the Blue
Thursday Favorite Things #394 – An Artful Mom
Thursday Fashion Files Link Up #217 – Curly Crafty Mom
Trendy Thursday Linkup – Thirty Minus One
Pin Party #321 – The Pin Junkie
Best of the Weekend – Calypso in the Country
Home Matters #238 – Modern on Monticello
Link Up – Lizzie in Lace
Link Your Stuff – Annemarie’s Haakblog
Snickerdoodle Create Bake Make Link Party 289 – Across the Boulevard
It looks indeed perfect for summer! Thank you for sharing at The Really Crafty Link Party. Pinned!
This is adorable… and such a great tutorial for this dyed shoulder bag! I saw your feature on TFT! Hope we get to see this at Tuesday Turn About (I haven’t checked yet! 😉 )