Part 3 of the crochet-a-long for how to crochet the Tessellated Triangles Sweater is on the top front and back panels.
This post contains affiliate links for LoveCrafts. If you make a purchase by clicking on them, I make a small commission at no extra cost to you. Thanks for your support!
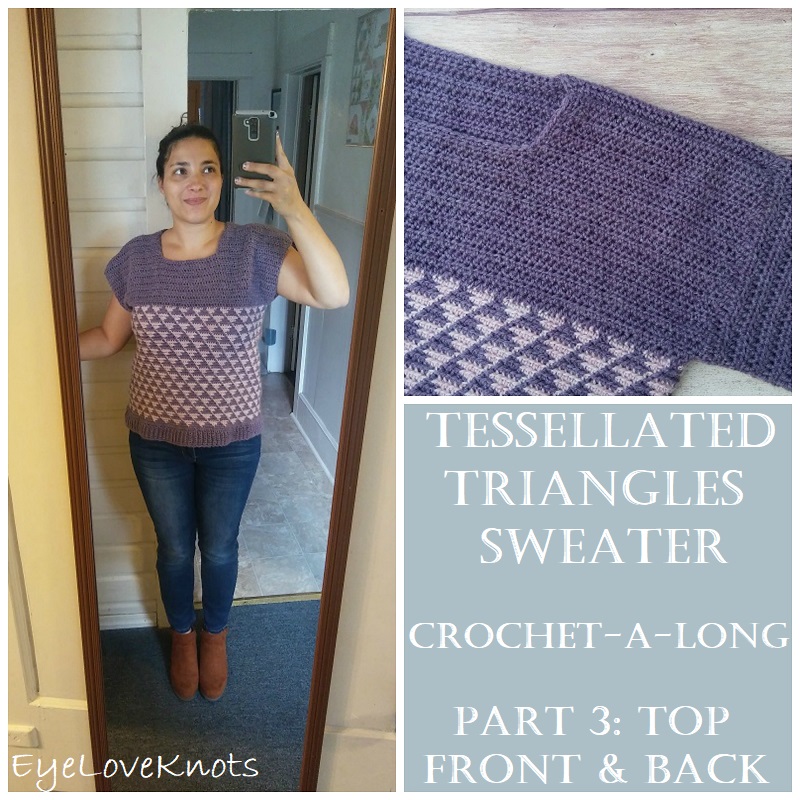
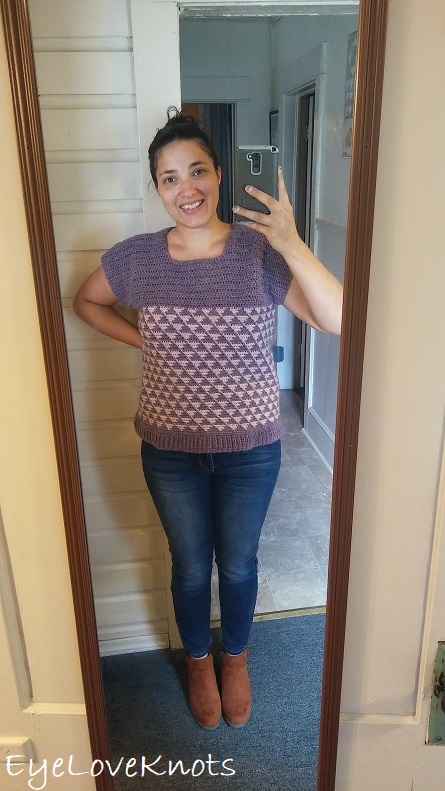
This week, we are working on the top front and back panels. After you finish this part, you will have a completed top with short sleeves. Next week we will add 3/4 or full length sleeves (if desired).
If you would like a PDF version of this post, you may get one through either my EyeLoveKnots Etsy Shop, Ravelry or LoveCrafts Shop for a small fee. This fee is to compensate for the views lost when you no longer need to return to the blog to for the information, as you will have your own copy. Plus! It helps fund supplies for new projects to share with you!
Shop EyeLoveKnots Etsy: Tessellated Triangles Sweater.
Shop EyeLoveKnots LoveCrafts: Tessellated Triangles Sweater.
Are you a Raveler? Share your version of this project on Ravelry – Tessellated Triangles Sweater.
Abbreviations
- HDC2tog – Half Double Crochet Two Stitches Together to Decrease
- HDC – Half Double crochet
- RS – Right Side of Work
- WS – Wrong Side of Work
- SC – Single Crochet
- SC3tog – Single Crochet Three Stitches Together to Decrease
Pattern Notes
The yarns I have used in this sample is Lion Brand’s Touch of Alpaca (Pink and Purple version). If you follow me on Instagram or Facebook, you have seen a Gray and Red version I am making, that one is in Hobby Lobby’s I Love This Yarn.
Instructions for size XS given with S, M, L, XL, 2X, 3X in parenthesis.
Up to now, you have been crocheting over another strand of yarn throughout your sweater, but for these top front and back panels, you will be working as normal.
To match the tension of the triangle body section, we will decrease a little first, and then work normally in back and forth rows of half double crochet.
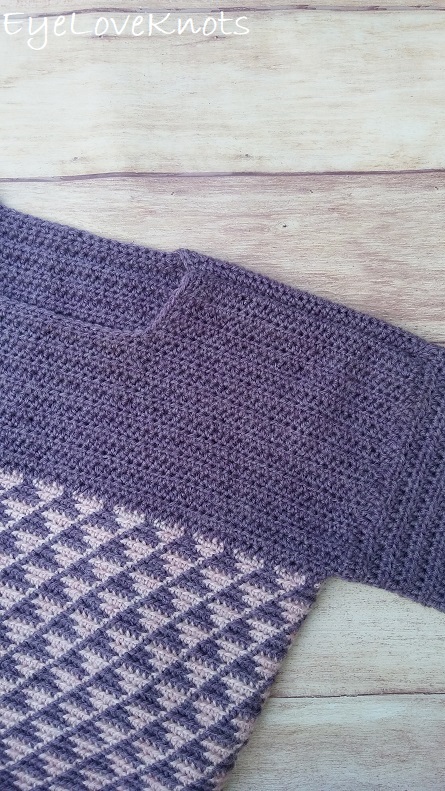
Top Front
Chain 1. (HDC2tog, HDC next 4) 12x (14x, 16x, 17x, 19x, 20x, 24x). [60 (70, 80, 85, 95, 100, 120) HDC]
Rows 2 – 14: Chain 1, turn. HDC into the 1st HDC, and each across.
Row 15 – Begin Shoulder: Chain 1, turn. HDC into the 1st 20 (25, 30, 32, 37, 40, 50) HDC, leave the rest unworked. [20 (25, 30, 32, 37, 42, 45) HDC]
Rows 16 – 19 (21, 22, 23, 25, 26, 27): Chain 1, turn. HDC into the 1st HDC, and each across. Fasten off.

Row 20 (22, 23, 24, 26, 27, 28) – 2nd Shoulder of Front: Skip the next 20 (25, 30, 32, 37, 40, 50) stitches and join yarn in the next HDC. Chain 1. HDC into this 1st HDC, and each across, then continue to repeat rows 16 – 19 (21, 22, 23, 25, 26, 27).
The entire length of this top front piece is the armhole depth of the sweater. It should measure 7.13” (7.63”, 8”, 8.5”, 9”, 9.63”, 10”) tall.
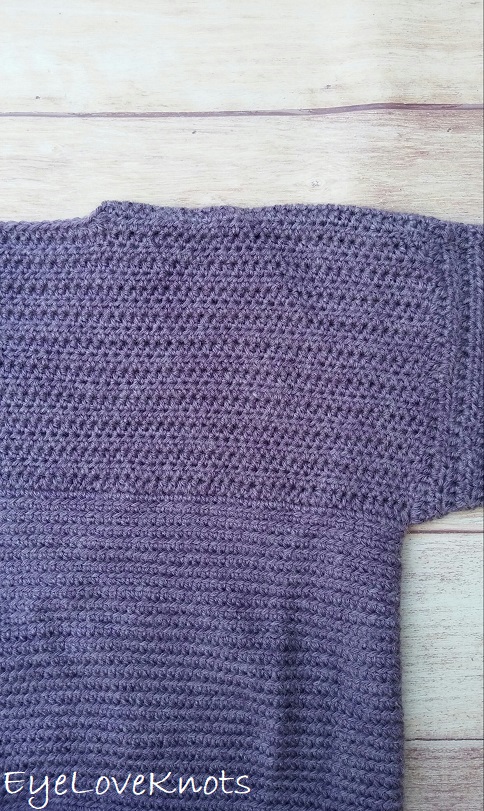
Top Back
Matching pattern (either from WS or RS), join yarn at the next stitch along the backside. Chain 1. (HDC2tog, HDC next 4) 12x (14x, 16x, 17x, 19, 20, 24x). [60 (70, 80, 85, 95, 100, 120) HDC]
Rows 2 – 15 (17, 18, 19, 21, 22, 23): Chain 1, turn. HDC into the 1st HDC, and each across.
Row 16 (18, 19, 20, 22, 23, 24) – Begin Shoulder: Chain 1, turn. HDC into the 1st 20 (25, 30, 32, 37, 40, 50) HDC, leaving the rest unworked. [20 (25, 30, 32, 37, 42, 45) HDC]
Rows 17 – 19 (19 – 21, 20 – 22, 21 – 23, 23 – 25, 24 – 26, 25 – 27): Chain 1, turn. HDC into the 1st HDC, and each across. Don’t fasten off!
Turn to the WS of the sweater, line shoulder stitches up, and slip stitch join through both layers (just like you did to join the ribbing). Fasten off.

Row 20 (22, 23, 24, 26, 27, 28) – 2nd Shoulder: From next unworked stitch, skip 20 (20, 20, 21, 21, 20, 20) HDC. Join yarn in the next HDC, and repeat rows 16 – 19 (18 – 21, 19 – 22, 20 – 23, 22 – 25, 23 – 26, 24 – 27) plus joining.
*Take a moment to try on the sweater. It should fit just like a blouse at this point. Now is the time to make adjustments to the top front and back pieces.
- Do you like how much coverage the front piece is giving you before the neckhole begins? If not, you can take out the shoulders, and add or subtract rows, then work more or less shoulder rows to equal the final number of rows in the pattern.
- Is the neckhole too big or too small? You can take out the shoulders, and skip more or less stitches in between to fit to your liking.
- Is the armhole too big or too small? You can add or subtract rows to your liking. I designed this sweater to have larger armholes than I would on a blouse because I wanted it to fit comfortably over another top without bunching/feeling tight at the underarm.
Now that you’ve adjusted as needed, if you don’t like the ridge seam of the slip stitch join of the shoulders, you may take it out, and use the whipstitch or mattress stitch joining methods, otherwise, leave it as is for weaving.
If you are happy with your top as is, you may add neck edging (instructions below), weave all your ends in, and enjoy! But if you would like to add 3/4 or full length sleeves, we will add those next Monday, September 23rd.
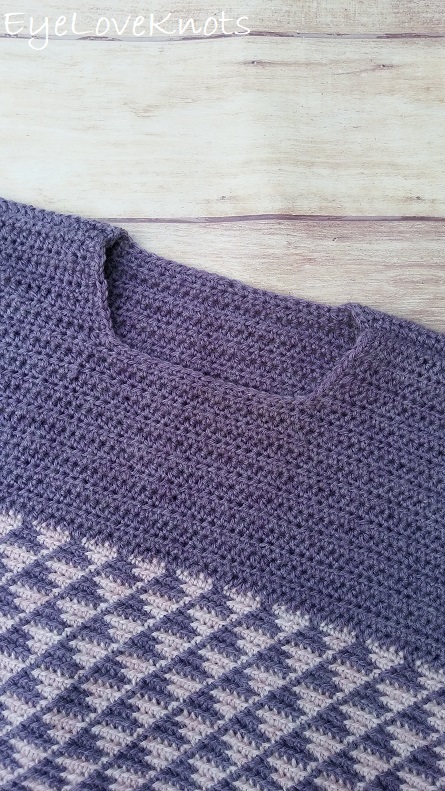
Neck Edging – Optional, but gives a clean, finished edge, and helps keep shape of neckhole
From the RS, join yarn in a center shoulder seam. Chain 1, HDC in this stitch, loosely SC over to corner, SC3tog over to the stitch before corner + corner + next stitch, loosely SC over to next corner and work the same way, loosely SC over to next shoulder seam and work a HDC in this one, then loosely SC to next corner and work decrease, loosely SC to next corner and work decrease, loosely SC back to 1st stitch, and slip stitch join together. Fasten off.
Can’t wait to see your projects! Tag @eyeloveknots and/or #tessellatedtrianglesweater on Instagram!
Join the EyeLoveKnots Crafting Community on Facebook to share your creations, and see what others are up to!
This sweater turned out so cute! Thank you for sharing! 🙂
https://colorandgrace.com