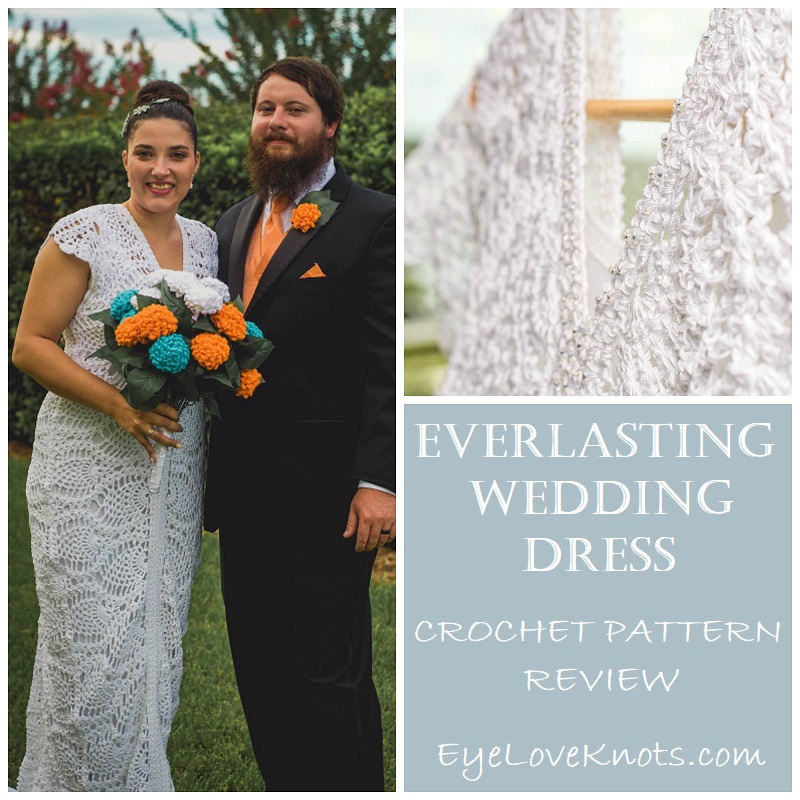
This is a review on the Everlasting Wedding Dress crochet pattern from Annie’s Catalog. It’s a lot of work, but easy to follow, and produces a gorgeous dress!
This post contains affiliate links for Annie’s Catalog, LoveCrafts and SheIn. If you make a purchase by clicking on them, I make a small commission at no extra cost to you. Thanks for your support!
Welcome to the September Pinterest Challenge Blog Hop, hosted by My Pinterventures. The purpose of this Pinterest Challenge is to motivate all the participants of this hop (and you too) to not just pin, but to make it happen!
I thought this challenge would be the perfect one to share my crocheted wedding dress – yes! The dress I made and wore for my own wedding! The Everlasting Wedding Dress has been sitting pinned to my Events: Weddings. Originally, I wanted to design my own wedding dress, but I was having trouble finding a lightweight WHITE yarn to use (white is hard to come by!), and I eventually got tired of striking out, so I turned to a classic – Aunt Lydia’s #10 Crochet Thread and bought this dress pattern (since thread was the recommended yarn for it).
Fair warning, this post is long! Sorry, but there’s a lot of info!
This dress pattern was easy to follow, and really fun to work up. I felt inspired the whole time with the beautiful stitch patterns, and easy in construction. I am even thinking about making a blouse version.
This pattern includes instructions for making the headband you see, which is a beautiful piece, and could even base used as the base for a veil, but I did not make this – just the dress.
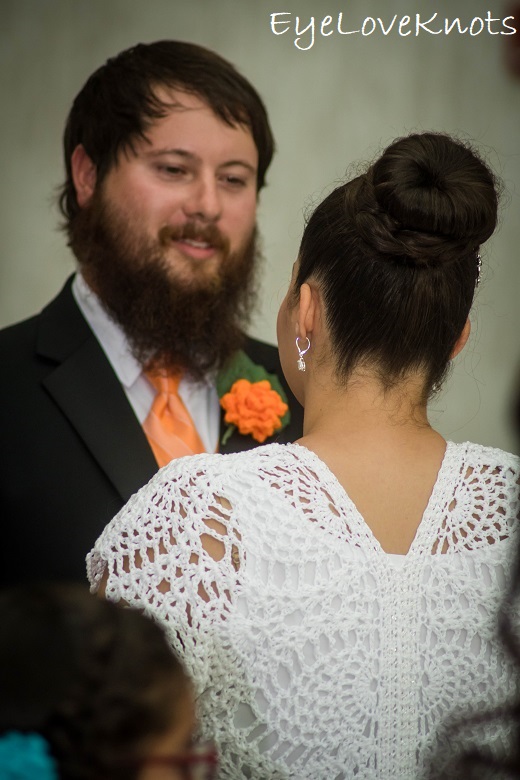
Also, the dress is very see through with the lace pattern. I used the Maxi Tank Dress from SheIn. It looks more solid in the picture, but it’s very thin – more like a slip, than an everyday dress.
Overview:
- For a better fitting dress, use a cotton blend yarn.
- This dress is a little heavy. Since it’s comprised of four rectangles sewn together, it would be so easy to use a lighter yarn/thread, and just adjust the length (and the rest accordingly).
- Measure, measure, measure! It’s the best thing you can do along the way to ensure a garment that fits the way you want.
- Not explained anywhere in pattern, but per Annie’s Customer Service, the hook used to meet gauge is meant for the dress, and the other for the headband – I used both for my dress (explained below).
- Last row of panels needs to be evened out, and I explain how.
- Buy extra beads than you think you need.
- For the beaded center, go up a hook size than what you met gauge with, and work the single crochets on the looser side – soooo important!
- I found too much extra fabric on the bottom front of the dress, which looked really awful (and really bummed me out!), but I found a way to fix it, and I explain how too.
[I did not reread everything, so if you see anything wonky, or needs more clarification, please drop me a line or send an email!]
Materials I Used:
- Aunt Lydia’s #10 Crochet Thread – I used roughly 4,000 yards to make size Medium
- G6/4.25mm Crochet Hook
- #18 Tapestry Needle for Weaving and Sewing
- 972 Clear 6/0 Seed Beads (less than pattern calls for) – I got mine at my local JoAnn’s
- Scotch Tape (More in Beading section)
- Sewing Pins for Assembling Train
- Stitch Markers with a Clasp – I also used in assembly
Let’s Talk Yarn & Beading Tool:
First, I want to point out that the original pattern calls for Omega Eulali #1. I hadn’t heard of this yarn, and when I looked it up to see how much yardage was in each skein to compare, I read “thread” and “lace” and I automatically connected #10 crochet thread. My gauge was so far off that I actually had to hold three strands of the thread together to meet gauge, and now that I am revisiting it, I seemed to have missed that the Omega is a Size 3 Thread, which is thicker – makes sense.
Aunt Lydia does have a #3 Fashion Thread available – I will add that it is has half that yardage of the #10’s ball, and nearly the same price of it as well, so I might go with a sport weight yarn in it’s place.
Yarn Alternative, Mercerized (similar to #10 Thread): Omega’s Sinfonia.
However, I highly recommend going with a cotton blend if you can find it in your desired color, and I will tell you why. 100% cotton will grow/stretch, and continue to do so every time you try it on and/or wear it because this is the nature of the yarn. This worried me a little after I assembled the whole thing, and had to keep trying it on to make sure it fit right. Every time I put it on, I was wishing I had been able to find a cotton blend. Cotton blends with a synthetic yarn like polyester, nylon, polamide, acrylic, etc or wool will hug your body, and drape/flow better. This secondary fiber helps the garment keep it’s shape, and bounce back after it stretches. I did a lot of looking, and I had a really hard time finding a similar weight white yarn – most companies sell cream colored yarn and name it “white”. I returned my fair share of yarn.
There are a few ways you can string your beads on – I explain how I created a shoe lace end and strung mine further down, but you can also do it by replacing you current crochet hook with a small crochet hook that is small enough to fit through the bead, or you can thread a needle and string them on (this didn’t work for me this time), and there’s another way I can picture in my head, but I can’t think of what it’s called at the moment…
Time Spent:
I worked my dress over several months. It really felt like the actual crocheting aspect flew by, but I had to squeeze it into the time after I got off of work, and before Todd got home, since I didn’t want him to see my dress.
After adding everything up, it came to 58.5 hours.
Size:
For reference: I am 5’5″ weighing 160 pounds with a 39″ bust. I haven’t measured my hips in a while, but I think they are 42″.
I measured as I went, and while my bust size says I should have made a size Medium, I actually followed the instructions for Small (based on my measurements). This pattern is available in sizes Small through 3X. The pattern is very easy to adjust/customize along the way.
Pattern Notes:
More on Gauge:
Okay, let’s start back at the gauge. The pattern materials say we need two crochet hooks, but the pattern doesn’t actually tell us which hook we need to use for what part – this information is missing. I worked three gauge swatches, and finally met gauge with three strands of the #10 crochet thread held together, and a G6/4.25mm crochet hook. I ignored the two crochet hook instructions, and just worked with the G6/4.25mm [though you will need that H8/5mm (or a crochet hook one size bigger than what you met gauge with) for later].
*Edited to include: I emailed Annie’s customer service, and their reply was that the hook used to meet gauge is used for the dress, and the other hook is used for the headband. This makes a lot of sense, however, the pattern does not specify with which hook gauge is supposed to be met with, so I honestly couldn’t tell you if it were the smaller or larger size for the headband, I can only tell you that I met gauge with the G6/4.25mm, and used this for my dress, as well as one hook size up for the beaded section, which I think it super helpful (more explained later). As I find out more regarding the hooks, I will update this post!
Panels
The actual dress is comprised of four rectangular panels – two for each side. The panels are joined at the shoulders. Keep in mind the multiple for the stitch pattern in the panels in 12. If you want to make it shorter or longer, subtract or add 12 chains to the original foundation.
Throughout the pattern, the left and right sides of the panels are mirrored to each other. I found that at the end of Row 6, there is a chain 1 that is out of place, so I eliminated it to match the beginning of the row. To continue into Row 7, I worked the first double crochet into the first stitch.
The rest of the instructions for the panels are very straight forward and easy to follow, and even to memorize. And even though it seems like a lot, I felt like they really just flew by.
At the end of Round 8, I measured the panel to see what the length would be. According to the pattern, the length was supposed to be 57″, but my panel was measuring 65.5″ – waaayy too long. I took out 24 chains, and reworked up to Round 8 again, and the second time, found that it was measuring 61.5″, which was still too long, sooooo, I ended up taking off 48 chains from the original foundation chain.
I did not end up measuring the panel for a third time, but I did hold it up to my shoulder where it would sit once assembled, and was really happy with the length. I highly recommend doing this WITH THE SHOES ON that you will be wearing for the event. I want to point out that I think the length I ended up with was on the shorter side, which can be see by the way the train does not rest on the floor, but this is what I wanted because I did not want to have to worry about having to hold my dress up or stepping on it.
Panel Width
As you continue working the rows, you are building the width of your dress. Measure the width before continuing onto the sleeves to make sure it is on point. Keep in mind that the beaded center will add to your width!
The repeats don’t end on a specific row type, they just end, so you can do it at any point that is equal to the width you want.
If you are using 100% cotton yarn, you will want the panels to be at least equal to your bust circumference – you don’t want it to be smaller because you don’t want it to have to stretch out to fit (it will not stretch back).
I worked my panels to 9.25″ wide each (for my 39″ bust) – I think was a final repeat of 4 and 5.
Adjusted Final Panel Row
I was a little concerned with the shell pattern that the panel ended on, but I decided to just continue to follow the pattern – trust it would work out.
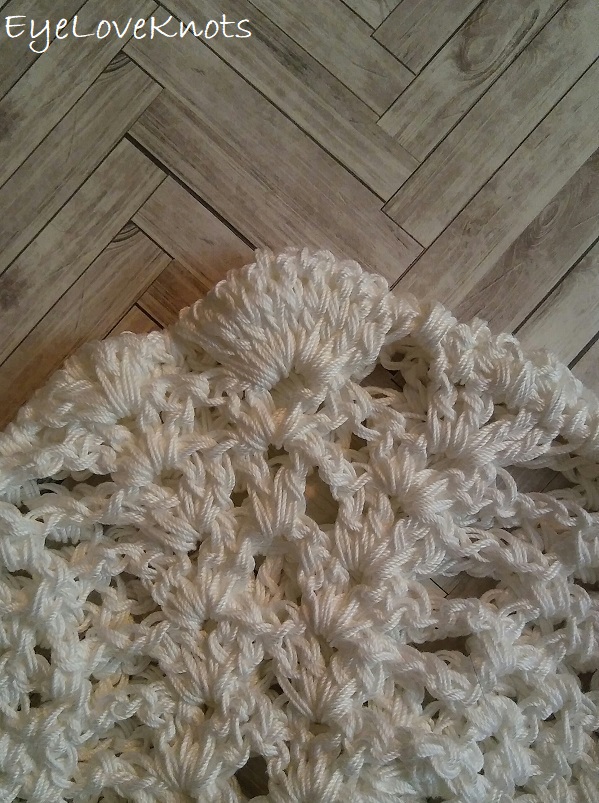
After I seamed my sides closed, and put the dress on, my concern came to life – the edges were so wavy with very poor draping and awful puffiness.
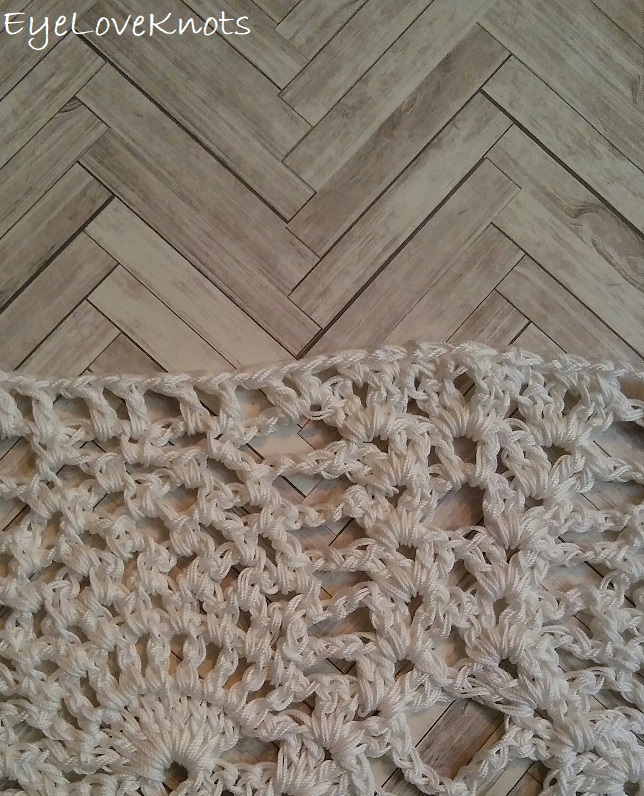
The truth, the final edge needs to be more even, so I took out the final row I worked (on each panel!), and worked an evening row where I worked a stitch followed by a chain, and the stitch used was determined by the height needed to make it even. In some cases I worked a double crochet, and in some others, I worked a single crochet. This row is similar to how you work the final row of a ripple pattern to even it out.
Sleeves
I did work the sleeves to see how they looked, but I didn’t even up keeping them. I liked the way no sleeves fit and looked.
Seams
I am used to working seams by either hand sewing or slip stitching through the layers. The pieces for this dress are seamed with a single crochet plus chain 1, and I think it’s done this way so the seams are less bulky on the inside, and for more security with the heavier pieces – this dress is quite heavy!
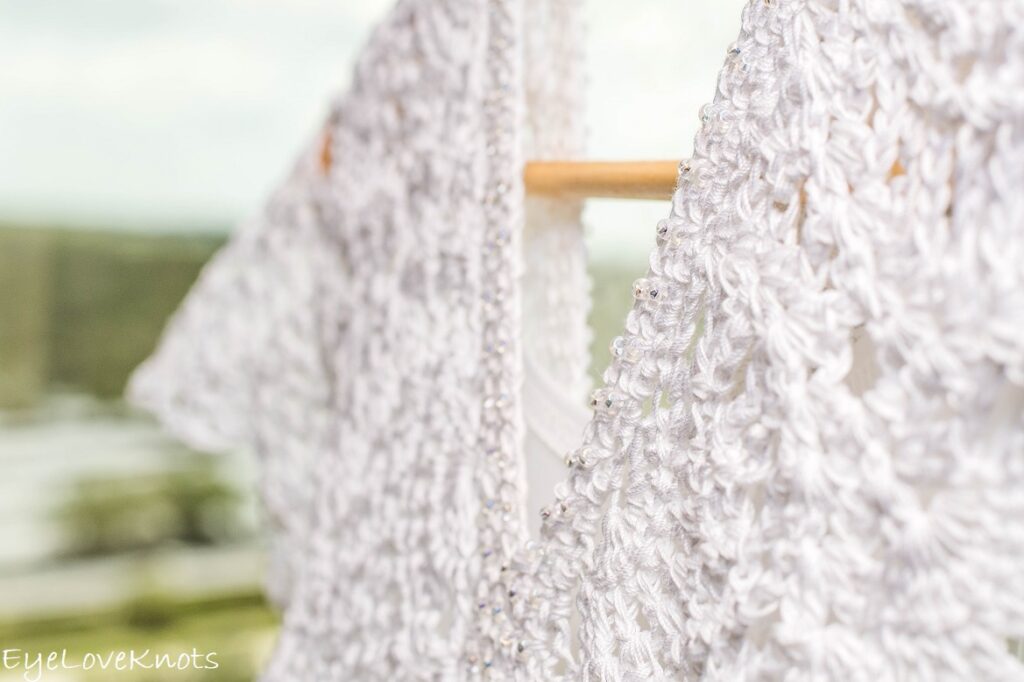
Beading!
This is where that H8/5mm crochet hook comes in (or a crochet hook one size bigger than what you met gauge with).
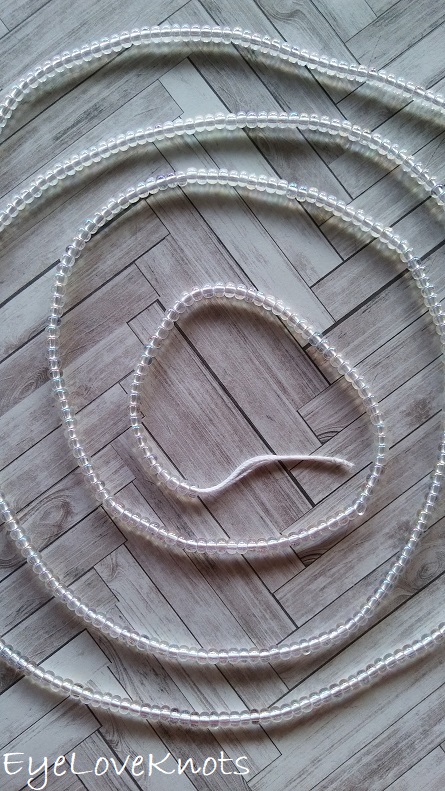
One thing I did not consider when I started with my three strands held together – I wouldn’t be able to thread it with a needle, and string on my beads. There was a moment of slight panic, but then a lightbulb went off – scotch tape. I tightly wrapped the end of my thread with scotch tape so it created a end just like the plastic end of shoe laces, and threaded the beads right onto this. It was a little bit of a challenge to get it tight enough, and I found when I started stringing the beads on that some of them have larger holes than others. If you have a bead reamer, it will come in handy, but in my case, I just put those beads aside that didn’t fit, and was thankful I bought extra beads.
The beaded center of the dress is worked in the moss stitch pattern. I am going to tell you a big, BIG mistake I made – I did not think about switching hooks until it was too late, and you will see how that affected my dress a little later. It is so important to you go up a hook size than what you have been using, and work the single crochets on the looser side, otherwise it will pucker.
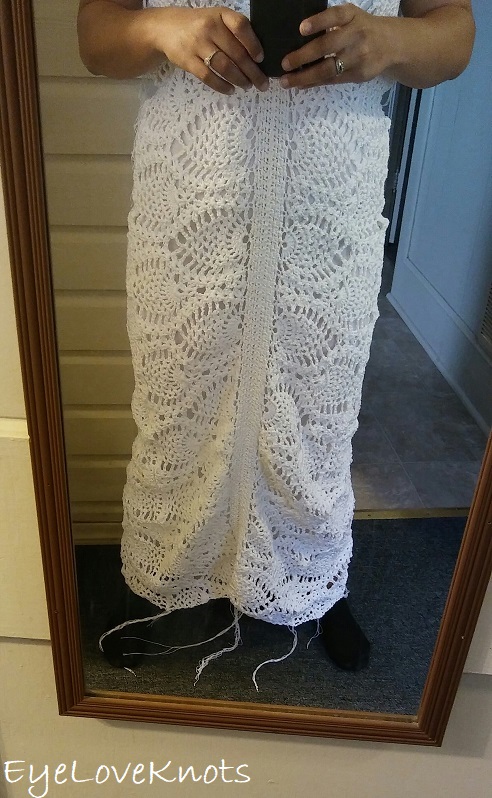
After the final assembly, I experienced the puckering down the beaded center, and this was because I did not switch crochet hooks or pay attention to my tension. The puckering is because it’s too tight. To help with this, I stretched out the beaded center, pinned it in place, and ironed from the wrong side.
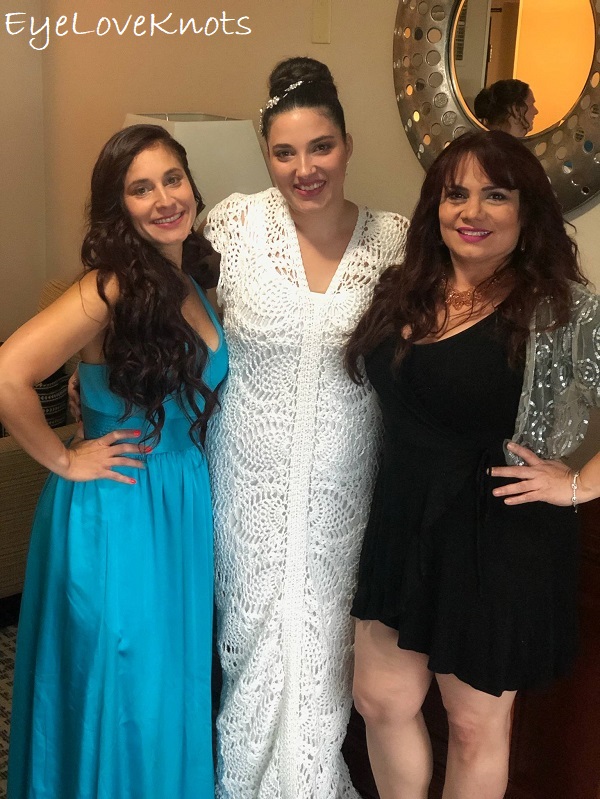
It really only helped a little, but it really needed it, and the rest, I just played off as if it was supposed to be that way – here I am with my sister and cousin). Another way you can fix the puckering is by blocking, but the best fix is to do it right the first time by just going up a hook size, and crocheting looser.
Train:
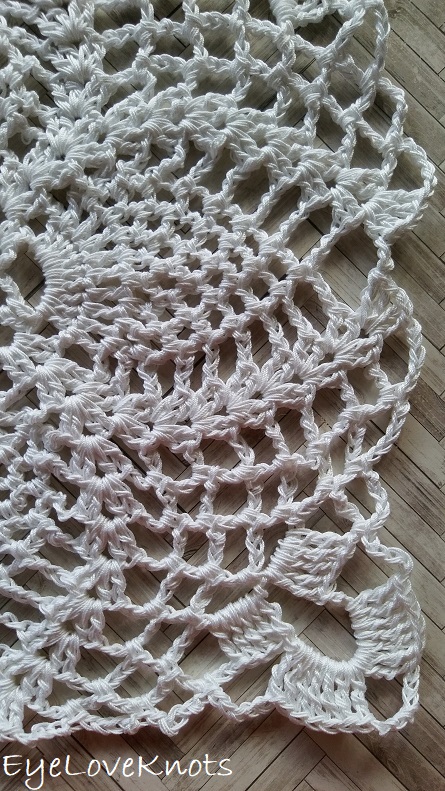
The train is comprised of four squares joined together in the last round. It is really a gorgeous pattern, and so inspirational!
I found that in Rounds 4 – 14, there is a reoccurring error. They all state to “Sl st in first 2 dc and ch-1 sp”, but it should actually be to slip stitch into only one double crochet, not two because it is a beginning shell, and the end is joined to the third chain (also the first double crochet of the beginning shell).
I did have to adjust my train to reach necessary measurement – schematics say with edging, the train should measure 26″.
First off, switch back to the H8/5mm crochet hook for the moss stitch edging around the train. I only worked one round of edging (instead of 5) because it was slightly larger than the 26″ needed. The edging is worked evenly around, so for each longer chain space, I worked the single crochet repeat twice, and then just once for each of the smaller chain spaces.
Assembly
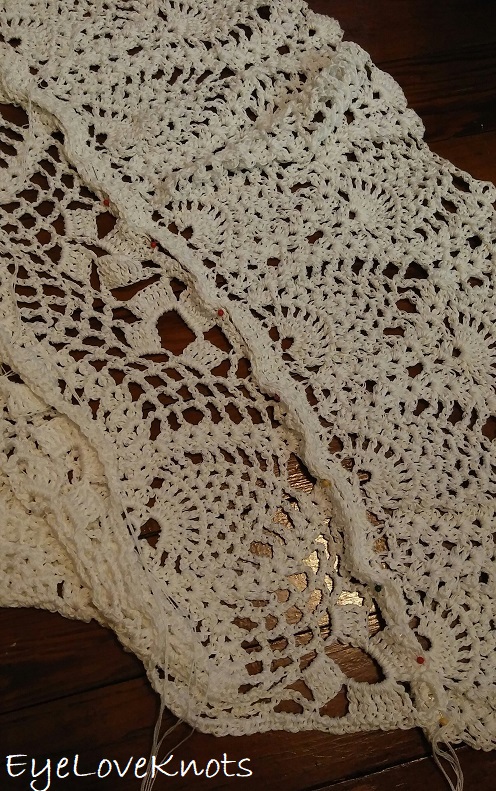
First thing I did was attach the train to the back panels. I sat on the floor, carefully pinned everything in place making sure to line everything up, and then crocheted the seam.
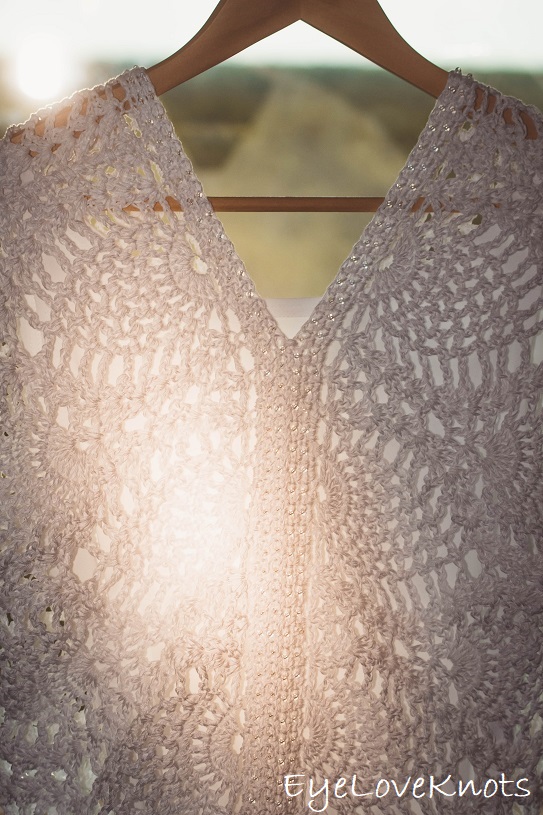
Next, I used stitch markers to closed up the sides, front and back, and put on to test how it would look. Be careful when closing to match up the centers of the pineapples – it will be very noticeable while worn if not even.
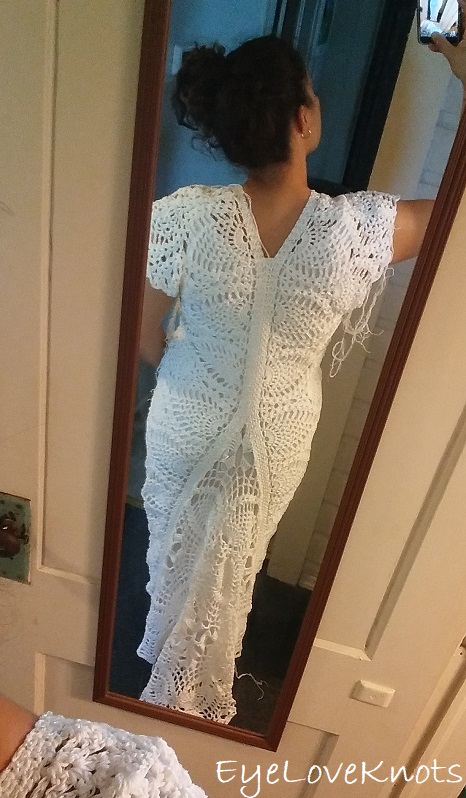
While the dress was on, I adjusted the stitch markers until I was happy with how the armholes fit, as well as where the back and front set. Once happy, I crocheted the seams.
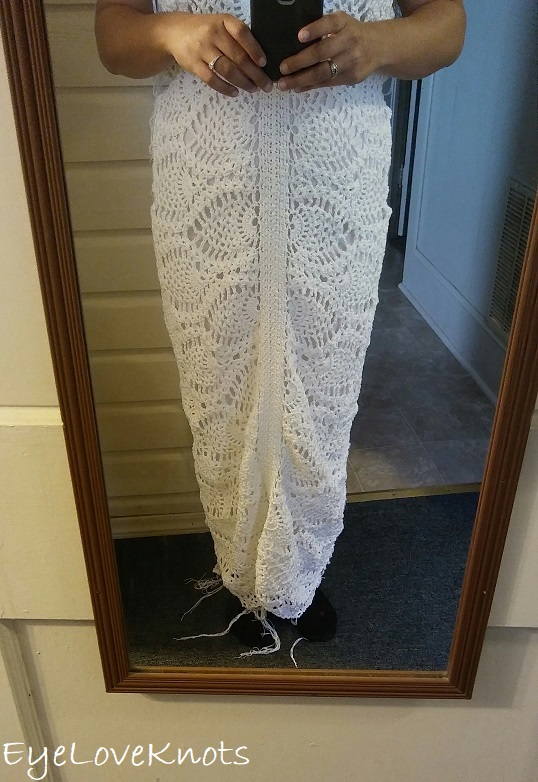
After seamed, I found an awful surprise with the bottom front of my dress, and if this happens to you too, I will tell you what I did to fix it.
Final Edging
This is where I fixed the bottom front problem. The reason why it wasn’t laying nicely was for two reasons: 1.) it was stiff from the cotton yarn, and 2.) had too much fabric. My thought for future fixes is simply a cotton blend yarn, and 4-6″ of negative ease.
I brainstormed, and tried a couple different ways to fix the problem from where I was:
- I unseamed the beaded center up to my knees, which helped so much, but the fabric did not lay nicely (poor drape), so it would have needed to be tacked down, and I didn’t like this.
- I contemplated taking out the train, which I think would have fixed it because it would have pulled back that extra fabric, but I really loved what the train added, so I resolved it a different way (explained below).
To fix the excess fabric issue, I did this in the final edging. With the wrong side facing, I lined up the beaded SIDES of the train pinching the center of it, and joined the yarn here through both layers. This instantly helped by pulling back the extra fabric around the back of my legs. I worked the rest of the train edging evenly as the pattern states, but I worked the single crochet repeat twice in the points to prevent cupping.
Due to the puckering, the front of my dress was higher than the rest, so I also resolved this in the final edging by working the moss stitch evenly along the front of the dress in half double crochet to add height.
My dress finished on the shorter side, which wouldn’t have been a problem if my dress underneath was shorter, or if I hemmed it, but I didn’t want to hem it, so I just added three more moss stitch rounds (in single crochet) to my edging, and in these extra rounds, I paid special attention to the point where I joined the layers, and worked a similar stitch here to secure it.
Edited to Include: I ordered this dress pattern in March 2019. As of then, it did not include the instructions for the picot edging seen in the pattern (and the revision I found did not mention the edging). As per Annie’s Customer Service, the pattern has been updated to include said instructions. If your copy does not have it, email them, and they will help you out.
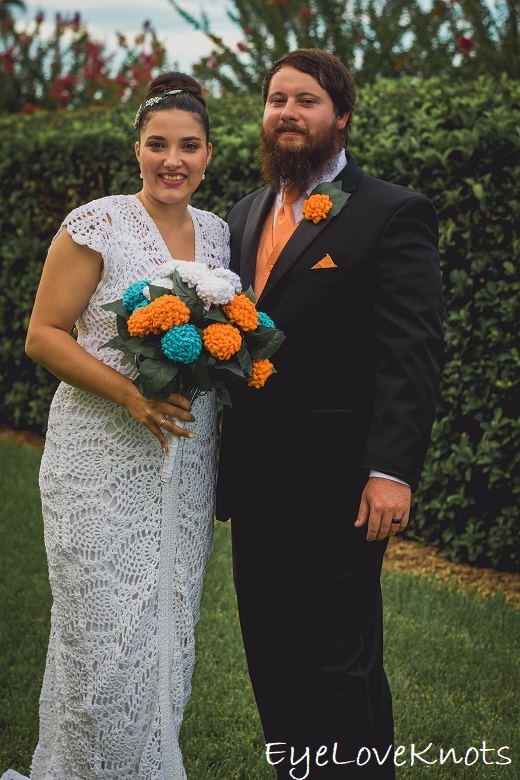
Here I am with my handsome groom.
Wow! So much work, but such a stunning finished piece!
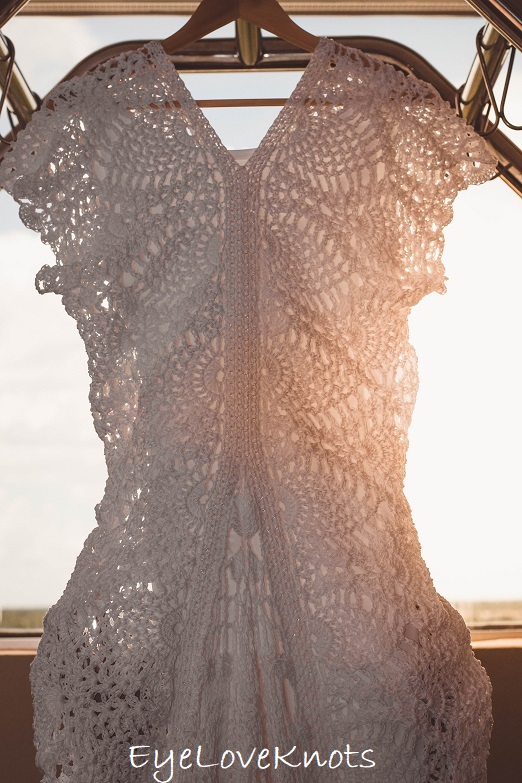
My wedding photographer was William Fryson “The Fryguy” (local to Orlando, Florida) – and he was awesome, and such a pleasure to work with. He was impressed with my dress, and came to realize it would be a challenge to photograph, but brought up a luggage cart, and got my tiny niece to sit on the cart behind the dress, and hold it out – you can kind of see her hands on the hip area.
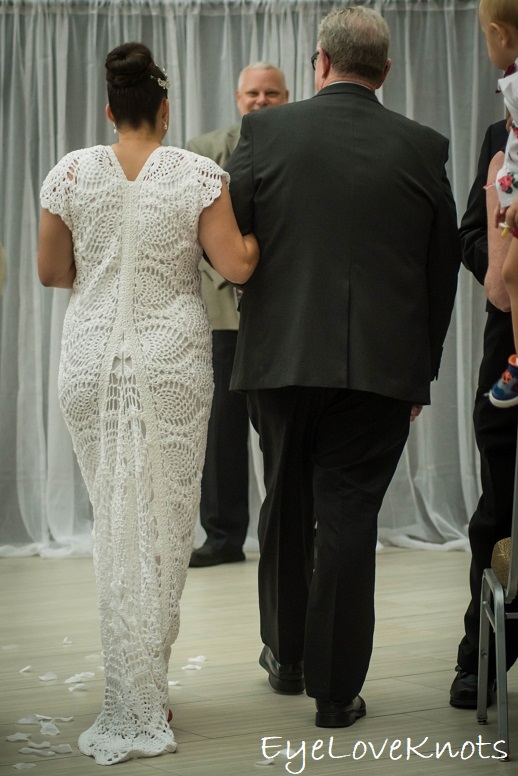
Walking down the aisle with one of the greatest men of all times!
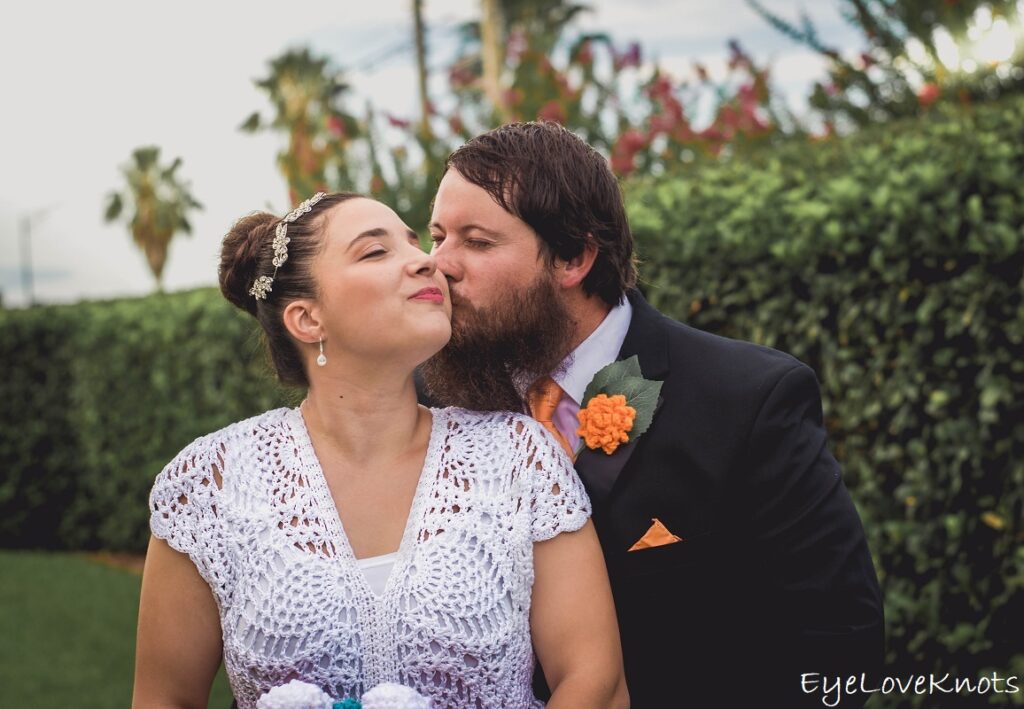
One of my absolute favorites <3
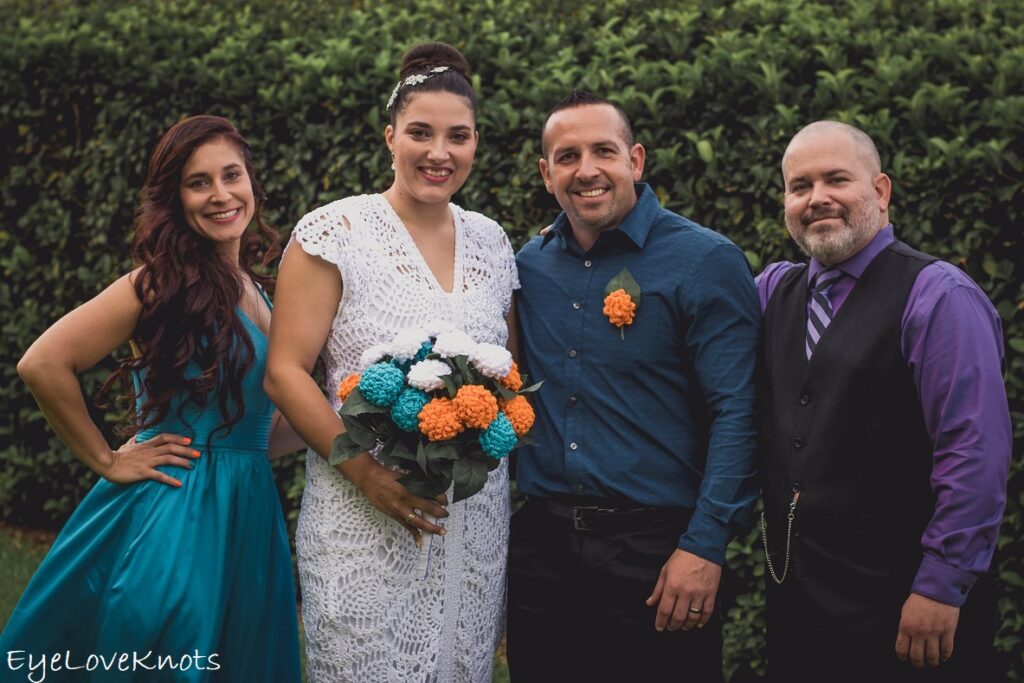
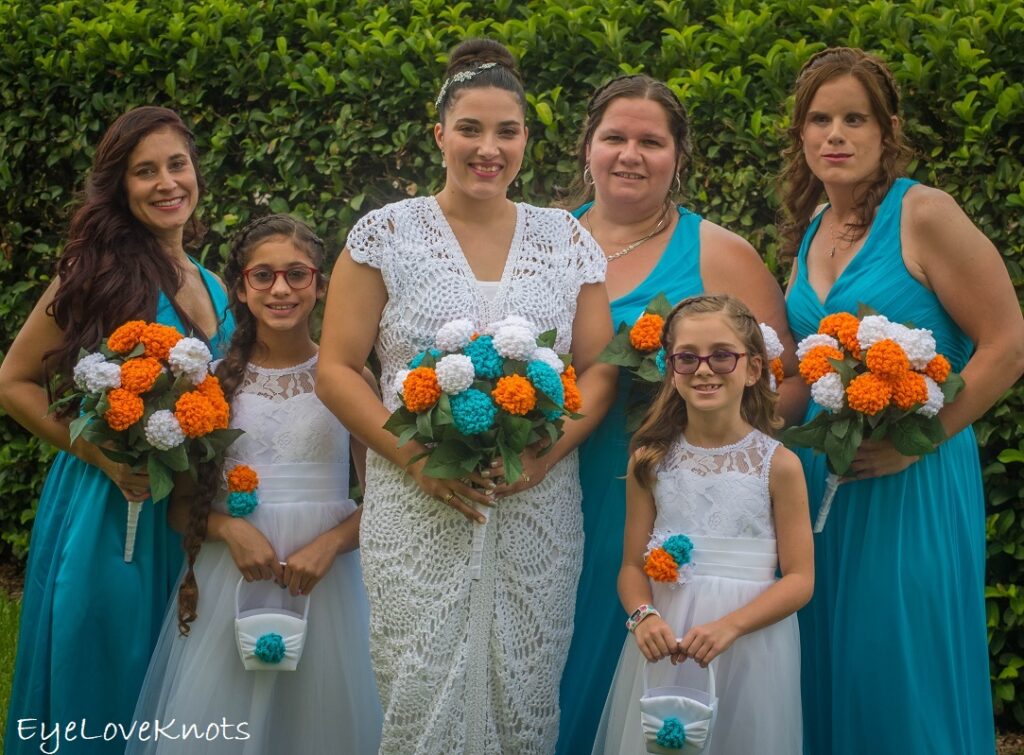
And! A picture of me and my siblings – another favorite of mine! They really helped make my day – couldn’t have done it without them!
Join the EyeLoveKnots Crafting Community on Facebook to share your creations, and see what others are up to!
Linked Up To…
Creative Monday Link Up – Claire Justine
Handmade Monday #144 – Sum of their Stories
The Really Crafty Link Party #186 – Keeping it Real
Craftastic Monday Link Party – Sew Can Do
Little Cottage Link Party #20 – Love My Little Cottage
All About Home Link Party #7 – Common Ground
Fabulous Party #286 – Lou Lou Girls
Project Inspire{d} Link Party #342 – The How-to Home
Craft Schooling Sunday – Creative Jewish Mom
Ginx Woolly Linx September – Ginx Craft
Weekday Wear Linkup – Away from the Blue
517th Inspire Me Tuesday – A Stroll Thru Life
Tutorials & Tips Link Party #407 – Home Stories A to Z
{Wow Me} Wednesday #322 – Ginger Snap Crafts
Your Whims Wednesday #426 – My Girlish Whims
The Wednesday Link Party #314 – The Stitchin’ Mommy
To Grandma’s House We Go Link Party #159 – Chas’ Crazy Creations
Waste Not Wednesday 174 – Faeries and Fauna
The Linky Ladies Party #168 – The Purple Poncho
Turning Heads Linkup – Elegantly Dressed and Stylish
Confident Twosday Linkup – I do deClaire
Hookin’ on Hump Day #199 – Moogly Blog
Style Six Linkup – The Queen in Between
Pin Party #335 – The Pin Junkie
Scrappy Stitchers Link Party #55 – Stitches n Scraps
Thursday Favorite Things #408 – An Artful Mom
Thursday Fashion Files Link Up #229 – Curly Crafty Mom
Trendy Thursday Linkup – Thirty Minus One
Best of the Weekend – Calypso in the Country
Home Matters #252 – Modern on Monticello
Handmade & Otherwise Weekly Link Up Week 18 – Petals, Pies and Otherwise
Snickerdoodle Create Back Make Link Party #303 – EyeLoveKnots
Link Your Stuff – Annemarie’s Haakblog
The Weekly Link Up – Claire Justine
Handmade Monday #145 – Sum of their Stories
The Really Crafty Link Party #187 – Keeping it Real
The Craftastic Monday Link Party – Sew Can Do
Craft Schooling Sunday – Creative Jewish Mom
Talk of the Town 194 – My Repurposed Life
Tuesday Turn About #19 – My Wee Abode
{Wow Me} Wednesday #323 – Ginger Snap Crafts
Your Whims Wednesday #267 – My Girlish Whims
The Wednesday Link Party #315 – The Stitchin’ Mommy
To Grandma’s House We Go Link Party 160 – Chas’ Crazy Creations
Waste Not Wednesday Link Party 175 – Faeries and Fauna
Style Six Linkup – The Queen in Between
Hookin’ on Hump Day #200 – Moogly Blog
Crochet Patterns and Anything Crochet Link Party #16 – Joy of Motion
Pin Party #336 – The Pin Junkie
Best of the Weekend – Calypso in the Country
Home Matters #253 – Modern on Monticello
Handmade & Otherwise Weekly Link Up Week 19 – Petals, Pies and Otherwise
Link Up – Lizzie in Lace
Link Your Stuff – Annemarie’s Haakblog
Snickerdoodle Create Bake Make Link Party 304 – EyeLoveKnots
Let’s see what other things Pinterest inspired! Head over and visit the other hosts to see what they crafted, cooked, built, or tried!

Erlene – My Pinterventures | Jenny – Cookies Coffee and Crafts
T’onna – Sew Crafty Crochet | Julie – Sum of their Stories
Cherryl – Farm Girl Reformed | Beverly – Across the Boulevard
Gail – Purple Hues and Me | Roseann – This Autoimmune Life
Joanne – Our Unschooling Journey | Leanna – Faeries and Fauna
Pamela – Felt-Ed | Susan – Suzerspace
Kristie – Love My Little Cottage | Alexandra – EyeLoveKnots
Lauren – Mom Home Guide | Shirley – Intelligent Domestications
Michelle – Our Crafty Mom | Lynne – My Family Thyme
Emily – Domestic Deadline | Marci – Stone Cottage Adventures
You are a beautiful bride and the dress is wonderful! <3
Good wishes and a lot of happy times for you & your husband!!
Sandra
Thank you!
When measuring the gauge, did you measure from the starting edge to the 2nd shell or did u start at the first dc that makes up the pineapple? I want to make sure I’ve got my gauge right
For gauge, I measured within the pattern, not from the edges.
Beautiful bride and your dress is amazing. It looked like a beautiful day. Congratulations and I wish you a lifetime of happiness.
Hehe, I thought it was kind of a mess of a day, but we got some really lovely pictures.
Oh my word, this is absolutely gorgeous. You look amazing!
Everything about this is just beautiful. Congrats! (on getting married and on the finished dress!)
Thank you, Julie!
Gorgeous dress! It’s so impressive that you could crochet your own gown. What a treasure!
Originally, I decided to make my own dress for the low cost (getting married is so expensive!), but as I worked on it, I really couldn’t have pictured myself as a crocheter not making my dress. I am proud of it.
Congrats! The dress is beautiful and you’re a gorgeous bride! Crocheting a wedding dress is amazing!
Thanks, T’onna! It was a challenge, and I enjoyed every bit of it.
Your dress is beautiful and amazing! What talent, skill and determination to have crochet your own wedding dress! And you look fabulous in it, too! What a lovely affair! Congratulations!
Thanks so much for the kind words, Gail! I definitely had moments of doubt, but I also had people telling me I couldn’t do it or wouldn’t finish it, and I took that in as fuel to get it done. I had a lot of fun working it up, and love how it turned it.
You and the dress are both beautiful! You did a great job!
Thanks, Cherryl!
This is STUNNING! I love to crochet but I never would have thought to crochet a wedding dress, you did an amazing job.
Thank you, Emily! I tried to DIY as much as I could for the wedding (so expensive to get married), so I crocheted my dress, all the bouquets, boutineers and corsages, my garter and embellishments for the ring boxes. Was so much fun!
This is very impressive Alexandra! Very stunning!
Thank you, Roseann!
Wow!! What a lot of work! You did a great job working through the challenges. And you look very pretty. Congratulations!
Liberty @ B4andAfters.com
Thank you, Liberty!
Wow, your dress is amazing! It’ll definitely be a cherished heirloom to pass down to family. You looked beautiful in it & congratulations!
Thanks, Erlene!
WOW! Your wedding dress is absolutely beautiful and you are a stunning bride! I am seriously impressed with your crochet skills. Congratulations on your wedding! The two of you look so happy! -Marci @ Stone Cottage Adventures
Thanks so much for your kind words! I really appreciate it. We are very happy together, and now that we’ve turned the page, are having fun planning the future.
Wow Alexandra, you look STUNNING!!!!!! And that dress, OMW. It’s beautiful. I can only imagine the work that went into making it. So, so, lovely
Thanks so much, Michelle! It was quite a big project for me, but I had a lot of fun putting it together.
That is an amazing dress!! You look so beautiful. Pinned.
Thank you!
Your dress is beautiful! I’m so impressed that you crocheted your wedding gown. Congratulations!
Thanks, Marie!
You were a beautiful bride and the dress is truly special! How wonderful!
Thank you, Linda!
Absolutely gorgeous! I am in awe.
Thanks, Michelle!
Congratulations! You look so beautiful in your dress and you must be so proud – even with the little issues you found you worked them all out and made such a lovely dress!
Hope that you had a great weekend 🙂 Thank you so much for joining the #weekdayWearLinkUp 🙂 I just posted this week’s linkup, I’d love you to join again! 🙂
I was quite proud when I was able to put it on, and see it come to life. Thanks, Mica!
Wow what an amazing dress, you look so beautiful! You must be so proud of yourself, it required a lot of work but it was worth it
Lots of work, but I love how it turned out, and as someone who’s passion is crocheting, I feel like this was the best option for me too!
How nice to see some more photos of your stunning dress, and your wedding. It was such an ambitious project, and you look amazing. Thanks for linking to Ginx Woolly Linx party with this.
Hehe. Lots of people kept telling me I couldn’t do it, and I wouldn’t finish it, and I used that as fuel to get it done. I had some doubts along the way, but I am glad I didn’t give up. Thanks, Ginny!
I love this amazing dress, and I loved reading about how you made it! What a beautiful bride you were! I’ll be featuring it tomorrow at Thursday Favorite Things–Congrats!
Thank you so much, Pam! The kind words, and the support as so appreciated!
WOW!!! You did such an amazing job on this dress. It’s gorgeous and what an awesome sense of accomplishment, making it yourself. Love it. Thanks for linking up for the Style Six Linkup.
XOXO
Thanks, Lisa! I was definitely feeling proud wearing it around. Took a lot of hard work, and I had my doubts, but I really love how it turned out, and glad I didn’t give up.
Wow! Your very talented! I love your dress congratulations!!!
Happy fall,
Kippi
Thanks, Kippi!
This dress is absolutely beautiful and unique.
Ps. thanks for linking up at thirtyminusone.com
Xx, Nailil
Thank you, Nailil! I love partying with you, and reading all your other posts.
Oh my word, this is the most stunning dress I have ever seen! What a special creation for your special day!
Shelbee
http://www.shelbeeontheedge.com
Thank you so much, Shelbee!
You are truly an inspiration, and so proud of you for having the confidence to crochet your own dress…. so special and you look amazing! thanks so much for sharing on craft schooling sunday!
Your kind words, and support are so appreciated, truly! This made my day to read. Thank you so much!
What a beautiful dress! I am so impressed. My mother was a beautiful crocheter. This dress reminded me of some of the crocheted items that she made. I truly have an appreciation for the many hours that you spent on this dress. Some of the designs in this dress reminds me of what my mother called a Pineapple pattern. Anyway, congratulations on a beautiful job!!!
The pineapple stitch is correct. When I got engaged, and I started thinking about my dress, I knew right away that I wanted to use this stitch pattern – so pretty, and elegant. Thanks so much for the kind message! Glad I could bring back some nice memories for you 🙂
Crazy gorgeous and an amazing talent you have! SO impressed, girl! Thanks for sharing at Tuesday Turn About! And congrats on your marriage!
Thank you so much, Julie!
This is a beautiful dress. Never thought about doing something like this. Very unique.
Thank you!!
I have never worked with beads, and honestly I have no intention. I really don’t think I have the patience for that. And being honest, I don’t think I’d have the patience or faith to make a wedding dress. Your dress (and photos) are beautiful. Congrats on such a huge accomplishment!
Thank you so much, Verna! Working with beads isn’t too hard – as long as you can string them right on with a needle and your working thread/yarn. My probably was that it didn’t work out that way, but I do have some really pretty dyed wooden beads sitting in my WIPs basket with the idea in mind to include them in a clutch design.