This is a free crochet pattern for how to crochet the Through the Window Beanie – a fun crochet pattern that uses the mosaic crochet technique. Don’t let it scare you! It’s comprised of simple single crochet stitches, chains and easy double crochets. Seven sizes included.
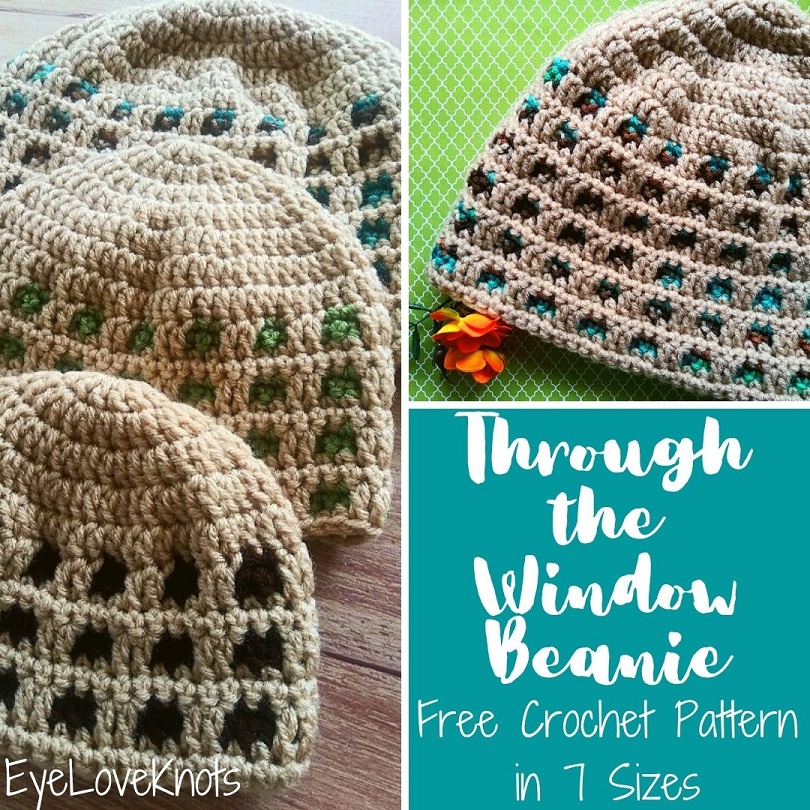
I made this beanie to match my recently published Through the Window Scarf.
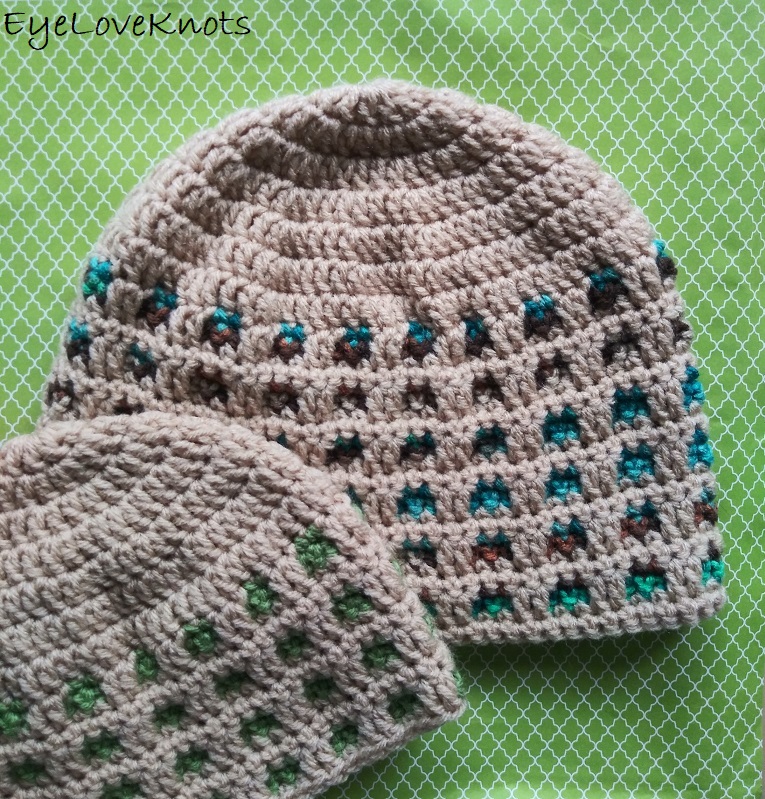
While my favorite way to work this technique is with a variegated color underneath, and a solid coordinating color on top, it also looks great with both solid colors, and even looks neat all in one color – think white on white texture.
The idea of mosaic crochet may intimidate you, but please don’t let it. This scarf is comprised of single crochets and chains with some double crochets to create the overlap. I think a confident beginner could do this. Make sure to check the pattern notes for a photo that breaks the pattern down just a bit, and should ease your fear.
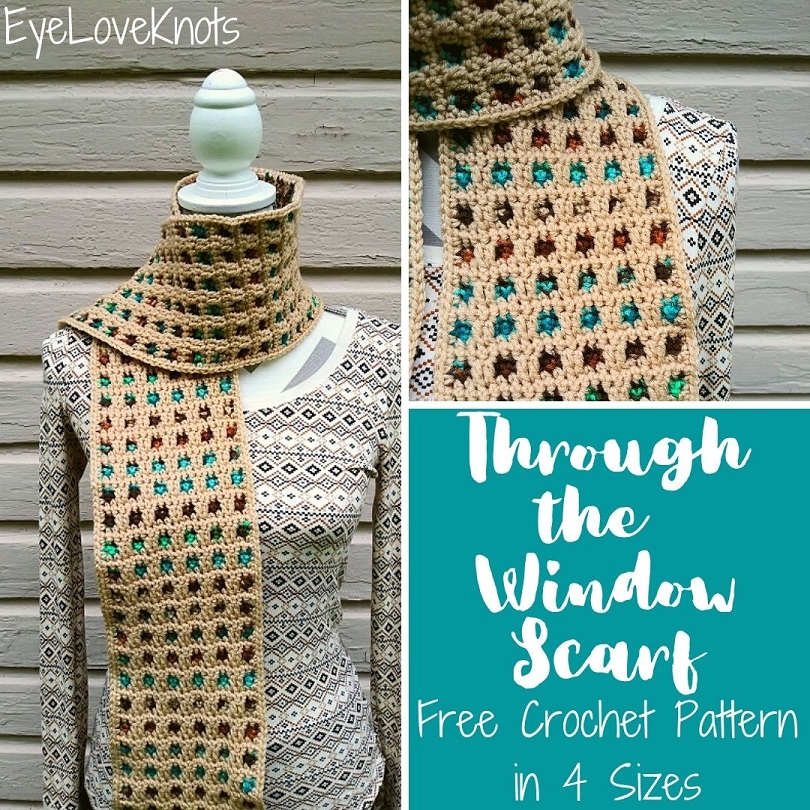
Make a matching Through the Window Scarf using this free crochet pattern!
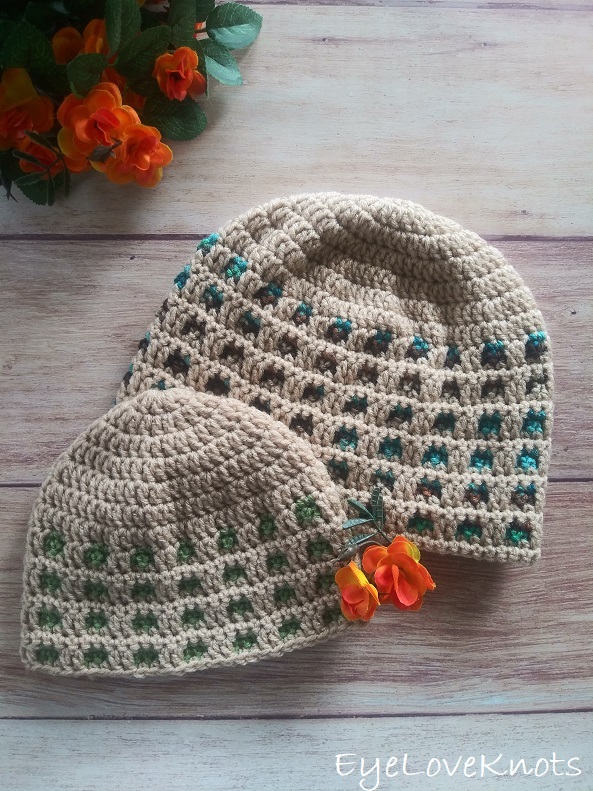
Ad-Free, Printer-Friendly PDF:
If you would like a PDF version of this post, you may get one through either my EyeLoveKnots Etsy Shop, Ravelry or LoveCrochet Shop for a small fee. This fee is to compensate for the views lost when you no longer need to return to the blog to for the information, as you will have your own copy. Plus! It helps fund supplies for new projects to share with you!
Shop EyeLoveKnots Etsy: Through the Window Beanie.
Shop EyeLoveKnots LoveCrafts: Through the Window Beanie.
Share your version of this project on Ravelry – Through the Window Beanie.
Save this to your Favorites On – AllFreeCrochet, FaveCrafts, Crochet Pattern Bonanza.
Materials:
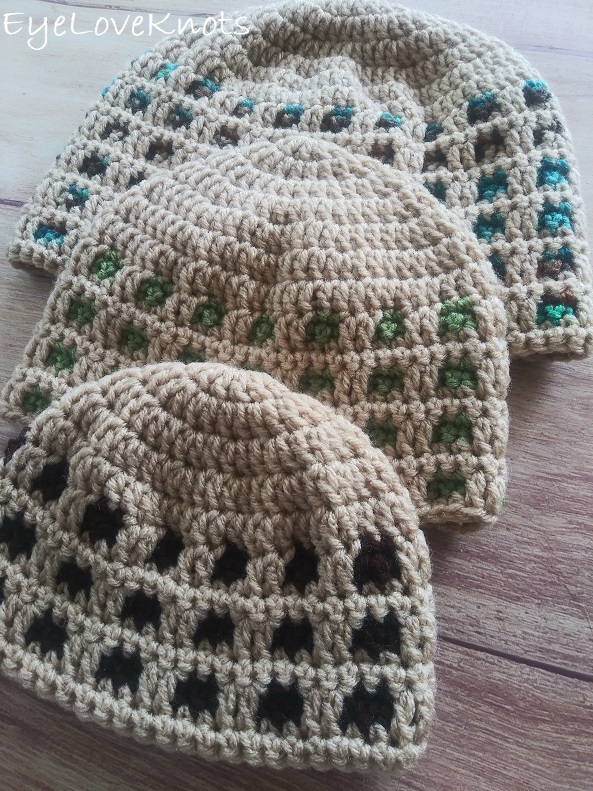
- Small Amount of Worsted Weight Yarn (I used Red Heart Super Saver in Buff and Reef for the Adult Small, in Buff and Tea Leaf for the Toddler and in Buff and Chocolate for the 3-6 Months).
- H8/5mm Crochet Hook
- Tapestry Needle
Material Notes:
I only weighed out yarn for the 3-6 months, and Toddler sizes, which were 21 yards of Buff and 9 yards of Chocolate, and 24 yards of Buff and 11 yards of Tea Leaf, respectively. The Adult Small used 66 yards in total, so with one skein of each color, you can make multiple beanies.
Yarn Alternatives: Lion Brand’s Vanna’s Choice or Heartland, Hobby Lobby’s I Love This Yarn, Red Heart’s Soft, Bernat’s Super Value and Premier Yarns Everyday Soft.
If you have concerns about using Red Heart Super Saver and similar because of the roughness and stiffness of the fabric, I have a couple tips!
- If the yarn is too rough for your hands to crochet with, remove the skein wrapper, place the skein into a mesh lingerie bag (I bought mine at JoAnn’s), then machine wash it by itself on the gentle cycle in cold water with a mild detergent. Once it’s finished, toss it into the dryer on low heat – you may need to run it through 2 – 3 times to get the center dry.
- To add softness and better drape to the finished piece, crochet in it’s entirety and weave in the ends, then wash and dry in the same manner (without the lingerie bag) or simply dry once with a dryer sheet.
Time Spent:
For the adult small size, I had my beanie ready in 1.5 hours.
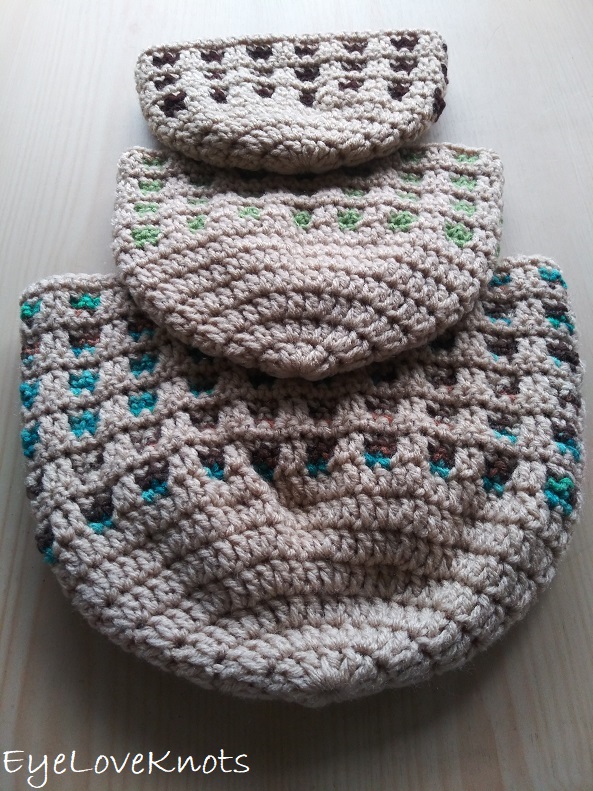
Measurements:
Typically, figuring in the yarn stretch for synthetics and wool, I design beanies with -2″ of ease to stretch to fit. Because of this single crochet based stitch pattern, this works up tighter, and has been designed to have 0 ease to the bigger size of the circumference range.
- Newborn: 4.38″ Crown Diameter (that’s 4 3/8″) by 5″ Tall to fit a head circumference of 13″ – 14″
- 3 – 6 Months: 4.94″ Crown Diameter (that’s 4 15/16″) by 5.25″ (or 5 1/4″) Tall to fit a head circumference of 15 – 16″
- 6 – 12 Months: 5.94″ Crown Diameter (that’s 5 15/16″) by 5.88″ (or 5 7/8″) Tall to fit a head circumference of 17 – 19″
- Toddler: 6.13″ Crown Diameter (that’s 6 1/8″) by 6.56″ (or 6 9/16″) Tall to fit a head circumference of 18 – 20″
- Child: 6.75″ Crown Diameter (that’s 6 3/4″) by 7.25″ (or 7 1/4″) Tall to fit a head circumference of 20 – 22″
- Adult Small: 6.75″ Crown Diameter (that’s 6 3/4″) by 8.5″ (or 8 1/2″) Tall to fit a head circumference of 20 – 22″
- Adult Large: 7.13″ Crown Diameter (that’s 7 1/8″) by 8.5″ (or 8 1/2″) – 9″ Tall to fit a head circumference of 22 – 23″
Gauge:
11 HDC = 3″ Wide; 9 Rows = 3 1/8″
Abbreviations (US):
- SC – Single Crochet (Photo Tutorial)
- DC – Double Crochet (Photo Tutorial)
Pattern Notes:
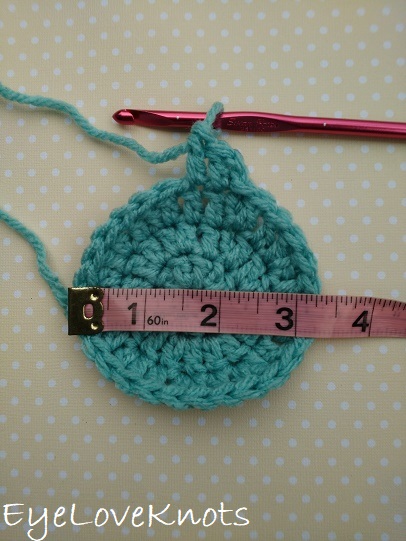
This is how we measure the crown diameter. If you need help working up the basic beanie, I have a photo tutorial HERE.
I work the increases differently than most to help keep my seam straight. Typically you would work an increase repeat as two stitches in the first, one stitch in the next, or one stitch in the first, two stitches in the next, but I split that first increase by working the first stitch of it into the first stitch, which positions it just to the left of the beginning chain, and then the last stitch of the increase into the same stitch as the first but it positions it just to the right of the beginning chain. By this increase hugging the beginning chain, it will remain straight. Feel free to replace my method with you preferred method of increasing.
The beginning chains do not count as a stitch except for the one row noted.
Watch for turning instructions because they are not throughout.
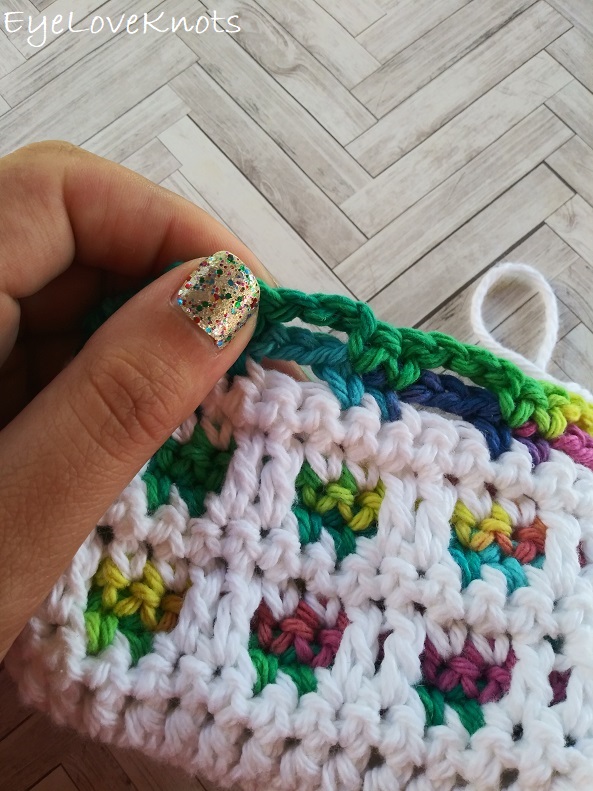
In the pattern, I will instruct for example, in Round 8 of the Adult Small Beanie “DC into R6”. In the photo above, you can see how there is a skipped stitch in white, and two rows of chains above it. You will push those chains to the back, and work the double crochet just into that skipped stitch in white.
Stitch multiple is 4.
To change yarn colors, after joining, turn to the new working side. Pull the new color through, then pull the original color tight (it will disappear). Work the round as written, but before joining, move the previous color to the inside so it won’t be visible from the right side of the beanie.
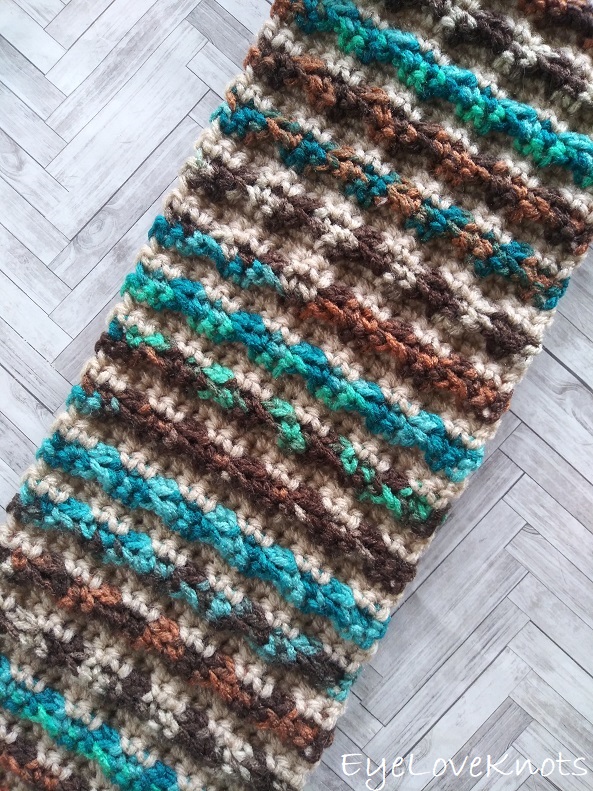
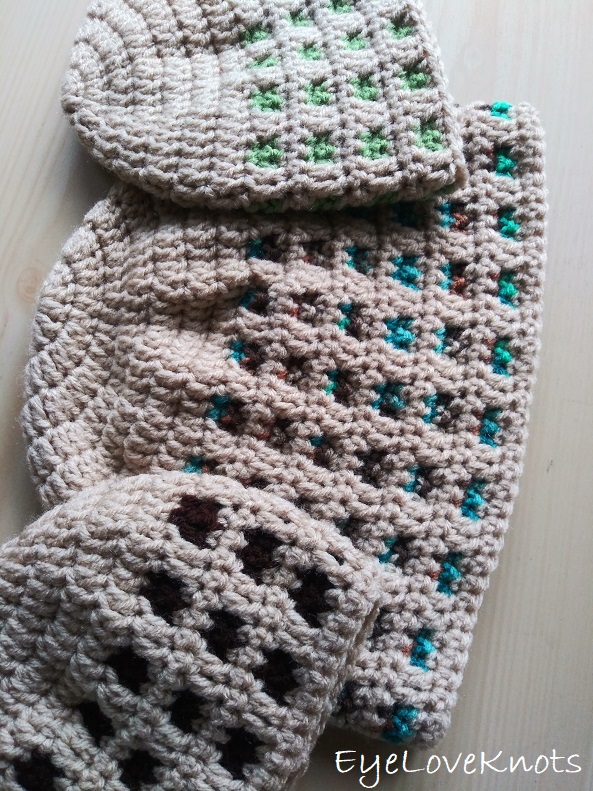
This is what the back of this stitch pattern looks like (shown on my Through the Window Scarf). There aren’t any floats throughout the pattern other than the yarn that will be carried up the join.
Newborn:
In Buff, chain 5. Slip stitch to join a ring. Chain 2. Work 10 DC into the ring. Join. (10 DC)
R2: Chain 2. Work 1 DC into the first stitch, 2 DC in each of the next 9 DCs, and 1 DC into the same as the first. Join. (20 DC)
R3: Chain 2. Work 1 DC into the first 2 stitches, (2 DC into the next stitch, 1 DC into the next stitch) 9x, 1 DC into the same as the first. Join. (30 DC)
R4: Chain 2. Work 1 DC into the first 3 stitches, (2 DC into the next stitch, 1 DC into each of the next 2 stitches) 9x, 1 DC into the same as the first. Join. (40 DC)
R5: Chain 2 (counts as a DC this round only). DC into the 2nd stitch, and each stitch around, switch to Reef. (40 DC)
R6: In Reef, chain 1. SC into the 1st stitch, chain 3, skip the next 2 stitches, (SC into each of the next 2 stitches, chain 3, skip the next 2 stitches) 9x, SC into the next stitch. Join. (20 SC)
R7: Chain 1, turn. SC into the 1st stitch, chain 3, (SC into each of the next 2 SC, chain 3) 9x, SC into the next SC. Join, and switch to Buff. (20 SC)
R8: In Buff, chain 1, and turn. SC into the 1st SC, DC into each of the 2 open stitches from R6, (SC into each of the next 2 SC, DC into each of the next 2 stitches of R6) 9x, SC into the next SC. Join. (40 stitches)
R9: Chain 1, and turn. SC into the 1st stitch, and each stitch around. (40 SC)
R10 – 13: Repeat Rows 6 – 9.
R14: Chain 1, turn. SC into the 1st SC, and each around. (40 SC)
Fasten off, and weave in ends.
3 – 6 Months:
In Buff, chain 5. Slip stitch to join a ring. Chain 2. Work 13 DC into the ring. Join. (13 DC)
R2: Chain 2. Work 1 DC into the first stitch, 2 DC in each of the next 12 DCs, and 1 DC into the same as the first. Join. (26 DC)
R3: Chain 2. Work 1 DC into the first 2 stitches, (2 DC into the next stitch, 1 DC into the next stitch) 12x, 1 DC into the same as the first. Join. (39 DC)
R4: Chain 2 (counts as a DC this round only). DC into the 1st stitch, and each stitch around, switch to Reef. (40 DC)
R5: In Reef, chain 1. SC into the 1st stitch, chain 3, skip the next 2 stitches, (SC into each of the next 2 stitches, chain 3, skip the next 2 stitches) 9x, SC into the next stitch. Join. (20 SC)
R6: Chain 1, turn. SC into the 1st stitch, chain 3, (SC into each of the next 2 SC, chain 3) 9x, SC into the next SC. Join, and switch to Buff. (20 SC)
R7: In Buff, chain 1, and turn. SC into the 1st SC, DC into each of the 2 open stitches from R5, (SC into each of the next 2 SC, DC into each of the next 2 stitches of R5) 9x, SC into the next SC. Join. (40 stitches)
R8: Chain 1, and turn. SC into the 1st stitch, and each stitch around. (40 SC)
R9 – 16: Repeat Rows 5 – 8.
R17: Chain 1, turn. SC into the 1st SC, and each around. (40 SC)
Fasten off, and weave in ends.
6 – 12 Months:
In Buff, chain 5. Slip stitch to join a ring. Chain 2. Work 13 DC into the ring. Join. (13 DC)
R2: Chain 2. Work 1 DC into the first stitch, 2 DC in each of the next 12 DCs, and 1 DC into the same as the first. Join. (26 DC)
R3: Chain 2. Work 1 DC into the first 2 stitches, (2 DC into the next stitch, 1 DC into the next stitch) 12x, 1 DC into the same as the first. Join. (39 DC)
R4: Chain 2. Work 1 DC into the first 3 stitches, (2 DC into the next stitch, 1 DC into each of the next 3 stitches) 12x, 1 DC into the same as the first. Join. (52 DC)
R5: Chain 2 (counts as a DC this round only). DC into the 2nd stitch, and each stitch around, switch to Reef. (52 DC)
R6: In Reef, chain 1. SC into the 1st stitch, chain 3, skip the next 2 stitches, (SC into each of the next 2 stitches, chain 3, skip the next 2 stitches) 12x, SC into the next stitch. Join. (52 stitches)
R7: Chain 1, turn. SC into the 1st stitch, chain 3, (SC into each of the next 2 SC, chain 3) 12x, SC into the next SC. Join, and switch to Buff. (26 SC)
R8: In Buff, chain 1, and turn. SC into the 1st SC, DC into each of the 2 open stitches from R6, (SC into each of the next 2 SC, DC into each of the next 2 stitches of R6) 12x, SC into the next SC. Join. (52 stitches)
R9: Chain 1, and turn. SC into the 1st stitch, and each stitch around. (52 SC)
R10 – 20: Repeat Rows 6 – 9, ending on a Row 8.
Fasten off, and weave in ends.
Toddler:
In Buff, chain 5. Slip stitch to join a ring. Chain 2. Work 10 DC into the ring. Join. (10 DC)
R2: Chain 2. Work 1 DC into the first stitch, 2 DC in each of the next 9 DCs, and 1 DC into the same as the first. Join. (20 DC)
R3: Chain 2. Work 1 DC into the first 2 stitches, (2 DC into the next stitch, 1 DC into the next stitch) 9x, 1 DC into the same as the first. Join. (30 DC)
R4: Chain 2. Work 1 DC into the first 3 stitches, (2 DC into the next stitch, 1 DC into each of the next 2 stitches) 9x, 1 DC into the same as the first. Join. (40 DC)
R5: Chain 2. Work 1 DC into the first 4 stitches, (2 DC into the next stitch, 1 DC into each of the next 3 stitches) 9x, 1 DC into the same as the first. Join. (50 DC)
R6: Chain 2. Work 1 DC into the first 5 stitches, (2 DC into the next stitch, 1 DC into each of the next 4 stitches) 9x, 1 DC into the same as the first. Join. (60 DC)
R7: Chain 2 (counts as a DC this round only). DC into the 2nd stitch, and each stitch around, switch to Reef. (60 DC)
R8: In Reef, chain 1. SC into the 1st stitch, chain 3, skip the next 2 stitches, (SC into each of the next 2 stitches, chain 3, skip the next 2 stitches) 14x, SC into the next stitch. Join. (30 SC)
R9: Chain 1, turn. SC into the 1st stitch, chain 3, (SC into each of the next 2 SC, chain 3) 14x, SC into the next SC. Join, and switch to Buff. (30 SC)
R10: In Buff, chain 1, and turn. SC into the 1st SC, DC into each of the 2 open stitches from R8, (SC into each of the next 2 SC, DC into each of the next 2 stitches of R8) 14x, SC into the next SC. Join. (60 stitches)
R11: Chain 1, and turn. SC into the 1st stitch, and each stitch around. (60 SC)
R12 – 22: Repeat Rows 8 – 11, ending on a Row 10.
Fasten off, and weave in ends.
Child:
In Buff, chain 5. Slip stitch to join a ring. Chain 2. Work 11 DC into the ring. Join. (11 DC)
R2: Chain 2. Work 1 DC into the first stitch, 2 DC in each of the next 10 DCs, and 1 DC into the same as the first. Join. (22 DC)
R3: Chain 2. Work 1 DC into the first 2 stitches, (2 DC into the next stitch, 1 DC into the next stitch) 10x, 1 DC into the same as the first. Join. (33 DC)
R4: Chain 2. Work 1 DC into the first 3 stitches, (2 DC into the next stitch, 1 DC into each of the next 2 stitches) 10x, 1 DC into the same as the first. Join. (44 DC)
R5: Chain 2. Work 1 DC into the first 4 stitches, (2 DC into the next stitch, 1 DC into each of the next 3 stitches) 10x, 1 DC into the same as the first. Join. (55 DC)
R6: Chain 2. Work 1 DC into the first 5 stitches, (2 DC into the next stitch, 1 DC into each of the next 4 stitches) 10x, 1 DC into the same as the first. Join. (66 DC)
R7: Chain 2 (counts as a DC this round only). DC into the 1st stitch, and each of the next 31 stitches, 2 DC into the next stitch, DC into each of the remaining stitches around, switch to Reef. (68 DC)
R8: In Reef, chain 1. SC into the 1st stitch, chain 3, skip the next 2 stitches, (SC into each of the next 2 stitches, chain 3, skip the next 2 stitches) 16x, SC into the next stitch. Join. (34 SC)
R9: Chain 1, turn. SC into the 1st stitch, chain 3, (SC into each of the next 2 SC, chain 3) 16x, SC into the next SC. Join, and switch to Buff. (34 SC)
R10: In Buff, chain 1, and turn. SC into the 1st SC, DC into each of the 2 open stitches from R8, (SC into each of the next 2 SC, DC into each of the next 2 stitches of R8) 16x, SC into the next SC. Join. (68 stitches)
R11: Chain 1, and turn. SC into the 1st stitch, and each stitch around. (68 SC)
R12 – 26: Repeat Rows 8 – 11, ending on a Row 10.
Fasten off, and weave in ends.
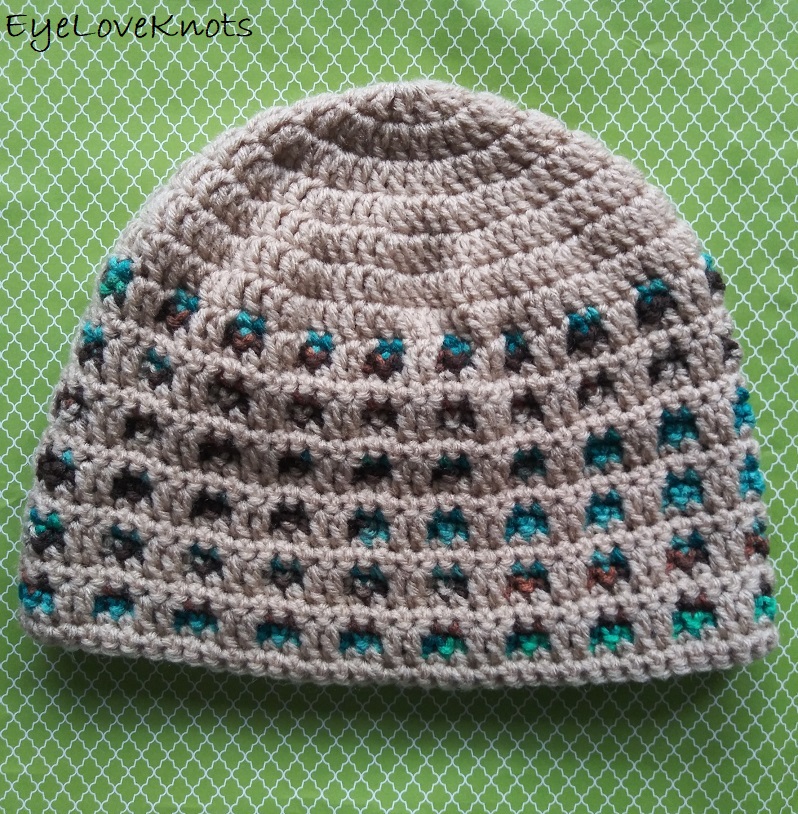
Adult Small:
In Buff, chain 5. Slip stitch to join a ring. Chain 2. Work 11 DC into the ring. Join. (11 DC)
R2: Chain 2. Work 1 DC into the first stitch, 2 DC in each of the next 10 DCs, and 1 DC into the same as the first. Join. (22 DC)
R3: Chain 2. Work 1 DC into the first 2 stitches, (2 DC into the next stitch, 1 DC into the next stitch) 10x, 1 DC into the same as the first. Join. (33 DC)
R4: Chain 2. Work 1 DC into the first 3 stitches, (2 DC into the next stitch, 1 DC into each of the next 2 stitches) 10x, 1 DC into the same as the first. Join. (44 DC)
R5: Chain 2. Work 1 DC into the first 4 stitches, (2 DC into the next stitch, 1 DC into each of the next 3 stitches) 10x, 1 DC into the same as the first. Join. (55 DC)
R6: Chain 2. Work 1 DC into the first 5 stitches, (2 DC into the next stitch, 1 DC into each of the next 4 stitches) 10x, 1 DC into the same as the first. Join. (66 DC)
R7: Chain 2 (counts as a DC this round only). DC into the 2nd stitch, and each of the next 31 stitches, 2 DC into the next stitch, DC into each of the remaining stitches around, switch to Reef. (68 DC)
R8: In Reef, chain 1. SC into the 1st stitch, chain 3, skip the next 2 stitches, (SC into each of the next 2 stitches, chain 3, skip the next 2 stitches) 16x, SC into the next stitch. Join. (34 SC)
R9: Chain 1, turn. SC into the 1st stitch, chain 3, (SC into each of the next 2 SC, chain 3) 16x, SC into the next SC. Join, and switch to Buff. (34 SC)
R10: In Buff, chain 1, and turn. SC into the 1st SC, DC into each of the 2 open stitches from R8, (SC into each of the next 2 SC, DC into each of the next 2 stitches of R8) 16x, SC into the next SC. Join. (68 stitches)
R11: Chain 1, and turn. SC into the 1st stitch, and each stitch around. (68 SC)
R12 – 31: Repeat Rows 8 – 11.
Fasten off, and weave in ends.
Adult Large:
In Buff, chain 5. Slip stitch to join a ring. Chain 2. Work 10 DC into the ring. Join. (10 DC)
R2: Chain 2. Work 1 DC into the first stitch, 2 DC in each of the next 9 DCs, and 1 DC into the same as the first. Join. (20 DC)
R3: Chain 2. Work 1 DC into the first 2 stitches, (2 DC into the next stitch, 1 DC into the next stitch) 9x, 1 DC into the same as the first. Join. (30 DC)
R4: Chain 2. Work 1 DC into the first 3 stitches, (2 DC into the next stitch, 1 DC into each of the next 2 stitches) 9x, 1 DC into the same as the first. Join. (40 DC)
R5: Chain 2. Work 1 DC into the first 4 stitches, (2 DC into the next stitch, 1 DC into each of the next 3 stitches) 9x, 1 DC into the same as the first. Join. (50 DC)
R6: Chain 2. Work 1 DC into the first 5 stitches, (2 DC into the next stitch, 1 DC into each of the next 4 stitches) 9x, 1 DC into the same as the first. Join. (60 DC)
R7: Chain 2. Work 1 DC into the first 6 stitches, (2 DC into the next stitch, 1 DC into each of the next 5 stitches) 9x, 1 DC into the same as the first. Join. (70 DC)
R8: Chain 2 (counts as a DC this round only). DC into the 2nd stitch, and each of the next 34, 2 DC into the next stitch, DC into each of the remaining stitches around, switch to Reef. (72 DC)
R9: In Reef, chain 1. SC into the 1st stitch, chain 3, skip the next 2 stitches, (SC into each of the next 2 stitches, chain 3, skip the next 2 stitches) 17x, SC into the next stitch. Join. (36 SC)
R10: Chain 1, turn. SC into the 1st stitch, chain 3, (SC into each of the next 2 SC, chain 3) 17x, SC into the next SC. Join, and switch to Buff. (36 SC)
R11: In Buff, chain 1, and turn. SC into the 1st SC, DC into each of the 2 open stitches from R9, (SC into each of the next 2 SC, DC into each of the next 2 stitches of R9) 17x, SC into the next SC. Join. (72 stitches)
R12: Chain 1, and turn. SC into the 1st stitch, and each stitch around. (72 SC)
R13 – 28 (32): Repeat Rows 9 – 12.
R29 (33): Chain 1, and turn. SC into each stitch around. Join. (72 SC)
Fasten off, and weave in ends.
Please feel free to make and sell your own Through the Window Beanie using this pattern, but please DO NOT claim this pattern as your own nor should you sell my pattern, and DO NOT re-publish my photos as your own. DO NOT copy and paste my pattern anywhere, link to it instead.
DIY Lovers: Join the EyeLoveKnots Crochet & DIY Community on Facebook to share your creations, and see what others are up to!
Fashion Lovers: Join the Alexandra Lane Lifestyle Facebook group to share, and see what others are up to!
Linked Up To…
Happiness is Homemade Link Party – Create with Cynthia
Unlimited Monthly Link Party 16 – Grammy’s Grid
Handmade Monday #194 – Sum of their Stories
Ginx Woolly Linx Party September – Ginx Craft
Craftastic Monday Link Party – Sew Can Do
The Really Crafty Link Party #233 – Keeping it Real
Fabulous Party #338 – Lou Lou Girls
559th Inspire Me Tuesday – A Stroll Thru Life
Linky Ladies Party #194 – The Purple Poncho
You’re the Star September Blog Hop – B4 and Afters
The Wednesday Link Party 366 – The Stitchin’ Mommy
Waste Not Wednesday 224 – Pretty DIY Home
Scrappy Stitchers Link Party #67 – Stitches n Scraps
Creatively Crafty Link Party #242 – Life Beyond the Kitchen
Creative Crafts Linky Party #8 – Creatively Beth
Party in Your PJs #327 – The Apple Street Cottage
{Wow Me} Wednesday #473 – Ginger Snap Crafts
Hookin’ on Hump Day #223 – Moogly Blog
Your Whims Wednesday #477 – My Girlish Whims
Artsy-Fartsy Party #311 – Artsy Fartsy Mama
Encouraging Hearts & Home Blog Hop – Apron Strings & Other Things
Creative Compulsions Linky Party #78 – My Bijou Life
Thursday Favorite Things #458 – An Artful Mom
Pin Party #387 – The Pin Junkie
Traffic Jam Weekend Linky Party #251 – My Bijou Life
Friday Favorites – Busy Being Jennifer
Create, Bake, Grow & Gather Party #438 – Shabby Art Boutique
Week #9 Embracing Home and Family Link Party – The Everyday Farmhouse
The Hearth and Soul Link Party – April, the 21st Century Housewife
Link Your Stuff – Annemarie’s Haakblog
Scraptastic Saturdays Party #308 – Scrapality
A Morning Cup of Joe Linky Party – The Cottage Market
Snickerdoodle Create Bake Make Link Party 355 – EyeLoveKnots
Thanks so much for linking up with me at my #UnlimitedMonthlyLinkParty 16.
Thank you for hosting!
These hats are just lovely! Pinned! Thanks for sharing with Creative Compulsions.
Michelle
https://mybijoulifeonline.com
Thank you for pinning!
So cute! Thank you for sharing at Embracing Home and Family!
Hi Alexandra, Thank you for visiting and linking up at the Wednesday Link Party! I love the stitch you used to create this pretty hat and it is great having it available in so many sizes! You are being featured today at Wednesday Link Party 367. Here’s the link to the post in case you’d like to share it : https://oombawkadesigncrochet.com/2020/09/granny-square-pumpkin-beanie-party-367.html
Thank you again for visiting and for linking at the party! Rhondda
Thank you so much, Rhondda! I’ve become addicted to this stitch pattern – it’s so fun, and produces such a beautifully textured fabric. I missed the party this week, but looking forward to next week’s!
I love this and also the scarf. However, I cannot for the life of me figure out what this means: R2: Chain 2. Work 1 DC into the first stitch, 2 DC in each of the next 10 DCs, and 1 DC into the same as the first. Join. (22 DC) — What do you mean 2 DC into the same as the first? Could you show a picture to show me? Also, a tutorial on YouTube would be great. Thanking you in advance for your help. 🙂
We are increasing for a larger circle. See pattern notes section.
I am sorry, I get that part. I don’t get (1 DC into the same as the first). I inadvertently typed 2 DC into the same as the first, I meant 1 DC. The first what? Again, thank you for trying to help. 🙂 I want to crochet this ASAP. I cannot believe this is causing me so much trouble!
It’s worked into the first stitch, and in the pattern notes section is an explanation, which is why I suggested to look there.
I found your pattern and enjoy it. However, I have an question regarding Row 7. The chain 2 equates a DC and then you do 2 DCs in stitch 32. This equals 67 and not 68 stitches. What am I missing?
Glad you like it! You’re missing the double crochet into the 1st stitch. 66 stitches plus 1 extra in the first stitch, and 1 extra in the 32nd stitch equals 68 stitches total.