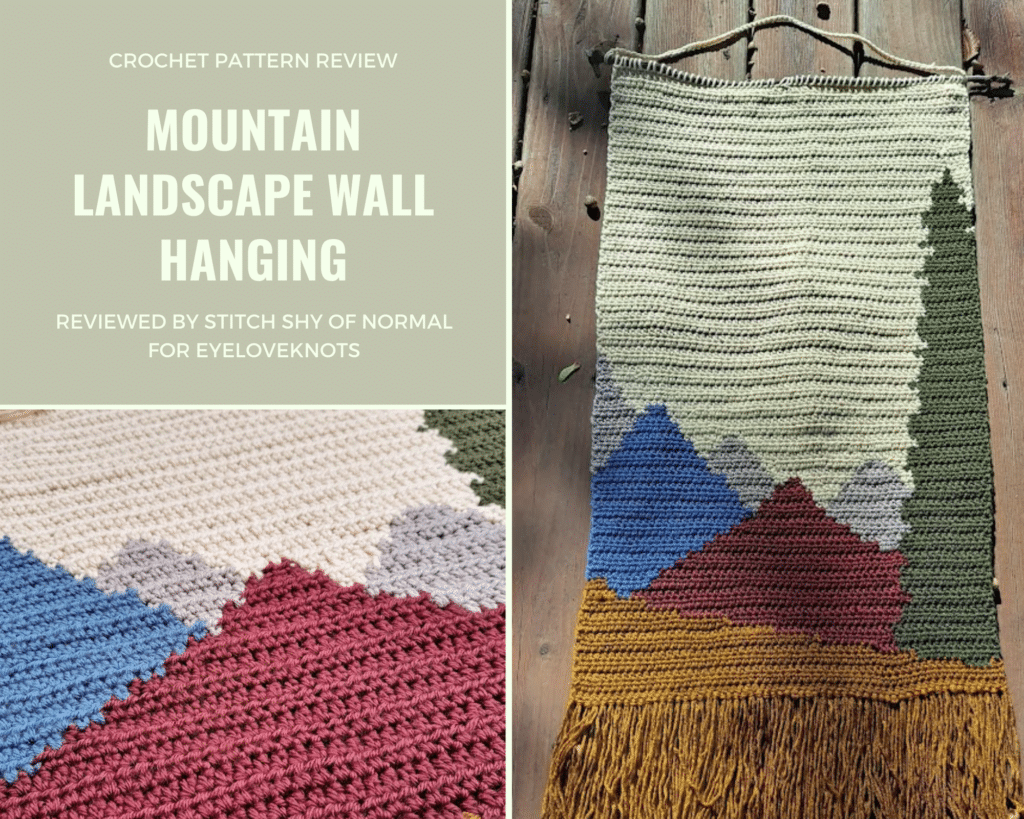
This is a crochet pattern review of the Mountain Landscape Wall Hanging pattern by Christine Naugle from Sweet Potato 3, for Annie’s Signature Designs. Review done by A Stitch Shy of Normal for EyeLoveKnots.
This post contains affiliate links for Lion Brand, Annie’s Catalog and WeCrochet. If you make a purchase by clicking on them, I make a small commission at no extra cost to you. Thanks for your support!
Find the crochet pattern review below, or visit the Annie’s Catalog website to purchase the pattern here!
It’s me, Abigail with A Stitch Shy of Normal.
Visit with me on Instagram @astitchshyofnormal for all kinds of awesome crochet makes and inspiration.
Tapestry crochet and myself have not always been friends. I love looking at it, and I continue to be impressed by what others make using the technique. But I dove into it far too early in my learning journey, and I refused to learn the proper techniques and decided I knew better. My projects did not go well, and I kind of gave up on using this process for a while.
Now that I feel like I’m pretty confident in my crochet knowledge, I felt comfortable starting to try some of these difficult techniques again. When I came across this wall hanging pattern from Annie’s Catalog, I knew it would make for a beautiful addition to my home and it would be a good challenge to take on in re-learning tapestry crochet. It isn’t overly detailed, being kind of an abstract landscape, so I had some freedom to make small mistakes. It’s a reasonable size with enough time spent to get some good practice in but it didn’t seem like it would take absolutely forever, either. So I went for it and decided to do it smart this time and actually try my hand at making some gorgeous art!
We’ve lived in our rental house just about a year now (pretty much exactly one year once this publishes, actually), and at this point we have most of the useful stuff and furniture figured out except for a few fun pieces I want to find through thrifting. When it comes to decorating, though, that’s always a work in progress. I don’t aim for a curated intentional look to my space, I decorate with whatever I want in whatever colors I feel like at the time. This makes for an eclectic look and that’s what I love to see around me! So something this colorful and large was the perfect addition. I ended up hanging it in our bedroom because there just happened to be a nail already in the wall in the perfect space between two windows. Now that it’s there, I don’t know how I could deal with that boring empty wall for a year! It’s like that space was just waiting for the right piece to hang up the whole time.
Materials I Used to Make my Wall Hanging:
- * Lion Brand Basic Stitch Anti-Pilling in “Gold Heather” and “Pomegranate”
- * Big Twist Soft in “Cream”
- * Big Twist Living in “Twilight Blue” and “Pine Green”, and I think “Chinchilla” (this color I lost the label for but I believe this is the light taupe shade I used)
- G6/4mm crochet hook – I like Clover Amour Ergonomic Hooks
- Scissors/yarn needle for finishing
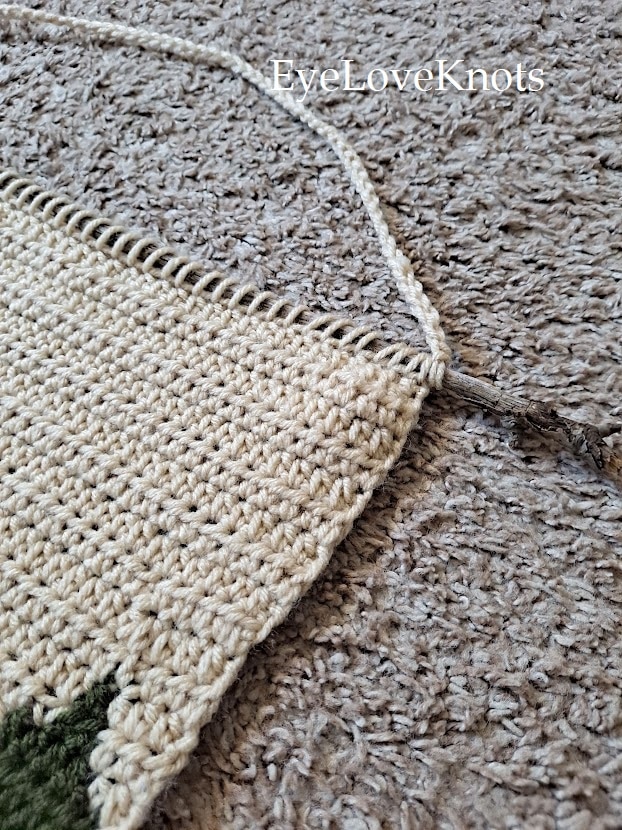
- I used a stick from my yard to hang mine, but the pattern calls for a dowel measuring about 15 inches long (I would have needed larger for my finished size anyway)
- Mountain Landscape Wall Hanging, Paid Crochet Pattern from Annie’s Catalog
Material Notes:
*All yarns used just under one full skein, but all require different amounts in the pattern. The pattern itself calls for a yarn that is 153 yards each, but remember I used a different weight. The lowest yardage/skein here is 180, so if you have about 200 yards of each you should be alright but be prepared! The cream one was Big Twist Soft and 320 yards to start, and it used a good amount. I would say have extra of your main/sky color to be safe.
I realize the yarn I used was not the correct weight. If you’ve checked out those pattern links above, you’ve seen that the yarn it calls for is actually DK weight. I did try to find that, but my local store just didn’t have much of a color selection in DK! So I decided to upgrade to worsted, thinking that as long as all my yarns were the same size as each other, or close to it, then the result should be the same with just a larger hanging.
And wow, did mine end up larger. You’ll see the exact numbers later on but I added about 4-5 inches of width and about 10 inches in length. Mine is certainly a statement piece, and I love that! There’s no hiding this hanging. As written, it’s more of a medium size, and I would consider mine large. And that’s fine by me. I did consider this possibility when yarn shopping, and to be fully honest I didn’t think I would add quite this much size. I thought it might add a couple inches both ways. I’m glad that the wall space I had ended up still working out!
Would I use these yarns again? Definitely. But if I had a selection of good color options in DK, would I recommend trying that next time? Also yes. It would work as the written size just as much as it did in my larger one. The pattern does clarify this, that you don’t need to worry about gauge but if you significantly alter it then you might want a different hook. I did not do this. I tried the first couple of rows with my G hook and decided I liked the drape. If I sized up my hook it would have been more loose and flowy, but as a wall hanging I wanted the stitches to be a little tight.
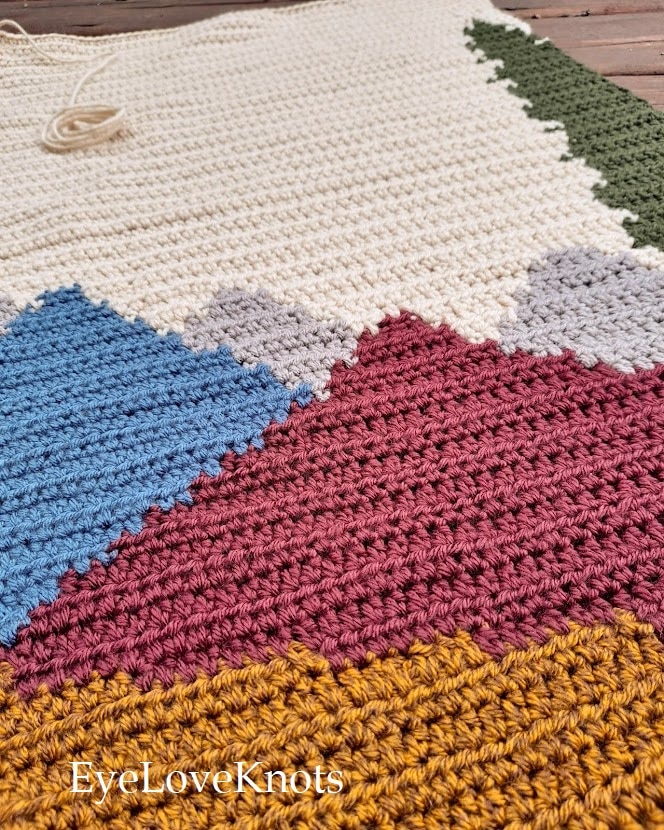
If I’m getting picky, I would have preferred better colors. I was shopping for color rather than trying to keep it one single brand (which is why I have such a varied selection), but even after several minutes searching for a few shades, I didn’t find the exact ones I wanted at times. I would have chosen a darker blue for that one mountain, and more of a dusty deep rose versus the brighter red. And my taupe mountains I think are supposed to be more brown. But my colors worked with each other, I think. The overall look is beautiful to me and that’s what really matters!
Time Spent:
I’ll be honest, this takes a little while. It keeps your interest very well, but it does take some serious time. I would estimate that mine took right around 12 hours or so all together. At times I would sit and just keep doing “one more row” for a couple of hours and that made it not feel too slow, but at other times with tons of color changes, it felt a little sluggish.
I recommend taking the time, though. This art is worth it!
Gauge:
The pattern gauge says that 4 inches should be 18 HDC (the only pattern stitch) and 14 rows.
Mine measures about 13-14 stitches in that width, and 10.5 rows.
You can see in that comparison why mine ended up significantly larger! To be honest with you, I did not measure my gauge. I didn’t care. I worked up the first row and just sort of held it up and thought “am I okay with this width?” When my answer was that it seemed big but I was fine with that, I moved on and didn’t consider gauge again!
Also for clarification, I measured this gauge in my cream section (basically the top half, the “sky”) and this might slightly vary with the other yarns. Each of these yarns is just a little bit different, but they all worked up similar enough for my purpose. If you are able to keep it all in one brand and even better, one single line of yarn, that would work best. I just chose colors over keeping it the exact same yarn, if that makes sense.
Measurements:
I’ve been hinting at it throughout the gauge section, but this is where mine really differs from the pattern.
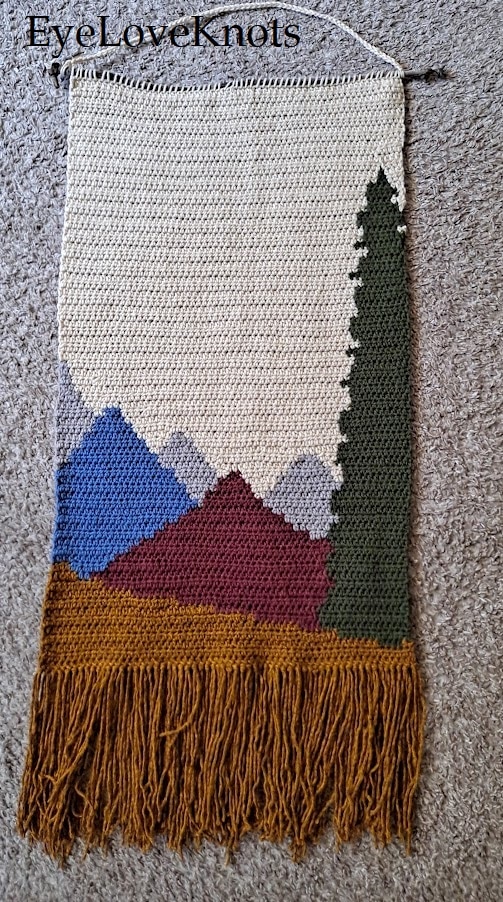
As written, this hanging is supposed to measure 13 inches wide and 20 inches long, not counting the fringe and dowel.
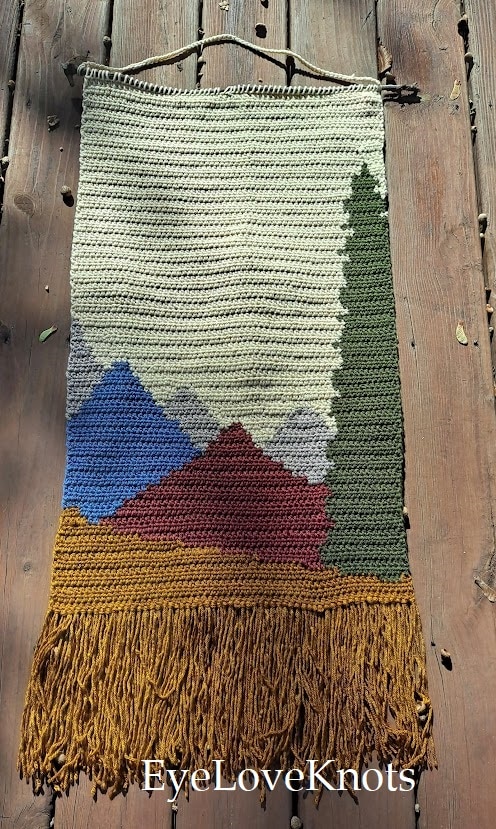
Mine? Well…mine measures 17 inches wide. And it’s 30 inches tall. With 7 inch fringe (which is actually shorter, the pattern suggests the fringe be 9 inches but I wanted mine a little smaller to not overpower the hanging itself).
Is this too big? No such thing in art! As long as it fits the space, and I like it, the size is perfect. If you don’t want a huge statement wall hanging, you might want to follow the yarn suggestions. But I didn’t care, and I still don’t. I like it just the way it is.
Pattern Notes:
This pattern was sincerely enjoyable to work on. With each row being 60 stitches wide, they were just large enough to keep me busy but not be overwhelming. And the abstract landscape scene means that there are plenty of color changes but they’re often larger triangle sort of shapes rather than specific little details. So you can mess up a little, miscount or not change the yarn over quite right, and the mountain still looks like a mountain. The giant tree in the foreground is probably my favorite part. I didn’t expect a wall hanging of all things to play with perspective like that! All in all, I was extremely happy with the process as well as the finished result.
Like I said, though, this one takes time. Even without the sheer size of mine, this pattern has a lot of rows! And towards the middle, some of those rows have 5+ color changes. Right about at the top of the gray/taupe peaks, you end up working sections of the tree, two of those taupe mountains, and some of the blue mountain as well…all with the empty sky in between. As with any tapestry project, the color changes and keeping track of all your yarn is the most challenging part.
The designer does try to help with this, though! The notes include suggestions on how to turn your rows to avoid tangling up your yarn, and gives you tips on when you should cut your yarn and when it’s okay to work over it instead. I tried my best to follow these tips as much as possible. With the turning suggestion, though, I forgot that one basically immediately. So I can tell you that while that tip probably does really help, it’s not the end of the world if you don’t do it! Did I get frustrated with yarn tangles? Absolutely. But when it got really bad, I just cut my yarn off and then reattached that color when it came back into play. Tapestry crochet can be tough, but an abstract look like this can also be very forgiving when you need to make alterations like that!
I was tempted as I worked on this to just crochet over my ends when I changed colors. But I remembered my early lessons in what not to do (which is exactly what I used to do), and decided to instead give myself the headache of weaving them all in at the end. And I have to admit that this was the better decision. I do recommend that as you change colors, you keep all the knots and tails on one side. I did this because it made it simpler when weaving in ends. I could just lay it out on a table and see all the work I had to do, but I wasn’t flipping the giant rectangle back and forth as I worked.
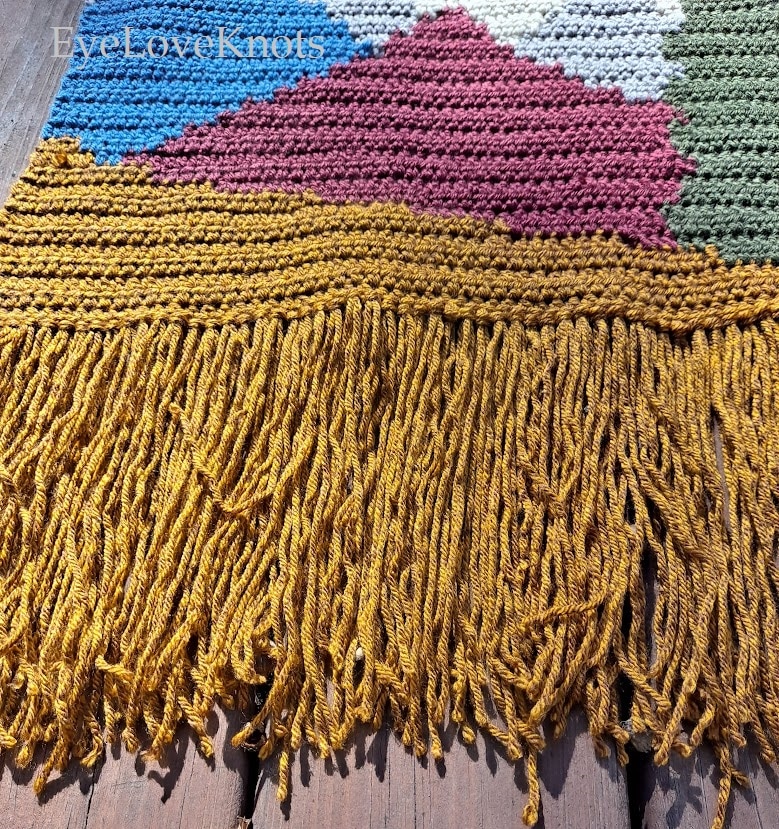
I don’t really have any critiques of this pattern, honestly! The techniques were easy to understand, and the tips were helpful when I remembered to do them. It took a while but each row itself went pretty quickly. The color layout was genius and gives a very impactful piece. The fringe is a genius addition, I wouldn’t have thought to add that myself but it really adds that final punch to the overall look. I think this ended up being a great reintroduction to tapestry crochet and it actually left me wanting to do more! I think artsy wall hangings done in tapestry crochet are going to be very on-trend throughout this coming fall and winter, and I look forward to trying as many of them as I can!
Don’t forget to visit with me on Instagram @astitchshyofnormal for all kinds of awesome crochet makes and inspiration.
Join one of our awesome Facebook groups to share your creations, and see what others are up to!
– EyeLoveKnots Crochet & DIY Community
– DIY Home On Rockwood Lane
– Alexandra Lane Lifestyle
Linked Up To…
All About Home #116 – Common Ground
Tuesday Turn About #124 – My Wee Abode
Home Matters Linky Party #355 – Modern on Monticello
Beautifully Made Link Party for Home Decor 187 – Across the Blvd
Ginx Woolly Linx Party November – Ginx Craft
Linky Ladies Party #218 – The Purple Poncho
The Loop Scoop #25 – Moogly Blog
Party in Your PJs #383 – The Apple Street Cottage
Happiness Is Homemade Link Party #399 – Decor Craft Design
Craft Schooling Sunday – Creative Jewish Mom
Unlimited Link Party 37 – Grammy’s Grid
Handmade Monday #252 – Sum of their Stories
The Really Crafty Link Party #288 – Keeping it Real
Link Up Potpourri #16 – My Bijou Life
You’re the Star Blog Hop – Decor Craft Design
Craftastic Monday Link Party – Sew Can Do
612th Inspire Me Tuesday – A Stroll Thru Life
Fabulous Party 396 – Lou Lou Girls
Spread the Kindness Link Up #247 – Shelbee on the Edge
Wonderful Wednesday – Oh My Heartsie Girl
{Wow Me} Wednesday #529 – Ginger Snap Crafts
The Wednesday Link Up 423 – Oombawka Design Crochet
Team Creative Crafts Linky Party #66 – Artsy-Fartsy Mama
Thursday Favorite Things Link Party #514 – An Artful Mom
Creatively Crafty Link Party #300 – Try It – Like It – Create It
Encouraging Hearts and Home Blog Hop – Slices of Life
Create, Bake, Grow & Gather Party #493 – Shabby Art Boutique
Funtastic Friday Link Party #357 – Simply Beautiful by Angela
Link Your Stuff – Annemarie’s Haakblog
Saturday Sparks Link Party 447 – Pieced Pastimes
A Morning Cup of Joe – The Cottage Market
This is amazing! Such a cool idea! Love the colors used!
xoxo
Lovely
http://www.mynameislovely.com
Isn’t it just so gorgeous? I’m glad you liked it!
It turned out amazing! I may have to try this.
Thank you! You really should, it was a lot of fun and now I have a gorgeous decoration to hang up forever!
This project is so pretty. It would go well in my home because I live in the mountains. Thanks for sharing it. Now I just need to learn to crochet again. LOL Thanks for sharing great projects each week. #HomeMattersParty