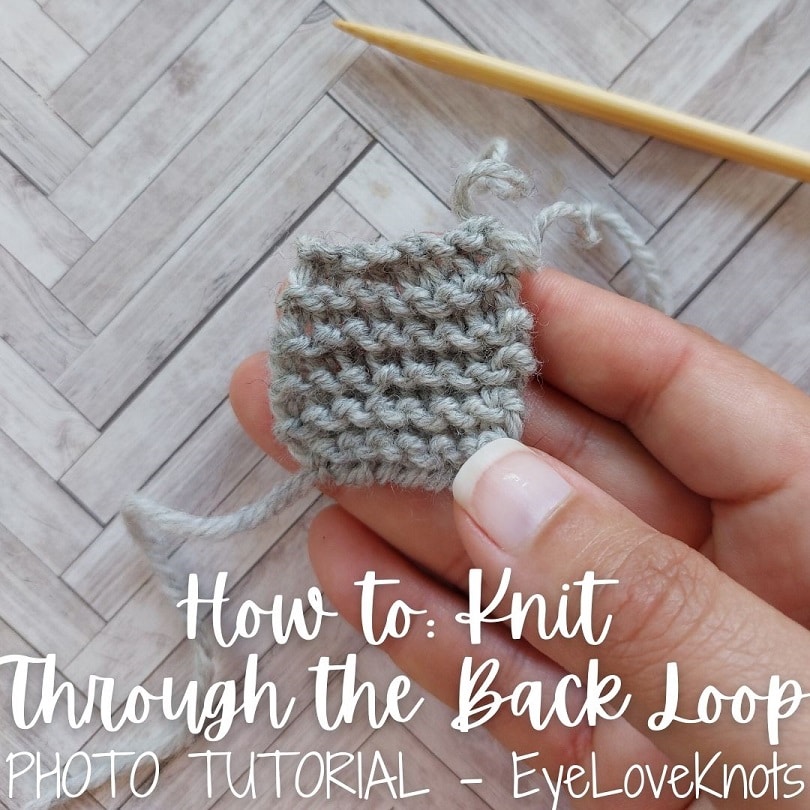
How to Knit Through the Back Loop – a very easy, beginner friendly knitting photo and video tutorial. Knitting through the back loop is a variation of the beginner friendly garter stitch. There is also an FAQ section to answer all your questions about Knitting Through the Back Loop.
This post contains affiliate links for WeCrochet. If you make a purchase by clicking on them, I make a small commission at no extra cost to you. Thanks for your support!
I discovered this stitch pattern on accident back when I was designing my Super Chunky Kinsley Blake Scarf.
I won’t lie to you, I worked up the whole entire scarf thinking I was doing the proper garter stitch pattern, and that it just looked a little off because it was in the plushy yarn. When I went to double check that I was doing the bind off row correctly (because it had been a while since I knit last), I noticed I didn’t insert my needles the same way. I reached out to some friends to show them how I worked the stitch, and asked what I was actually doing, and it turns out it’s called “Knitting Through the Back Loop”. It’s a variation of the knit stitch, but worked into the back loop so it twists the stitches.
I fell in love with this stitch, and it revamped my desire to knit! While it’s a little tighter to work with on the needles, I found I had so much more control over my stitches, and my fabric turned out much nicer than it ever did in the past with knit stitch.
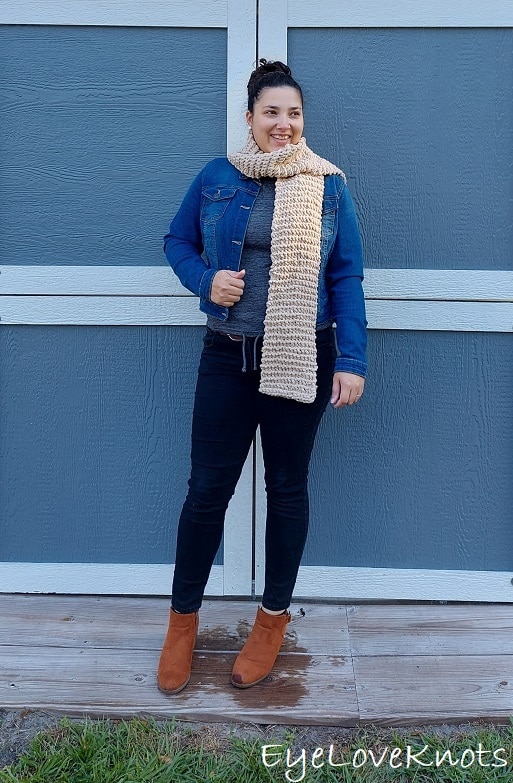
Kinsley Blake is my line here at EyeLoveKnots that features easy knitting patterns worked with this Knitting Through the Back Loop stitch pattern. Check more of them out right here.
You can use any weight yarn with respective needles, but for this tutorial I am using – I am using WeCrochet Swish Yarn in Dove Heather, and a pair of H8/5mm knitting needles. I need to give a big shout out to WeCrochet for supplying me with the yarn to complete this project – it’s leftover yarn from my Haylee Beanie, Free Crochet Pattern. Swish Yarn is 100% superwash merino wool, but it’s so soft, not itchy, and it’s so cozy, it feels like it’s giving you a big hug.
Because I am a crocheter first, I follow the continental style for knitting, which is easier for crocheters to pick up since it’s very similar. I hold my yarn the same way for both crafts, and I will show photos of me working this way. I also hold my yarn in a slightly modified way, and that is to help my aching hands by being able to keep my fingers looser and more open, than closed up – it’s been a game changer for me. I do also have a photo tutorial showing How to Hold Your Yarn.
I am not creating anything new here, but I did take the time to take the photos, edit them, and put this tutorial together, so please respect my work. Do not pin or share any of the tutorial images – just the main photo. Provide the link for others to find my page (help out me and my blog with the traffic). Do not copy and paste my work anywhere. Thank you!
AD-FREE, PRINTER FRIENDLY PDF:
If you would like a PDF version of this post, you may get one through either my EyeLoveKnots Etsy, LoveCrafts or Ravelry Shops for a small fee. This fee is to compensate for the views lost when you no longer need to return to the blog to for the information, as you will have your own copy. Plus! It helps fund supplies for new projects to share with you!
Shop EyeLoveKnots Etsy: How to Knit Through the Back Loop.
Save this to Your Favorites on: AllFreeKnitting, FaveCrafts, Cheap Thrifty Living, DIYideaCenter
What is the Knit Stitch? What is the Garter Stitch? Are the Knit Stitch and Garter Stitch the Same?
It’s quite easy to confuse working a knit stitch and working the garter stitch. A knit stitch is a technique of working a type of stitch, and when working a project in which you knit all the way across the row, then turn and knit all the way across the row, and repeat, it creates the garter stitch pattern.
What Does it Mean to Knit Through the Back Loop?
While working the standard knit stitch, you insert your needle from left to right from the front side to the back. When working a knit stitch through the back loop, you insert your needle from right to left through the back loop on the backside of the needle.
What is the Abbreviation for Knit Through the Back Loop?
In patterns, you will see Knit Through the Back Loop abbreviated as KTBL.
You may see it written as KTBL5, meaning to knit into each of the next 5 stitches working each of those stitches through the back loop.
You may also see “knit through back loop all the way across” which simply means to knit into each stitch all the way across working each stitch through the back loop.
What is the Right Side and Wrong Side?

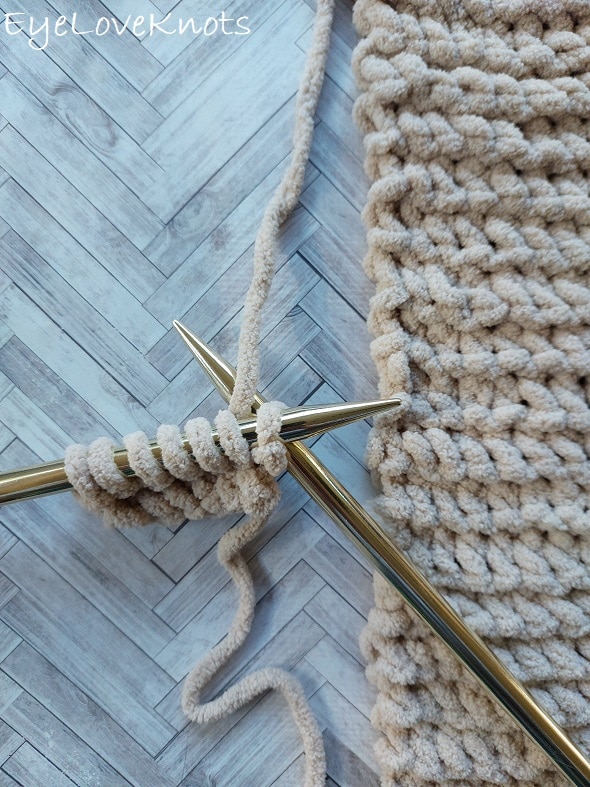
Fabric created with the garter stitch is identical on both sides, and therefore reversible so you can decide which you prefer to be the right side and wrong side of your project, though, you will notice that there are two specific types of rows created that alternate – on the actual right side, you will notice “V” shapes, and on the actual wrong side you will notice ridges, and in the case of working through the back loop, the “V” shapes will have a twisted appearance, best shown in the super chunky yarn above.
How to Knit Through the Back Loop Video Tutorial:
How to Knit Through the Back Loop Photo Tutorial:
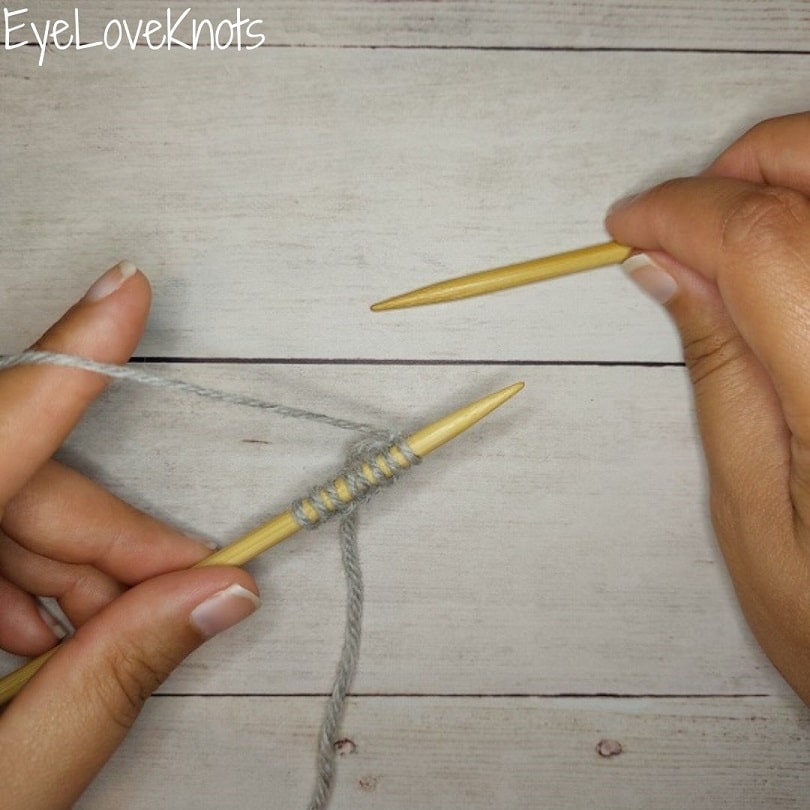
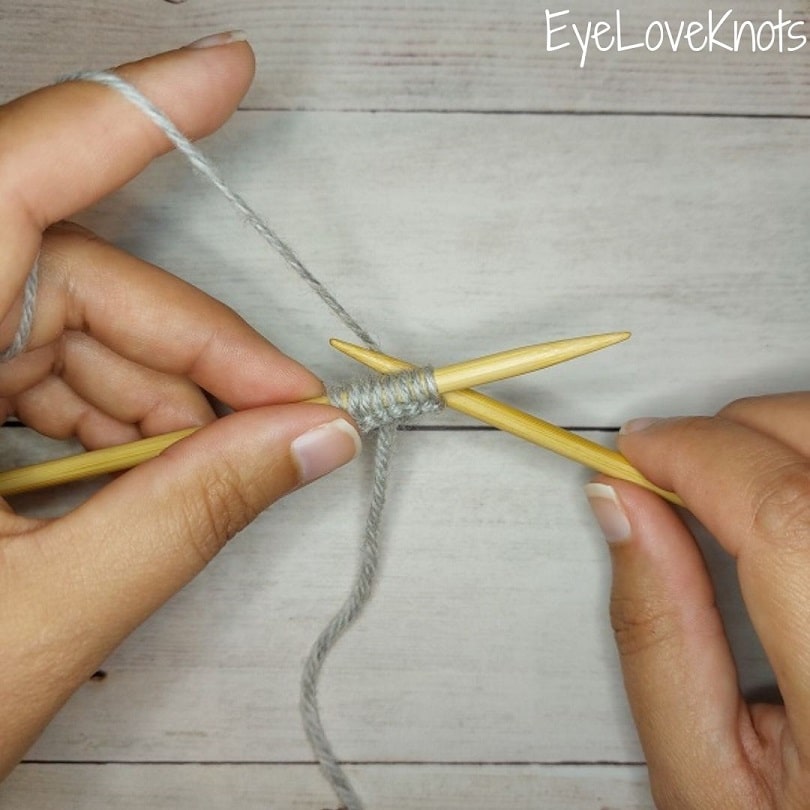
First thing you will do is make a slip knot, and cast on – my preferred cast on is the Long Tail Cast On (which counts as the first row itself).
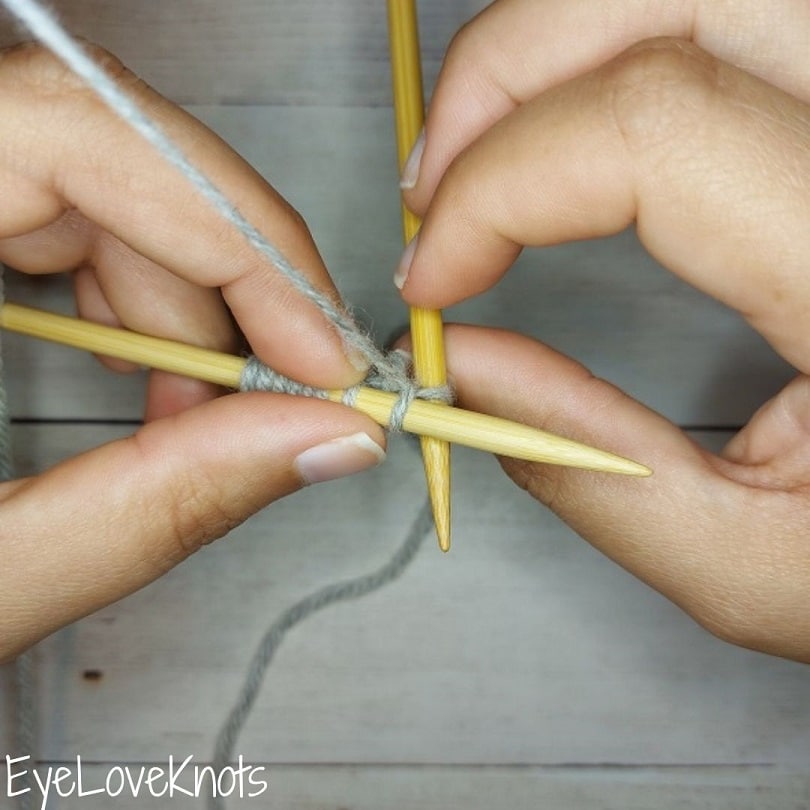
I find the easiest way to see my stitches for the first row is to slightly rotate my left hand knitting needle forward to see the backside. With the working yarn at the back of the work (as normal for a knit stitch), insert right hand knitting needle from right to left directly through the backside of the first loop first.
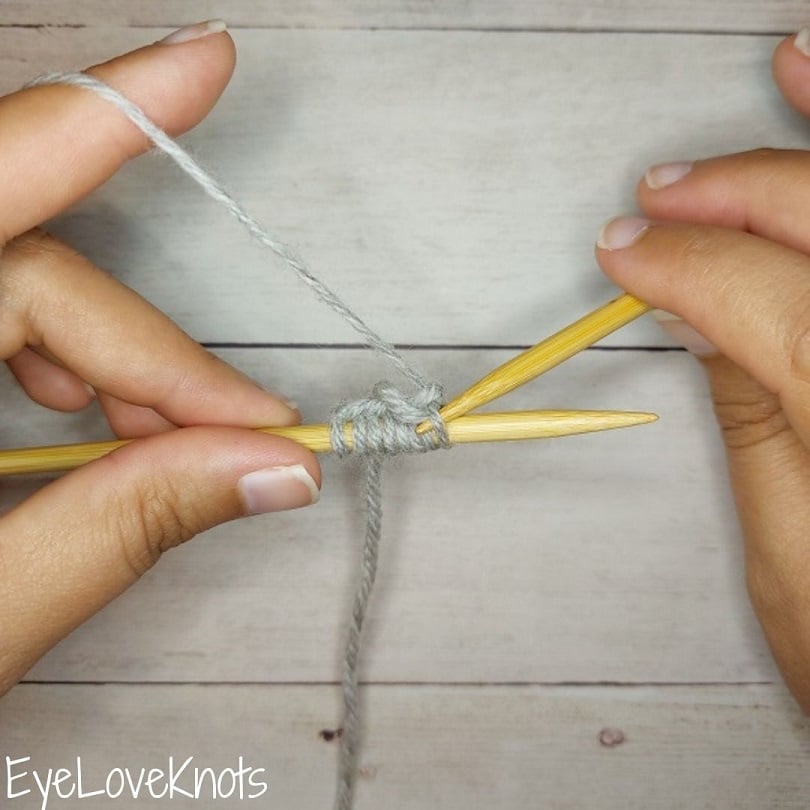
Here is a view from the front side.
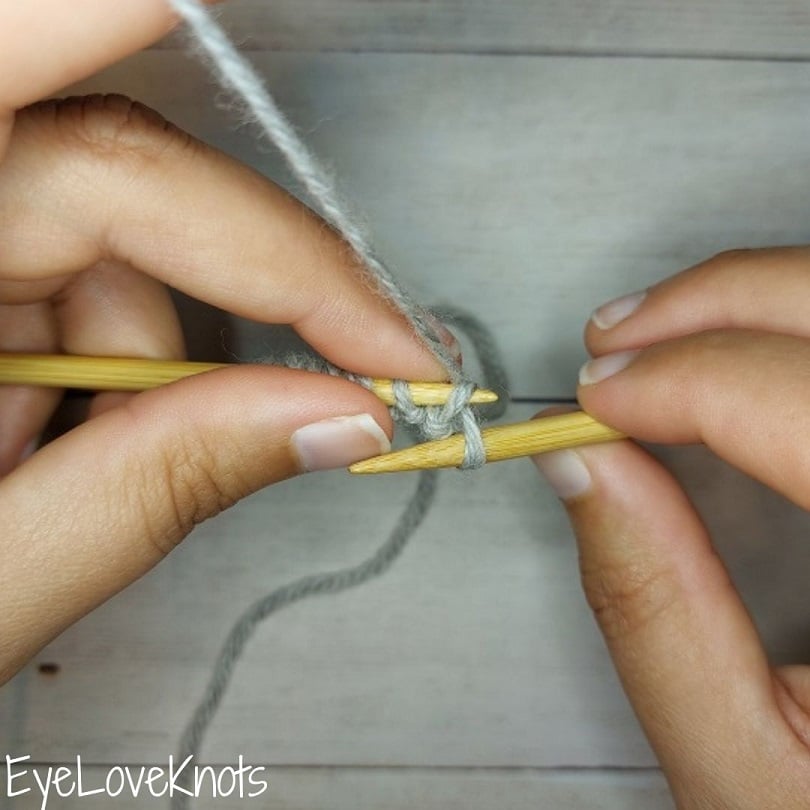
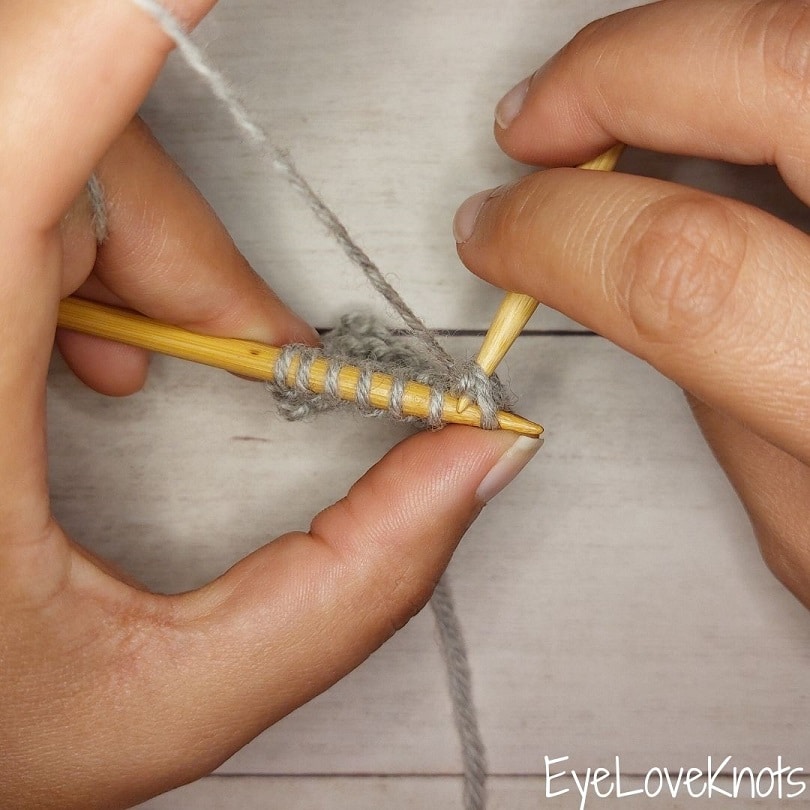
Wrap the needle around the working yarn working to the right of the strand…
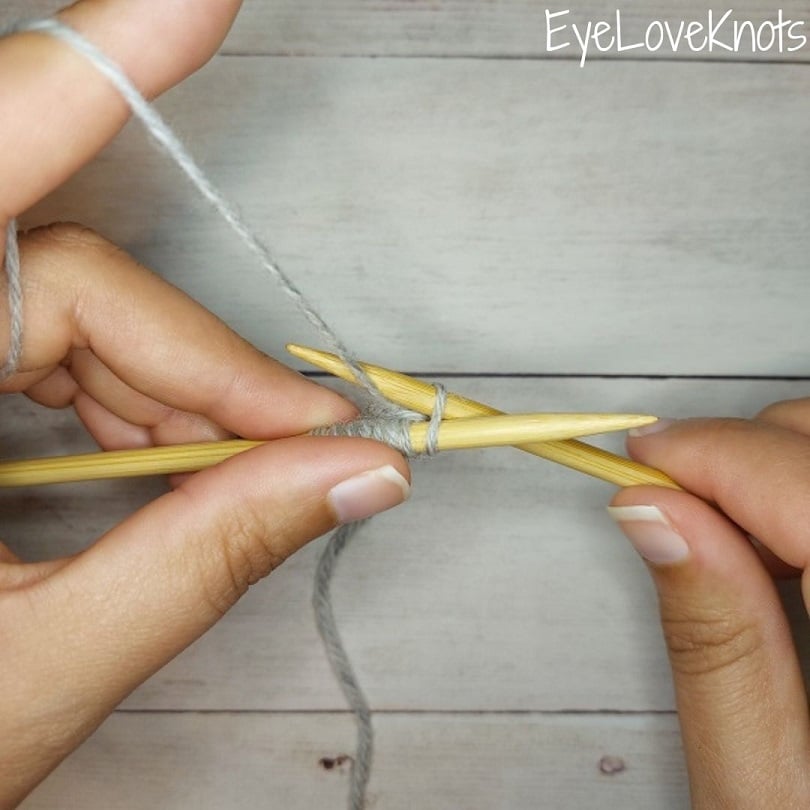
…and then bring the right hand needle downwards towards the left sandwiching the strand in between…
…and continue downward past the left hand needle turning that loop you picked up into a stitch on your right hand needle AKA pull the loop through. Here is a top view.
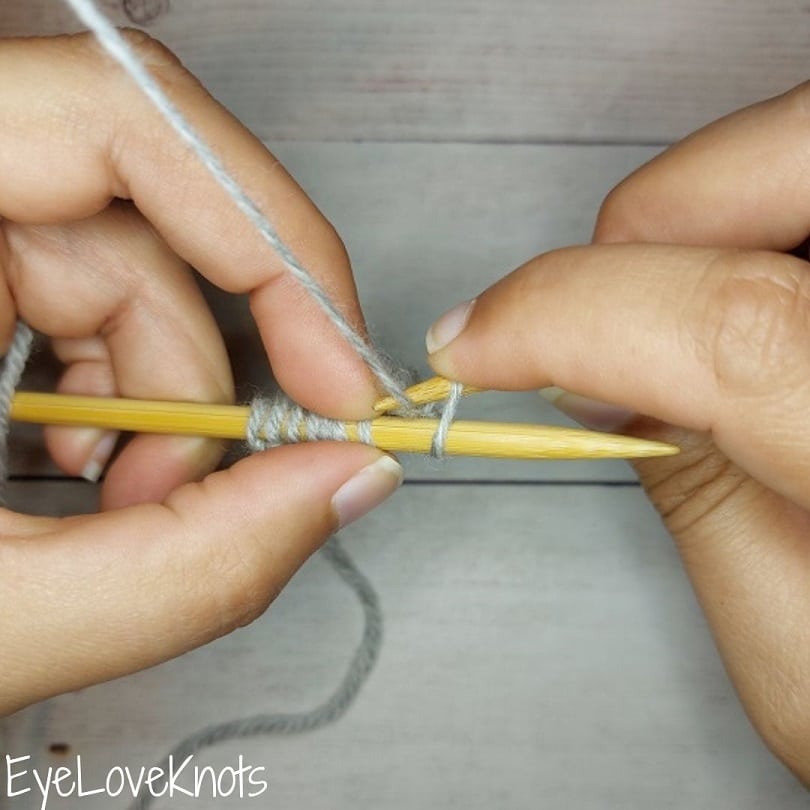
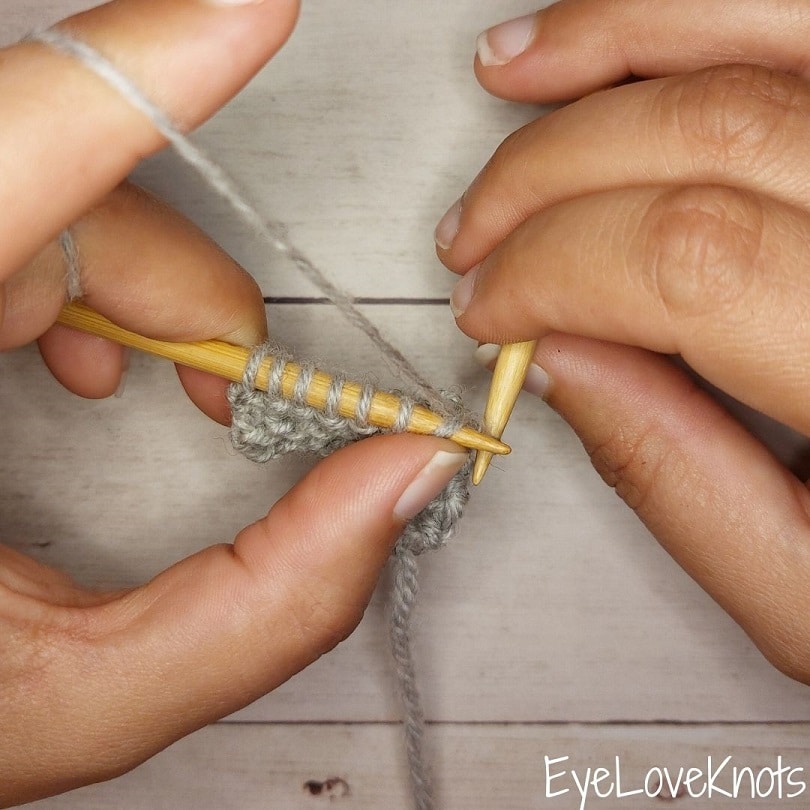
Now that the stitch is securely on your right hand needle, drop the stitch from your left hand needle AKA slip the stitch from your left hand needle – I use my left hand to help me slide the stitches forward, easily slide the stitch off my needle, and then slide the stitches back onto the shaft of the needle.
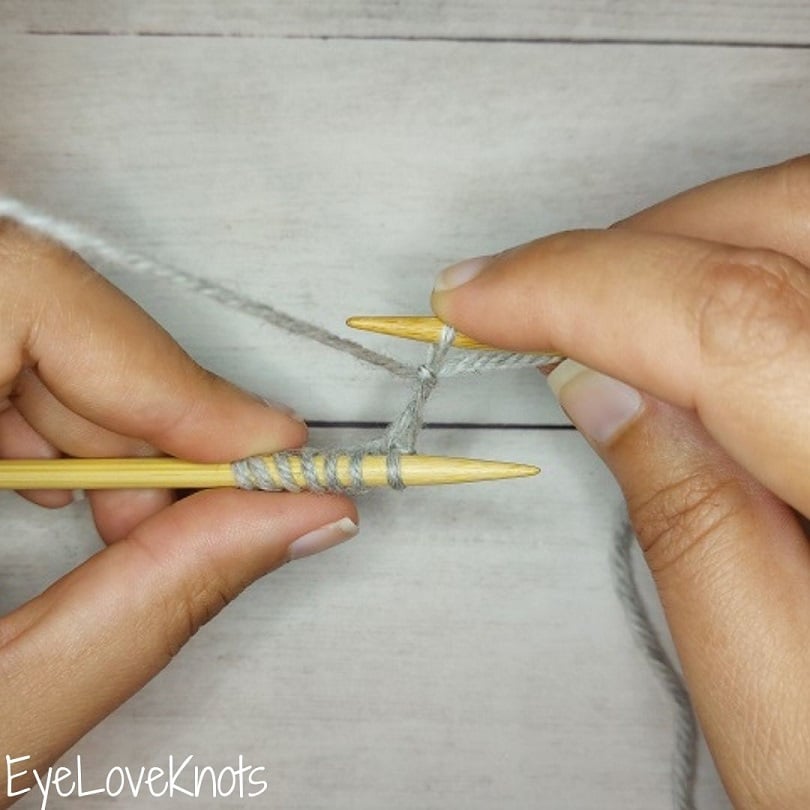
And now you’re ready to knit the next stitch working through the back loop.
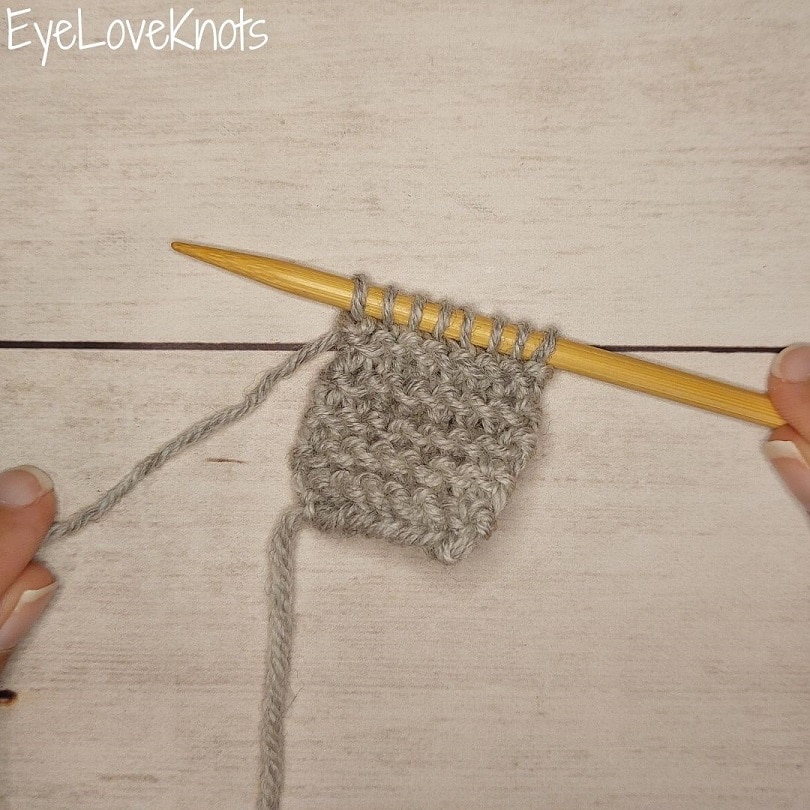
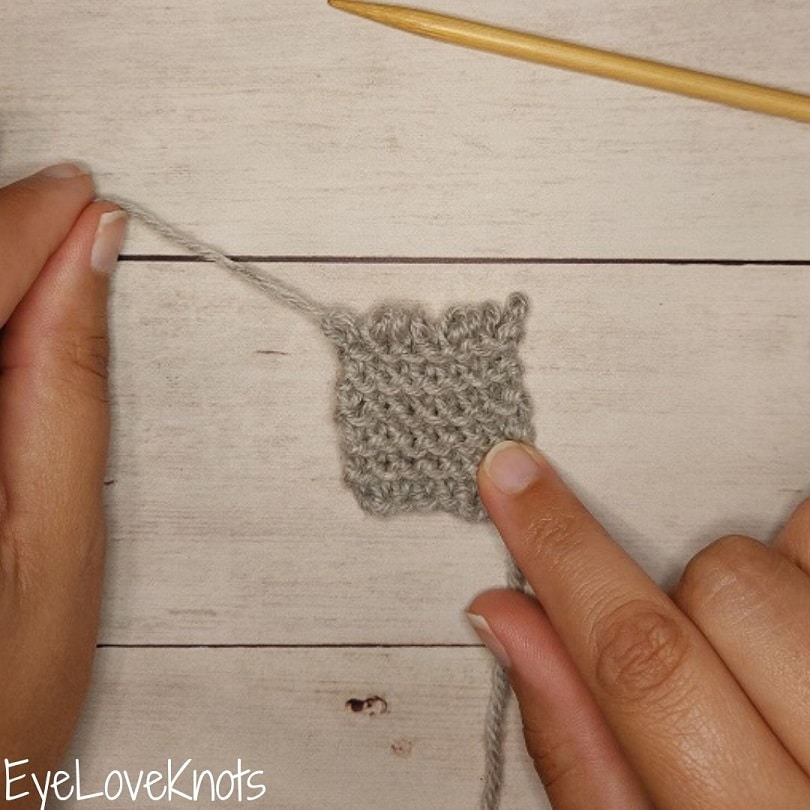
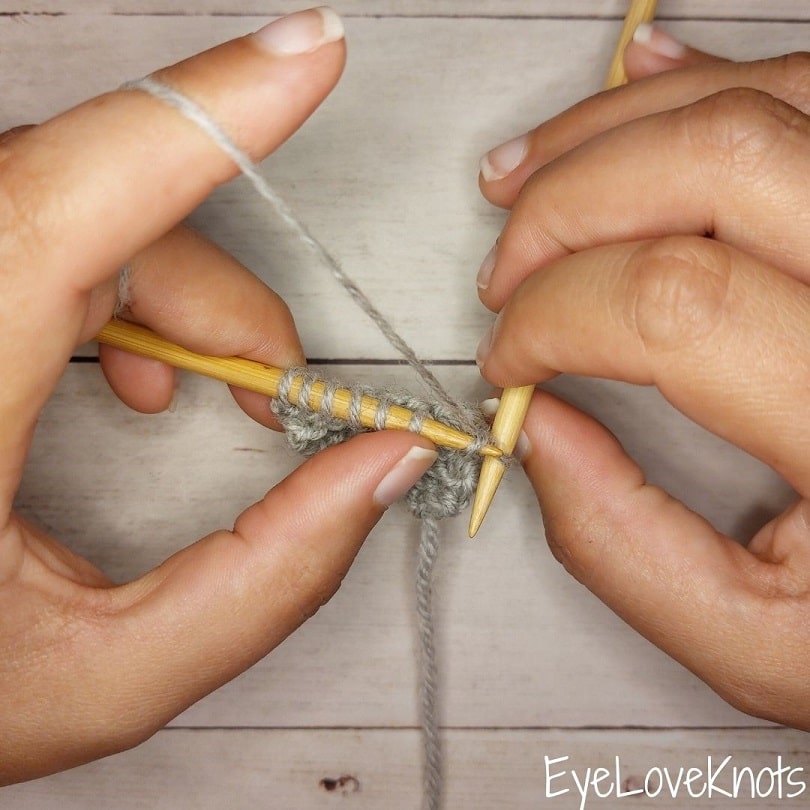
Continue knitting across. When you’ve reached the end of the row, turn and place the right hand needle into your left and the left hand needle into your right, and begin again.
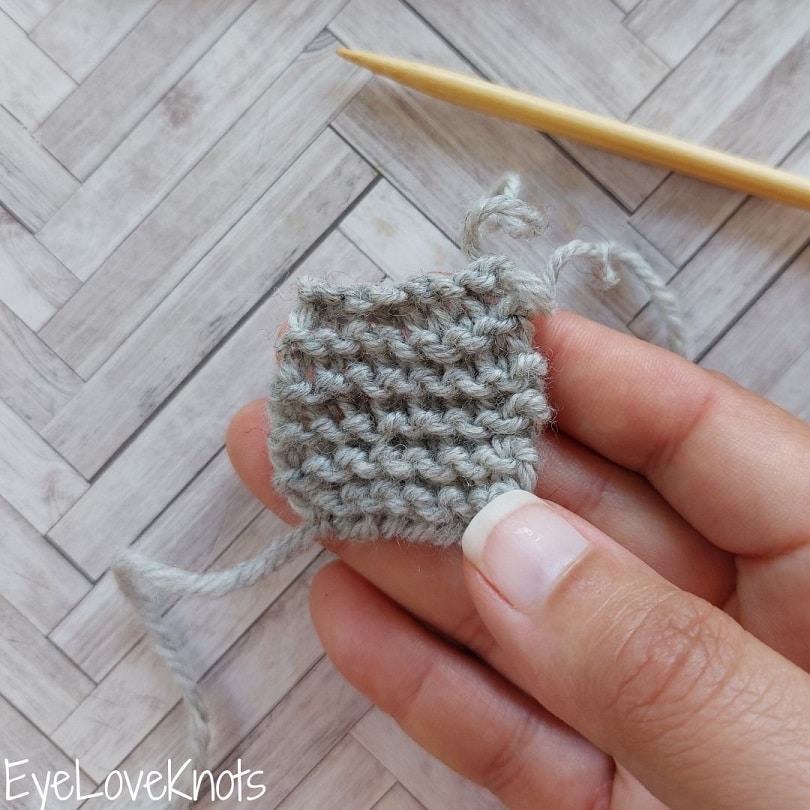
Make sure to stop and count periodically to make sure you have the same number of stitches on your needle. The sample above is 8 stitches, shown by the 9 loops on my needle
How Do You Frog Knit Rows if There is an Extra or Missing Stitch?
This is something I was always so afraid to do, and not sure even exactly how until I sat down to investigate closer and practice AKA remove stitches on purpose. Work very carefully as you go so stitches don’t pull out.
Here is my example: Pretend instead of counting 8 stitches like I should have, let’s say I counted 9 stitches on my needle. This would mean I worked an extra stitch somewhere, and now I am going to go back to figure out where and rework it.

First thing, remove the knitting needle leaving just the loops.
Next, pull on the working yarn strand to remove stitches one by one across the row.
Recount now to see how many stitches you have. If you still have too many (or not enough) stitches, turn, and remove another row of stitches.
If you are right on, reinsert your needle directly through each loop to pick them all back up. The loops shouldn’t shift much so just make sure not to twist them as you put them back on or the fabric will have a different look.
How Do You Count Knit Rows?
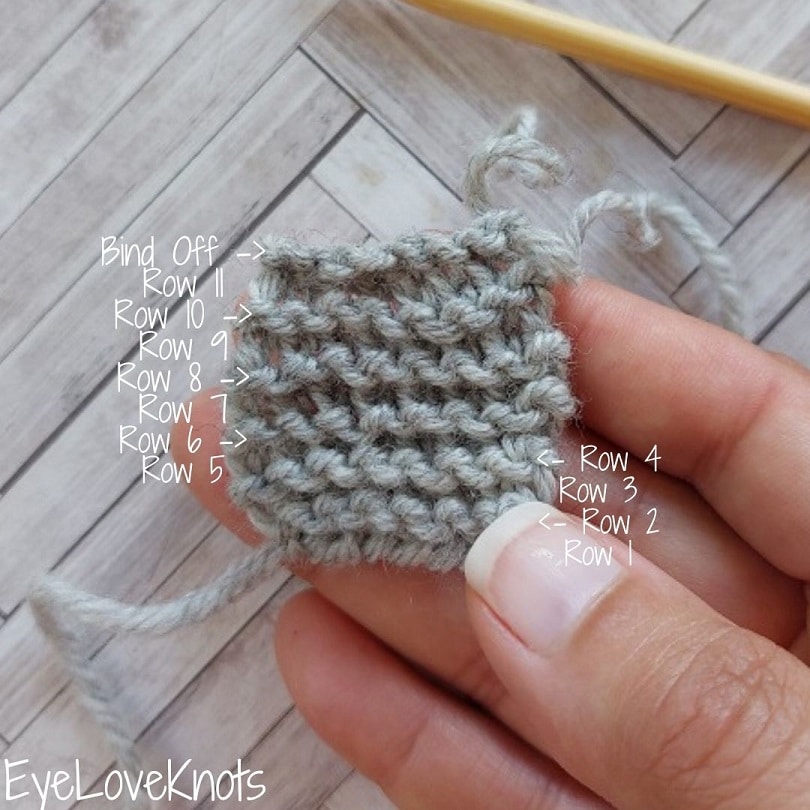
Going back to the look of the two different rows we see – a row that looks like a ridge, and a row of twisted “V” shape stitches, there are two different ways you can count knit rows: 1.) Count only the ridge rows on both sides of your project; 2.) Count each row individually on one side of your project. My preferred method is the second one, which is shown above.
How to Knit Through the Back Loop Bind Off:
The basic idea: Bring the first stitch (the one on the right) up, over the second stitch, and off the needle. This leaves you with one stitch, knit another stitch through the back loop, and repeat.

Start by knitting two stitches each through the back loop.
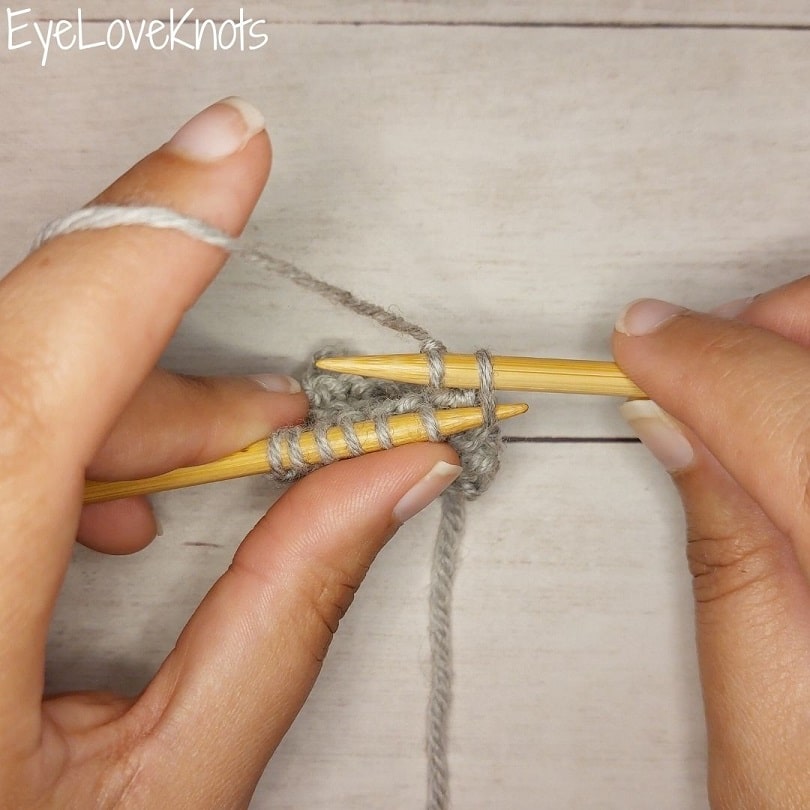
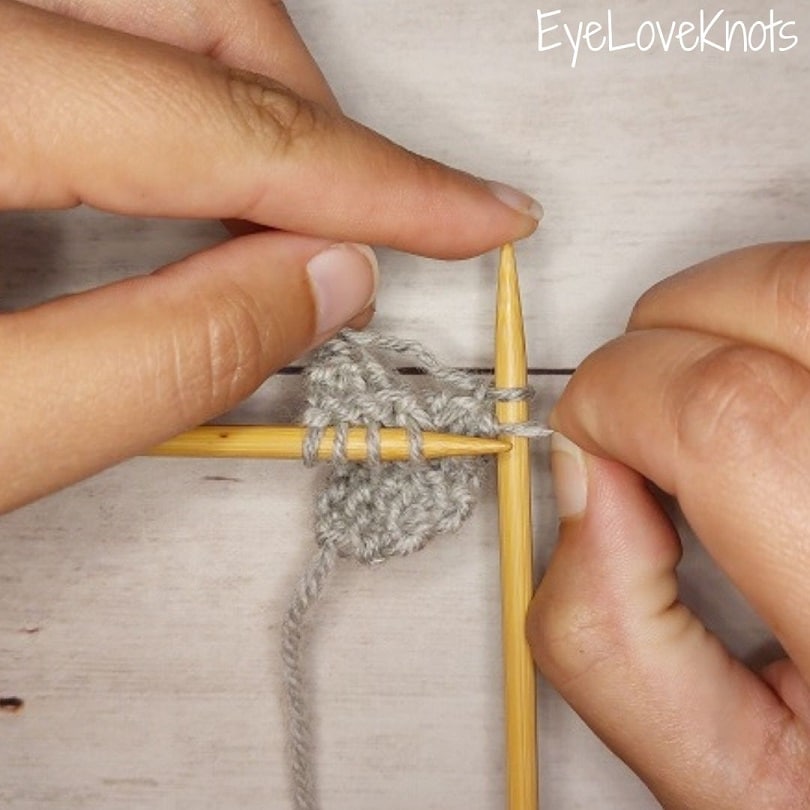
Insert your left hand needle into the first stitch on your right hand needle.
Bring the right hand needle downwards towards the left sandwiching the second stitch in between…
…and continue downward past the left hand needle keeping that second stitch on your right hand needle AKA pull the loop through.
Now that the stitch is securely on your right hand needle, drop the stitch from your left hand needle AKA slip the stitch from your left hand needle – I use my left hand to help me slide the stitches forward, easily slide the stitch off my needle, and then slide the stitches back onto the shaft of the needle.
Knit another stitch through the back loop only so you have two stitches on your right hand needle, and then repeat. When you get to the end, you can fasten off, and pull up on that loop to break it, and better secure your last stitch.
Can You Use Your Fingers to Bind Off?
I have struggled with binding off since I started, and while I can use my needles to do it, sometimes I just find it so much easier to use my fingers, and I have better control. Practice makes perfect so that is my recommendation, but do not make yourself so frustrated that you give up on the project.
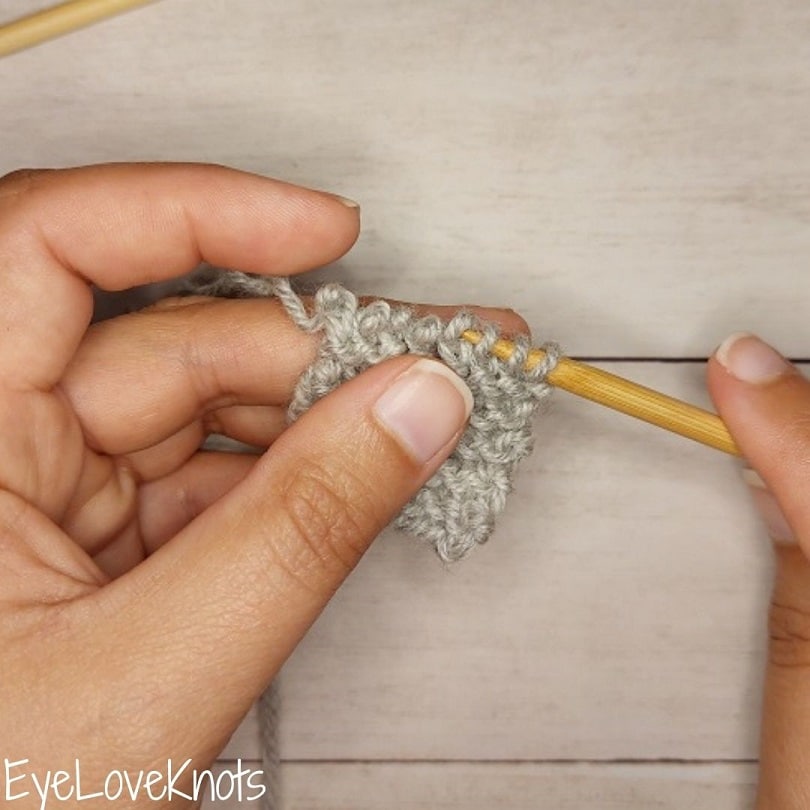
When I use my fingers, I knit the first two stitches, then I push back the stitches on the left hand needle so they do not fall off, and I carefully drop that needle, then I turn the right hand needle so the point is facing up and the base is against my body. I use my left hand to keep the second stitch on the right hand needle secure, and with my right hand, I grab the first stitch, pull it up, over the second stitch, and off the needle.
Join one of our awesome Facebook groups to share your creations, and see what others are up to!
– EyeLoveKnots Crochet & DIY Community
– DIY Home On Rockwood Lane
– Alexandra Lane Lifestyle
Linked Up To…
Link-up Potpourri #44 – My Bijou Life
Happiness Is Homemade Link Party #427 – Decor Craft Design
You’re the Star Blog Hop – Decor Craft Design
Sundays on Silverado #93 – The House on Silverado
Handmade Monday #278 – Sum of their Stories
The Really Crafty Link Party #316 – Keeping it Real
Craftastic Monday Link Party – Sew Can Do
Hello Monday – Pink Lady
Anything Goes Linky #330 – My Random Musings
Traffic Jam Weekend Link Party #324 – My Bijou Life
Craft Schooling Sunday – Creative Jewish Mom
Share the Wealth Linky #19 – Big Fat Menopausal Life
Create, Bake, Grow & Gather Party #520 – Shabby Art Boutique
Funtastic Friday Link Party #385 – Simply Beautiful by Angela
Saturday Sparks Link Party 515 – Pieced Pastimes
Pink Saturday – How Sweet the Sound
A Morning Cup of Joe – The Cottage Market
639th Inspire Me Tuesday – A Stroll Thru Life
Fabulous Party 425 – Lou Lou Girls
The Happy Now Blog Link- Up #322 – JENerally Informed
The Wednesday Link Party – Oombawka Design Crochet
Team Creative Crafts Link Party #95 – Artsy Fartsy Mama
Wonderful Wednesday – Oh My Heartsie Girl
Wonderful Wednesday Blog Hop – My Life Abundant
Thursday Favorite Things #542 – An Artful Mom
Creatively Crafty Link Party #329 – Try It, Like It, Create It
Encouraging Hearts & Home Blog Hop – My Slices of Life
Grace at Home No. 469 – Imparting Grace
Linky Party – Karins Kottage
Really great, easy to follow and understand. Thanks for sharing at My Big Fat Menopausal Life’s Share the Wealth party. Hope the rest of your month is wonderful!
Thank you, Helen!