This is a crochet pattern review of the Shabby Rose Tote pattern from Day’s Crochet & Knit. Review done by A Stitch Shy of Normal for EyeLoveKnots.
This post contains affiliate links for Etsy, Lion Brand, Amazon and WeCrochet. If you make a purchase by clicking on them, I make a small commission at no extra cost to you. Thanks for your support!
Find the crochet pattern review below, or check out the free online pattern right here (ad-free, printer friendly option available too via Etsy).
In a hurry? Pin this for later when you have more time.
It’s me, Abigail with A Stitch Shy of Normal.
I love sustainability, and I try to find small changes I can make in my everyday life to help save resources where I can. I grew up with the classic situation of a bag under the kitchen sink full of other bags, and you would eventually bring it into the store or even before that was an option you’d eventually throw the whole thing out when it got too full. Yes, it was nice having those bags to carry things now and then but it was not worth all the plastic waste! I love that people are generally moving towards using reusable shopping bags when they can, and I try to do the same.
However, sometimes you just don’t get to do that. Sometimes you have no choice, like you didn’t bring your reusable bag and you need to purchase more than you can carry in your hands for a walk or something. It happens to all of us, and not everyone has the choice (or the desire) to never ever use plastic bags. I realized that cutting it out 90% of the time is still a big step forward for me and my household, so this is what we do! But now that we don’t have that “bag of bags” in a kitchen cupboard, I end up not knowing what to do with the few that I do end up bringing home now and then.
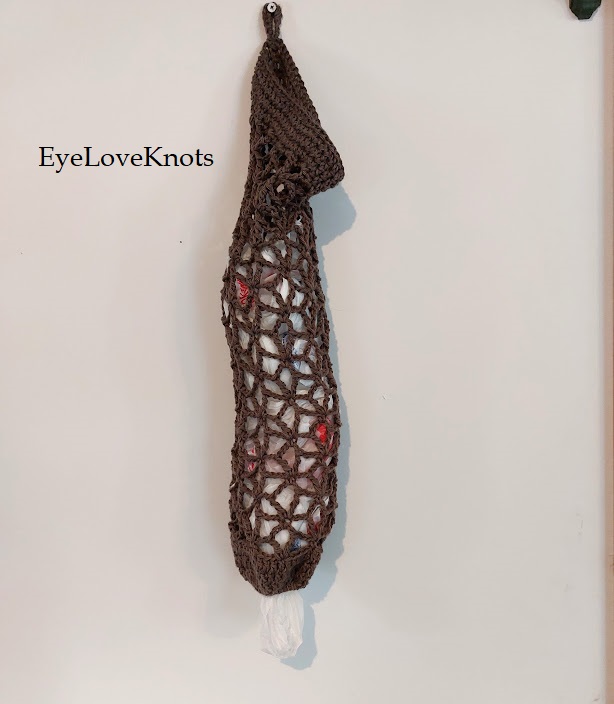
As far as what to do with them, I am planning to try making my own “plarn” or yarn made from plastic bags like this. It’s apparently a very fun thing to use for making your own reusable bags, or things like rugs. I’ve also heard there are groups that use these to make mattresses for those in need as this “yarn” creates a thick and supportive surface. It’s going to take me a while to collect them and I wanted a nice-looking option. So I found this bag saver pattern that caught my eye and will look lovely hanging up in my kitchen until I have enough bags to make my own plarn! We have a tutorial right here at EyeLoveKnots if you’d like to learn to make plarn.
Visit with me on Instagram @astitchshyofnormal for all kinds of awesome crochet makes and inspiration!
What Materials Do I Need to Crochet a Bag Saver?
- Roughly half a cake of Lion Brand Comfy Cotton Blend, which is a lightweight #3 yarn. I believe I used the color “Mochaccino” but my label has long since been lost and the website no longer shows that colorway. I compared it to the colorways listed on Ravelry.
- H8/5mm Crochet Hook – I like to use Clover Amour Ergonomic Hooks
- One standard hair tie, the basic ones with no embellishments (but a new one that has not been stretched by use). I like to buy a pack of something like these and just keep them with my craft supplies for patterns like this, that way I know they haven’t been used for my hair yet! (And with a mix of colors like that link you could pick a shade that will blend in to your yarn color even better)
- Scissors, yarn needle, etc for assembly.
- Optional–you can add embellishments like a wooden bead and/or a tassel, and the pattern does give these instructions. I just chose not to add them myself.
- Boho Bag Saver, Free Crochet Pattern from Day’s Crochet & Knit–there is a paid download option via Etsy, but I used the free web version myself!
Material Notes:
I found this yarn to be a great fit, but that’s not a surprise at all since I used the exact yarn the designer recommended! I had most of a cake left in my stash, so obviously it was a great choice. Something like gauge wouldn’t be super vital on a project like this, so you could easily substitute other cotton yarns or similar fibers. But if you want to use this yarn I definitely recommend it!
It comes in so many cute colors, although many of them seem to not exist on their site right now. However, it is a very popular spring and summer yarn so perhaps the color selection will expand again once the weather warms back up! I want to try this with one of the multicolored varieties, I think I might have one of those on my yarn shelf so I’ll have to try that out. However I did not do this before writing this review so I can’t show how cute that will surely be. (Keep an eye on my Instagram though because I plan to start on this one soon!
Would I use this yarn again for this pattern? Definitely, and I’m starting again right away! Other options I’d consider for this one would be something like Caron Cotton Cakes (which also does not seem to be available online right now, I’m hoping that’s just a seasonal thing) or Lion Brand 24/7 Cotton. Some cotton choices might be considered weight 3, some weight 4 but in my opinion this wouldn’t matter all that much as long as you’re happy with the finished size of the tube (on the Ravelry page for this pattern the designer suggests using either category!)
How Long Does it Take to Crochet a Bag Saver?
Not much time at all! I think I made this one over a single weekend, with maybe only a few hours put into it. Let’s say about 4-6 hours because initially getting used to the pattern takes a minute, but once you’re comfortable with where to stitch and where to skip, it’s a breeze!
Gauge:
This pattern does not have a standard gauge measurement but instead the designer says that after round 2 your circle should measure about 4″ wide. I did check this at the time and mine was more like 4.25″, which I knew was just fine. I would have changed things up if it had been wildly off.
Measurements:
The designer says this should measure about 4.5″ wide and about 24″ long.
Mine with only light stretching from hanging up on my wall measures about 5″ wide and 22″ long. This isn’t exactly matching the pattern but also it doesn’t really matter at all for something like this. You’d just want it generally in the ballpark, and could absolutely make it smaller or larger intentionally! You can tell from my “gauge” comparison that my circle was slightly large from the beginning so I was not surprised when my finished bag saver ended up a little wider than it should be. This also makes sense that it’s a little shorter when it instead stretched out width-wise.
Pattern Notes:
This pattern is very quick and simple! Like you might suspect looking at the intricate mesh detail, it does take a little bit to get used to the stitching. The first couple of rounds involved a lot of frogging and re-trying while I tried to get my loops to line up right. But keep in mind when I mention it took me a few tries that this took place over maybe 5-10 minutes. Once I got it down and understood what it was supposed to look like, the rest of the project was smooth sailing.
If you’re struggling like me, the best advice I can give is to trust the shape. It looks really funny for the first round or two of the mesh pattern but keep going! The pictures the designer has on there help a lot. At the beginning you want that semi-circle they show, with a triangle upside down inside. That helped me a lot to just match up how my stitches looked to the picture. I wish there was a chart to help visualize it even better, but I was working off of the free online pattern and I don’t know what additional resources might be available in the printed PDF version (if anything). But once I got there it really wasn’t too hard, and the majority of the bag is a simple two-round repeat! Then before you know it, you’re done.
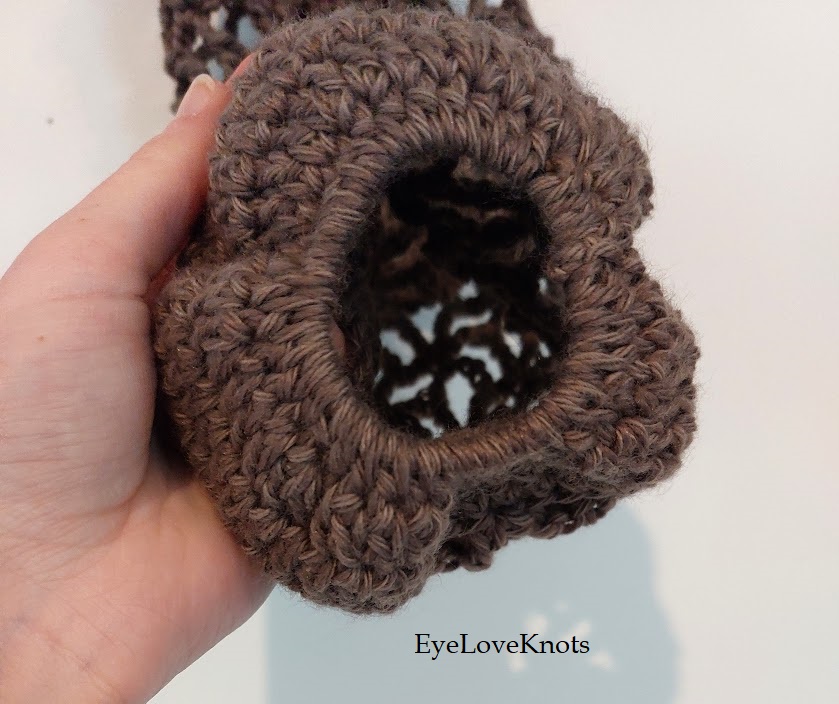
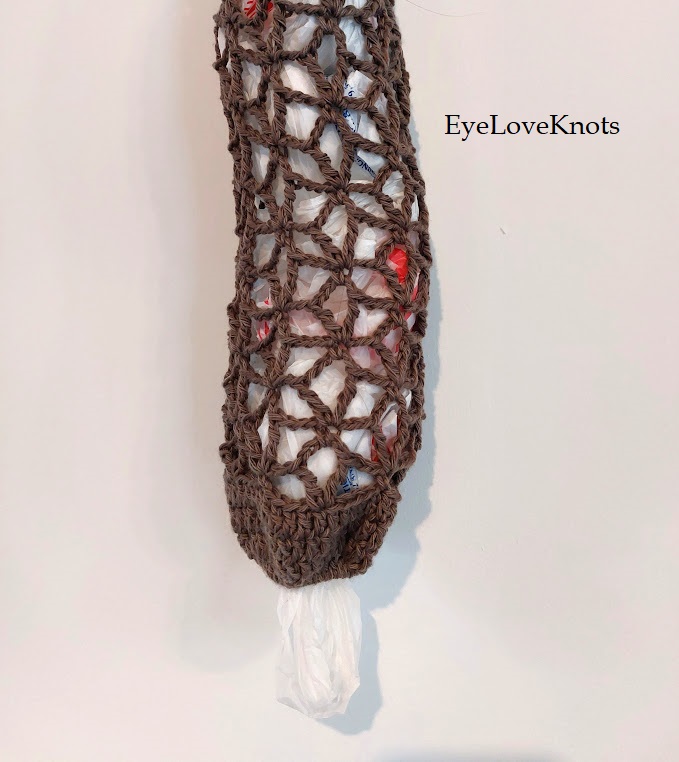
I really appreciate bag savers like this that incorporate working around a hair tie or elastic of some sort to begin. The bottom opening can get pretty stretched out otherwise, and you want a bag saver that can hold up throughout years of use hopefully. And this pattern found that happy medium where there are enough stitches to cover the hair band with no gaps but it fit perfectly!
Bag savers themselves have been around forever, and I’ve even written my own pattern for one! But this pattern in particular caught my eye since it’s such a cute stitch pattern and with it being so open and meshy it uses very little yarn. You could make two of these from one cake of Comfy Cotton Blend fairly easily. This would make for an affordable gift option for a housewarming, or for a college student moving into the dorms!
You might be curious why I chose not to add embellishments like the tassel or the bead, but that just wasn’t too appealing to me. I wanted simple and durable and I just could see the tassel coming off or the bead escaping years down the line. That’s probably me overthinking things, but I realized it was all just for looks so I could simply leave those parts off!
I definitely recommend checking out this pattern if you like simple and quick projects, or you have cotton yarn hanging around your stash…or if you’re building up a collection of bags with no idea where to store them! This pattern was enjoyable and simple, and ended up as a useful and impressive addition to my kitchen. I will continue to make more of these and I hope you check it out yourself to make one too!
Don’t forget to visit with me on Instagram @astitchshyofnormal for all kinds of awesome crochet makes and inspiration.
Join one of our awesome Facebook groups to share your creations, and see what others are up to!
– Yarn Crafts & Coffee Community
– DIY Home On Rockwood Lane
– Alexandra Lane Lifestyle
Linked Up To…
Craft Schooling Sunday – Creative Jewish Mom
Happiness is Homemade – Decor Craft Design
You’re the Star Blog Hop – Decor Craft Design
Sundays on Silverado #132 – The House on Silverado
Handmade Monday #314 – Sum of their Stories
The Really Crafty Link Party #352 – Keeping it Real
Hello Monday – Pink Lady
Anything Goes Linky 365 – My Random Musings
Craftastic Monday Link Party – Sew Can Do
672nd Inspire Me Tuesday – A Stroll Thru Life
Fabulous Party 463 – Lou Lou Girls
Talent-Sharing Tuesdays Link-Up 53 – Scribbling Boomer
The Happy Now Blog Link- Up #360 – JENerally Informed
Linky Ladies Party #233 – The Purple Poncho
Beautifully Made Home Decor Link Party 250 – Across the Boulevard
All About Home #183 – Common Ground
Create, Bake, Grow & Gather Party #559 – Shabby Art Boutique
Funtastic Friday Link Party #424 – Simply Beautiful by Angela
Home Matters Linky Party #417 – Modern on Monticello
Farmhouse Friday 287 – County Road 407
Pink Saturday – How Sweet the Sound
A Morning Cup of Joe – The Cottage Market
Tuesday Turn About #192 – My Wee Abode
Vintage Charm Party 379 – My Thrift Store Addiction
The Loop Scoop 57 – Moogly Blog
Wednesday Link Party 493 – Oombawka Design Crochet
Team Creative Crafts Link Party #136 – Artsy-Fartsy Mama
Wonderful Wednesday Blog Hop – My Life Abundant
Wednesday Link Party #338 – Grandma’s House We Go
Creatively Crafty Link Party #371 – Try It – Like It – Create It
Encouraging Hearts and Home Blog Hop – My Slices of Life
Grace at Home No. 500 – Imparting Grace
Linky Party – Karins Kottage
Crafty Creators Link Party #59 – Life as a LEO Wife
Share Your Crafts Link Party #4 – White House Crafts
I love making and using my own bag savers! I have a few around the house that I’ve used for years, and they have held up great, even the hair tie at the end. I keep one in the kitchen, one in the laundry room, and a few in my craft area that are for bags I’ll turn into plarn.
wow, I need one! thanks so much for sharing on craft schooling sunday!
They’re very useful as well as cute! Glad you enjoyed.
What a great idea! Our used plastic bags are in a huge jumble in our pantry. Thank you for sharing this post in the Talent-Sharing Tuesdays Link-Up 53.
Carol
http://www.scribblingboomer.com
We all have that “bag of bags” hidden somewhere, it’s just a fact of life! At least now I can have it in a more accessible place but still looking cute! Thanks for stopping by.