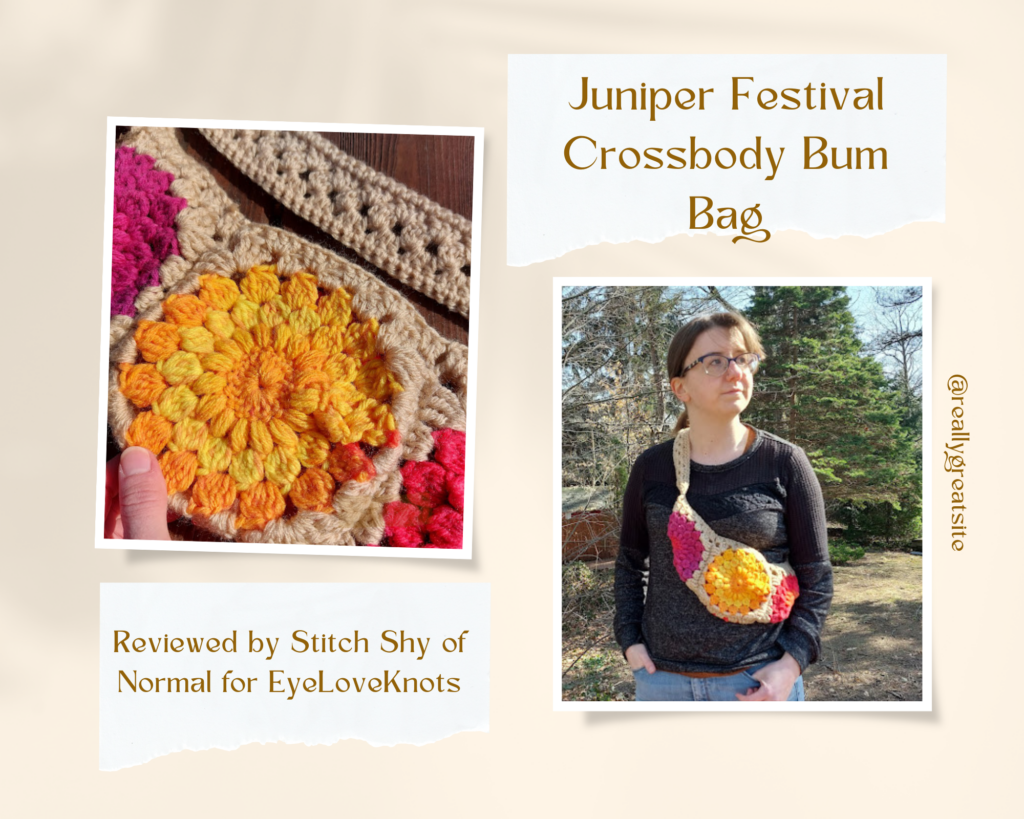
This is a crochet pattern review of the Juniper Festival Crossbody Bum Bag pattern by Casey’s Crochet. Review done by A Stitch Shy of Normal for EyeLoveKnots.
This post contains affiliate links for WeCrochet. If you make a purchase by clicking on them, I make a small commission at no extra cost to you. Thanks for your support!
Find the crochet pattern review below, or click here to purchase the pattern on Ravelry!
In a hurry? Pin this for later when you have more time.
It’s me, Abigail with A Stitch Shy of Normal.
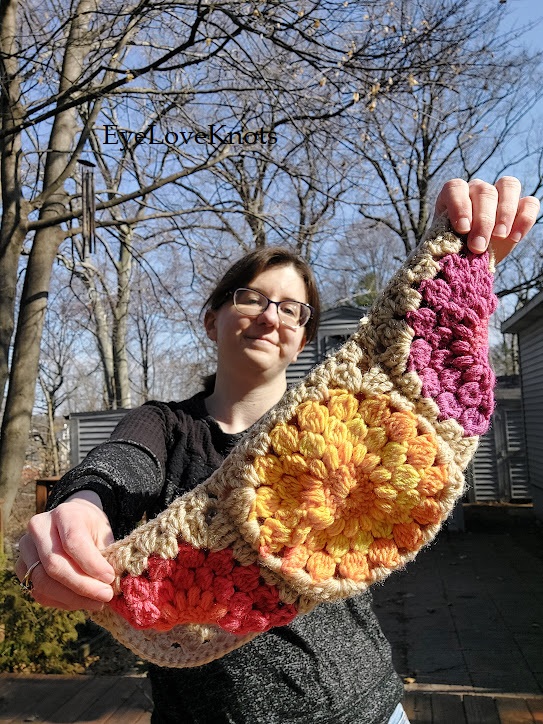
I’ve seen this bag and others like it all over the place on social media and crafting sites lately! I’m not even going to try to figure out who started this big trend, but quite a few fashion and craft designers have jumped on it and I’m totally here for it! I love the look, I adore the boho hippie vibes, and they’re so super cute.
This crochet pattern is one I would very strongly recommend. It was easy to make, it doesn’t use too much yarn so it’s affordable, and it gives you a very useful and super cute accessory at the end. I plan to use this adorable little bag a lot this coming summer! It’s not huge so it won’t weigh you down, but it has the space for the basics like a wallet and phone.
Visit with me on Instagram @astitchshyofnormal for all kinds of awesome crochet makes and inspiration!
What Materials Do I Need to Crochet a Bum Bag?
- Less than half a skein of Red Heart Super Saver in the Buff colorway
- About half a skein of Red Heart Super Saver Stripes in the Fruity Stripes colorway
- I9/5.5mm crochet hook – I like to use Clover Amour Ergonomic Hooks
- Scissors and yarn needle for assembly
- Juniper Crossbody Bum Bag, Paid Crochet Pattern from Casey Crochet via Ravelry
Material Notes:
Wonderful, but I didn’t expect anything else! This pattern seemed like any decent worsted would work, and I chose to look for one more on the sturdy and durable side versus a super soft one. When I was considering the colors to put in the middle circle section, it occurred to me that I could instead just use a variegated yarn and get different squares without changing color!
The obvious choice in this case, for both color and the sort of yarn I was looking for, was Red Heart Super Saver Stripes. This line has some truly gorgeous bright colorways and I use it all the time. I picked a coordinating neutral from the regular Super Saver just to make things like gauge easier (in my experience the different kinds of RHSS seem to play together nicely). Picking the Stripes colorway was the hard part but I ended up choosing Fruity Stripes for the range of warm colors that would look great for spring/summer! To match with this I considered picking a matching pink or yellow, but ended up deciding to let the bright shades be the star with a soft tan neutral.
Would I recommend this yarn for this pattern? Yes, very much. I think it worked great, I think it looks beautiful, and it was very affordable. I used a coupon at Joann plus there were sales…so I ended up getting materials for this bag for about 6-7 bucks. But even at the regular prices it shouldn’t be more than 10 dollars! Like I said I used less than a full skein of both of these–about half of the Stripes and maybe a third of the solid shade. You might even have these in your stash!
How Long Does it Take to Crochet a Bum Bag?
I made this whole thing start to finish from one night to the next afternoon. I was able to whip up the 4 circles in the evening, then border them the next morning with my coffee and sew it all together in the following afternoon!
If I had to put a number on it, I think this took about 5-6 hours of work. It’s nice for working on in bursts as well, you can make the squares one at a time and set the project aside.
Gauge & Measurements:
Pattern Notes:
This pattern was very simple and I really enjoyed the process! I appreciated the simplicity of the instructions. The squares work up really fast, and although I didn’t change colors I don’t think it would add that much time. I personally worked up the inner circles first and set them aside, then did the outer neutral borders later on. I had no issues with the squares, the stitches were explained well and it was very clear when to turn or not. I also liked that the designer explained what to do if you were changing colors versus those who weren’t.
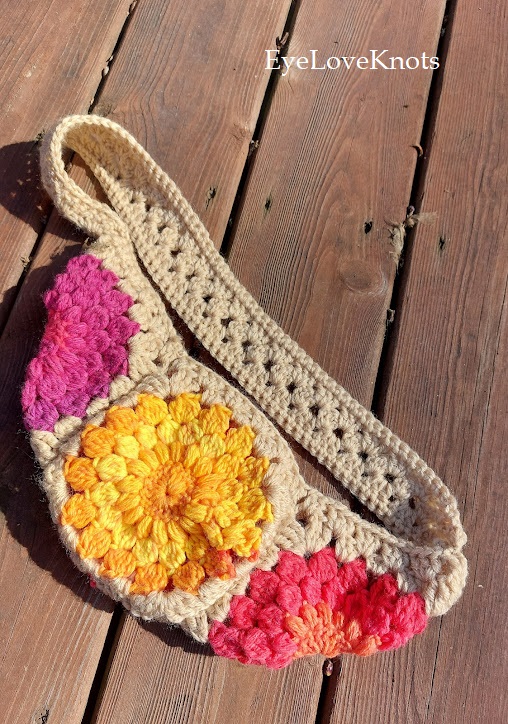
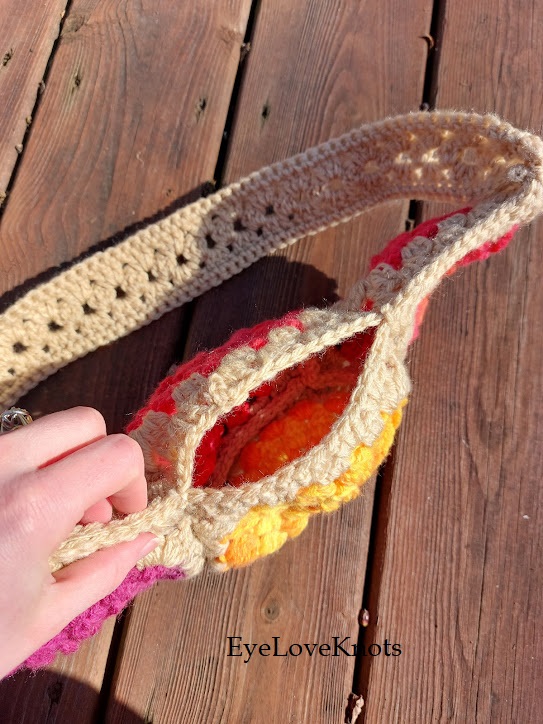
My confusion happened more once I got to the assembly of the bag. I liked the clear pictures on how to attach the squares to each other and how to fold the outer ones! I just didn’t see any point where it said to sew the bottom squares together, and I nearly forgot to do this! It might be obvious to most but I would have appreciated my hand being held there. And in the edging/strap section, on the second row of granny clusters, I was confused whether I was supposed to treat the outer corners like the middle ones or not. It’s explained what to when you meet the border of two squares when you’re working across the side, but not what to do when it’s a “corner” of one single square, the ones you fold in half to make the triangle edges. However, I just guessed and it didn’t hurt anything. I was able to make my strap and attach it solidly just fine!
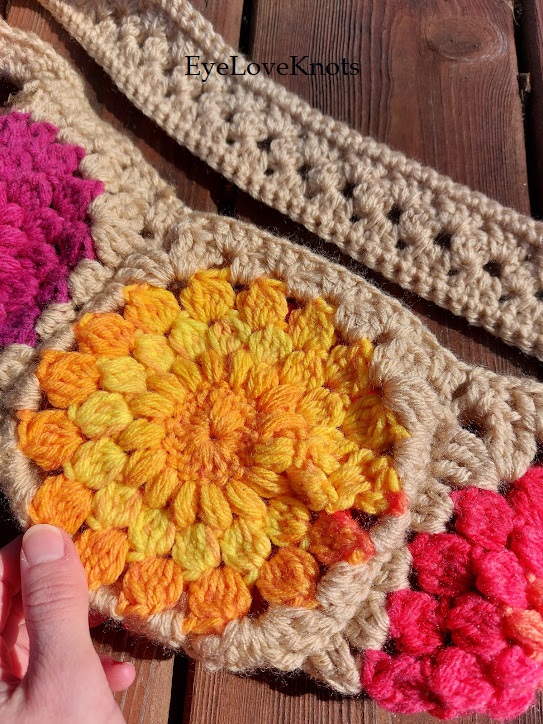
Like I mentioned earlier, this worked up very fast! This bag is only 4 simple granny squares. Two of them form the front/back of the bag, while the other two are folded in half to make the diagonal sides for the shape of the bag. It was really fun to pick my color layout to display the shades the way I wanted, and I enjoy having my bright yellow square front and center!
This bag also seems quite useful. No, it’s not going to be very secure for small things like hair clips or loose change. But a wallet, phone, and a pair of sunglasses would be fine! This would be a good minimal bag to grab on a warm spring day to go browse a craft fair. And I like the novelty of how you wear it! It doesn’t hang down at your side, so you feel secure having your valuables right at your body. And it’s very easy to just reach a hand in and grab whatever you need.
My overall impression of this pattern is very positive. My only issues were minor and easily solved, and it was a great pattern experience. I would definitely make one of these again. I might do that for gifts, since I know I can work one up in about a weekend quite easily!
Don’t forget to visit with me on Instagram @astitchshyofnormal for all kinds of awesome crochet makes and inspiration.
Join one of our awesome Facebook groups to share your creations, and see what others are up to!
– Yarn Crafts & Coffee Community
– DIY Home On Rockwood Lane
– Alexandra Lane Lifestyle
Linked Up To…
Weekday Wear – Away from the Blue
Talent Sharing Tuesday Link Up 59 – Scribbling Boomer
Confident Twosday – I do deClaire
Turning Heads Tuesday – Elegantly Dressed and Stylish
Wow on Wednesday – Is This Mutton?
Thursday Fashion Files – Doused in Pink
Chic and Stylish Link Up – Mummabstylish
Spread the Kindness Link Up on the Edge #646 – Shelbee on the Edge
Fancy Friday – Nancy’s Fashion Style
Neverending Style Link Up – The Grey Brunette
Craftastic Monday Link Party – Sew Can Do
Linky Ladies Party #235 – The Purple Poncho
Loop Scoop 59 – Moogly Blog
Team Creative Crafts Link Party #140 – Artsy-Fartsy Mama
Creatively Crafty Link Party #374 – Try It – Like It – Create It
The Wednesday Link Party 497 – Oombawka Design Crochet
Saturday Sparks Link Party 559 – Pieced Pastimes
Craft Schooling Sunday – Creative Jewish Mom
You’re the Star Blog Hop – Decor Craft Design
Happiness is Homemade – Decor Craft Design
Sundays on Silverado #139 – The House on Silverado
Handmade Monday #321 – Sum of their Stories
The Really Crafty Link Party #359 – Keeping it Real
Hello Monday – Pink Lady
Anything Goes Linky 372 – My Random Musings
677th Inspire Me Tuesday – A Stroll Thru Life
Fabulous Party 470 – Lou Lou Girls
The Happy Now Blog Link- Up #367 – JENerally Informed
Wonderful Wednesday Blog Hop – My Life Abundant
Encouraging Hearts and Home Blog Hop – My Slices of Life
Grace at Home No. 503 – Imparting Grace
Linky Party #313 – Karins Kottage
Crafty Creators Link Party #62 – Life as a LEO Wife
Create, Bake, Grow & Gather Party #566 – Shabby Art Boutique
Funtastic Friday Link Party #431 – Simply Beautiful by Angela
A Morning Cup of Joe – The Cottage Market
Anything Goes – How Sweet the Sound
Such beautiful, bright and cheerful flowers!
How beautiful! I love the bright colors!
That’s fabulous, I love the colours!
Emma xxx
http://www.style-splash.com
Thanks! I love color so much!
Beautiful bag, I love the colours 🙂
Thank you so much! I love intense colors.
Love it, thanks for sharing on craft schooling sunday!
Oh I like the bright colours you used with this! It looks like a really practical bag for carrying a few essentials 🙂
Thanks for joining the Weekday Wear Link up 🙂
Thank you! It’s a great blend of cute and practical, I agree. Thanks for checking it out!
I love seeing crochet interpreted in on- trend ways. Beautiful bag. Thanks for linking
This is a cute bag. How do you keep pens or pencils from falling through the crochet holes? Did you add a liner?
I personally did not add a liner, I chose to just use this for larger things like my phone/wallet. If I wanted to put items like my keys or writing utensils it definitely would need a liner but I haven’t tried that myself yet.
Super crossbody bag — looks like it would be great for running errands, travel, and everyday wear. I really like the bright, cheerful colors and the flower motif. Thank you for sharing this post in the Talent-Sharing Tuesdays Link-Up 59.
Carol
http://www.scribblingboomer.com
What pretty crossbody bum bag! I love the colors you chose for your crocheted flowers. Thank you for linking up at our weekly Link Party! You are being featured at our Wednesday
Party #498 this week. Here’s the direct link to the post in case you’d like to share your feature:
https://oombawkadesigncrochet.com/crochet-this-simple-shawl-a-hand-puppet-or-a-crossbody-bum-bag-link-party-498/
Hope to see you again next week! Rhondda