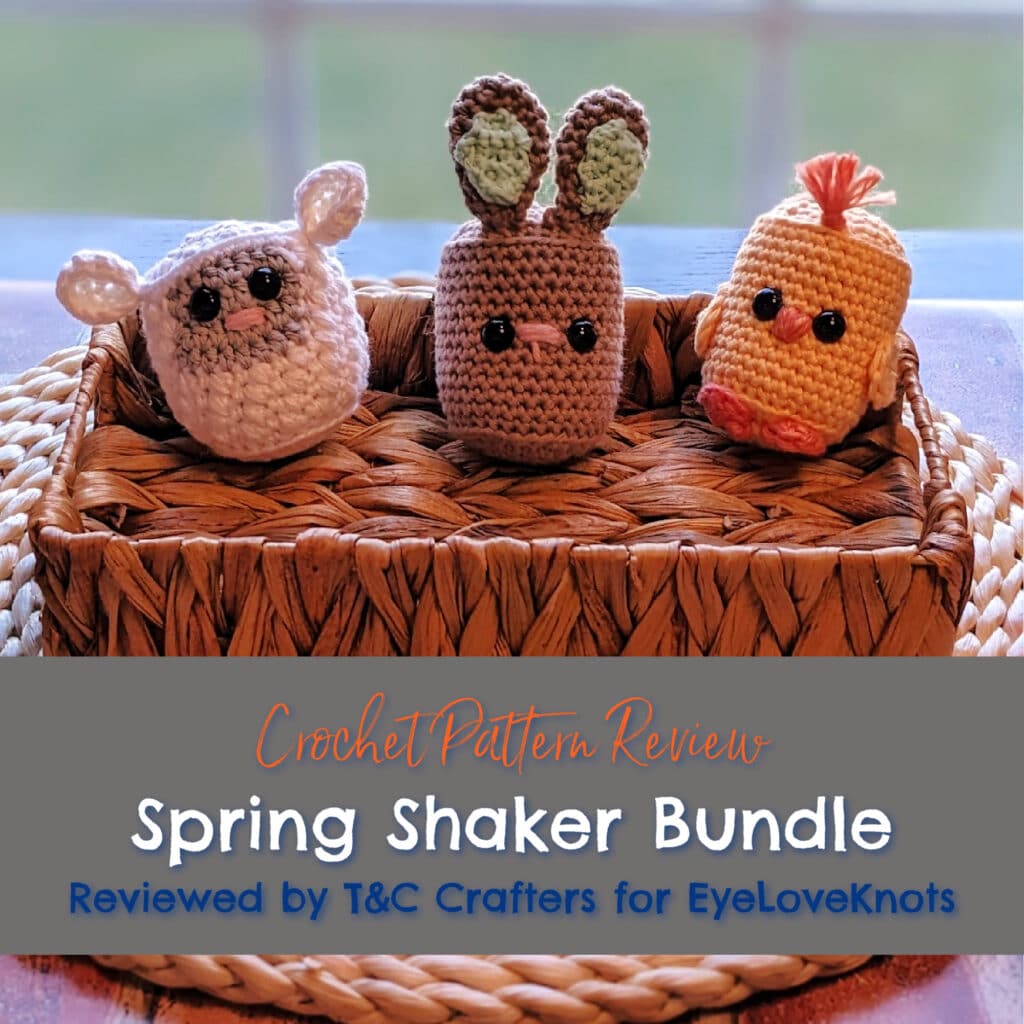
This is a crochet pattern review of the Spring Shaker Bundle designed by Katie McGowan of Katie Mae Crochet. Review done by Candace of T&C Crafters for EyeLoveKnots.
This post contains affiliate links for WeCrochet, Etsy, and Amazon. If you make a purchase by clicking on them, I make a small commission at no extra cost to you. Thanks for your support!
Find the crochet pattern review below, or click here to purchase the pattern from Katie Mae Crochet on Etsy!
In a hurry? Pin this for later when you have more time.
It’s me, Candace with T&C Crafters.
Visit with me on Facebook and Instagram for all kinds of awesome crochet makes and inspiration.
With Easter quickly approaching, I have had my eye out for adorable little Easter crochet patterns that would work up well for markets. When I came across the Spring Shaker Bundle by Katie Mae Crochet, I knew this would be perfect to make up for spring market inspiration!
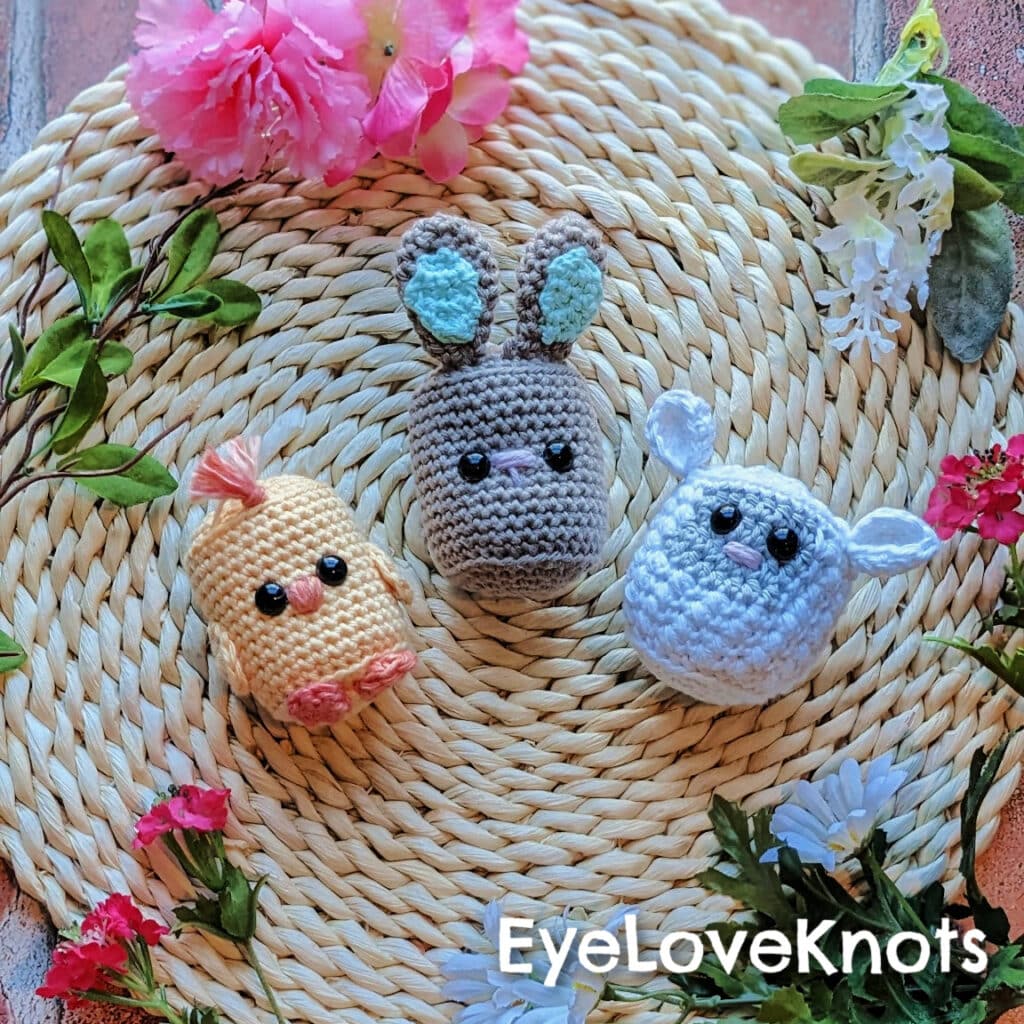
Craft fair customers are always on the lookout for cute baby gifts for the new arrivals in their life! A cute set of rattles like this adorable Easter-themed one by Katie Mae Crochet would be perfect for a spring baby shower gift or a toddler’s birthday. All three patterns included in this bundle work up quickly and easily, and the ways to customize these cuties are endless! These Easter shakers are great as a bundle or individually, and they are sure to wow prospective customers at your next craft fair or make a new mom smile!
Materials I Used:
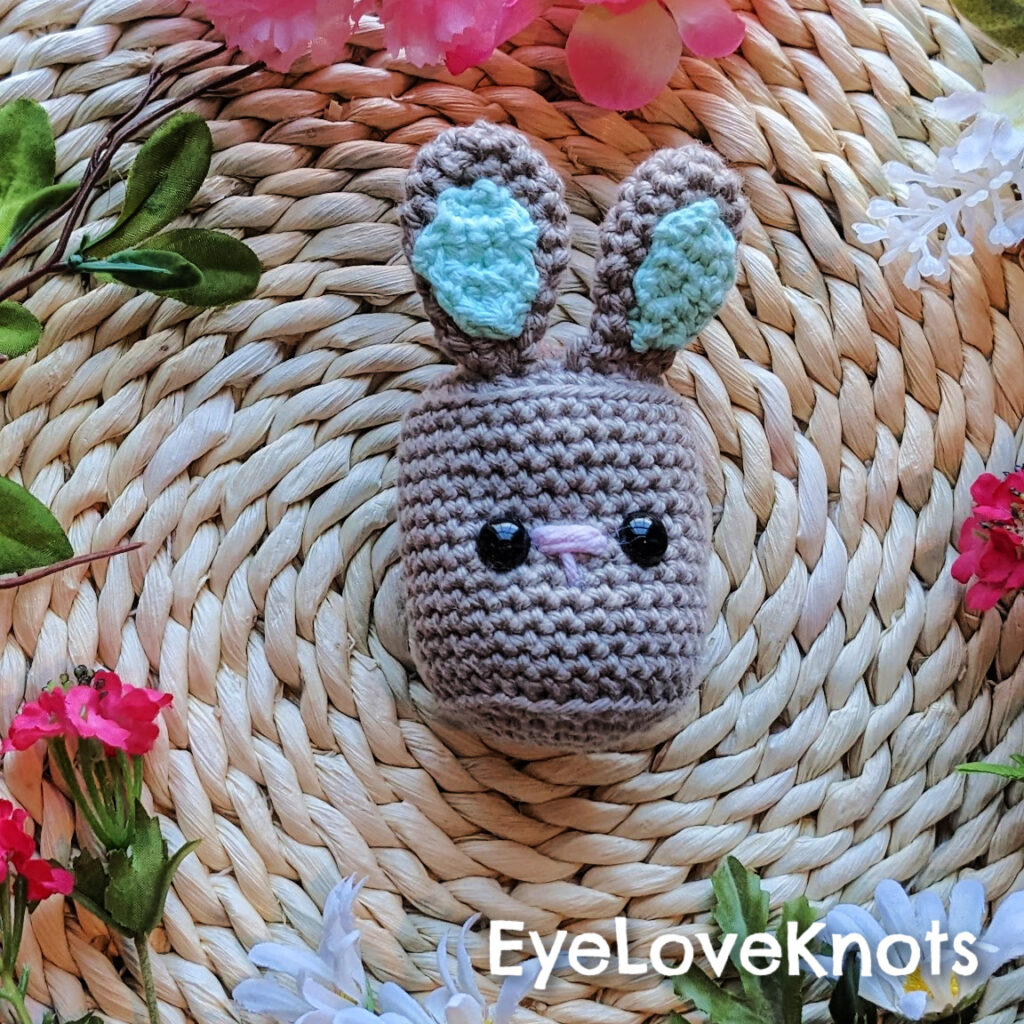
- Bunny: Mainstays 100% Cotton in Brown Stone Beige, Lily Sugar’n Cream in Beach Glass, and Peaches & Creme in Pastel Pink
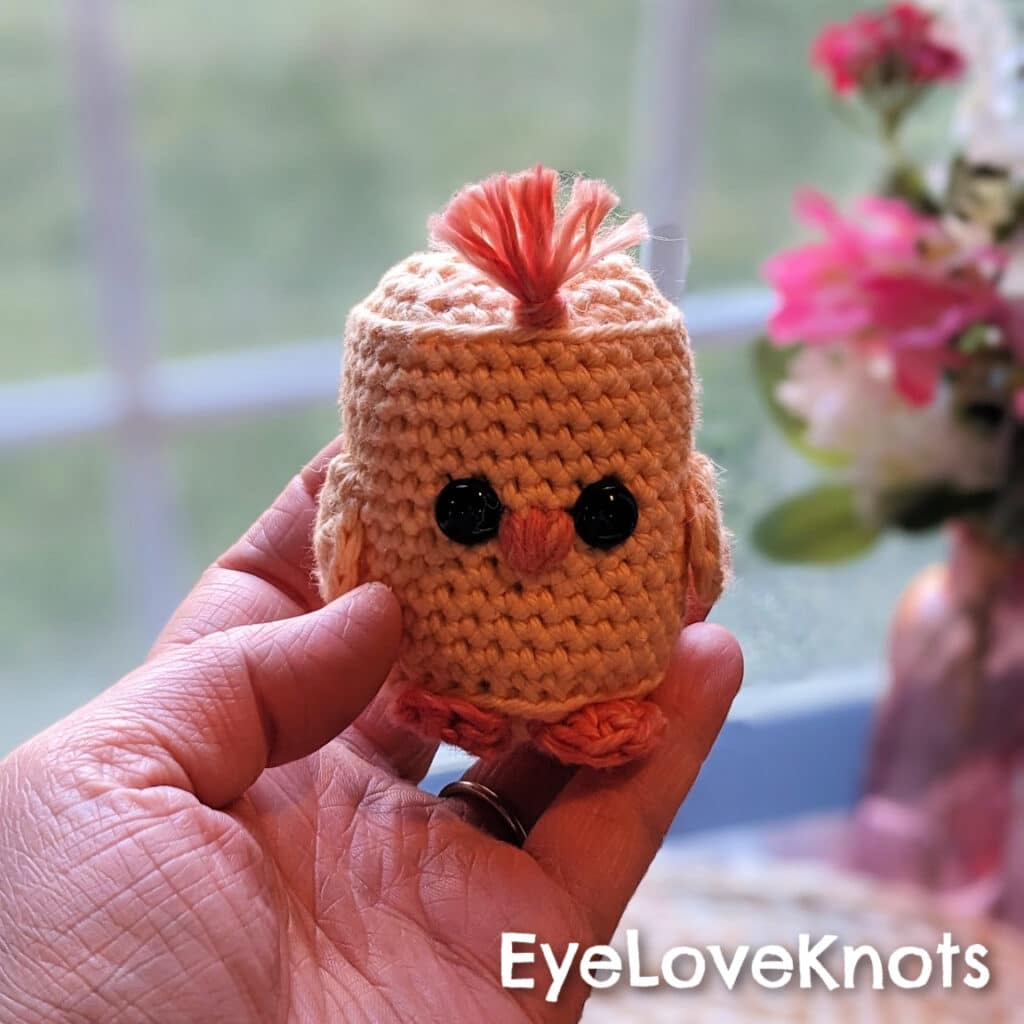
- Chick: I Love This Cotton in Buttercup and a discontinued variegated orange
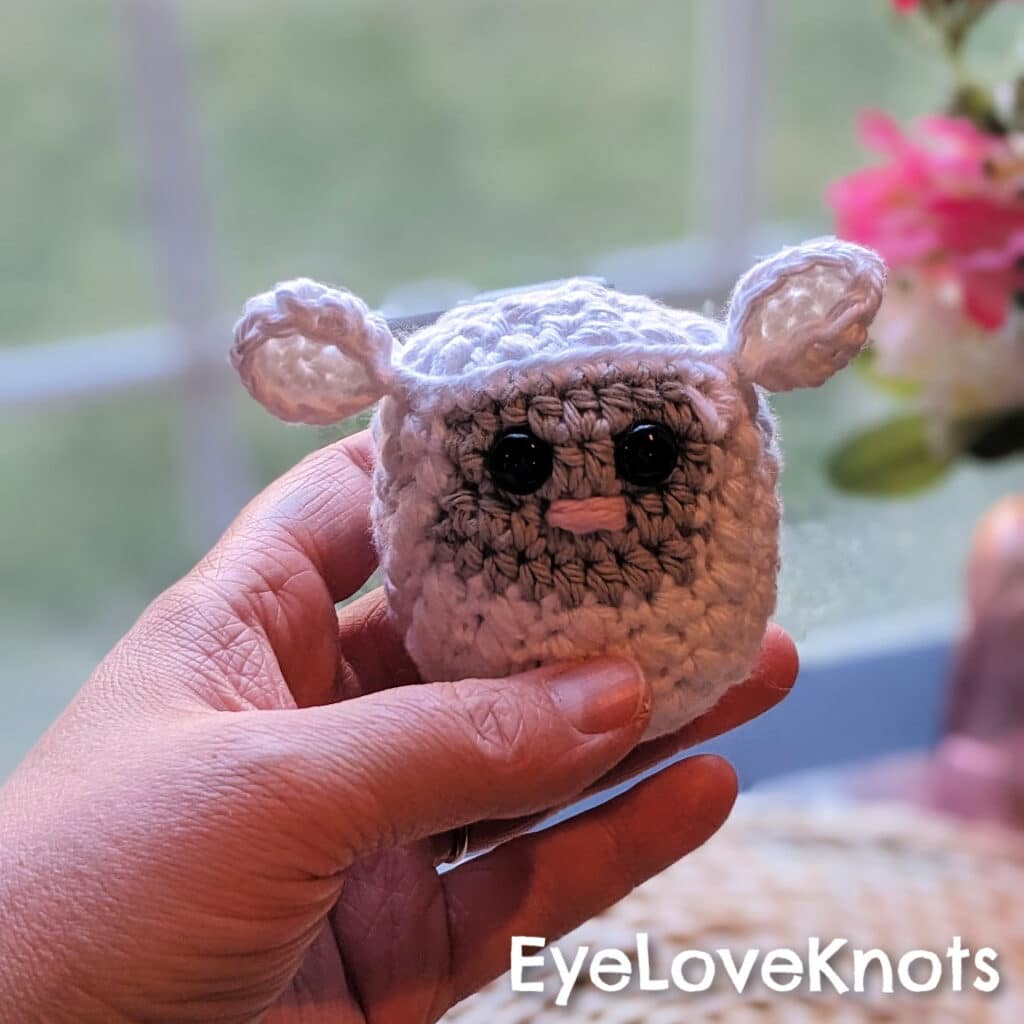
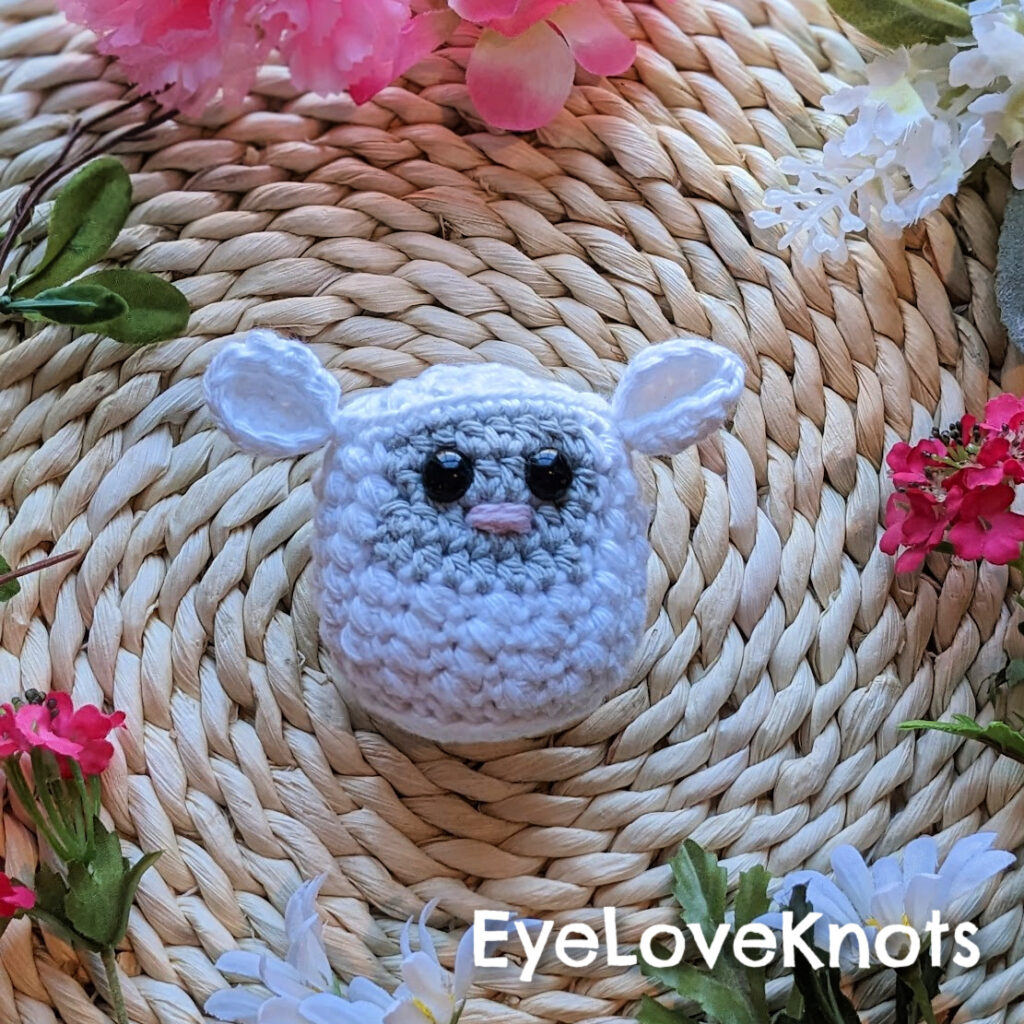
- Sheep: I Love This Cotton in White, Premier Home Cotton in Pewter, and Peaches & Creme in Pastel Pink
- G6/4mm Crochet Hook – I love using my Clover Amour Ergonomic Hook!
- Yarn Needle
- 6 (2 for each) 10 mm Black Safety Eyes
- 6 small round plastic rattle inserts
- Polyester Fiberfil
- Spring Shaker Bundle, Paid Crochet Pattern by ByKatieMaeCrochet via Etsy
Material Notes:
When making my set of shaker toys, I worked from my stash of cotton yarns and used a variety of different brands. While I was happy with how the coloring of each piece worked out, the slight discrepancies in the weights of the yarns did impact my finished pieces slightly. For example, when making the sheep, I used I Love This Cotton for the white portion and Premier Home Cotton for the gray face. The Premier Home Cotton was slightly thicker, so the face was a little taller than the stitches on the body. I think it worked out alright, but I would recommend trying to use the same brand of yarn throughout, or making sure that your yarn is similar in thickness for each shaker.
The pattern calls for 9 mm safety eyes. I did not have this exact size and used the 10 mm black safety eyes I had on hand instead, and the size difference was definitely noticeable. There was less of a gap between the eyes due to them being slightly larger, which made the noses a little more squished. I think mine still turned out really cute with the 10 mm black eyes, but in the future, I would try to stick with the 9 mm eyes.
You will only need a small amount of fiberfill for this project, so you could likely use some you have on hand. The shakers should not be over-stuffed or they will lose their shape. The minimal amount of yarn and other supplies needed for these shakers makes them perfect for market prep!
When making items for small children, you need to be really cautious about using materials that could be a choking hazard. The small rattle inserts and safety eyes in these shakers can be safe as long as they are securely fastened inside and cannot come out. In the event that the stitches become loose and the safety eyes or rattle inserts could start to come out, it is extremely important to not let children or pets near these shakers. The pattern includes a similar disclaimer. I would recommend that if you want to be overly cautious to consider using felt eyes for this pattern.
Time Spent:
Each of the individual shakers took me about 2 hours to crochet for a total of 6 hours for the bundle. The sheep took me the longest to make and the chick was the fastest.
Measurements:
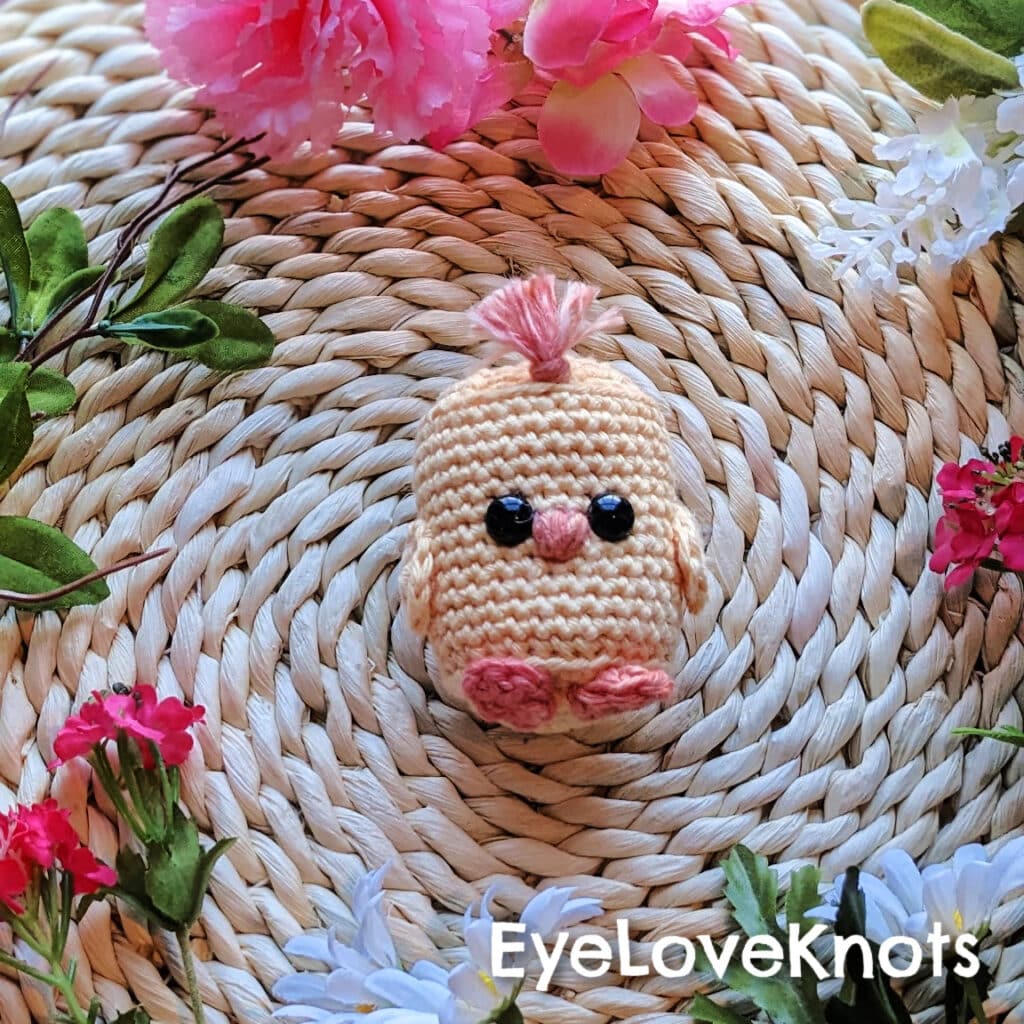
All three shakers were very similar in size. The chick measured 2.25 inches wide and 3.5 inches tall (to the top of the orange hair sticking up). The bunny measured 2.25 inches wide and 4.5 inches tall. The sheep measured 2.5 inches wide and 2.75 inches tall.
Gauge:
Gauge is not essential for this project, however, you do want to make sure you don’t have gaps showing between your stitches. If you are noticing gaps when working up your shakers, you will want to decrease your hook size so that you won’t have fiberfil coming out of the toy between your stitches.
For my shakers, a magic circle with 6 single crochets using cotton yarn and a G6/4 mm crochet hook measured just under a half inch in diameter. After increasing in each stitch, my second round measured a little under 1 inch in diameter.
Pattern Notes:
These little shakers are easy and pretty quick to make up. Both the chick and the bunny feature all single crochets, and the sheep only has a few additional stitches, so they are also relatively beginner-friendly. All three patterns are worked with joined rounds. If you prefer to use continuous rounds instead, the lamb would be the only design that may be effected due to the color change for the face.
Both the chick and the bunny bodies are worked up in the same way. They feature some edging along the way to help make them cylindrical so they can sit up on a flat surface. When making the bodies, it is important to not over-stuff the bodies, or the body will not have a flat top and bottom like intended. The details on the chick and the bunny are what set them apart.
For the chick, you will need to make two feet and two wings that will need attached. The pattern gives a relative idea about where to attach these, but placement is not overly critical as long as your chick is symmetric and cute. The chick’s beak can be added with additional orange yarn or embroidery floss, and is put on after the chick is stuffed. The little tuft of hair at the top is also added at the end.
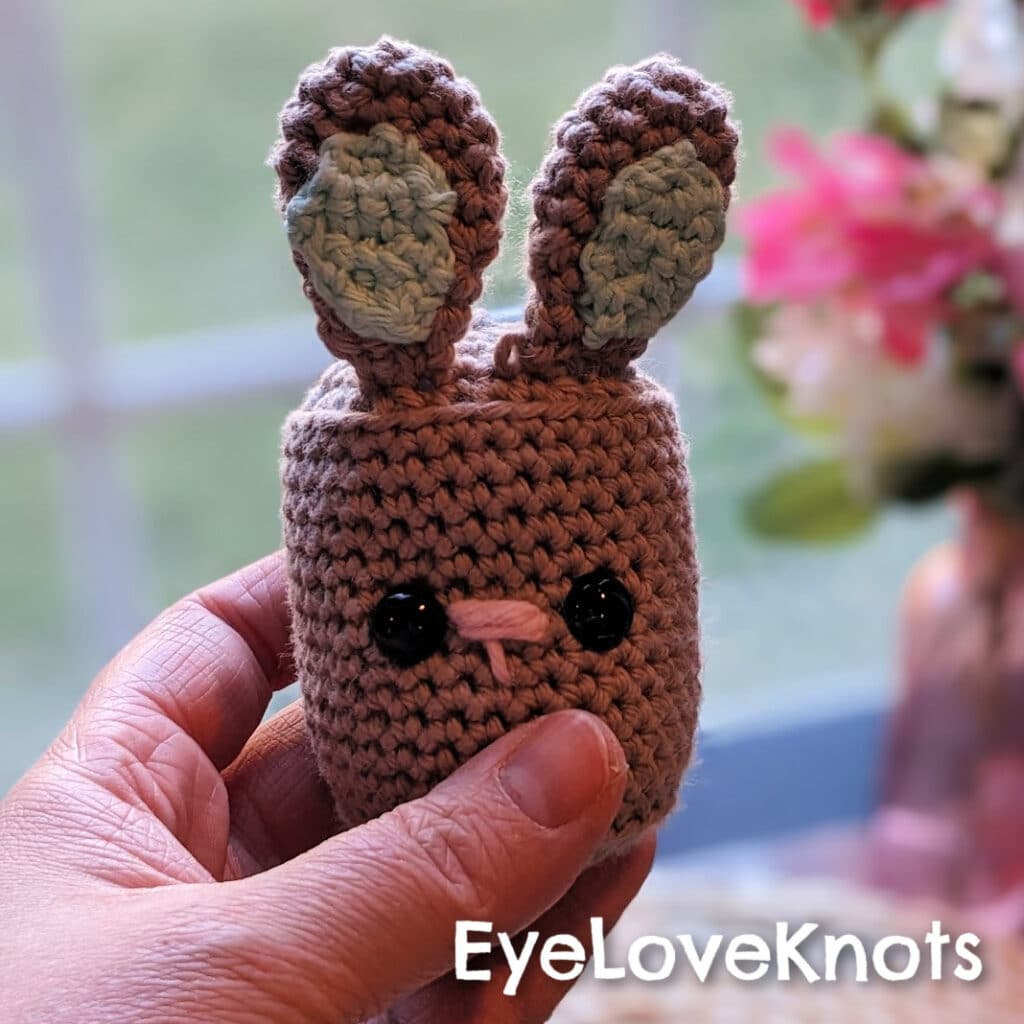
When making the bunny, the ears are the only part that needs to be made and attached, other than the embroidered nose. The ears are constructed in two pieces – the main part of the ear and the colorful part of the inner ear. The main part of the ear, or the outer ear as the pattern calls it, is worked in the round. If you didn’t want to add the inner ear, you may be able to get away with just using this part of the ear. I really like the way the inner ear provides a splash of color. I chose to go with a cute bright blue color for mine, but you could also stick with traditional pink or another color for the inner ear. The inner ear is worked as one flat piece that gets sewn in place. If you were in a hurry, you could also cut some felt to use for the inner ear embellishment.
The sheep is similar to the other two shakers, but the body is constructed differently. The flat bottom of the sheep is made in the same way with joined rounds of single crochet, but then an additional stitch is introduced to make the sheep have a wool-like fluffy look. The bumps on the sheep are the result of uneven berry stitches. This was my first time using this stitch, but it was very easy to use with the special stitch explanation provided in the pattern.
Although not overly difficult, the sheep was the trickiest part of this pattern bundle for me. When working with the joined rounds, my rounds moved slightly off to the side. While this didn’t matter when creating the chick and the bunny, it did end up impacting the look of my sheep’s face slightly because it off-set the color changes. I made some quick adjustments on the fly to straighten it out, but this is something to be mindful of as you make the sheep yourself.
Overall, I think this Spring Shaker Bundle pattern worked up super well and totally adorable! If I had an upcoming Easter market, I would 100% be making these on repeat to sell as individuals and little sets! My kids (two and four) absolutely love playing with these toys, and I’m sure babies would love them too! I definitely recommend trying out this cute set, and if you do, I’d love to hear all about your experience! Be sure to tag @katiemaecrochet, @eyeloveknots, and @tandc_crafters on social media so we can see your finished shakers!
Don’t forget to visit with me on Instagram for all kinds of awesome crochet makes and inspiration.
Join one of our awesome Facebook groups to share your creations, and see what others are up to!
– Yarn Crafts & Coffee Community
– DIY Home On Rockwood Lane
– Alexandra Lane Lifestyle
Linked Up To…
Beautifully Made Home Decor Link Party 255 – Across the Blvd
All About Home #188 – Common Ground
Home Imagined Link Party #14 – Sky Lark House
Tuesday Turn About #194 – My Wee Abode
Farmhouse Friday 293 – County Road 407
Home Matters Linky Party #423 – Modern on Monticello
Craftastic Monday Link Party – Sew Can Do
Linky Ladies Party #234 – The Purple Poncho
The Wednesday Link Party 496 – Oombawka Design Crochet
Team Creative Crafts Link Party #139 – Artsy-Fartsy Mama
Creatively Crafty Link Party #373 – Try It – Like It – Create It
Craft Schooling Sunday – Creative Jewish Mom
You’re the Star Blog Hop – Decor Craft Design
Sundays on Silverado #137 – The House on Silverado
Handmade Monday #319 – Sum of their Stories
The Really Crafty Link Party #357 – Keeping it Real
Hello Monday – Pink Lady
Anything Goes Linky 370 – My Random Musings
675th Inspire Me Tuesday – A Stroll Thru Life
Fabulous Party 468 – Lou Lou Girls
Talent Sharing Tuesday – Scribbling Boomer
The Happy Now Blog Link Up #365 – JENerally Informed
Vintage Charm Party 382 – My Thrift Addiction
Wednesday Link Party #341 – To Grandma’s House We Go
Wonderful Wednesday Blog Hop – My Life Abundant
Encouraging Hearts and Home Blog Hop – My Slices of Life
Grace at Home No. 502 – Imparting Grace
Linky Party #313 – Karins Kottage
Crafty Creators Link Party #61 – Life as a LEO Wife
Funtastic Friday – Simply Beautiful by Angela
Morning Cup of Joe – The Cottage Market
These little guys are simply adorable! The shaping is neat too.
Thank you so much! My kiddos are absolutely obsessed with them and won’t put them down! They sure are a hit 🙂
These are just adorable!!
Thank you! I absolutely loved how they turned out!!
These are the cutest!
Aww, thank you so much!!
So adorable! Thank you for sharing with us at the Home Imagined Link party.-Meagan
These shaker toys are adorable — perfect as gifts tucked into little Easter baskets. Thank you for sharing this post in the Talent-Sharing Tuesdays Link-Up 57.
Carol
http://www.scribblingboomer.com
Thank you so much! They really are perfect for Easter baskets!
Oh, these are just precious!!
Oh, thank you so much!! They were so fun to make!
The spring shakers look so cute! I’m featuring you at this week’s #HomeMattersParty. Thanks for sharing!
These Spring Shakers are adorable! What a fun Easter pack! Thank you for linking up at our weekly Link Party! You are being featured at our Wednesday
Party #497 this week. Here’s the direct link to the post in case you’d like to share your feature:
https://oombawkadesigncrochet.com/spring-shakers-alice-dress-easter-bunny-applique-link-party-497/
Hope to see you again next week! Rhondda