This post contains affiliate links for Amazon. If you make a purchase by clicking on them, I make a small commission at no extra cost to you. Thanks for your support!
Do you follow Family Bugs? It was one of the first blogs that I started following, primarily because in the beginning I wanted to make hats and wasn’t able to create my own based off of measurements yet. The Basic Beanie from Family Bugs is a great place to start. I have since learned how to work up my own based on size and such, but I still enjoy reading the other posts of Family Bugs, and seeing the new projects. Recently, I answered a call requesting bloggers to work up Pattern Reviews in exchange for the pattern for free. Since I love doing Pattern Reviews, and am always looking for something new to try, I jumped on it. Sarah sent me the Dress Up Doll and matching Bubble Dress for the Dress Up Doll, and I got to work.
In this post, you will find the Dress Up Doll Pattern Review, and on Wednesday you will find the Bubble Dress Pattern Review and finished pictures of my doll.
Materials I Used:
– About Half a Skein of Simply Soft Yarn in Dark Country Blue and Bone, and about a Quarter of a Skein to a Third of Soft Blue (JoAnn’s)
– G6/4.25mm Crochet Hook (as recommended in the pattern)
– Two 0.5″ Light Blue Buttons for Eyes
– 10 6mm Light Brown Chenille Stems (Pipe Cleaners) by Tree House Studio (Hobby Lobby)
Light Brown Pipe Cleaners
– A few handfuls of Polyfil Fiber (Stuffing) by Fairfield (JoAnn’s)
– A Small Amount of Black Embroidery Floss for Mouth
– Hot Glue Gun and Stick
– Dress Up Doll Crochet Pattern (Paid Pattern) by FamilyBugs
Material Notes:
I did have to redo the dress, which I worked in mostly the Soft Blue so I lost track of how much was used but it wasn’t much, as the only other thing I used it for was the built in garments.
The light blue eyes I used were part of a variety pack from JoAnn’s. I bought the variety pack about two years ago so I am not sure on much of the button package details. I couldn’t find it online for this post.
The pipe cleaners came in a package like this photo from the 100 Value Pack, but I only got the 25 package. “6mm” makes you question the size, but it’s just the standard pipe cleaners that I am sure you have used in many other projects before.
Time Spent:
The doll took me about a combined 6 hours to complete, with each section adding about an hour and the hair with two.
Measurements:
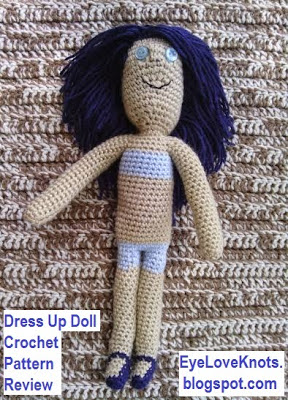
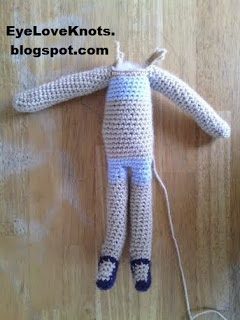
My doll measures 14.75″ in length by 5.75″ wide with arms laying by sides.
My numbers vary from Sarah’s but no biggie. It’s really up to you!
Pattern Notes:
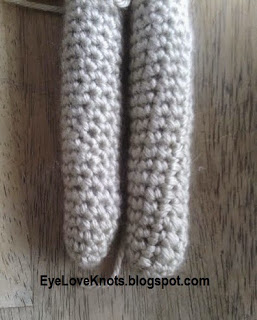 |
| Left: Continuous Round; Right: Slip Stitch Join and Chain 1. You can see the seam on this one, starting above the “O” and going in a diagonal. |
In general, I did not turn my work because I wanted the shiny right side to be showing. I worked one arm and leg as written with the join, and one arm and leg in a continuous manner. I definitely prefer the continuous manner so there is not visible seam, and it keeps the limbs tighter and less puffy. If you choose to work with the join and chain 1, I suggest working the first stitch into the first stitch so it keeps the seam straight, rather than counting the chain 1 as a stitch and working into the second stitch.
I did not weave in many ends. I was able to knot most of my tails together. Really the only weaving I did was in the beginning tails of arms, and the beginning tail of the head. The cool think about all the tails being on the inside of the doll is you don’t need to make your tails look neat. I weaved them in and out of the piece three or four times and then left the remaining tail piece hanging inside. It works great as extra stuffing.
Head:
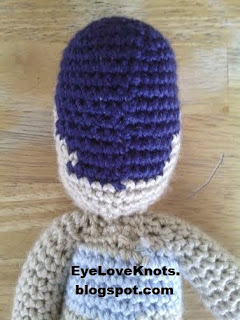
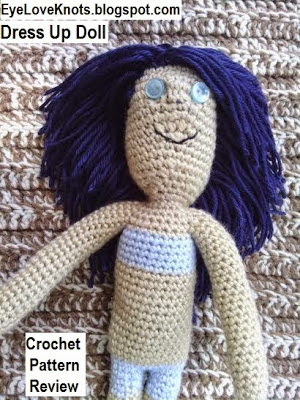
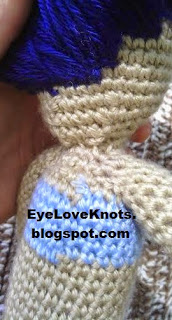 My head came out to a funny shape. I am not sure if it is because I worked it without turning that it became kind of stretched out. I questioned it the whole time it was all a WIP, but didn’t redo it. I ended up stitching up the head as is with a few extra stitches placed in the base of the back of the head so it wouldn’t be so floppy and odd-shaped – shown to the right. If I were to re-make the doll, I would omit 3-5 rows of the head and work the decreases sooner.
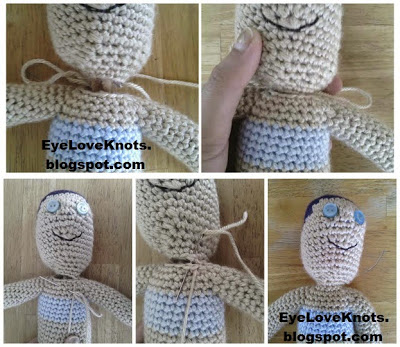
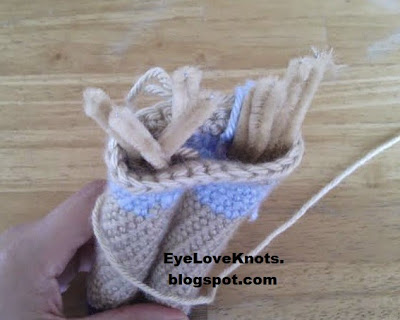
Also to help with the floppiness, I did use the pipe cleaners in the neck trick, however, instead of using four folded in half, I used two folded in four since I was looking at a smaller space, and had already stuffed the body and head.
The eye trick is pretty cool. I added my buttons at this time since it was most convenient for me, and then continued on and added the mouth when suggested to in the pattern.
While I was working on putting the eyes in, I was kicking myself for carrying my darker yarn all the way around as it was pulling out around the nose area. I tried to move the stitches over the yarn a little but still. This is particularly because I didn’t drop my yarn at the color change, but I definitely suggest doing so.
While I think the eye trick is cool, I did not nail it this time. I think I got more of a turtle look – hehe. If I were to remake the doll, I think I would just leave out the eye/nose trick and either stitch on the button eyes or use some embroidery floss to create some eyes.
I was lazy and just hot glued the eyes onto the doll, but since hot glue sticks to yarn so well – those buggers are going anywhere anytime soon. Keep in mind, if they do come off – they pose a choking hazard to small children.
Overall, the head is the only thing I really am not the happiest about on my doll. I wish I would have taken the time to redo the head, but the doll kind of took quite a bit of time and I wasn’t feeling like going back at the end.
Arms:
I weaved my ends in after the first 5 rounds. I don’t recommend waiting too long as the arms are skinny and harder to turn inside out than for example the head.
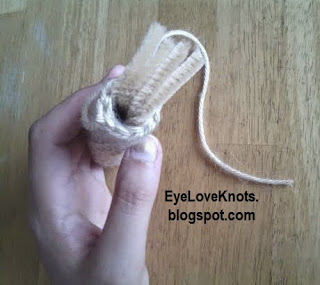
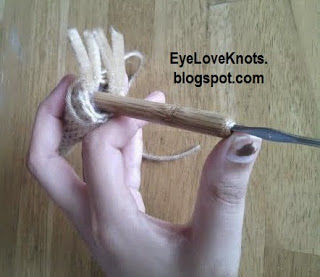
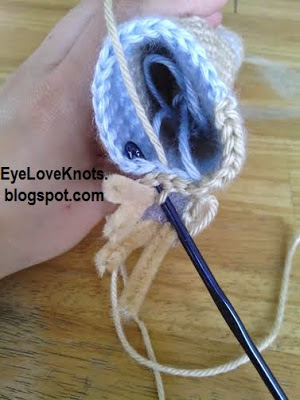
I love the idea of using the pipe cleaners in the limbs to add bend-ability and flexibility. I do recommend putting in the pipe cleaners first, and the stuffing around them, otherwise the stuffing will pose a problem. The pipe cleaners do not go through it easily. Find below photos showing how I worked this process, but first a note: I suggest curling the ends of your pipe cleaners so they do not poke out of the doll once she is finished. You can easily do this with jewelry pliers if you have those handy, but you can also do it with your fingers. I did not think about this until the doll was completed and I noticed the ends were poking out. Not child safe.
Legs: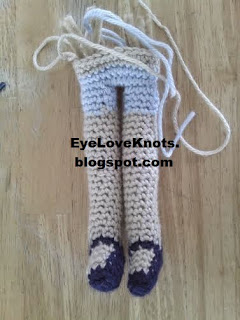 All tails in the foot and leg can be knotted together so no weaving is required. I dropped the previous color after working that first stitch over the two tails, and pick it back up at the continuation of the color, pulling taught. To keep the round shape, I used my middle finger to round out the foot. Otherwise, your piece may flatten from pulling the yarn tails around.
I began Round 10 with a chain 2, and then repeated Round 7, but for the remaining rounds, I worked a chain 1 and single crochet around, rather than repeating Round 7 because I didn’t like the bubbly-ness that was created by it, and I didn’t like the hole that was created by the double crochet join.
To even out the spiral (from working in the continuous manner), after completing the last round work a single crochet in the next stitch and a slip stitch in the next stitch joining in your new color at the last yarn over.
After Round 9, I worked a chain 1, not a chain 2 as written.
I stuffed the foot after Round 9, and then worked four more rounds and stuffed again so that when I added my pipe cleaners, they would not poke through the backside of the foot. I did not do any more stuffing until I completed my legs as I worked them the same way as I did the arms. I put in my pipe cleaners positioning them on the front side of the legs so the bend would be like having a knee.
I was able to work Round 1 of the Body over the tails from the legs, so no need to weave in the ends from the legs.
Body:
I began the body with a chain 1, rather than a chain 2 since the stitches around were single crochets.
Make sure to follow the first line. Don’t add the same number of chain spaces on both sides as you will feel like doing because you will end up with too much slack. I know, because I did that! And was confused why it didn’t look and feel right, until I reread the line of the pattern.
For the beginning of Round 1, I began it with a chain 1, instead of a chain 2 because I do not like slack and hole that is created by a chain larger than the stitches to follow. Because I dropped it down a stitch, I had to add an extra single crochet into the chain 2 space to get back on track with the pattern.
I sewed up the crotch after working one full round in the skin color so I could work over a few stitches of the undergarment color. After whipstitching the crouch closed, I took the needle into the piece and knotted it together with the tail from the undergarment.
I worked the body in a continuous manner, as I did many of the other pieces. A note for working in a continuous manner – you may need to adjust the stitches to even things out. I had to work a single crochet 6 in the beginning of Round 21 to center the arm on the side, and end with a single crochet 2. It’s quite alright to do so! In fact, you need to or your doll (or finished piece) will be uneven. All the time you put into crocheting the piece, make sure everything is even and centered.
My underwear came out kind of small – I recommend adding an additional round or two to raise the band.
Hair:
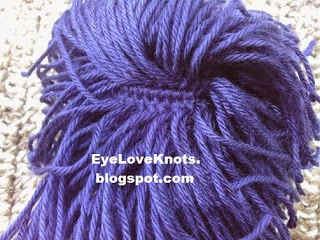
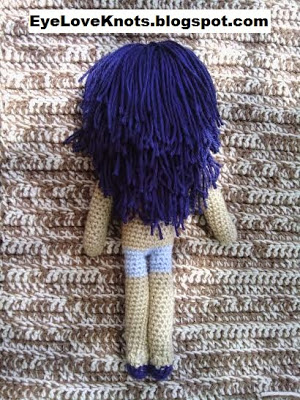
I cut a total of 204 strands of yarn 10.5″ in length. I added the hair with the doll laying flat and legs facing away from me around most of the piece, except the very front of the hair. I added it with the dolls legs facing me so the hair would flip out differently in the front.
I added a full line across the base of the head for two rows so it would be nice and full, and then I began skipping two lines in between the remaining placement – shown above. This gave the hair a nice layered look.
At the crown of the head, I skipped one line, rather than two.
OVERALL, it was a fun project to work up – different from what I have been working. If you are interested in purchasing a finished Dress Up Doll, feel free to send me a message with your custom request. I am undecided whether these will be added to the shop. I will definitely be buying some more outfits for the doll, and working up some more Pattern Reviews.
Are you interested in having someone test out your patterns? Or share Pattern Reviews on your patterns? Please contact me! I LOVE sharing the talents of other designers 🙂 And trying new projects and patterns.
Wow… What a great review and such detail, I sure hope that Family Bugs appreciate all the time you took for this review! I love the layered hair as well, and the pantie line could use a few more rows, just like you said.. Great little dress up dolly in the end. Kim
Sarah of Family Bugs is great! Very nice, appreciative and a pleasure to work with 🙂
This is an amazing review, and your doll turned out so cute! I have actually started using crochet thread with a size 2 hook to work up some REALLY adorable keepsake dolls with this pattern (minus the eye and nose trick…I usually just keep going in a round). I’m so glad you enjoyed the process ?