EyeLoveKnots

  • Home
  • Crochet
    • Free Crochet Patterns
    • Crochet Pattern Reviews
    • Crochet 101
  • Knitting
  • Crafting
    • Plastic Canvas DIYs
    • Jewelry DIYs
    • Sewing
    • Cross Stitching
    • Upcycling
    • Other DIYs
  • Seasonal DIYs
    • 4th of July DIYs
    • Back to School DIYs
    • Christmas DIYs
    • Easter DIYs
    • Fall DIYs
    • Halloween DIYs
    • Spring DIYs
    • St. Patrick’s Day DIYs
    • Summer DIYs
    • Thanksgiving DIYs
  • Holidays/Seasonal
    • Valentine’s Day
    • St. Patrick’s Day
    • Spring
    • Easter
    • Summer
    • 4th of July
    • Fall
    • Halloween
    • Thanksgiving
    • Christmas
    • Winter
  • Home DIY & Decor
    • In the Bathroom
    • In the Bedroom
    • In the Dining Room
    • In the Kitchen
    • In the Living Room
    • Kids Room
  • Fashion
    • Nail Art
  • Recipes
  • Living the Dream
  • Fun Finds Around the Web
  • Linking Up To…
  • Latest News & Links
  • Privacy and Sharing Policies
  • About Our GREAT Team!
  • Latest News & Links

Drops of Sunshine Dangle Earrings – Easy DIY

May 28, 2015

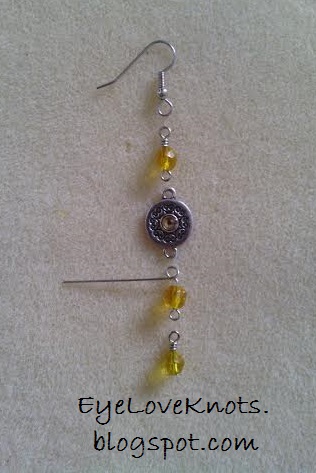
I have been sitting on this post for awhile. This is the third Thursday – Yikes! But I have been unable to decide on a name, finally I think these shall be the “Drops of Sunshine” Dangle Earrings. Thanks to my boyfriend, Chad, for the name. He’s so supportive of my craft!

Materials I Used:
     – 2 10mm Gold Accented Charms of the Jewelry Basics Teardrop Accent Set Brown by Cousin (JoAnn‘s)
     – 6 (3 each) 6mm Round Gold Beads by Darice
     – 4 (2 each) 2″ Silver Plated Eyepins by Darice
     – 2 (1 each) 2″ Silver Plated Headpins by Darice
     – 2 (1 each) 20mm Surgical Steel Earring Wires (AliCsSupplyShop on Etsy)
     – 2 Round Nose Pliers 
     – Wire Cutters (also called Side Cutters)

Material Notes:
     All supplies except the Earring Wires purchased at my local JoAnn’s.     
I went back to JoAnn’s to purchase some more of the gold accented charms but they were gone – neither of the JoAnn’s in my area carry them in store anymore. I’ve linked to the Cousin site link above.
     The eyepins and headpins are not hypoallergenic, but since these pieces don’t come in contact with the skin, it will be fine for anyone with sensitive skin. The surgical steel earrings wires are perfect for anyone with sensitive skin as they are hypoallergenic! If you don’t have any allergies, feel free to also use silver plated earring wires too.
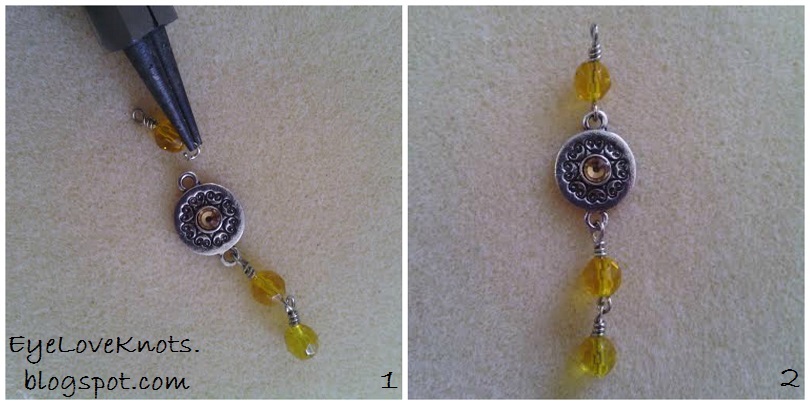
     I regularly like to use two pliers in my projects – one in each hand. Normally, I will note that one pair will suffice but for this particular pair, a second pair is needed to work the final step of this pair. This could vary depending on the materials you are using, and whether or not you follow all of my steps.

Time Spent:
     I had this pair of earrings done in about 15 minutes. It took me longer to brainstorm the layout than to assemble the earrings.

Measurements:
     These earrings measure 2.25″ in length. If you use the Basic Loop rather than the Wrapped Loop, your earrings will come out a smidgen shorter.

Tutorial Notes:
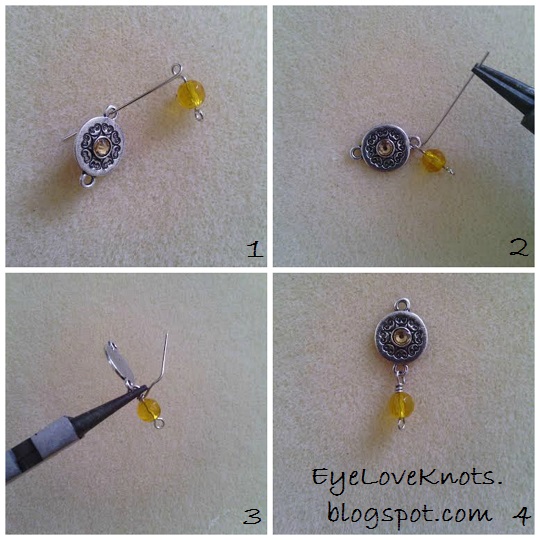
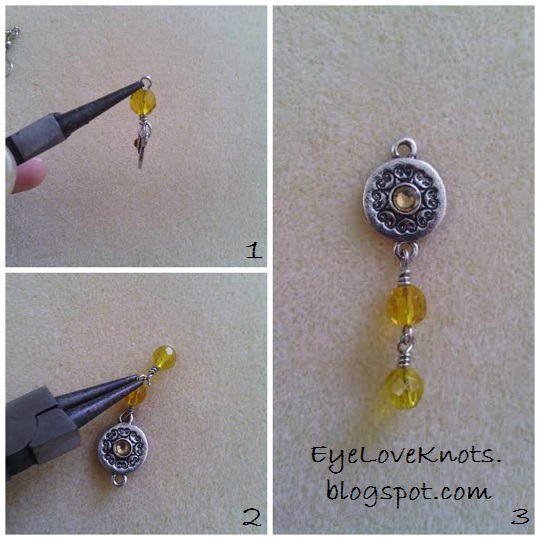
     I made wrapped loops for my pendants – I have a photo tutorial here, Forming a Wrapped Loop.
You could always just use a Basic Loop, but I like the stability and clean finish of the wrapped loop.
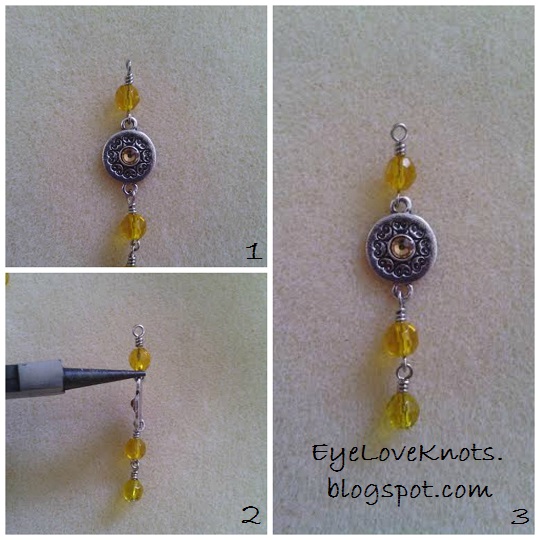
Tutorial:

First things first, settle on the layout. I went through three different layouts before I decided on this one. Originally, I was going to make just one pair of earrings using both components from the Teardrop Accent Set and one wrapped loop charm but then I decided against it.
 
If you are following along with me, I first created one wrapped loop charm on an eyepin, one half wrapped loop charm on an eyepin, and one wrapped loop charm on a headpin – shown above.
1 – Begin working the wrapped loop, but before you start
wrapping, make sure to string on your charm.
 
2 – Make sure when you string on your charm that the 
wrapping on the eyepin is going to be facing the direction that you want.
You want the wrapping of each to look consistent.
 
3 – I held my pliers at the join of the two pieces to stablize it, 
and used my other pair of pliers to work the wrapping.
 
4 – First dangle completed. The earrings would look nice with just a simple dangle. If you like it like this, just work the wrapped loop on a headpin instead of a eyepin and attach the earring wire to the top of the charm.
1 – Open the bottom loop of the charm you just attached.
Remember to open away from you, and not side to side.
 
2 – Attach the headpin, and close the loop.
 
3 – Again, you can stop here. Or you can continue.
1 – Open the bottom loop of the remaining wrapped loop, 
and attach to the top loop of the charm. Close loop.
 
2 – One thing left to do before attaching the earring wire.
Notice the top loop is not facing the direction we need it to.
If you were to attach your earring wire now, they your earring would be hanging sideways. 
1 – Same photo as the last.
 
2 – Here you’ll need both pairs of pliers.
Turn the pendant 90 degrees to the left, and with one pair of pliers
grab hold of the wrapped loop (shown). 
With the other pair of pliers, grab hold of the top wrapped loop (not shown).
 
3 – Turn hands inward enough so the top loop has the hole facing you while laying correctly. And now you are ready to attach your earring wire! 
Open the loop of the earring wire, attach to your piece and close.
Make sure when you attach your earring wire that your piece is facing the correct way. It’s very easy to attach it backwards. Hehe.
Now you have a beautiful pair of earrings that glisten like the sunshine!
 
This is one of my favorite ways to make earrings. I have several pairs made similarly. I would love to see your version! Please share on the EyeLoveKnots Facebook page.
 
If you enjoyed this tutorial, please make sure to subscribe directly or follow me on Bloglovin! New jewelry tutorials coming your way [nearly] every Thursday, and more craft projects through the week!

Filed Under: Jewelry DIYs, Uncategorized Tagged With: 15 Minutes or Less, 6mm Beads, AliCsSupplyShop, Dangle, Darice, Hypoallergenic Earrings, Jewelry Basics by Cousin, Jewelry DIY, Joann, Silver Plated, Surgical Steel, Yellow

❮ PREVIOUS POST

Yarn Fanatic Party #38 – String Theory Hand Dyed Yarn Sponsored Giveaway

NEXT POST ❯

Yarn Fanatic Party #39 – Chalk Full of Yarny Inspiration!

Leave a Reply Cancel reply

Your email address will not be published. Required fields are marked *

This site uses Akismet to reduce spam. Learn how your comment data is processed.

Welcome!

Welcome!

Hey! I'm Alexandra, the blogger and creator behind EyeLoveKnots and On Rockwood Lane! My passion is being creative. My favorite thing to do is crochet, and you will almost always find me having a cup of coffee and working on a new crochet project, but when I'm not doing that, you might find me out at a local park rollerblading, baking some fresh cookies, picking veggies in the garden or re-decorating for a new season or holiday. My two cats are great supervisors for all my adventures (minus the being outside because they think it's too hot in Florida to be anywhere but inside), and make sure I take plenty of breaks.

Meet the Team!

Meet the Team!

On the left, Abby is the maker behind A Stitch Shy of Normal, and on the right Jessica is the maker behind Nice and Knotty and Candace is the maker behind TandC Crafters.

Together, they help me bring awesome crochet projects to you! Click the image to learn more about them, and get their Instagram links, where they are constantly sharing tons of crochet inspiration.

Don’t Miss Out

Crochet! Magazine Spring 2023

Crochet! Magazine Spring 2023

(Affiliate Link) Click this image to get this issue now. These 22 designs are the perfect way to welcome in Spring with easy to wear layers, sweet styles amplified with striking stitch patterns, and some fun whimsical projects too.

Crochet World April 2023

Crochet World April 2023

(Affiliate Link) Click this image to get this issue now. These 21 designs are the perfect way to welcome in Spring with fun pops of color, sweet crochet thread projects, and fresh takes on the classic granny stitch pattern.

Gnome Caddy Pattern

Gnome Caddy Pattern

(Affiliate Link) Click this image to get a copy of this pattern! This adorable little Spring Gnome Caddy has a place for all of your crochet supplies. It's worked in a lightweight #3 yarn, but work in a worsted weight #4 yarn for even more space!

Archives

Copyright © 2023 EyeLoveKnots · Custom site by Moonsteam Design