I have been inspired by so many projects linked up at our Yarn Fanatic Party – a linky party we host here and on The Philosopher’s Wife beginning on Monday afternoons and running through the week.
Keep in mind, this will vary depending on your yarn, hook and phone size. You will notice in Audrey’s post that she either has a larger phone than I, or used a lighter weight yarn than I since she has more rows on her phone case.
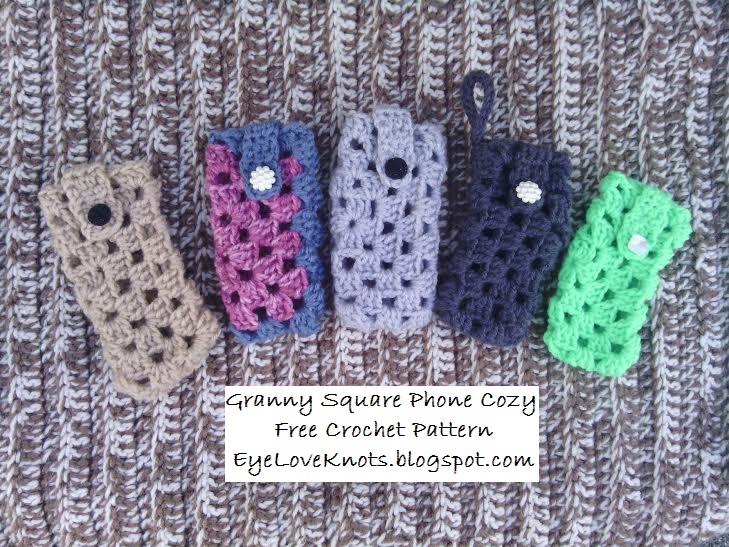
Experiment with yarn weights and colors! There are lots of great color combinations out there.
This post has A LOT of info – but I hope it is all helpful to you! I would love your feedback, please comment below!
– G6/4.25mm Crochet Hook if using Super Saver (5.75)
– I9/5.5mm Crochet Hook is using I Love This Yarn
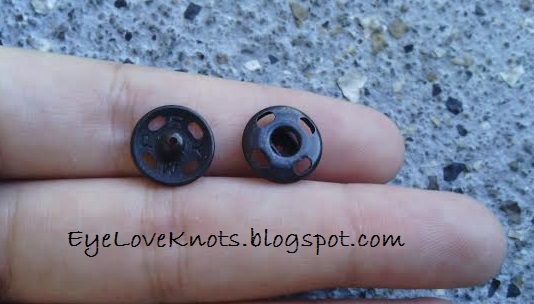
– Size 3 Sew-On Snap – I used one of the 4 Sew-On Snaps by Dritz in Black and Nickel-Plated (JoAnn’s) on each cozy
– Opt. Decorative Button – I used a 3/4″ White Pearl Cluster Shank Button, 5/8″ White Square Shank Button, and 5/8″ Beaded Black Shank Button
– Opt. Matching Thread
– Opt. Hot Glue
Material Notes:
I used several yarn types to see if I could achieve the same results. Of the above yarns chosen, my favorite for this project is the Vanna’s Choice Yarn. I love how defined the stitches are, and the durability of Vanna’s Choice. I also am a big fan of I Love This Yarn for many projects including this phone cozy. As for the Super Saver Yarn… it works well, but is a little rough in nature. I also could not get the same 6″ measurement so I have two separate measurements listed below for you.
I chose to use 2-3 strands of the worsted weight yarn in place of the sewing thread, hence the “optional” part.
The hot glue would be if you would rather hot glue the decorative button onto the flap, rather than sew. I also chose to sew it on.
I had my granny square cozy ready to use in about 45 minutes.
Measurements:
The granny square measures 6″ across, and my phone [an Android, Model Z995] 5.75″ around by about 5″ in length. But it also fits my boyfriend’s phone [a Galaxy S5] 6.5″ around by 5.5″ in length. Also fits iPhone 5S according to specs found on the Apple website.
Using the Super Saver Yarn, with the G6/4.25mm hook the square measures 5.75″ across and fits my phone well; while with the H8/5mm hook the squares measures 6.25″ across and fits my boyfriend’s phone better.
Gauge:
With Vanna’s Choice and an H8/5mm Hook = 4″ x 4″
Chain 16, DC in the 4th stitch, and in each stitch across. (14 DC)
R2 – R8: Chain 2, turn. DC in the 2nd stitch, and each stitch across.
Fasten Off.
With I Love This Yarn and an I9/5.5mm Hook = 4″ x 4″
Chain 16, DC in the 4th stitch, and in each stitch across. (14 DC)
R2 – R8: Chain 2, turn. DC in the 2nd stitch, and each stitch across.
Fasten Off.
With Super Saver and a G6/4.25mm Hook = 4″ x 3″
Chain 18, DC in 4th stitch and across (16 DC)
R2 – R6: Chain 2, turn. DC in the 2nd stitch, and each stitch across.
Fasten Off.
With Super Saver and an H8/5mm Hook = 3″ x 3.75″
Chain 12, DC in 4th and across (10 DC)
R2 – R7: Chain 2, turn. DC in the 2nd stitch, and each stitch across.
Fasten Off.
Abbreviations:
DC – Double Crochet
Pattern Notes:
You may need to allow for more or less stretch depending on your yarn type. I didn’t have any issues with stretching with any of my three choices.
Join to the first double crochet, not to the beginning chain space.
Slip stitch over to the chain space at the end of each round, unless changing colors. If changing colors, fasten off at join to the first double crochet, and join new color in the next chain space.
The pattern of a granny square can also vary a little depending on your yarn choice and hook size. Using Vanna’s Choice with the H8/5mm crochet hook, I found it necessary to work a chain one in between each cluster, however, if I were using Red Heart’s With Love, I would leave out the chain one. You will need to experiment a little if using a different yarn type and hook.
How can you tell if you need the chain 1, chain 2, or none? You will notice one of three things:
1.) Square will take on a butterfly-like look with the corners pointing out and the insides caving – you will need to add in a chain space;
2.) Square will take on a rounded look with the insides bulging – eliminate chain space.
3.) Square will be nice and crisp – Perfect!
I will have a How to Crochet a Granny Square photo tutorial up next week! And this will be updated with link 🙂
Button: At first, my plan with the flap was to sew on a button to the top of the flap between Row 6 and 7, and then use the holes of the of the granny square as the buttonhole. After I finished working the flap though, I realized that I would either have to sew the button onto the back of the flap, which could possibly scratch my phone, or tuck the flap inside the cozy – both of which I didn’t want to do. I then thought about the snap button. I like to sew on buttons with 2-3 strands of the worsted weight yarn which would blend in just fine with the cozy, but I decided to add a decorative button on top of my flap to hide the slightly visible stitches and add a little pop to the cozy.
Pattern:
Cozy:
Chain 5. Join to form a ring. Chain 2, work 2 DC into the ring, chain 3, (3 DC into the ring, Chain 3) 3x. Join, slip stitch over.
R2: Chain 2, work 2 DC into the same chain space, chain 3, 3 DC into the same chain space, chain 1, (3 DC into the next chain space, chain 3, 3 DC into the same chain space, chain 1) 3x. Join, slip stitch over.
R3: Chain 2, work 2 DC into the same chain space, chain 3, 3 DC into the same chain space, chain 1, 3 DC into the next chain space, chain 1, (3 DC into the next chain space, chain 3, 3 DC into the same chain space, chain 1, 3 DC into the next chain space, chain 1) 3x. Join, slip stitch over.
R4: Chain 2, work 2 DC into the same chain space, chain 3, 3 DC into the same chain space, chain 1, 3 DC into the next chain space, chain 1, 3 DC into the next chain space, chain 1, (3 DC into the next chain space, chain 3, 3 DC into the same chain space, chain 1, 3 DC into the next chain space, chain 1, 3 DC into the next chain space, chain 1) 3x. Join, slip stitch over.
R5: Chain 2, work 2 DC into the same chain space, chain 3, 3 DC into the same chain space, chain 1, 3 DC into the next chain space, chain 1, 3 DC into the next chain space, chain 1, 3 DC into the next chain space, chain 1, (3 DC into the next chain space, chain 3, 3 DC into the same chain space, chain 1, 3 DC into the next chain space, chain 1, 3 DC into the next chain space, chain 1, 3 DC into the next chain space, chain 1) 3x. Join, slip stitch over.
Pull up on loop so it doesn’t come out. Do not fasten off yet.
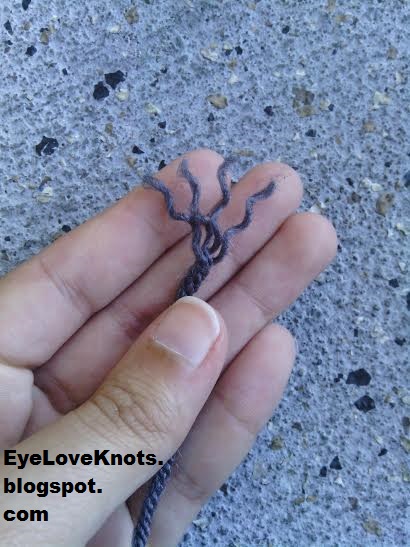
Weave in center of granny square.

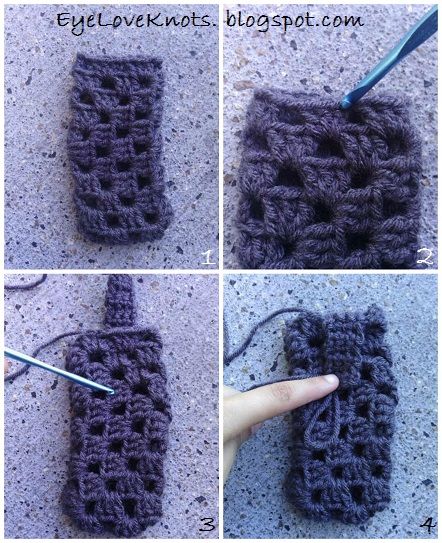
2 – 3: Fold granny square in half with right sides facing each other. Reinsert hook into the loop, and chain 1. Your hook right now should be on the wrong side of the square, and you may be thinking, “Am I holding this right?” The answer is yes! With the chain 1 that you have just worked, you have the give necessary to continue working. Just reach over to the top layer and continue on.
Slip stitch into the the chain just before the 1st DC of the cluster, and slip stitch into the next 31 stitches – DO NOT skip chain spaces.
4: Make sure to work under both loops of the stitch, and through both layers of the granny square.
6: When you come to the chain space, work the slip stitch into the stitch (shown by the white line) and not into the space (shown by the hook). This is going to add to the sturdyness of the cozy.
7: Two of your three sides should now be closed up.
8: Fasten off your yarn. Thread needle with tail and sew into the last stitch so there isn’t a hole. Weave in remaining tail piece.
9: Turn your cozy right side out. This image shows the side seam. It’s nice and clean.
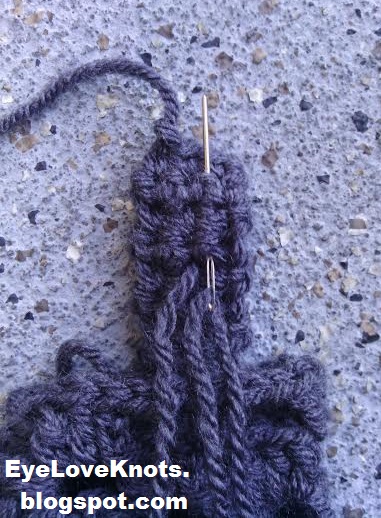
Flap:
1: Turn case to back side (doesn’t matter which side you choose as both sides are of the right side, just with clusters facing different directions).
2: Find the center and attach yarn. Chain 1, single crochet in the same stitch, and in the next two stitches. (3 SC).
R2 – R8: Chain 1, turn. SC into the 1st stitch, and the next 2 stitches.
3 – 4: Check to make sure the flap matches where you want your button to be. If you are following my pattern, it should be perfect for attaching to the second cluster vertically from the top center.
Fasten Off with a long enough tail for sewing on a decorative button, but don’t add just yet.
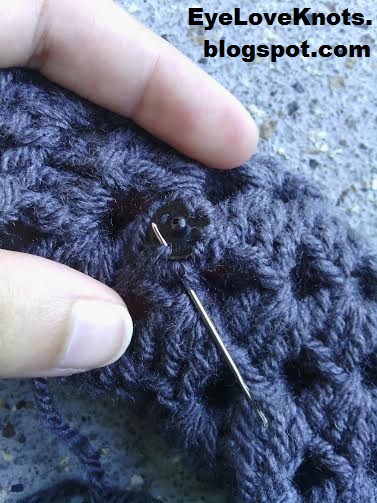
Sew on Snap Button:
Using 2-3 strands of the worsted weight yarn, or a matching thread (doubled up), sew on a Snap Button. I did so to the second cluster vertically from the top center, and in between Row 7 and 8 of the Flap.

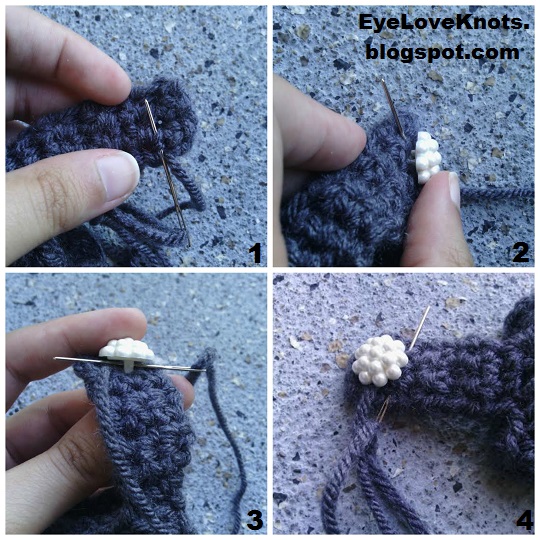
Now you can leave the cozy as such, or you can sew on a decorative button.
Using the long tail, sew on the decorative button. You don’t need to sew it on as tightly as usual as it is just for decoration purposes, and not to be used. Hence the okay for using the full worsted weight yarn tail, and not less strands for more passes.
Another option would be to hot glue on the button, but do so with care so as not to get any glue in the way of the snap button.

*I ran into a slight concern with my button as it had a shank and the shank did not fit down in between the stitches as I envisioned due to the snap button being on the other side. This did not really pose an issue though, I sewed right through the surface and the shank and made a kind of cushion around it to provide security. I felt this was best shown in photos.
Strap:

Join yarn to the stitches right above the first stitch of the slip stitch seam you created after completing the granny square. Make sure to join yarn through both layers for added security.
DO NOT join yarn to the opposite side of the granny square as it does not have the support to hold the strap. Your square will stretch out and get droopy along the side.
Chain 20, slip stitch into same stitch.
*I wanted just a small strap that I could attach my keys to if I wanted to and that I could hold in my fingers, but you may want to chain a strap large enough for your wrist to fit through.
Chain 1, turn. Slip stitch in each stitch across. Slip stitch join.
Fasten Off and Weave in Ends.
Please feel free to make and sell your own Granny Square Phone Cozies using this pattern, but please DO NOT claim this pattern as your own nor should you sell my pattern, and DO NOT re-publish my photos as your own. DO NOT copy and paste my pattern anywhere, link to it instead.
*If you would like a PDF version of this post, you may get one through my Etsy shop for a small fee. This fee is to compensate for the view/s lost once you no longer need to return to the blog for the information, as you will have your own copy. Plus! It helps fund supplies for new projects to share with you!
Shop EyeLoveKnots – Granny Square Phone Cozy.

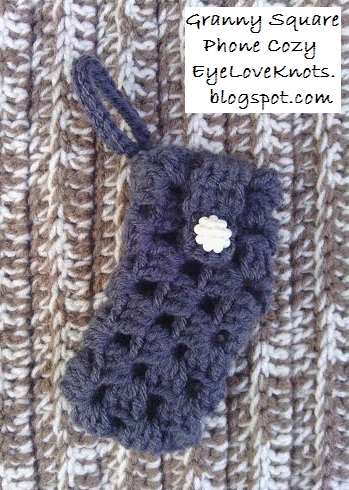
Now you can enjoy your new Granny Square Phone Cozy! Thanks for the inspiration Audrey!
I hope I didn’t confuse anyone with the addition of my photos. I just thought it would be helpful for anyone not as advanced to see what I was talking about.
With so many size, yarn type and color options, I would love to see them! Please share your photos on my EyeLoveKnots Facebook page!
**I am now on Ravelry! Check out the EyeLoveKnots Ravelry page to keep track of all your EyeLoveKnots favorites in your que, and share your WIPS and finished projects!
Don’t miss out on new crochet patterns, reviews, jewelry tutorials and more! Subscribe to EyeLoveKnots by using the box on the right side toolbar, or follow me via Bloglovin!
Dear Alexandra, your phone cozies look beautiful and so easy to make, I will make one as soon as my old one gives up its shape. Have a nice week, Viola
Can't wait to see how you customize yours 🙂