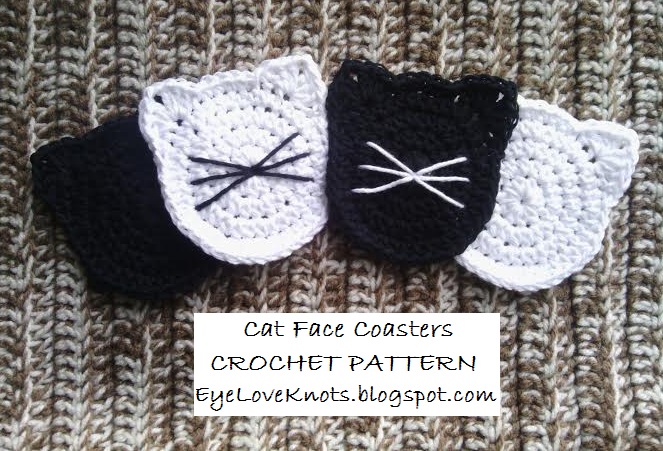
Are you a cat lover, or a dog lover? Well, by the title of this post (and the lot of photos I have shared of my Shiloh), I am sure you can guess what I am! I have decided in honor of that, I would work up some Cat Face Coasters.
Materials:
– About 60 yards of Worsted Weight Cotton Yarn – I used Lily Sugar n Cream in Black & White
– I9/5.5mm Crochet Hook
– #18 Tapestry Needle for Weaving in Ends
– Opt. Flat Nose Pliers (found in the Jewelry section of your craft store)
Material Notes:
Yarn Alternatives: Bernat’s Handicrafter Yarn, Hobby Lobby’s Crafter’s Secret Cotton Yarn. Lion Brand Kitchen Cotton will work up a tad bit bigger.
I do not recommend using Hobby Lobby’s I Love This Cotton. It’s too soft, and isn’t as durable.
My local JoAnn’s stores carry larger skeins of Lily Sugar n Cream Yarn. With one 4 oz skein, you will be able to make 8-10 of these coasters.
Cotton yarn is a little tougher when it comes to weaving in your ends. You will want a tapestry needle with a larger eye, and duller point otherwise, it will take you longer to weave in your ends and hurt your fingers from tugging at the needle and yarn.
Flat nose pliers are great for use with chunky and super bulky weight yarns as well as cotton. Insert the needle as you normally would for weaving but instead of struggling to get it out the other side, use the pliers to pull it out. Works like a charm!
Care Instructions:
Lily Sugar n Cream yarn is machine washable and dryable. Throw them in with the rest of your clothing, but you may want to put them in a lingerie bag to keep track of them, and then lay flat to dry. I do suggest if adding the whiskers, hand wash the coasters – You do not want the loose yarn to get caught on anything in the washing machine.
Time Spent:
I worked up the set of four in just about an hour.
Measurements:
These scrubbies measure 4″ across (not including ears).
Gauge:
Using an I9/5.5mm Hook and Lily Sugar n Cream – 4″ x 3.75″
Chain 17, DC in the 4th chain, and each chain across. (15 DC)
R2 – 7: Chain 1, turn. DC in the 1st stitch, and in each stitch.
Fasten Off.
Abbreviations:
SC – Single Crochet
HDC – Half Double Crochet
DC – Double Crochet
Pattern Notes:
Work with a loose tension, otherwise, the ends of the scrubbie will curl up.
Having the beginning increase split on either side of the beginning chain helps keep the seam straight, and also adds to the ease of keeping a looser tension.
I have a How to Crochet a Flat Circle and Keep a Straight Seam photo tutorial available should you need assistance or to see the beginning and ending of each row.
Joining is to be done into the first half double crochet, not the beginning chain.
Pattern:
Chain 5. Join to form a ring. Chain 1, 10 HDC in ring. Join to the first HDC. Pull center tail tight to close center hole.
R2: Chain 1. HDC into the first HDC, 2 HDC in each of the next 9 HDC, HDC into the next HDC. Join. (20 HDC)
R3: Chain 1. HDC into the first 2 HDC, (2 HDC into the next HDC, HDC into the next HDC) 9x, HDC into the next HDC. Join. (30 HDC)
R4: Chain 1. HDC into the first 3 HDC, (2 HDC into the next HDC, HDC into the next 2 HDC’s) 9x, HDC into the next HDC. Join. (40 HDC)
EARS:
Chain 1, single crochet in the next stitch, skip next stitch, 3 DC into the next stitch, chain 2, 3 DC into the same stitch, skip next stitch, slip stitch into the next stitch, SC in the next 4 stitches, slip stitch in the next stitch, skip the next stitch, 3 DC into the next stitch, chain 2, 3 DC into the same stitch, skip next stitch, single crochet into the next stitch, skip next stitch, slip stitch into the next stitch – instead of slip stitching here, I made an invisible join in this stitch. You can see a photo tutorial of this technique in my Newborn Twin Chunky Beanie post.
If not using the invisible join, Fasten Off and Weave in Ends.
WHISKERS:
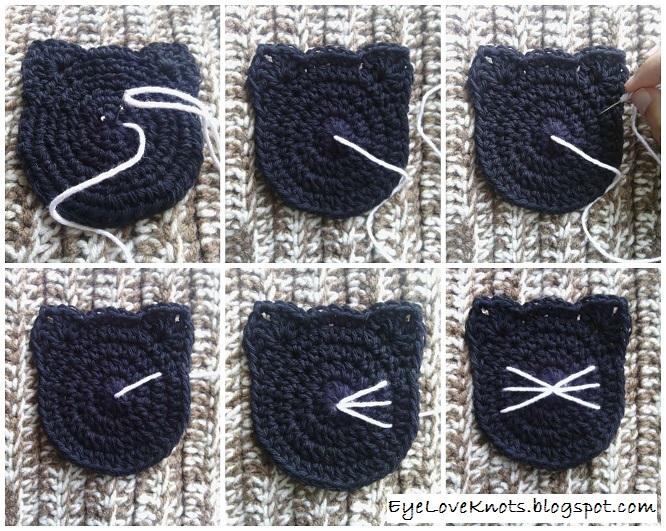
I cut a 30″ piece of yarn, threaded it into my tapestry needle and then weaved the beginning tail in and out about three times into the backside of the beginning ring. From there, I inserted it through the center ring. From the front side, I went diagonally upward and inserted the needle into a space between stitches in the 3rd round – to make the right side top whisker. From the backside, I brought the needle up through the center ring again. I continued in this motion, working three whiskers on each side.
Please feel free to make and sell your own Cat Face Coasters using this pattern, but please DO NOT claim this pattern as your own nor should you sell my pattern, and DO NOT re-publish my photos as your own. DO NOT copy and paste my pattern anywhere, link to it instead.
*If you would like a PDF version of this post, you may get one through my Etsy shop for a small fee. This fee is to compensate for the view/s lost once you no longer need to return to the blog for the information, as you will have your own copy. Plus! It helps fund supplies for new projects to share with you!
Shop EyeLoveKnots – Cat Face Coasters.
With so many size, yarn type and color options, I would love to see them! Please share your photos on my EyeLoveKnots Facebook page!
I am on Ravelry! Check out the EyeLoveKnots Ravelry page to keep track of all your EyeLoveKnots favorites in your que, and share your WIPS and finished projects!
Don’t miss out on new crochet patterns, reviews, jewelry tutorials and more! Subscribe to EyeLoveKnots by using the box on the right side toolbar, or follow me via Bloglovin!
I love cats and your cat face coaster are adorable. Thanks for sharing this pattern.
Have a nice day, Margaret
Thank you for taking the time to comment 🙂
I'm also a cat lover! Lovely coasters! We have 3 black cats and one white cat, so these coasters would really fit in here 🙂
Thank you for the inspiration!
Sigrid
Thank you Sigrid! I would love to see your finished ones if you attempt these 🙂 And a photo of your cats to go with it!
So delighted to have seen this post! I love the Cat Coasters and I, too, am a Cat and Crochet lover. I dabble some at other crafts but really love crochet. I love to put on an audiobook and get out the hook! And my kitties join in with crocheting quite often. They are most helpful yarn chasers whenever a ball of yarn goes rolling across the floor. Thanks again.
I can definitely relate! Except my Shiloh doesn't really chase the yarn, he eats it. I've done a good job keeping it away from him over the years that now he really doesn't care for it. Glad you stopped by!
Hi, love your pattern and can't wait to give it a go. Just a quick question, would you mind if I made some to sell with all proceeds going to Cat's Protection. I am trying to raise funds for them by running the Royal Parks half marathon and thought having some cute things to sell might help me get to my target.
Perfectly fine with me! Would love your feedback once you've given the pattern a try, and to see your finished coasters 🙂 Good luck with the sales!
From Purfylle – so sorry this accidently got deleted!!!!!!: These are just too cute for words. I've shared it in a post and I've used one of your images which I've set to link back here. Please let me know if that's alright or if you would prefer I didn't include it in my post. The lady I made my coasters for was thrilled with them. Thank you so much for making it freely available to us all. http://www.purfylle.com/2016/04/crochet-cat-coasters.html
I'm glad you were able to rescue it because there's no way I would have remembered what I wrote to repost it :o)
My daughter is the ultimate cat Mother so she would really like these coasters for her new apartment.
So fun! I have received quite a few cat lover related items myself, and I just love it! I am sure she will too.
I wish you had a knitting pattern for this cat.
Hi Cindy! I wish my knitting skills were better. I am working on them though because come 2019, I would like to be able to share knitting patterns on the blog (and submit to magazines). I will keep this pattern in mind.
Did you ever do a knitted version of cat coasters
My knitting skills are pretty limited. At this time, just crochet patterns. I do plan to work on my knitting this year though.
What a cute easy pattern – I love animals so I will be making these. Thank you for sharing this pattern.
I feel a little dense but for some reason my cat’s rows don’t add up. Where does the last HDC of each row go, and then where do I join?
These are adorable, by the way.
Glad you like them! They are a favorite of mine. Please see the pattern notes section for tutorial on how to crochet a circle.
I just love this pattern. It’s so cute and easy.
Thank you for the cat faces I’m not going to make coasters yet I’m putting it onto granny squares for baby afghan. My niece is expecting twins.
That’s such a cute idea! I’d love to see how it turns out.
Thank you
OMG this has been the most fun, free pattern.
Bless you!
From a happy beginner hooker~
I am so happy to hear that!