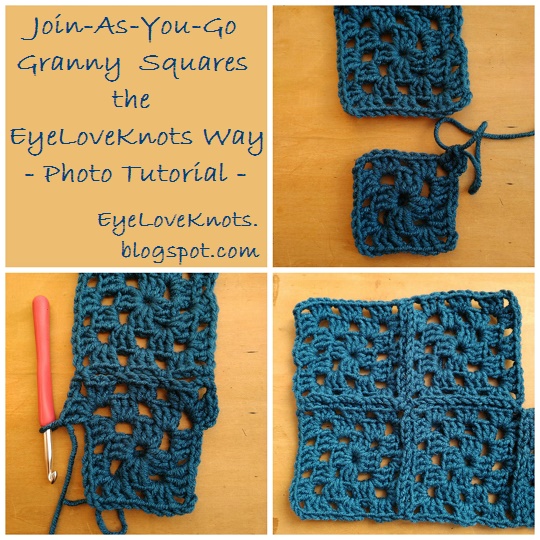
I am currently working on a project that uses this technique – a great technique I have used in the past that pretty much forces you to weave in your ends as you go, and avoids having a bunch of granny squares sitting around that you will have to sew together later.
For this tutorial, I am using Big Twist Yarns Premium from my local JoAnn’s in the Premium Ocean colorway, and a J10/6mm crochet hook, but any yarn with respective hook will do! I am also using the abbreviations SC for single crochet, and DC for double crochet.
Before we start, in what techniques can you use this technique? There is no limit! I have used this technique to join squares together to make blankets, a headband, a sweater, my Granny’s Stashbusting Tissue Box Cover, my more recent Granny’s Patriotic Wreath…
If you would like a PDF version of this post, you may get one through either my EyeLoveKnots Etsy Shop or EyeLoveKnots Craftsy Shop for a small fee. This fee is to compensate for the views lost when you no longer need to return to the blog to for the information, as you will have your own copy. Plus! It helps fund supplies for new projects to share with you!
Shop EyeLoveKnots Etsy: Join-As-You-Go Granny Squares.
Shop EyeLoveKnots Craftsy: Join-As-You-Go Granny Squares.
Let’s get started!
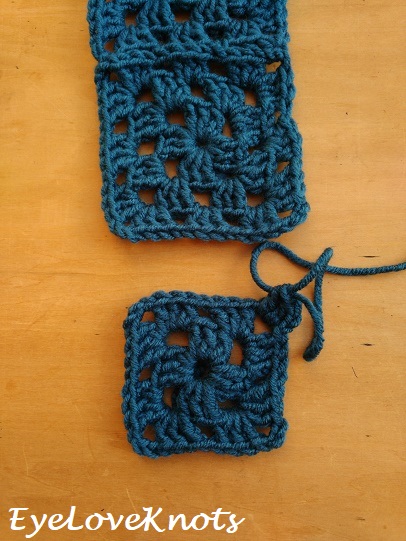
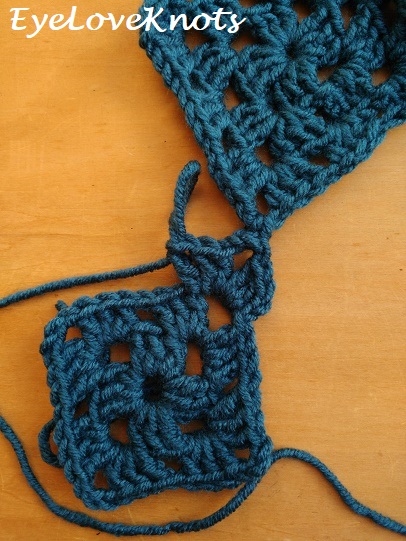
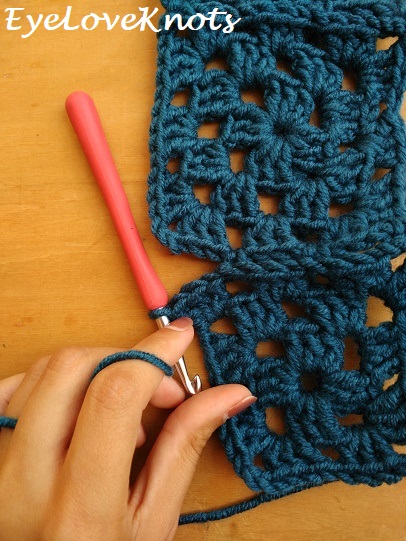
Square with 1 Side to Join:
Chain 2. 2 DC into the 1st chain space.
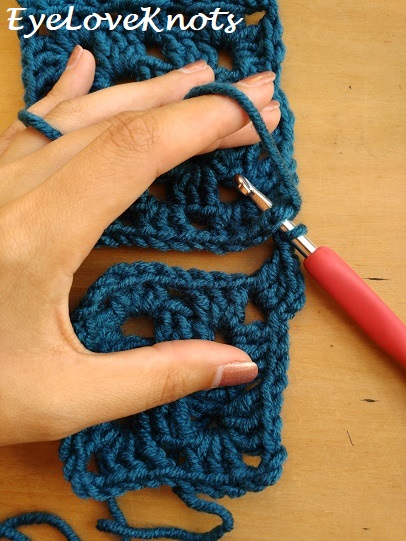
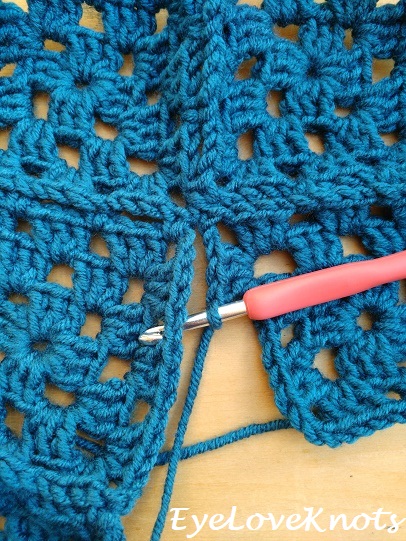
Chain 1. Insert hook from behind into the chain space of the previous square…
SC over the chain space of the previous square, chain 1…
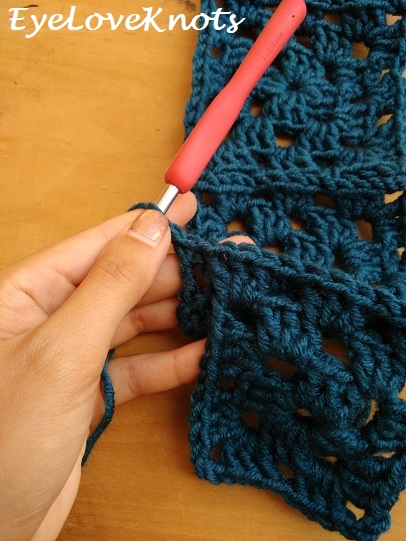
As usual, 3 DC into into the chain space of the current square.
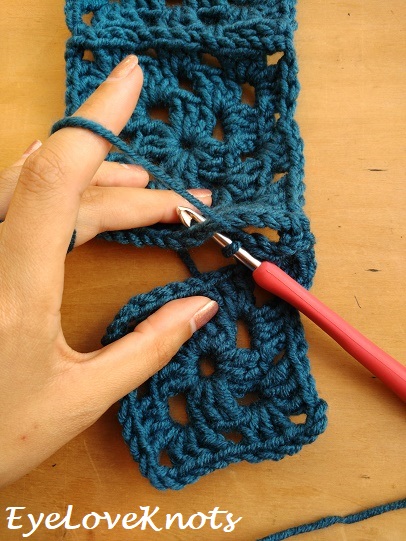
Chain 1. Insert hook from behind into the chain space of the previous square…
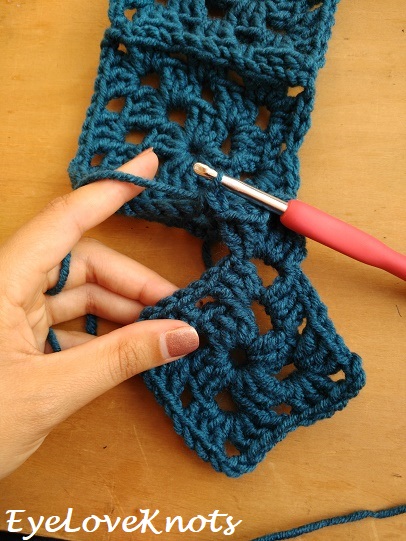
SC over the chain space of the previous square, chain 1, 3 DC into the next chain space of the current square, chain 1…
Insert hook from behind into the chain space of the previous square…
SC over the chain space of the previous square, chain 1, 3 DC into the next chain space of the current square…
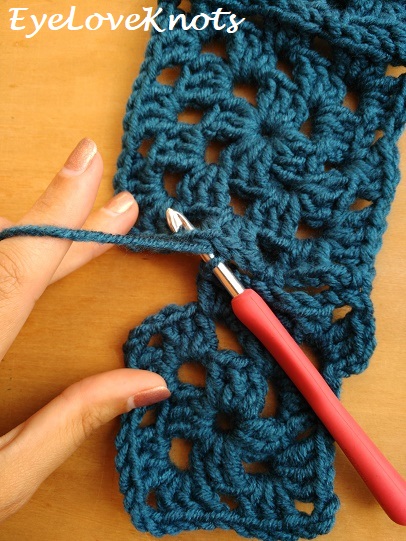
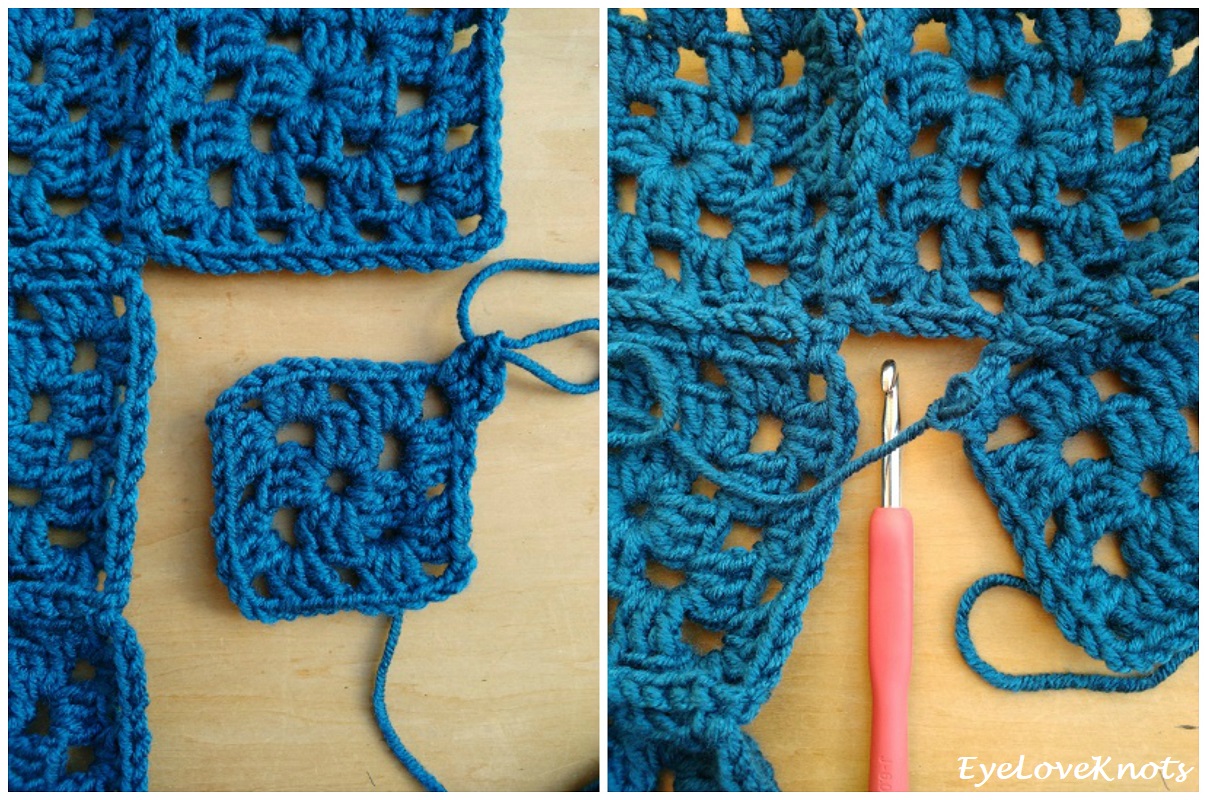
**If you have a larger square than mine, you will continue the process of single crocheting into the previous square, and then working a cluster into the current square.
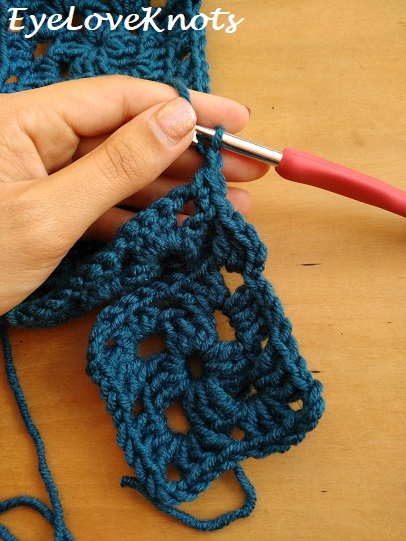
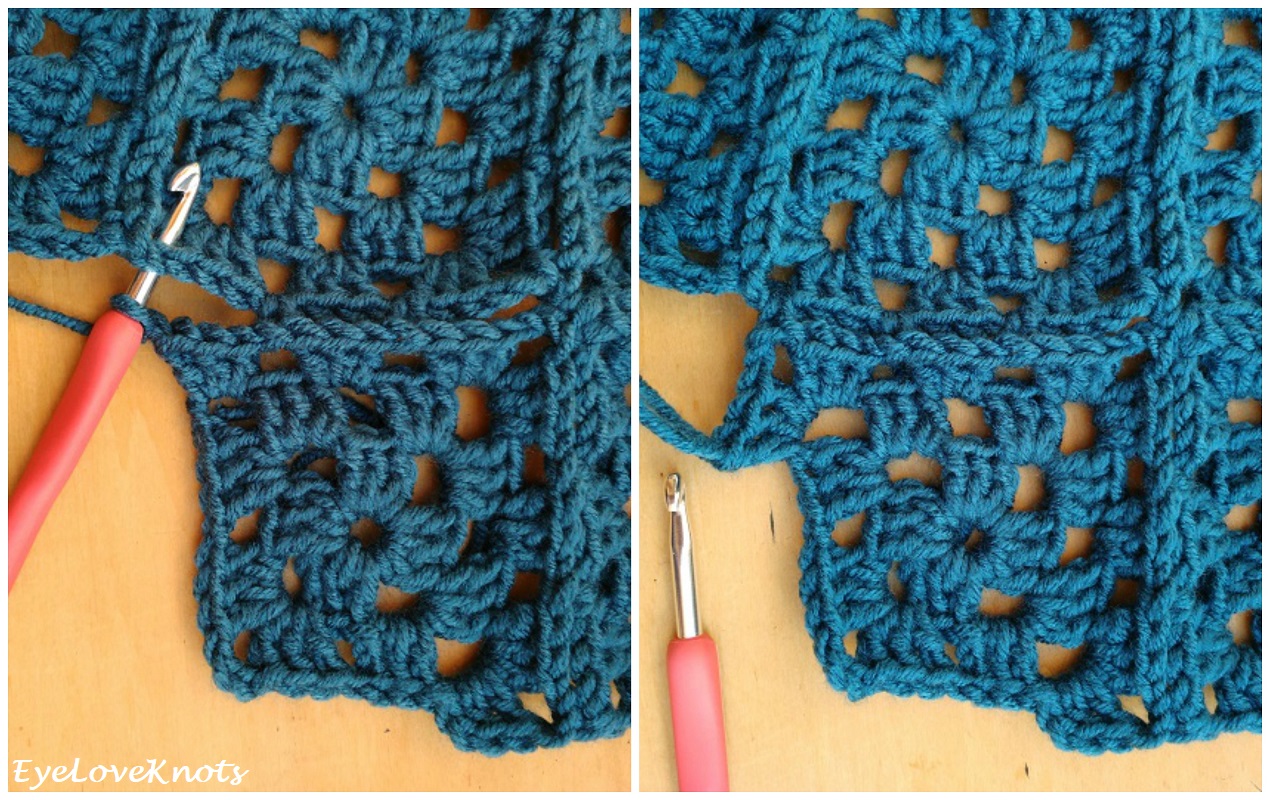
Chain 1. Insert hook from behind into the chain space of the previous square, SC over this chain space, chain 1…

As usual, 3 DC into the corner chain space of the current square, and continue working around as usual.
*The first side is now joined to the previous square.
Square with 2 or More Sides to Join:
Work in the same manner as the previous join shown, but only up to the third to last photo, right before the bolded text that mentions repeating… add a chain 1 at the end.
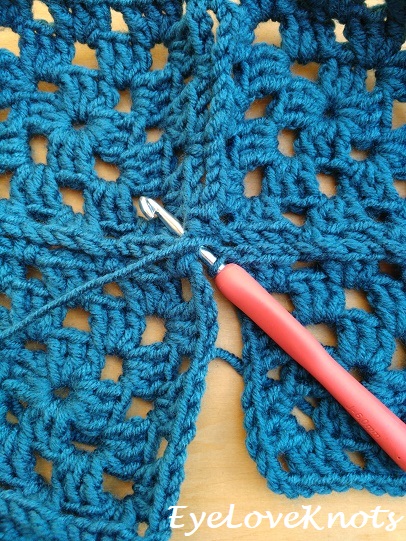
Chain 1. Insert hook from behind into the chain space diagonally across from current square, SC over this chain space…
Chain 1. 3 DC into into the corner chain space of the current square, chain 1…
Continue in the same manner as Join with 1 Side.
The only time you’ll really have to work MORE than two sides is if you forget to put in a square, and you have to go back and add it. That is the only time I had to work a three sided join – two as usual, and the third to the square to the left of the one working.
I usually work across one row, and then go back and weave in my ends so I don’t have a bunch of ends at the end of my project – completely up to you!
When I know that I will be working a border over my piece, I will work a slip stitch join, but if I don’t plan on adding a border, than I will work a nice, clean invisible join.
I know I used to be intimidated by this technique before, but I have been using it for a while, and love it’s ease, look and working as I go. I hope this tutorial has helped you!
I am not re-inventing the wheel here. This stitch pattern is not copyrighted, but my words and photos from this post are. DO NOT try to claim my words and photos as your own, nor should you try to sell them. DO NOT copy and paste my pattern anywhere, link to it instead.
Join the EyeLoveKnots Crafting Community on Facebook to share your creations, and see what others are up to!
Linked Up To…
Hey, thanks for this! It's just in time for Christmas gift season. I love granny squares but hate having to sew them together, and the tails always come out anyway. This will save a bunch of time!
Thanks for dropping me a line 🙂 Granny Squares are one of my favorites! I have some fun projects coming with the new year, and an even better way of joining. Good luck this holiday season!