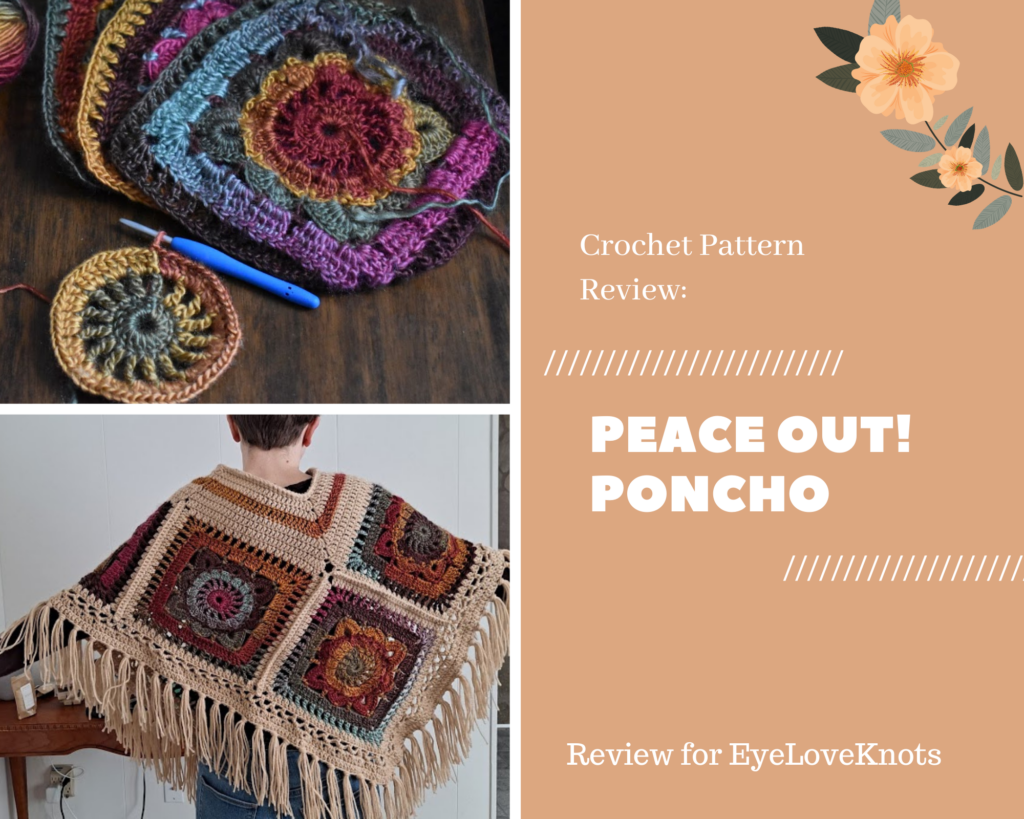
This is a crochet pattern review of the Peace Out! Poncho Crochet Pattern by Lena Skvagerson for Annie’s Signature Designs. Review done by A Stitch Shy of Normal for EyeLoveKnots.
This post contains affiliate links for Annie’s Catalog, Lion Brand Yarns, WeCrochet, and LoveCrafts. If you make a purchase by clicking on them, I make a small commission at no extra cost to you. Thanks for your support!
It’s me, Abigail with A Stitch Shy of Normal.
Visit with me on Instagram @astitchshyofnormal for all kinds of awesome crochet makes and inspiration.
For these reviews, I like taking risks and doing patterns that otherwise might sit on my favorites list for months. I enjoy using this as an “excuse” to play around with a fun pattern that I’d otherwise talk myself out of. A couple of months ago, while browsing through the Annie’s Catalog website, I came across this totally awesome rainbow poncho. I smiled, thought “I wish I could make that”, and moved on browsing.
Then I started thinking about it more. Why was that limited to only wishing I could make it? I have the perfect reason right in front of me to make one purely because I feel like it and it looks like a lot of fun. So I went back and immediately bought the pattern! I took my time picking the right yarn (I’ll explain that later), so I only was able to make it recently in January, but I’ve been excited for this one for a little while now!
It may not be the ideal garment for bitter January winds and snow, but you bet once I can go outside without the air hurting my face, I’ll be rocking this poncho! I think it’ll be adorable over long sleeves now, as well as super cute with shorts and a t-shirt in summer (although it’s a little warm, so I’d wear it for those summer evenings outside).
The pattern does include instructions for a bonus headband too, although I did not make one of these because I only had enough Landscapes for the poncho itself. I think it’s adorable, and if I would have bought an extra skein of my multicolored yarn I would make one. You could go full hippie vibes with both!
Materials I Used:
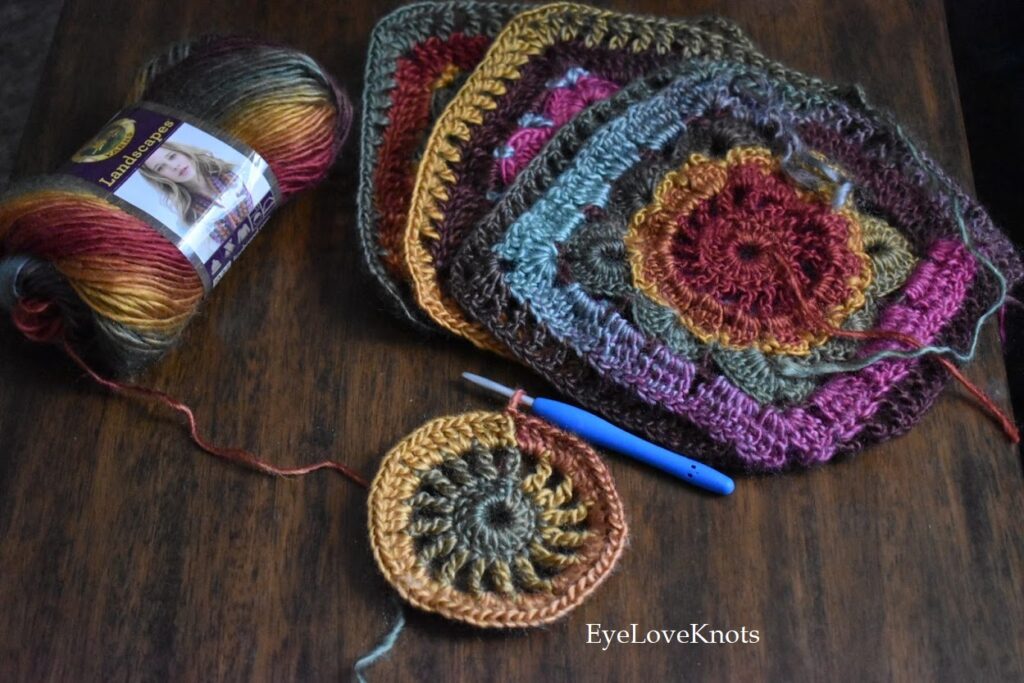
- About 500 yards (or less than 4 skeins) of Lion Brand Landscapes in the Desert Spring colorway
- Roughly 400 yards (I had a “Jumbo” skein of 744 yards and used just over half) of Red Heart Super Saver in the Buff colorway
- H8/5mm hook – I like Clover Amour Ergonomic Hooks
- Yarn needle/scissors for assembly
- Peace Out! Poncho and Headband, Paid Crochet Pattern from Annie’s Signature Designs
Material Notes:
The original pattern calls for the variegated yarn to be Berocco Millefiori. When I found it for online ordering, it was pretty pricey! I looked on various websites for substitutions but all of the options listed were also unique ones from brands that are harder to find and/or expensive. As a last resort, I looked on the Ravelry project page for this pattern and found someone who said they used Lion Brand Landscapes. I knew that was an option I could totally find in stores! So I messaged her and asked how she felt it had worked out, and she told me it was a great substitute. I love finding help through the community in situations like that!
In my experience as well, Landscapes was an excellent choice. It’s less chaotic than the original, as it just stripes through colors rather than randomly jumping back and forth through bright shades. But it changes quickly enough that each square had several different colors in it, and each one is unique! The gauge was pretty close, and in something like a poncho, 90% gauge accuracy is often good enough.
My solid color was my go-to of Red Heart Super Saver, another tried-and-true that you guys know I use more often than not. I chose it in this case since the main feature of this pattern seemed to be the variegated centers of the squares, and the outside was more of a supporting character. It looked like any basic worsted solid color would work here, which I still agree with after finishing the pattern. I chose the tan shade after a lot of indecision in the yarn aisle. It took a long time to find a colorway of Landscapes that I liked for this project, and then it took even longer to find a coordinating solid shade! In the end, I don’t think the tan really “matches” anything in the variegated, but rather it just sort of exists in the background to let the colors shine. Just like how in the original pattern they used a black yarn to let the rainbow pop!
Would I use these yarn choices again for this pattern? Absolutely yes. I can only imagine all the gorgeous pairings you could make! Instead of a basic neutral to support the variegated, you could do a bright fun solid color to enhance it or stand out. Or two solids might be fun here too! Or one solid color and letting the textures stand out instead…I might have a whole wardrobe of these ponchos!
Time Spent:
I did this one mostly over one weekend, so I would estimate 8 or 9 hours? The squares are the bulk of the work and the rest was probably just a couple of hours total. For a rough breakdown, the squares were maybe 6-7 hours, the top and bottom edging another 2 or so, and the fringe probably less than one.
Measurements:
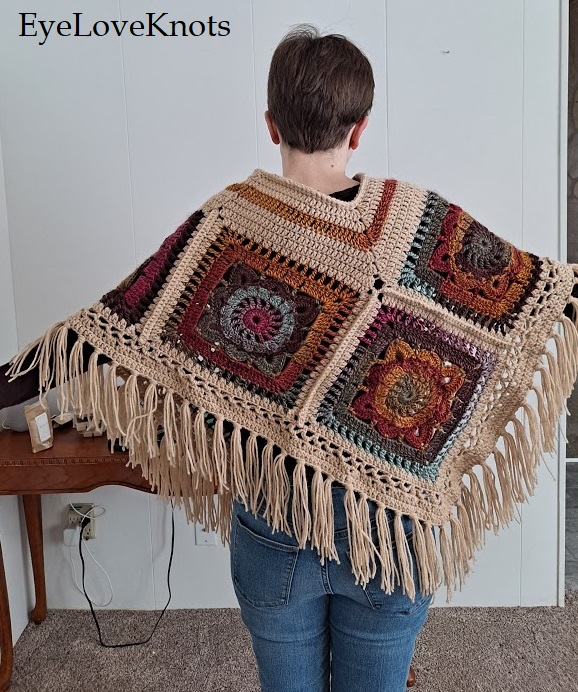
Laying it out flat on the floor, my poncho measures 22″ from the bottom of the neck to the bottom tip (without fringe) and 33.5″ wide edge to edge (the outermost corners laid out like the picture below).
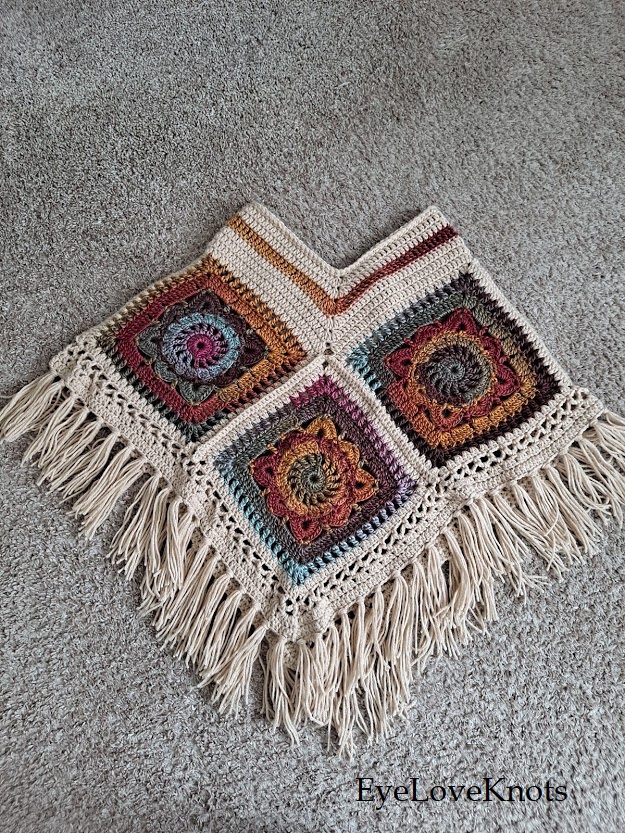
The pattern mentions it being 22″ in length, so I was right on target there, and they phrase the width as “circumference” being 59.5″. I’m not totally sure what they’re measuring there, but they also say it’s at the widest point. This could be at about the same spot I’m measuring, and this means mine is a little too wide around as doubling my width would be about 67 inches.
Since this is a poncho, none of this is a big deal. As long as it fits on your body and hangs the way you want, the dimensions are customizable!
Gauge Info:
It suggests the squares be 10.5″ and this is what mine measured before the outer final row. This was close enough to me! I think they mean with the last row of solid added, in which case mine are a little large. This is probably why my width is bigger than written.
If you’re wanting to check this before you make a full square, my circle was roughly 4.5″ across after round 3. Keep in mind that this is NOT an official dimension from the designer, just my own results!
Pattern Notes:
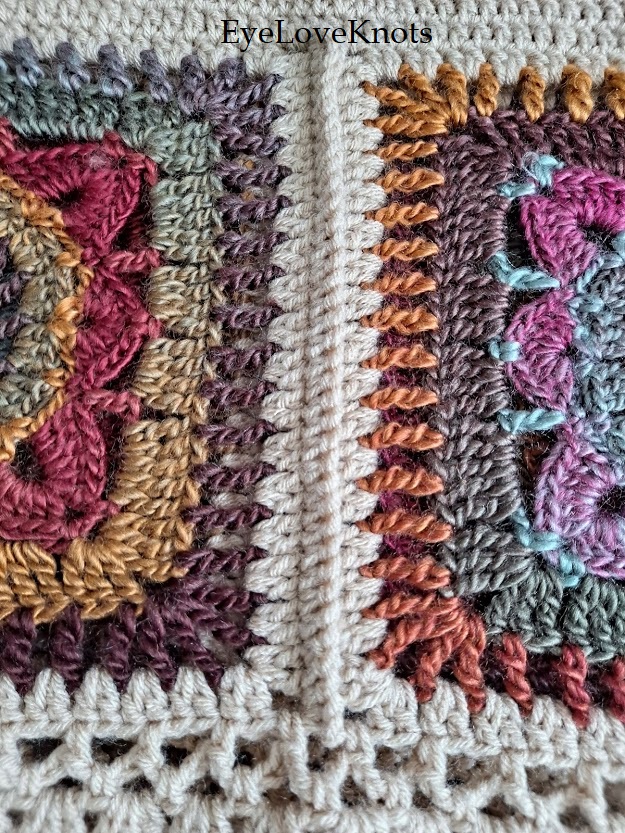
The squares were fairly simple and they each go quickly! I just put on some good TV and made square after square one afternoon. I figured that was the easiest way to get through this pattern, pushing through the main portion of the 6 squares and then putting it all together with the solid color. I feel like this strategy worked out well, and it was extra satisfying to see the variegated squares stack up!
There wasn’t any particular round in the squares that caused me any trouble, but I want to point out that you need to read it very carefully. The instructions are complicated until you get into it, but they phrase it thoroughly. You just need to read each step and make sure you end each round with the correct number of stitches or chain loops or whatever part you’re creating. It should always remain a nice flat circle or square.
The assembly was a little confusing, just because one step isn’t directly stated (that I can see). It tells you how to lay out the squares for assembly, and then it seems to only tell you to seam in one small area. However, the next step is to stitch around the whole edge of the poncho. I interpreted this to mean sewing the entire thing together as in the diagram, and this worked out for me. I think I just expected the instructions to hold my hand a little more than they did.
Once I had the squares together, the edging on both the bottom and top was smooth sailing! The bottom edging includes a couple rounds of chain loops that create what looks like interlocked spaces, and this was easy enough but I had to fudge it just a little at the end of the round. I feel like this didn’t really hurt anything, because the following rounds are just filling in these spaces with stitches for a clean finishing edge.
The top edging, at least the very beginning, confused me for a moment. It tells you to start “in the first corner space on the square right after the center on one of the straight edges”. If you read that and your brain is spinning a little, I felt the same way. What was “one of the straight edges” when everything in this project is a square? What would be the “center” of a poncho? I decided to interpret this as best I could and see how that worked out, being ready to frog and start this section over if needed. But I think I got it right! I took the “straight edges” to mean the parts where there’s two squares next to each other, or basically the shoulders. The “center” of this would be where the two meet. The directions supported this, as it says to go across this first square and then decrease where the V would be (the front/back points). I don’t know how to explain that any clearer, but I hope that helped someone else be a little less confused than I was! If it helps, that was the only part of the edging that stopped me in my tracks momentarily.
I did not block this project at any stage. I could see a benefit to blocking the squares before assembly, it would give you nice straight edges and help to be sure they are all equal size! However, even without doing this, I didn’t notice my poncho being lumpy or distorted in any way. So while I think blocking would be great, in my opinion it’s not necessary!
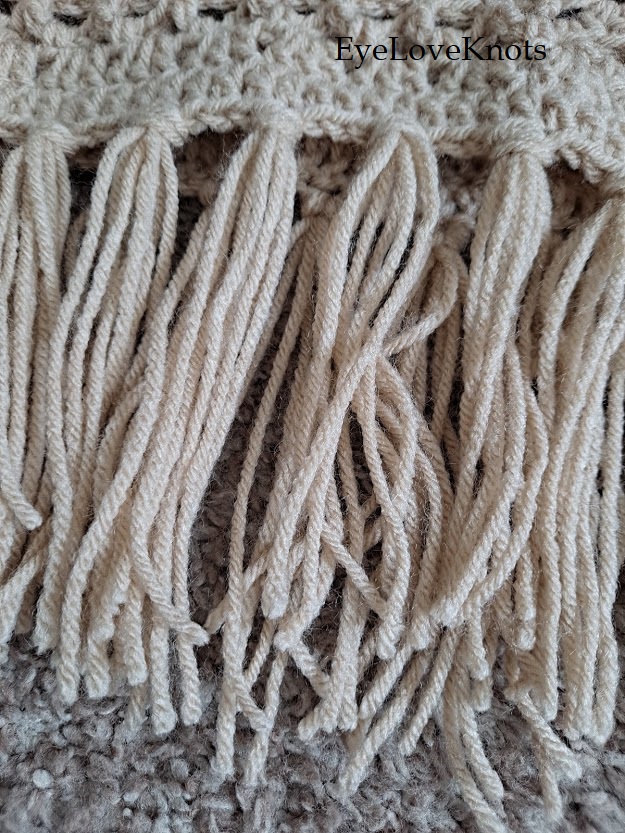
This poncho has a LOT of fringe. The instructions recommend cutting 330 pieces of yarn. Yes, THREE HUNDRED AND THIRTY. I read that and in my head started thinking “well, I don’t need all of that”, but I realized if I’m reviewing this pattern I should do it as written. Pro-tip: find something that’s about the length you need (I used a textbook that was about 11.75″ tall since the pattern called for 12″ pieces) and wrap it around half that number of times! It’s still a lot, wrapping it 120ish times (I didn’t count exactly but made sure I had extra if anything), but it was so much quicker than measuring that many! I then just cut the top and bottom and had my fringe! And I consider it to have been worth the effort. Yes, it’s a lot. But I think this whole thing is kind of a statement piece! It’s bold and loud and fringe-tastic and it all just kind of works.
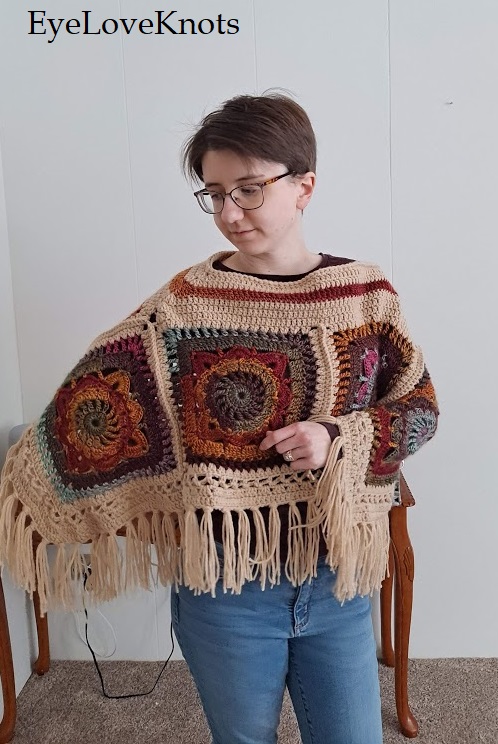
The pattern includes a picture of the model wearing it in a way that I would consider sideways. In a traditional poncho shape, the “V” at the middle would be the front or back. At least that’s what I always thought! They even have a picture of it laid out as such. But on the model, she has those points on her shoulders, and it’s extremely gorgeous. So I guess this poncho can be worn at least two different ways! I tried modeling it myself both ways, as you can see, and both are comfy! Personally I’ll probably wear it most often with the V in the front/back, as that’s just a silhouette I like the look of.
So far, because it’s February (in Michigan!), I have only worn this over a long-sleeve shirt or a t-shirt indoors. I can’t wait to try this as sort of a topper to block the breeze in the spring, I feel like it will be lovely!
What colors would you use for this project? Rainbow and neon? Neutrals? All solid to rock the texture instead? I’d love to hear it!
Don’t forget to visit with me on Instagram @astitchshyofnormal for all kinds of awesome crochet makes and inspiration.
Join one of our awesome Facebook groups to share your creations, and see what others are up to!
– EyeLoveKnots Crochet & DIY Community
– DIY Home On Rockwood Lane
– Alexandra Lane Lifestyle
Linked Up To…
Weekday Wear Link Up – Away from the Blue
Weekly Link Up #212 – Beauty by Miss L
Turning Heads Linkup – Elegantly Dressed and Stylish
Confident Twosday Linkup – I do deClaire
Style with a Smile Link Up – Style Splash
Style Six Linkup – The Queen in Between
Style on the Daily Link Up – Straight A Style
Thursday Fashion Files Link Up #294 – Curly Crafty Mom
Chic and Stylish Link Up – Mummbastylish
Fancy Friday Linkup – Nancy’s Fashion Style
Style Link Up – Lizzie in Lace
Ginx Woolly Linx Party February – Ginx Craft
Craftastic Monday Link Party – Sew Can Do
Linky Ladies Party #205 – The Purple Poncho
The Loop Scoop #8 – Moogly Blog
{Wow Me} Wednesday #493 – Ginger Snap Crafts
The Wednesday Link Party 387 – The Stitchin’ Mommy
Creative Crafts Link Party #30 – Creatively Beth
Craft Schooling Sunday – Creative Jewish Mom
You’re the Star Blog Hop – Decor Craft Design
Happiness is Homemade #363 – Decor Craft Design
Handmade Monday #216 – Sum of their Stories
The Really Crafty Link Party #255 – Keeping it Real
Party in Your PJs #347 – The Apple Street Cottage
Waste Not Wednesday #243 – Pretty DIY Home
Creatively Crafty Link Party #264 – Life Beyond the Kitchen
Artsy-Fartsy Link Party #243 – Artsy-Fartsy Mama
Home Matters Linky Party #320 – Modern on Monticello
Create, Bake, Grow & Gather Party #459 – Shabby Art Boutique
A Morning Cup of Joe Linky Party – The Cottage Market
Ultimate Monthly Link Party 21 – Grammy’s Grid
Hearth and Soul Link Party – April, The 21st Century Housewife
Over the Moon 265 – Marilyn’s Treats
580th Inspire Me Tuesday – A Stroll Thru Life
Fabulous Party #360 – Lou Lou Girls
Your Whims Wednesday #499 – My Girlish Whims
Thursday Favorite Things #478 – An Artful Mom
Encouraging Hearts and Home Blog Hop – Apron Strings and Other Things
Traffic Jam Weekend Linky Party #271 – My Bijou Life
Friday Favorites – Busy Being Jennifer
Snickerdoodle Create Bake Make Link Party 374 – EyeLoveKnots
Alexandra, this poncho speaks to me. I love the boho vibe!
I’m so happy, Marie! I really love the boho vibe too! This was done by one of my awesome contributors, Abby. She’s so talented!
Looks gorgeous. I’d love to learn to crochet. Followed from the happiness is homemade pinky party.
It’s a very fun craft to learn, it just quickly becomes addicting, lol! And thanks!
Wow! You are talented! I don’t have the patience to crochet or knit anything. I usually leave it up ti my mother in law LOL! This is beautiful!
Haha I don’t have the patience for knitting so I understand! It’s a great stress reliever for me 🙂 And thanks!
What a fun statement poncho! The colours are so nice and I like the tassels too! Perfect piece for adding a little extra warmth in spring! 🙂
Thanks so much for joining the #WeekdayWearLinkup! Hope that you are having a good weekend 🙂
Lovely hippy poncho. Love the big squares and all those tassels.
It’s certainly big and impactful, isn’t it? I like that it’s loud and fun!
The poncho is amazing, I love it! I really want to learn to crochet. Thanks for linking up!
Emma xxx
http://www.style-splash.com
You should! It’s so fun to do, and really relaxing. I like seeing how you style the crocheted pieces you find. It’s inspiring!
Your Peace Out Poncho turned out beautifully! Thank you for linking up at our weekly Link Party! You are being featured at our Wednesday Party #388 this week. Here’s the direct link to the post in case you’d like to share your feature:
https://oombawkadesigncrochet.com/2021/03/peace-out-poncho-bear-lily-porridge-recipe.html
Wishing you the very best, Rhondda
The poncho is really pretty. I love the colors.
Thank you! I really enjoyed this colorway.
Excellent review; thank you. I appreciate you pointing out the confusing instruction terms that help us determine if we are willing to tackle something like that. Frogging & guessing what to do can be frustrating, but you gave insight to encourage us. Pattern diagrams indicating exactly where to start, instead of “the first corner space after the center on the straight edge,” would be nice.
Thank you so much for your kind words. That’s what I try to do with these reviews, help people be aware of how challenging or simple the pattern might be for those with different levels of experience. It was a genuinely fun pattern to make!