How to upcycle a store bought shirt by crocheting onto the fabric so it fits more the way you like!
This post contains affiliate links for Amazon. If you make a purchase by clicking on them, I make a small commission at no extra cost to you. Thanks for your support!
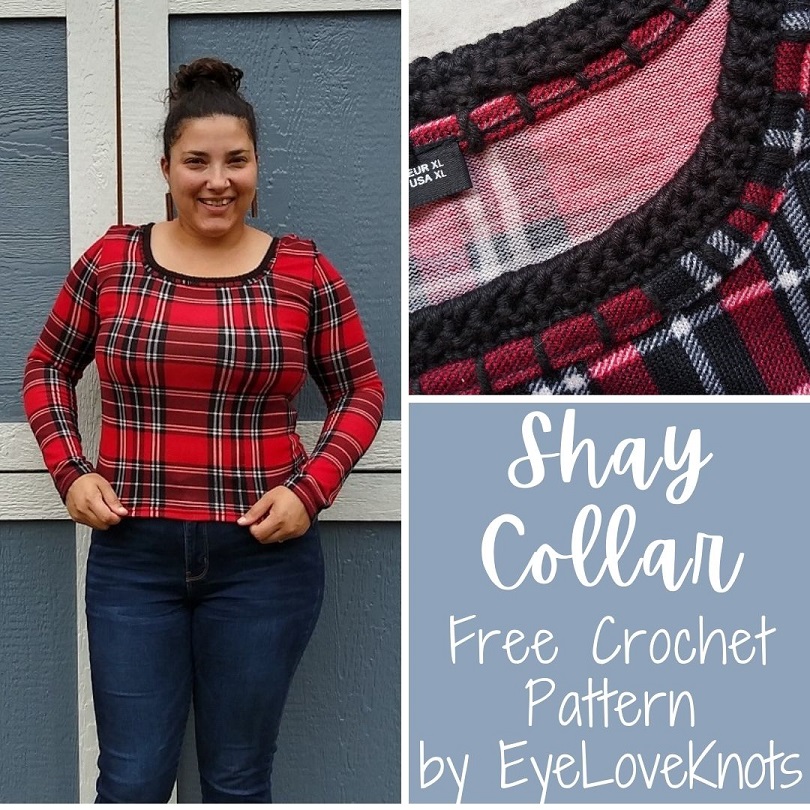
Welcome to the April Pinterest Challenge! The purpose of this Pinterest Challenge is to motivate us to not just pin, but to make it happen!
This month’s challenge is Eco-Friendly.
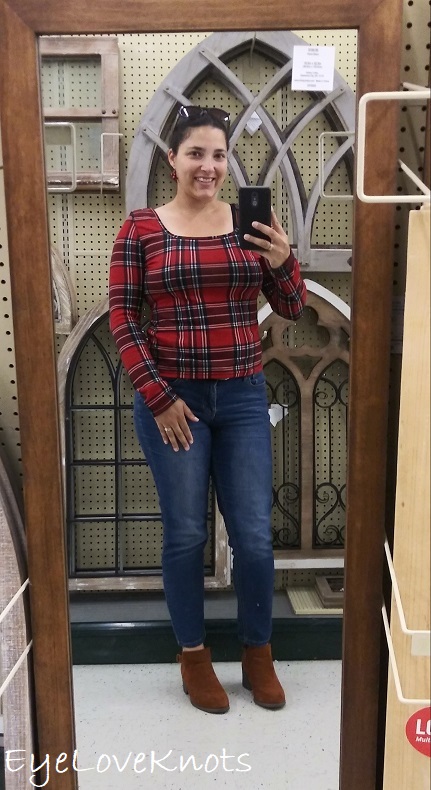
I purchased this Long Sleeve Scoop Neck Tartan Tee from SheIn a couple years ago – it’s sold out, but you can try searching “square neck” or “scoop neck” for something similar. It’s a pretty print, and the fabric is soft and comfortable but there were two issues for me: 1.) the square neckline (because it’s really not a scoop neck) goes out too far and my bra straps show, and 2.) it’s too short – it’s more crop length. I wore the top once (in this photo), and then it’s been sitting in my closet since while I’ve contemplated donating it. When I was trying to figure out what kind of fabric project I could upcycle for this Pinterest Challenge, I immediately thought about fixing this top. I figured what would be the harm if I messed it up, or it didn’t turn out?
My inspiration for this was a combination of this crocheted collar and this modesty panel. I wanted something simple to close in the neckline.
You can find more Eco-Friendly inspiration in my Seasonal: Eco-Friendly board.
AD-FREE, PRINTER FRIENDLY PDF:
If you would like a PDF version of this post, you may get one through either my EyeLoveKnots Etsy Shop, Ravelry or LoveCrochet Shop for a small fee. This fee is to compensate for the views lost when you no longer need to return to the blog to for the information, as you will have your own copy. Plus! It helps fund supplies for new projects to share with you!
Shop EyeLoveKnots Etsy: Shay Collar.
Shop EyeLoveKnots LoveCrochet: Shay Collar.
Share your version of this project on Ravelry – Shay Collar.
Save this to your Favorites: AllFreeCrochet, FaveCrafts, Cheap Thrifty Living, Crochet Pattern Bonanza, DIYideaCenter.
Materials:
- Small Amount of Worsted Weight Yarn – I used some Berroco Modern Cotton that I had in my stash
- G6/4.25mm Crochet Hook
- Tapestry Needle with Sharp Point
Material Notes:
You can use any lightweight worsted weight yarn for this project. I used this cotton blend because I am familiar with how it washes and wears, and I wanted something that would hold up well.
Time Spent:
This project took me about an hour to complete.
Abbreviations (US Terms):
- RS – Right Side of the Fabric
- SC – Single Crochet (Photo Tutorial)
- Rev SC – Reverse Single Crochet
Pattern Notes
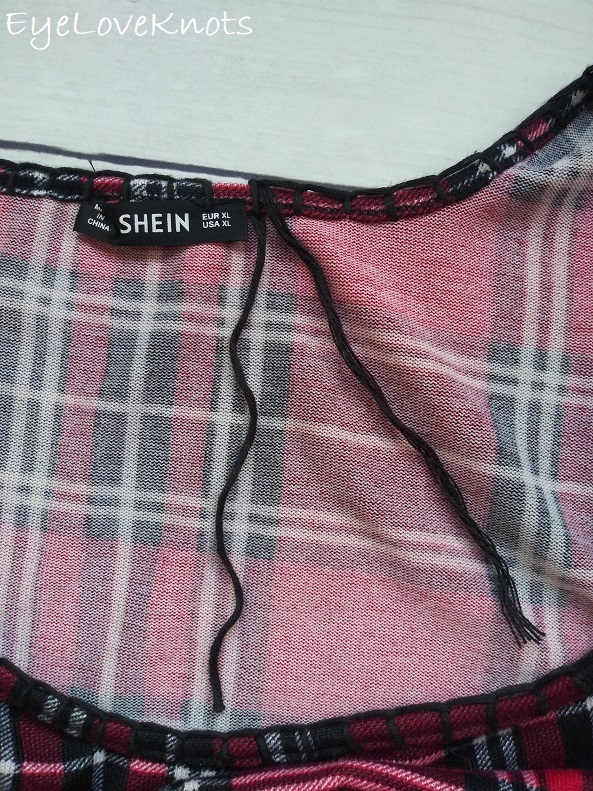
Rather than knotting the beginning and end of the blanket stitch, leave a tail that you can weave into the crocheted fabric at the end.
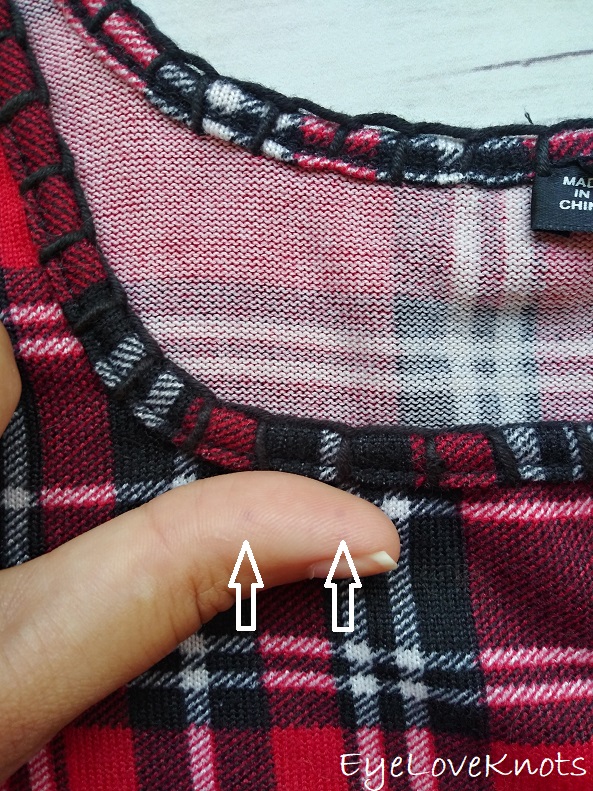
To help me keep the 0.5″ distance around, I drew two dots on my thumb to use as quick reference as I worked the blanket stitch around.
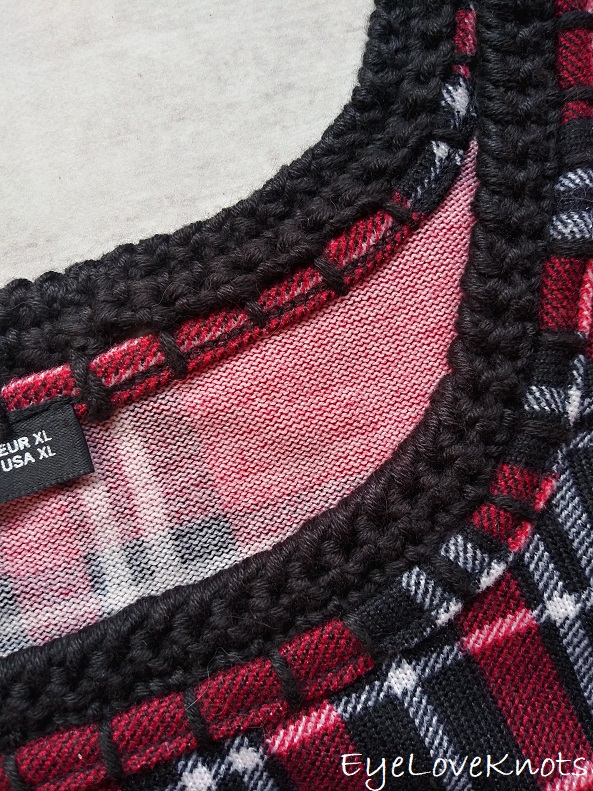
Pattern:
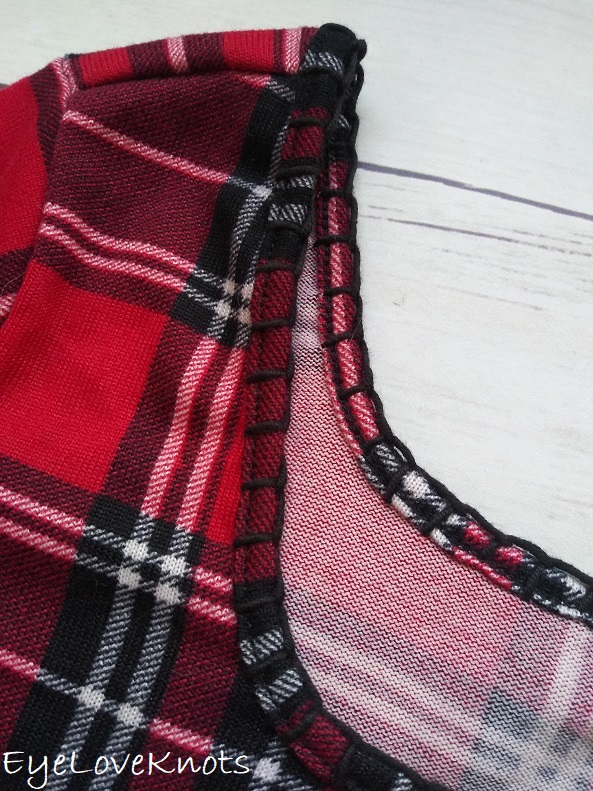
First thing, you’ll need to sew a blanket stitch all the way around the neckline leaving 0.5″ in between each stitch. This is why a sharp tapestry needle is important so it will fit the yarn you’re using in the eye, and pierce the fabric. Once finished with the last blanket stitch, fasten off.
Make a slip knot and place it on your crochet hook – I normally would just tie on and chain, but the slip knot was a more secured, clean way to work into the blanket stitch. With the RS facing, work 2 SC into each space around the entire neckline. Join to the 1st SC. (I had 134 SC for mine)
R3 – 4: Chain 1, turn. SC into the 1st SC, and each SC around. Join to the 1st SC.
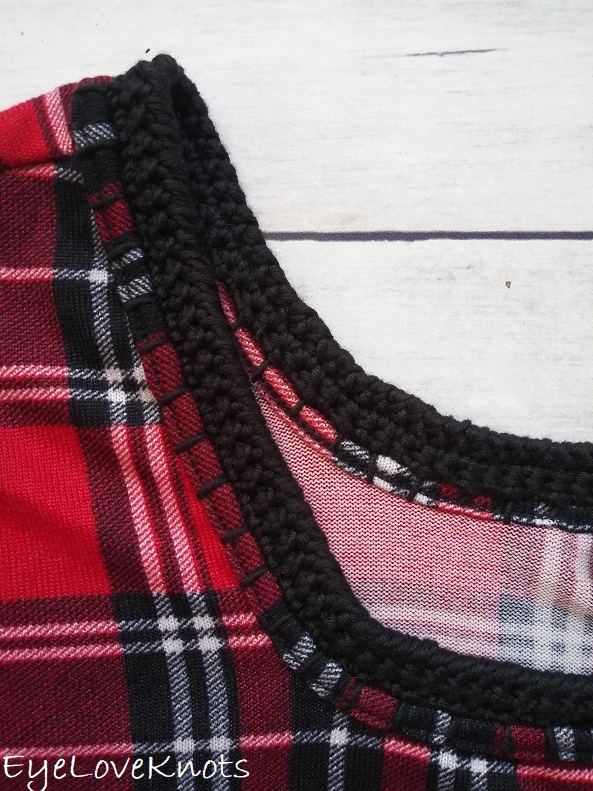
*Try the top on. If you want more/less coverage, you can add/subtract a round of single crochet.
R5: Chain 1, turn. Rev SC into each stitch around.
Fasten off, and weave in ends.
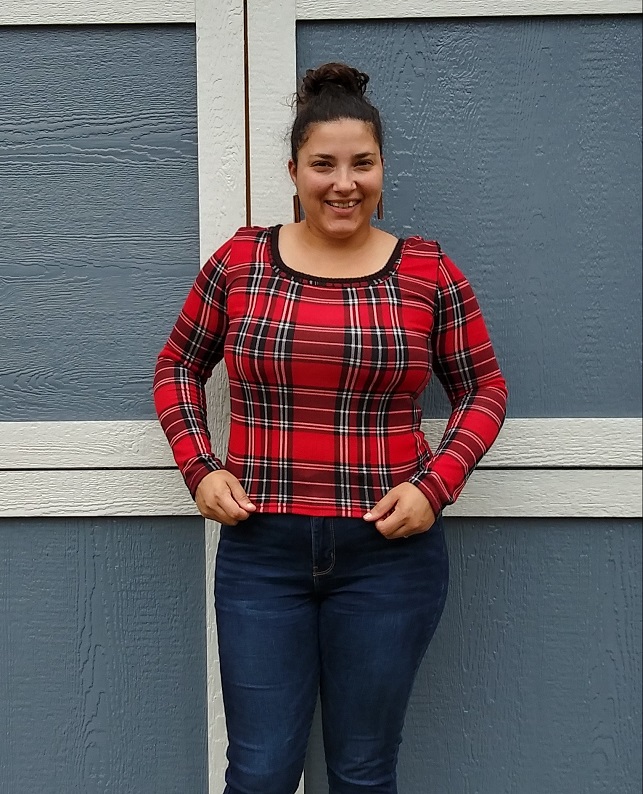
The top is still short, but I just paired it with some high waisted pants. Before, it was too much to have the neckline and length bothering me, but I can work with just one. I was tempted to crochet around here too but after testing the neckline out a little, I am worried it will be too tight, and I won’t be able to get my arms through.
Join one of our awesome Facebook groups to share your creations, and see what others are up to!
– EyeLoveKnots Crochet & DIY Community
– DIY Home On Rockwood Lane
– Alexandra Lane Lifestyle
Linked Up To…
Unlimited Link Party 24 – Grammy’s Grid
Happiness is Homemade #372 – Decor Craft Design
Craft Schooling Sunday – Creative Jewish Mom
Turning Heads Linkup – Elegantly Dressed and Stylish
Confident Twosday Linkup – I do deClaire
Style Six Link Up – The Queen in Between
Style on the Daily Linkup – Straight A Style
Thursday Fashion Files Link Up #301 – Curly Crafty Mom
Chic and Stylish Link Up – Mummabstylish
Style Link Up – Lizzie in Lace
Fancy Friday Linkup – Nancy’s Fashion Style
Weekday Wear Link Up – Away from the Blue
Style with a Smile Link Up – Style Splash
Farmhouse Friday Link Party #203 – County Road 407
Ginx Woolly Linx Party May – Ginx Craft
Linky Ladies Party #210 – The Purple Poncho
The Loop Scoop #13 – Moogly Blog
Handmade Monday #226 – Sum of their Stories
The Really Crafty Link Party #265 – Keeping it Real
Craftastic Monday Link Party – Sew Can Do
Creative Crafts Linky Party #40 – Creatively Beth
Creatively Crafty Link Party #274 – Life Beyond the Kitchen
Artsy-Fartsy Party #343 – Artsy-Fartsy Mama
You’re the Star Blog Hop – Decor Craft Design
Unlimited Link Party 25 – Grammy’s Grid
Hearth & Soul Link Party – April, the 21st Century Housewife
Fabulous Party 370 – Lou Lou Girls
Party in Your PJs #357 – The Apple Street Cottage
{Wow Me} Wednesday #503 – Ginger Snap Crafts
Your Whims Wednesday #510 – My Girlish Whims
The Wednesday Link Party 397 – Oombawka Design
Thursday Favorite Things #488 – An Artful Mom
Encouraging Hearts & Home Blog Hop – Scratch Made Food
Traffic Jam Weekend Linky Party #280 – My Bijou Life
Create Bake Grow & Gather Party #467 – Shabby Art Boutique
Funtastic Friday Link Party #331 – Simply Beautiful by Angela
A Morning Cup of Joe Linky Party – The Cottage Market
Snickerdoodle Create Bake Make Link Party 384 – EyeLoveKnots
One More Row – Free Crochet Link Party #32 – Loops and Love Crochet
Are you a blogger interested in joining the #pinterestchallenge blog hop? Join the Pinterest Challenge Group on Facebook for all the details.
Let’s see what other things Pinterest Inspired! Head over and visit the other hosts to see what they crafted, cooked, built or tried!

Farm Girl Reformed | Sew Crafty Crochet | Mom Home Guide
Treasures Made from Yarn | Little Vintage Cottage
Southern Sunflowers | Stone Cottage Adventures | EyeLoveKnots
On Rockwood Lane | The Apple Street Cottage | Our Good Life
Pandora’s Box | Our Sutton Place
Very cool, I love the way it looks now with the crochet edge on the neckline and I have always wondered how you attach crochet edging to fabric!
Tania
Thank you! There is also a blade you can get for a rotary cutter called a skip stitch blade, and use it to poke the holes for you beforehand – I’ve used it on felt and fleece. Then you can crochet right into the holes.
Great post! Thanks for sharing. x
Thank YOU!
This is a wonderful way to update a top that is just sitting in the closet. Great idea!
Definitely! I almost donated this top, but glad I gave it a second chance.
The shirt is cute as is, but the crochet collar really adds extra personality….nice work!
That top is so cute with the crocheted neckline! It looks darling on you and so much more expensive too!
Thanks so much, Laura! I almost donated this top, but glad I tried this out first.
First, nope, not seeing any hummers yet. We got snow today. They are probably waiting it out! I love this idea. What a wonderful way to use up some leftover yarn, and add a little something something to a garment.
So hard for me to imagine that it could be snowing so late into April, but I also say that about how cold it gets in some places. Here in Florida we don’t have very many seasons
I love the detail of your new neckline! ‘Very pretty! Thank you for the step by step directions! -Marci @ Stone Cottage Adventures
Thanks, Marci! Turned out better than I imagined it.
The neckline turned out perfect. You are really talented, Alexandra
If you can sew, you can attach black gathered lace trim to add length to the top
Thank you so much, Helen! My sewing skills are pretty basic, but I might be able to figure it out with a video – do you have one?
Perfect neckline with crochet border.
Thank you!
The crocheted neckline is fabulous! It’s a really lovely detail. Thanks for linking up!
Emma xxx
http://www.style-splash.com
Thank YOU! Turned out better than I imagined it would.
That turned out great! I have added crochet trim to a fleece blanket before but used a tiny hole punch to put holes around the edges. What a great idea to use a blanket stitch around the existing neckline. Pinned.
That’s a good idea with the hole punch! They also have a blade for a rotary cutter called a skip stitch blade. It pokes the holes so you can crochet right into them.
Well done! It looks great!
http://www.chezmireillefashiontravelmom.com
Thanks so much!
Wow, that’s a clever way to fix the top and personalize it a bit. Gotta keep this one in mind!
http://www.withinaworldofmyown.com
Thanks so much! I’m glad I was able to breathe new life in it so I could continue to enjoy it
What a fun touch with your top! I think it’s a really cute addition with the neckline! You’re very talented 🙂
Thanks so much for joining the #WeekdayWearLinkup 🙂 Hope that you have a nice weekend ahead of you!
Thanks so much! I had a lot of fun with this project, and just happy that it now fits me a lot better
That’s adorable, Alexandra! I would love to be able to do that! Great detail to the top.
Thank you, Pam! Never too late to learn 😉
Thank you for sharing this on Traffic Jam Weekend! It has been chosen as a fave feature for this week’s party that goes live on Thursday at 5:00 pm CST.
I really appreciate that! Thank you!
Hello, this is one of my personal favorites for last week’s Encouraging Hearts and Home. I hope you stop by and say hello, this post has also been pinned to the Encouraging Hearts and Home board! Thank you for being a part of Encouraging Hearts and Home, we appreciate all that you share. Have a great week ahead!
What a cool idea!!