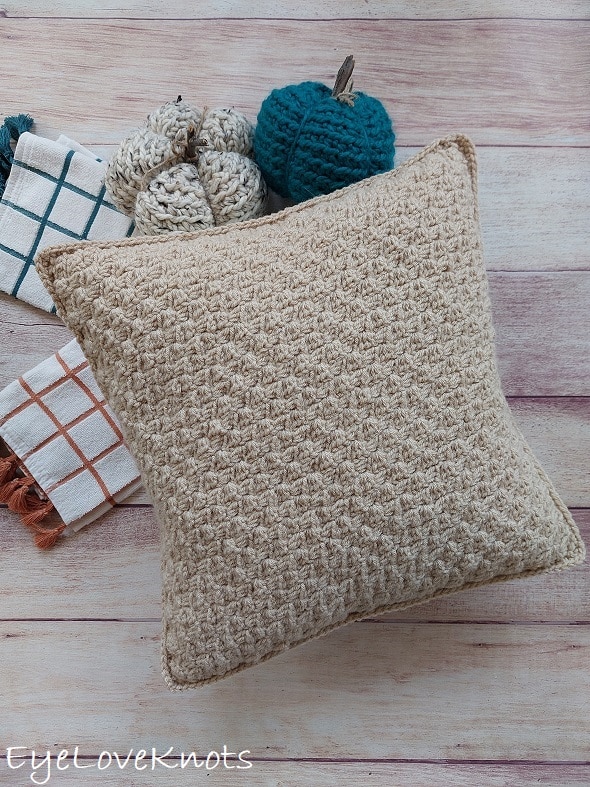
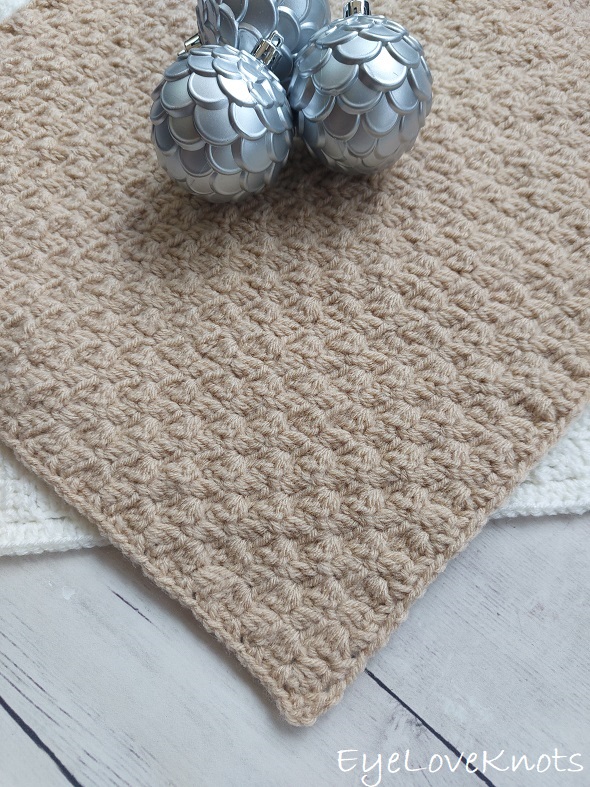
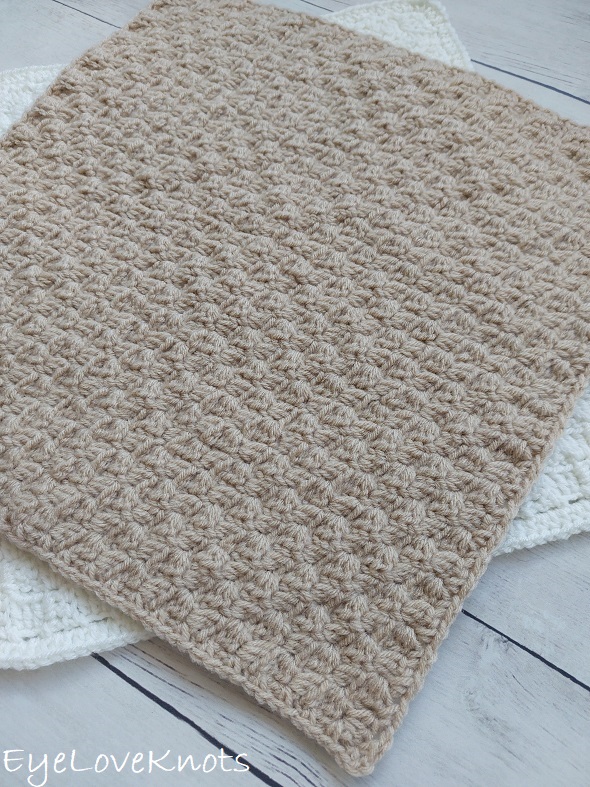
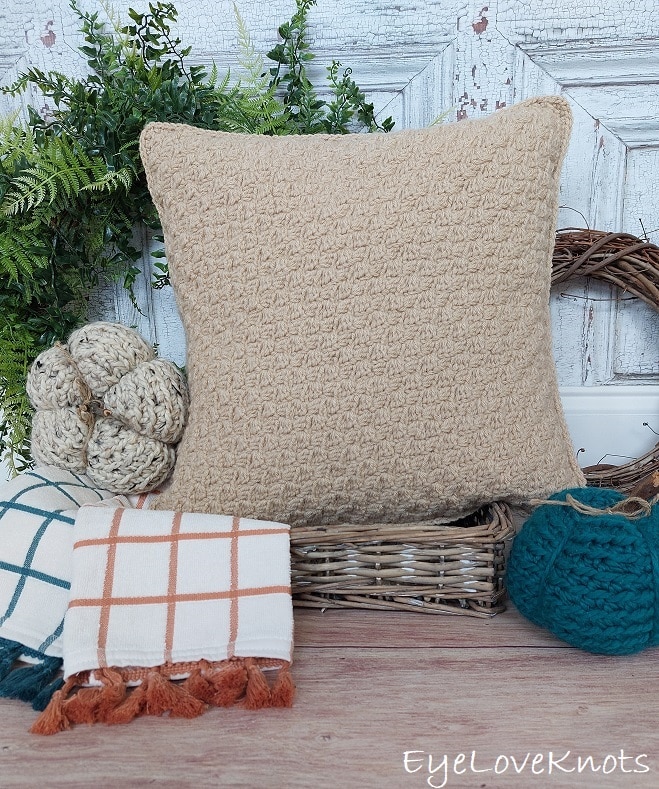
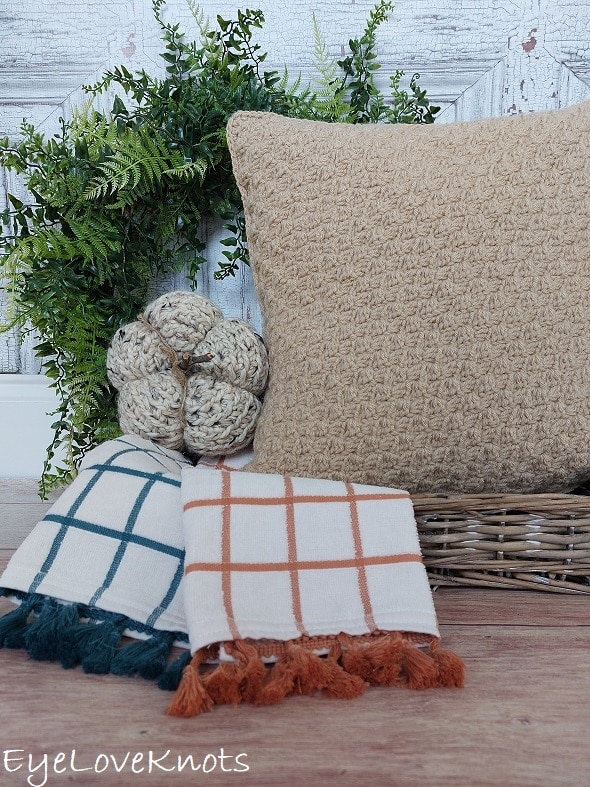
This is a free crochet pattern and video tutorial showing how to crochet the Colin Harper Throw Pillow, which is a Basic C2C Throw Pillow worked in HDC Boxes with 8 sizes included.
This post contains affiliate links for Etsy, Amazon and WeCrochet. If you make a purchase by clicking on them, I make a small commission at no extra cost to you. Thanks for your support!
Find the free crochet pattern instructions below, or purchase a printer-friendly, ad-free PDF on Ravelry by clicking here.
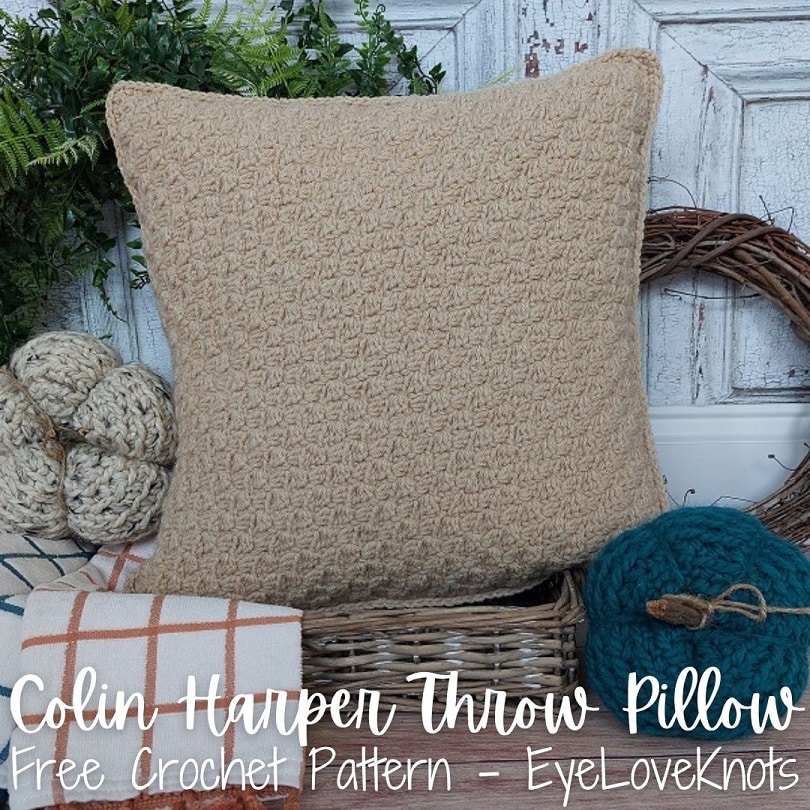
Even though it’s Summer time, I have got Fall on my mind, and this is the first project that came to mind – a throw pillow made with corner to corner (C2C) boxes worked in half double crochet, and appliqued with falling leaves – I will use my Basic Leaf 2 Ways crochet pattern.
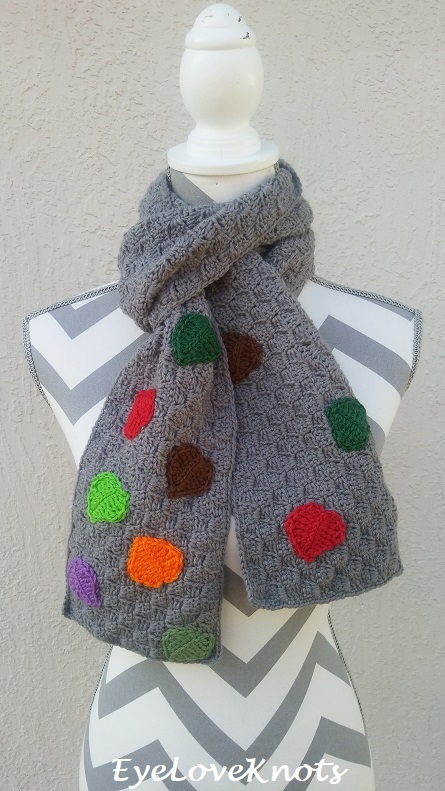
I’ll look similar to my Fall Inspired Lightweight C2C Scarf, but in throw pillow form.

And hopefully will be a good pair to my Fall Vibes Square that I’m hoping to turn into a throw pillow soon too.
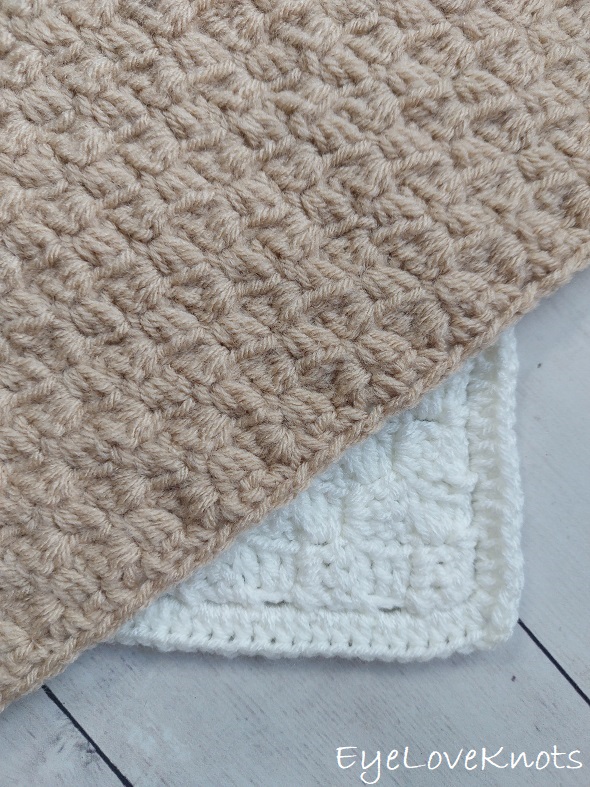
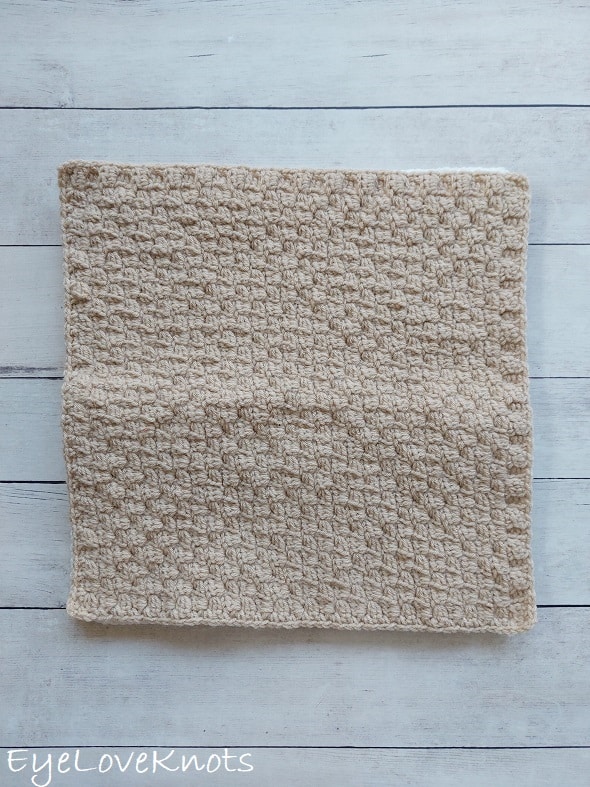
Step one was to create the front of the throw pillow, which I accomplished last month. I ended up working up 12 sizes for this afghan square, and you can find that in my Basic C2C Afghan Square in HDC Boxes. You can create lots of matching pieces with this afghan square pattern!
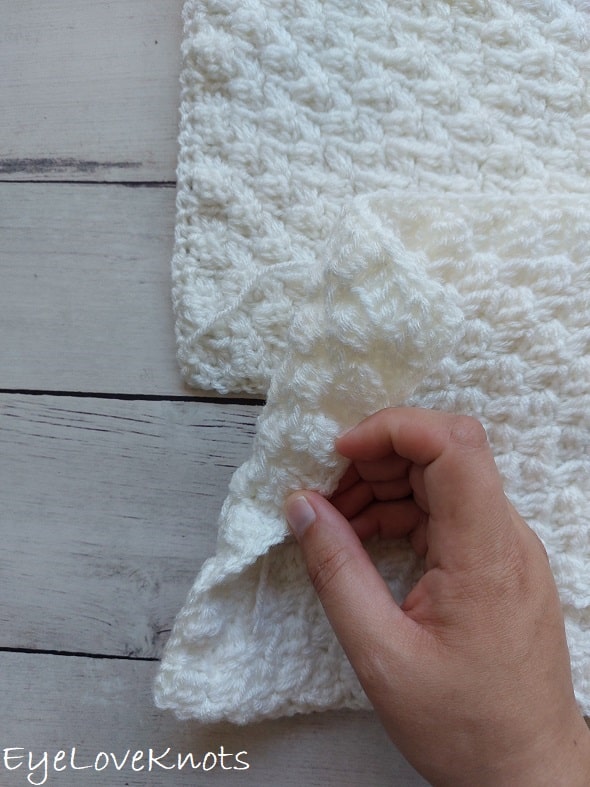
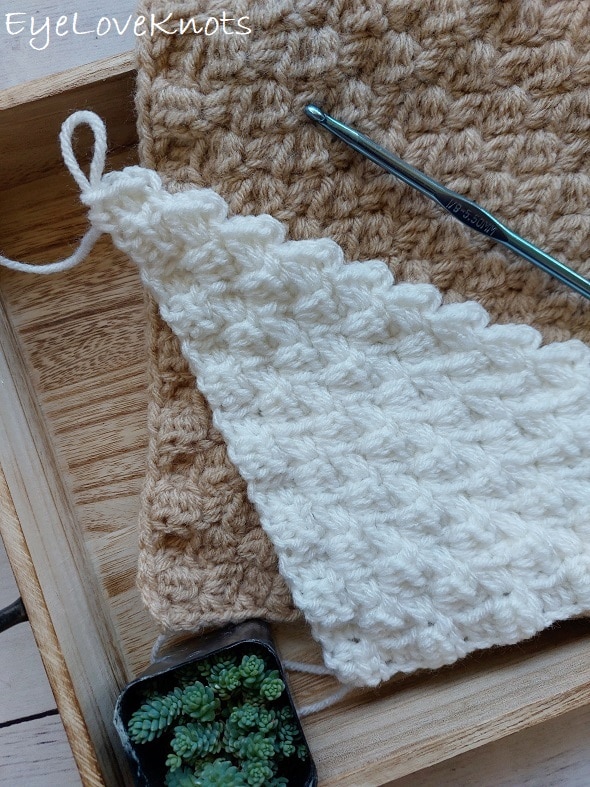
Step two is creating the back panels, and assembling, which you’ll find in this post. I love envelope style pillows so I can easily switch the covers out depending on my mood or the time of year, plus no guess work in stuffing, and it makes washing very easy too.
Step three will be appliqueing on the leaves, which I will share in another post soon.
How Do You Crochet a Simple Envelope Style Throw Pillow?
Step 1: Crochet a square to your desired size for the front panel.
Step 2: Crochet two back panels that overlap at least 3″, and are the same width as your front panel.
Step 3: With wrong sides facing up, lay the back top panel down, then lay the back bottom panel down with the two pieces overlapping, then lay the front panel on top with the wrong side facing down and line the stitches up all the way around.
Step 4: Seam through all the layers to join – my preferred way is to single crochet the layers together, and I do this with the right side of the pillow facing up to get the nicest, most defined edge.
How Do You Crochet a Simple Throw Pillow in C2C HDC Boxes?
If you do not want to crochet an envelope style throw pillow, you can crochet two front panels, and seam them together, stuffing with Poly-fil before closing all the way up. Easy peasy throw pillow! And gauge isn’t essential – you just need two squares that are the same size.

AD-FREE, PRINTER FRIENDLY PDF:
If you would like a PDF version of this post, you may get one through either my EyeLoveKnots Etsy Shop, Ravelry or LoveCrochet Shop for a small fee. This fee is to compensate for the views lost when you no longer need to return to the blog to for the information, as you will have your own copy. Plus! It helps fund supplies for new projects to share with you!
Shop EyeLoveKnots Etsy: Colin Harper Throw Pillow.
Shop EyeLoveKnots LoveCrochet: Colin Harper Throw Pillow.
Share your version of this project on Ravelry – Colin Harper Throw Pillow.
Save this to Your Favorites on: AllFreeCrochet, FaveCrafts, Cheap Thrifty Living, DIYideaCenter, Crochet Pattern Bonanza, AllFreeHolidayCrafts, Free Crochet Tutorials, The Free Crochet Family
What Supplies Do I Need to Crochet a C2C Throw Pillow?
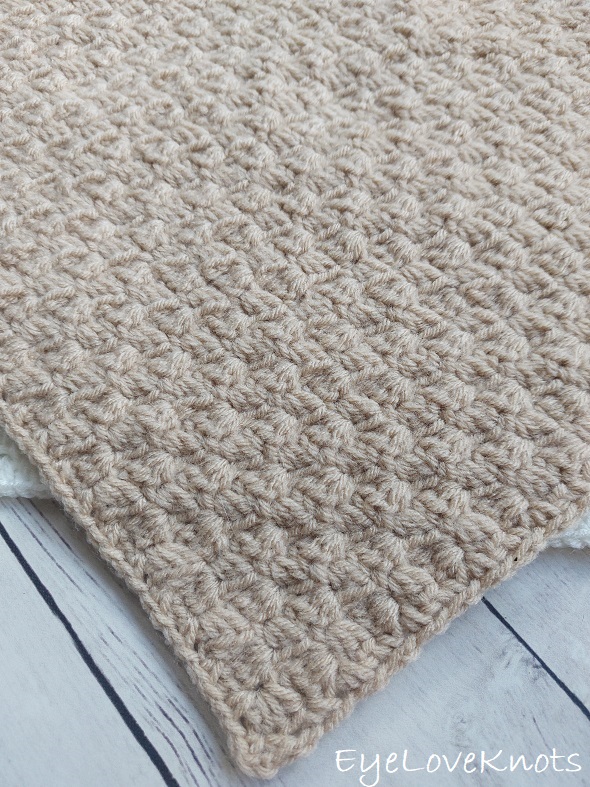
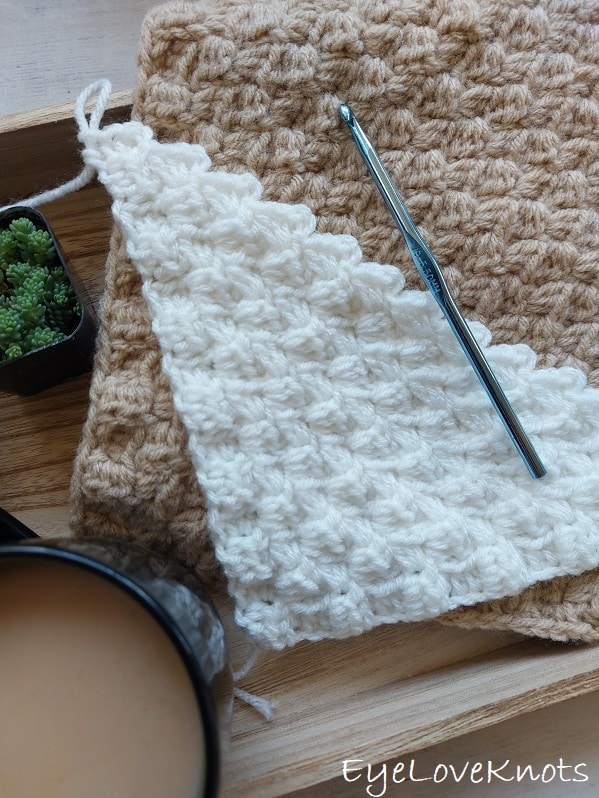
- 397 (541, 692, 921, 1146, 1401, 1660, 2047) Yards Total of Worsted Weight Yarn – I used Red Heart Super Saver in Buff and Soft White
- I9/5.5mm Crochet Hook
- Tapestry Needle
- Soft Tape Measure (if gauge is essential for your project)
- Envelope Style: Pillow Form – I get mine at JoAnn, but there are a lot of options on Etsy, and on Amazon
- Closed: Poly-fil Stuffing
Material Notes:
Similar Yarns: Caron’s One Pound, Bernat’s Super Value.
The yardage has been tested with the 16″ size, and the rest are estimated based on this. If you want to split the colors like I did (Buff on Front, Soft White on Back), then you’ll need the following yardages shown as Buff; Soft White:
- 12″: 185; 212
- 14″: 257; 284
- 16″: 329; 363
- 18″: 438; 483
- 20″: 545; 601
- 22″: 668; 733
- 24″: 800; 860
- 27″: 969; 1078
Sizes Included:
12″ (14″, 16″, 18″, 20″, 22″, 24″, 27″)
Gauge:
6 Squares = 4.13″ (4 1/8″) Wide by 3.63″ (3 5/8″) Tall
Abbreviations (US Terms):
- HDC – Half Double Crochet (Photo Tutorial)
- SC – Single Crochet (Photo Tutorial)
- C2C in HDC – Corner to Corner in Half Double Crochet Boxes (Photo Tutorial)
Pattern Notes:
All panels grow from the bottom corner upward diagonally. This is the nature of C2C, or Corner to Corner.
Beginning chain 1 in the boxes and the skipped stitches from the chain 5 does count as a stitch. In the border, the chain 1, does not count as a stitch.
A box is comprised of four half double crochet’s.
The “space under the same chain joined to” is defined as the space between the last two half double crochets of the previous rows box.
Working the final half double crochet into the top of the chain from the previous row helps to keep the edge more even. After completing the first box, you may also need to lightly tug on it to keep it even as well.
Instructions for smallest size – 12″ shown with 14, 16, 18, 20, 22, 24 and 27 in parenthesis.
There are a lot of words and numbers to this pattern, and that can seem intimidating or daunting, but basically, you are going to build your panel one row at a time increasing until you get the size you’re looking for, [where applicable, maintaining the number of boxes to meet the width desired], then decreasing back down to one box. The border will add 0.5″ to the finished size, so keep that in consideration while increasing.
As you work your panels, the row you stop increasing on will measure 0.5” larger then the finished measurement. It’s safe to say this will be the finished size after the border is added, and the fabric “rests”. If after you finish the first round of the border, your panel is not measuring large enough, you can add another round to the border working one stitch per single crochet and per chain space all the way around increasing in the corners.
Colin Harper Throw Pillow, aka Basic C2C Throw Pillow worked in HDC Boxes, Video Tutorial:
Front Panel Measurement (Width by Height):
- 12″: 12.38″ (12 3/8″) by 12.13″ (12 1/8″)
- 14″: 14.13″ (14 1/8″) by 13.63″ (13 5/8″)
- 16″: 16″ by 15.75″ (15 3/4″)
- 18″: 18.38″ (18 3/8″) by 18.25″ (18 1/4″)
- 20″: 20.38″ (20 3/8″) by 20.25″ (20 1/4″)
- 22″: 22.38″ (22 3/8″) by 21.75″ (21 3/4″)
- 24″: 24.38″ (24 3/8″) by 24.25″ (24 1/4″)
- 27″: 26.88″ (26 7/8″) by 26.75″ (26 3/4″)
Front Panel, Basic HDC C2C Throw Pillow Written Tutorial:
Chain 5. HDC into the 3rd chain, and into each of the next 2. (1 Box)
Row 2: Chain 5, and turn. HDC into the 3rd chain, and into each of the next 2, slip stitch into the top corner stitch of the next box. Chain 1, work 2 HDC into the space under the same chain joined to, HDC into the top of the last stitch. (2 Boxes)
Row 3: (I) Chain 5, and turn. HDC into the 3rd chain, and into each of the next 2, slip stitch into the top corner stitch of the next box;
(II) Chain 1, work 3 HDC into the space under the same chain joined to, skip the next 3 HDCs, slip stitch into the top corner stitch of the next box;
(III) Chain 1, work 2 HDC into the space under the same chain joined to, HDC into the top of the last stitch. (3 Boxes)
Rows 4 – 21 (25, 28, 33, 37, 41, 45, 50): Using Row 3 as a base, you will continue working in the same manner repeating (II) one extra time each row to increase the number of boxes by one each row. At the end, you will have the same number of boxes as rows.
Begin Decreasing:
Row 22 (26, 29, 34, 38, 42, 46, 51): Turn. Slip stitch into the 2nd stitch, and each of the next 2. Chain 1, work 3 HDC into the space under the same chain joined to, skip the next 3 HDCs, slip stitch into the top corner stitch of the next box;
(IV) (chain 1, work 3 HDC into the space under the same chain joined to, skip the next 3 HDCs, slip stitch into the top corner stitch of the next box) 19x (23x, 26x, 31x, 35x, 39x, 43x, 48x);
Chain 1, work 2 HDC into the space under the same chain joined to, skip the next 3 HDCs, slip stitch into the top of the last stitch. [20 (24, 27, 32, 36, 40, 44, 49) Boxes]
Work Until You Have 3 Boxes Left: Using the previous row as a base, you will continue working in the same manner repeating (IV) one less time each row to decrease the number of boxes by one each row. Continue working until you have 3 boxes left.
2 Boxes: Turn. Slip stitch into the 2nd stitch, and each of the next 2. Chain 1, work 3 HDC into the space under the same chain joined to, skip the next 3 HDCs, slip stitch into the top corner stitch of the next box, chain 1, work 2 HDC into the space under the same chain joined to, skip the next 3 HDCs, slip stitch into the top of the last stitch. (2 Boxes)
1 Box: Turn. Slip stitch into the 2nd stitch, and each of the next 2. Chain 1, work 3 HDC into the space under the same chain joined to. Skip the next 3 HDCs, slip stitch into the top of the last stitch. (1 Box)
Border: Chain 1. SC into the space just under the same chain joined to, [chain 1, (SC into the next space in between boxes, chain 1) across to the corner, (SC, chain 2, SC) into the corner] 4x, chain 1, slip stitch join to the 1st SC.
Fasten off, and weave in ends.
Back Bottom Panel Height:
- 12″: 5.88″ (5 7/8″)
- 14″: 7″
- 16″: 8.13″ (8 1/8″)
- 18″: 9.25″ (9 1/4″)
- 20″: 9.88″ (9 7/8″)
- 22″: 11″
- 24″: 12.13″ (12 1/8″)
- 27″: 13.38″ (13 3/8″)
Back Bottom Panel, Basic HDC C2C Throw Pillow Written Tutorial:
Chain 5. HDC into the 3rd chain, and into each of the next 2. (1 Box)
Row 2: Chain 5, and turn. HDC into the 3rd chain, and into each of the next 2, slip stitch into the top corner stitch of the next box. Chain 1, work 2 HDC into the space under the same chain joined to, HDC into the top of the last stitch. (2 Boxes)
Row 3: (I) Chain 5, and turn. HDC into the 3rd chain, and into each of the next 2, slip stitch into the top corner stitch of the next box;
(II) Chain 1, work 3 HDC into the space under the same chain joined to, skip the next 3 HDCs, slip stitch into the top corner stitch of the next box;
(III) Chain 1, work 2 HDC into the space under the same chain joined to, HDC into the top of the last stitch. (3 Boxes)
Rows 4 – 10 (12, 14, 16, 17, 19, 21, 24): Using Row 3 as a base, you will continue working in the same manner repeating (II) one extra time each row to increase the number of boxes by one each row. At the end, you will have the same number of boxes as rows.
Now that this panel is as tall as we need, we will no longer begin with a chain 5 on this side. We will slip stitch over to form an even edge, then work across adding a box to the width so it will get wider to match the front panel. Then we will begin the next row with a chain 5 to form an extra box to add to the width, work across the row only up to the height of the last box to maintain the edge. You will maintain the same number of boxes in this process.
Work until you have 21 (25, 28, 33, 37, 41, 45, 50) boxes wide.
Begin Decreasing:
Next Row: Turn. Slip stitch into the 2nd stitch, and each of the next 2. Chain 1, work 3 HDC into the space under the same chain joined to, skip the next 3 HDCs, slip stitch into the top corner stitch of the next box;
(IV) (chain 1, work 3 HDC into the space under the same chain joined to, skip the next 3 HDCs, slip stitch into the top corner stitch of the next box) 8x (10x, 12x, 14x, 15x, 17x, 19x, 22x);
Chain 1, work 2 HDC into the space under the same chain joined to, skip the next 3 HDCs, slip stitch into the top of the last stitch. [9 (11, 13, 15, 16, 18, 20, 23) Boxes]
Work Until You Have 3 Boxes Left: Using the previous row as a base, you will continue working in the same manner repeating (IV) one less time each row to decrease the number of boxes by one each row. Continue working until you have 3 boxes left.
2 Boxes: Turn. Slip stitch into the 2nd stitch, and each of the next 2. Chain 1, work 3 HDC into the space under the same chain joined to, skip the next 3 HDCs, slip stitch into the top corner stitch of the next box, chain 1, work 2 HDC into the space under the same chain joined to, skip the next 3 HDCs, slip stitch into the top of the last stitch. (2 Boxes)
1 Box: Turn. Slip stitch into the 2nd stitch, and each of the next 2. Chain 1, work 3 HDC into the space under the same chain joined to. Skip the next 3 HDCs, slip stitch into the top of the last stitch. (1 Box)
Border: Chain 1. SC into the space just under the same chain joined to, [chain 1, (SC into the next space in between boxes, chain 1) across to the corner, (SC, chain 2, SC) into the corner] 4x, chain 1, slip stitch join to the 1st SC.
Fasten off, and weave in ends.
Back Top Panel Height:
- 12″: 9.25″ (9 1/4″)
- 14″: 9.88″ (9 7/8″)
- 16″: 11″
- 18″: 12.13″ (12 1/8″)
- 20″: 13.38″ (13 3/8″)
- 22″: 14.63″ (14 5/8″)
- 24″: 15″
- 27″: 16.75″ (16 3/4″)
Back Top Panel, Basic HDC C2C Throw Pillow Written Tutorial:
Chain 5. HDC into the 3rd chain, and into each of the next 2. (1 Box)
Row 2: Chain 5, and turn. HDC into the 3rd chain, and into each of the next 2, slip stitch into the top corner stitch of the next box. Chain 1, work 2 HDC into the space under the same chain joined to, HDC into the top of the last stitch. (2 Boxes)
Row 3: (I) Chain 5, and turn. HDC into the 3rd chain, and into each of the next 2, slip stitch into the top corner stitch of the next box;
(II) Chain 1, work 3 HDC into the space under the same chain joined to, skip the next 3 HDCs, slip stitch into the top corner stitch of the next box;
(III) Chain 1, work 2 HDC into the space under the same chain joined to, HDC into the top of the last stitch. (3 Boxes)
Rows 4 – 16 (17, 19, 21, 24, 26, 27, 30): Using Row 3 as a base, you will continue working in the same manner repeating (II) one extra time each row to increase the number of boxes by one each row. At the end, you will have the same number of boxes as rows.
Now that this panel is as tall as we need, we will no longer begin with a chain 5 on this side. We will slip stitch over to form an even edge, then work across adding a box to the width so it will get wider to match the front panel. Then we will begin the next row with a chain 5 to form an extra box to add to the width, work across the row only up to the height of the last box to maintain the edge. You will maintain the same number of boxes in this process.
Work until you have 21 (25, 28, 33, 37, 41, 45, 50) boxes wide.
Begin Decreasing:
Next Row: Turn. Slip stitch into the 2nd stitch, and each of the next 2. Chain 1, work 3 HDC into the space under the same chain joined to, skip the next 3 HDCs, slip stitch into the top corner stitch of the next box;
(IV) (chain 1, work 3 HDC into the space under the same chain joined to, skip the next 3 HDCs, slip stitch into the top corner stitch of the next box) 14x (15x, 17x, 19x, 22x, 24x, 25x, 28x);
Chain 1, work 2 HDC into the space under the same chain joined to, skip the next 3 HDCs, slip stitch into the top of the last stitch. [15 (16, 18, 20, 23, 25, 26, 29) Boxes]
Work Until You Have 3 Boxes Left: Using the previous row as a base, you will continue working in the same manner repeating (IV) one less time each row to decrease the number of boxes by one each row. Continue working until you have 3 boxes left.
2 Boxes: Turn. Slip stitch into the 2nd stitch, and each of the next 2. Chain 1, work 3 HDC into the space under the same chain joined to, skip the next 3 HDCs, slip stitch into the top corner stitch of the next box, chain 1, work 2 HDC into the space under the same chain joined to, skip the next 3 HDCs, slip stitch into the top of the last stitch. (2 Boxes)
1 Box: Turn. Slip stitch into the 2nd stitch, and each of the next 2. Chain 1, work 3 HDC into the space under the same chain joined to. Skip the next 3 HDCs, slip stitch into the top of the last stitch. (1 Box)
Border: Chain 1. SC into the space just under the same chain joined to, [chain 1, (SC into the next space in between boxes, chain 1) across to the corner, (SC, chain 2, SC) into the corner] 4x, chain 1, slip stitch join to the 1st SC.
Fasten off, and weave in ends.
How to Assemble an Envelope Style Crochet Throw Pillow:
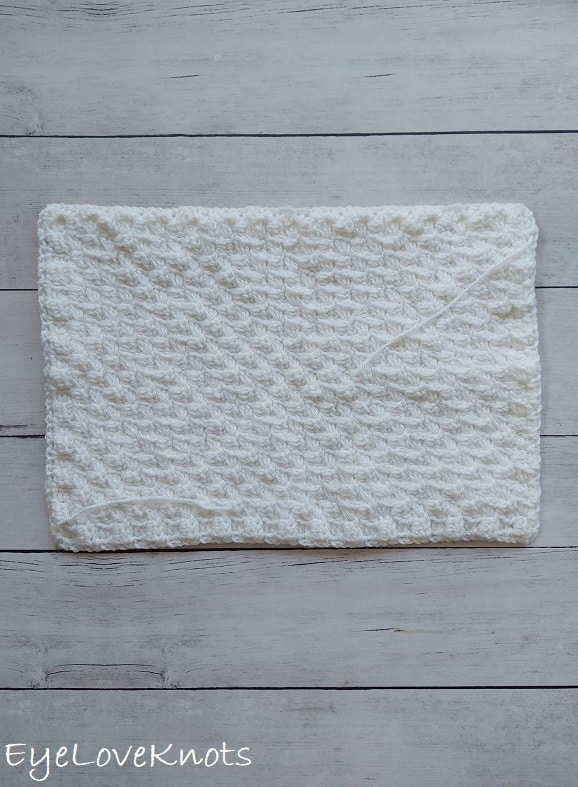
Lay the top back panel down with the wrong side facing up.
Lay with top bottom panel on top of the other panel also with the wrong side facing up overlapping about 3″ – it doesn’t have to be perfect because you’ll get it there in the next step.
Lay the top panel down on top of the back panels with the wrong side facing down, and line up the sides.
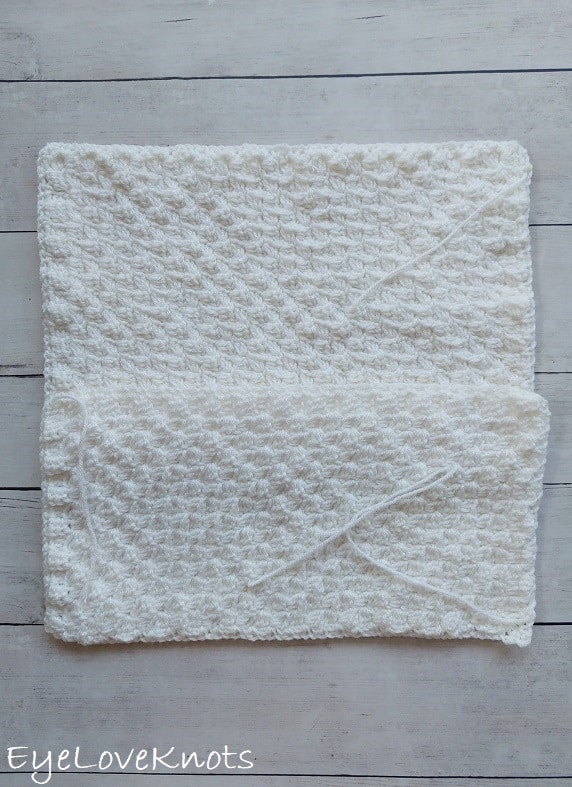
You can use sewing pins or locking stitch markers to keep everything in place, but what I like to do is just work with the front panel and the top back panel until I get to the point where I add in the bottom back panel, then I realign everything.
With the front side of the pillow still facing you, attach yarn into any stitch working through both layers, and chain 1. I like to do it into the first single crochet after the top right corner.
Evenly SC through each single crochet stitch, and each chain space working through all given layers (mostly two layers, but will be three layers in the center where the two back panels overlap), and work a “SC, chain 1, SC” in each corner. This will produce a corner that is more rounded, for a more square corner, add more chains. Once back to the beginning, slip stitch join to the 1st SC, and fasten off. Weave in final ends, and then add pillow form.
Feel free to use this information to make and sell your own items. When sharing, designer credit is appreciated, but not required. All EyeLoveKnots Patterns, Photos and PDF’s are protected under copyright. They are not to be copied, distributed or sold – doing so is copyright infringement and stealing! DO NOT copy and paste my pattern anywhere, and DO NOT share the written pattern with others, share the link to the pattern instead so others can find it themselves.
Join one of our awesome Facebook groups to share your creations, and see what others are up to!
– EyeLoveKnots Crochet & DIY Community
– DIY Home On Rockwood Lane
– Alexandra Lane Lifestyle
Linked Up To…
Craft Schooling Sunday – Creative Jewish Mom
Sundays on Silverado #108 – The House on Silverado
Handmade Monday #291 – Sum of their Stories
Craftastic Monday – Sew Can Do
Happiness is Homemade – Decor Craft Design
You’re the Star Blog Hop – Decor Craft Design
Hello Monday – Pink Lady
Anything Goes Linky #343 – My Random Musings
652nd Inspire Me Tuesday – A Stroll Thru Life
Fabulous Party 439 – Lou Lou Girls
Beautifully Made Home Decor Link Party 229 – Across the Blvd
Talent Sharing Tuesday – Scribbling Boomer
The Happy Now Blog Link- Up #336 – JENerally Informed
All About Home #159 – Common Ground
Create, Bake, Grow & Gather Party #535 – Shabby Art Boutique
Home Matters Linky Party #395 – Modern Monticello
Farmhouse Friday 269 – County Road 407
Saturday Sparks Link Party 530 – Pieced Pastimes
A Morning Cup of Joe – The Cottage Market
Fabulous Party 440 – Lou Lou Girls
Linky Ladies Party #228 – The Purple Poncho
Tuesday Turn About #167 – My Wee Abode
653rd Inspire Me Tuesday – A Stroll Thru Life
Beautifully Made Home Decor Link Party 230 – Across the Blvd
Talent Sharing Link Up – Scribbling Boomer
The Happy Now Blog Link- Up #337 – JENerally Informed
All About Home #160 – Common Ground
The Loop Scoop 45 – Moogly Blog
The Wednesday Link Party 467 – Oombawka Design
Team Creative Crafts Link Party #110 – Artsy-Fartsy Mama
Wonderful Wednesday – Oh My Heartsie Girl
Wonderful Wednesday Blog Hop – My Life Abundant
Wednesday Link Party #312 – To Grandma’s House We Go
Thursday Favorite Things #557 – An Artful Mom
Creatively Crafty Link Party #344 – Try It Like It Create It
Encouraging Hearts and Home Blog Hop – My Slices of Life
Crafty Creators Link Party #34 – Life as a LEO Wife
One More Row Free Crochet Link Party #46 – Loops and Love Crochet
Share the Wealth Link Up #27 – Big Fat Menopausal Life
The stitch used on the pillow is just so pretty!
Michelle
https://mybijoulifeonline.com
I really like the textured look of this stitch pattern, and the neutral color of the pillow would complement almost any decor. Thank you for participating in Talent-Sharing Tuesdays Link-Up 31.
Carol
http://www.scribblingboomer.com
Thanks Carol! The texture of this fun stitch pattern wins me over every single time.
I love the texture and speed of C2C! Who is Colin Harper though? Did I miss the bit where you explain the name?
You’re so right! I meant to put a plug in there about it, but basically it’s just a series on my blog that features C2C boxes worked in half double crochets.
I LOVE the texture of C2C. I waited a long time to try it, but I am completely hooked now!
Wonderful, so perfect for fall! thanks for sharing last week on craft schooling sunday!
Thank you! That is exactly what this beautiful colorway reminds me of.
Hello – me again. I’m just popping by to say:
Thank you for participating in Talent-Sharing Tuesdays Link-Up 32.
Carol
http://www.scribblingboomer.com
Your Colin Harper Throw Pillow turned out beautifully 🙂 I love that you have so many sizes available for this pillow too! Thank you for linking up at our weekly Link Party! You are being featured at our Wednesday Party #468 this week. Here’s the direct link to the post in case you’d like to share your feature: https://oombawkadesigncrochet.com/crochet-folk-art-crochet-peppers-colin-harper-throw-pillow-link-party-468/
Hope to see you again next week! Rhondda
So exciting! Thanks so much 🙂 I always try to have a little something for everyone.