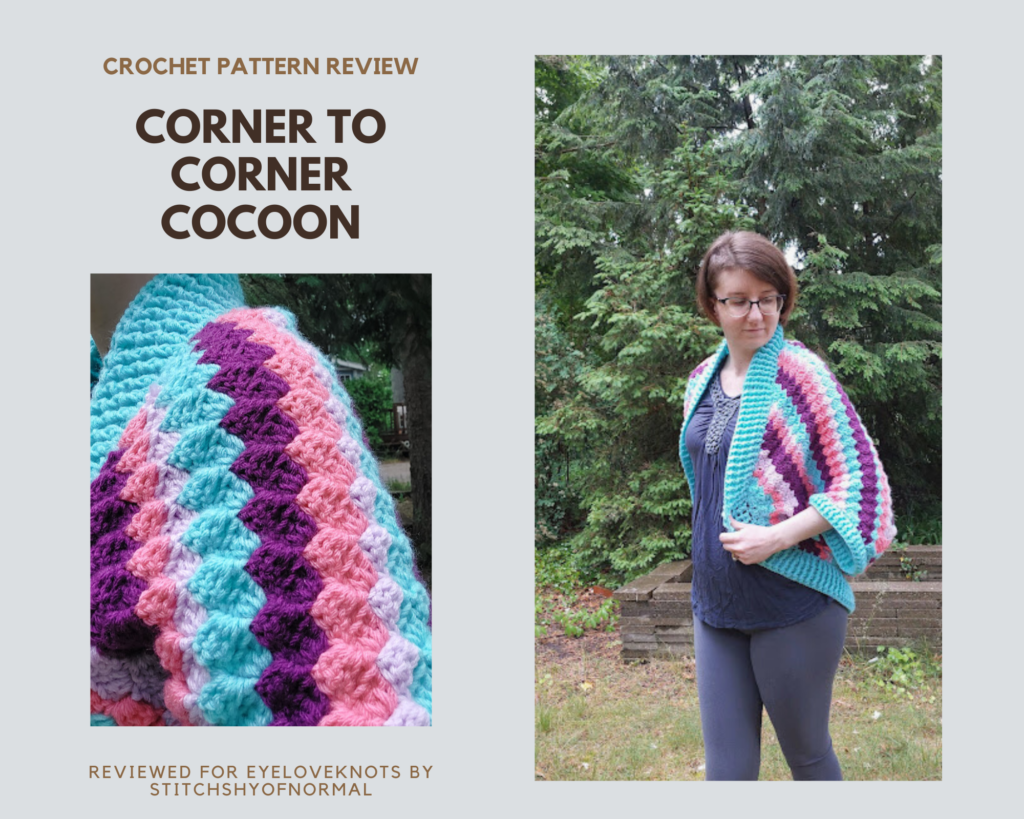
This is a crochet pattern review of the “Corner to Corner Cocoon” by designer Heart Hook Home. Review done by A Stitch Shy of Normal for EyeLoveKnots.
This post contains affiliate links for Etsy, WeCrochet and Lion Brand Yarn. If you make a purchase by clicking on them, I make a small commission at no extra cost to you. Thanks for your support!
Find the crochet pattern review below. For the pattern, you can view the free crochet pattern, or purchase the Ad-Free, Printer Friendly PDF on Etsy!
In a hurry? Pin this for Later when you have more time.

It’s me, Abigail with A Stitch Shy of Normal.
Visit with me on Instagram @astitchshyofnormal for all kinds of awesome crochet makes and inspiration!
I love C2C or corner to corner crochet. (These two names mean the same thing and the designer actually titles this pattern using both phrases, I just picked one for my title). It’s a technique I learned early in my crochet journey and have used on and off throughout the years. It makes for really cute blankets and a fun way to create pixelated pictures for things like pillow covers or wall hangings!
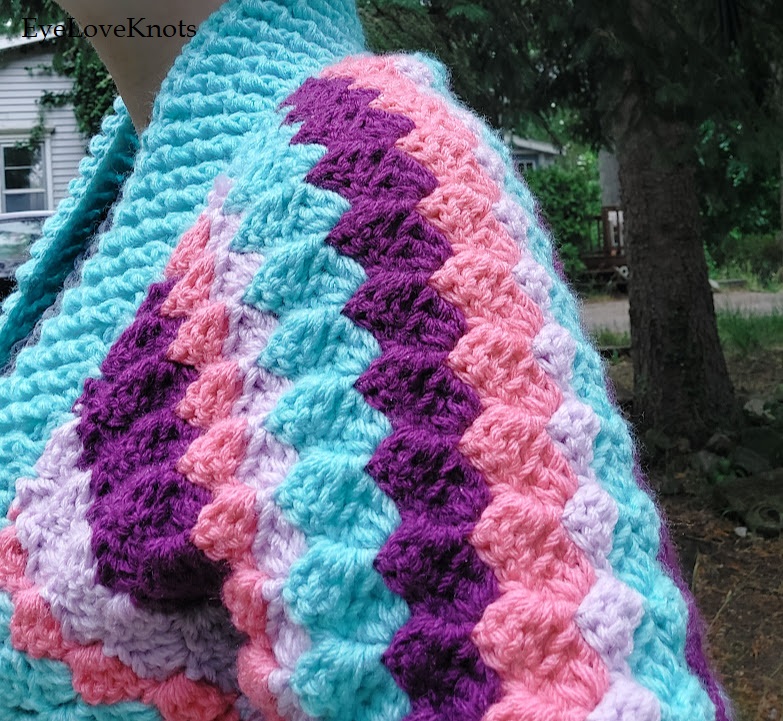
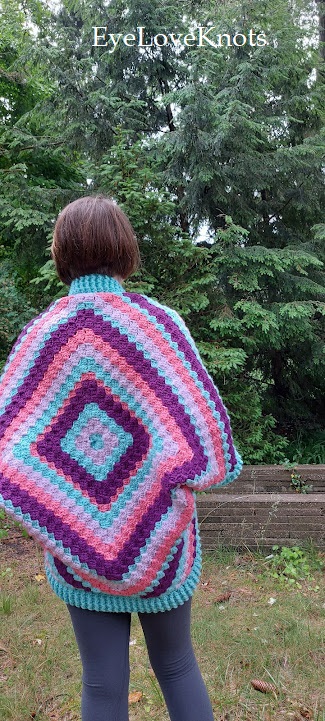
However, what I had never attempted or even was aware you could do, was corner to corner crochet in the round. Rather than working in diagonal lines to create a rectangle, this technique actually has you working around and around in the same little squares, allowing you to customize the size very easily. As far as I know this would only work for squares rather than rectangles with different sizes to each dimension, but who knows? I didn’t even know this was a possibility until a few weeks ago, so don’t take my word on it! I loved learning this technique and while I needed to lean on the video tutorial a bit, the resources were there to help and I got the hang of it before too long.
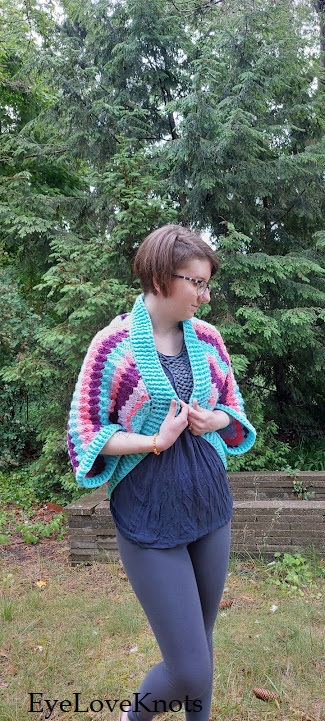
I love how this technique was used to create an adorable cocoon sweater. This is a very common style of crochet sweater since you just need to make a big comfy square, then fold it in and sew some sleeve openings. That’s it! It can fit a range of sizes, and offers that special comfort only a big shapeless kind of sweater can give. (I swear they’re even comfier than more fitted styles, hopefully I’m not the only one!) This pattern in particular also offers the beautiful color patterning, allowing you to make something truly one-of-a-kind.

What Materials Do I Need to Crochet a Cocoon?
- About 1600 yards of worsted weight yarn – I used Big Twist Value in Aqua, Soft Purple, Watermelon, and Purple (about three quarters of the skein for Soft Purple and Watermelon, the entire skein for Purple, and almost a full two skeins of the Aqua).
- I9/5.5mm Crochet Hook – I like to use Clover Amour Ergonomic Hooks
- Corner to Corner Cocoon Crochet Pattern – the free pattern on the Heart Hook Home site, or the paid PDF via Etsy
- Scissors/yarn needle for assembly
Material Notes:
I think this yarn worked out amazingly. When I first looked at the pattern and saw I would need four different colors and likely a couple skeins of some of those colors, I wanted to keep this as affordable as possible. I was thinking something along the lines of Red Heart Super Saver or Lion Brand Basic Stitch, both of which I commonly use for basic worsted weight yarns (just remember I am not speaking to the gauge working out with these yarns, I did not try them!)
However, I actually ended up getting lucky with my timing. At the time I was browsing Joann’s website to pick my yarn colors in advance as I was planning to run by after work, I came across a sale on their Big Twist Value yarn. This line has been great for me before, I’ve used it for a ton of different projects. It’s very comparable to Red Heart Super Saver in terms of feel and quality in my opinion. And at this time, it was on a great sale of something like 4 skeins for ten dollars (which is NOT an active sale anymore at the time I’m writing this!). Plus there was a coupon for pickup. And I only needed about six skeins if I was doing my math correctly! So I was able to snag all of this yarn for something like twelve bucks, which I considered very worthwhile. Now with the regular price and assuming you don’t have any coupons, it would be closer to 25/30 bucks for the same amount…which I still would consider a decent value for this sweater!

Did this yarn work out well? For sure. It has gorgeously bright colors, feels good on the hands, and is soft against my skin in the finished sweater. It holds up nicely in stitching, and I found very few knots in the skeins (which just kind of happens sometimes). The label does say it can handle machine washing as well, with the usual rule of no tumble drying. I have not washed this sweater yet but I expect it to handle that pretty well! I would absolutely use this line again, for another color combo.
How Long Does it Take to Crochet a Cocoon?
This project took me a little over a week of working on it most evenings, and I’d estimate I put in between 18 to 20 hours into it. The main square takes some time since each row grows as you work, but then you add outside corners to turn it back into a square and those go pretty quickly! And the ribbing doesn’t take as long as it might look.
Gauge & Measurements:
The listed gauge in the pattern says that after round 3, the square should be 5″ across. And after round 5, it should be 8″ across.
Comparing that to my notes, I had a square closer to 4.5″ across at round 3 but it worked out to be just about 8″ at round 5. So I decided it was close enough to continue. With a design like this, you have some wiggle room for the piece to turn out a couple inches larger/smaller than expected and still get a good fit. I anticipated my finished square might be an inch or two short but thought that seemed fine!
The finished measurement is decided by the size of your square before you shape the sleeves by folding and seaming it. And I’m going to be honest with you guys here–I did not measure at this point. I know, it was such an easy check to make but I got excited! But measuring my shaped sweater as best I can, it looks like mine would have measured about 36.5″-37″ across, and the size I made is supposed to be 38″ across. So I got lucky there.

Pattern Notes:
This is not a very simple beginner pattern, but if you’re willing to learn a new technique it is approachable! I would suggest you only tackle this if you’re already fairly comfortable with C2C crochet in the classic form. Not discouraging you if you want a challenge, but I feel like it might be a little confusing.
I struggled with working this in the round for a little while, it’s not a really difficult technique but it was just so new to me! The designer provides a really helpful video though, and I had to refer to it many times. It shows the process very well, and it helped a lot of things click for me. And even when I felt like I knew what I was doing I continued to check back with the video to see if it was looking the way it was supposed to!
The pattern isn’t so bad when you get used to the strategy, though. Once you’re a few rounds into the center diamond you’ll see that you just keep increasing the size the same way, working around and around and around. I would strongly suggest printing the pattern out so you can read the instructions and also have the color progression visible at the same time. I had to keep scrolling back and forth, and also clicking over to my Ravelry project page where I listed what colors were each number for me! If you make a smarter choice than I did and print it out, all that confusion will be gone.
The corners are really fun and quick to work up once you get there. I liked the explanation of how to change colors too, I believe that was in the video. It helped me keep clean lines to my stripes. The downside is that the first corner goes really fast, and then you realize you have to do that three more times.

My one “complaint” about this pattern is that I feel the armhole space was not clearly explained. You fold the corners of the square in and seam the horizontal sides from the middle outward, “leaving 12 blocks open for an armhole”, and they do clarify that this is about 9″. I interpreted this to mean when it’s laying flat, I will seam up to 12 blocks remaining on my folded sweater, leaving 24 total blocks not seamed. If you haven’t guessed, it seems this was incorrect. It looks like it’s supposed to be 12 blocks TOTAL. My armhole is double the intended size. I figured this out when starting the cuffs. Why didn’t I fix it? Because at this point I had already done all the ribbing for the inner section, and that would be frogging a ton of work. I don’t mind my larger armholes, just wanted to warn others of my mistake!
My one other change, on purpose this time, was working only 4 rows of ribbing on those cuffs instead of the listed 6. I just felt they were big enough at this round and wanted to let the inner ribbing be the main star! If I had made them half the circumference like they were supposed to be, maybe my opinion would have been different. But that’s just what I chose to do.
I found this pattern a complete joy to make. The colors kept things interesting, the stitching is simple once you get the technique down, and the construction is lovely! It’s comfy and big and warm and the striped colors will definitely draw attention. I recommend trying this pattern out if you feel you’re ready to try C2C crochet in the round! It was a great learning experience and I now feel like I can use this stitch technique in future creations.

Don’t forget to visit with me on Instagram @astitchshyofnormal for all kinds of awesome crochet makes and inspiration.
Join one of our awesome Facebook groups to share your creations, and see what others are up to!
– Yarn Crafts & Coffee Community
– DIY Home On Rockwood Lane
– Alexandra Lane Lifestyle
Linked Up To…
Spread the Kindness Link Up on the Edge #664 – Shelbee on the Edge
Linky Ladies Party #239 – The Purple Poncho
Loop Scoop 67 – Moogly Blog
Weekday Wear Linkup – Away from the Blue
Style with a Smile Link Up – Style Splash
Confident Twosday Linkup – I do deClaire
Fancy Friday Linkup – Nancy’s Fashion Style
Ageless Style – My Slices of Life
Thursday Fashion Files – Doused in Pink
Chic and Stylish Link Up – Mummabstylish
Craftastic Monday Link Party – Sew Can Do
Team Creative Crafts Link Party #158 – Artsy-Fartsy Mama
Wednesday Link Party 515 – Oombawka Design Crochet
Saturday Sparks Link Party 577 – Pieced Pastimes
Handmade Monday #334 – Sum of their Stories
Happiness is Homemade 489 – Decor Craft Design
Hello Monday – Pink Lady
Anything Goes Linky 386 – My Random Musings
Tuesdays with a Twist #535 – God’s Growing Garden
Love Your Creativity Link Party #211 – Life and Linda
271 Senior Salon Pit Stop – Esme Salon
Craft Schooling Sunday – Creative Jewish Mom
Sundays on Silverado #155 – The House on Silverado
692nd Inspire Me Tuesday – A Stroll Thru Life
Fabulous Party 486 – Lou Lou Girls
The Happy Now Blog Link-Up #384 – JENerally Informed
To Grandma’s House We Go Link Party #360 – Grandma’s House DIY
Wonderful Wednesday Blog Hop – My Life Abundant
Traffic Jam Friday Reboot – Is This Mutton?
Create, Bake, Grow & Gather Party #584 – Shabby Art Boutique
Morning Cup of Joe – The Cottage Market
Pink Saturday – How Sweet the Sound
Encouraging Hearts and Home – My Slices of Life
Crafty Creators Link Party #7 – Life as a LEO Wife
Thursday Favorite Things #622 – An Artful Mom
Wow, love it! I’ve shared this on craft schooling sunday as the attendence was on the low side, hope that is okay!
This is beautiful! Thank you so much for sharing your Corner-to-Corner Pattern Review at the Senior Salon Pit Stop party this week. I’m excited to be featuring it at the party tomorrow. Sharing on Facebook and pinned.
Hugs,
Maria @ kraftyplanner.com
It’s absolutely fabulous! I love the style and the colours. Thanks for linking up!
Emma xxx
http://www.style-splash.com