This is a crochet pattern review of the Cheeseburger Bag pattern by designer Eclectic Jess. Review done by A Stitch Shy of Normal for EyeLoveKnots.
This post contains affiliate links for WeCrochet. If you make a purchase by clicking on them, I make a small commission at no extra cost to you. Thanks for your support!
Find the crochet pattern review below or click here to find the pattern purchase page on the designer’s site!
In a hurry? Pin this for later when you have more time.
It’s me, Abigail with A Stitch Shy of Normal.
I’ve always been a fan of “food crafts”. Hats that look like a bag of popcorn, or a blanket shaped like a giant pizza slice. I love it in all forms, sewing or knitting or crochet! I’ve made a cheeseburger beanie in the past, and a pizza slice blanket for my little brother. I’m sure I’ve done more as well but those are the two that stick out in my head. I’ve experimented with some of these ideas myself but I can never quite capture the food I’m aiming for in yarn form…yet. I’ll get there!
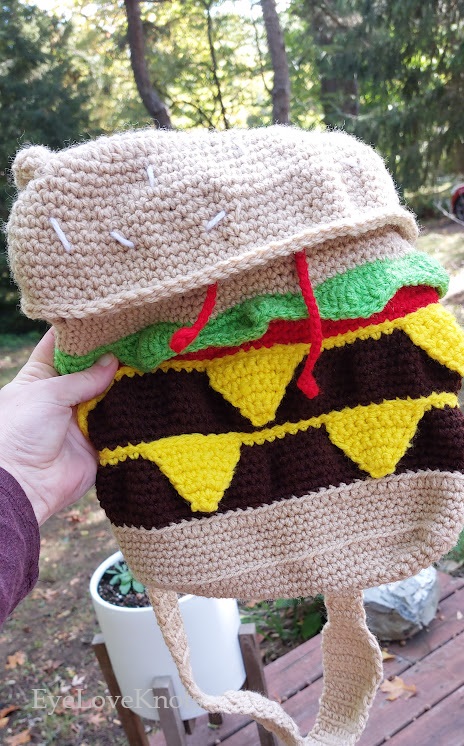
Anyway, when I spotted this crossbody bag shaped like a cheeseburger on Ravelry a couple weeks back, I knew it had to be mine. It’s the best of everything! It’s a crossbody, my favorite style of bag for actual everyday use. It’s shaped like food, one of my favorite “genres” of handmade crafts. Plus it’s just stinking cute. I know real cheeseburgers aren’t necessarily this bright colored and perfectly stacked. This design looked like it came out of a freezeframe of a Scooby Doo episode. And I loved it at first sight! I put it on my favorites list on the site right away.

Then earlier this week, I had a rough day at work and some stress outside of work. I wanted to just do something for myself for fun. I decided impulsively that I was going to make myself this cheeseburger bag right here and now! I needed a “me” project for no reason, and this one had been on my mind. Plus it uses basic worsted weight acrylic yarn, so I knew with Joann sales and coupons I could get the materials pretty cheap. I didn’t plan to make it for any kind of deadline and it wasn’t my original plan for this review. However, I finished it so quickly AND loved it so much that I knew I had to share the joys of this project with all of you! If this review gets you to check out this pattern and make one for yourself, I’m so happy I shared it. The designer has a ton of food-themed patterns plus a lot of fun other designs, and I will be checking out the rest of their selection as soon as I finish typing this up! (If I buy another one of their patterns now I’ll want to start on it right now, and you know how that tends to go…)
Visit with me on Instagram @astitchshyofnormal for all kinds of awesome crochet makes and inspiration!
What Materials Do I Need to Crochet a Cheeseburger Purse?
- Red Heart Super Saver yarn in the following colorways: Buff (most of 1 skein), Coffee (about half a skein), Bright Yellow, Spring Green, & Cherry Red (small amounts of each, less than a quarter of the skeins). This is my personal usage but your “toppings” may vary!
- Scrap bits of white, I had Big Twist Value in “White” but of course any worsted would work.
- F5/3.75mm hook and G6/4mm hook – I like to use Clover Amour hooks!
- Needle and scissors for finishing off, which is actually pretty minor in this pattern–just weaving in a lot of ends and some quick assembly with the strap.
- The paid Cheeseburger Bag pattern, found here on the designer’s website!
Material Notes:
I don’t need to tell you how great Red Heart Super Saver is for basic things like a bag…but I still will. It’s affordable, it’s durable, the colors are nice and bright, and it’s that nice mix of soft but sturdy. It’s machine washable and most craft stores have a decent selection of colors. I have zero complaints about this yarn, just like always!
Did it work well for this pattern? Of course it did. The colors came out adorable! The designer actually used more of a gold shade for their bun, giving it a toasted look. I just personally didn’t like that combination when I picked up all the shades at the store, I wanted the cheese to stand out more against the bun, so I chose the lighter tan shade of RHSS “Buff”. I wish I could have found something in between. But yes, that’s my only complaint here, that I couldn’t find the literal perfect shade of one of the colorways I bought. I think the rest (the burger, cheese, lettuce, cheese, and ketchup) were all great matches for what they were representing.
Obviously I would use this again. Not that I necessarily plan to make another cheeseburger bag for myself, but if I make one as a gift I’ll use the same yarn! Or if I make any of the gorgeous food designs from this creator, I will probably reach for Super Saver again since it went so well. I definitely recommend this or a comparable yarn if you’re making yourself one of these bags.
How Long Does it Take to Crochet a Cheeseburger Bag?
I definitely rushed this project, just because I loved it and wanted to use it ASAP. In terms of days, I managed to make this thing between Tuesday and Sunday this week! This is around work and life, so in hours actually spent with yarn in my hands I’d estimate maybe 8-10 hours. That’s very quick in my opinion for such a colorful and fun project!
Gauge & Measurements:
The listed gauge is given as 9SC x 10 rows being 2″ square, but I actually followed the designer’s note within the pattern. As you start the bottom bun, they say at the end of round 5 (so basically when you’ve finished the base of the bottom bun), your oval should be about 8″ long and 2.5″ wide. I checked mine at this point and had those measurements exactly, not even a touch big or small. I would have been fine fudging it a little if I was happy with the size but it seems like my gauge was right on target!
The finished bag is meant to be roughly 9″ tall, 8″ wide, and 2″ deep. Mine is pretty much right on, it depends on how I try to flat lay it. The shape of a burger is difficult to measure correctly! But I’m within about half an inch either way on these measurements, so I am very happy with how my measurements compare.
Pattern Notes:
I absolutely LOVED this pattern. That’s it, that’s the review.
But seriously, it was a joy from start to finish. Each section goes quickly enough that you don’t get super bored of it, and you’re changing colors regularly to get a visual interest. You can clearly tell what each part is supposed to represent, and you could easily swap out colors or add some extra toppings–can you imagine all the different cheese options, or adding some mushrooms instead of the lettuce? I want to figure out how to add some pickles in there too. You can also make it a single-patty burger if you want it to be shorter. There’s so many options and I want to try mixing up the toppings next time around!

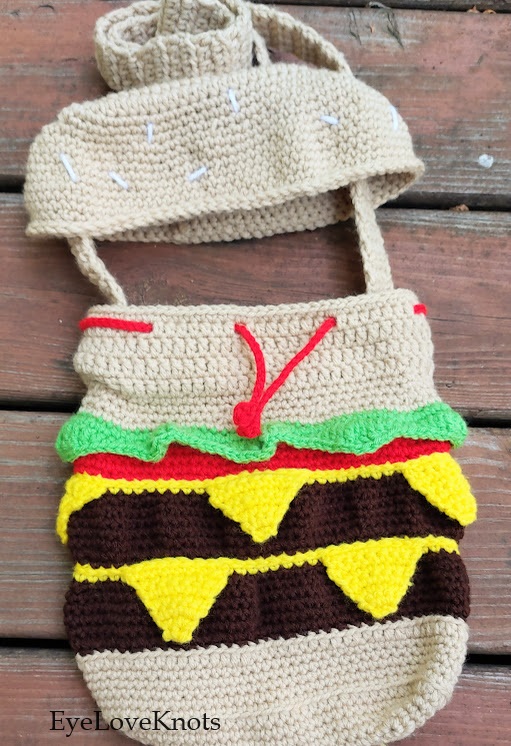
I don’t have any complaints about anything being confusing in the pattern this time around, I don’t think any of it stood out to me. 90% of this pattern is working basic stitches like SC or HDC in the round, and increasing or decreasing to shape the various layers. But if you’re afraid this one is full of sewing, don’t worry! You work each piece directly on top of the previous one. The separation between the layers is done through techniques like working in the back loops or adding a round of slip stitching to make a neat line. The entire bottom bun up to the inner section of the top bun is one piece, and you then work a separate top bun and strap. All you do at the end is add sesame seeds to the top bun (if you want), line up the strap and sew that in, and weave in all your ends! (If you didn’t already do that at each step, which is obviously what I did, of course…I’m great at weaving in my ends as I go and not leaving them until the end with a big mess for myself.)
I did leave out one small touch just for my own preference–after you work up the tomato slice, the pattern says to essentially surface slip stitch around the whole thing again. I started doing this and just wasn’t in love with the look. It looks cute in the pattern picture, it might just be my own tension with it that I didn’t like. Whatever the reason, I chose to leave this step out and keep my tomato a solid stripe rather than adding additional texture.
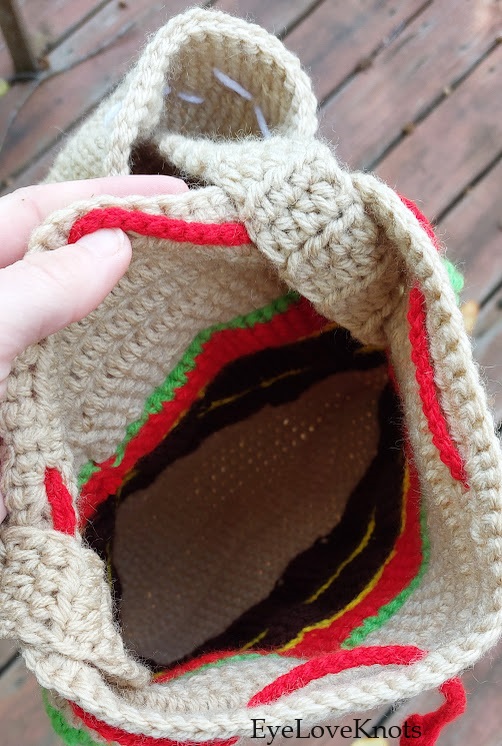
This pattern has been one of my absolute favorite makes in the past year or so. I had fun making it, I truly enjoyed each step, and I love the look of the finished result. I recommend you check it out, especially as we begin to approach the holiday season! The pattern didn’t take me all that long and the total yarn cost was not that bad for just one bag. If you were to make a few for gifts it would only get better as you wouldn’t need to buy more than one skein of all the “toppings” colors (red, green, yellow) unless you were making quite a few bags. I feel like teenagers or college students would love this as a fun conversation starter bag. And it has plenty of room for a wallet, phone, and miscellaneous other bits!
If you check out this pattern based on the review, I hope you enjoy it just as much as I did. What toppings do you like on your cheeseburgers in real life? I like to do tomato, pickles, onion, ketchup, and mustard (I like the classics). Is there a topping you can’t live without, or one that most people think is odd that you love? Let me know!
Don’t forget to visit with me on Instagram @astitchshyofnormal for all kinds of awesome crochet makes and inspiration.
Join one of our awesome Facebook groups to share your creations, and see what others are up to!
– Yarn Crafts & Coffee Community
– DIY Home On Rockwood Lane
– Alexandra Lane Lifestyle
Linked Up To…
Leave a Reply