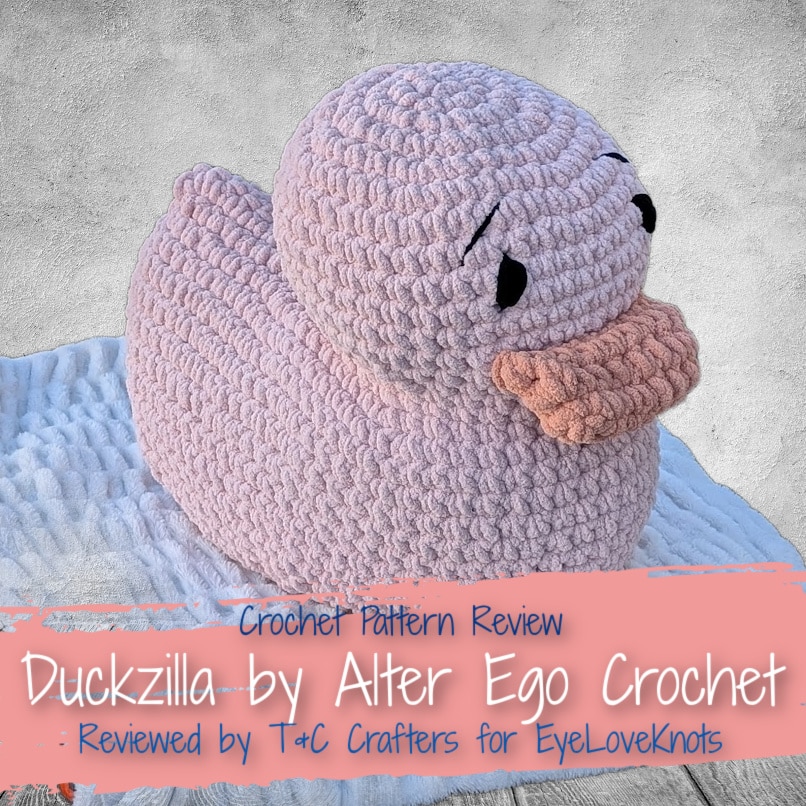
This is a crochet pattern review of the Duckzilla designed by Alter Ego Crochet. Review done by Candace of T&C Crafters for EyeLoveKnots.
This post contains affiliate links for Etsy and Amazon. If you make a purchase by clicking on them, I make a small commission at no extra cost to you. Thanks for your support!
Find the crochet pattern review below, or click here to purchase the pattern from Alter Ego Crochet on Etsy!
In a hurry? Be sure to pin it for later!
It’s me, Candace with T&C Crafters.
Visit with me on Facebook and Instagram for all kinds of awesome crochet makes and inspiration.
For the last few years, my youngest niece on my husband’s side of the family has been my little crafting buddy. She loves to make hair bows, friendship bracelets, and assorted crafts of all types. Recently, we have been working on her crochet skills. She has already made an adorable little mini octopus and is about 20 rows into a blanket! While not all young kids appreciate handmade birthday gifts, I know for a fact that she loves them!
Since my niece’s favorite animal is a duck, I knew immediately when I saw the Duckzilla pattern from Alter Ego Crochet that I needed to make one for her! I waited for a good sale on jumbo yarn and stocked up. My original plan was to make her this duck for Christmas, but once I started it and realized just how huge it was, I figured her birthday in January would be a better deadline.
While the Duckzilla pattern takes some time to work up because it’s so big, it was 100% worth it! My niece is absolutely in love with this giant duck! In addition to being an adorable addition to her room, she is able to use it as a bean bag-style chair! She’s a pretty tall 12-year-old and has plenty of room to relax and crochet while leaning on the duck. If you know someone that loves ducks, or if you just want to make a giant duck for fun, I definitely recommend this pattern!
What Materials Do You Need to Crochet Duckzilla?
- Bernat Blanket Extra Thick in Pink Dust (5 skeins) and Oatmeal (1 skein)
- Yarn Bee Eternal Bliss in Butterscotch (1 skein)
- Bernat Blanket Yarn in Black (eyes)
- X 25 mm Crochet Hook
- Stuffing (15 pounds)
- Yarn Needle
- Cardboard or Wood for Base
- Duckzilla, paid crochet pattern by Alter Ego Crochet via Etsy
Material Notes:
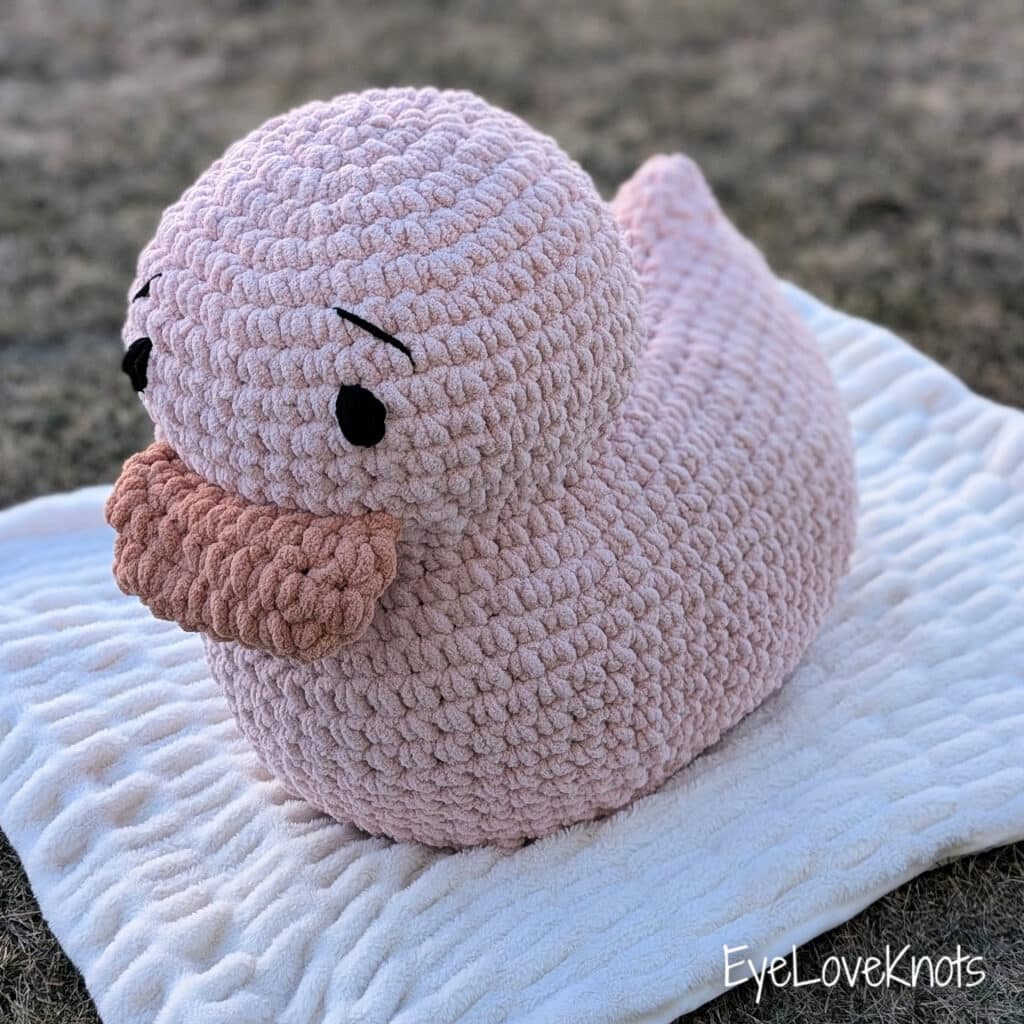
Due to the size of this duck, you are going to need a lot of yarn. The original pattern calls for Hobbii blanket yarn and suggests using 9 skeins of pink, 1 skein in yellow, 1 skein in white, and 1 skein in black. I opted to use Bernat Blanket Extra Thick instead. Since the Bernat Blanket Extra Thick skeins are about twice the weight of the Hobbii blanket yarn skeins, I thought that 5 skeins of pink would be enough. I ran a bit short, so I had to adjust and make the bottom of my duck using some yarn in the colorway Oatmeal for the bottom instead. I really actually liked how it turned out with the different color bottom. I think it made it look more like a real rubber duck.
For the beak, I originally had gotten some Bernat Blanket Extra Thick in the color gold, but I ended up purchasing some Yarn Bee Eternal Bliss in Butterscotch to use instead. I liked that colorway better since it was more of a blend with the pink rather than a stark contrast. Even though the skeins of Yarn Bee Eternal Bliss are smaller, I only needed one skein for the beak.
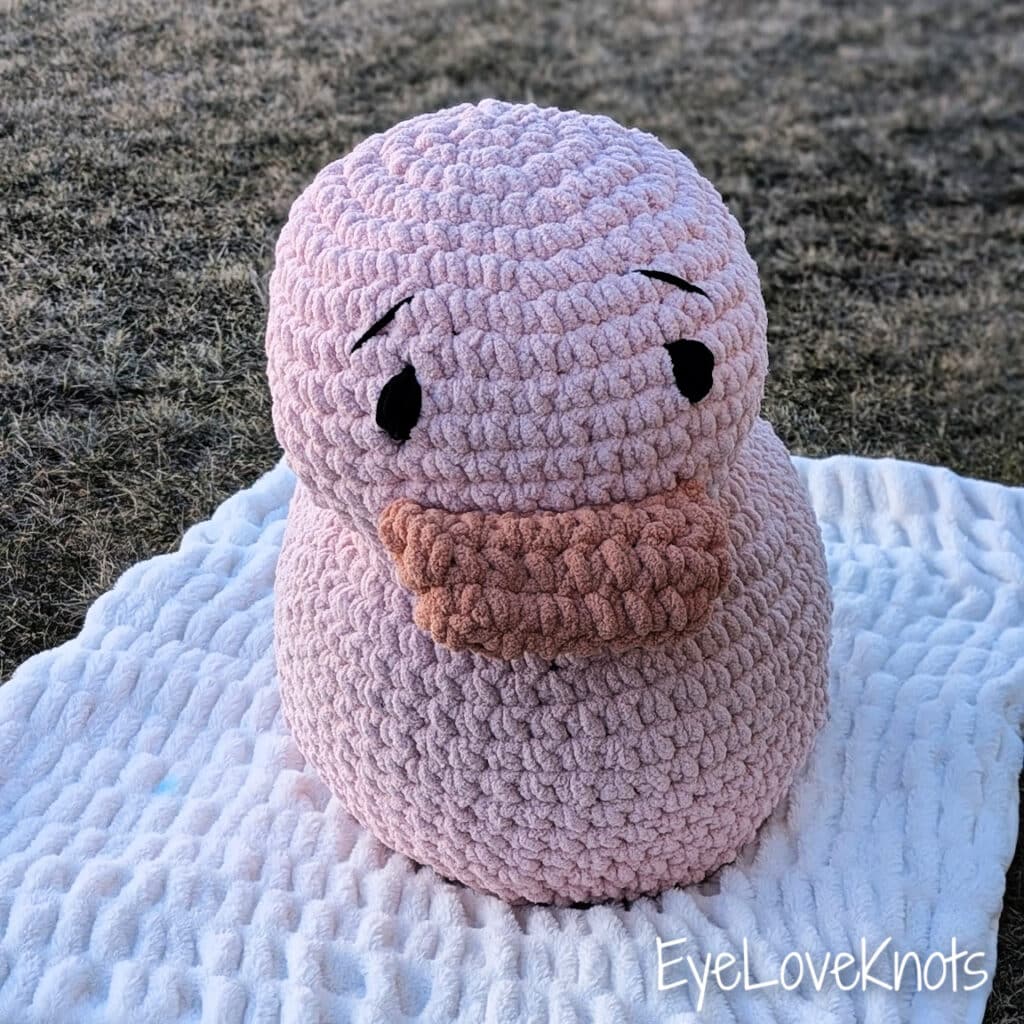
In the original pattern, the eyes are made with the jumbo yarn and are black and white. I opted to just use Bernat Blanket yarn in black and do a lot of layers when making the eyes. I think leaving off the white from the eyes made the duck look friendlier, which was the look I was going for.
The pattern calls for a 20 mm crochet hook. I used my 25 mm hook instead because I didn’t have a 20 mm. I have pretty tight tension, so the bigger hook worked out for me.
When I first saw cardboard on the materials list of the pattern, I was really confused, but you definitely will need it! The bottom of the duck should be flat, so the cardboard is meant to keep the bottom flat rather than allowing it to round off when being stuffed. I had a piece of wood that was the backing from a picture frame that I cut and used instead. I want the duck to last a really long time, so I wanted to use material that would be okay if it got damp and wouldn’t lose it’s shape over time. I didn’t use fabric glue to attach my wooden piece, but that is recommended in the pattern.
For the stuffing, I used about 15 pounds of polyester fiber fill. After about 10 pounds of stuffing, it seemed as if the duck looked stuffed, but the extra five pounds were definitely necessary to help it keep its shape and allow it to be used as a pillow/chair.
While I did a lot of the sewing just by pulling yarn through stitches, you will still want to have a really solid yarn needle to attach the beak and embroider the eyes.
How Long Does It Take to Crochet Duckzilla?
I had to crochet Duckzilla over a period of a few weeks because the super bulky yarn really wore out my elbow and shoulder. If I had to estimate the total time I logged from start to finish, I would say that crocheting it took about 6 hours without breaks. It took another hour or so to stuff completely and add the beak and eyes.
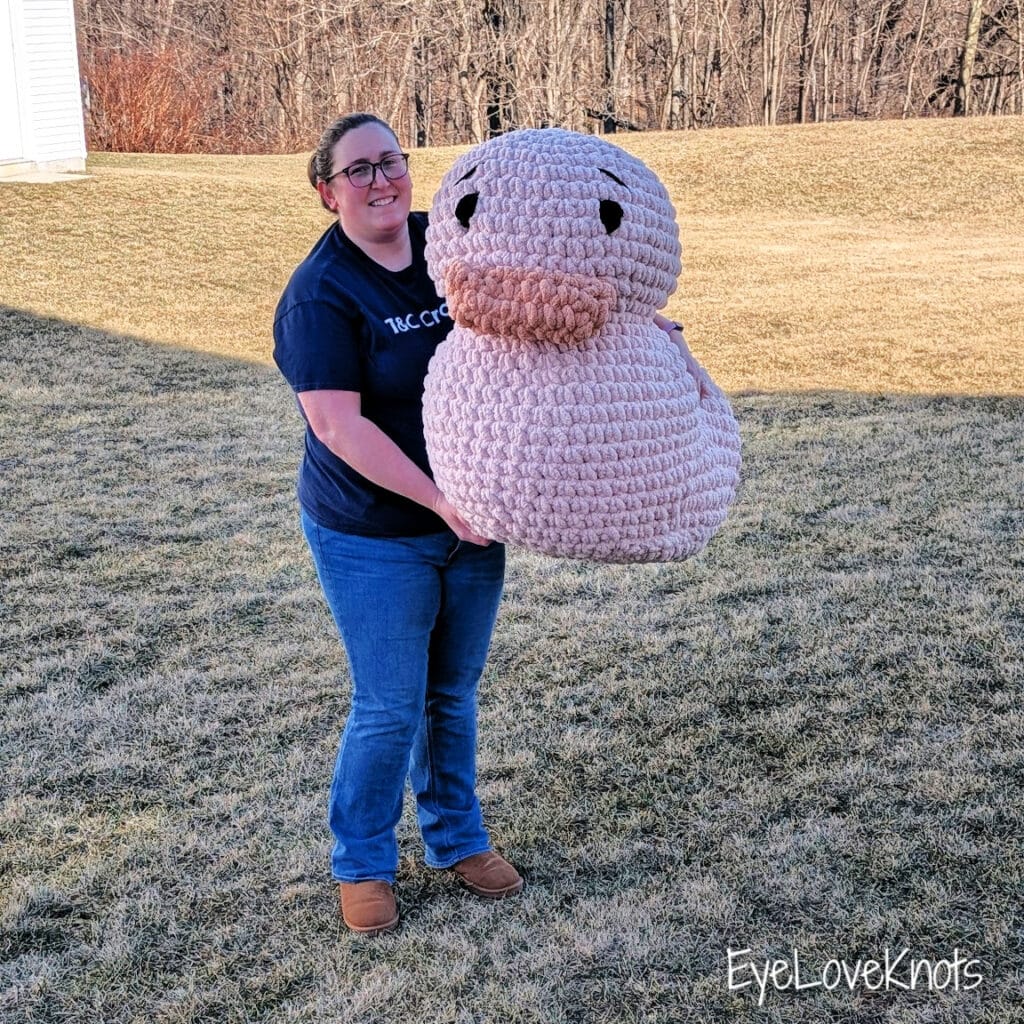
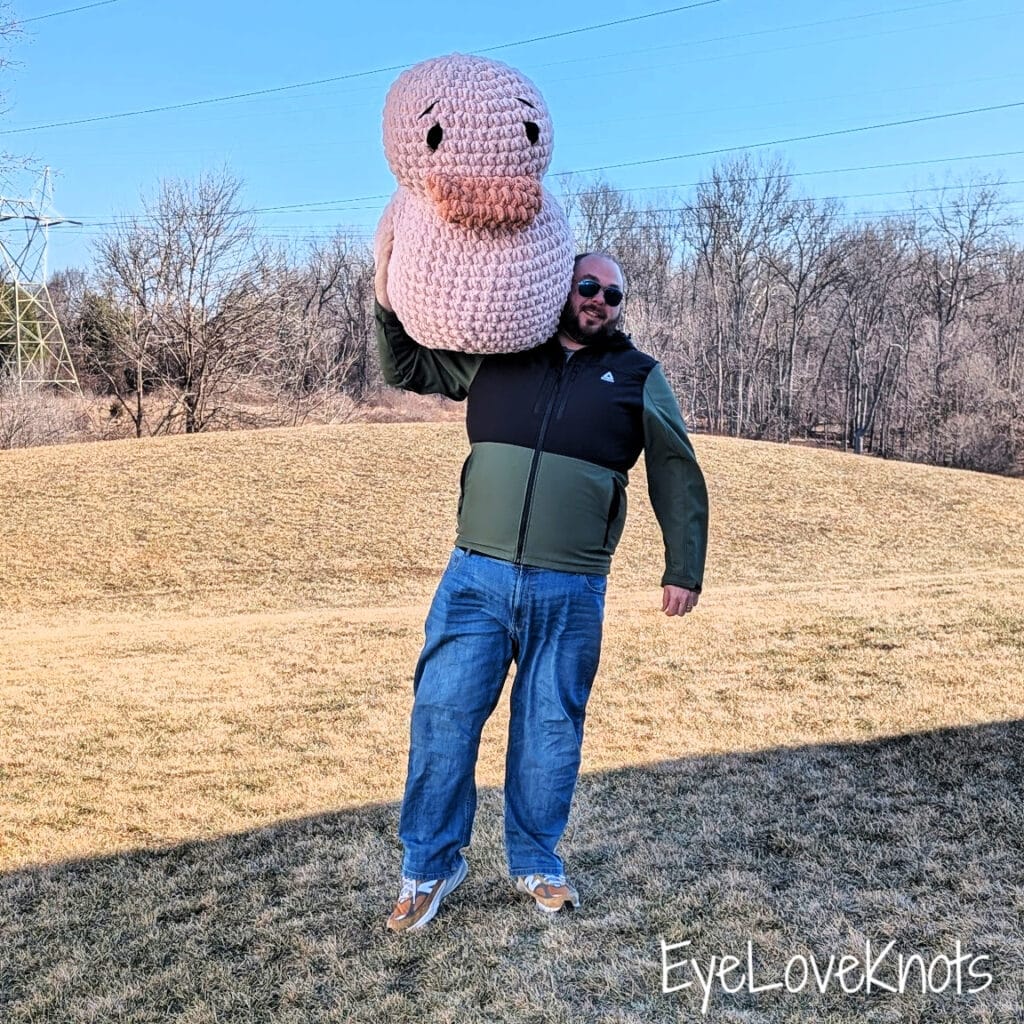
How Big is Duckzilla?
The finished Duckzilla is huge! It measures approximately 40 inches long and 32 inches high. In the picture below, my husband is holding it. To give you a size comparison, he is 6′ 5″ tall!
Gauge:
Using Jumbo weight 7 yarn and a 25 mm crochet hook, a magic circle with 6 SC measures approximately 4.5 inches in diameter.
Gauge is not critical in this type of project. You mainly just want to make sure that there are not gaps between stitches so that the stuffing does not come through. If you notice gaps, you will want to go down a hook size.
All About Making Duckzilla:
The pattern for Duckzilla is pretty beginner friendly and easy to follow, however, it is quite an arm workout! While there isn’t really any part of this pattern that is overly difficult, working with the jumbo yarn and a large hook can definitely be challenging.
This pattern is worked in the round starting from the head down. The tail is worked in rows and then joined back into the round making the body of the duck all one big piece. Moving from the tail and back to the round was the only place I found slightly challenging, however, the designer provides a full playlist of helpful videos and lots of great pictures.
The beak and the bottom of the duck are crocheted separately. Before sewing the bottom and the top together, you will need to attach a piece of cardboard or wood for stability. I used a piece of wood and drilled holes in it so I could tie it to the bottom.
When stuffing Duckzilla, it is important to make sure stuffing gets to all the parts of the head and body and that it is firmly stuffed. Without enough stuffing, it is really easy for the finished piece to lose its shape, especially if it will be used as a chair or to lay on.
In the original pattern, the designer made the eyes look angry, which makes sense for the name “Duckzilla.” I opted to just use black yarn and make happier eyes so mine looked friendly. I appreciated the designer including directions on where to add the eyes and beak for easy placement.
Overall, I think this was a great pattern and it made the perfect birthday gift for my niece! I definitely recommend you try this pattern out if you think you could use a giant duck in your life!

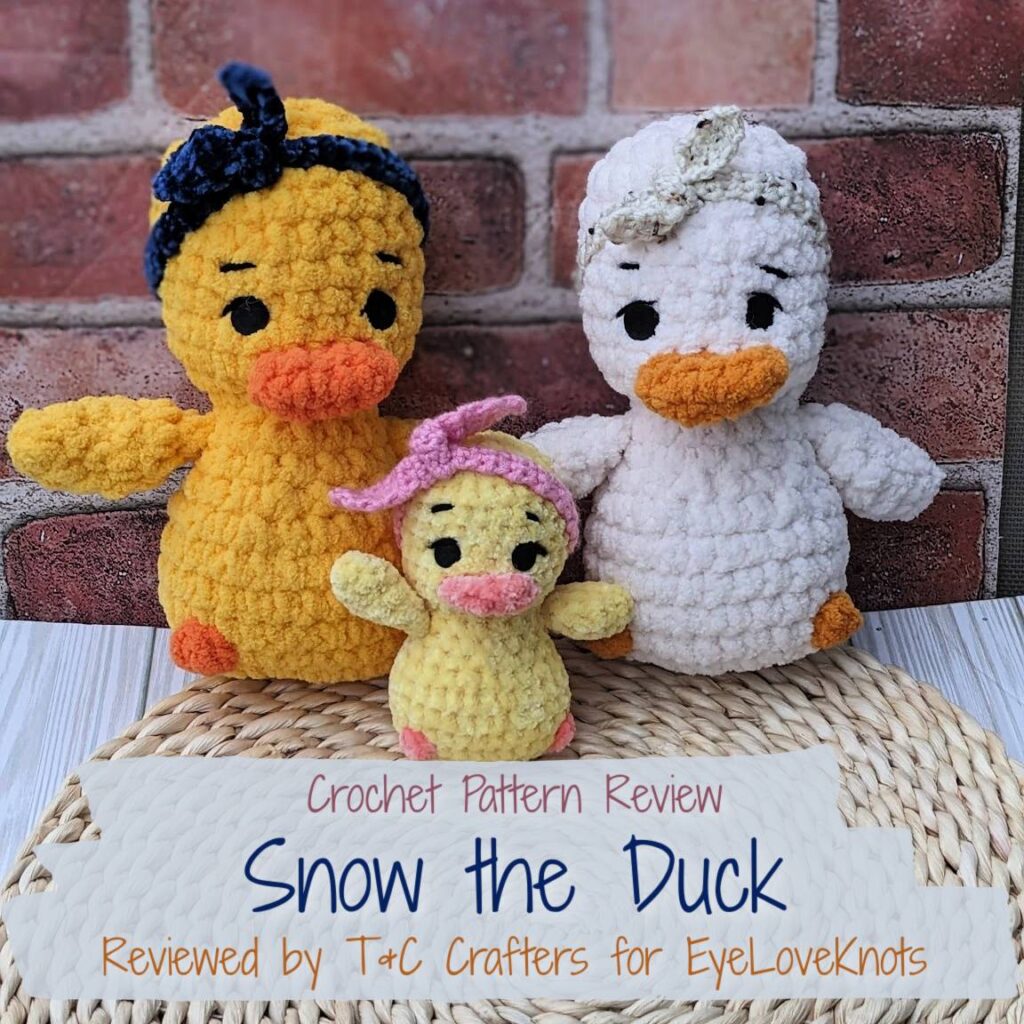
Looking for More Cute Duck Patterns?
Check out the Snow the Duck pattern review!
Don’t forget to visit with me on Instagram for all kinds of awesome crochet makes and inspiration.
Join one of our awesome Facebook groups to share your creations, and see what others are up to!
– EyeLoveKnots Crochet & DIY Community
– DIY Home On Rockwood Lane
– Alexandra Lane Lifestyle
Linked Up To…
Leave a Reply