I love making ceramic tile coasters! I love all the neat scrapbook papers options, both found in my local craft stores and in the digital world.
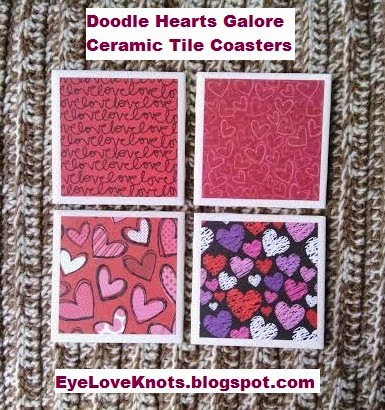
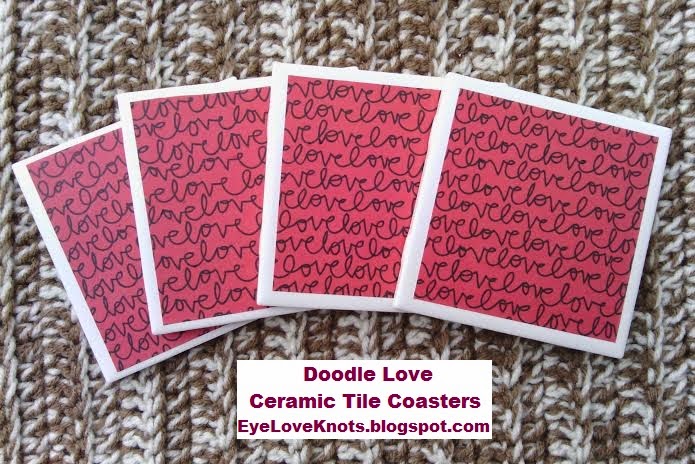
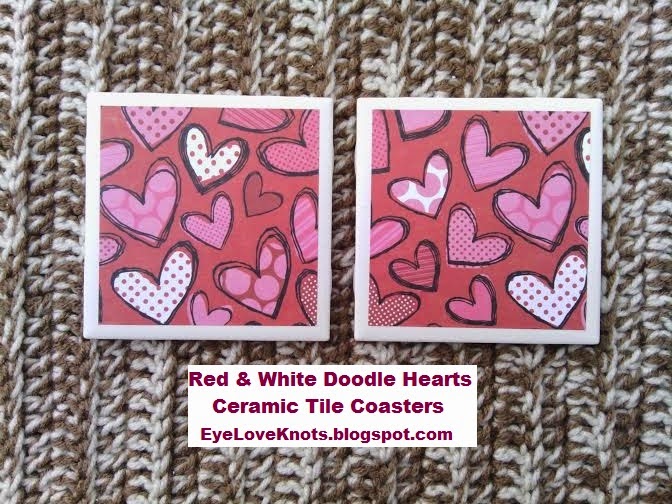
As part of the 5th Day of my 14 Days of Valentine Inspired Crafts, I am sharing these adorable Doodle Hearts ceramic tile coasters!
Make sure to tune back in every day for the next 9 days to receive your inspiration! Don’t forget to subscribe, and follow me on Bloglovin’!
**My 14 Days of Valentine’s Inspired Crafts Linky Party is now live. Please come link up your projects, recipes, stories, decor ideas, etc!
Materials:
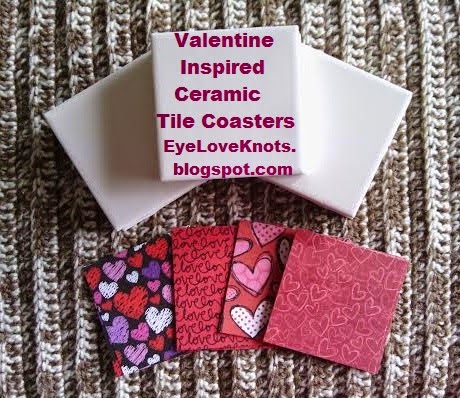
– 4.25″ Ceramic Tile Coasters – You can find these at your local hardware store for $0.16!
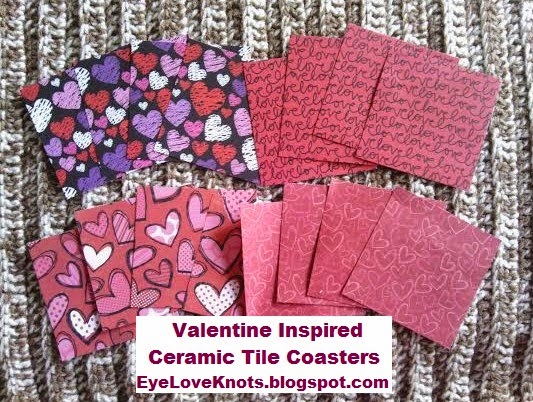
– Scrapbook Paper – You can find these many places!
I used Random Doodle Hearts, Scribble Hearts, Red & White Doodle Hearts, and Doodle Love single sheets found at Hobby Lobby.
– Cutting Tool – You can use scissors, a rotary cutter or a paper trimmer.
I use Fiskars SureCut Paper Trimmer, a small paper cutter found at JoAnn‘s.
– Mod Podge – I use Mod Podge Matte Finish.
– Foam Brush – I use 1″ Foam Brushes by Fine Touch found at Hobby Lobby
– Sealer – I use Krylon Clear Crystal Acrylic Coating found at JoAnn’s
– Hot Glue Gun
– Glue Sticks – Approximately 1 mini stick per coaster plus 1-2 per set of 4 to glue down miscellaneous felt pieces in the end
– Felt or Cork – I use Felt
– Pencil (Optional)
– a bank card or similar object to smooth out paper (Optional)
I have a more detailed post on DIY Ceramic Tile Coasters – Supplies Needed. Visit it to find out more information on the materials and my tips!
Time Spent:
The most time consuming part of this project is the drying process. A single set of 4 ceramic tile coasters requires approximately 30 minutes of actual work, and roughly an hour and 40 minutes drying time before you move them to dry for 24 hours prior to using.
DIY – This is a basic guide, you can find a more detailed version in my DIY Ceramic Tile Coasters – The Process post:
1.) Choose Your Paper
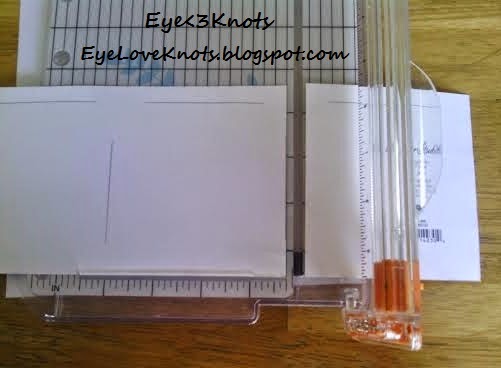
2.) Cut 3.75″ Squares from your Paper
3.) Dust off your ceramic tiles, and lay them out.
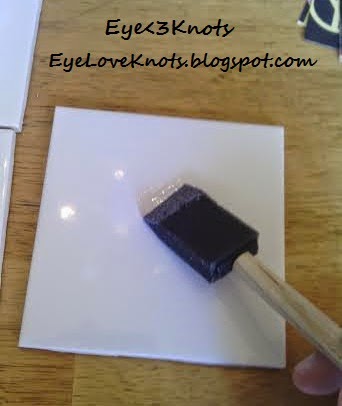
4.) One tile at a time, brush on a coat of Mod Podge, and quickly place down a paper square. Adjust as necessary – mod podge does dry quickly.
5.) Use your fingers, bank card or other object to smooth out the paper on the tile. It is during this time that you will need to get all the air bubbles out, and seal down the edges. It isn’t something you can come back to later. Set aside to dry.
6.) After about 20 minutes, brush on a second coat of Mod Podge.
7 – 8) With 20 minutes between coats, brush on additional coats of Mod Podge.
9.) Lay out your tiles somewhere outdoors for sealing. Cover your space – I used scrap paper and a tote lid.
Spray a lite coat of sealer to your tiles. Allow to dry.
10.) After 20-30 minutes, spray a second coat of sealer to your tiles and set somewhere to dry for 24 hours.
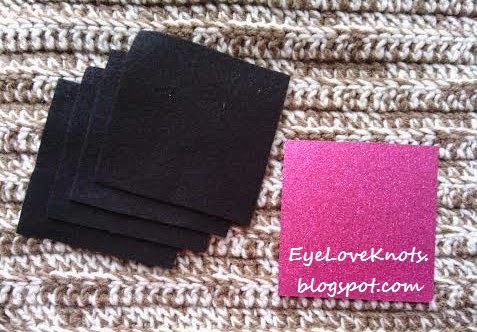
11.) Cut 4″ Squares from your felt or cork.
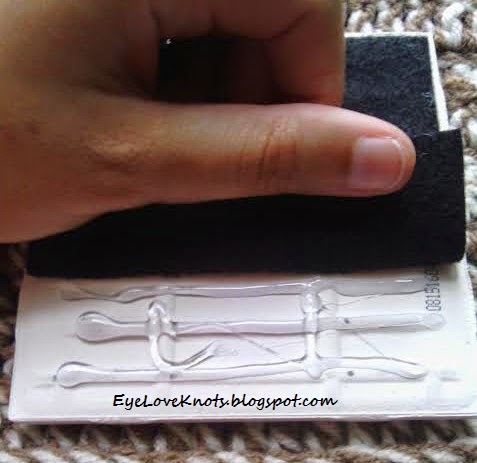
12.) Once the tiles are ready, use your hot glue to glue on the felt or cork.

Make sure to go back and check the nooks and crannies along the edges to ensure all pieces have been glued down.
Using the mod podge and sealer does not make your coasters water proof, only water resistant. You can wipe them off with a damp cloth, but do not submerge in water or place in a dishwasher.
Enjoy your new coasters!


You May Also Like:
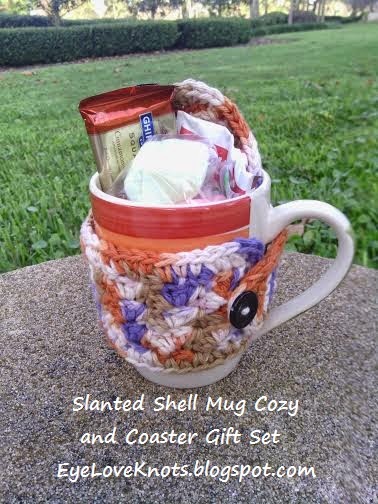 |
| Slanted Shell Mug Cozy & Coaster Gift Set Free Crochet Patterns & Gift Idea |
 |
| Raspberry Surprise Front Post Wine Cozy Free Crochet Pattern |
 |
| Rainbow Bright Ombre Coasters Free Crochet Pattern |
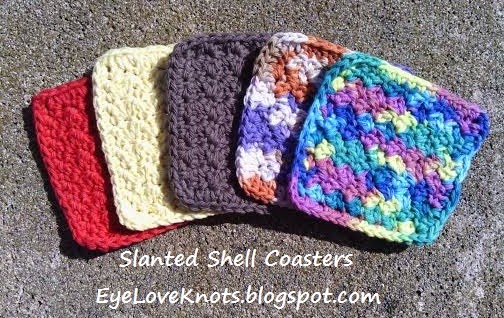 |
| Slanted Shell Coasters Free Crochet Pattern |
Linked Up To…
Show and Tell Link Party – Flamingo Toes
12 Fabulous DIY Projects to Try & Monday Funday – Club Chica Circle
Motivational Monday – Burlap and Babies / Curly Crafty Mom
Take Charge of Life, Share Your Creativity Link Party No. 150 – It’s Overflowing
The Handmade Hangout #38 – Too Much Time on my Hands
Funtastic Friday #14 – Olives n Okra
Link Party Palooza – Tater Tots and Jello / I Heart Naptime
The Party Bunch – The Idea Room / Thirty Handmade Days
Best DIY Projects and Recipe Party – The 36th Avenue
The Pin Junkie Pin Party #107 – The Pin Junkie
Be.You.Tiful You #59 – Fry Sauce and Grits
Lucky Projects for St. Pat’s Day and I’m Lovin’ It {linky party} – Tidy Mom
Worthwhile Wednesdays #58 – Crafty Allie
Your Whims Wednesday #202 – My Girlish Whims
10 Spring Break Ideas, From Dream to Reality #157 – The DIY Dreamer
March 2015 Week 1 Sharing Time – Raising Memories
Submarine Sunday #114 – USS Crafty
Be.You.Tiful Print, Share Your Creativity Link Party No. 152 – It’s Overflowing
Saturday Crafty Showcase – Bowdabra
Snickerdoodle Sunday Link Party #71 – 2 Crochet Hooks / Sadie Seasongoods
Link Your Stuff – Annemarie’s Haakblog
On Display Thursday Link Party (No. 33) – Average but Inspired
Link and Share Wednesday Party 82 – Oombawka Design Crochet
Nifty Thrifty Sunday #191 – Nifty Thrifty Things
Craft Schooling Sunday – Creative Jewish Mom
Tutorials and Tips Link Party {199} – Home Stories A to Z
Sunday Showcase Linkup Party 3/8 – My Crafty Spot
Sew Darn Crafty Linky Party – Sew Many Ways
Inspiration Monday #87 – Scattered Thoughts of a Crafty Mom
Create Link Inspire Linky Party #67 – The Crafty Blog Stalker
Lou Lou Girls Fabulous Party #49 – Lou Lou Girls
Inspire Me Monday Week 166 – Create With Joy
Made by You Monday – Skip to my Lou
What a great way to make some one of a kind coasters! Thanks for linking up at Motivational Monday!
🙂 Fast, fun and inexpensive.
Fun!
🙂
such a great idea! I had no idea it would be this easy to make your own coasters! Already thinking of the fun patterns I could try 🙂 Thanks for sharing with us at Snickerdoodle Sunday!
Too many options, if there could be such a thing. I have a hard time narrowing it down each time I set out to make a new set (or 10) – hehe.
What a clever idea–and they're gorgeous, too! Thanks for linking up and sharing with us at Funtastic Friday. Hope to see you again this week.
Quite fun to make because you can have so much in such a little amount of time – too many sometimes hehe.