This post contains affiliate links for LoveCrochet. If you make a purchase by clicking on them, I make a small commission at no extra cost to you. Thanks for your support!
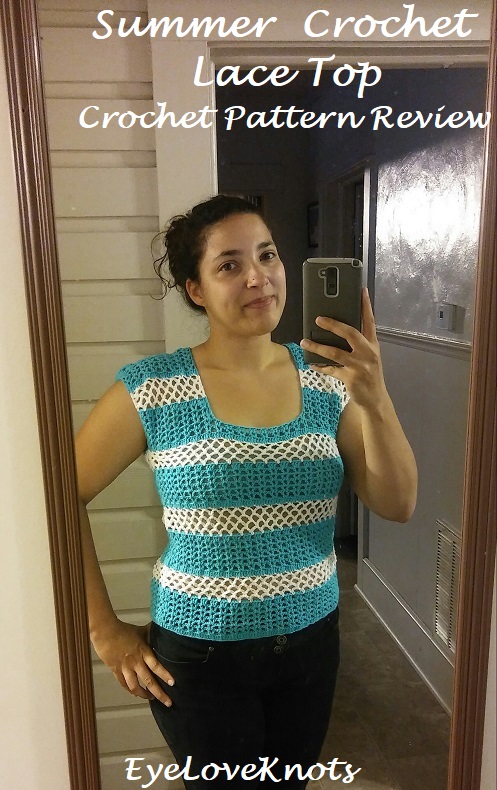
I have been waiting for this pattern to come out ever since I worked up the Summer Crochet Lace Wrap. As soon as I finished it, I sent over a message to Helena saying that I thought it would make a great summer top, and she sent me a sneak peek of this top. It was ready for testing last week, and I was lucky enough to be chosen to test.
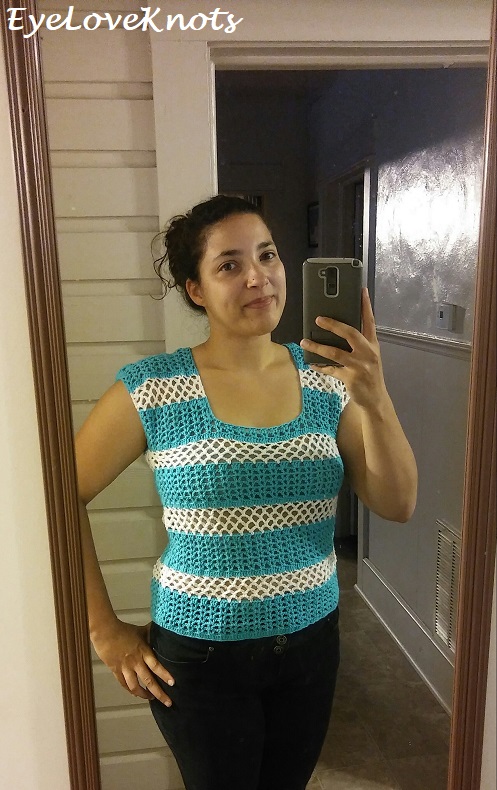
I made a little change to the front piece – more of a tank top style, and I will explain how I did this in more detail in the Pattern Notes section below in case you desire it too.
While this has been made to be a top, you could easily add more to the length to make it a swimsuit cover. In this case, I would recommend taking the measurement from your largest area (either bust or hips), and going based off this measurement.
Materials I Used:
- 575 Yards of Premier Yarn’s Cotton Fair – 425 Yards (2 skeins) of the Turquoise colorway, and 125 Yards (1 skein) of the White
- G6/4mm Crochet Hook
- Tapestry Needle for Weaving in Ends & Sewing
- Summer Crochet Lace Top, Free Crochet Pattern from CrochetN’Crafts
Material Notes:
Yarn Alternative: Berroco’s Modern Cotton DK, Deborah Norville’s Serenity Garden Yarn.
For Summer/Warm weather, you will want a cotton blend – ie cotton/acrylic, cotton/rayon… Cotton to keep you cool, and a synthetic fiber to help keep the shape, and add durability. Now, if you wanted to make this more sweater like to go over a long sleeved shirt, you could go with an acrylic or wool blend.
Time Spent:
I did not carry my yarn up the side when switching to make the stripes, and when sewing the sides, I matched the colors as well, so I had a lot of extra weaving in to do in the end for a total of about 12 and a half hours. I also had to add to my foundation chain. Had I used a larger crochet hook, the time may have been less, and then of course if you stick with one color too.
Measurements:
This pattern has instructions for sizes Extra Small through Extra Large, but with a basic shape, it is very easy to adjust. The original pattern is designed to have 6″ of positive ease – meaning it is going to have an oversized fit measuring 6″ wider than given bust measurements.
I do not like oversized clothing, so I went based off my measurements and knowledge of the yarn stretch to pick the perfect size for me. This yarn will stretch 2-3″. I have a bust of 39″, and chose to make the small size. Math behind my decision: 18.5″ (width of the small) times two pieces (to give a final circumference) = 37″, plus 2″ of stretch means it would definitely fit comfortably – and it did! I love the fit of the finished top.
Gauge:
I met gauge working a straight double crochet swatch (as this is where the gauge was taken in the original pattern) with a 4.5mm hook, but when I worked several rows of the piece, I was measuring 15.25″ wide, instead of 18.5″. How could this be you might ask? Well, if gauge is taken from working in pattern (as it was in this case), then the swatch also needs to be worked in pattern, otherwise you will get an inaccurate measurement because tension changes.
I recommend working up a gauge of at least 28 chains (or any multiple of 4), and work in given pattern for two repeats.
In my case, I had already worked up the Summer Crochet Lace Wrap, which used the same yarn, so I took it out, and measured out 18.5″ across a double crochet row, used the same G6/4mm crochet hook, and ended up needing 100 stitches to meet the correct measurement (which meant 104 foundation chains).
Pattern Notes:
The first row of double crochets is worked into the back bumps. This is important because you will not be working a final edging around the bottom of the finished top, so working into the back bumps creates a clean, even edge. If you are having trouble working into them, you can work your foundation chain in a hook size larger, and then switch back.
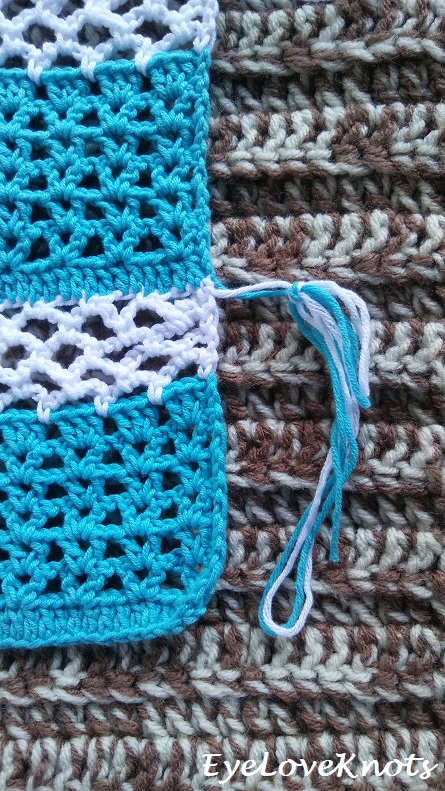
While working the first piece (the back), I left long tails in the beginning of the color change, and left long tails at the end of the color change, so that I could use these tails to sew up the sides in the end, without having to cut and secure separate pieces later. On the second piece (the front), I left my tails as normal, and weaved them in before I whipstitched the pieces together.
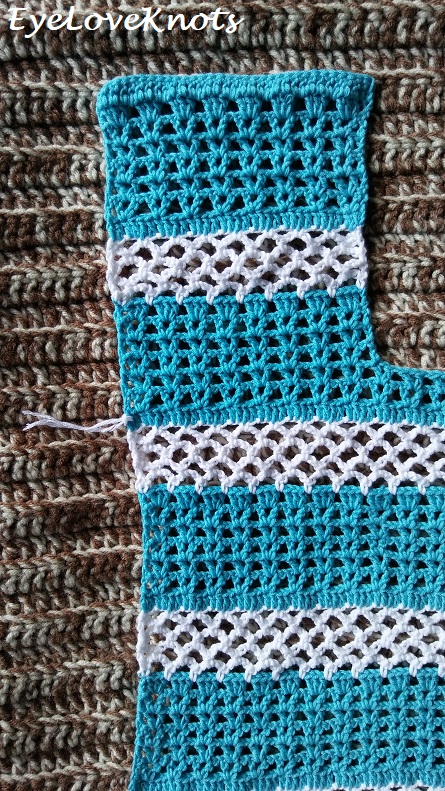
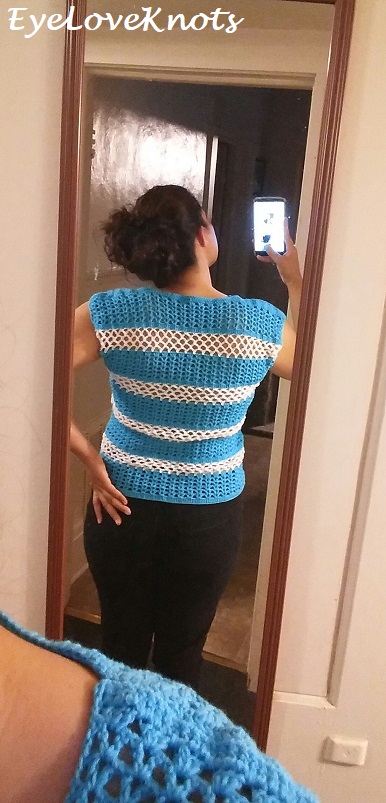
After working the pattern as written, my top finished way too short, measuring 18″ long at the end of Row 49, so I added another repeat of Rows 2 through 7, and then Row 13. When I measured the flat piece, it was measuring about 21.25″ long. My ideal length is about 22.5″, so I thought it might be okay, but I really should have added another repeat of the mesh as well to lengthen it even more because the finished top is a little short for my taste. In the photo, I have some high waisted pants on, so it works out. If you aren’t sure on the finished length, you can slip stitch the two pieces together as a temporary thing, and try on the top to see how it fits before sewing everything together, and weaving in your ends.
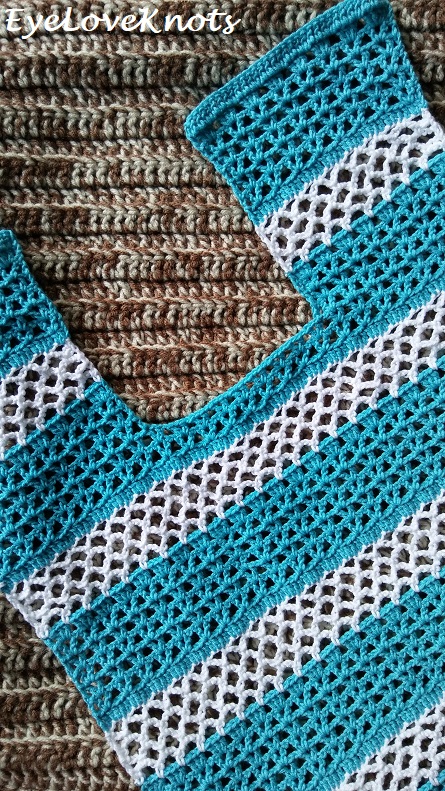
For the front piece… I wanted to make this top for me, and I am not a fan of the fit the original assembly gives – I feel like it’s choking me, so I decided to work more of a tank top like front piece. Alternatively, I could have left a wider neck opening, but I didn’t want to go this route this time.
To accomplish the tank top style, I worked the first 40 rows the same as the back piece, then I worked the rest as follows:
R41 – 43: Chain 3. (v-stitch into the next v-stitch, chain 1) 8x, DC into the next DC.
R44: Chain 3, turn. (3 DC into the next v-stitch, chain 1) 8x, DC into the next DC.
R45: In White (to match the mesh), chain 1 and turn. SC into the 1st stitch, chain 5, (SC into the next chain space, chain 5) 7x, SC into the chain.
R46: Chain 5, turn. SC into the 1st chain space, (chain 5, SC into the next chain space) 7x, chain 2, DC into the last stitch.
R47 – 48: Repeat Row 45 and 46.
R49: Chain 1, turn. SC into the 1st stitch, chain 3, (SC into the next chain 5 space, chain 3) 7x, SC into the last stitch.
R50: Chain 2, turn. DC across.
R51: Chain 3, turn. Skip the 2nd DC, v-stitch into the next DC, (chain 1, skip the next 3 DC, v-stitch into the next DC) 7x, DC into the next stitch.
R52 – 55: Repeat R41 through 44.
R56: Chain 2, turn. DC across.
Then, I matched this on the opposite side, making sure to work Row 41 from the right side to match the first side.
I wanted to keep the original shape of the pattern (since I was testing it), so I whipstitched the sides as written, matching the colors, so my armhole was actually 7.75″ long, which fit great! I used a scrap piece of yarn, as shown, to mark the end of my armhole.
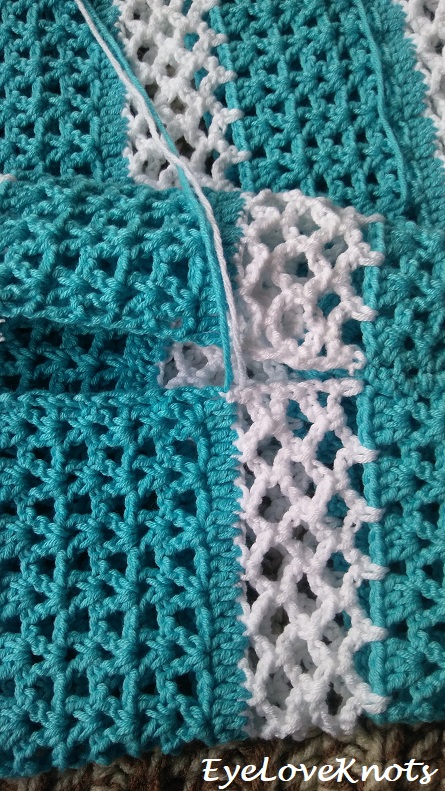
When working the sides (and using the tails I left for sewing), the turquoise went in one direction – from the color change to the left, while the white went in the other direction – from the color change to the right.
And for the shoulder seams, I just whipstitched the top of the pieces I had created, making the finished sleeves 5.5″ wide.
I would say, if I made another, to have a better fit around the arms, and to avoid the puckering at the armpit, I would leave a little space under the arm, maybe one or two v-stitches in from the sides. I would also match this shaping on the back piece.
I did not end up adding any edgings to my arm or neck openings because it fit so well.
Join the EyeLoveKnots Crafting Community on Facebook to share your creations, and see what others are up to!
Linked Up To…
Inspiration Monday – Scattered Thoughts of a Crafty Mom
428th Inspire Me Tuesday – A Stroll Thru Life
Lou Lou Girls Fabulous Party #221 – Lou Lou Girls
The Linky Ladies Party #135 – The Purple Poncho
The Scoop Link Party #332 – Worthing Court Blog
You’re the Star Linky Party Week 91 – Let it Shine
Craftastic Monday Link Party – Sew Can Do
Merry Monday #210 – A Wonderful Thought
Creative Mondays Blog Hop – Claire Justine
Handmade Monday #81 – Sum of their Stories
The Really Crafty Link Party #125 – Keeping it Real
The Style File – Lady in Violet
Confident Twosday Linkup – I do deClaire
Turning Heads Linkup – Elegantly Dressed and Stylish
{wow me} wednesday #357 – Ginger Snap Crafts
The Wednesday Link Party #251 – The Stitchin’ Mommy
The Fashion Files Link Up #167 – Curly Crafty Mom
I’m Lovin’ It linky party week 415 – Tidy Mom
The Pin Junkie Pin Party #271 – The Pin Junkie
Funtastic Friday 185 Link Party – Olives n Okra
Home Matters Party #190 – Domestic Deadline
Friday Frenzy Link Party – 06/29/18 – Kelly Lynn’s Sweets and Treats
Lizzie in Lace Link Up – Lizzie in Lace
Weekend Wear Linkup – Mom with Style
Best of the Weekend – Hello Little Home
Sweet Inspiration Link Party #113 – The Boondocks Blog
Sundays at Home #212 – Celebrating Everyday Life
Snickerdoodle Create Bake Make Party #238 – Across the Boulevard
Scrappy Stitchers Link Party #43 – Stitches ‘N’ Scraps
Ginx Woolly Linx Party July – Ginx Craft
Nifty Thrifty Sunday #342 – Meet Our Life
Craft Schooling Sunday – Creative Jewish Mom
Handmade Monday #83 – Sum of their Stories
Merry Monday Link Party #212 – A Wonderful Thought
The Scoop Link Party #334 – Worthing Court Blog
Hello July Craftastic Monday Link Party – Sew Can Do
430th Inspire Me Tuesday – A Stroll Thru Life
Fabulous Party #223 – Lou Lou Girls
The Linky Ladies Party #136 – The Purple Poncho
Turning Heads Linkup – Elegantly Dressed and Stylish
Confident Twosday Linkup – I Do DeClaire
From Dream to Reality #316 – The DIY Dreamer
Talk of the Town #131 – My Repurposed Life
{wow me} wednesday #359 – Ginger Snap Crafts
Hookin’ on Hump Day #170 – Petals to Picots
Your Whims Wednesday #363 – My Girlish Whims
Wednesday Link Party #253 – The Stitchin’ Mommy
Summer Style Link Up – Living on Cloud Nine
Crafty Love Link Party #35 – Jessie at Home
Thursday Fashion Files Link Up #169 – Curly Crafty Mom
Funtastic Friday 187 Link Party – Olives n Okra
Best of the Weekend – Hello Little Home
Sweet Inspiration Link Party #115 – The Boondocks Blog
Friday Frenzy Link Party – 07/13/18 – Kelly Lynn’s Sweets and Treats
Link Your Stuff – Annemarie’s Haakblog
Weekend Wear Linkup – Mom with Style
Lizzie in Lace Link Up – Lizzie in Lace
Snickerdoodle Create Bake Make Party #240 – Across the Boulevard
Sundays at Home #214 – Celebrating Everyday Life
It turned your beautiful. Love the pattern and the colors.
Thank you for sharing at The Really Crafty Link Party. Pinned.
I had a lot of ends to weave in, but the colors did come out perfect! Thanks for pinning.
What a sweet little top, this has turned out really nicely. I love the summery stripes.
Yes, the stripes came out really well. Thanks for stopping by, Julie!
Super cute!! PINNED 🙂
Thank you!!
You caught me at “Crochet”. Cute top. You did a good job. Im currently trying to find a summer top to crochet. I even thought of making a crochet yoke to add to a tshirt. However, I may just have to try this pattern. Thanks for sharing it.
Lisa
I love the idea of crocheting a yoke for a top! My sewing skills are pretty basic though so it’s been quite intimidating to me.
This top is a super easy one to work up, and has a really fun stitch pattern. Helena does a fabulous job with her designs.
The color and style of the top look great on you. I wondered how you size a garment with yarn and I like how you explained it and the give that the yarn has.
thanks for linking!
jess xx
http://www.elegantlydressedandstylish.com
Glad I could help! Many factors to consider when working up garments, but very fun, and rewarding to do.
Eye love this!! So cute! Thanks for sharing at Friday Frenzy Link Party. PINNED!
Clever play on words there 😉 Thanks for visiting!
Another great summer top. Very inspiring.