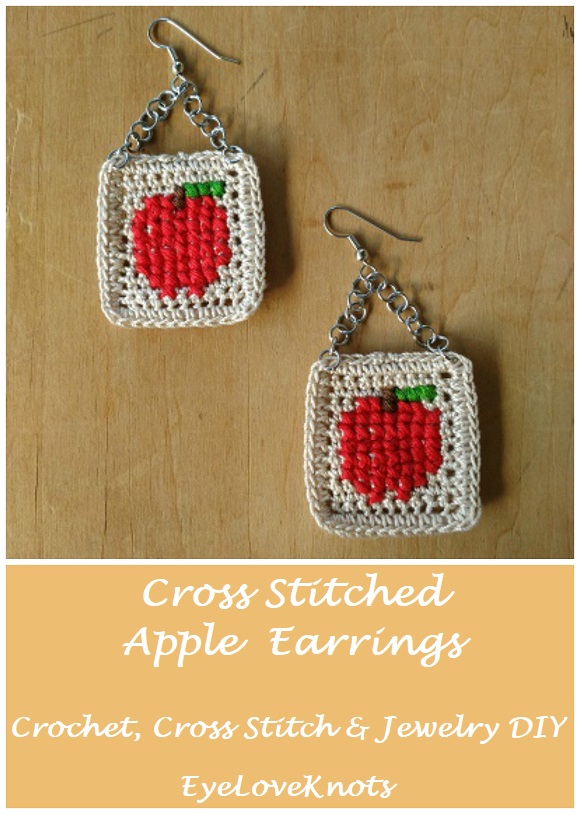
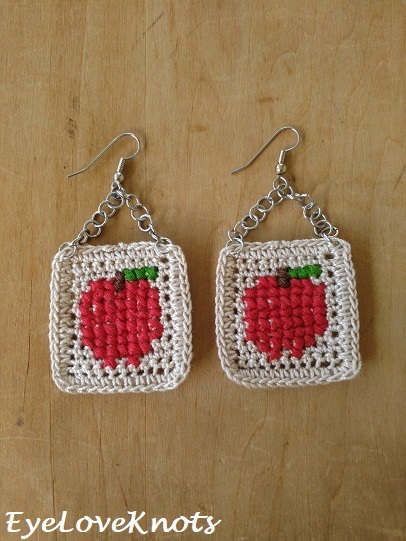
This is a free crochet pattern for how-to crochet square earrings, and how-to cross stitch an apple onto them! These are awesome lightweight earrings that are easy to customize for Fall and Back to School.
This pattern first appeared on The Stitchin’ Mommy, where I was a regular contributor.
Back in February, I worked up some Cross Stitch Heart Earrings, and fell in love with the idea that I could cross stitch onto a crocheted piece – me and Aida have never really gotten along. This time, I am back with some sweet little Apple Earrings perfect for back to school and the upcoming fall season. You can change out the apple color, and background color to suit your preference – maybe you want it on a black background to simulate a chalkboard, or perhaps you love green apples more than red.
If you would like a PDF version of this post, you may get one through either my EyeLoveKnots Etsy Shop or EyeLoveKnots Craftsy Shop for a small fee. This fee is to compensate for the views lost when you no longer need to return to the blog to for the information, as you will have your own copy. Plus! It helps fund supplies for new projects to share with you!
Shop EyeLoveKnots Etsy: Cross Stitched Apple Earrings.
Shop EyeLoveKnots LoveCrafts: Cross Stitched Apple Earrings.
Are you a Raveler? Share your version of this project on Ravelry – Cross Stitched Apple Earrings.
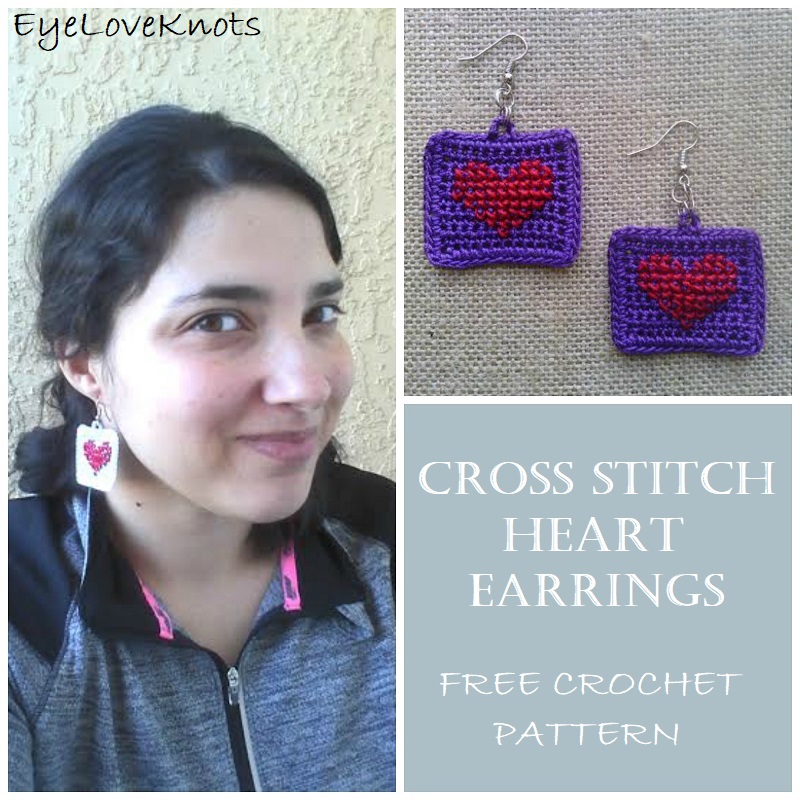
How about a pair for Valentine’s Day? Cross Stitch Heart Earrings.
Free Apple Crochet Patterns:
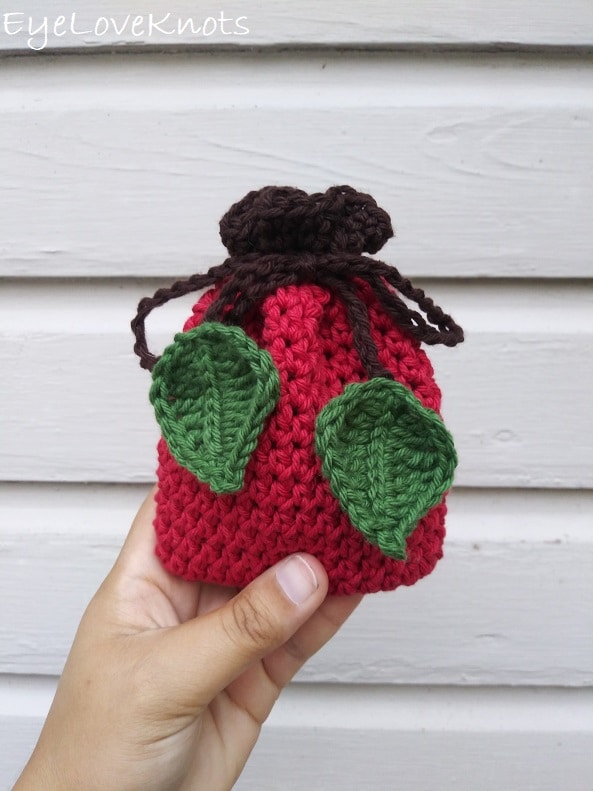
An apple mini bag makes a great reusable gift bag to gift earrings in.
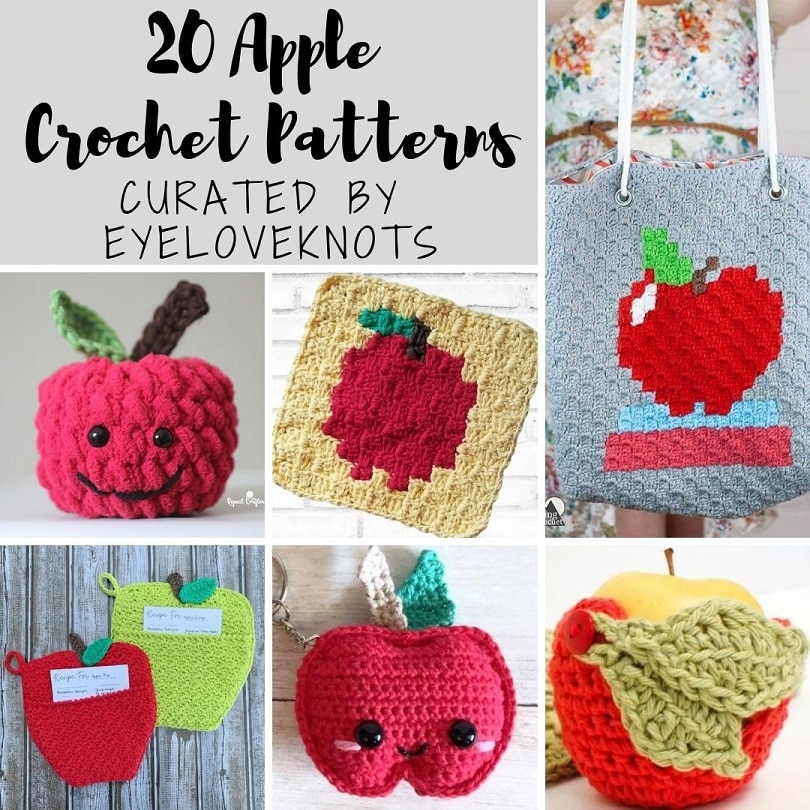
You’ll find so many other great apple crochet projects that would pair well with these Apple Earrings in this collection of 20 Free Apple Crochet Patterns.
Explore other Apple themed projects here on EyeLoveKnots or on my sister blog, On Rockwood Lane.
Ad-Free, Printer Friendly PDF:

If you would like a PDF version of this post, you may get one through either my Etsy Shop, Ravelry Shop or LoveCrafts Shop for a small fee. This fee is to compensate for the views lost when you no longer need to return to the blog to for the information, as you will have your own copy. Plus! It helps fund supplies for new projects to share with you!
Materials:
- Small Amount of #10 Crochet Thread – I used Hobby Lobby’s artiste 100% Mercerized Egyptian Cotton in Eggnog [Tan]
- Small Amounts of Red, Green and Brown Embroidery Floss – I used #130 for Red, 965 for Green and 226 for Brown (JoAnn’s)
- B/2mm Crochet Hook
- Tapestry Needle for Weaving in Ends
- Small Piece of 10 Mesh Plastic Canvas
- 2 Earring Wires – I used 20mm Stainless Steel Ear Wires
- 32 4mm Jump Rings – I used some from an Assorted Box Set Antiqued Silver from an Etsy shop no longer open
- Jewelry Pliers – I like to have one in each hand
Material Notes:
Yarn Alternatives for the Base: Aunt Lydia’s #10 Crochet Thread.
Thread will also work for the apple, but the picture doesn’t come out nearly as full. I worked my first pair in thread, and then went for the embroidery floss.
Time Spent:
I worked up a pair in just over an hour.
Measurements:
1.5″ Wide and Hangs 2.5″ from Earring Wire
Gauge:
12 SC by 10 Rows = 1 3/8″ by 1 1/8″
Abbreviations:
- SC – Single Crochet
Pattern Notes:
I have a photo tutorial on How to Cross Stitch on Crocheted Fabric if you need help getting started.
At the end of the first side of working on the frame, you may think it’s not long enough, but it is! Just tug at your piece a little to stretch. The second stitch of each corner should be over the pointy edge.
I worked an invisible join at the end of the earring base not only to give a clean, finished look, but also so I wouldn’t have to rejoin yarn to create the hanging loop.
I have a photo tutorial on How to Make an Invisible Join, but if you prefer to slip stitch closed, when you make your hanging loop, just secure the thread by running it under several stitches as if weaving it in (I make three passes).
“Do I have to crochet around the plastic canvas frame?” I have been asked this several times, and the easy is no, you don’t – you can block/starch the finished earring instead, but I do not like to block things.
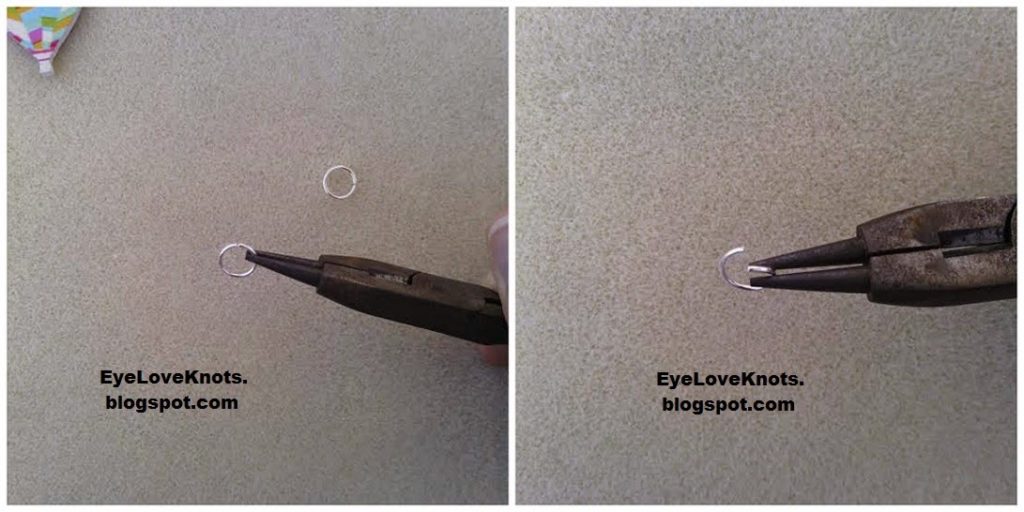
To Open Loop of Earring Wire, and Jump Rings:
Grab one end of your earring wire with your round nose pliers.
You will need to grab the other end with another pair of pliers or your fingers for leverage and stability.
Pull open the loop TOWARDS you, not side to side.
Close the same way.
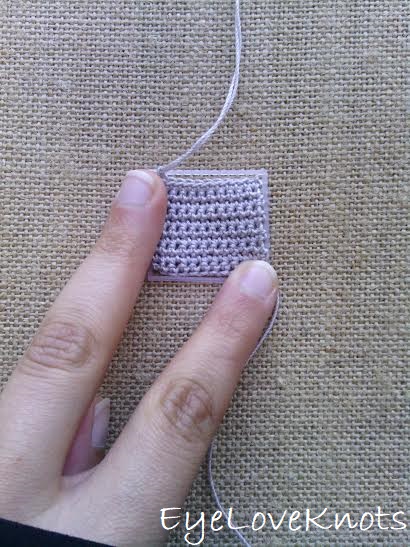
Earring Base (Crocheted):
Chain 11. SC in the 2nd chain from the hook and across. (10 SC)
R2 – 11: Chain 1, turn. SC in the 1st SC and in each SC across. (10 SC)
Pull up a loop and set aside.
Frame:
The reason I added the plastic canvas frame was because my finished square was not really laying flat, and since I am not a blocker, I thought of the frame so it would keep its shape and still be lightweight and flexible.
Cut a rectangle out of the 10 Mesh Plastic Canvas that is 12 holes (Wide) by 13 holes (Tall), then cut all of the insides out so you are left with just the outer frame. This should be about just a little bigger than your finished piece.
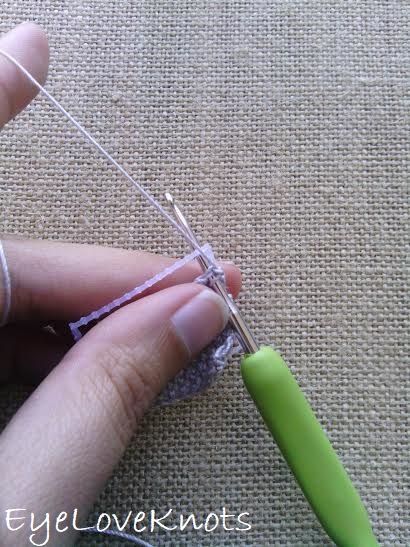
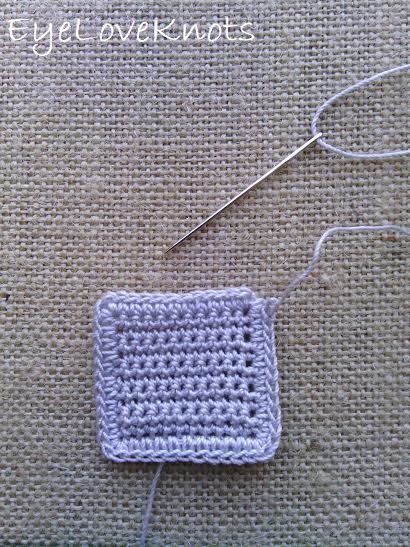
To begin, reinsert your hook into the last loop, hold your crocheted piece up to the frame, and beginning in the first stitch, and work through both layers:
Chain 1, turn. SC into the first 9 SCs, 3 SC in the next SC – corner – SC 8 down the side of the piece, 3 SC in the next stitch – corner – SC in the next 9 stitches across the opposite side of the foundation chain, 3 SC in the next stitch – corner – SC 8 up the side of the piece, 1 SC in the first stitch join as an invisible join (or as 2 SC in the first stitch and slip stitch to join if not using the invisible join).
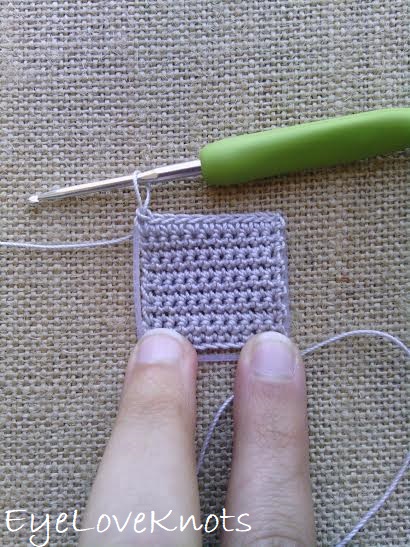
Work an invisible join (or slip stitch join & see Pattern Note section).
Apple Cross Stitch Pattern:
As a blogger, I rely on views to my blog to earn money from my ads. Please do NOT share my graph photo, or save to Pinterest. Doing so, would allow makers to not have to return to my blog, which would result in a loss of views and income.
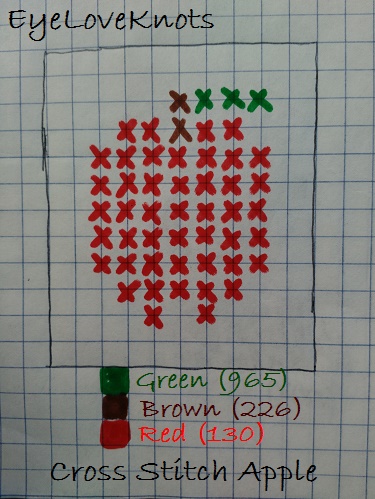
Using the above chart, cross stitch your apple.
I worked my brown first, then green, and ended with red.
*Please do not pin or share this image – link to the post instead.
Earring Assembly:
You will use seven jump rings on each side of the square, plus one in the center to hold the two sides together. Starting with the first one, open a jump ring, hook it into the corner stitch of your piece, and to an unopened jump ring. Close. Continue adding jump rings to create a chain of seven on each of the top two corners on your piece. Once you have seven on both sides, open an additional jump ring and hook it through both top jump rings to pull the two chains to the center. Open the loop on the earring wire, and hook onto both top jump rings. Close.
Repeat for Second and Enjoy!
Join the EyeLoveKnots Crafting Community on Facebook to share your creations, and see what others are up to!
Linked Up To…
Nifty Thrifty Sunday #346 – Meet Our Life
Handmade Monday #87 – Sum of their Stories
Creative Mondays – Claire Justine
Tutorials & Tips Link Party {362} – Home Stories A to Z
Merry Monday #216 – A Wonderful Thought
The Scoop Link Party #338 – Worthing Court Blog
The Really Crafty Link Party #131 – Keeping it Real
Craftastic Link Party – Sew Can Do
434th Inspire Me Tuesday – A Stroll Thru Life
From Dream to Reality #318 – The DIY Dreamer
Fabulous Party #227 – Lou Lou Girls
Turning Heads Linkup – Elegantly Dressed and Stylish
Confident Twosday Linkup – I do deClaire
Ginx Linx Party August – Ginx Craft
The Linky Ladies Party #138 – The Purple Poncho
In Stitches #16 – Nicki’s Homemade Crafts
Hookin’ on Hump Day #172 – Petals to Picots
Scrappy Stitchers Link Party #44 – Stitches ‘N’ Scraps
Crafty Love Link Party #36 – Jessie at Home
Thursday Fashion Files Link Up #173 – Curly Crafty Mom
Funtastic Friday 191 Link Party – Olives n Okra
Sweet Inspiration Link Party #119 – Purple Hues and Me
Pin Party #277 – The Pin Junkie
Lizzie in Lace Link Up – Lizzie in Lace
Weekend Wear Linkup – Mom with Style
Friday Frenzy Link Party – 08/10/18 – Kelly Lynn’s Sweets and Treats
Link Your Stuff – Annemarie’s Haakblog
Snickerdoodle Create Bake Make Link Party #244 – Across the Boulevard
Sundays at Home #218 – Celebrating Everyday Life
Funny earrings 🙂
Hehe.
Oh, they are so cute! Lovely step by step images :).
Thanks! Try my best to provide everyone anything they might need to make their own.
So pretty! Thank you for sharing the tutorial and the pattern at The Really Crafty Link Party. Pinned.
Thanks for hosting! I enjoy partying with you 🙂
Hi Alexandra,
Love your descriptions on how to make the items you show. these are darling little earrings!
thanks for linking!
jess xx
http://www.elegantlydressedandstylish.com
Thank you so much, Jess!
These apple earrings are adorable. Love them. Thanks for sharing at Snickerdoodle. Pinning.
Thanks so much, Beverly! I had a lot of fun stitching up these earrings.
I love this project. So cute and original.
Thanks, Ginny! I had a lot of fun stitching them up.
You are so talented, these earrings are so cute!!
Thank you, Meg!