Learn how to crochet a cozy ear warmer using inset mosaic crochet stitches with this free crochet pattern. Don’t let it scare you! It’s comprised of simple single crochet stitches, chains and easy double crochets. Child, Toddler and Adult sizes included.
This post contains affiliate links. If you make a purchase by clicking on them, I make a small commission at no extra cost to you. I only recommend products I love and hope you’ll love them too! Click here to find out about the different affiliate programs I am apart of. This post also contains shop links to my yarn shop and craft store, Yarn Crafts & Coffee. You can shop online or in person in Melbourne, Florida.
Find the free crochet pattern instructions below, or purchase a printer-friendly, ad-free PDF on Ravelry by clicking here.
In a hurry? Pin this for later when you have more time.
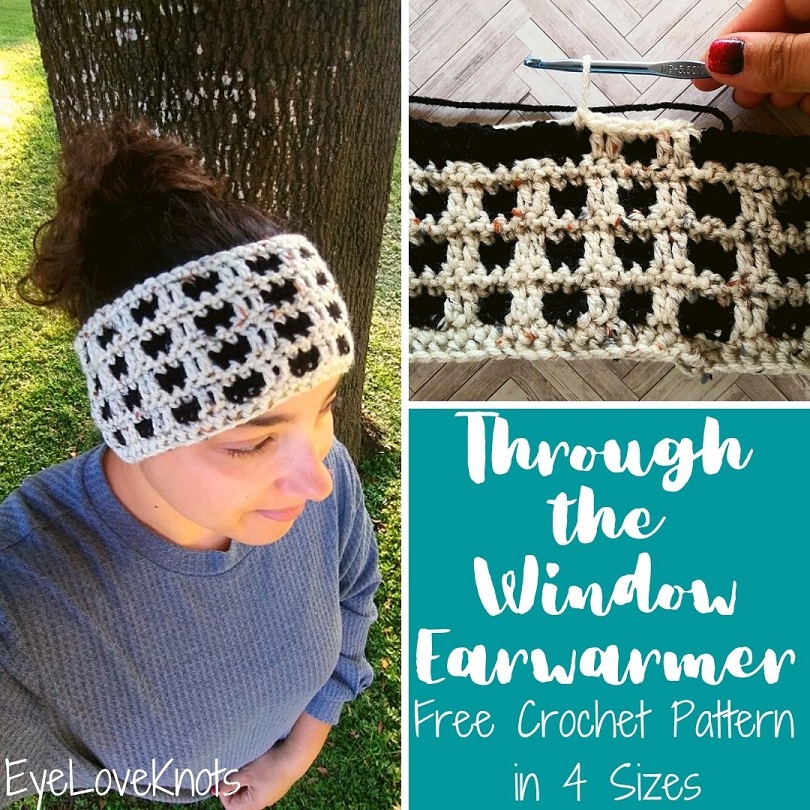
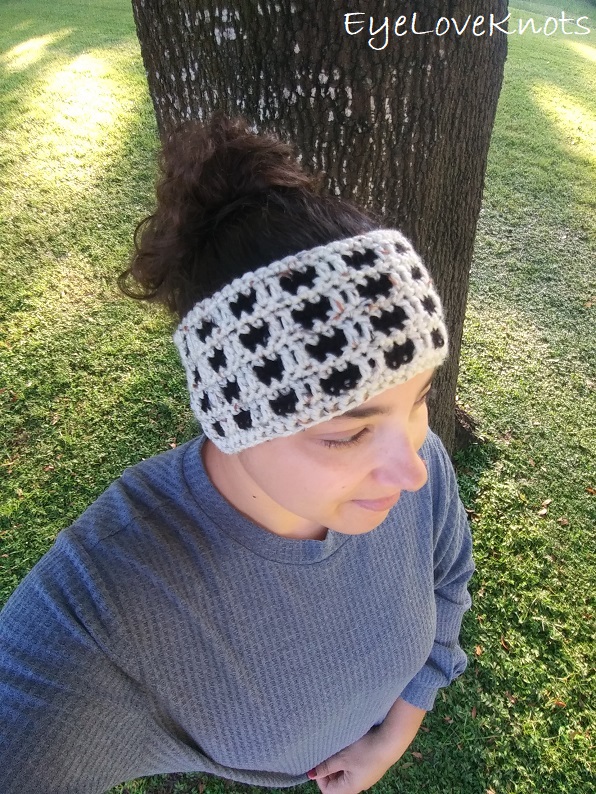
Because I love having my hair up in a bun, my go-to cold weather accessory is an ear warmer since they are open on the top. I also live in Florida where it’s still warmer than other places in the Winter, and sometimes, an ear warmer over the ears is really all that’s needed, or pairs perfectly with a hoodie.
When I am in colder weather or windy weather, I wear an ear warmer, a messy bun beanie (which is open at the top) and then my hoodie (and usually my Ribbed Granny Stitch Cowl). I find that a beanie alone doesn’t keep my ears cozy enough.
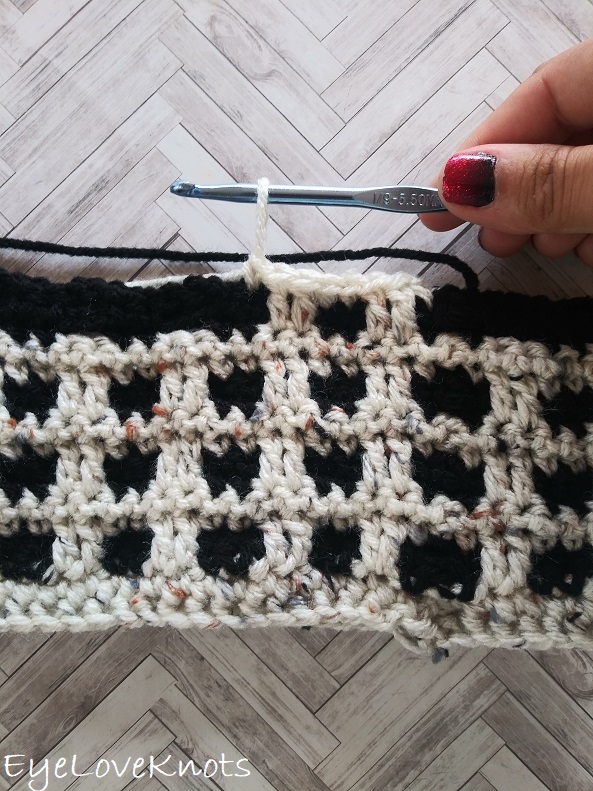
The idea of mosaic crochet may intimidate you, but please don’t let it. This stitch pattern is comprised of single crochets and chains with some double crochets to create the overlap. I think a confident beginner could do this. Make sure to check the pattern notes for a photo that breaks the pattern down just a bit, and should ease your fear.
Mosaic Crochet Patterns:
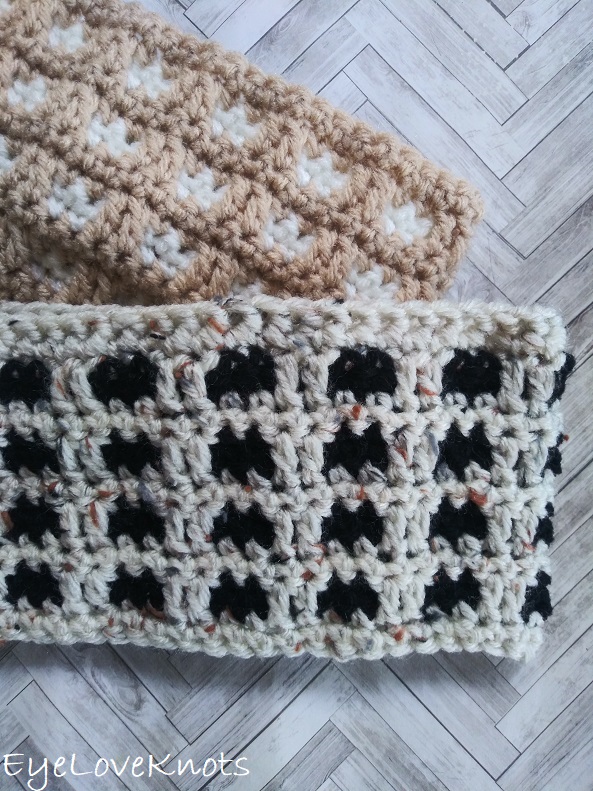
Through the Window is a fun crochet line that features inset mosaic crochet, a technique combining chains and single crochets with double crochets worked over the chains. With the main color worked on top of the fun, colored background boxes, it reminds me a window pane – the inspiration behind the name.
My favorite way to work this mosaic stitch pattern is by using a variegated yarn as the background color and a coordinating color over top of it as the main color, but over the years, I’ve enjoyed working many samples in a single solid color as the background color, or two solid colors to resemble stripes. The possibilities are endless!
Find more Through the Window accessory and home decor crochet patterns here on EyeLoveKnots, and Through the Window accessory and wearables crochet patterns on Cre8tion Crochet.
You’ll Love These Mosaic Crochet Patterns that I’ve Designed to Match:
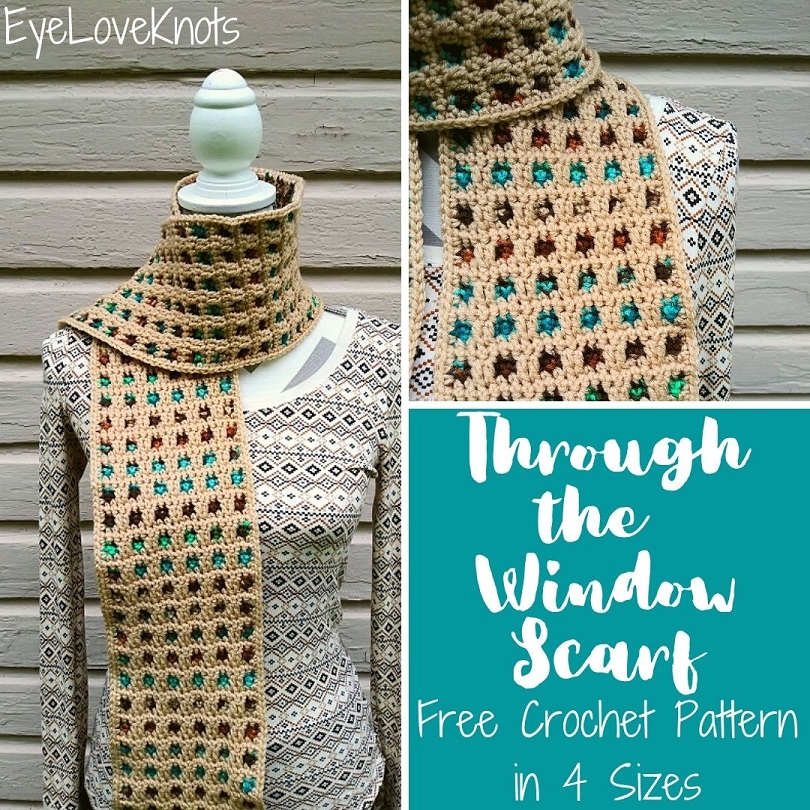
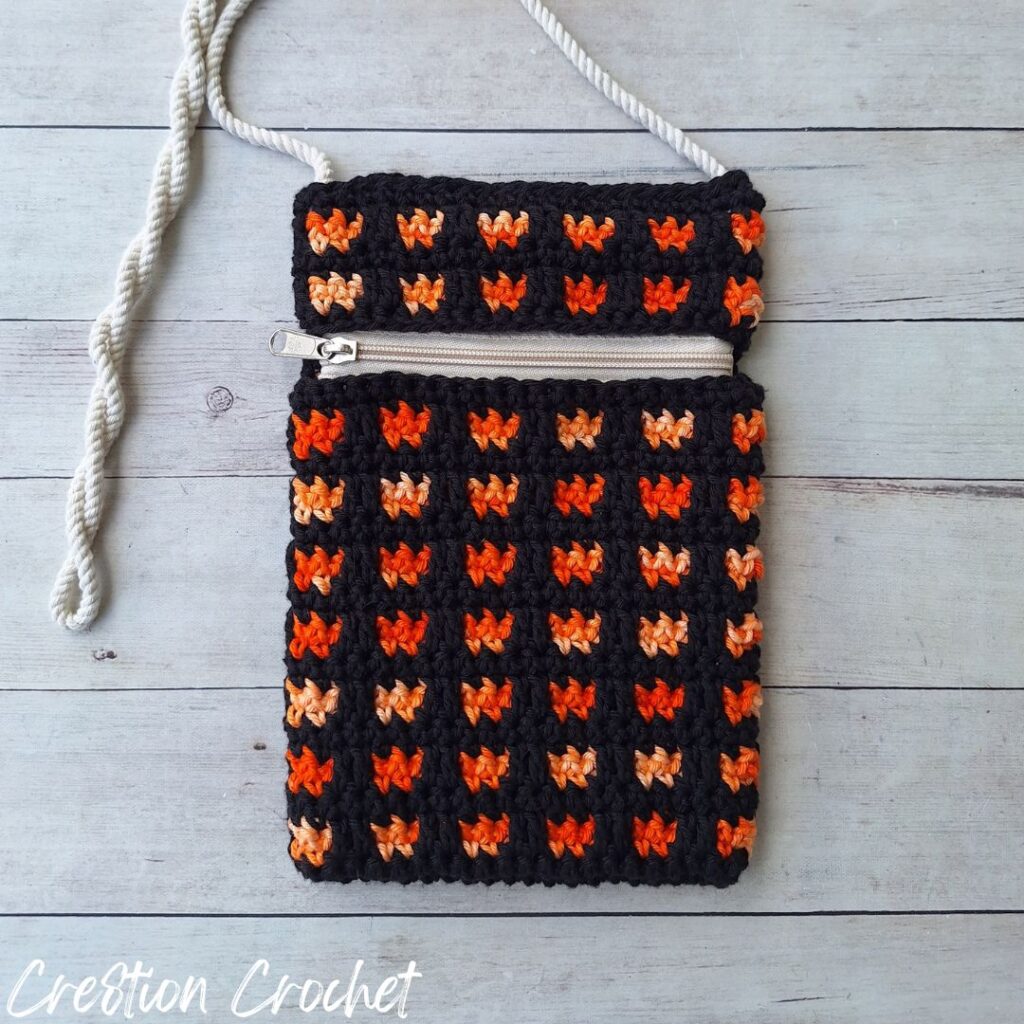
Through the Window Crossbody Bag
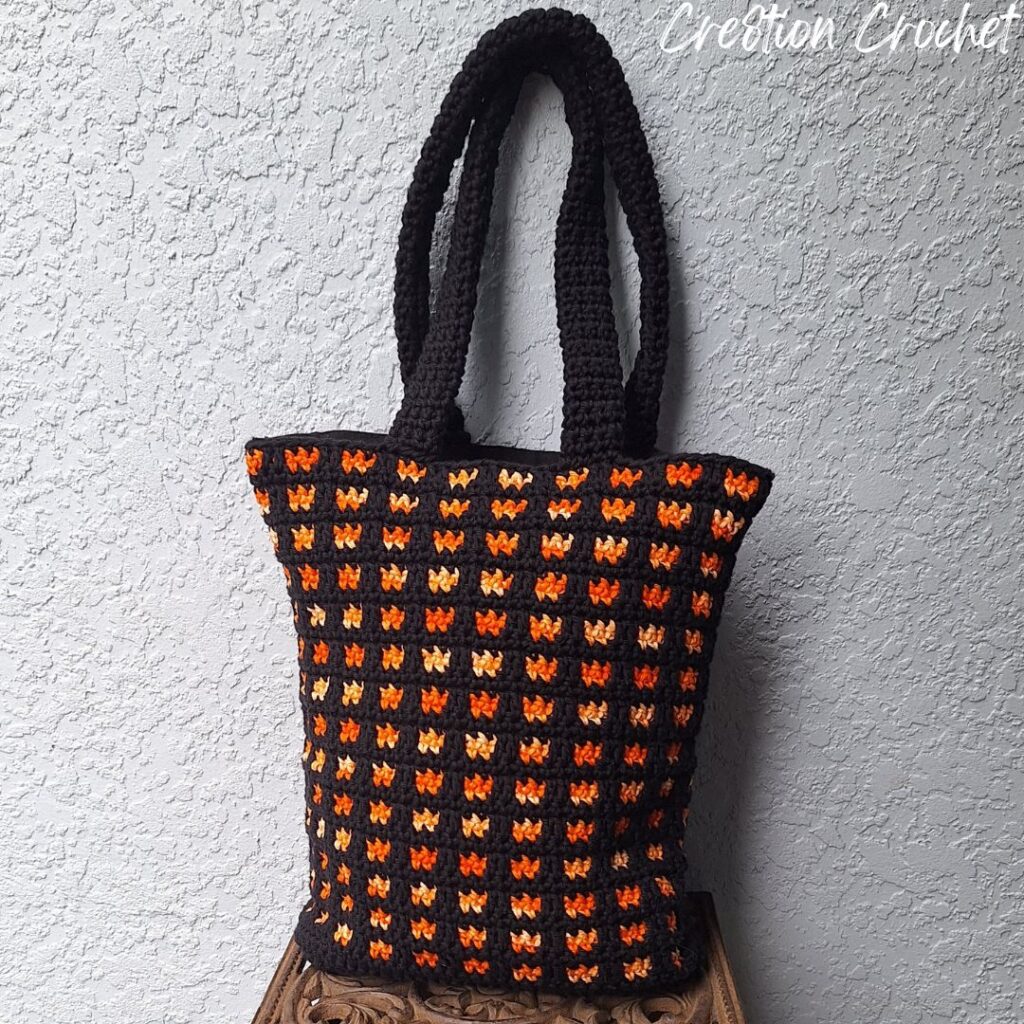

Through the Window Cosmetic Bag or Hook Pouch

This ear warmer is featured in the Spooktacular Halloween Crafting Event hosted on my Yarn Crafts & Coffee blog.
Ad-Free, Printer Friendly PDF:
EyeLoveKnots newsletter subscribers get access to Exclusive Subscriber Content, like the free PDF of this pattern via the Free File Library – you’ll find the tab on the top menu. The library is password protected so sign up for my newsletter and you’ll receive a Welcome email containing this month’s password, or if you are already a blog subscriber, reference your latest newsletter for this month’s password. From the library, you’ll be able to access the PDFs via Google Drive – you do not need to have a Google Drive account to view and download the PDF.

Through 07/04/26 at 11:59pm EST, you can grab a free copy of the PDF for the Through the Window Earwarmer on Ravelry using code BATS26. I earn my income from the number of pageviews my blog sees, so please do not share the code, but instead share the link to this post so others can find it. Thank you!
After 07/04/26 or for non-subscribers, if you would like a PDF version of this post, you may get one through either my Etsy Shop, Ravelry Shop or LoveCrochet Shop for a small fee. This fee is to compensate for the views lost when you no longer need to return to the blog to for the information, as you will have your own copy. Plus! It helps fund supplies for new projects to share with you!
Shop EyeLoveKnots Etsy: Through the Window Earwarmer.
Shop EyeLoveKnots LoveCrafts: Through the Window Earwarmer.
Share your version of this project on Ravelry – Through the Window Earwarmer.
Save this to your Favorites On – AllFreeCrochet, FaveCrafts, Crochet Pattern Bonanza.
Materials:
- Small Amount of Worsted Weight Yarn (For the adult small, I used 78 yards in total of Red Heart Super Saver in Aran Fleck and Black).
- I9/5.5mm Crochet Hook
- Tapestry Needle
- Scissors
- Tape Measure (Gauge is essential)
Yarn Talk:
There are many yarns that would be perfect for ear warmers! The first question I would start with is will it be for warm weather or cold weather? A cotton blend yarn, like Berroco Modern Cotton, would be perfect for late Spring into early Fall. Both an acrylic yarn, like my chosen Red Heart Super Saver, and wool blends, like Lion Brand Wool Ease or Berroco Vintage, are great in cold, non-windy weather. A superwash merino wool yarn, like Knit Picks / WeCrochet Swish, would be perfect for chilly morning runs and cold weather, windy or not.
Acrylic yarns, like my chosen Red Heart Super Saver, are the most common yarn for worsted weight projects, and while the wind will go straight through acrylic fabric, it does work well for ear warmers when it’s just cool out or if you’re like me and you also wear a beanie or hoodie with the earwarmer.
To help protect against the wind, I would recommend an animal fiber, ie wool, alpaca, etc. The more animal fiber within the yarn, the better it will protect against the wind and the warmer it will be. If you are allergic to wool, but still want an animal fiber, Alpaca is a popular choice.
If you have concerns about using Red Heart Super Saver and similar because of the roughness and stiffness of the fabric, I have a couple tips!
- If the yarn is too rough for your hands to crochet with, remove the skein wrapper, place the skein into a mesh lingerie bag, then machine wash it on the gentle cycle in cold water with a mild detergent. Once it’s finished, toss it into the dryer on low heat – you may need to run it through 2 – 3 times to get the center dry. Do not use a pillowcase in place of the mesh bag or it will pill and get an ugly halo.
- To add softness and better drape to the finished piece, crochet in it’s entirety and weave in the ends, then wash and dry in the same manner or simply dry once with a dryer sheet. You can do it with or without the mesh bag, but it protects it so much more from all friction of all the other items so much better in the bag. Do not use a pillowcase in place of the mesh bag or it will pill and get an ugly halo.
Tools & Notions:
We have lots of great crochet hooks in our Yarn Crafts and Coffee Yarn Shop. The most popular, and preferred by Candace and Emily, are the Clover Amour Crochet Hooks with the soft handles and smooth metal hook. Alexandra prefers metal crochet hooks with large, ergonomic clay handles and just loves the fun designs from SiennasBowtique and BronzeShepherdStudio! If your preference is wood, the LYKKE brand are lovely, smooth and sturdy.
Tapestry Needles with the blunt, round end are essential for sewing and finishing on a number of yarn crafts, including crocheting, knitting as well as needlepointing on fabric and plastic canvas. The blunt, rounded end allows the needle to pass easily through the fabric created by yarn and holes on canvas without snagging (or getting your fingers) in the process. More specifically for crocheting and knitting, a Bent Tip Tapestry Needle makes weaving, grafting and sewing so much easier on the hands. The long oval eye makes threading strands of yarn easier, though you may still want to use a needle threader.
Scissors are an essential tool. When I’m working on the go, I like to carry a pair of folding scissors as they fit perfectly in even the tiniest of bags. When I am working at home or have more space in my bag for a larger notions pouch, I like to use a pair of lightweight, all-purpose scissors as they are so versatile and great for a variety of things from cutting plastic canvas mesh to trimming yarn ends after weaving in to cutting out a care card to include with a handmade gift.
A tape measure is an essential tool in a multitude of crafts, including crocheting, knitting and needlepoint to name a few, especially if you are cutting material to finish a project or trying to meet gauge.
Time Spent:
For the adult small size, I had my earwarmer ready in just over 45 minutes.
Measurements:
- Toddler: 3 3/8″ Tall by 9″ Wide to fit a head circumference of 18 – 20″
- Child, Teen & Adult Small: 4 1/8″ Tall by 9 5/8″ Wide to fit a head circumference of 20 – 22″
- Adult Large: 4 1/8″ Tall by 10 3/4″ Wide to fit a head circumference of 22 – 23″
This ear warmer is crocheted in the round, meaning it makes a tube, so you don’t have it seam it closed later. The widths provided are with the ear warmer laying flat, and that width measurement is half of the total finished circumference, which you want to be 2″ – 2 1/2″ smaller than your head circumference. This can vary depending on your yarn choice and the fit you like best (ie comfortable but loose fit or for it to fit like a hug).
The head circumferences provided are based on average sizes. To measure your head for the most accurate measurement, take a soft tape measure and measure your head circumference, or the distance around your head, just above your eyebrows.
Gauge (Essential):
- 14 DC = 4″ Wide; 7 Rows = 4″
- In Pattern, 4 repeats (2 DC, 2 SC) x 4 = 4 1/4″ Wide
Gauge it very important for ear warmers that are worked in the round. If you do not meet gauge, and continue making your ear warmer, the finished size will either be too small or too big so make sure to stop and check it. If you’re measuring smaller than the given measurements, go up a crochet hook size, and if you’re measuring larger, go down a crochet hook size. Rework the sample, take gauge again, and see where you are.
Abbreviations (US):
- FSC – Foundation Single Crochet
- SC – Single Crochet (Photo Tutorial)
- DC – Double Crochet (Photo Tutorial)
Special Stitch:
A foundation single crochet (or FSC) is recommended for beginning as a beginning chain can limit the amount of stretch on a finished project, and here we don’t want that earwarmer to feel too tight or restrictive. Alternatively, you can use one size larger crochet hook, and work a beginning chain of the number of stitches, then slip stitch join. Switch to the correct crochet hook, and work a round of single crochet (the larger hook is to add more flexibility).
How to FSC: Chain 2. Insert hook into the first chain, yarn over, pull through, yarn over, pull through first loop (to create foundation chain), yarn over, pull through two loops on hook. First chain and SC created. Looking at the stitch in your hand, you should see the top of the SC to the right, and parallel on the left side, it should look like the opposite side of the beginning foundation chain. You will be working in these stitches on the left. To create the next stitch and each stitch after, insert hook under both loops of the foundation chain (left side) yarn over, and pull through, yarn over, pull through the first loop, yarn over, pull through 2 remaining loops.
Pattern Notes:
Within the pattern, Color A is represented by Aran Fleck and is the main color of the ear warmer, and Color B is represented by Black and is the color of the boxes aka little windows. I was labeling the colors within the pattern with the ones I used for my project, but I found that in in person classes, students were having a tough time with it when using different colors so I hope the more generic terms are more helpful.
The stitch multiple is 4, which means a number that is divisible by 4, like 8, 12, 16, etc. To adjust the width of the ear warmer, start with a chain that is a multiple of 4. Once joined, round one will finish with the same number of single crochets as chains that you started with.
The beginning chains do not count as a stitch.
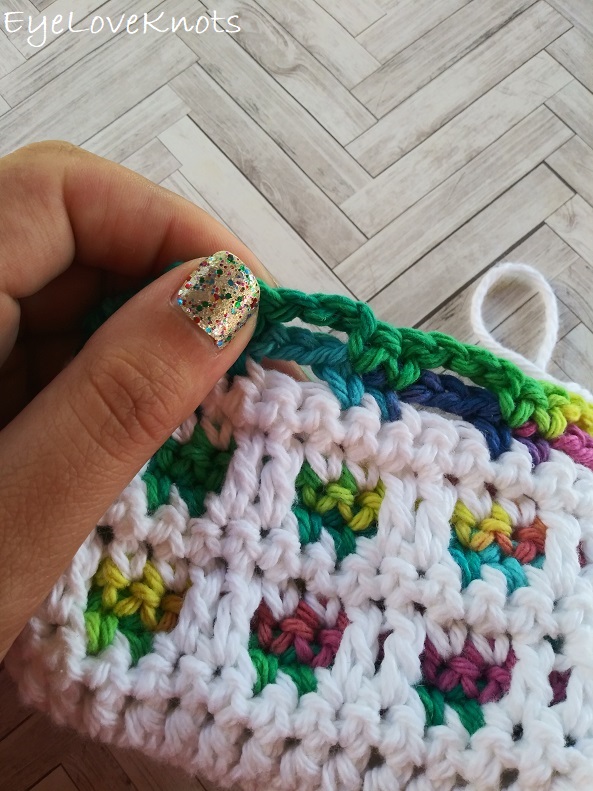
In the pattern, I will instruct for example, in Round 5 of the Adult Small size “DC into R3”. In the photo above, you can see how there are two skipped stitches in white, and two rows of chains above it. You will push those chains to the back, and work the double crochet just into each of the skipped stitches, which are single crochet stitches. Once you finish the double crochet stitches, you’ll notice that they will lay on top of the chains, but not be connected to them. Working the next single crochet will connect the layers of fabric together.
For the most seamless color change: after joining, turn to the new working side. Pull the new color through, then pull the original color tight (it will disappear). I have a Short video demonstrating this color change on an ornament, but same process. This is my preferred method, but you can also work the more traditional manner of changing in that last yarn over of the previous stitch.
Work the round as written, but before joining, move the previous color to the inside so it won’t be visible from the right side, or front side, of the earwarmer.
Carry the yarn up on the wrong side, or back side, with the slip stitch join so it’s right where you need it when you’re ready to switch back – this will result in a small float that is visible along the inside. Alternatively, you can fasten off every two rounds and reattach the yarn when you’re ready for it again, but this will result in a lot of ends to weave in.
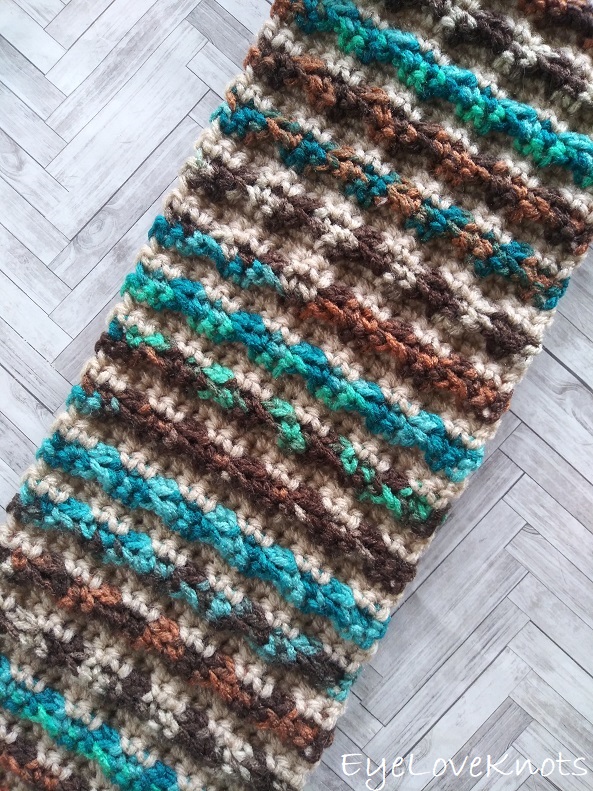
This is what the back of this stitch pattern looks like (shown on my Through the Window Scarf). There aren’t any floats throughout the pattern other than the yarn that will be carried up the join.
Each round adds height to the ear warmer. If you would like a thinner ear warmer, work less repeats, and for a thicker ear warmer, work more repeats.
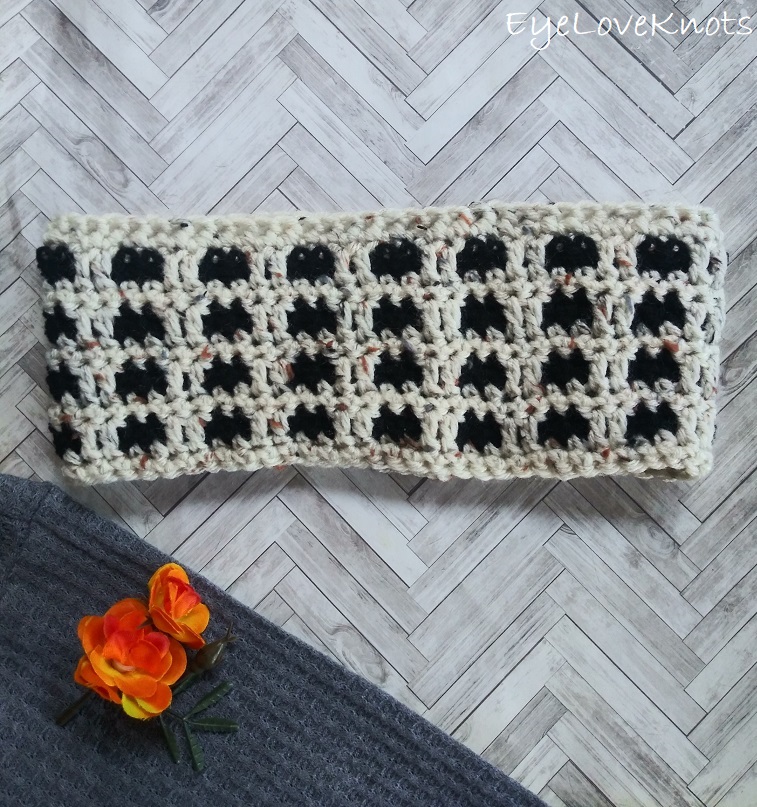
Toddler Ear Warmer Pattern:
In Color A, chain 2, then FSC 60. Join. (60 SC)
R2: Chain 1, turn. SC into the 1st stitch, and each stitch around. Join, and switch to Color B. (60 SC)
R3: In Color B, chain 1 and turn. SC into the 1st stitch, chain 3, skip the next 2 stitches, (SC into each of the next 2 stitches, chain 3, skip the next 2 stitches) 14x, SC into the next stitch. Join. (30 SC and 30 chain spaces)
R4: Chain 1, turn. SC into the 1st stitch, chain 3, (SC into each of the next 2 SC, chain 3) 14x, SC into the next SC. Join, and switch to Color A. (30 SC and 30 chain spaces)
R5: In Color A, chain 1, and turn. SC into the 1st SC, DC into each of the 2 open stitches from R3, (SC into each of the next 2 SC, DC into each of the next 2 stitches of R3) 14x, SC into the next SC. Join. (60 stitches)
R6: Chain 1, and turn. SC into the 1st stitch, and each stitch around. (60 SC)
R7 – 14: Repeat Rows 3 – 6.
If you haven’t checked gauge yet, after Round 9, measure in pattern to ensure you’re meeting gauge: 4 repeats (2 DC, 2 SC) x 4 = 4 1/4″ Wide
Fasten off, and weave in ends.
Child, Teen & Adult Small Ear Warmer Pattern:
In Color A, chain 2, then FSC 64. Join. (64 SC)
R2: Chain 1, turn. SC into the 1st stitch, and each stitch around. Join, and switch to Color B. (64 SC)
R3: In Color B, chain 1 and turn. SC into the 1st stitch, chain 3, skip the next 2 stitches, (SC into each of the next 2 stitches, chain 3, skip the next 2 stitches) 15x, SC into the next stitch. Join. (32 SC and 32 chain spaces)
R4: Chain 1, turn. SC into the 1st stitch, chain 3, (SC into each of the next 2 SC, chain 3) 15x, SC into the next SC. Join, and switch to Color A. (32 SC and 32 chain spaces)
R5: In Color A, chain 1, and turn. SC into the 1st SC, DC into each of the 2 open stitches from R3, (SC into each of the next 2 SC, DC into each of the next 2 stitches of R3) 15x, SC into the next SC. Join. (64 stitches)
R6: Chain 1, and turn. SC into the 1st stitch, and each stitch around. (64 SC)
R7 – 18: Repeat Rows 3 – 6.
If you haven’t checked gauge yet, after Round 9, measure in pattern to ensure you’re meeting gauge: 4 repeats (2 DC, 2 SC) x 4 = 4 1/4″ Wide
Fasten off, and weave in ends.
Adult Large Ear Warmer Pattern:
In Color A, chain 2, then FSC 72. Join. (72 SC)
R2: Chain 1, turn. SC into the 1st stitch, and each stitch around. Join, and switch to Color B. (72 SC)
R3: In Color B, chain 1 and turn. SC into the 1st stitch, chain 3, skip the next 2 stitches, (SC into each of the next 2 stitches, chain 3, skip the next 2 stitches) 17x, SC into the next stitch. Join. (36 SC and 32 chain spaces)
R4: Chain 1, turn. SC into the 1st stitch, chain 3, (SC into each of the next 2 SC, chain 3) 17x, SC into the next SC. Join, and switch to Color A. (32 SC and 36 chain spaces)
R5: In Color A, chain 1, and turn. SC into the 1st SC, DC into each of the 2 open stitches from R3, (SC into each of the next 2 SC, DC into each of the next 2 stitches of R3) 17x, SC into the next SC. Join. (72 stitches)
R6: Chain 1, and turn. SC into the 1st stitch, and each stitch around. (72 SC)
R7 – 18: Repeat Rows 3 – 6.
If you haven’t checked gauge yet, after Round 9, measure in pattern to ensure you’re meeting gauge: 4 repeats (2 DC, 2 SC) x 4 = 4 1/4″ Wide
Fasten off, and weave in ends.
Please feel free to make and sell your own items made using this pattern, but keep in mind, this written pattern and my photos are protected by copyright. Please DO NOT claim this pattern as your own nor should you sell my pattern. DO NOT re-publish my photos as your own. DO NOT copy and paste my pattern anywhere, link to it instead so other’s can visit. Making videos providing instructions how to make my projects on any social media platform is also not permitted.
Join one of our awesome Facebook groups to share your creations, and see what others are up to!
– Yarn Crafts & Coffee Community
– DIY Home On Rockwood Lane
– Alexandra Lane Lifestyle
Linked Up To…
The Hearth and Soul Link Party – April, the 21st Century Housewife
Handmade Monday #195 – Sum of their Stories
The Really Crafty Link Party #234 – Keeping it Real
Craftastic Monday Link Party – Sew Can Do
Linky Ladies Party #194 – The Purple Poncho
Weekday Wear Linkup – Away from the Blue
Turning Heads Linkup – Elegantly Dressed and Stylish
Confident Twosday Linkup – I do deClaire
Party in Your PJs #328 – The Apple Street Cottage
Your Whims Wednesday #478 – My Girlish Whims
Style on the Daily Weekly Link Up – Straight A Style
Style Six Linkup – The Queen in Between
Creative Crafts Linky Party #9 – Creatively Beth
The Wednesday Link Party 367 – Oombawka Design Crochet
{Wow Me} Wednesday #474 – Ginger Snap Crafts
Creatively Crafty Link Party #245 – Life Beyond the Kitchen
Artsy-Fartsy Party #312 – Artsy-Fartsy Mama
Thursday Fashion Files Link Up #277 – Curly Crafty Mom
chicandstylish #linkup – Mummbastylish
Thursday Favorite Things #459 – An Artful Mom
Pin Party #388 – The Pin Junkie
Friday Favorites – Busy Being Jennifer
Create, Bake, Grow & Gather Party #439 – Shabby Art Boutique
Embracing Home and Family Link Party #10 – The Everyday Farmhouse
Farmhouse Friday Link Party #174 – County Road 407
Fancy Friday Linkup – Nancy’s Fashion Style
Link Your Stuff – Annemarie’s Haakblog
Scraptastic Saturdays Party #308 – Scrapality
A Morning Cup of Joe Linky Party – The Cottage Market
Snickerdoodle Create Bake Make Link Party 355 – EyeLoveKnots
Ginx Woolly Linx Party October – Ginx Craft
What cute pieces! the earwarmer looks so practical for winter and the scarf is beautiful! 🙂
Thanks so much for joining the #WeekdayWearLinkup! Hope that you had a wonderful weekend 🙂
Thank you, Mica! Now that the cold weather has come to Florida, I am so excited to be able to wear my pieces out and about.
Still loving that through the window stitch. Thanks for joining in Ginx Woolly Linx Party for October.
What a beautiful pattern, it took me a little over 1 hour to finish. I will try different colors great holiday presents!! Thank you!!
I am so glad you liked it! They make lovely gifts.
I love mosaic crochet so much! Its such a great way to change colors.