How to crochet an easy, simple and beginner friendly lacy women’s poncho perfect for Spring and Fall!
This post contains affiliate links for Lion Brand Yarns and LoveCrafts. If you make a purchase by clicking on them, I make a small commission at no extra cost to you. Thanks for your support!
Today is Day 2! I will be sharing a crochet pattern review each day through Friday of my favorite made for me garments from Salena Baca’s new crochet book, Build Your Skills Crochet Tops: 26 Simple Patterns for First-Time Sweaters, Shrugs, Ponchos & More. On Saturday, I’ll review the whole book, and we’ll do a giveaway!
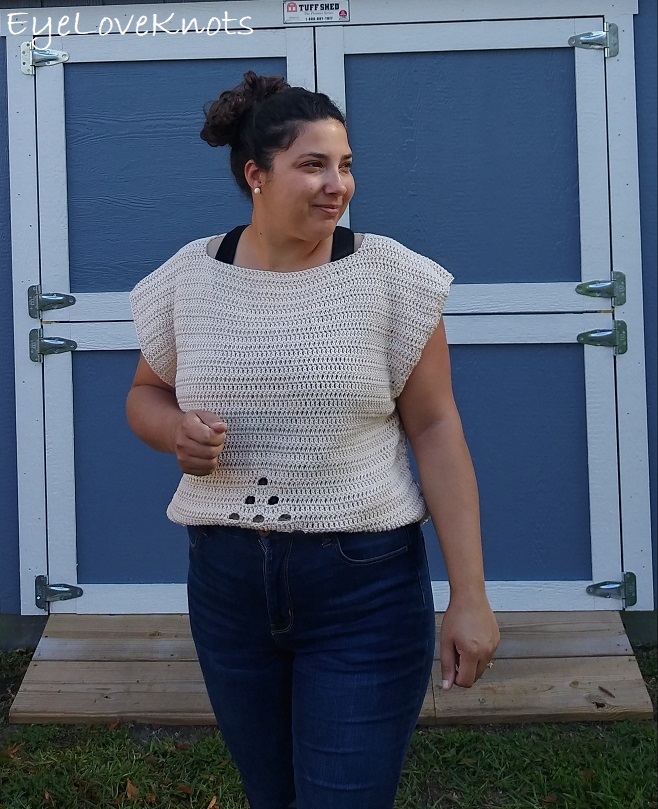
First up was the Vanessa Tee, shown above. Check out my crochet pattern review for the Vanessa Tee.
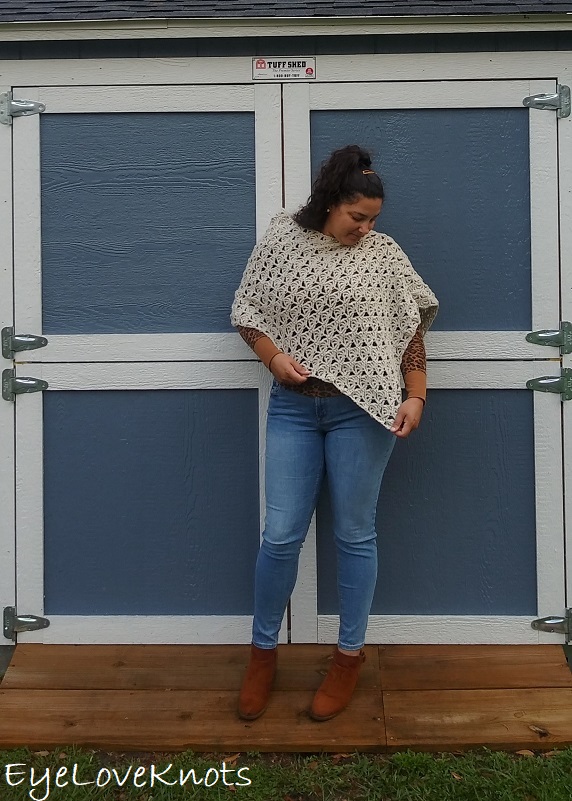
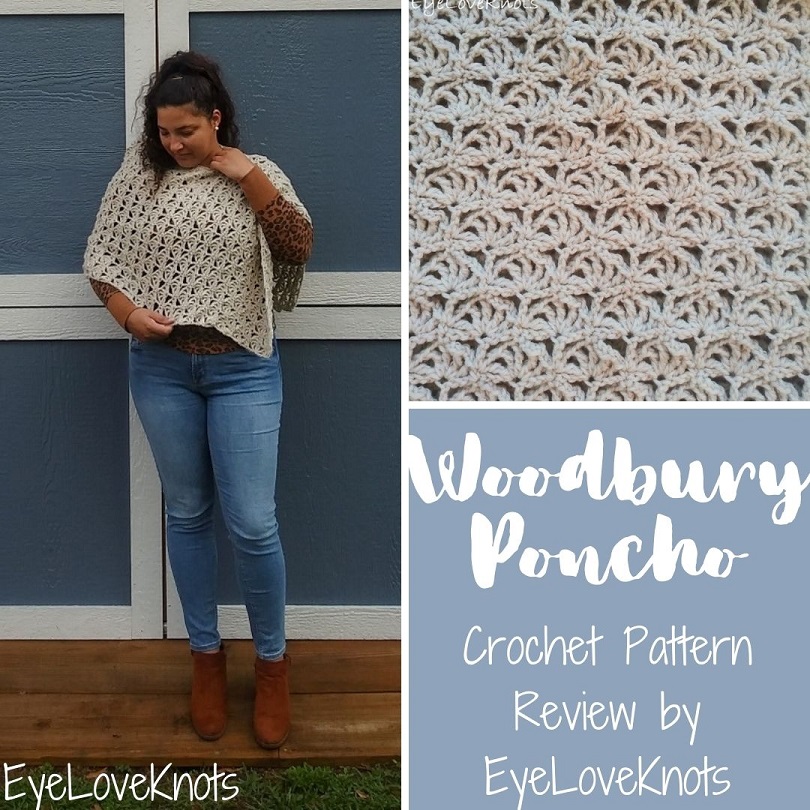
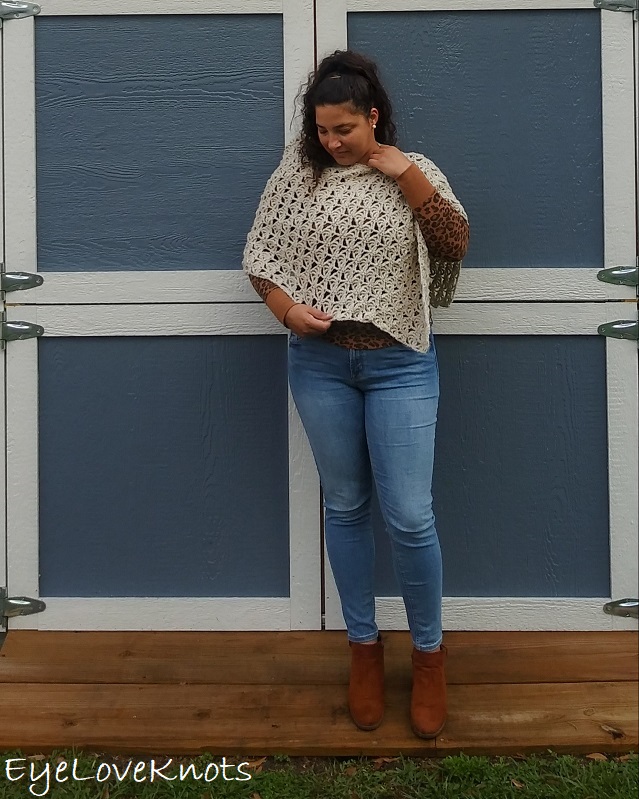
Next up, the Woodbury Poncho! What first caught my attention was the big, beautiful, lacy fans. I also like that the style leaves my hands and arms free to do things without restriction.
I went searching through my stash, and pulled out some Lion Brand Wool Ease. This poncho will be great over a long sleeve in cooler weather, especially when I want a little more warmth than a jacket, but don’t want the heavy, bulkiness of a coat.

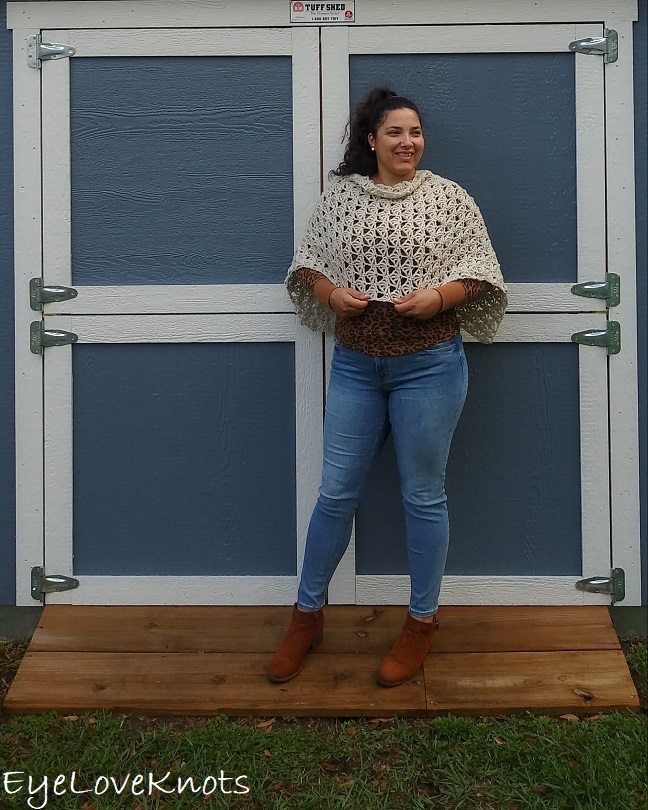
This pattern was very easy to follow. Don’t let the pattern scare you at all because it’s worked in just simple chains, single crochets and treble crochets. If you can work a double crochet, a treble crochet is just one extra yarn over in the beginning, and one extra yarn over and pull through in the end making this a great project for a confident beginner, and a plus – it can be worn two ways.

This is what the back looks like when worn this way.
Materials I Used:
- 638 Yards of Lion Brand’s Wool Ease Yarn in Natural Heather
- I9/5.5mm Crochet Hook
- Tapestry Needle
- Woodbury Poncho, Paid Crochet Pattern in Build Your Skills Crochet Tops: 26 Simple Patterns for First-Time Sweaters, Shrugs, Ponchos & More
Material Notes:
Original pattern uses Cascade Yarns Cantata yarn. I am not familiar with this yarn, or the yarns that were mentioned by Salena as alternatives, but I comprised of 70% cotton and 30% wool, it sounds like a really delightful yarn to work with and wear so if you have the chance, I would recommend ordering some to try. You can find it on LoveCrafts.
For my poncho, I dug through my stash and pulled out one of my favorite yarns, Lion Brand Wool Ease. It’s soft, warm but not too heavy and wears and washes well.
Time Spent:
The Small size took me just over 7 hours to complete.
Measurements:
To decide what size I wanted to work, I took my tape measure and measured the circumference around my arms and bust, which was 50″. I would say this is the most important measurement, but so easy to adjust by simply adding or subtracting more rows. The pattern suggests measuring from neck to arm (which I took to be where the arm bends based on the photo) and my measurement was 15″ so 22″ seemed to be just fine.
Before sewing my fabric measured 34.5″ wide by 51″ long.
Gauge:
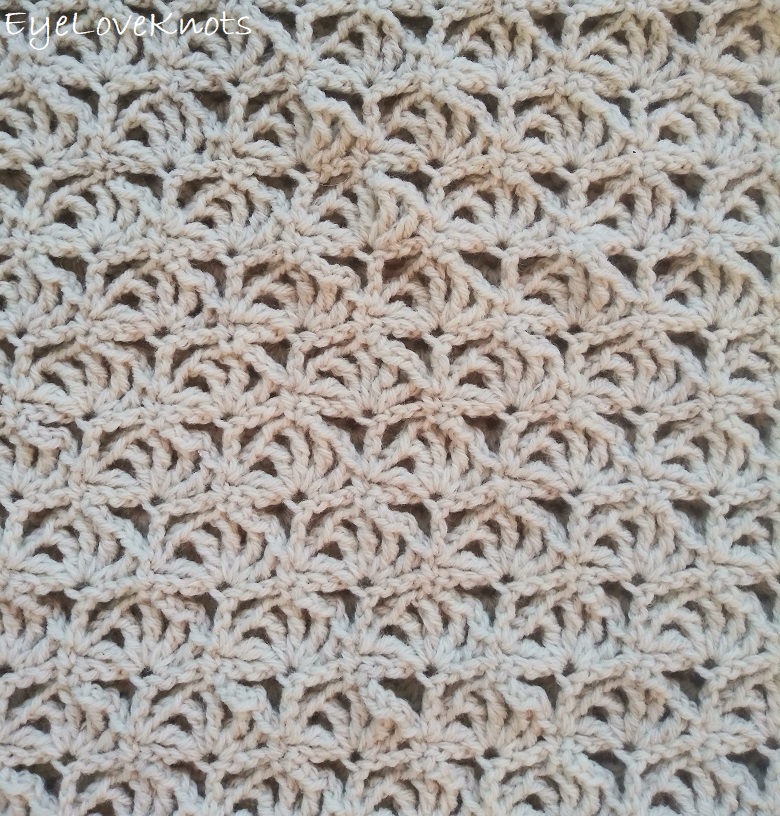
- Original Pattern: 1 Fan = 2.4″ wide; 6 Rows in Pattern = 4″ tall
- My Gauge: 1 Fan = 2″ wide; 6 Rows in Pattern = 4″ tall
It’s funny because my gauge width measured 0.4″ less, but my finished fabric turned out to be 14.5″ wider than the pattern says it should have been. Technically, my fabric should have come out smaller so I am not sure, but could be that the yarn from the original behaves differently because it has the cotton in it – I’m not sure, but I don’t think it’s essential because the 34.5″ width still fit great, and did not restrict me in any way. You can check how it will fit at any time by holding it up to your neck, and seeing how far down your arm it falls.
Overall Thoughts:

This pattern was very easy to follow, and I really like the open lace fans – they were so easy to work up too! It is a four row repeat, so this pattern is perfect for a road trip, or mindlessly crocheting in front of the TV. The construction is super simple. It’s one long rectangle that is folded in half lengthwise, and sewn on one side only leaving the neckhole open so nothing too fancy, but it looks fancy.
This poncho is worked in simple chains, single crochets and treble crochets. Don’t let the idea of a treble crochet scare you. If you can work a double crochet, a treble crochet is just one extra yarn over in the beginning, and one extra yarn over and pull through in the end making this a great project for a confident beginner.
My recommendation is going to be to “try it on” before you get too far into it to make sure it is going to fit the way you like. You can test the width by placing the edge at the side of you neck (widthwise that is) and seeing how far down your far it falls. If you think it’s too long, remove chains from the foundation in multiples of 8. If you think it’s too short, add chains to the foundation in multiples of 8. If you measured around your arms, and bust as I did, that should be sufficient enough to judge the length of your fabric before sewing, but if you want to test it, before fastening off and sewing closed, simply slip stitch the layers together and try it on.
Pattern Notes:
Foundation: I worked the first row into the back hump of the foundation chain to help give the edge a finished, clean edge so there was no added border.
Row 2: I changed the beginning of Row 2 to be a chain 7 because a treble crochet is equal to 4 chains, and as written, I found this edge to be a bit tight.
Row 3: I worked the last stitch of Row 3 into the 4th chain of the beginning chain 7.
Row 4: I worked the last stitch into the 4th chain of the beginning chain 5, and it kept a straight side edge without being tight. You’ll notice it’s “tight” if it hangs more restrictedly on the side.
Since I knew I wanted the length to be close to that 50″ I measured, I just kept measuring my fabric until I reached a spot near my goal. 85 rows ended up measuring 51″.
I was closer to 50″ at the end of 84 rows, but as written, the last row the pattern recommends is a fan row, but I think it should be one of the other rows so it finishes with a straight edge, and that’s why I added row 85.
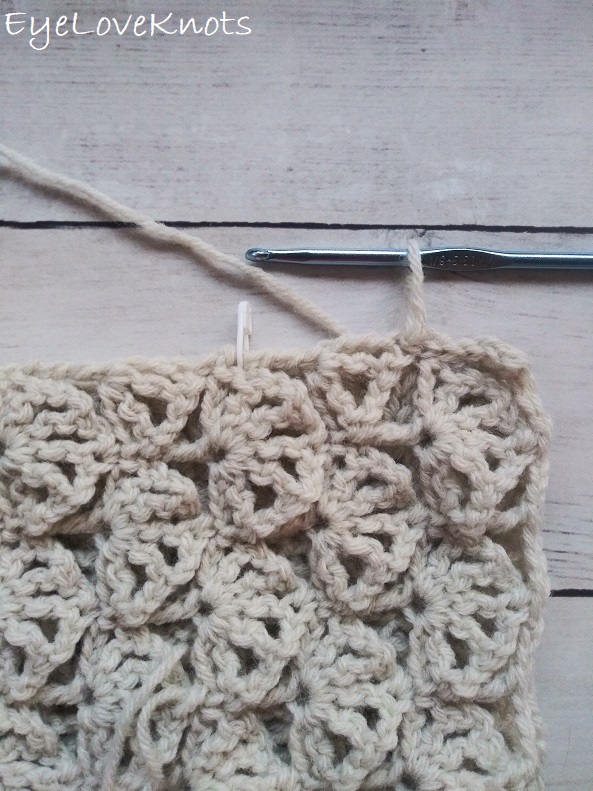
Tip! Stitch markers are great for matching up the rows when you are seaming. I hate when I get to the end point, and my fabric isn’t matched up, so I just use my stitch markers to take the guess work out. ALSO! I like to slip stitch my seams closed first so I can try it on to see if I am completely happy with the fit before sewing closed with a needle. Slip stitching seams can make the fabric pucker and prevent stretch which might make the top bunch up and not lay flat and that’s why sewing with a needle is better. For this particular top, I felt it was sufficient enough with the slip stitch seam and not compromised on fitting so I didn’t even take it out to sew closed with the needle.
Join one of our awesome Facebook groups to share your creations, and see what others are up to!
– EyeLoveKnots Crochet & DIY Community
– DIY Home On Rockwood Lane
– Alexandra Lane Lifestyle
Linked Up To…
Craft Schooling Sunday – Creative Jewish Mom
Over the Moon 267 – Marilyn’s Treats
Weekly Link-Up #214 – Beauty by Miss L
Weekday Wear Link Up – Away from the Blue
Turning Heads Tuesday – Elegantly Dressed and Stylish
Confident Twosday Linkup – I do deClaire
Style with a Smile Link Up – Style Splash
Style Six Link Up – The Queen in Between
Style on the Daily Link Up – Straight A Style
Thursday Fashion Files Link Up – Curly Crafty Mom
Fancy Friday Linkup – Nancy’s Fashion Style
Style Link Up – Lizzie in Lace
Linky Ladies Party #206 – The Purple Poncho
The Loop Scoop #9 – Moogly
Create, Bake, Grow & Gather Party #461 – Shabby Art Boutique
A Morning Cup of Joe – The Cottage Market
You’re the Star Blog Hop – Decor Craft Design
Happiness is Homemade Link Party 365 – Decor Craft Design
Craftastic Monday Link Party – Sew Can Do
Ginx Woolly Linx Party March – Ginx Craft
The Really Crafty Link Party #257 – Keeping it Real
Handmade Monday #218 – Sum of their Stories
The Wednesday Link Party 389 – The Stitchin’ Mommy
Waste Not Wednesday 245 – Pretty DIY Home
Creative Crafts Linky Party #32 – Creatively Beth
Creatively Crafty Link Party #266 – Creatively Crafty
Link Your Stuff – Annemarie’s Haakblog
Unlimited Monthly Link Party 22 – Grammy’s Grid
The Hearth and Soul Link Party – April, the 21st Century Housewife
Fabulous Party #362 – Lou Lou Girls
Party in Your PJs #349 – The Apple Street Cottage
{Wow Me} Wednesday #495 – Ginger Snap Crafts
Your Whims Wednesday #501 – My Girlish Whims
Thursday Favorite Things #480 – An Artful Mom
Artsy-Fartsy Party #335 – Artsy-Fartsy Mama
Encouraging Hearts and Home Blog Hop – Apron Strings and Other Things
Traffic Jam Weekend Linky Party #273 – My Bijou Life
Friday Favorites – A Day of Small Things…
Snickerdoodle Create Bake Make Link Party 376 – EyeLoveKnots
Wow! The poncho pattern is so pretty! It has a gorgeous lacy effect. I love how it looks on you!
This is so pretty. The stitch looks difficult, but sometimes the look can be deceiving. It looks fabulous on you!
Don’t let it scare you at all! It’s a really gorgeous stitch pattern, but made of simple treble crochets, single crochets and chains. Really should give it a try!
That’s a beautiful poncho and such a lovely design with the stitching! It looks great on you 🙂
Thanks so much for joining the #WeekdayWearLinkup 🙂
Thanks, Mica!
Hi Alexandra! I LOVE the stitch in the poncho – it is so pretty! The finished poncho looks great too 🙂 I didn’t know Salena had a new book come out – I’m going to go check that out too!
Thank you for linking up at our weekly Link Party! You are being featured at our Wednesday Party #390 this week. The post will be live on March 17, 2021. Here’s the direct link to the post in case you’d like to share your feature:
https://oombawkadesigncrochet.com/2021/03/woodbury-poncho-sun-and-stars-granny-square-doll-cardigan-set.html
Hope to see you again next week! Rhondda
Thanks so much, Rhondda! Yeah, her new book is really great! Lots of easy, beautiful garments in it that cover all times of year. Looking forward to partying with you today.
Thanks so much! Your notes are so detailed and super helpful
So glad I could help!