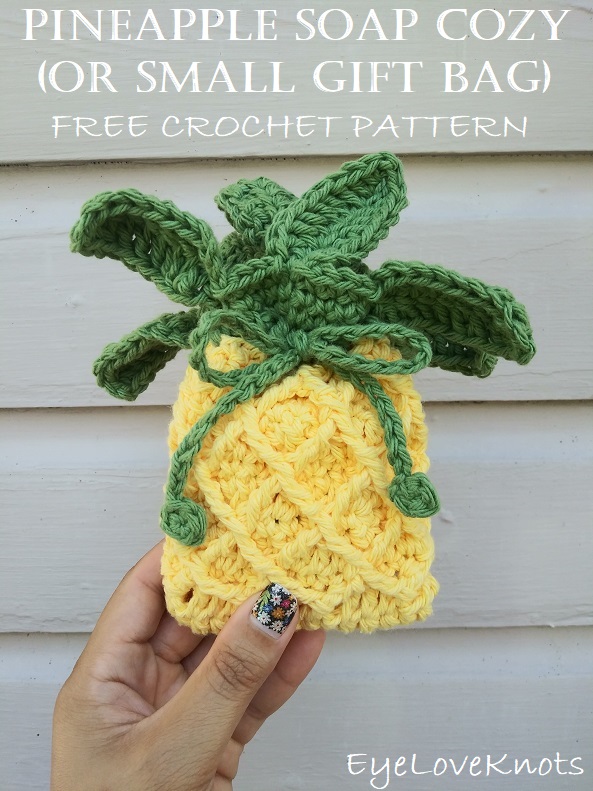
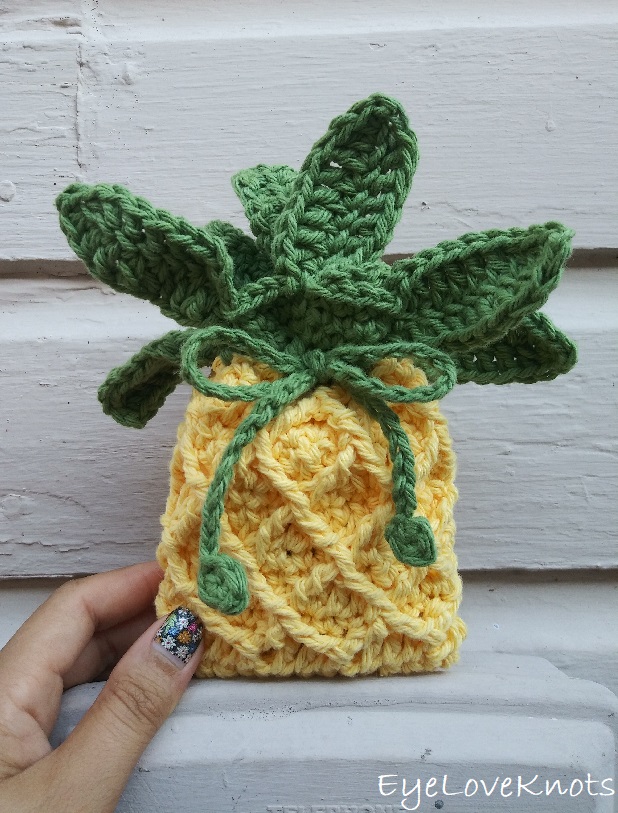
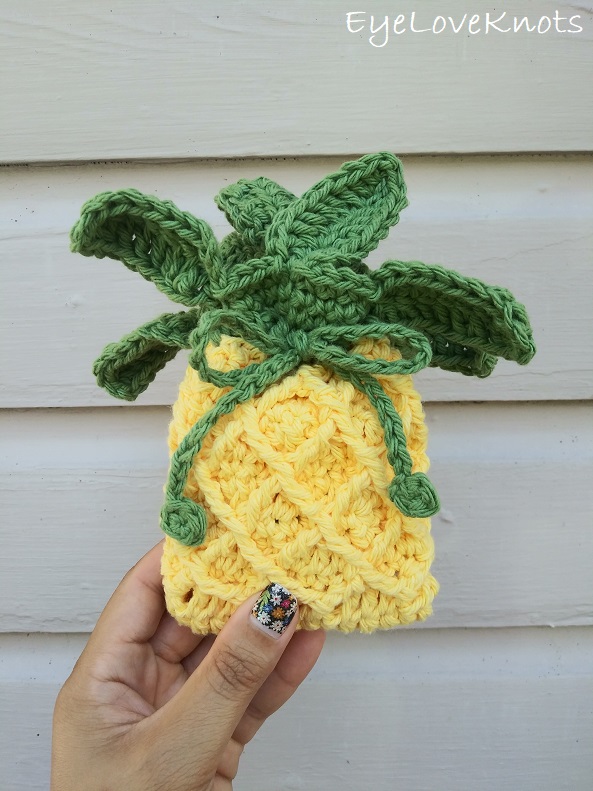
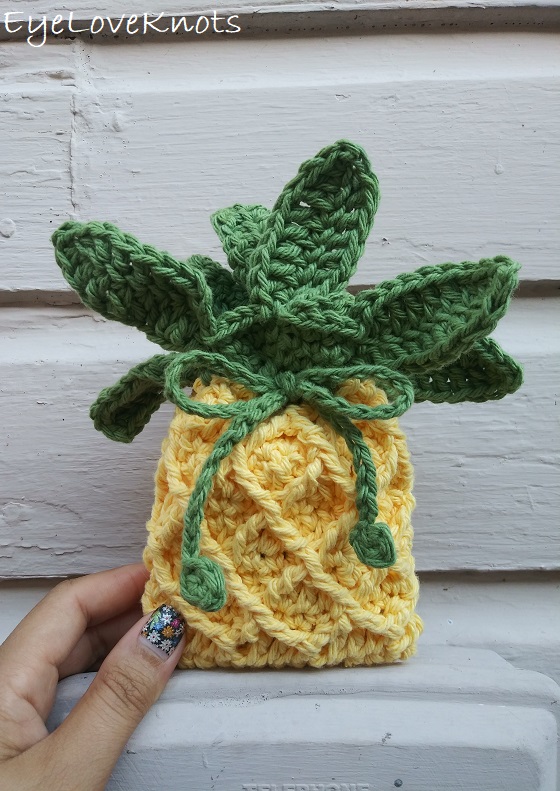
Learn how to crochet a Pineapple Gift Bag, the perfect mini gift bag to use with a homemade soap, as a gift bag for tropical themed earrings or to use as favor bags for a Luau party!
This post contains affiliate links. If you make a purchase by clicking on them, I make a small commission at no extra cost to you. I only recommend products I love and hope you’ll love them too! Click here to find out about the different affiliate programs I am apart of. This post also contains shop links to my yarn shop and craft store, Yarn Crafts & Coffee. You can shop online or in person in Melbourne, Florida.
Find the free crochet pattern instructions below, or purchase a printer-friendly, ad-free PDF on Ravelry by clicking here.
In a hurry? Pin this for later when you have more time.
Crochet mini bags are one of my favorite things to make. They are quick to work up and so versatile!
Originally, this mini crochet bag was designed as a soap cozy, where you place a bar of soap in it and use it in the shower to exfoliate with and make your bar of soap go further, but these mini crochet bags are also perfect as candy pouches for parties, as small gift bags and even as a coin purse, so in rediscovering this design as part of my Fun & Fruit Crafting Event 2026, I decided to rename this bag as a Mini Gift Bag.
When I designed this Pineapple Mini Gift Bag, I was inspired by my Carrot Mini Gift Bag, and had been wanting to make one that looked like a pineapple complete with the leaves.
I thought the criss crossed stitch pattern from the Diamond Stitch was appropriate for the pattern/texture of an actual pineapple, and the leaves are a modified version of my Super Easy Carrot Applique.
Imagine this little bag as a soap cozy gifted with a homemade soap or textured facial scrubbies, as a candy or favor pouch at a Luau or Tiki Party or as a gift bag gifted with a gift card to a favorite Smoothie shop or some Summer themed earrings, like these Pineapple Earrings from A Winding Road Crochet.
Soap Cozy Note:
The feedback I’ve received for this bag as a soap cozy is that with it’s solid fabric and thicker yarn, it does take a while to dry so keep this in mind if you intend to use it this way. Perhaps, consider using a lighter weight yarn, or a cotton blend with a fast drying fiber, like bamboo.
Ad-Free, Printer Friendly PDF:

EyeLoveKnots newsletter subscribers get access to Exclusive Subscriber Content, like the free PDF of this pattern via the Free File Library – you’ll find the tab on the top menu. The library is password protected so sign up for my newsletter and you’ll receive a Welcome email containing this month’s password, or if you are already a blog subscriber, reference your latest newsletter for this month’s password. From the library, you’ll be able to access the PDFs via Google Drive – you do not need to have a Google Drive account to view and download the PDF.
Through 06/08/26 at 11:59pm EST, you can grab a free copy of the PDF for the Pineapple Small Gift Bag on Ravelry using code PINEAPPLE26. I earn my income from the number of pageviews my blog sees, so please do not share the code, but instead share the link to this post so others can find it. Thank you!
After or for non-subscribers, if you would like a PDF version of this post, you may get one through either my Etsy Shop, Ravelry Shop or LoveCrafts Shop for a small fee. This fee is to compensate for the views lost when you no longer need to return to the blog to for the information, as you will have your own copy.
Save this to Your Favorites On: AllFreeCrochet, FaveCrafts, Crochet Pattern Bonanza, AllFreeHolidayCrafts, DIYideaCenter, Cheap Thrifty Living
Materials:
- 70 Yards of Worsted Weight Yarn
- H8/5mm Crochet Hook
- Tapestry Needle
- Scissors
- Optional, Jewelry Pliers
Yarn Talk:
Originally, I used Lily Sugar n Cream in Yellow and Sage Green. I have since stopped using Lily Sugar n Cream Yarn because it is not colorfast, which means the colors fade and bleed when using or after washing in the project. Now, for 100% cotton yarn, I love using WeCrochet Dishie and Cascade Nifty Cotton Circulo as they’re both colorfast. I also like Natural Cotton Maxcolor 4/6 and Queensland Coastal Cotton, which are colorfast as well, but I couldn’t find the right colors to match in these yarns.
If you are going to use this bag as a soap cozy, you’ll want to use either a 100% cotton or a blend of cotton with linen, cotton with bamboo or linen with bamboo. Linen gets strong when wet, and gets softer and nicer with each wash. On it’s own, it’s on the rougher side for feel, but linen blends often combine with cotton or bamboo to add softness. Bamboo yarns have a high absorbency – even more than cotton – however, bamboo is weaker when wet, and more prone to developing mold so if bamboo is a fiber you want to use, I definitely recommend going with a blend of linen and/or cotton. Stay away from synthetic fibers, like acrylic, as they lack the absorbency needed.
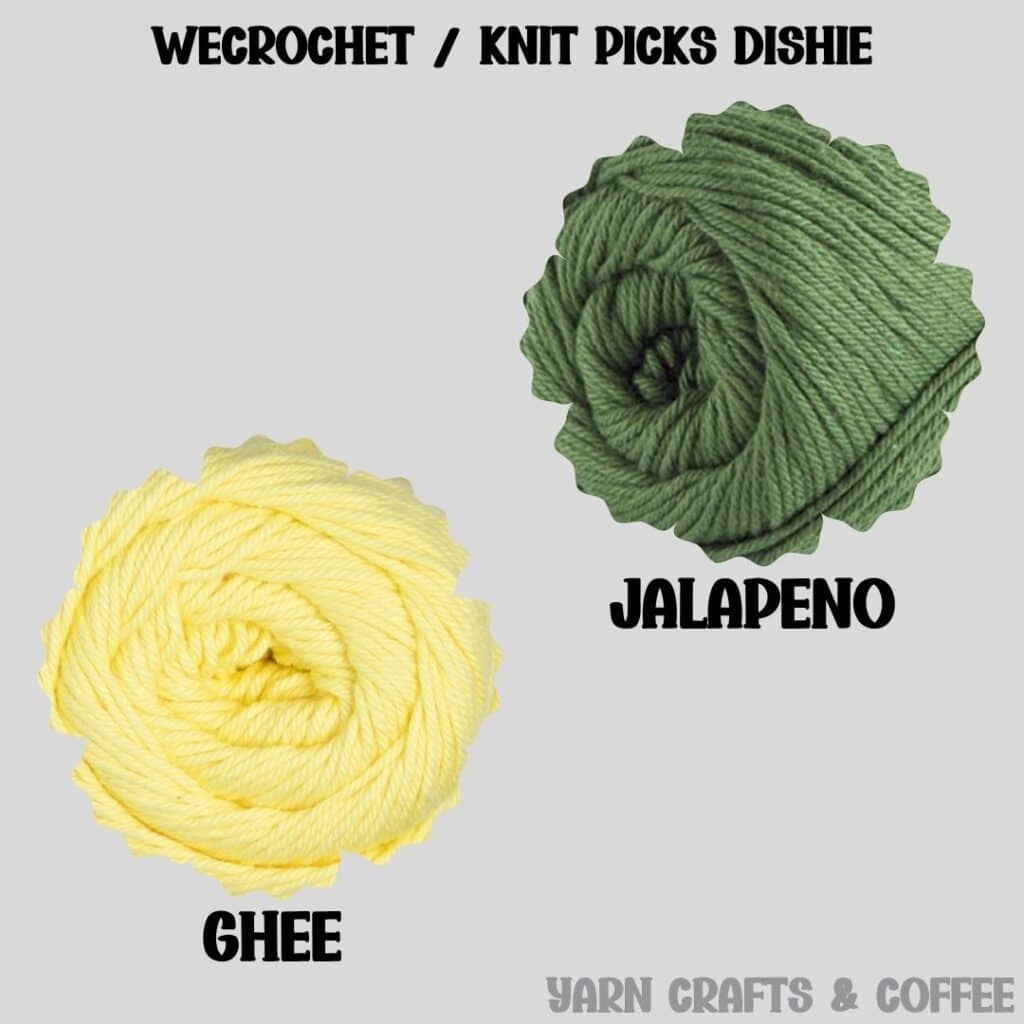
WeCrochet Dishie (aka Knit Picks Dishie) is a versatile, soft worsted weight #4 yarn made of 100% cotton. It’s on the lighter side for worsted weight working up similarly to Cascade Nifty Cotton, Queensland Coastal Cotton and I Love This Cotton from Hobby Lobby. It’s machine washable and dryable making projects easy to care for. As of June 1st, it is available in an amazing number of colors – 83 colors.
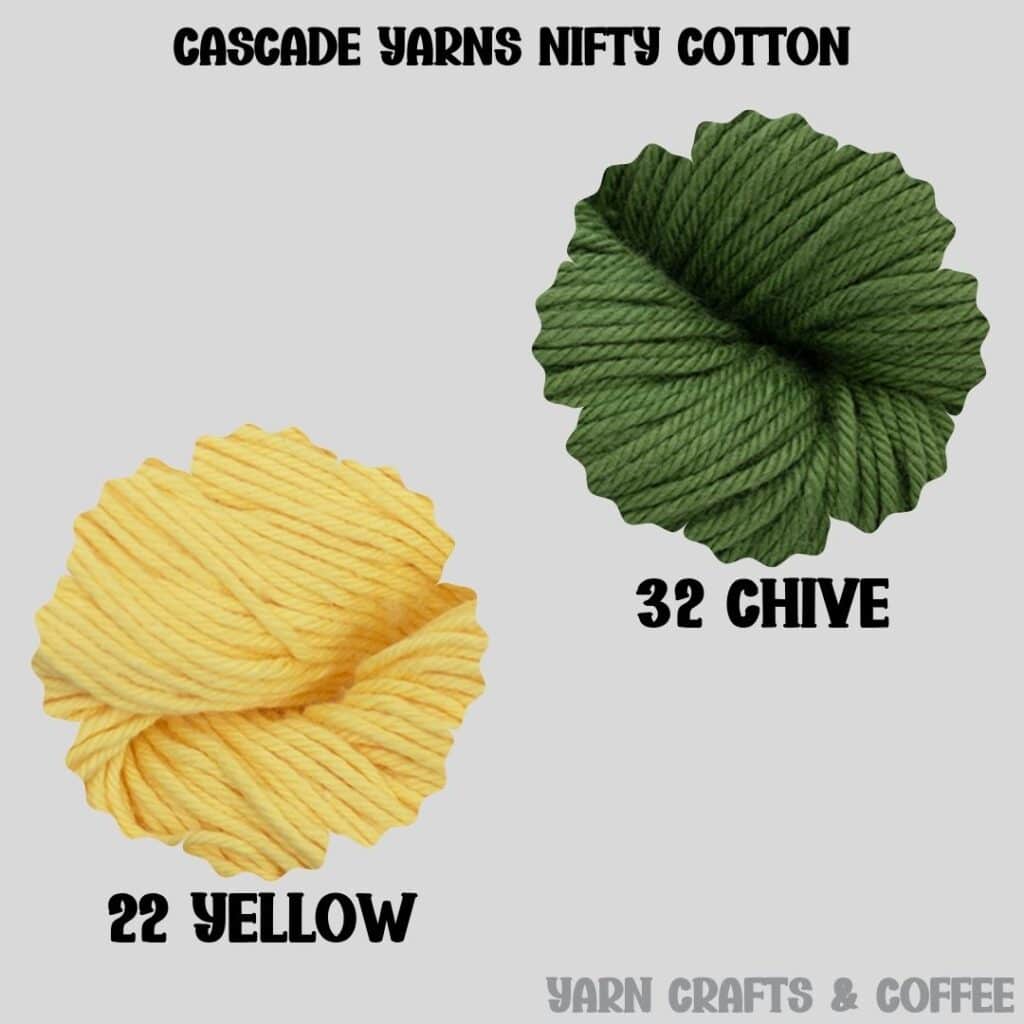
Cascade Nifty Cotton Yarn is a versatile, soft worsted weight #4 yarn made of 100% cotton. It’s on the lighter side for worsted weight working up similarly to WeCrochet Dishie, Queensland Coastal Cotton and and I Love This Cotton from Hobby Lobby. It’s machine washable and dryable making projects easy to care for. As of June 1st, it is available in an amazing number of colors – 66 colors.
Note: The feedback I’ve received for this bag as a soap cozy is that with it’s solid fabric and thicker yarn, it does take a while to dry so keep this in mind if you intend to use it this way. Perhaps, consider using a lighter weight yarn with more chains using the stitch multiple, or a cotton blend with a fast drying fiber, like bamboo.
As a gift bag, candy pouch or favor bag, you can reach for any fiber yarn desired. This pattern was written for a 100% cotton yarn, which produces a more relaxed fabric. If you choose a different fiber, such as 100% acrylic, you may want to go up a hook to achieve the same measurements.
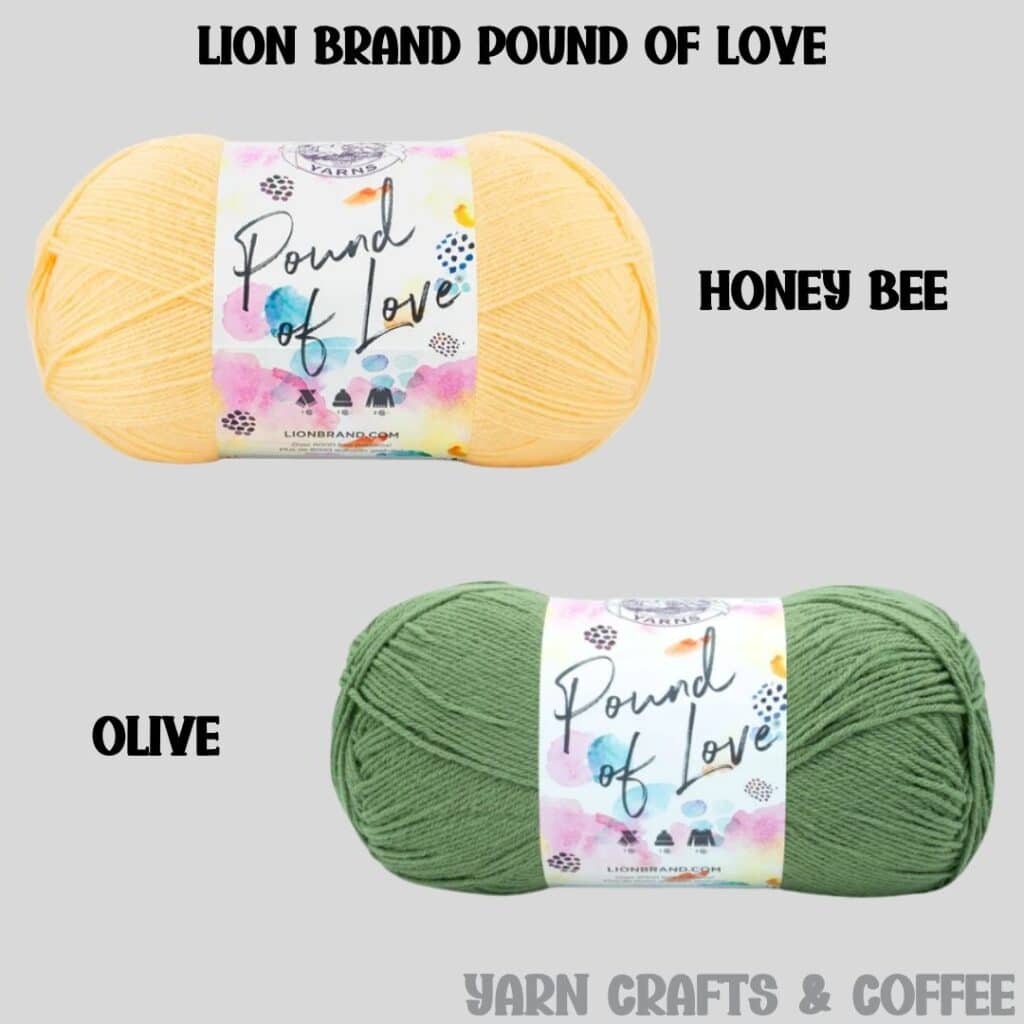
Lion Brand Pound of Love Yarn is a soft, acrylic yarn that comes in a one pound ball. One pound means you won’t need many skeins to get projects done and even after big projects, like baby blankets, you’ll usually have some yarn leftover for smaller projects. It’s machine washable and dryable making projects easy to care for. As of June 5th, it is available in a 35 colors.
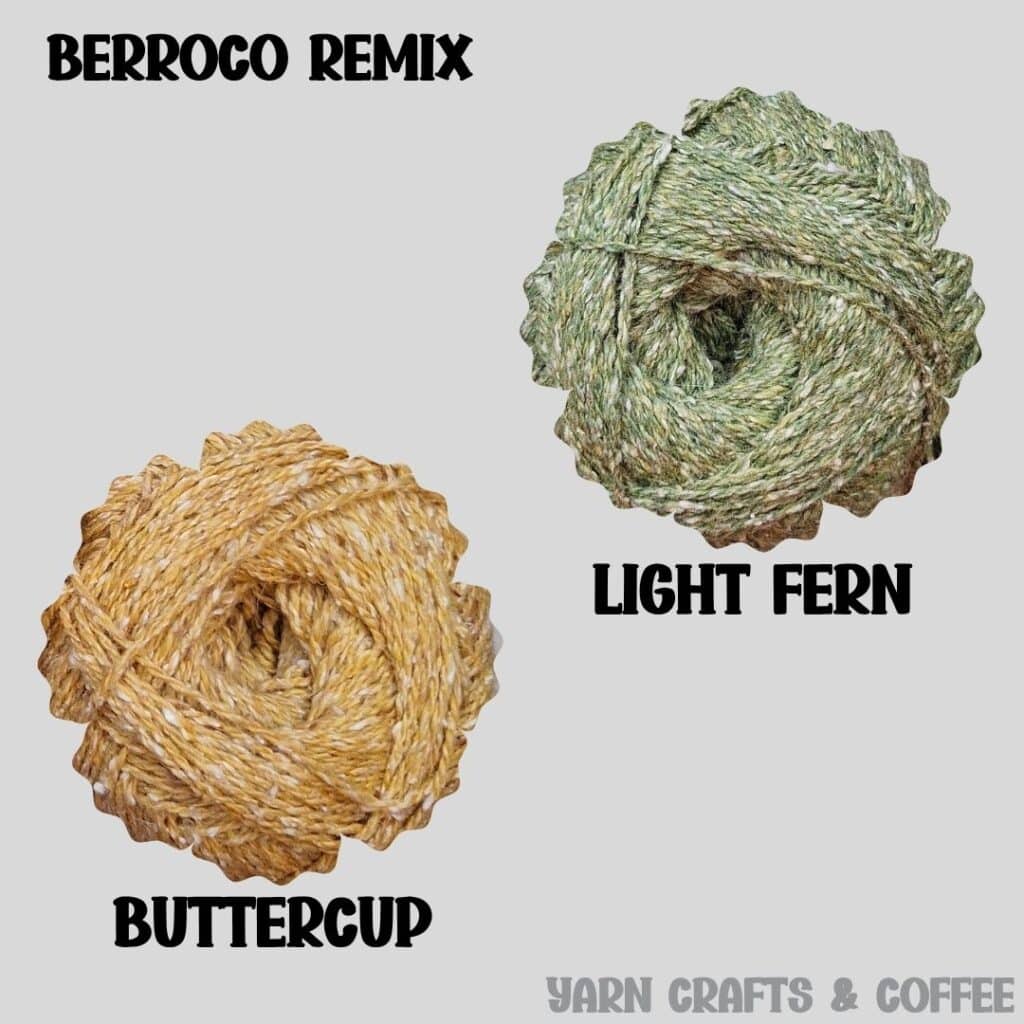
Berroco Remix Yarn is a fantastic wool-free, eco-friendly yarn that consists of 30% superfine nylon, 27% cotton, 24% acrylic, 10% silk and 9% linen all of recycled fibers from garments and other textiles. It has such a lovely texture and lightness to it! It’s machine washable and dryable making projects easy to care for and will soften with washing too. As of June 5th, it’s available in over 20 colors.
Tools & Notions:
We have lots of great crochet hooks in our Yarn Crafts and Coffee Yarn Shop. The most popular, and preferred by Candace and Emily, are the Clover Amour Crochet Hooks with the soft handles and smooth metal hook. Alexandra prefers metal crochet hooks with large, ergonomic clay handles and just loves the fun designs from SiennasBowtique and BronzeShepherdStudio! If your preference is wood, the LYKKE brand are lovely, smooth and sturdy.
Tapestry Needles with the blunt, round end are essential for sewing and finishing on a number of yarn crafts, including crocheting, knitting as well as needlepointing on fabric and plastic canvas. The blunt, rounded end allows the needle to pass easily through the fabric created by yarn and holes on canvas without snagging (or getting your fingers) in the process. More specifically for crocheting and knitting, a Bent Tip Tapestry Needle makes weaving, grafting and sewing so much easier on the hands. The long oval eye makes threading strands of yarn easier, though you may still want to use a needle threader.
Scissors are an essential tool. When I’m working on the go, I like to carry a pair of folding scissors as they fit perfectly in even the tiniest of bags. When I am working at home or have more space in my bag for a larger notions pouch, I like to use a pair of lightweight, all-purpose scissors as they are so versatile and great for a variety of things from cutting plastic canvas mesh to trimming yarn ends after weaving in to cutting out a care card to include with a handmade gift.
Jewelry Pliers are an excellent tool to use to help weave in the ends of tough yarns, such as cotton yarns and chunkier yarns, that can be quite tough on the fingers when weaving in with just fingers and a tapestry needle. Sore thumbs and frustration can be a thing of the past by simply using jewelry pliers to help pull the tapestry needle through the work. Make sure the eye of the needle is facing up so you can see directly down it and carefully pull, wiggling as needed. If it gets caught and you tug too hard, it will break the eye of your needle.
Time Spent:
This cozy took me about an hour.
Measurements:
4 1/4″ Wide by 5 3/4″ Tall to SC Edge of Leaf Round
Gauge (Not essential):
16 HDC by 10 Rows = 4″
Abbreviations (US Terms):
- HDC – Half Double Crochet (Photo Tutorial | Video Tutorial)
- DC – Double Crochet (Photo Tutorial)
- SC – Single Crochet (Photo Tutorial)
Special Stitches:
Mod-fptr2tog – Modified Front Post Treble Crochet Two Together: yarn over 2x (3 loops on hook), insert hook around the indicated post, yarn over and pull through, (yarn over and pull through 2 loops) 2x (2 loops on hook, yarn over 2x, skip the next 3 stitches (making sure not to mistakenly count the stitch behind the post stitch), insert hook around the next post, yarn over and pull through (5 loops on hook), (yarn over and pull through 2 loops) 2x, yarn over and pull through remaining 3 loops.
Working this modified stitch creates an upside down “V”, and when you work rounds following the first modified round, you will be working into the top peak of that upside down “V”.
fptr2tog – Front Post Treble Crochet Two Together: yarn over 2x (3 loops on hook), insert hook around the indicated post, yarn over and pull through, (yarn over and pull through 2 loops) 2x (2 loops on hook, yarn over 2x, insert hook around the next post, yarn over and pull through (5 loops on hook), (yarn over and pull through 2 loops) 2x, yarn over and pull through remaining 3 loops.
FDC – Foundation Double Crochet: Yarn over, insert hook into the first chain, yarn over and pull through, yarn over and pull through first loop (to create foundation chain), (yarn over and pull through two loops on hook) 2x. First chain and DC created. Looking at the stitch in your hand, you should see the top of the DC to the right, and parallel on the left side, it should look like the opposite side of the beginning foundation chain. You will be working in these stitches on the left. To create the next stitch and each stitch after, yarn over, insert hook under both loops of the foundation chain (left side) yarn over and pull through, yarn over and pull through first loop, (yarn over and pull through 2 loops) 2x.
FHDC – Foundation Half Double Crochet: In this pattern, you are working into the stitches on the left that look like the opposite side of the beginning foundation chain following a FDC… To create the FHDC, yarn over, insert hook under both loops of the foundation chain (left side), yarn over and pull through first loop, yarn over and pull through remaining 3 loops.
FSC – Foundation Single Crochet: In this pattern, you are working into the stitches on the left that look like the opposite side of the beginning foundation chain following a FHDC… To create the SDC, insert hook under both loops of the foundation chain (left side) yarn over and pull through, yarn over and pull through first loop, yarn over and pull through the remaining 2 loops.
Pattern Notes:
The stitch multiple for this design in the round is 4 – if you need a smaller or bigger size, I recommend going down or up a hook size.
Beginning chain 1 does not count as a stitch but beginning chain 2 does.
When working a half double crochet or single crochet round, slip stitch join to the first stitch of the round. When working a double crochet round, slip stitch join to the top chain of the beginning chain 2.
Bag Pattern:
In Yellow, chain 17. 2 HDC into the 3rd chain and the next 13 chains, 3 HDC into the last chain, HDC into the next 13 chains along the opposite side of the foundation chain, HDC into the 1st stitch. Join to the 1st HDC. (32 HDC)
R2: Chain 2. DC into the 2nd HDC, and each HDC around. Join. (32 DC)
R3: Chain 1. SC into the 1st DC, mod-fptr2tog starting around the next post, SC into each of the 3 skipped DC, (mod-fptr2tog starting around the same post previously worked around, SC into each of the 3 skipped DC) 6x, mod-fptr2tog ending in the same post as the first one, SC into each of the last 2 DC. Join.
Note: Your diamonds may look crooked at this point, but the pattern will get straighter as you add rounds.
R4: Chain 2. DC into the 2nd stitch, and each stitch around. Join. (32 DC)
R5: Chain 1. SC into the 1st 3 DC, fptr2tog over the 1st 2 peaks of Round 3, (skip 1 DC, SC into the next 3 DC, fptr2tog over the same peak previously worked around and the next peak both of Round 3) 7x. Join.
R6: Chain 2. DC into the 2nd stitch, and each stitch around. Join. (32 DC)
R7: Chain 1. SC into the 1st DC, fptr2tog over the peak that is directly underneath you and the next peak both of Round 5, (skip 1 DC, SC into the next 3 DC, fptr2tog over the same peak previously worked around and the next peak both of Round 5) 7x, SC into each of the last 2 DC. Join.
R8: Chain 2. DC into the 2nd stitch, and each stitch around. Join. (32 DC)
R9: Chain 1. SC into the 1st 3 DC, fptr2tog over the 1st 2 peaks of Round 7, (skip 1 DC, SC into the next 3 DC, fptr2tog over the same peak previously worked around and the next peak both of Round 7) 7x. Join.
R10: Chain 2. DC into the 2nd stitch, and each stitch around. Join. (32 DC)
R11: Chain 1. SC into the 1st DC, fptr2tog over the peak that is directly underneath you and the next peak both of Round 9, (skip 1 DC, SC into the next 3 DC, fptr2tog over the same peak previously worked around and the next peak both of Round 9) 7x, SC into each of the last 2 DC. Join and switch to Green. Fasten off Yellow.
R12: In Green, chain 1. SC into the 1st stitch, and each stitch around. (32 SC)
R13: Chain 3 (counts as a DC + chain 1). Skip the 2nd SC, (DC into the next SC, chain 1, skip the next SC) 15x. Join. (16 DC)
R14 – 15: Chain 1. SC into the 1st stitch, and each stitch around. Join. (32 SC)
R16, Leaves: [Chain 3, FDC 6 with the 1st half worked into the 1st stitch of Round 15 (not the 1st chain of the beginning chain 3), FHDC, FSC, chain 1, now working into the opposite side of the foundation created: SC into the next SC, HDC into the next HDC, DC into each of the next 6 DC, chain 1, slip stitch into the same stitch as the base chain 3, SC into the next 3 SC of Round 15] 8x.
Fasten Off, and Weave in End/s.
Tie Pattern:
In Green, chain 2. Work 4 SC into the 1st chain, slip stitch to the 1st SC. Chain 62. Work 3 SC into the 2nd to last chain. Slip stitch join, & fasten off.
Weave in ends, then weave the tie in and out of Round 13.
Please feel free to make and sell your own items made using this pattern, but keep in mind, this written pattern and my photos are protected by copyright. Please DO NOT claim this pattern as your own nor should you sell my pattern. DO NOT re-publish my photos as your own. DO NOT copy and paste my pattern anywhere, link to it instead so other’s can visit. Making videos providing instructions how to make my projects on any social media platform is also not permitted.
Join one of our awesome Facebook groups to share your creations, and see what others are up to!
– Yarn Crafts & Coffee Community
– DIY Home On Rockwood Lane
– Alexandra Lane Lifestyle
Linked Up To…
- Ginx Woolly Linx Party July – Ginx Craft
- The Loop Scoop #18 – Moogly Blog
- All About Home #101 – Common Ground
- Tuesday Turn About #109 – My Wee Abode
- Home Matters Linky Party #340 – Modern on Monticello
- Craftastic Monday Link Party – Sew Can Do
- {Wow Me} Wednesday #514 – Ginger Snap Crafts
- The Wednesday Link Party 408 – Oombawka Design Crochet
- Create, Bake, Grow & Gather #478 – Shabby Art Boutique
- Saturday Sparks Link Party #432 – Pieced Pastimes
- Handmade Monday #237 – Sum of their Stories
- The Really Crafty Link Party #276 – Keeping it Real
- Artsy-Fartsy Party #354 – Artsy-Fartsy Mama
- The Hearth and Soul Link Party – April, the 21st Century Housewife
- You’re the Star Blog Hop – Decor Craft Design
- Your Whims Wednesday #521 – My Girlish Whims
- Encouraging Hearts and Home Blog Hop – Scratch Made Food
- Friday Favorites – Busy Being Jennifer
- Thursday Favorite Things #499 – An Artful Mom
- A Morning Cup of Joe – The Cottage Market
- Linky Ladies Party #215 – The Purple Poncho
- Anything Goes Linky 476 – My Random Musings
- Hello Monday – Pink Lady
- Craftastic Monday Link Party – Sew Can Do
- The Really Crafty Link Party #515 – Keeping it Real
- Senior Salon Pit Stop – Esme Salon
- Handmade Monday #476 – Sum of their Stories
- Fabulous Party 635 – Lou Lou Girls
- The Happy Now Blog Link-Up #533 – JENerally Informed
- Talking About it Tuesdays #125 – My Slices of Life
- Busy Monday 727 – A Pinch of Joy
- Vintage Charm Party #544 – My Thrift Store Addiction
- The Crafter’s Party – Oombawka Design Crochet
- Creatively Crafty Linky Party #306 – Artsy-Fartsy Mama
- Wonderful Wednesday Blog Hop – My Life Abundant
- To Grandma’s House We Go Link Party #509 – Grandma’s House DIY
- Wednesdays in the Studio – Link Party 72 – Studio 27
- BFF Open House – Chocolate is the Answer
- Create-it Link Party #451 – Try it – Like it – Create it
- The Crazy Little Lovebirds Link Party 145 – Crazy Little Lovebirds
- Home Matters Linky Party #585 – Modern on Monticello
- Funtastic Friday Link Party #597 – Coastal Bohemian
- Create, Bake, Grow & Gather Party #731 – Shabby Art Boutique
- Saturday Sparks Link Party 722 – Pieced Pastimes
- A Morning Cup of Joe – The Cottage Market
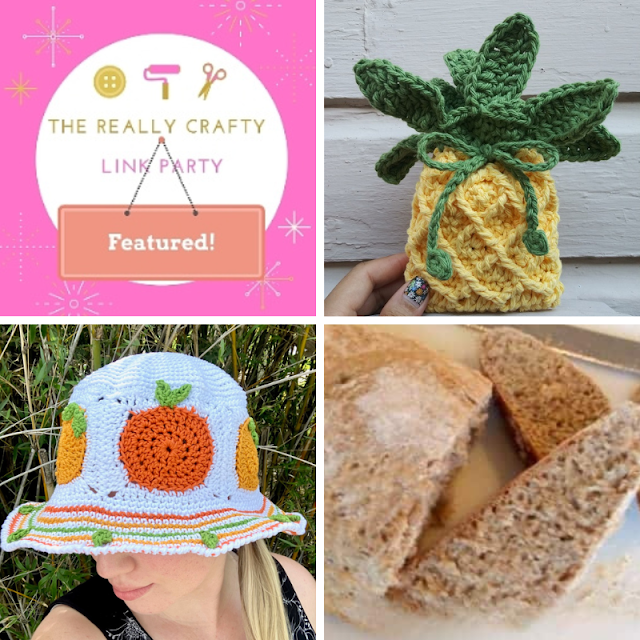
Our Pineapple Mini Gift Bag was featured at The Really Crafty Link Party #516 hosted by Keeping it Real.
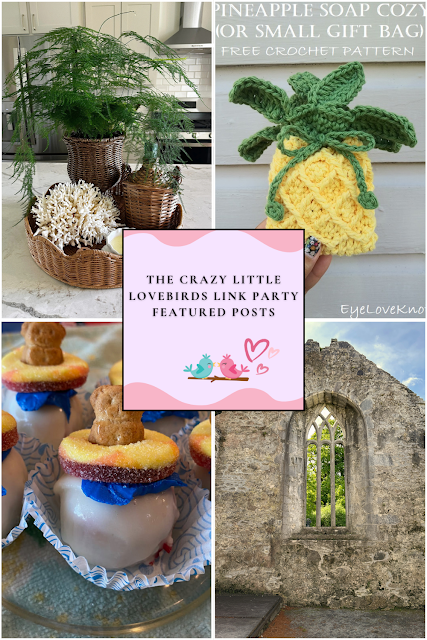
Our Pineapple Mini Gift Bag was featured at The Crazy Little Lovebirds Link Party #146.
This is really cute Alexandra!
Thanks, Marie! I had a lot of fun with this one.
So cute!
Michelle
https://mybijoulifeonline.com
Such a SUPER CUTE crochet pattern! Thanks for sharing over at the Creative Crafts Linky Party. We will be featuring you starting Wednesday!
Thanks so much! I really appreciate the feature!
Hi Alexandra, This is a super fun Pineapple Soap Cozy! Thank you for linking up at our weekly Link Party! You are being featured at our Wednesday Party #409 this week. Here’s the direct link to the post that will be published on Wednesday July 28 at 12:00 AM EST, in case you’d like to share your feature:
Hope to see you again next week! Rhondda
https://oombawkadesigncrochet.com/2021/07/summer-halter-top-pineapple-soap-cozy-cranberry-vodka-popsicle-recipe.html
Thanks so much, Rhondda! I appreciate the feature!
Hi Alexandra,
Your pattern is so darling! My middle daughter is always running out of tp and I’d love to make a cover for her as a Christmas gift. How could I adjust it accordingly?
Karen
That’s a fun idea! The stitch multiple is 4 for the diamond stitch pattern. I am not sure if it would be better to work it top down like a beanie, and then add the leaves, or bottom up, and cinch at the top like this bag is. I think bottom up would be the easiest because it could be made basically the same as this soap cozy. In either case, the bottom would be open to stick the roll into. I use Charmin rolls, which are quite a bit larger than the average, what is the size of your roll? I can work on a pattern and video. I’ll explain the two ways I think I’d do it below, but I’m leaning towards bottom up because of the way the top is done.
For bottom up, I would probably work a foundation half double crochet to fit and get the stitch multiple, and then work in pattern starting at Round 3 upwards a little taller than I needed to give space for the cinching, and by that I mean enough space to accommodate the diameter, and then continue in pattern from Round 12 to the end.
For top down, I would probably start with a ring of 12, and increase as if making a beanie until I get the diameter needed. Working in 100% acrylic yarn, like Red Heart Super Saver, I would probably work it smaller so it stretched to fit, and working in 100% cotton, I might increase a bit more because of the stretch. Then I would start the instructions in Round 3, and continue in pattern repeating as necessary to cover the roll. I’m thinking the first couple rounds in green, and the rest in yellow so when you go to add the top it blends a little better. For the top though, I don’t know. I’m not sure if I would change to crocodile stitch in the round for it?
This is ADORABLE!
Thank you 🙂
That is so cute!
Thanks so much!
This is adorable! Super cute and functional. I’m so happy you shared this with us at The Crazy Little Lovebirds link party.
This is darling! Visiting from the Crazy Little Lovebirds link party.
So cute! I’m happy to feature your post tomorrow at The Crazy Little Lovebirds link party.