This is a crochet pattern review of Tank the Turtle designed by Mel’s Crocheted Creations. Review done by Candace of T&C Crafters for EyeLoveKnots.
This post contains affiliate links for Etsy and Amazon. If you make a purchase by clicking on them, I make a small commission at no extra cost to you. Thanks for your support!
It’s me, Candace with T&C Crafters.
Visit with me on Facebook for all kinds of awesome crochet makes and inspiration.
This week is my final week of the school year, and I’m ready for a break from teaching. I am so excited to crochet like crazy over my summer break! I have high hopes of participating in a bunch of markets this fall and winter, so I have been looking for adorable and quick patterns that I can make in bulk to prepare. A few weeks back I saw someone share about how popular their little turtles were at their market, so I decided to snag the Tank the Turtle pattern they suggested.
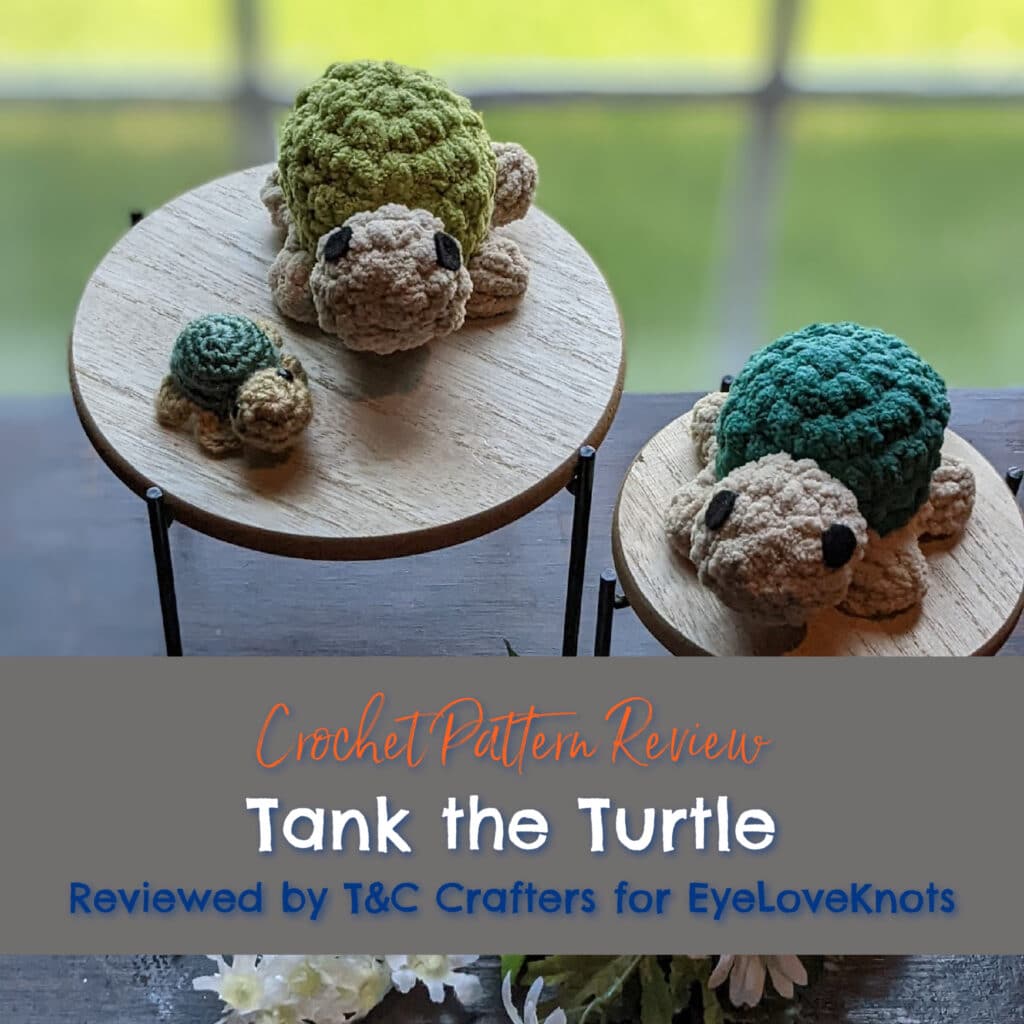
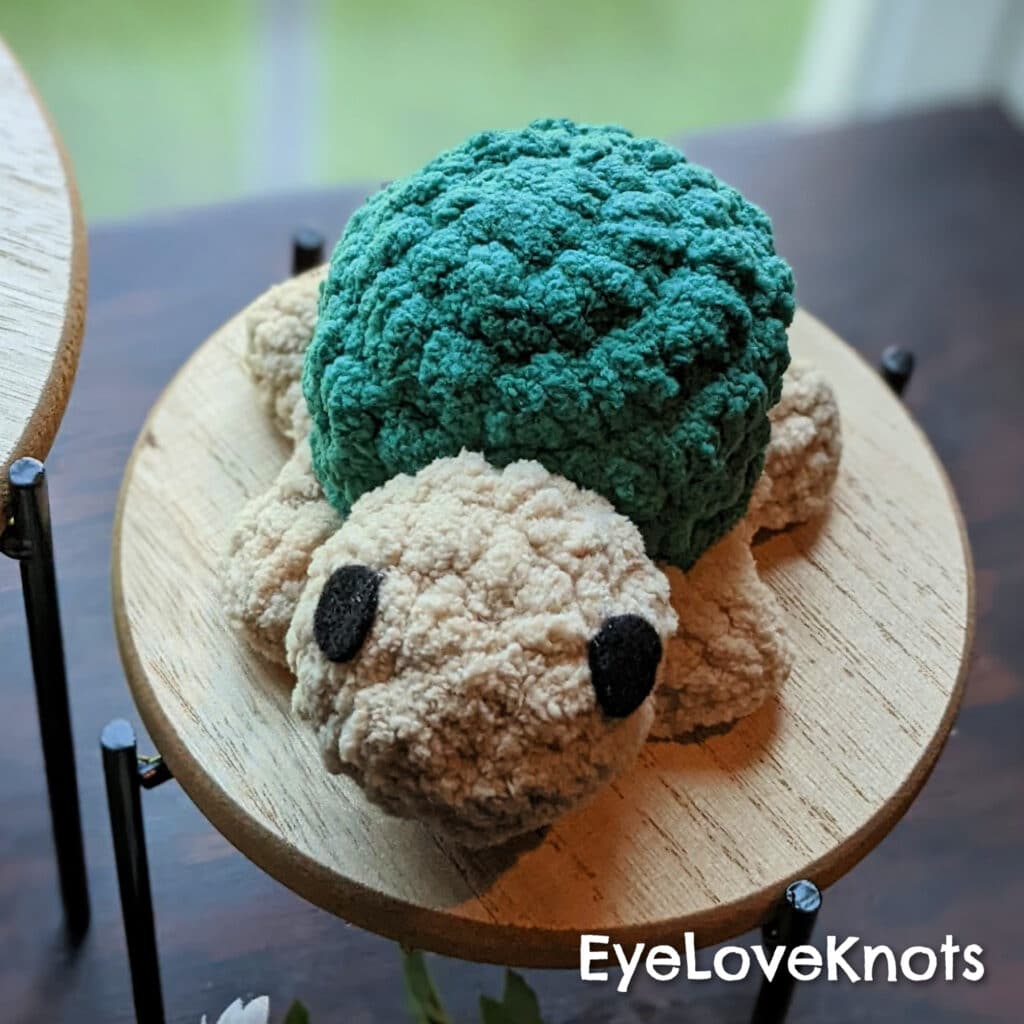
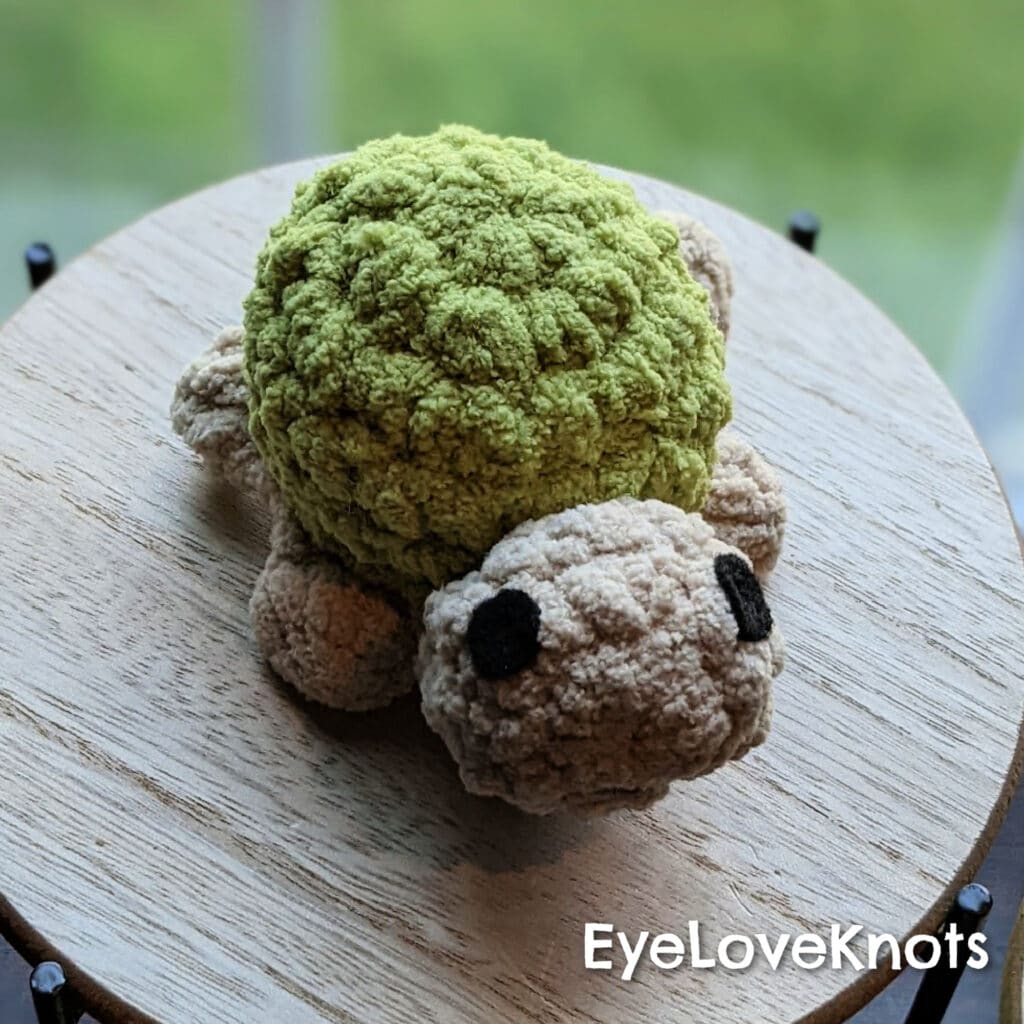
The Tank the Turtle pattern by Mel’s Crocheted Creations (MelsCrochetKnitCo on Etsy) is 100% worth the hype I’ve seen on social media. This pattern is incredibly quick and easy to work up in bulk, and it creates the most adorable little turtles! In just one evening and about two episodes of my favorite show, I was able to make three of these little turtles and start on a fourth. I am so excited to make more of these adorable turtles. I am sure they are going to be bestsellers at my upcoming markets!
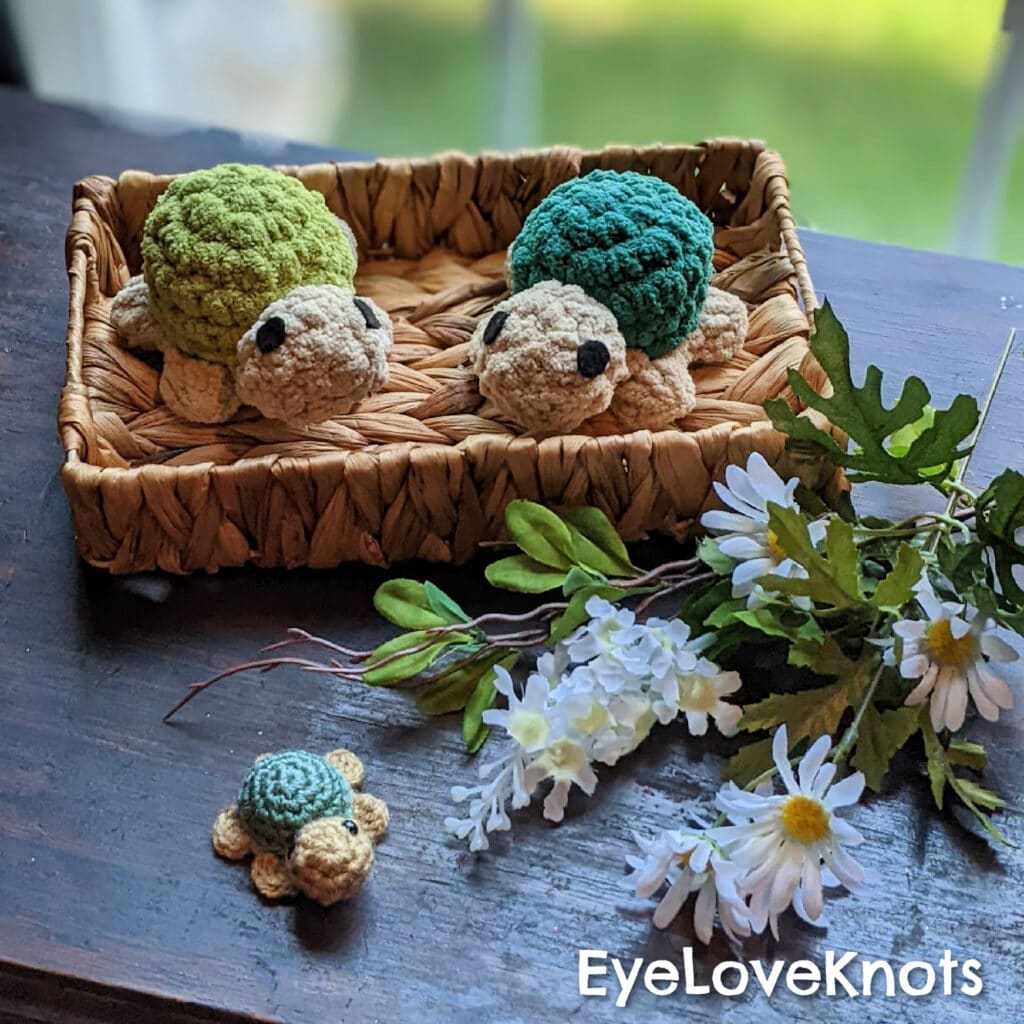
These finished turtles are the perfect size for little hands or for a cute little pet to sit on a desk or a dashboard. At my last market, items of this size sold like crazy. I am confident that these turtles will do the same. You can also work this pattern up in a lighter weight yarn for an absolutely adorable mini turtle!
What Materials Do I Need To Crochet a Turtle Plushie?
- Regular Size: Bernat Blanket Yarn in Almond and Deep Sea, Bernat Blanket Yarn O’Go in Scuba, J10/6mm Crochet Hook, Small Amount of Black Felt for Eyes, Hot Glue
- Mini Size: I Love This Yarn in Light Taupe and Red Heart Super Saver in Light Sage, G6/4mm Crochet Hook, 8mm Safety Eyes (also TONS of options on Amazon)
- Darning Needle
- Small Amount of Polyester Fiberfil
- Tank the Turtle, paid crochet pattern by Mel’s Crocheted Creations (MelsCrochetKnitCo on Etsy)
Material Notes:
The designer wrote this pattern for Bernat Blanket Yarn or a similar size yarn. There are a lot of different options available from different brands. If you want to make your turtle a similar size, make sure you use a super bulky yarn. In the pattern, the designer recommends a K10.5/6.5mm crochet hook. I chose to use a J10/6mm crochet hook instead because that is what I typically use on similar patterns. It was also the hook I was more comfortable with using.
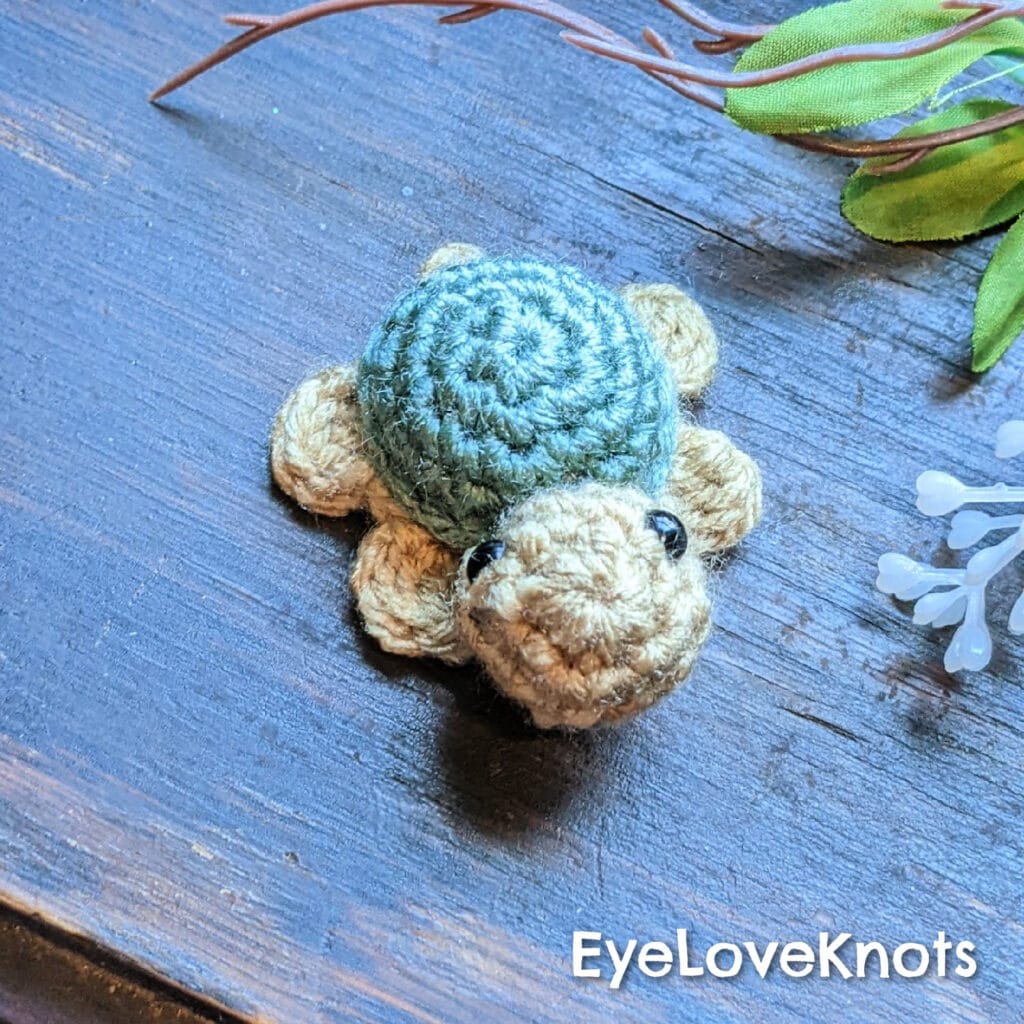
I decided to also make a tiny version of Tank the Turtle, so I made another set of pieces in worsted weight yarn. For this turtle, I used a G6/4mm crochet hook. I am in love with how cute this turtle turned out, and I would highly recommend trying this size!
My daughter was one of those babies that would put anything she could in her mouth, so I am really cautious about using safety eyes on toys going to small children. For this reason, I opted for felt eyes for the plush, larger version of my turtles. I cut these out using my Cricut machine, following a tutorial I found on Instagram by Kaytedid’s. I did end up using plastic safety eyes for the mini turtles because I plan on attaching a keychain to it rather than selling it as a toy. If you didn’t want to use safety eyes for the mini turtles, you could embroider eyes using a french knot instead.
Time Spent:
Each turtle took a little under 30 minutes to make. If you are planning on making a lot of turtles, it may save you some time to make all the bodies and heads, and then make the shells and attach the pieces afterwards. This will allow you to not have to reference the pattern as much and may speed up the process.
Measurements:
The regular-size turtle is 5 inches long, 3.5 inches wide, and just under 3 inches tall. The mini-size turtle is 2.5 inches long, 2 inches wide, and about 1.5 inches tall.
Gauge:
Gauge is not provided for this pattern and is not important. You will just want to make sure your stitches are tight enough together that stuffing cannot come out. If you notice gaps between your stitches, you will want to go down a hook size to prevent this problem.
If you want to make sure that your turtle turns out the same size as mine, when using a J10/6mm crochet hook with blanket yarn, a magic circle with six single crochets should measure 1 inch in diameter, and after a second round of increases in each stitch, it should measure approximately 1.75 inches in diameter.
Pattern Notes:
Overall, the Tank the Turtle pattern is a beautifully written pattern that is simple enough for a somewhat advanced beginner to follow. There are a bunch of very clear pictures that help to describe important parts of the pattern. The notes and directions for creating the turtle are all very thorough and don’t leave any questions left unanswered.
My favorite part about this pattern is that even though the turtle is made in three pieces, there is no sewing involved. This makes it easy to make sure your turtle comes out like intended instead of worrying that you may have attached pieces in the wrong spot. Instead of sewing, this pattern uses strategic use of slip stitches to attach all the pieces at the end.
To make the turtle, you start with either the head or the body portion. For the head, you will work in the round with a series of single crochets, increases, and decreases. With only a few rows, the head works up really quickly and only requires a tiny bit of polyfil. The base of the round head gets crocheted together to create the neck.
The body is also worked in the round, but it is made as a flat piece that creates the bottom of the turtle. Starting with a regular circle, you will using single crochets to create the belly portion. After that, the pattern gets really clever and uses a combination of slip stitches, double crochets, and half double crochets to make all the legs and the tail of the turtle. By only working in the back loop of the stitches at this point, a circle is formed where you can easily see where the shell of the turtle will be attached.
If you are familiar with amigurumi, the shell of the turtle will be a breeze to make. It is worked in the round with single crochets and increases. Once you have made the shell, you will continue to use the working yarn to attach all the turtle pieces together. The pattern clearly explains where to start the attachment process, as well as when and how to attach the neck of the head to the rest of the body. The designer even provides tips to make stuffing the turtle as easy as possible.
Once you have attached all the pieces of the turtle, you will just need to place one tiny stitch in the back of the turtle’s head. This helps to make sure the head stay up to make the turtle look happy and alert. When I cut off the last piece of my green yarn from the shell, I made it a bit long so I could weave it inside the shell and then use it to attach the head. After that, you just need to weave in any remaining ends, and you’re done! This pattern truly is that simple!
If you are looking for a quick and adorable pattern, you will not want to miss out on trying Tank the Turtle! I definitely recommend this pattern for market prep or easy gifts for kids. I’d love to see how your turtles turn out and what colors you choose! If you end up making some, be sure to tag @melscrochetedcreations, @tandc_crafters, and @eyeloveknots so we can see your finished pieces!

Don’t forget to visit with me on Instagram for all kinds of awesome crochet makes and inspiration.
Join one of our awesome Facebook groups to share your creations, and see what others are up to!
– EyeLoveKnots Crochet & DIY Community
– DIY Home On Rockwood Lane
– Alexandra Lane Lifestyle
Linked Up To…
Handmade Monday #281 – Sum of their Stories
The Really Crafty Link Party #318 – Keeping it Real
Happiness Is Homemade Link Party – Decor Craft Design
Craftastic Monday – Sew Can Do
Linky Ladies Party #225 – The Purple Poncho
All About Home #147 – Common Ground
The Loop Scoop #39 – Moogly Blog
The Wednesday Link Party 454 – Oombawka Design Crochet
Team Creative Crafts Link Party #97 – Artsy-Fartsy Mama
Creatively Crafty Link Party #331 – Try It, Like It, Create It
Fabulous Friday Link – Peacock Ridge Farm
Home Matters Linky Party #383 – Modern on Monticello
Inspirations Link Party #3 – Pieced Pastimes
Saturday Sparks Link Party 518 – Pieced Pastimes
Link-up Potpourri #47 – My Bijou Life
You’re the Star Blog Hop – Decor Craft Design
Hello Monday – Pink Lady
Sundays on Silverado #96 – The House on Silverado
Fabulous Party 429 – Lou Lou Girls
Talent-Sharing Tuesdays Link-Up 21 – Scribbling Boomer
The Happy Now Blog Link- Up #324 – JENerally Informed
Wonderful Wednesday – Oh My Heartsie Girl
Wonderful Wednesday Blog Hop – My Life Abundant
Wednesday Link Party #299 – To Grandma’s House We Go
Thursday Favorite Things #544 – An Artful Mom
Encouraging Hearts and Home Blog Hop – My Slices of Life
Traffic Jam Weekend Link Party #327 – My Bijou Life
Create, Bake, Grow & Gather Party #523 – Shabby Art Boutique
Funtastic Friday Link Party #388 – Simply Beautiful by Angela
Crafty Creators Link Party #22 – Life as a Leo Wife
Pink Saturday – How Sweet the Sound
A Morning Cup of Joe – The Cottage Market
Share the Wealth Link Up #22 – Big Menopausal Life
Sooooo cute!! I love turtles!! ❤️
❤️carmen
Thank you so much! I think they turned out so happy-looking!
These turtles are adorable. Perfect as baby shower gifts to use as nursery decor pieces.
Thank you for linking up at Talent-Sharing Tuesdays Link-Up 21.
Carol
http://www.scribblingboomer.com
Thank you so much! They would be perfect for baby gifts!
Tank the Turtle is adorable! Thanks for sharing at #HomeMattersParty.
Thank you so much! I love this pattern!
These turtles are absolutely adorable! I want to keep them for myself!
Thank you so much! My kiddos have claimed a few as their own, so thankfully I have a few extra around the house!
I love this little guy!! Thanks for sharing at My Big Fat Menopausal Life’s Share the Wealth Party. Your participation is greatly appreciated!! I’d be honored if you added our party to your list! Have a fabulous week.
Thank you so much! I hope you have a great week as well!