This is a free crochet pattern and video tutorial showing how to crochet my Gwendolyn Table Runner, which is an easy granny square table runner. With just simple granny squares joined together, it is so easy to make larger or smaller by simply adding or taking squares away.
This post contains affiliate links for WeCrochet and Etsy. If you make a purchase by clicking on them, I make a small commission at no extra cost to you. Thanks for your support!
Find the free crochet pattern instructions below, or purchase a printer-friendly, ad-free PDF on Ravelry by clicking here.
In a hurry? Pin it for Later.

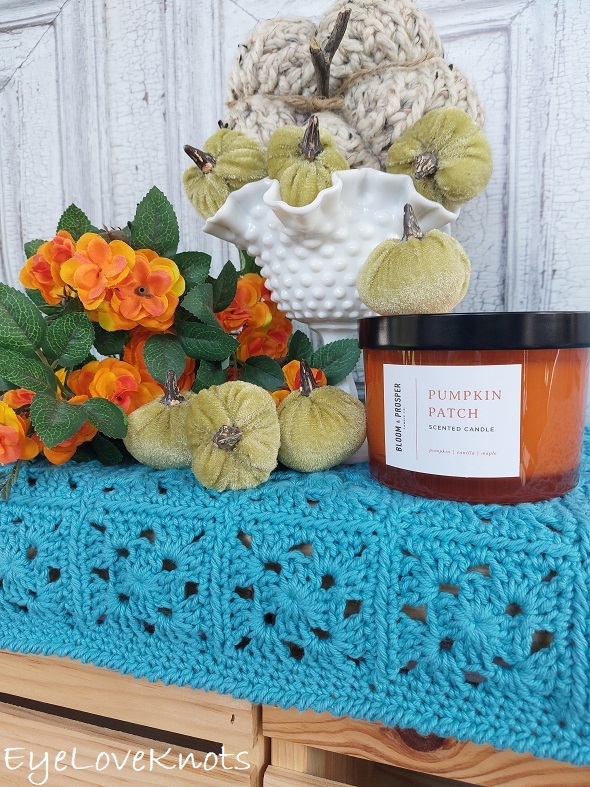
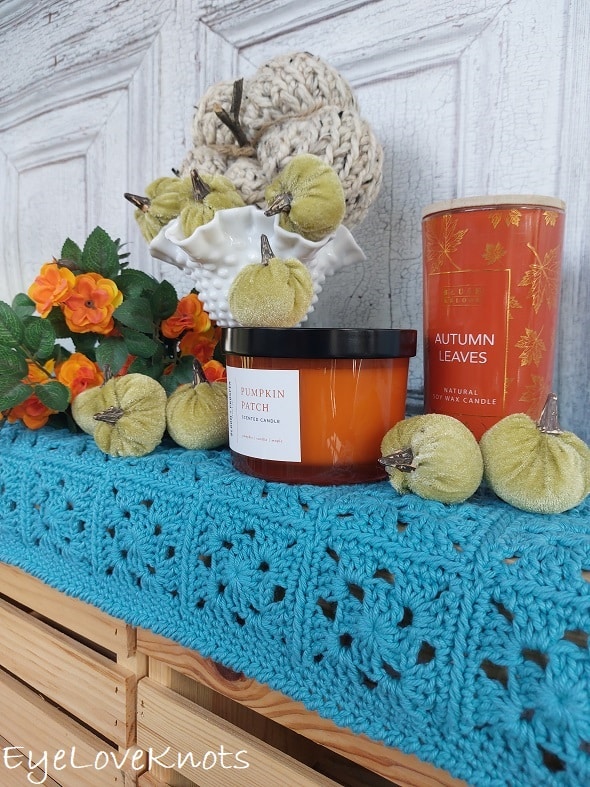
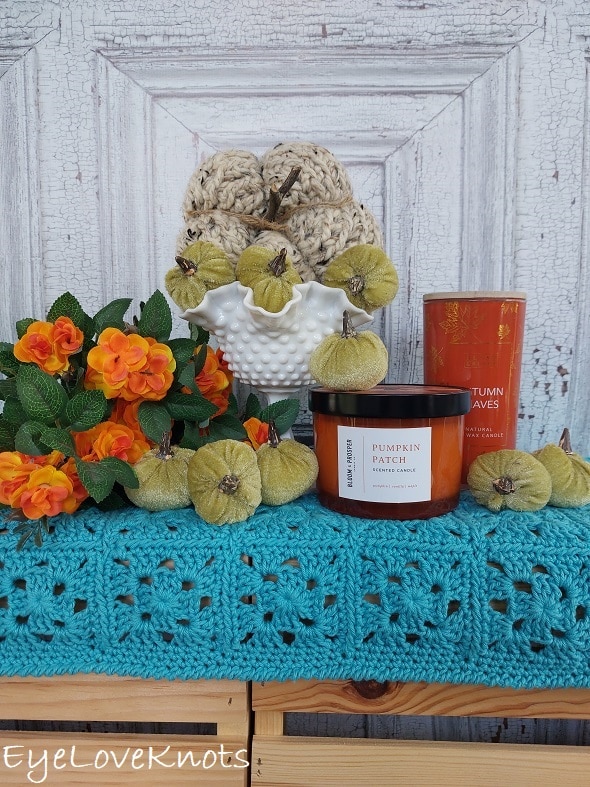
This bright blue (really turquoise/teal) is the winner of my heart. I’ve determined in the last few years that I really just love it, but also it’s such a versatile, fun color that can be used year ’round.

A couple of years ago, I shared a free crochet pattern for the Gwendolyn Doily, and this runner was inspired by that. I wanted a larger version that I could keep on my entryway table year ’round, and just change out the decor for it depending on the season.
By the way, this cactus candle you see above smells amazing! It’s a coconut soy candle from InspireLites on Etsy, and Baja Cactus Blossom is the scent – it’s sweet, and just so lovely! You can order yourself one of these awesome candles RIGHT HERE!
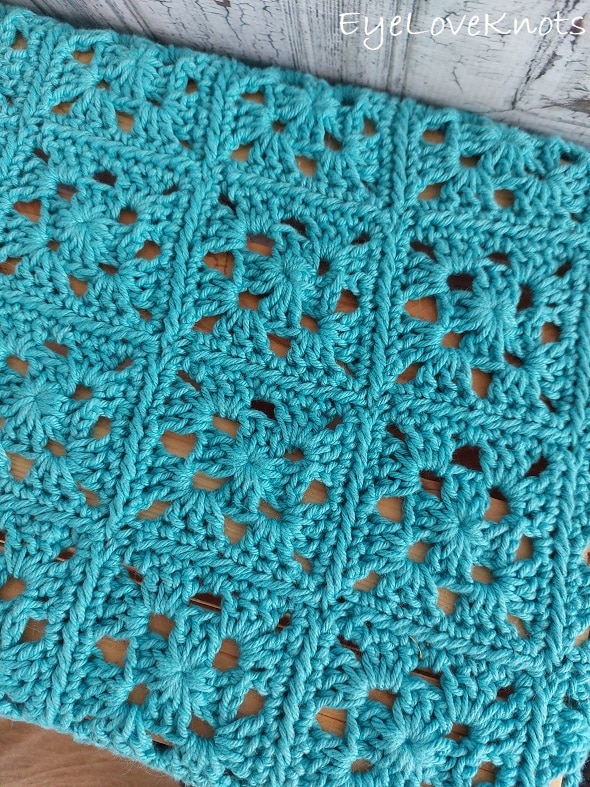
The beauty of this table runner is that it can easily be made larger or smaller by adding or substracting granny squares. They’re all joined together in the end with a continuous join. I love this join method because it means only one tail in the beginning, and one tail at the end, so only two weaves! I paired this with another favorite, the Pull Loop Through Join that gives a lovely twisted look around the squares, and the reverse single crochet edging matches it perfectly!
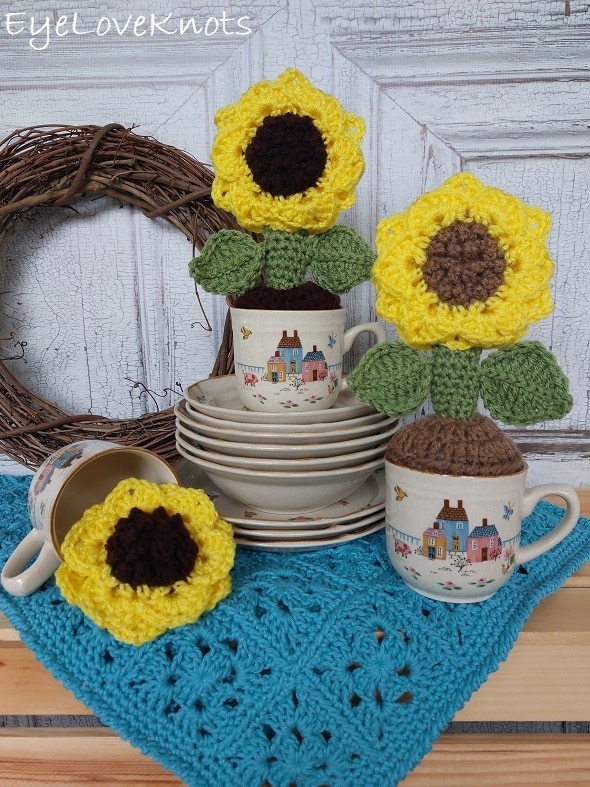
You may also recognize the runner from when I shared my Upcycled Potted Sunflowers.
AD-FREE, PRINTER FRIENDLY PDF:
If you would like a PDF version of this post, you may get one through either my EyeLoveKnots Etsy Shop, Ravelry or LoveCrafts Shop for a small fee. This fee is to compensate for the views lost when you no longer need to return to the blog to for the information, as you will have your own copy. Plus! It helps fund supplies for new projects to share with you!
Shop EyeLoveKnots Etsy: Gwendolyn Table Runner.
Shop EyeLoveKnots LoveCrafts: Gwendolyn Table Runner.
Share your version of this project on Ravelry – Gwendolyn Table Runner.
Save this to your Favorites: AllFreeCrochet, FaveCrafts, Cheap Thrifty Living, DIYideaCenter, Crochet Pattern Bonanza, AllFreeHolidayCrafts, Free Crochet Tutorials, The Free Crochet Family
In a hurry? Pin it for Later.
What Supplies Do I Need to Crochet a Table Runner?
- 810 Yards of Worsted Weight Cotton Yarn – I used about 4.25 balls of WeCrochet Dishie in the Azure colorway
- H8/5mm Crochet Hook
- Tapestry Needle
- Optional, Jewelry Pliers
Material Notes:
Yarn Alternatives: Crafters Secret Cotton, Lily Sugar n Cream (it’s a touch thicker so the finished runner may come out a bit bigger – go down a hook size if you want to match better)
I am using cotton because it’s durable, and machine washes and dries well. If you intend on using with warm or moist items, I recommend the cotton (or wool), otherwise any fiber works.
Jewelry pliers are an excellent tool to use to help weave in ends, as cotton yarn can be quite tough on the fingers when weaving in with just fingers and a tapestry needle. I never need with Dishie, but I do with others.
How Long Does It Take to Crochet a Table Runner?
This table runner took about 16 hours to complete, worked in several seatings.
Measurements:
14.38″ (14 3/8″) Wide by 46″ Tall
Gauge:
1 Square = 2.75″
Abbreviations – US Terms:
- DC – Double Crochet (Photo Tutorial)
- SC – Single Crochet (Photo Tutorial)
- RS – Right Side of the Fabric
- WS – Wrong Side of the Fabric
- PLT – Pull Loop Through (a join-as-you-go method)
- How to PLT: After DC in current piece, pull up a loop and pull out crochet hook, re-insert hook from the front through the corresponding stitch on Motif B [your corresponding piece] and pull loop through
Pattern Notes:
If you prefer, I have a step by step photo tutorial of how to work a granny square.
The assembly is worked as one continuous join so there aren’t that many ends to weave in (plus you can easily adjust the width and/or length using this method). This means one strand the whole way from square one to the end. The instructions are broken into three pieces for ease in reading and following – do not fasten off at any of these points.
In working the continuous join, you are working from the bottom right corner of the table runner, upward, working in a backwards “S” motion. Section I works from right to left, then section II works from left to right, and section III finishes the table runner working down directly down, and joins to the very first single crochet.
As you work the second, third and fourth rounds of the border, if you find your fabric is ruffling especially in the last round, then I suggest going down a hook size.
Gwendolyn Table Runner, Video Tutorial:
Gwendolyn Table Runner, Written Pattern:
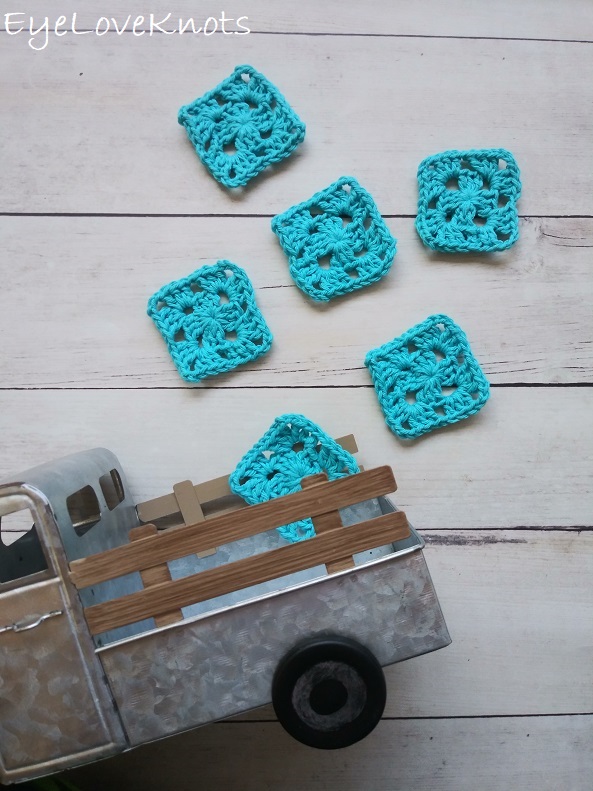
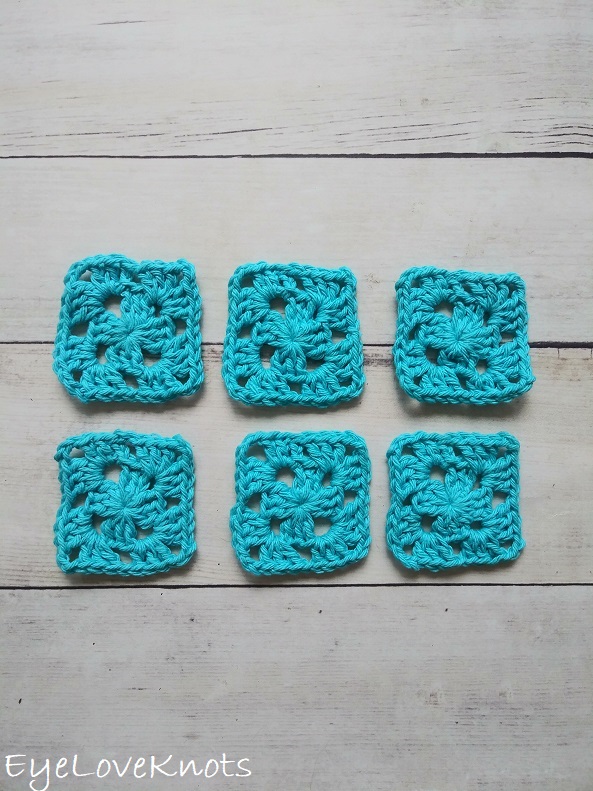
Squares – Make 80:
Chain 5. Slip stitch join to form a ring. Chain 2 (counts as a DC), 2 DC into the ring, (chain 3, 3 DC into the ring) 3x, chain 2. Join to the 1st DC.
R2: Slip Stitch over to the next chain space. Chain 2 (counts as a DC), 2 DC into the same space, chain 3, 3 DC into the same space, chain 1, [(3 DC, chain 3, 3 DC) into the next chain space, chain 1] 3x. Join to the top of the beginning chain 2.
Fasten off. I recommend weaving in ends at this point.
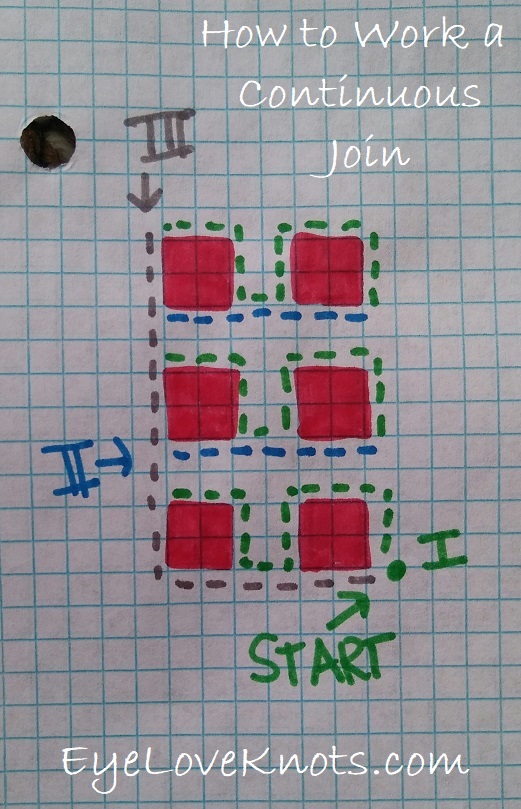
Continuous Join – Work as instructed even though photos show only 3 squares. This is the photo tutorial from my Gwendolyn Doily:
I like to stack my square just as they’ll be joined, so in this case, it would be 16 stacks of 5 squares each because this table runner will be assembled into 16 rows of 5 squares (or you can reverse it, and do 5 rows of 16 squares). When you lay out and join your squares, make sure all the squares are facing the same direction – you can distinguish the direction by the seam from joining – I have mine at the top.
Join yarn with a SC to the bottom right corner chain space, then…
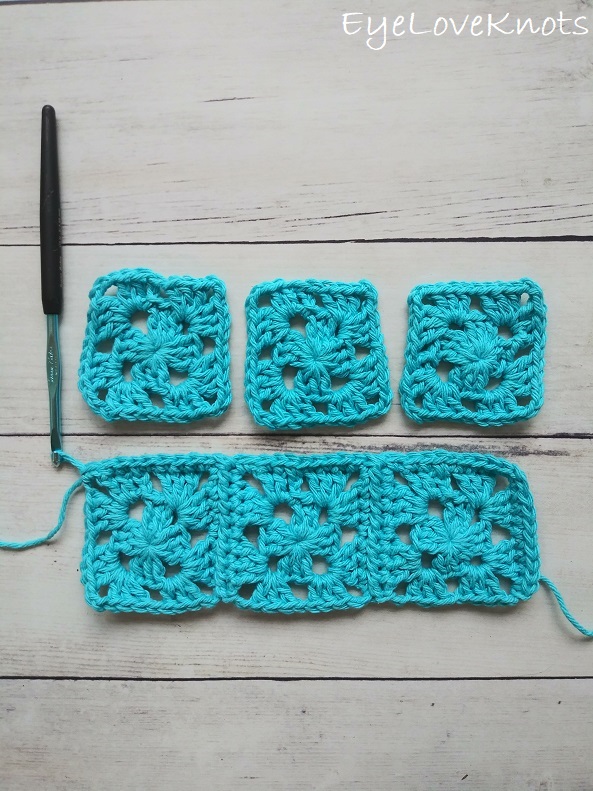
I. SC up the next 7 stitches, (SC, chain 1, SC) into the next chain space, SC across the next 7 stitches, [(SC, chain 1, SC) into the next chain space, SC down the next 8 stitches; From the RS: insert hook into the bottom right corner chain space of the next square, and complete the SC, PLT, SC & PLT into the next 8 stitches, turn to the WS, SC into the previous squares chain space, turn to the RS, SC into the current squares same chain space and the next 7 stitches] 4x, SC into the next chain space…
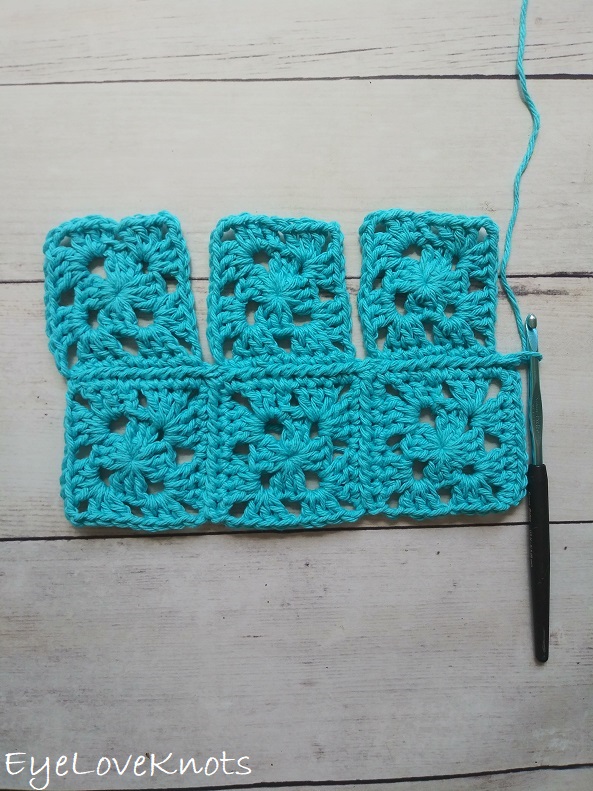
II. From the right side: [insert hook into the bottom left corner chain space of the next square, and complete the SC, PLT, (SC & PLT into the next 8 stitches), turn to the WS, SC into the center join of previous rows squares, turn to the RS] 4x, insert hook into the bottom left corner chain space of the next square, and complete the SC, PLT, SC & PLT into the next 8 stitches, turn to the WS, SC into the chain space of the previous row’s square, turn to the RS.
Repeat I.
Repeat II + I, 12 more times ending at the far left chain space of the final square.
III. Chain 1, SC into the same chain space, now working down the side, SC into the next 8 stitches, (SC into the center join, SC into the next chain space, SC into the next 8 stitches) 13x, SC into the center join, SC into the next chain space, SC into the next 7 stitches, (SC, chain 1, SC) into the next corner chain space, SC into the next 8 stitches, (SC into the center join, SC into the next chain space and next 8 stitches) 4x, chain 1. Join to the first SC.
Border R2 – 3: Chain 1. SC into the 1st stitch and each stitch up to the next corner, (SC, chain 1, SC) into the next corner chain space, SC into the next stitch and each stitch over to the next corner, (SC, chain 1, SC) into the next corner chain space, SC into the next stitch and each stitch down to the next corner, (SC, chain 1, SC) into the next corner chain space, SC into the next stitch and each stitch over to the beginning. SC into the same stitch as the first. Join to the first SC. Weave in remaining ends.
R4: Chain 1. Rev SC into the next stitch and each stitch all the way around working just one stitch per corner. Fasten off, and then join similar to that of invisible join just mimicking the look of the other stitches.
Weave in ends.
Feel free to use this information to make and sell your own items. When sharing, designer credit is appreciated, but not required. All EyeLoveKnots Patterns, Photos and PDF’s are protected under copyright. They are not to be copied, distributed or sold – doing so is copyright infringement and stealing! DO NOT copy and paste my pattern anywhere, and DO NOT share the written pattern with others, share the link to the pattern instead so others can find it themselves.
Join one of our awesome Facebook groups to share your creations, and see what others are up to!
– Yarn Crafts & Coffee Community
– DIY Home On Rockwood Lane
– Alexandra Lane Lifestyle
Linked Up To…
Happiness is Homemade Link Party – Decor Craft Design
Sundays on Silverado #117 – The House on Silverado
Hello Monday – Pink Lady
Anything Goes Link Party 352 – My Random Musings
The Really Crafty Link Party #337 – Keeping it Real
Handmade Monday #300 – Sum of their Stories
Craftastic Monday Link Party – Sew Can Do
Beautifully Made Home Decor Link Party 237 – Across the Blvd
All About Home #168 – Common Ground
Tuesday Turn About #175 – My Wee Abode
660th Inspire Me Tuesday – A Stroll Thru Life
Fabulous Party 448 – Lou Lou Girls
The Happy Now Blog Link Up #345 – JENerally Informed
Wonderful Wednesday – Oh My Heartsie Girl
Wonderful Wednesday Blog Hop – My Life Abundant
The Wednesday Link Party #320 – To Grandma’s House We Go
Thursday Favorite Things #565 – An Artful Mom
Encouraging Hearts and Home Blog Hop – My Slices of Life
Linky Party November – Karins Kottage
Create, Bake, Grow & Gather Party #544 – Shabby Art Boutique
Funtastic Friday Link Party #409 – Simply Beautiful by Angela
Talent Sharing Tuesday – Scribbling Boomer
The Wednesday Link Party 475 – Oombawka Design Crochet
Team Creative Crafts Link Party #118 – Artsy-Fartsy Mama
Grace at Home No. 486 – Imparting Grace
Home Matters Linky Party #404 – Modern on Monticello
Farmhouse Friday 277 – County Road 407
Linky Ladies Party #230 – The Purple Poncho
The Loop Scoop 49 – Moogly Blog
Creatively Crafty Link Party #352 – Try It – Like It – Create It
Crafty Creators Link Party #41 – Life as a LEO Wife
Pink Saturday – How Sweet the Sound
A Morning Cup of Joe – The Cottage Market
Saturday Sparks Link Party 538 – Pieced Pastimes
Share the Wealth Link Up #30 – Big Fat Menopausal Life
One More Row Free Crochet Link Party #48 – Loops and Love Crochet
I love the color you chose for this! The turquoise is so pretty!
Thank you! It’s my favorite color <3
Your table runner is lovely, that turquoise is perfect with the autumnal orange flowers and candles etc.
Thank you! It’s my favorite color <3
This is such a pretty runner! I like how the turquoise complements the autumn colors in your vignette. The warm colors work well together. Thank you for sharing this post in the Talent-Sharing Tuesdays Link-Up 40.
Carol
http://www.scribblingboomer.com
Thank you! I’ve been working on my photography. I was very happy with how this turned out too.