This is a free crochet pattern explaining how to crochet a granny square blanket worked in one large continuous manner. It is suitable for beginners, and being worked in super bulky yarn, it works up quickly. 7 sizes included!
This post contains affiliate links for Etsy. If you make a purchase by clicking on them, I make a small commission at no extra cost to you. Thanks for your support!
Find the free crochet pattern instructions below, or purchase a printer-friendly, ad-free PDF on Ravelry by clicking here.
In a hurry? Pin this for later when you have more time.
I originally published this back in June of 2014, and it was named Watercolor Lily Pads Chunky Granny Square Baby Blanket as it was made in a newborn size only, and worked in a very beautiful green and blue colorway named Kitty.
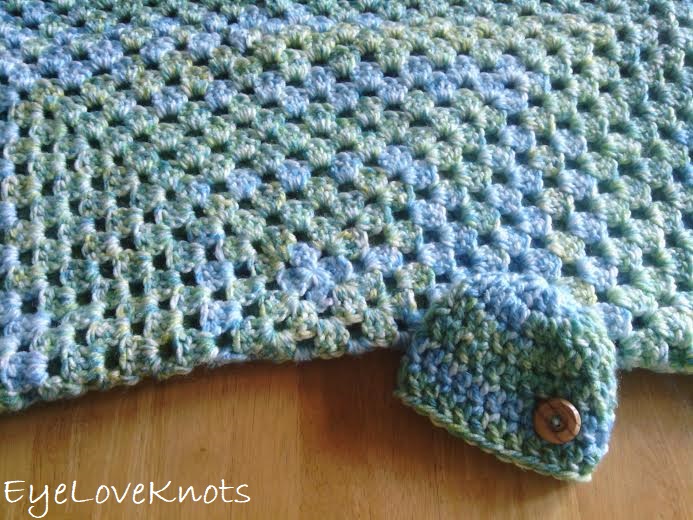
In fact, this is the original! This is Deborah Norville’s Serenity Chunky Yarn named Kitty that reminded me of lily pads floating on the water. The yarn is now named Premier Yarns Serenity Chunky Yarn.
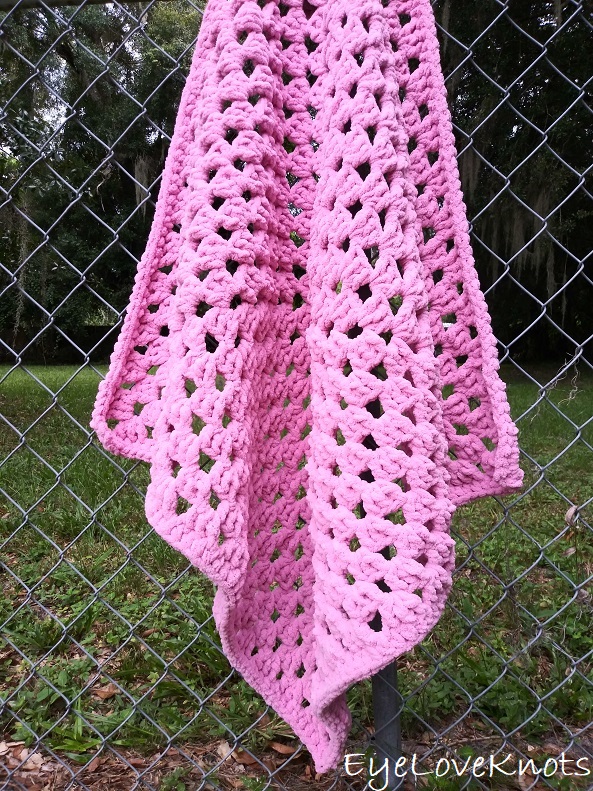
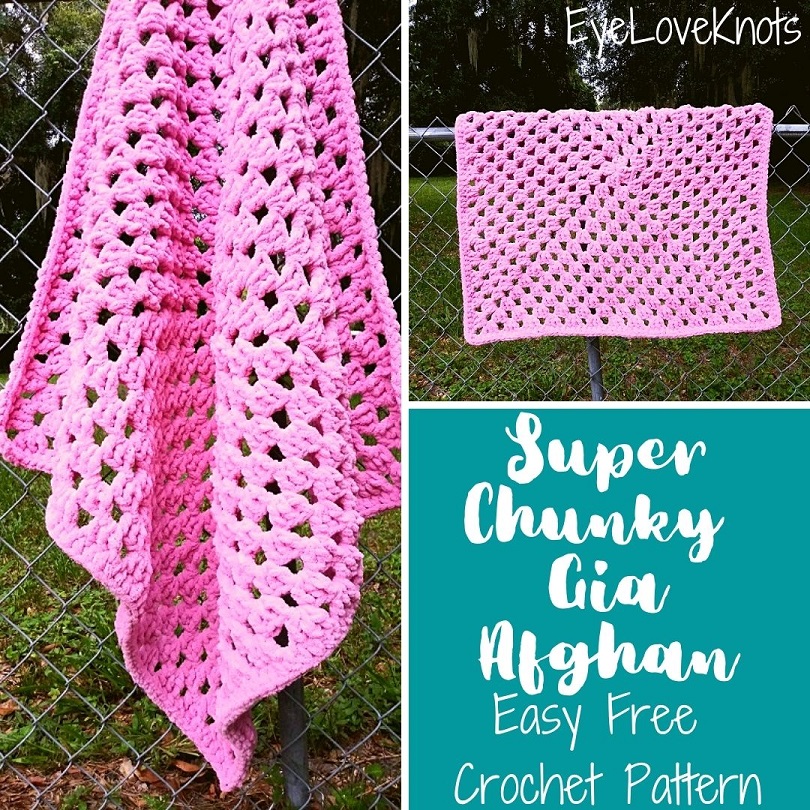
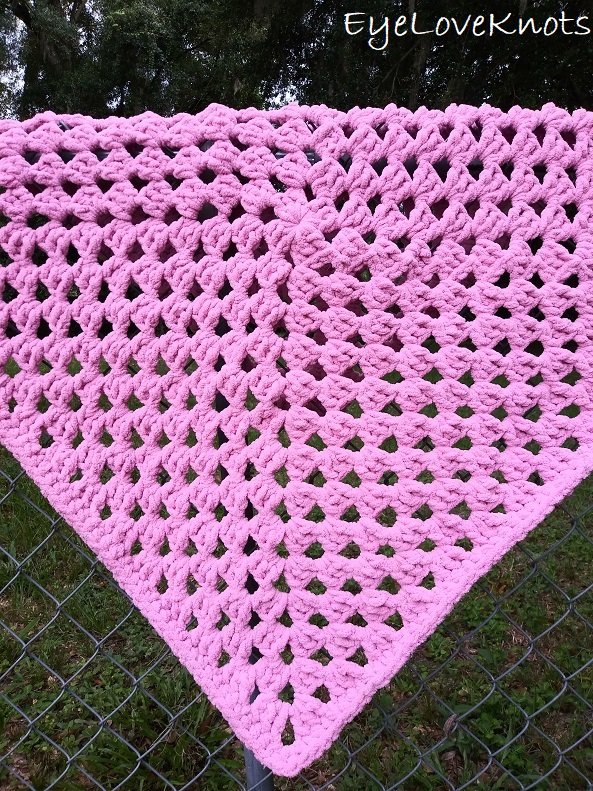
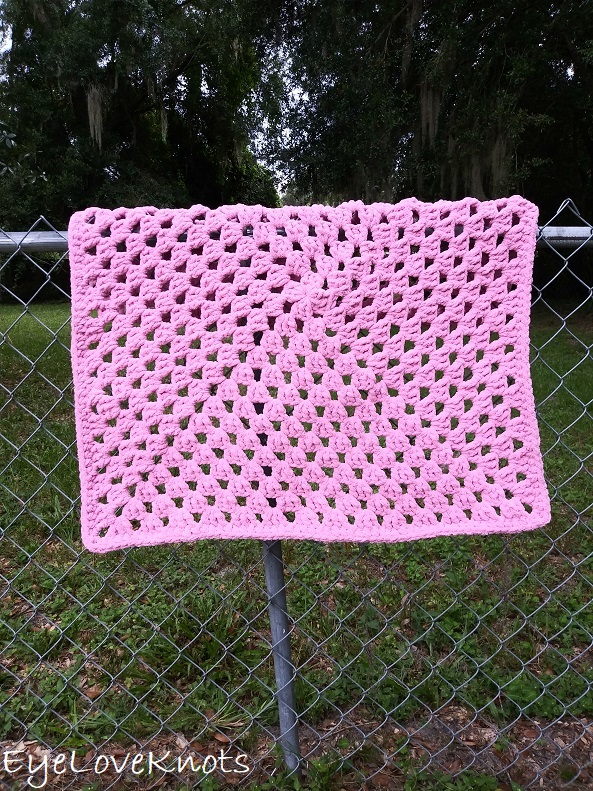
Recently, I was looking back at old designs to refresh, and I came to this one. I turned to my favorite blanket yarn, Bernat Blanket Yarn, and picked a sweet pink color, as my sample was going to be for a baby blanket. I will admit that I picked this color because I thought it was a softer, dusty pink, but it’s actually a brighter pink more traditional used for a sweet baby girl.
The original pattern was only written in newborn size, but with this update, this pattern now contains 7 sizes including two photography blanket sizes, newborn, toddler, child, lapghan and throw.
Ad-Free Printer Friendly PDF:

If you would like a PDF version of this post, you may get one through either my Etsy Shop, Ravelry Shop or LoveCrafts Shop for a small fee. This fee is to compensate for the views lost when you no longer need to return to the blog to for the information, as you will have your own copy. In a hurry? Pin this for later when you have more time!
Save this to your Favorites on: AllFreeCrochet, FaveCrafts, AllFreeCrochetAfghanPatterns, Crochet Pattern Bonanza (sub 09/03), DIYideaCenter, FaveCrafts, Cheap Thrifty Living, AllFreeHolidayCrafts, Free Crochet Tutorials
What Supplies Do I Need to Crochet a Granny Square Afghan?
- 39 (144, 316, 451, 554, 728, 1309) Yards of Super Bulky Yarn – I used Bernat Blanket Yarn in Orchid Dusk
- M13/9mm Crochet Hook
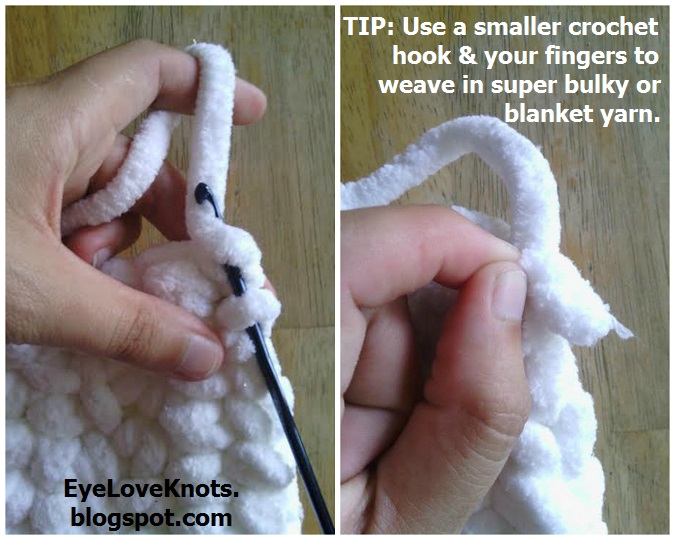
- Small Crochet Hook (like a G6/4.25mm) with large mouth to weave in ends
Material Notes:
For the original blanket worked in bulky yarn, I used a bit less than 5 skeins, or 545 Yards, as 4 skeins finished at 29″ minus one side.
How Long Does It Take to Crochet a Granny Square Afghan?
This newborn blanket took me just over 2 hours, 15 minutes to complete.
Measurements:
- Newborn Photography Layering Blanket: 10.5″ Square
- Newborn Photography Blanket: 20.38″ Square
- Newborn Blanket: 30″ Square
- Toddler: 39.75″ Square
- Child: 45.63″ Square
- Lapghan: 35.88″ Square
- Throw: 61.38″ Square
While the newborn photography blanket is sized similarly to preemie blanket guidelines, I do not recommend a blanket made from Bernat Blanket Yarn for a preemie because it is too heavy for them, and they can become overheated easily.
The first two sizes are meant to be newborn photography photo props. Typically, the base is the blanket, and then the layering blanket is laid in a different direction on top, and then baby. Sometimes the newborn size is also used in photography.
Gauge – Not Essential:
Round 1 = 3.5″ in diameter; Round 2 = 5.63″
Abbreviations (US Terms):
- DC – Double Crochet (Photo Tutorial)
- HDC – Half Double Crochet (Photo Tutorial)
Pattern Notes:
In case you need a refresher, here’s a photo tutorial on How to Crochet a Granny Square.
If you want your blanket rounds to be in alternating colors, at the end of the round you will fasten off, then join your next color into the next corner chain space.
Join to the beginning chain 2 of the body, and the 1st stitch in the border.
Super Chunky Gia Afghan Written Pattern:
Chain 5. Slip stitch join to form a ring. Chain 2, work 2 DC into the ring, (chain 3, 3 DC into the ring) 3x, chain 2. Join. (12 DC)
R2: Slip stitch into the next 2 DC, then into the next chain space. Chain 2, 2 DC, chain 3, 3 DC into the same chain space, chain 1, [(3 DC, chain 3, 3 DC) into the next chain space, chain 1] 3x. Join. (24 DC)
R3: Slip stitch into the next 2 DC, then into the next chain space. Chain 2, 2 DC, chain 3, 3 DC into the same chain space, chain 1, [(3 DC, chain 3, 3 DC) into the next chain space, chain 1, 3 DC into the next chain space, chain 1] 3x. Join. (36 DC)
R4: Slip stitch into the next 2 DC, then into the next chain space. Chain 2, 2 DC, chain 3, 3 DC into the same chain space, chain 1, [(3 DC, chain 3, 3 DC) into the next chain space, chain 1, (3 DC into the next chain space, chain 1) 2x] 3x. Join. (48 DC) Stop here for layering blanket, and proceed to border.
R5: Slip stitch into the next 2 DC, then into the next chain space. Chain 2, 2 DC, chain 3, 3 DC into the same chain space, chain 1, [(3 DC, chain 3, 3 DC) into the next chain space, chain 1, (3 DC into the next chain space, chain 1) 3x] 3x. Join. (60 DC)
You will continue in this same manner increasing the center of each side by one cluster.
R6: Slip stitch into the next 2 DC, then into the next chain space. Chain 2, 2 DC, chain 3, 3 DC into the same chain space, chain 1, [(3 DC, chain 3, 3 DC) into the next chain space, chain 1, (3 DC into the next chain space, chain 1) 4x] 3x. Join. (72 DC)
R7: Slip stitch into the next 2 DC, then into the next chain space. Chain 2, 2 DC, chain 3, 3 DC into the same chain space, chain 1, [(3 DC, chain 3, 3 DC) into the next chain space, chain 1, (3 DC into the next chain space, chain 1) 5x] 3x. Join. (84 DC)
R8: Slip stitch into the next 2 DC, then into the next chain space. Chain 2, 2 DC, chain 3, 3 DC into the same chain space, chain 1, [(3 DC, chain 3, 3 DC) into the next chain space, chain 1, (3 DC into the next chain space, chain 1) 6x] 3x. Join. (96 DC)
R9: Slip stitch into the next 2 DC, then into the next chain space. Chain 2, 2 DC, chain 3, 3 DC into the same chain space, chain 1, [(3 DC, chain 3, 3 DC) into the next chain space, chain 1, (3 DC into the next chain space, chain 1) 7x] 3x. Join. (108 DC) Stop here for photography blanket, and proceed to border.
R10: Slip stitch into the next 2 DC, then into the next chain space. Chain 2, 2 DC, chain 3, 3 DC into the same chain space, chain 1, [(3 DC, chain 3, 3 DC) into the next chain space, chain 1, (3 DC into the next chain space, chain 1) 8x] 3x. Join. (120 DC)
R11: Slip stitch into the next 2 DC, then into the next chain space. Chain 2, 2 DC, chain 3, 3 DC into the same chain space, chain 1, [(3 DC, chain 3, 3 DC) into the next chain space, chain 1, (3 DC into the next chain space, chain 1) 9x] 3x. Join. (132 DC)
R12: Slip stitch into the next 2 DC, then into the next chain space. Chain 2, 2 DC, chain 3, 3 DC into the same chain space, chain 1, [(3 DC, chain 3, 3 DC) into the next chain space, chain 1, (3 DC into the next chain space, chain 1) 10x] 3x. Join. (144 DC)
R13: Slip stitch into the next 2 DC, then into the next chain space. Chain 2, 2 DC, chain 3, 3 DC into the same chain space, chain 1, [(3 DC, chain 3, 3 DC) into the next chain space, chain 1, (3 DC into the next chain space, chain 1) 11x] 3x. Join. (156 DC)
R14: Slip stitch into the next 2 DC, then into the next chain space. Chain 2, 2 DC, chain 3, 3 DC into the same chain space, chain 1, [(3 DC, chain 3, 3 DC) into the next chain space, chain 1, (3 DC into the next chain space, chain 1) 12x] 3x. Join. (168 DC) Stop here for newborn blanket, and proceed to border.
R15: Slip stitch into the next 2 DC, then into the next chain space. Chain 2, 2 DC, chain 3, 3 DC into the same chain space, chain 1, [(3 DC, chain 3, 3 DC) into the next chain space, chain 1, (3 DC into the next chain space, chain 1) 13x] 3x. Join. (180 DC)
R16: Slip stitch into the next 2 DC, then into the next chain space. Chain 2, 2 DC, chain 3, 3 DC into the same chain space, chain 1, [(3 DC, chain 3, 3 DC) into the next chain space, chain 1, (3 DC into the next chain space, chain 1) 14x] 3x. Join. (192 DC)
R17: Slip stitch into the next 2 DC, then into the next chain space. Chain 2, 2 DC, chain 3, 3 DC into the same chain space, chain 1, [(3 DC, chain 3, 3 DC) into the next chain space, chain 1, (3 DC into the next chain space, chain 1) 15x] 3x. Join. (204 DC) Stop here for lapghan blanket, and proceed to border.
R18: Slip stitch into the next 2 DC, then into the next chain space. Chain 2, 2 DC, chain 3, 3 DC into the same chain space, chain 1, [(3 DC, chain 3, 3 DC) into the next chain space, chain 1, (3 DC into the next chain space, chain 1) 16x] 3x. Join. (216 DC)
R19: Slip stitch into the next 2 DC, then into the next chain space. Chain 2, 2 DC, chain 3, 3 DC into the same chain space, chain 1, [(3 DC, chain 3, 3 DC) into the next chain space, chain 1, (3 DC into the next chain space, chain 1) 17x] 3x. Join. (228 DC) Stop here for toddler blanket, and proceed to border.
R20: Slip stitch into the next 2 DC, then into the next chain space. Chain 2, 2 DC, chain 3, 3 DC into the same chain space, chain 1, [(3 DC, chain 3, 3 DC) into the next chain space, chain 1, (3 DC into the next chain space, chain 1) 18x] 3x. Join. (240 DC)
R21: Slip stitch into the next 2 DC, then into the next chain space. Chain 2, 2 DC, chain 3, 3 DC into the same chain space, chain 1, [(3 DC, chain 3, 3 DC) into the next chain space, chain 1, (3 DC into the next chain space, chain 1) 19x] 3x. Join. (252 DC)
R22: Slip stitch into the next 2 DC, then into the next chain space. Chain 2, 2 DC, chain 3, 3 DC into the same chain space, chain 1, [(3 DC, chain 3, 3 DC) into the next chain space, chain 1, (3 DC into the next chain space, chain 1) 20x] 3x. Join. (264 DC) Stop here for child blanket, and proceed to border.
R23: Slip stitch into the next 2 DC, then into the next chain space. Chain 2, 2 DC, chain 3, 3 DC into the same chain space, chain 1, [(3 DC, chain 3, 3 DC) into the next chain space, chain 1, (3 DC into the next chain space, chain 1) 21x] 3x. Join. (276 DC)
R24: Slip stitch into the next 2 DC, then into the next chain space. Chain 2, 2 DC, chain 3, 3 DC into the same chain space, chain 1, [(3 DC, chain 3, 3 DC) into the next chain space, chain 1, (3 DC into the next chain space, chain 1) 22x] 3x. Join. (288 DC)
R25: Slip stitch into the next 2 DC, then into the next chain space. Chain 2, 2 DC, chain 3, 3 DC into the same chain space, chain 1, [(3 DC, chain 3, 3 DC) into the next chain space, chain 1, (3 DC into the next chain space, chain 1) 23x] 3x. Join. (300 DC)
R26: Slip stitch into the next 2 DC, then into the next chain space. Chain 2, 2 DC, chain 3, 3 DC into the same chain space, chain 1, [(3 DC, chain 3, 3 DC) into the next chain space, chain 1, (3 DC into the next chain space, chain 1) 24x] 3x. Join. (312 DC)
R27: Slip stitch into the next 2 DC, then into the next chain space. Chain 2, 2 DC, chain 3, 3 DC into the same chain space, chain 1, [(3 DC, chain 3, 3 DC) into the next chain space, chain 1, (3 DC into the next chain space, chain 1) 25x] 3x. Join. (324 DC)
R28: Slip stitch into the next 2 DC, then into the next chain space. Chain 2, 2 DC, chain 3, 3 DC into the same chain space, chain 1, [(3 DC, chain 3, 3 DC) into the next chain space, chain 1, (3 DC into the next chain space, chain 1) 26x] 3x. Join. (336 DC)
R29: Slip stitch into the next 2 DC, then into the next chain space. Chain 2, 2 DC, chain 3, 3 DC into the same chain space, chain 1, [(3 DC, chain 3, 3 DC) into the next chain space, chain 1, (3 DC into the next chain space, chain 1) 27x] 3x. Join. (348 DC)
R30: Slip stitch into the next 2 DC, then into the next chain space. Chain 2, 2 DC, chain 3, 3 DC into the same chain space, chain 1, [(3 DC, chain 3, 3 DC) into the next chain space, chain 1, (3 DC into the next chain space, chain 1) 28x] 3x. Join. (360 DC) Stop here for throw blanket, and proceed to border.
Border:
Chain 1. HDC into the 1st stitch, and into every DC and chain space around working (2 HDC, chain 1, 2 HDC) into each corner space. Join.
Fasten off, and use a small crochet hook to weave in the ends.
Please feel free to make and sell your own items made using this pattern, but keep in mind, this written pattern and my photos are protected by copyright. Please DO NOT claim this pattern as your own nor should you sell my pattern. DO NOT re-publish my photos as your own. DO NOT copy and paste my pattern anywhere, link to it instead so other’s can visit. Making videos providing instructions how to make my projects on any social media platform is also not permitted.
Join one of our awesome Facebook groups to share your creations, and see what others are up to!
– Yarn Crafts & Coffee Community
– DIY Home On Rockwood Lane
– Alexandra Lane Lifestyle
Linked Up To…
Little Cottage Link Party #67 – Love my Little Cottage
All About Home #56 – Common Ground
Tuesday Turn About #65 – My Wee Abode
Charming Homes and Gardens Week 23 – White Arrows Home
One More Row Free Pattern Link Party #22 – Loops and Love Crochet
Home Matters Linky Party #299 – Modern on Monticello
Happiness is Homemade Link Party – Create with Cynthia
Craft Schooling Sunday – Creative Jewish Mom
Unlimited Monthly Link Party 16 – Grammy’s Grid
Hearth and Soul Link Party – April, the 21st Century Housewife
Handmade Monday #192 – Sum of their Stories
Ginx Woolly Linx Party September – Ginx Craft
The Really Crafty Link Party #231 – Keeping it Real
Craftastic Monday Link Party – Sew Can Do
558th Inspire Me Tuesday – A Stroll Thru Life
Fabulous Party #336 – Lou Lou Girls
Linky Ladies Party #193 – The Purple Poncho
Party in Your PJs #325 – The Apple Street Cottage
{Wow Me} Wednesday #471 – Ginger Snap Crafts
Hookin’ on Hump Day #222 – Moogly Blog
Your Whims Wednesday #476 – My Girlish Whims
The Wednesday Link Party 364 – The Stitchin’ Mommy
Waste Not Wednesday 222 – Pretty DIY Home
Friday Favorites – Busy Being Jennifer
Create, Bake, Grow & Gather Party #436 – Shabby Art Boutique
Link Your Stuff – Annemarie’s Haakblog
A Morning Cup of Joe Linky Party – The Cottage Market
Scraptastic Saturdays Party 305 – Scrapality
Embracing Home and Family Link Party #7 – The Everyday Farmhouse
Snickerdoodle Create Bake Make Link Party 352 – EyeLoveKnots
Scrappy Stitchers Link Party #67 – Stitches n Scraps
Thursday Favorite Things #457 – An Artful Mom
Creatively Crafty Link Party #241 – Life Beyond the Kitchen
Artsy-Fartsy Party #310 – Artsy Fartsy Mama
Encouraging Hearts & Home Blog Hop – Apron Strings and Other Things
Creative Compulsions Linky Party #77 – My Bijou Life
Pin Party #386 – The Pin Junkie
Traffic Jam Weekend Linky Party #250 – My Bijou Life


love it! thanks for sharing on craft schooling sunday
I love that pink! Thank you for sharing at The Really crafty Link Party this week. Pinned!
Thank you for pinning!
love the pattern and color you chose so very pretty thanks for sharing
come see us at http://shopannies.blogspot.com
Thanks, Angie!
Beautiful job. I like it in the bright pink. You make these projects seem to effortless and fun. Thanks for sharing again this week. #HomeMattersParty
Thanks, Donna! This stitch pattern is what is effortless and fun, and so versatile! That’s a good first project 😉
I know that yarn must be so soft! Adorable! Thank you for linking up at Embracing Home and Family!
Oohh, it is! Bernat Blanket Yarn is the best blanket yarn. It’s soft, cozy and machine washes and dries so well.
Lovely! Now I want to do a baby afghan like this. Thanks for sharing with Creative Compulsions!
Michelle
https://mybijoulifeonline.com
I definitely recommend it! And in the super chunky yarn they work up so quickly.
I have never bought any Bernat Blanket Yarn. I need to choose a pattern, yours, and when I’m ready to make a blanket, go buy the yarn. LOVE the pink!!!! Any color would be great 🙂
I highly recommend it! It’s the only thing I want to make blankets out of because it is soft and cozy but also wears and machine washes and dries so well. Fingers crossed Yarnspirations comes out with other weights of the same yarn.