This is a free crochet pattern for how to crochet Suzettes Beanie, an easy crochet beanie pattern worked in simple single and double crochet stitches, and available in 7 sizes. Perfect for cool Fall or Spring weather!
Find the free crochet pattern instructions below, or purchase a printer-friendly, ad-free PDF on Ravelry by clicking here.
This post contains affiliate links for WeCrochet. If you make a purchase by clicking on them, I make a small commission at no extra cost to you. Thanks for your support!
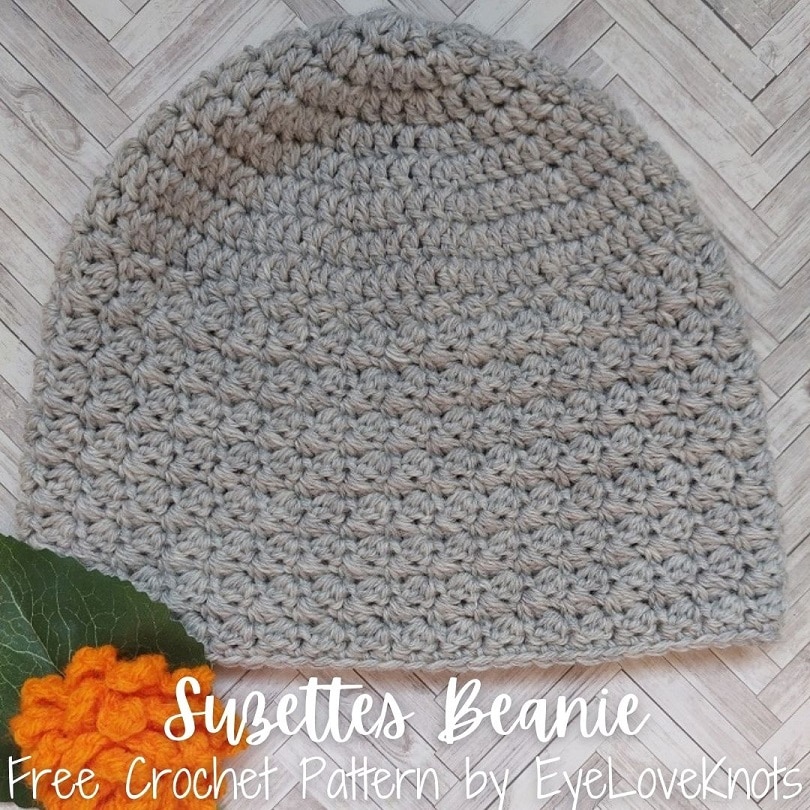
I first published this pattern back in May of 2016, and a few weeks prior, I shared three baby sizes in another post. As I revisit this post to update, I’ve combined them together into this post.
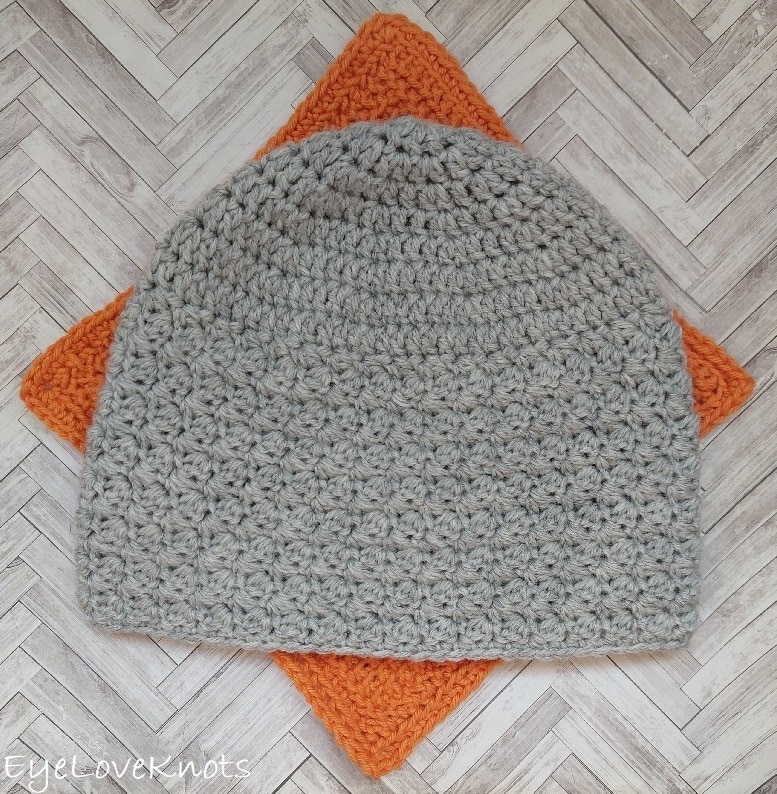
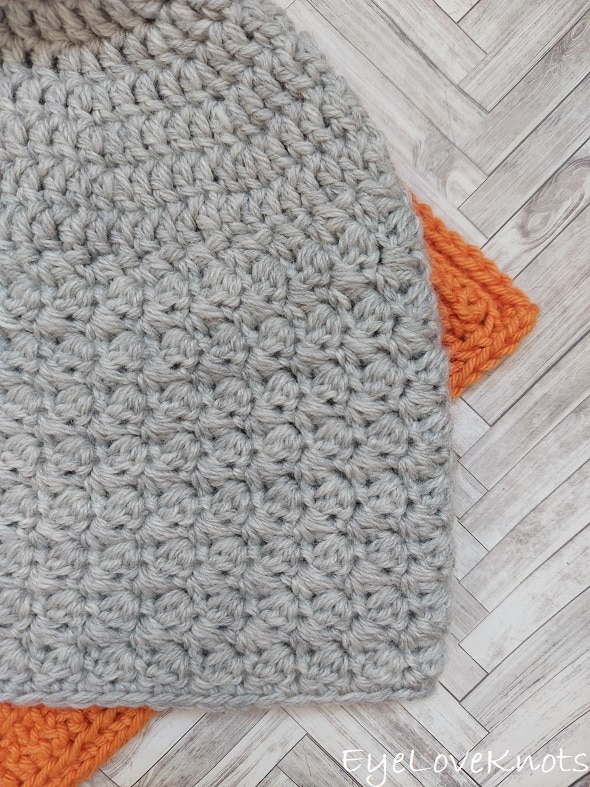
This beanie is worked in the suzette stitch pattern, which is created by working a single and double crochet into one stitch, and skipping the next. It creates such a cozy texture. It’s one of my favorites!
I need to give a big shout out to WeCrochet for supplying me with the yarn to complete this project. I picked WeCrochet Swish Yarn. It’s 100% superwash merino wool, but it’s so soft, not itchy, and it’s so cozy, it feels like it’s giving you a big hug.
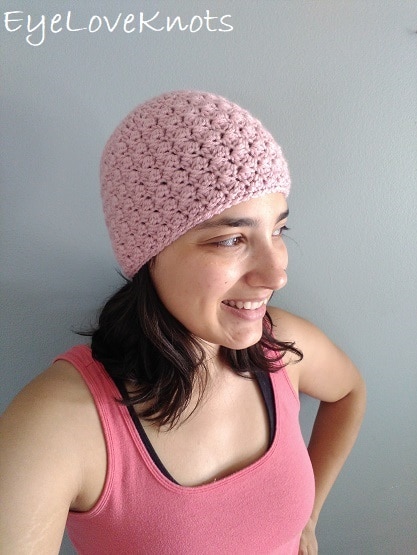
Here is my original beanie worked in Hobby Lobby I Love This Yarn.
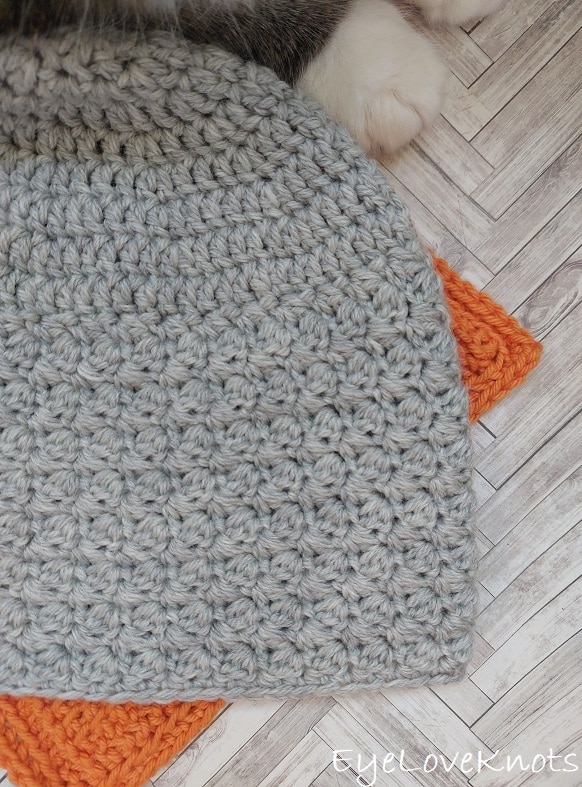
Here with my sweet Shiloh.
AD-FREE, PRINTER FRIENDLY PDF:
If you would like a PDF version of this post, you may get one through either my EyeLoveKnots Etsy Shop, Ravelry or LoveCrafts Shop for a small fee. This fee is to compensate for the views lost when you no longer need to return to the blog to for the information, as you will have your own copy. Plus! It helps fund supplies for new projects to share with you!
Shop EyeLoveKnots Etsy Shop – Suzettes Beanie.
Shop EyeLoveKnots LoveCrafts Shop – Suzettes Beanie.
Share your version of this project on Ravelry – Suzettes Beanie.
Save this to Your Favorites On: AllFreeCrochet, FaveCrafts, Crochet Pattern Bonanza, Cheap Thrifty Living, DIYideaCenter, AllFreeHolidayCrafts
Materials:
- 37 (49, 62, 82, 110, 140, 171) Yards of Worsted Weight Yarn – I used WeCrochet Swish in Dove Heather
- H8/5mm Crochet Hook (for the crown)
- I9/5.5mm Crochet Hook (for the body)
- Tapestry Needle
Material Notes:
Yarn Alternative: Lion Brand Wool Ease; Non-Wool: WeCrochet Brava, Red Heart Soft
Time Spent:
I was able to work up the teen/adult small size in just under 1.5 hours.
Measurements:
The Newborn Size has a crown of 4″ in diameter, a circumference of 12.56″ to fit a head size of 13″-14″, and is 5″ in length.
The 3-6 Month Size has a crown of 4.69″ (or 4 11/16″) in diameter, a circumference of nearly 14.75″ to fit a head size of 14″-16″, and is 5.25″ in length.
The 6-12 Month Size has a crown of 5.44″ (or 5 7/16″) in diameter, a circumference of nearly 17.08″ to fit a head size of 17″-19″, and is 5.75″ in length.
The Toddler Size has a crown of 5.44″ (or 5 7/6″) in diameter, a circumference of 17.08″ to fit a head size of 18″ – 20″, and is 6.5″ in length.
The Child Size Size has a crown of 6.31″ (or 6 5/16″) in diameter, a circumference of nearly 19.75″ to fit a head size of 20″ – 22″, and is 7″ in length.
The Teen/Adult Small Size has a crown of 6.31″ (or 6 5/16″) in diameter, a circumference of nearly 19.75″ to fit a head size of 20″ – 22″, and is 8.5″ in length.
The Adult Large Size has a crown of 6.56″ (or 6 9/16″) in diameter, a circumference of nearly 20.6″ to fit a head size of 22″ – 23″, and is about 8.5″ – 9.5″ in length.
*If you are concerned with the size (or want to make a different size), take your tape measure out and measure around your head just above your eyebrows. The distance around is the circumference. You will need to use this equation to figure out what size diameter you will need: Your Circumference – 2” / 3.14 (pi) = crown diameter. 2” is the amount of stretch for acrylic, wool, and similar.
Gauge:
In the round starting with 10 DC, after Round 3 = 3″
Abbreviations (US Terms):
- DC – Double Crochet (Photo Tutorial)
- SC – Single Crochet (Photo Tutorial)
Pattern Notes:
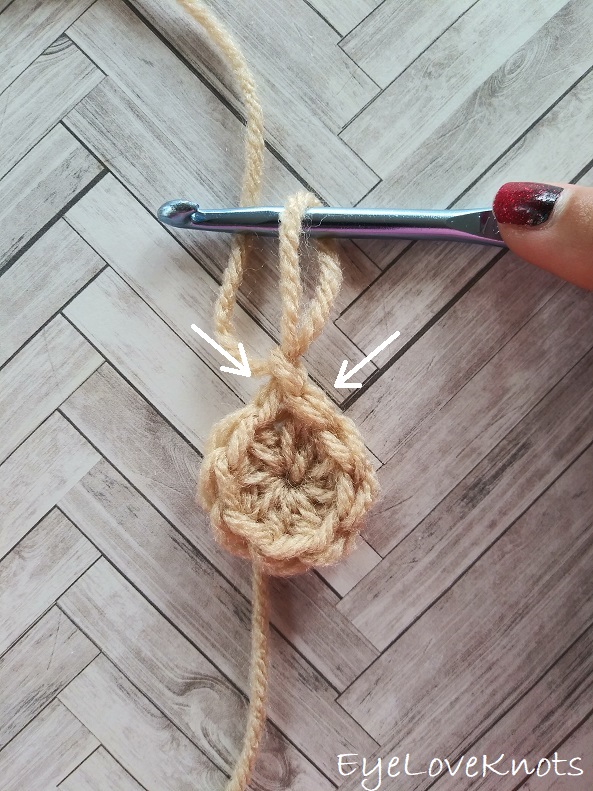
I work my crown and body differently than most to help keep my seam straight, and that is that the first stitch from the first set of increases is done in the first stitch of the round, which will appear just to left of the beginning chain, then the round will be worked as normal, and the final stitch of the round will be the second stitch of the first set of increases, and it will be worked into the same stitch as the first, and appear just to the right of the beginning chain. The photo above shows where the first and last stitch are worked, and I have a photo tutorial of this technique in my How to Keep a Straight Seam post. You can work in your preferred increase method as long as we end up with the same stitches at the end of the round.
In the crown, the beginning chain 2 does not count as a stitch.
Join to the first stitch, not the beginning chain 2 unless otherwise instructed.
When working the suzette stitch pattern, clusters are worked into a single crochet, and we’re skipping a double crochet.
For the very last round of single crochet, we want it to be on the right side of the fabric. This is why some sizes instruct to turn, while others don’t.
Suzettes Beanie Video Tutorial:
Newborn:
With H8/5mm hook, chain 4. Join to form a ring. Chain 2. 11 DC into the ring. Join. (11 DC)
R2: Chain 2. Work 1 DC into the first stitch, 2 DC in each of the next 10 DCs, and 1 DC into the last stitch. Join. (22 DC)
R3: Chain 2. Work 1 DC into the first two stitches, (2 DC into the next stitch, 1 DC into the next stitch) 10x, 1 DC into the last stitch. Join. (33 DC)
R4: Chain 2. Work 1 DC into the first three stitches, (2 DC into the next stitch, 1 DC into each of the next 2 stitches) 10x, 1 DC into the last stitch. Join. (44 DC)
R5: Chain 2. Work 1 DC into the second DC, and each DC around. Join to the top of the beginning chain 2. (44 DC)
R6: Switch to I9/5.5mm hook, then chain 1. (SC, DC) into the 1st stitch, skip the next stitch, [(SC, DC) into the next stitch, skip the next stitch] 21x. Join. (22 clusters)
R7 – 11: Chain 1, turn. (SC, DC) into the 1st stitch, skip the next stitch, [(SC, DC) into the next stitch, skip the next stitch] 21x. Join. (22 clusters)
R12: Chain 1, turn. 1 SC into the first stitch, & each stitch around. Join. (44 SC)
Fasten off, and weave in ends.
3 – 6 Months:
With H8/5mm hook, chain 4. Join to form a ring. Chain 2. 10 DC into the ring. Join. (10 DC)
R2: Chain 2. Work 1 DC into the first stitch, 2 DC in each of the next 9 DCs, and 1 DC into the last stitch. Join. (20 DC)
R3: Chain 2. Work 1 DC into the first two stitches, (2 DC into the next stitch, 1 DC into the next stitch) 9x, 1 DC into the last stitch. Join. (30 DC)
R4: Chain 2. Work 1 DC into the first three stitches, (2 DC into the next stitch, 1 DC into each of the next 2 stitches) 9x, 1 DC into the last stitch. Join. (40 DC)
R5: Chain 2. Work 1 DC into the first four stitches, (2 DC into the next stitch, 1 DC into each of the next 3 stitches) 9x, 1 DC into the last stitch. Join. (50 DC)
R6: Chain 2. Work 1 DC into the second DC, and each DC around. Join to the top of the beginning chain 2. (50 DC)
R7: Switch to I9/5.5mm hook, then chain 1. (SC, DC) into the 1st stitch, skip the next stitch, [(SC, DC) into the next stitch, skip the next stitch] 24x. Join. (25 clusters)
R8 – 12: Chain 1, turn. (SC, DC) into the 1st stitch, skip the next stitch, [(SC, DC) into the next stitch, skip the next stitch] 24x. Join. (25 clusters)
R13: Chain 1, turn. 1 SC into the first stitch, & each stitch around. Join. (50 SC)
Fasten off, and weave in ends.
6-12 Months:
With H8/5mm hook, chain 4. Join to form a ring. Chain 2. 10 DC into the ring. Join. (10 DC)
R2: Chain 2. Work 1 DC into the first stitch, 2 DC in each of the next 9 DCs, and 1 DC into the last stitch. Join. (20 DC)
R3: Chain 2. Work 1 DC into the first 2 stitches, (2 DC into the next stitch, 1 DC into the next stitch) 9x, 1 DC into the last stitch. Join. (30 DC)
R4: Chain 2. Work 1 DC into the first 3 stitches, (2 DC into the next stitch, 1 DC into each of the next 2 stitches) 9x, 1 DC into the last stitch. Join. (40 DC)
R5: Chain 2. Work 1 DC into the first 4 stitches, (2 DC into the next stitch, 1 DC into each of the next 3 stitches) 9x, 1 DC into the last stitch. Join. (50 DC)
R6: Chain 2. Work 1 DC into the first 5 stitches, (2 DC into the next stitch, 1 DC into each of the next 4 stitches) 9x, 1 DC into the last stitch. Join. (60 DC)
R7: Chain 2. Work 1 DC into the second DC, and each DC around. Join to the top of the beginning chain 2. (60 DC)
R8: Switch to I9/5.5mm hook, then chain 1. (SC, DC) into the 1st stitch, skip the next stitch, [(SC, DC) into the next stitch, skip the next stitch] 29x. Join. (30 clusters)
R9 – 14: Chain 1, turn. (SC, DC) into the 1st stitch, skip the next stitch, [(SC, DC) into the next stitch, skip the next stitch] 29x. Join. (30 clusters)
R15: Chain 1. Do not turn. 1 SC into the first stitch, & each stitch around. Join. (60 SC)
Fasten off, and weave in ends.
Toddler, 1-3 Years:
With H8/5mm hook, chain 4. Join to form a ring. Chain 2. 10 DC into the ring. Join. (10 DC)
R2: Chain 2. Work 1 DC into the first stitch, 2 DC in each of the next 9 DCs, and 1 DC into the last stitch. Join. (20 DC)
R3: Chain 2. Work 1 DC into the first 2 stitches, (2 DC into the next stitch, 1 DC into the next stitch) 9x, 1 DC into the last stitch. Join. (30 DC)
R4: Chain 2. Work 1 DC into the first 3 stitches, (2 DC into the next stitch, 1 DC into each of the next 2 stitches) 9x, 1 DC into the last stitch. Join. (40 DC)
R5: Chain 2. Work 1 DC into the first 4 stitches, (2 DC into the next stitch, 1 DC into each of the next 3 stitches) 9x, 1 DC into the last stitch. Join. (50 DC)
R6: Chain 2. Work 1 DC into the first 5 stitches, (2 DC into the next stitch, 1 DC into each of the next 4 stitches) 9x, 1 DC into the last stitch. Join. (60 DC)
R7: Chain 2. Work 1 DC into the second DC, and each DC around. Join to the top of the beginning chain 2. (60 DC)
R8: Switch to I9/5.5mm hook, then chain 1. (SC, DC) into the 1st stitch, skip the next stitch, [(SC, DC) into the next stitch, skip the next stitch] 29x. Join. (30 clusters)
R9 – 18: Chain 1, turn. (SC, DC) into the 1st stitch, skip the next stitch, [(SC, DC) into the next stitch, skip the next stitch] 29x. Join. (30 clusters)
R19: Chain 1. Do not turn. 1 SC into the first stitch, & each stitch around. Join. (60 SC)
Fasten off, and weave in ends.
Child, 4-12 Years:
With H8/5mm hook, chain 4. Join to form a ring. Chain 2. 10 DC into the ring. Join. (10 DC)
R2: Chain 2. Work 1 DC into the first stitch, 2 DC in each of the next 9 DCs, and 1 DC into the last stitch. Join. (20 DC)
R3: Chain 2. Work 1 DC into the first 2 stitches, (2 DC into the next stitch, 1 DC into the next stitch) 9x, 1 DC into the last stitch. Join. (30 DC)
R4: Chain 2. Work 1 DC into the first 3 stitches, (2 DC into the next stitch, 1 DC into each of the next 2 stitches) 9x, 1 DC into the last stitch. Join. (40 DC)
R5: Chain 2. Work 1 DC into the first 4 stitches, (2 DC into the next stitch, 1 DC into each of the next 3 stitches) 9x, 1 DC into the last stitch. Join. (50 DC)
R6: Chain 2. Work 1 DC into the first 5 stitches, (2 DC into the next stitch, 1 DC into each of the next 4 stitches) 9x, 1 DC into the last stitch. Join. (60 DC)
R7: Chain 2. Work 1 DC into the first 6 stitches, (2 DC into the next stitch, 1 DC into each of the next 5 stitches) 9x, 1 DC into the last stitch. Join. (70 DC)
R8: Chain 2. Work 1 DC into the second DC, and each DC around. Join to the top of the beginning chain 2. (70 DC)
R9: Switch to I9/5.5mm hook, then chain 1. (SC, DC) into the 1st stitch, skip the next stitch, [(SC, DC) into the next stitch, skip the next stitch] 34x. Join. (35 clusters)
R10 – 20: Chain 1, turn. (SC, DC) into the 1st stitch, skip the next stitch, [(SC, DC) into the next stitch, skip the next stitch] 34x. Join. (35 clusters)
R21: Chain 1, turn. 1 SC into the first stitch, & each stitch around. Join. (70 SC)
Fasten off, and weave in ends.
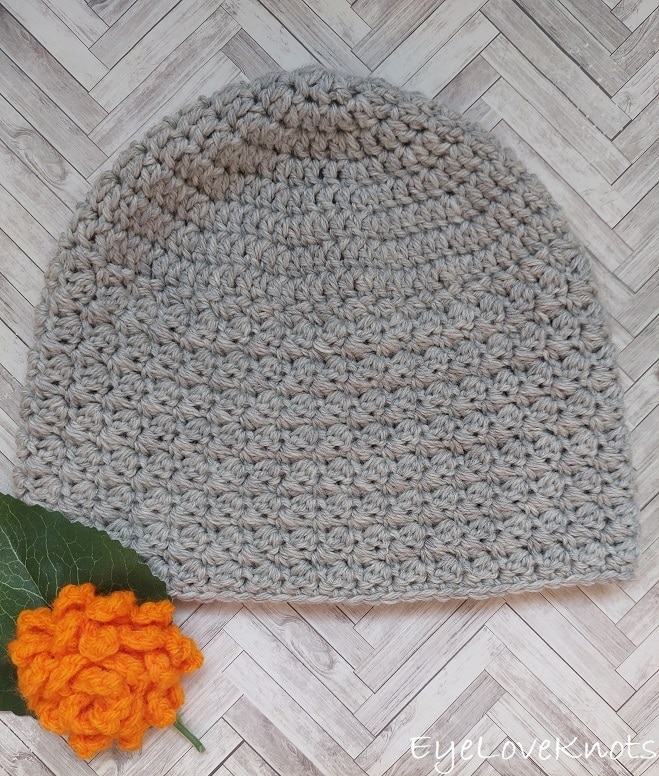
Teen/Adult Small:
With H8/5mm hook, chain 4. Join to form a ring. Chain 2. 10 DC into the ring. Join. (10 DC)
R2: Chain 2. Work 1 DC into the first stitch, 2 DC in each of the next 9 DCs, and 1 DC into the last stitch. Join. (20 DC)
R3: Chain 2. Work 1 DC into the first 2 stitches, (2 DC into the next stitch, 1 DC into the next stitch) 9x, 1 DC into the last stitch. Join. (30 DC)
R4: Chain 2. Work 1 DC into the first 3 stitches, (2 DC into the next stitch, 1 DC into each of the next 2 stitches) 9x, 1 DC into the last stitch. Join. (40 DC)
R5: Chain 2. Work 1 DC into the first 4 stitches, (2 DC into the next stitch, 1 DC into each of the next 3 stitches) 9x, 1 DC into the last stitch. Join. (50 DC)
R6: Chain 2. Work 1 DC into the first 5 stitches, (2 DC into the next stitch, 1 DC into each of the next 4 stitches) 9x, 1 DC into the last stitch. Join. (60 DC)
R7: Chain 2. Work 1 DC into the first 6 stitches, (2 DC into the next stitch, 1 DC into each of the next 5 stitches) 9x, 1 DC into the last stitch. Join. (70 DC)
R8: Chain 2. Work 1 DC into the second DC, and each DC around. Join to the top of the beginning chain 2. (70 DC)
R9: Switch to I9/5.5mm hook, then chain 1. (SC, DC) into the 1st stitch, skip the next stitch, [(SC, DC) into the next stitch, skip the next stitch] 29x. Join. (30 clusters)
R10 – 25: Chain 1, turn. (SC, DC) into the 1st stitch, skip the next stitch, [(SC, DC) into the next stitch, skip the next stitch] 34x. Join. (35 clusters)
R26: Chain 1. Do not turn. 1 SC into the first stitch, & each stitch around. Join. (70 SC)
Fasten off, and weave in ends.
Adult Large:
With H8/5mm hook, chain 4. Join to form a ring. Chain 2. 11 DC into the ring. Join. (11 DC)
R2: Chain 2. Work 1 DC into the first stitch, 2 DC in each of the next 10 DCs, and 1 DC into the last stitch. Join. (22 DC)
R3: Chain 2. Work 1 DC into the first two stitches, (2 DC into the next stitch, 1 DC into the next stitch) 10x, 1 DC into the last stitch. Join. (33 DC)
R4: Chain 2. Work 1 DC into the first three stitches, (2 DC into the next stitch, 1 DC into each of the next 2 stitches) 10x, 1 DC into the last stitch. Join. (44 DC)
R5: Chain 2. Work 1 DC into the first four stitches, (2 DC into the next stitch, 1 DC into each of the next 3 stitches) 10x, 1 DC into the last stitch. Join. (55 DC)
R6: Chain 2. Work 1 DC into the first five stitches, (2 DC into the next stitch, 1 DC into each of the next 4 stitches) 10x, 1 DC into the last stitch. Join. (66 DC)
R7: Chain 2. Work 1 DC into the first six stitches, (2 DC into the next stitch, 1 DC into each of the next 5 stitches) 9x, DC into each of the next 6 stitches, 1 DC into the last stitch. Join. (76 DC)
R8: Chain 2. Work 1 DC into the second DC, and each DC around. Join to the top of the beginning chain 2. (76 DC)
R9: Switch to I9/5.5mm hook, then chain 1. (SC, DC) into the 1st stitch, skip the next stitch, [(SC, DC) into the next stitch, skip the next stitch] 37x. Join. (38 clusters)
R10 – 25 (28): Chain 1, turn. (SC, DC) into the 1st stitch, skip the next stitch, [(SC, DC) into the next stitch, skip the next stitch] 37x. Join. (38 clusters)
R26 (8.5″ Length): Chain 1. Do not turn. 1 SC into the first stitch, & each stitch around. Join. (77 SC)
R29 (9.5″ Length): Chain 1, turn. 1 SC into the first stitch, & each stitch around. Join. (77 SC)
Fasten off, and weave in ends.
Please feel free to make and sell your own of Suzettes Beanie using this pattern, but please DO NOT claim this pattern as your own nor should you sell my pattern, and DO NOT re-publish my photos as your own. DO NOT copy and paste my pattern anywhere, link to it instead.
Join one of our awesome Facebook groups to share your creations, and see what others are up to!
– EyeLoveKnots Crochet & DIY Community
– DIY Home On Rockwood Lane
– Alexandra Lane Lifestyle
Linked Up To…
615th Inspire Me Tuesday – A Stroll Thru Life
Fabulous Party 399 – Lou Lou Girls
You’re the Star Blog Hop – Decor Craft Design
Unlimited Link Party 61 – Grammy’s Grid
Spread the Kindness Link Up #250 – Shelbee on the Edge
Share the Wealth Link Up #7 – Big Fat Menopausal Life
Link Up Potpourri #19 – My Bijou Life
Party In Your PJs #386 – The Apple Street Cottage
Thursday Favorite Things #517 – An Artful Mom
Encouraging Hearts & Home Blog Hop – Slices of Life
A Morning Cup of Joe – The Cottage Market
Handmade Monday #255 – Sum of their Stories
The Really Crafty Link Party #291 – Keeping it Real
Ginx Woolly Linx Party November – Ginx Craft
Craft Schooling Sunday – Creative Jewish Mom
Creatively Crafty Link Party #303 – Try It, Like It
Linky Ladies Party #218 – The Purple Poncho
Craftastic Monday Link Up – Sew Can Do
The Loop Scoop #26 – Moogly Blog
Create, Bake, Grow & Gather Party #496 – Shabby Art Boutique
The Wednesday Link Party 426 – Oombawak Design
Team Creative Crafts Linky Party #69 – Artsy-Fartsy Mama
{Wow Me} Wednesday #531 – Ginger Snap Crafts
Saturday Sparks Link Party 450 – Pieced Pastimes
One More Row Free Crochet Link Party #37 – Loops and Love Crochet
Great beanie pattern! Thanks for sharing it.
Thanks for dropping me a line 🙂 Would love to see your finished hats, and feedback on fitting if you get a chance to try it.
Pinned!
Michelle
https://mybijoulifeonline.com
Thank you!
Such a pretty stitch pattern! Thank you for sharing at Party In Your PJ’s.
Thank YOU, Ann!
Hi! I have a bag full of DK weight yarn and would like to make chemo caps with this pattern. Could you tell me how to convert the teen/small adult pattern to dk weight yarn?
Sure. First thing, you’ll need to create a flat circle (I like to use double crochet) that after several rounds of increasing will measure approximately 6.25″ (6 1/4″) in diameter and be an even number, then stop increasing and work one more round but of even stitching all the way, then begin working rounds in the suzette pattern until the beanie measures 8″-8.5″ tall. I like to finish with 1-2 rounds of single crochet or half double crochet, but you can finish on a suzette stitch round too for a fun, shell-like edging.