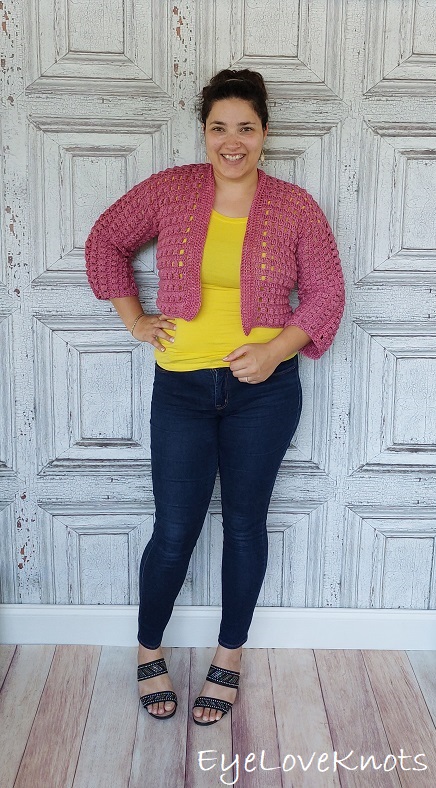
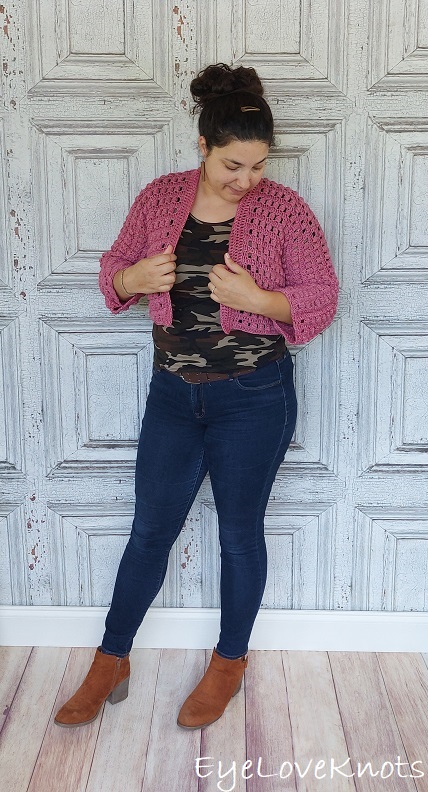
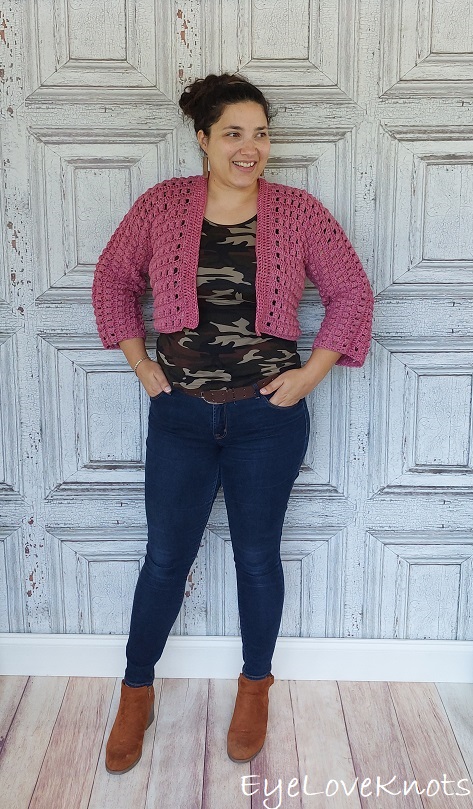
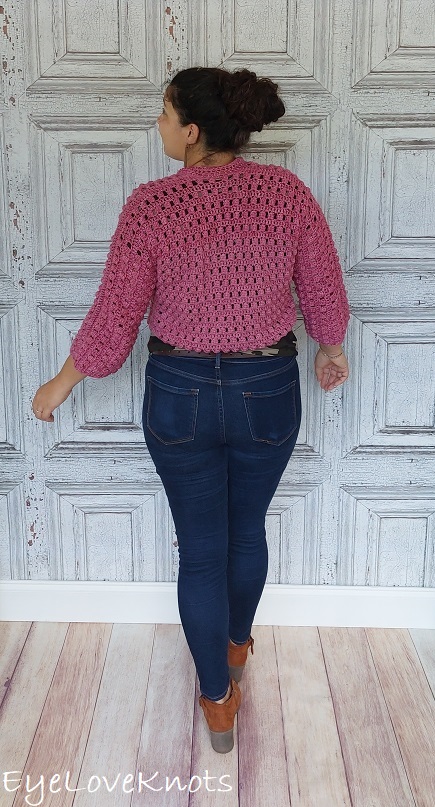
This is a free crochet pattern and video tutorial showing how to crochet the Lightweight Lucille Cardigan, a lacy, t-shape cardigan worked in lightweight yarn. Short, 3/4 and long sleeve options as well as cropped, hip and tunic lengths so you can make it exactly how you like!
This post contains affiliate links for LoveCrafts and Lion Brand Yarn. If you make a purchase by clicking on them, I make a small commission at no extra cost to you. Thanks for your support!
Find the free crochet pattern instructions below, or purchase a printer-friendly, ad-free PDF on Ravelry by clicking here.
In a hurry? Pin it for later when you have more time.
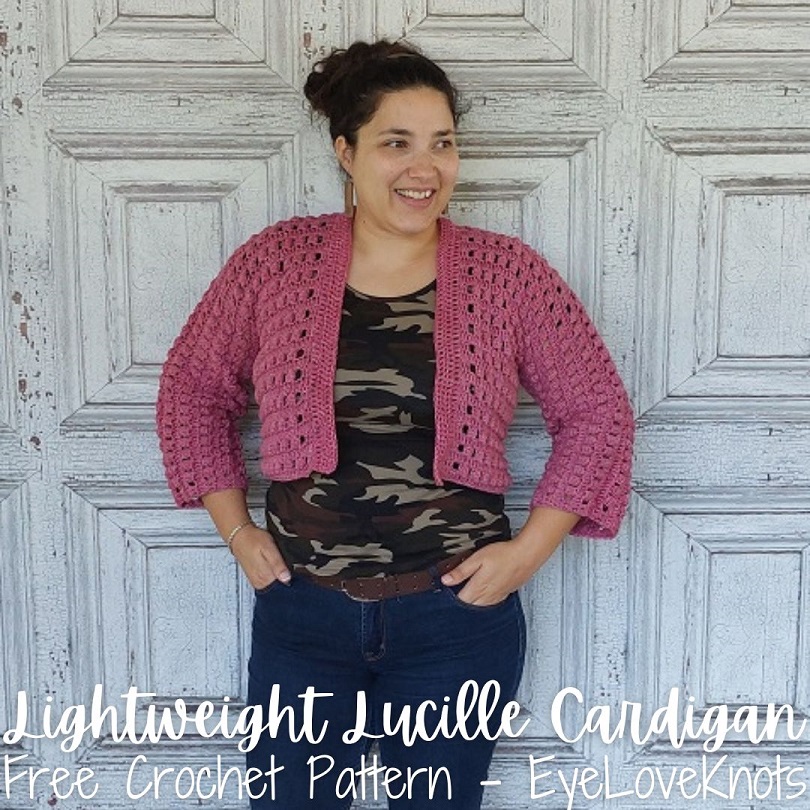
I originally designed this cardigan as part of the Design, Create, Repeat blog hops. The theme was “Pastels/Spring Colors”. I sat on the “pastels” idea, and had to think about what I was going to make.
At first, I thought lightweight, lacy pullover, but a poll through a few Facebook groups decided that a cardigan was more of what makers wanted, so a Spring cardigan it was!
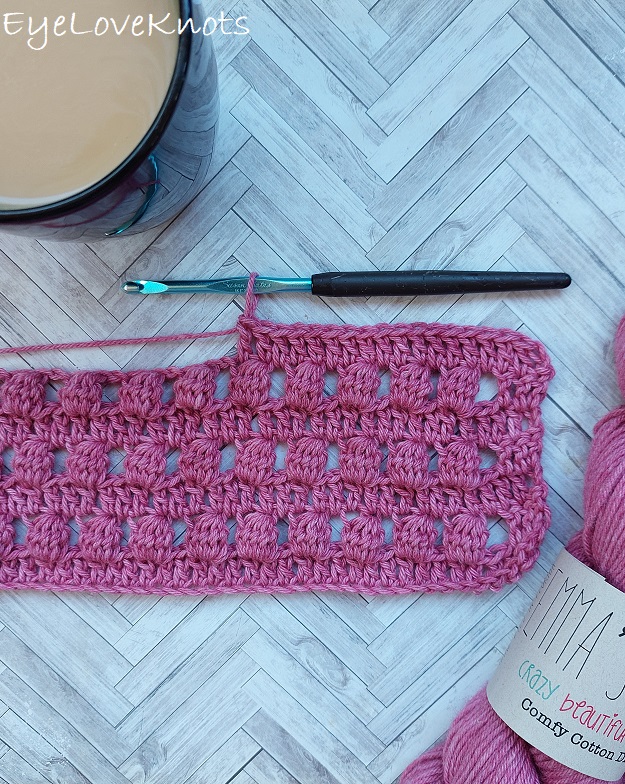
I incorporated the same design idea as what I was going to do with the pullover – 3/4 length sleeves, “T” style design, and the lacy cluster pattern you see (just like on my Oasis Cluster Top – Free Crochet Pattern).
For the yarn, I remembered browsing through LoveCrafts last year, and coming across Cascade Sarasota Yarn. At the time, I was thinking of making one of those 3D granny square blankets with the flower in the middle, and loved the idea of the pastels from this line, so I went back to it, and new this turquoise color would be perfect for Spring! I love how it’s not a solid color – really adds to it for me.
July 10, 2022 Update
This cardigan, originally named the Cropped Sarasota Cardi, is one of my more popular patterns, but I also get a lot of questions about the stitch pattern, especially when it comes to adding the arms. I decided to re-work the cardigan, and add a video tutorial to it.
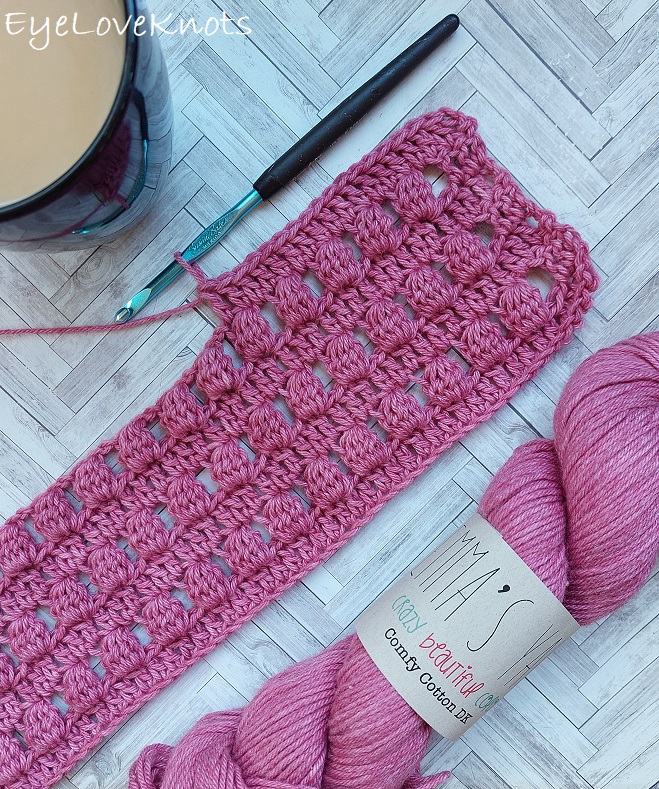
In re-working, I picked one of my favorite yarns, Emma’s Comfy Cotton DK from my local yarn shop, Four Purls. I shared one of my visits a couple years ago. This yarn is soft, springy and lightweight, and overall, the cotton and wool blend is lovely. The stitches favor the cotton fiber, so they’re more defined, but when working, it favors the wool fiber ending up lightweight (whereas cotton can be heavy) with more give and better draping. It’s cooler than you’d expect with wool, and not itchy either.
With all that said, I had to bring changes to the pattern to accommodate this yarn (plus 2 more sizes, finished lengths and sleeve lengths), but I did not want to remove the original instructions because they’re great for yarns similar to Cascade’s Sarasota Yarn that favor the cotton fiber: are heavy and produce a tighter fabric with less stretch, like Lion Brand’s Comfy Cotton Blend, Bernat’s Softee Baby Cotton and Premier Yarns Cotton Fair. The new instructions are great for yarns that favor the wool fiber: are lighter and produce a fabric with more stretch, like Lion Brand’s Coboo, and Berroco’s Vintage DK.
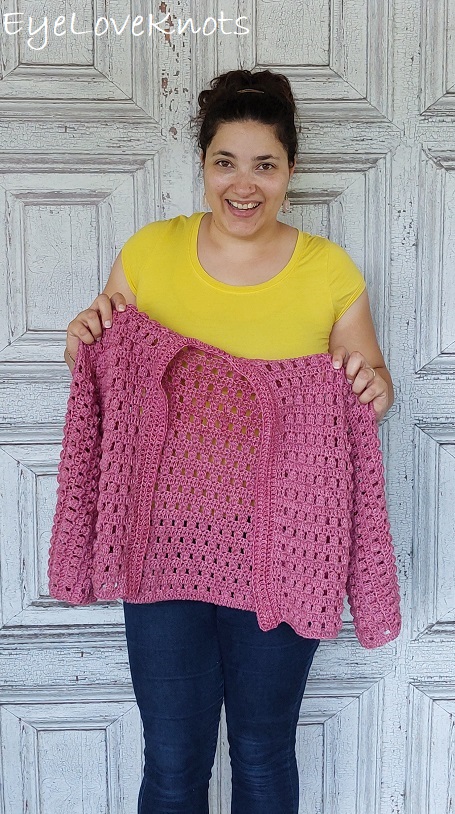
One big difference to mention is the fit. The original cardigan worked in the Cascade Yarn was designed to have 2″ of positive ease. This means the finished garment would measure 2″ larger than the given bust measurement for each size, which produces a more oversized cardigan. I simply do not like oversized garments, so while I was remaking this cardigan, I was struggling on motivation, and just bringing it all together because following the same 2″ of positive ease, it was creating a garment I wasn’t interested in or happy for myself. I decided to frog it, and restart with 6″ of negative ease for a more fitted cardigan. This means the finished garment will measure 6″ smaller than the given bust measurement for each size, but the yarn stretches to fit. If you want something more oversized, and you’re following the instructions for the Emma’s Yarn version, you’ll need to go up 2 sizes for the body, but still follow your original size for the sleeves. This works vice versa. If you’re following the instructions for the Cascade Yarn version, and you want something more fitted, simply go down a size (this is what I did with the original).
So this is a two-in-one pattern. Make sure to find the heading appropriate to your choice of yarn to follow those instructions. The video tutorial reflects the new version worked in Emma’s Yarn, but the pattern concept is the same. The PDF will include both versions.
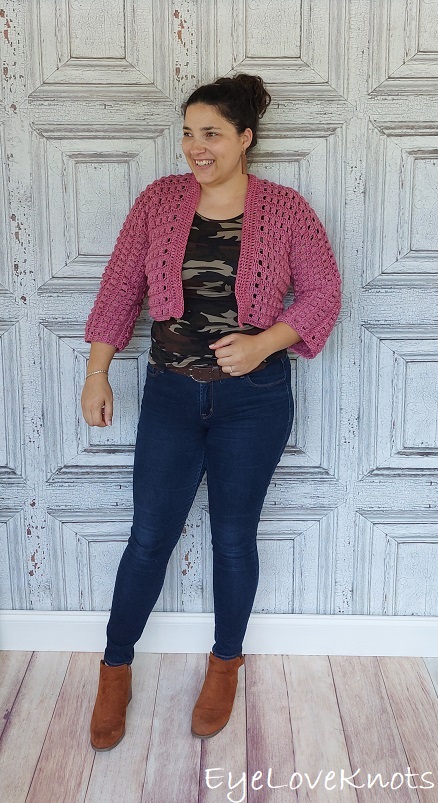
If you would like to grab a free copy of the PDF for this pattern, make sure to check out the Pattern Notes section below.
AD-FREE, PRINTER FRIENDLY PDF:
If you would like a PDF version of this post, you may get one through either my EyeLoveKnots Etsy Shop, Ravelry or LoveCrafts Shop for a small fee. This fee is to compensate for the views lost when you no longer need to return to the blog to for the information, as you will have your own copy. Plus! It helps fund supplies for new projects to share with you!
Shop EyeLoveKnots Etsy Shop – Lightweight Lucille Cardigan.
Shop EyeLoveKnots LoveCrafts Shop – Lightweight Lucille Cardigan.
Are you a Raveler? Share your version of this project on Ravelry – Lightweight Lucille Cardigan.
Save this to your Favorites on: AllFreeCrochet, FaveCrafts, Cheap Thrifty Living, DIYideaCenter, Crochet Pattern Bonanza, AllFreeHolidayCrafts, Free Crochet Tutorials, The Free Crochet Family
In a hurry? Pin it for later when you have more time.
Part 1, Lightweight Lucille Cardigan Video Tutorial – Showing Emma’s Yarn version, but same exact overall design so it works for both versions:
Part 2, Lightweight Lucille Cardigan Video Tutorial:
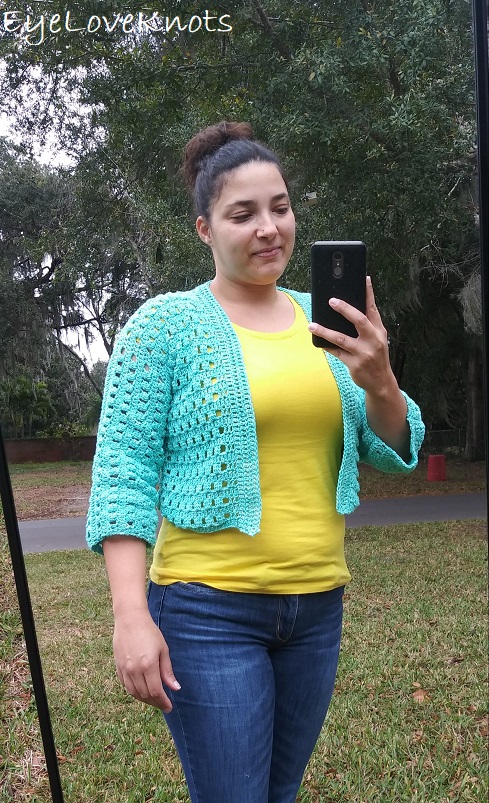
CASCADE’S SARASOTA YARN VERSION
What Materials Do I Need to Crochet a Lacy Cardigan?
- 982, (982, 982, 1570, 1570, 1884, 1884) Yards of a Cotton/Acrylic Blend Lightweight #3 Yarn – I used Cascade Sarasota in Turquoise and you will need 3 (3, 3, 5, 5, 6, 6) skeins
- H8/5mm Crochet Hook
- Tapestry Needle
Material Notes:
Yarn Alternative: Bernat’s Softee Baby Cotton Yarn, Lion Brand Comfy Cotton.
I made the size Medium, and used three full skeins. The rest is estimated based on this sample.
Time Spent:
I worked the medium size up in roughly 16 hours.
Measurements:
Decimals to Fractions: 0.13″ = 1/8″, 0.25″ = 1/4″, 0.38″ = 3/8″, 0.5″ = 1/2″, 0.63″ = 5/8″, 0.75″ = 3/4″, 0.88″ = 7/8″
Sizes Included: XS, S, M, L, XL, 2X 3X
To Fit Bust Size: 28″, 32″, 36″, 40″, 44″, 48″, 52″
Finished Bust Size (+2″ Larger/Positive Ease): 30″, 34″, 38″, 42″, 46″, 50″, 54″
Back Panel Width (Not Including Arms): 15.38″, 16.88″, 19″, 21.25″, 22.63″, 24.88″, 27.13″
Armhole Depth: 6.13″, 6.13″, 7.38″, 7.38″, 8.38″, 8.38″, 9.5″
Crop Length: 17.13″, 17.13″, 17.13″, 17.13″, 18.25″, 18.25″, 18.25″
Neck Opening Before Adding Collar: 5″
Sleeves: 3/4 Length
Gauge (Essential):
17 DC = 4″ Wide; 4 Clusters = 3″ Wide
To work a gauge swatch, I recommend starting with a chain 25, and then working in pattern.
The width gauge is the most important to meet. The height can always be adjusted later by working more or less repeats. If you cannot meet gauge, even with trying to go up or down hook sizes, then use your gauge swatch to determine how many stitches you’ll need to work to meet my provided measurements. Make sure to also follow the stitch multiple found in the Pattern Notes section.
Abbreviations (US Terms):
- DC – Double Crochet (Photo Tutorial)
- FDC – Foundation Double Crochet
- To FDC: Chain 3 (counts as a stitch here). Yarn over, insert hook into the first chain, yarn over, pull through, yarn over, pull through first loop (to create foundation chain), (yarn over, pull through two loops on hook) 2x. First chain and DC created. Looking at the stitch in your hand, you should see the top of the DC to the right, and parallel on the left side, it should look like the opposite side of the beginning foundation chain. You will be working in these stitches on the left. To create the next stitch and each stitch after, yarn over, insert hook under both loops of the foundation chain (left side) yarn over, pull through, yarn over, pull through first loop, (yarn over, pull through 2) 2x.
- How to Cluster: work the following all into one stitch: Yarn over, insert hook into the stitch, yarn over, pull through (3 loops on hook), [yarn over, pull through two loops on hook, yarn over, insert hook into the same stitch, yarn over, pull through] (4 loops on hook), repeat […] (5 loops on hook), repeat […] (6 loops on hook), yarn over, pull through all 6 loops on the hook.
Pattern Notes:
The chain multiple is 3 + 4 -> this means a number divisible by 3, and then add 4 to account for the turning chain. This is important if you would like to change the width of any of your pieces. To adjust from the chains I provided, simply add or subtract 3, but overall, the number you end up minus 4 needs to be divisible by 3 to work for the stitch pattern.
Beginning chain 2 counts as a double crochet.
When working into the chain space that’s before a cluster stitch, I recommend working one double crochet into the space as normal, and then one double crochet into the second chain – it’s very easy to spot. When working into a chain space that is before a 3-double crochet section, work both double crochets into the chain space.
Through 11/23/22 at 11:59pm EST, you can grab a free copy of the PDF for the Lightweight Lucille Cardigan on Ravelry using code FREECROCHET202221. I earn my income from the number of pageviews my blog sees, so please do not share the code, but instead share the link to this post so others can find it. Thank you!
If you’re viewing this after 11/23/22, you can still get a copy of the PDF on sale 50% off on Ravelry or on Etsy using code NEWCROCHET202223 until 11/27/22 at 11:59pm EST.
Back Panel:
Chain 61 (70, 76, 85, 94, 100, 109), DC into the 4th chain, and across. [59 (68, 74, 83, 92, 98, 107) DC]
R2: Chain 2, turn. DC into the 2nd and 3rd DCs, chain 2, skip next two DCs, (cluster into the next DC, chain 2, skip next two DCs) 17x (20x, 22x, 25x, 28x, 30x, 33x), DC into the last 3 DC. [6 DC + 17 (20, 22, 25, 28, 30, 33) clusters]
R3: Chain 2, turn. DC into the 2nd DC, and each stitch across. [59 (68, 74, 83, 92, 98, 107) DC]
R4 – 20 (20, 18, 18, 18, 18, 16): Repeat Rows 2 + 3, ending on a cluster row.
CHECKPOINT:
I recommend holding this back panel up to yourself (best if around the back, but the front works too) from your underarm down. Check to see if you like this length. If not, you can always add more repeat rows, just make sure to end on a cluster row. You can check basic fit widthwise here too. I pinned the panel to my shirt so I could get a better idea when looking in the mirror.
Here are the width measurements you should have (unless you’ve added or omitted any stitches from the pattern):
Back Panel Width (Not Including Arms): 15.38″, 16.88″, 19″, 21.25″, 22.63″, 24.88″, 27.13″
If you want to see how the overall body of the cardigan will be, you can set this back panel aside, work the bodies of the two front panels, then lay the back panel down with right side facing up, and each of the front panels down with the right side facing down lining up the far sides and slip stitch join the layers together on the sides (slip stitch because it’s temporary). Hold this up in the same manner. There will be a 5″ gap in the front as the collar is still missing. When you’re done checking, remove the slip stitches, and then continue on to add the arms to each panel.
Begin Arms:
R21 (21, 19, 19, 19, 19, 17): Chain 55 (58, 58, 61, 61, 61, 61), DC into the back loop of the 4th chain, and each stitch all the way across, then FDC 53 (56, 56, 59, 59, 59, 59). [165 (180, 186, 201, 210, 216, 225) DC]
R22 (22, 20, 20, 20, 20, 18): Chain 2, turn. DC into the 2nd and 3rd DCs, chain 2, skip next two DCs, (cluster into the next DC, chain 2, skip next two DCs) 15x (16x, 16x, 17x, 17x, 17x, 17x), DC into the next 3 DC, chain next 2, skip next two DCs, (cluster into the next DC, chain 2, skip next two DCs) 18x (21x, 23x, 26x, 29x, 31x, 34x), DC into the next 3 DC, chain next 2, skip next two DCs, (cluster into the next DC, chain 2, skip next two DCs) 15x (16x, 16x, 17x, 17x, 17x, 17x), DC into the last 3 DC. [12 DC + 48 (53, 55, 60, 63, 65, 68) Clusters]
R23 (23, 21, 21, 21, 21, 19): Chain 2, turn. DC into the 2nd DC, and each stitch across. [165 (180, 186, 201, 210, 216, 225) DC]
R24 (24, 22, 22, 22, 22, 20) – 31 (31, 31, 31, 33, 33, 33): Repeat Rows 22 + 23, ending on a DC row.
Fasten off.
CHECKPOINT:
I recommend holding this back panel up to yourself (best if around the back, but the front works too) from the top of your shoulder down matching up the newly added sleeves with you underarm (where it will be placed when worn). Check to see if you like this length for your armhole. If not, you can always add more repeat rows, just make sure to end on a double crochet row.
Here are the height measurements you should have (unless you’ve added or omitted any rows to/from the pattern):
Armhole Depth: 6.13″, 6.13″, 7.38″, 7.38″, 8.38″, 8.38″, 9.5″
Here are roughly the total height measurements you should have (unless you’ve added or omitted any rows to/from the pattern):
Crop Length: 17.13″, 17.13″, 17.13″, 17.13″, 18.25″, 18.25″, 18.25″
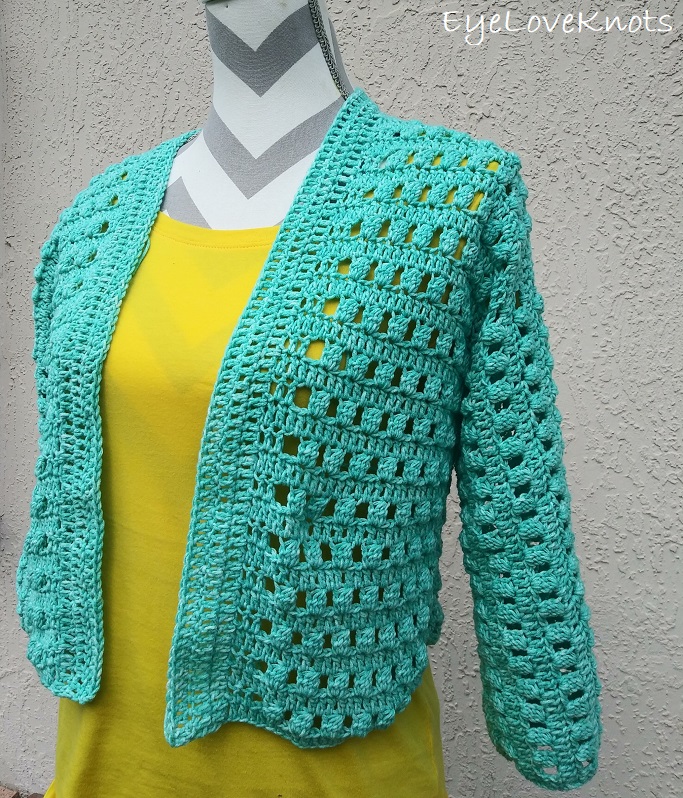
Front Panels – Make 2 (One Left & One Right):
Chain 22 (25, 31, 34, 37, 43, 46). DC into the 4th chain, and each across. [20 (23, 29, 32, 35, 41, 44) DC]
R2: Chain 2, turn. DC into the 2nd and 3rd DCs, chain 2, skip next two DCs, (cluster into the next DC, chain 2, skip next two DCs) 4x (5x, 7x, 8x, 9x, 11x, 12x), DC into the last 3 DC. [5 (6, 8, 9, 10, 12, 13) clusters]
R3: Chain 2, turn. DC into the 2nd DC, and each stitch across. [20 (23, 29, 32, 35, 41, 44) DC]
R4 – 20 (20, 18, 18, 18, 18, 16): Repeat Rows 2 + 3, ending on a cluster row.
CHECKPOINT:
Here are the width measurements you should have (unless you’ve added or omitted any stitches from the pattern):
Back Panel Width (Not Including Arms): 15.38″, 16.88″, 19″, 21.25″, 22.63″, 24.88″, 27.13″
Begin Arms:
LEFT SIDE R21 (21, 19, 19, 19, 19, 17): Chain 55 (58, 58, 61, 61, 61, 61), DC into the back loop of the 4th chain and into each chain across, then continue to DC across. [76 (82, 88, 94, 97, 103, 106) DC]
RIGHT SIDE, R21 (21, 19, 19, 19, 19, 17): Chain 2, and turn. DC into the 2nd DC, and all the way across, then FDC 53 (56, 56, 59, 59, 59, 59). [76 (82, 88, 94, 97, 103, 106) DC]
R22 (22, 20, 20, 20, 20, 18): Chain 2, turn. DC into the 2nd and 3rd DCs, chain 2, skip next two DCs, (cluster into the next DC, chain 2, skip next two DCs) 5x (6x, 8x, 9x, 10x, 12x, 13x), DC into the next 3 DC, chain next 2, skip next two DCs, (cluster into the next DC, chain 2, skip next two DCs) 21x (23x, 25x, 27x, 28x, 30x, 31x), DC into the last 3 DC. [26 (29, 33, 36, 38, 42, 44) clusters, 9 DC]
R23 (23, 21, 21, 21, 21, 19): Chain 2, and turn. DC into the 2nd DC, and into each DC across. [76 (82, 88, 94, 97, 103, 106) DC]
R24 (24, 22, 22, 22, 22, 20) – 31 (31, 31, 31, 33, 33, 33): Repeat Rows 22 + 23.
Fasten Off. Weave in Ends.
Assembly:
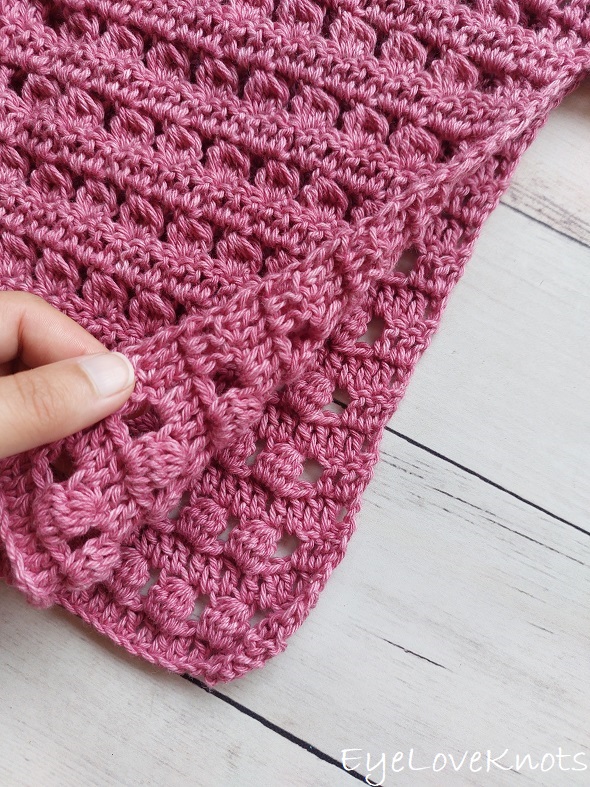
Lay back piece down with the wrong side face down, then lay the front pieces on top of it with the wrong sides facing up (so the right sides are both facing each other).
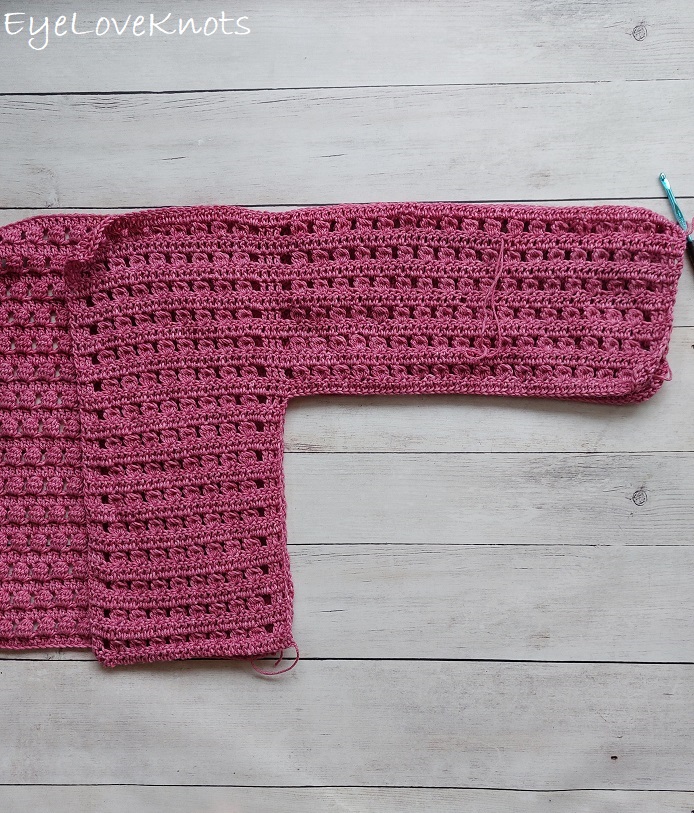
Attach yarn at the far right side through both layers. Chain 1, then slip stitch across the first shoulder. Fasten off. Turn piece, and reattach yarn at the far right side through both layers. Chain 1, then slip stitch across the second shoulder. Fasten off.
Attach yarn at corner of underarm through both layers. Chain 1, then slip stitch across underarm, and side side. Repeat for other side.
Collar:
From the right side, attach yarn to the bottom right side of the right panel. Chain 2, and evenly DC around to the same point on the other side.
R2 – 3: Chain 2, and turn. DC into the 2nd DC, and each DC back around.
You can continue to work more rows on the collar if more coverage is desired.
Fasten off, and weave in ends.
EMMA’S YARN COMFY COTTON DK VERSION
What Materials Do I Need to Crochet a Lacy Cardigan in Emma’s Yarn?
- Lightweight #3 Yarn – I used Emma’s Comfy Cotton DK in the Very Berry colorway (50% Superwash Merino Wool/50% Cotton; 232 Yards/100 Grams)
- H8/5mm Crochet Hook
- Tapestry Needle
- Soft Tape Measure (essential for gauge)
Material Notes:
Yarn Alternatives: Lion Brand’s Coboo, Berroco’s Vintage DK.
I made the size Large with 3/4 length sleeves. The rest is estimated based on this sample.
Yardage: The following chart is Size + Body Length = Total with Short Sleeves (Total with 3/4 Sleeves, Total with Long Sleeves):
- XS + Crop Length = 430 (670, 780)
- XS + Hip Length = 580 (815, 930)
- XS + Tunic Length = 670 (910, 1030)
- S + Crop Length = 560 (795, 895)
- S + Hip Length = 705 (800, 1040)
- S + Tunic Length = 825 (1060, 1160)
- M + Crop Length = 635 (915, 1035)
- M + Hip Length = 800 (1080, 1200)
- M + Tunic Length = 965 (1245, 1365)
- L + Crop Length = 715 (1000, 1140)
- L + Hip Length = 910 (1190, 1330)
- L + Tunic Length = 1100 (1385, 1525)
- XL + Crop Length = 905 (1190, 1350)
- XL + Hip Length = 1085 (1410, 1570)
- XL + Tunic Length = 1305 (1630, 1790)
- 2X + Crop Length = 920 (1275, 1435)
- 2X + Hip Length = 1160 (1515, 1675)
- 2X + Tunic Length = 1400 (1750, 1915)
- 3X + Crop Length = 1030 (1430, 1615)
- 3X + Hip Length = 1300 (1700, 1880)
- 3X + Tunic Length = 1510 (1910, 2095)
- 4X + Crop Length = 1120 (1550, 1705)
- 4X + Hip Length = 1410 (1840, 1995)
- 4X + Tunic Length = 1765 (2195, 2350)
- 5X + Crop Length = 1200 (1680, 1850)
- 5X + Hip Length = 1510 (1990, 2160)
- 5X + Tunic Length = 1820 (2300, 2470)
Measurements:
I am providing ALL of the measurements here as a handy reference, but I will also include the respective measurements throughout the pattern as check points.
Decimals to Fractions: 0.13″ = 1/8″, 0.25″ = 1/4″, 0.38″ = 3/8″, 0.5″ = 1/2″, 0.63″ = 5/8″, 0.75″ = 3/4″, 0.88″ = 7/8″
Sizes Included: XS, S, M, L, XL, 2X 3X, 4X, 5X
To Fit Bust Size: 28″, 32″, 36″, 40″, 44″, 48″, 52″, 56″, 60″
Finished Bust Size (-6″ Smaller/Negative Ease): 22″, 26″, 30″, 34″, 38″, 42″, 46″, 50″, 54″
Back Panel Width (Not Including Arms): 11.13″, 13.38″, 14.88″, 17.25″, 19.5″, 21″, 23.25″, 25.5″, 27.13″
CROP Length, Height of the Body (Not Including Arms): 10.13″, 11.25″, 10.13″, 10.13″, 10.13″, 10.13″, 9″, 9″, 7.88″
HIP Length, Height of the Body (Not Including Arms): 16.88″, 16.88″, 15.75″, 15.75″, 15.75″, 15.75″, 14.63″, 14.63″, 13.5″
TUNIC Length, Height of the Body (Not Including Arms): 21.38″, 21.38″, 21.38″, 21.38″, 21.38″, 21.38″, 19.13″, 21.38″, 19.13″
Armhole Depth: 6.13″, 6.13″, 7.25″, 7.25″, 8.38″, 8.38″, 9.5″, 9.5″, 10.63″
CROP Length, Total Length: 16.25″, 17.38″, 17.38″, 17.38″, 18.5″, 18.5″, 18.5″, 18.5″, 18.5″
HIP Length, Total Length: 23″, 23″, 23″, 23″, 24.13″, 24.13″, 24.13″, 24.13″, 24.13″
TUNIC Length, Total Length: 27.5″, 27.5″, 28.63″, 28.63″, 29.75″, 29.75″, 28.63″, 30.88″, 29.75″
Neck Opening Before Adding Collar: 5″
Front Panel Width (Not Including Arms): 5.13″, 6.5″, 7.38″, 8.13″, 9.63″, 10.38″, 11.13″, 12.63″, 13.38″
SHORT Sleeve Length: 4.38″, 4.38″, 4.38″, 4.38″, 4.38″, 5.13″, 5.13″, 5.13″, 5.13″
3/4 Sleeve Length: 13.38″, 14.13″, 14.13″, 14.13″, 14.13″, 14.88″, 14.88″, 15.63″, 15.63″
LONG Sleeve Length: 18″, 18″, 18″, 18.75″, 18.75″, 19.5″, 19.5″, 19.5″, 19.5″
Gauge (Essential):
20 DC = 5.13″ Wide by 10 Rows in Cluster Pattern (Beginning with a DC Row) = 5.5″ Tall
To work a gauge swatch, I recommend starting with a chain 31, and then working in pattern.
The width gauge is the most important to meet. The height can always be adjusted later by working more or less repeats. If you cannot meet gauge, even with trying to go up or down hook sizes, then use your gauge swatch to determine how many stitches you’ll need to work to meet my provided measurements. Make sure to also follow the stitch multiple found in the Pattern Notes section.
Abbreviations (US Terms):
- DC – Double Crochet (Photo Tutorial)
- FDC – Foundation Double Crochet
- To FDC: Chain 3 (counts as a stitch here). Yarn over, insert hook into the first chain, yarn over, pull through, yarn over, pull through first loop (to create foundation chain), (yarn over, pull through two loops on hook) 2x. First chain and DC created. Looking at the stitch in your hand, you should see the top of the DC to the right, and parallel on the left side, it should look like the opposite side of the beginning foundation chain. You will be working in these stitches on the left. To create the next stitch and each stitch after, yarn over, insert hook under both loops of the foundation chain (left side) yarn over, pull through, yarn over, pull through first loop, (yarn over, pull through 2) 2x.
- How to Cluster: work the following all into one stitch: Yarn over, insert hook into the stitch, yarn over, pull through (3 loops on hook), [yarn over, pull through two loops on hook, yarn over, insert hook into the same stitch, yarn over, pull through] (4 loops on hook), repeat […] (5 loops on hook), repeat […] (6 loops on hook), yarn over, pull through all 6 loops on the hook.
Pattern Notes:
The foundation chain multiple is 3 + 4 -> this means a number divisible by 3, and then add 4 to account for the turning chain. This is important if you would like to change the width of any of your pieces. To adjust from the chains I provided, simply add or subtract 3, but overall, the number you end up minus 4 needs to be divisible by 3 to work for the stitch pattern.
Beginning chain 2 counts as a double crochet.
When working into the chain space that’s before a cluster stitch, I recommend working one double crochet into the space as normal, and then one double crochet into the second chain – it’s very easy to spot. When working into a chain space that is before a 3-double crochet section, work both double crochets into the chain space.
Through 11/23/22 at 11:59pm EST, you can grab a free copy of the PDF for the Lightweight Lucille Cardigan on Ravelry using code FREECROCHET202221. I earn my income from the number of pageviews my blog sees, so please do not share the code, but instead share the link to this post so others can find it. Thank you!
If you’re viewing this after 11/23/22, you can still get a copy of the PDF on sale 50% off on Ravelry or on Etsy using code NEWCROCHET202223 until 11/27/22 at 11:59pm EST.
Back Panel:
Chain 46 (55, 61, 70, 79, 85, 94, 103, 109), DC into the 4th chain, and across. [44 (53, 59, 68, 77, 83, 92, 101, 107) DC]
R2: Chain 2, turn. DC into the 2nd and 3rd DCs, chain 2, skip next two DCs, (cluster into the next DC, chain 2, skip next two DCs) 12x (15x, 17x, 20x, 23x, 25x, 28x, 31x, 33x), DC into the last 3 DC. [6 DC + 12 (15, 17, 20, 23, 25, 28, 31, 33) clusters]
R3: Chain 2, turn. DC into the 2nd DC, and each stitch across. [44 (53, 58, 68, 77, 83, 92, 101, 107) DC]
CROP Length, R4 – 18 (20, 18, 18, 18, 18, 16, 16, 14): Repeat Rows 2 + 3, ending on a cluster row.
HIP Length, R4 – 30 (30, 28, 28, 28, 28, 26, 26, 24): Repeat Rows 2 + 3, ending on a cluster row.
TUNIC Length, R4 – 38 (38, 38, 38, 38, 38, 34, 38, 34): Repeat Rows 2 + 3, ending on a cluster row.
CHECKPOINT:
I recommend holding this back panel up to yourself (best if around the back, but the front works too) from your underarm down. Check to see if you like this length. If not, you can always add more repeat rows, just make sure to end on a cluster row. You can check basic fit widthwise here too. I pinned the panel to my shirt so I could get a better idea when looking in the mirror.
Here are the height measurements you should have (unless you’ve added or omitted any rows to/from the pattern):
CROP Length, Height of the Body (Not Including Arms): 10.13″, 11.25″, 10.13″, 10.13″, 10.13″, 10.13″, 9″, 9″, 7.88″
HIP Length, Height of the Body (Not Including Arms): 16.88″, 16.88″, 15.75″, 15.75″, 15.75″, 15.75″, 14.63″, 14.63″, 13.5″
TUNIC Length, Height of the Body (Not Including Arms): 21.38″, 21.38″, 21.38″, 21.38″, 21.38″, 21.38″, 19.13″, 21.38″, 19.13″
And here are the width measurements you should have (unless you’ve added or omitted any stitches from the pattern):
Back Panel Width (Not Including Arms): 11.13″, 13.38″, 14.88″, 17.25″, 19.5″, 21″, 23.25″, 25.5″, 27.13″
If you want to see how the overall body of the cardigan will be, you can set this back panel aside, work the bodies of the two front panels, then lay the back panel down with right side facing up, and each of the front panels down with the right side facing down lining up the far sides and slip stitch join the layers together on the sides (slip stitch because it’s temporary). Hold this up in the same manner. There will be a 5″ gap in the front as the collar is still missing. When you’re done checking, remove the slip stitches, and then continue on to add the arms to each panel.
Begin Arms, Short Sleeves:
Chain 19 (22, 22, 22, 22, 22, 22, 22, 22), DC into the back loop of the 4th chain, and each stitch all the way across body to the end, then FDC 17 (20, 20, 20, 20, 20, 20, 20, 20). [78 (93, 99, 108, 117, 123, 132, 141, 147) DC]
R2: Chain 2, turn. DC into the 2nd and 3rd DCs, chain 2, skip next two DCs, (cluster into the next DC, chain 2, skip next two DCs) 4x (5x, 5x, 5x, 5x, 5x, 5x, 5x, 5x), DC into the next 3 DC, chain next 2, skip next two DCs, (cluster into the next DC, chain 2, skip next two DCs) 12x (15x, 17x, 20x, 23x, 25x, 28x, 31x, 33x), DC into the next 3 DC, chain next 2, skip next two DCs, (cluster into the next DC, chain 2, skip next two DCs) 4x (5x, 5x, 5x, 5x, 5x, 5x, 5x, 5x), DC into the last 3 DC. [12 DC + 20 (25, 27, 30, 33, 35, 38, 41, 43) Clusters]
R3: Chain 2, turn. DC into the 2nd DC, and each stitch across. [78 (93, 99, 108, 117, 123, 132, 141, 147) DC]
R4 – 11 (11, 13, 13, 15, 15, 17, 17, 19): Repeat Rows 2 + 3, ending on a DC row.
Fasten off. Proceed to next checkpoint.
Begin Arms, 3/4 Length Sleeves:
Chain 55 (58, 58, 58, 58, 61, 61, 64, 64), DC into the back loop of the 4th chain, and each stitch all the way across body to the end, then FDC 53 (56, 56, 56, 56, 59, 59, 62, 62). [150 (165, 171, 180, 189, 201, 210, 225, 231) DC]
R2: Chain 2, turn. DC into the 2nd and 3rd DCs, chain 2, skip next two DCs, (cluster into the next DC, chain 2, skip next two DCs) 16x (17x, 17x, 17x, 17x, 18x, 18x, 19x, 19x), DC into the next 3 DC, chain next 2, skip next two DCs, (cluster into the next DC, chain 2, skip next two DCs) 12x (15x, 17x, 20x, 23x, 25x, 28x, 31x, 33x), DC into the next 3 DC, chain next 2, skip next two DCs, (cluster into the next DC, chain 2, skip next two DCs) 16x (17x, 17x, 17x, 17x, 18x, 18x, 19x, 19x), DC into the last 3 DC. [12 DC + 44 (49, 51, 54, 57, 61, 64, 69, 71) Clusters]
R3: Chain 2, turn. DC into the 2nd DC, and each stitch across. [150 (165, 171, 180, 189, 201, 210, 225, 231) DC]
R4 – 11 (11, 13, 13, 15, 15, 17, 17, 19): Repeat Rows 2 + 3, ending on a DC row.
Fasten off. Proceed to next checkpoint.
Begin Arms, Long Sleeves:
Chain 73 (73, 73, 76, 76, 79, 79, 79, 79), DC into the back loop of the 4th chain, and each stitch all the way across body to the end, then FDC 71 (71, 71, 74, 74, 77, 77, 77, 77). [186 (195, 201, 216, 225, 237, 246, 255, 261) DC]
R2: Chain 2, turn. DC into the 2nd and 3rd DCs, chain 2, skip next two DCs, (cluster into the next DC, chain 2, skip next two DCs) 22x (22x, 22x, 23x, 23x, 24x, 24x, 24x, 24x), DC into the next 3 DC, chain next 2, skip next two DCs, (cluster into the next DC, chain 2, skip next two DCs) 12x (15x, 17x, 20x, 23x, 25x, 28x, 31x, 33x), DC into the next 3 DC, chain next 2, skip next two DCs, (cluster into the next DC, chain 2, skip next two DCs) 22x (22x, 22x, 23x, 23x, 24x, 24x, 24x, 24x), DC into the last 3 DC. [12 DC + 56 (59, 61, 66, 69, 73, 76, 79, 81) Clusters]
R3: Chain 2, turn. DC into the 2nd DC, and each stitch across. [186 (195, 201, 216, 225, 237, 246, 255, 261) DC]
R4 – 11 (11, 13, 13, 15, 15, 17, 17, 19): Repeat Rows 2 + 3, ending on a DC row.
Fasten off. Proceed to next checkpoint.
CHECKPOINT:
I recommend holding this back panel up to yourself (best if around the back, but the front works too) from the top of your shoulder down matching up the newly added sleeves with your underarm (where it will be placed when worn). Check to see if you like this length for your armhole. If not, you can always add more repeat rows, just make sure to end on a double crochet row.
Here are the height measurements you should have (unless you’ve added or omitted any rows to/from the pattern):
Armhole Depth: 6.13″, 6.13″, 7.25″, 7.25″, 8.38″, 8.38″, 9.5″, 9.5″, 10.63″
Here are roughly the total height measurements you should have (unless you’ve added or omitted any rows to/from the pattern):
CROP Length, Total Length: 16.25″, 17.38″, 17.38″, 17.38″, 18.5″, 18.5″, 18.5″, 18.5″, 18.5″
HIP Length, Total Length: 23″, 23″, 23″, 23″, 24.13″, 24.13″, 24.13″, 24.13″, 24.13″
TUNIC Length, Total Length: 27.5″, 27.5″, 28.63″, 28.63″, 29.75″, 29.75″, 28.63″, 30.88″, 29.75″
Front Panels – Make 2 (One Left & One Right):
Chain 22 (28, 31, 34, 40, 43, 46, 52, 55). DC into the 4th chain, and each across. [20 (26, 29, 32, 38, 41, 44, 50, 53) DC]
R2: Chain 2, turn. DC into the 2nd and 3rd DCs, chain 2, skip next two DCs, (cluster into the next DC, chain 2, skip next two DCs) 4x (6x, 7x, 8x, 10x, 11x, 12x, 14x, 15x), DC into the last 3 DC. [6 DC + 4 (6, 7, 8, 10, 11, 12, 14, 15) Clusters]
R3: Chain 2, turn. DC into the 2nd DC, and each stitch across. [20 (26, 29, 32, 38, 41, 44, 50, 53) DC]
CROP Length, R4 – 18 (20, 18, 18, 18, 18, 16, 16, 14): Repeat Rows 2 + 3, ending on a cluster row.
HIP Length, R4 – 30 (30, 28, 28, 28, 28, 26, 26, 24): Repeat Rows 2 + 3, ending on a cluster row.
TUNIC Length, R4 – 38 (38, 38, 38, 38, 38, 34, 38, 34): Repeat Rows 2 + 3, ending on a cluster row.
CHECKPOINT:
Here are the height measurements you should have (unless you’ve added or omitted any rows to/from the pattern):
CROP Length, Height of the Body (Not Including Arms): 10.13″, 11.25″, 10.13″, 10.13″, 10.13″, 10.13″, 9″, 9″, 7.88″
HIP Length, Height of the Body (Not Including Arms): 16.88″, 16.88″, 15.75″, 15.75″, 15.75″, 15.75″, 14.63″, 14.63″, 13.5″
TUNIC Length, Height of the Body (Not Including Arms): 21.38″, 21.38″, 21.38″, 21.38″, 21.38″, 21.38″, 19.13″, 21.38″, 19.13″
And here are the width measurements you should have (unless you’ve added or omitted any stitches from the pattern):
Front Panel Width (Not Including Arms): 5.13″, 6.5″, 7.38″, 8.13″, 9.63″, 10.38″, 11.13″, 12.63″, 13.38″
Begin Left Arm, Short Sleeves:
Chain 19 (22, 22, 22, 22, 22, 22, 22, 22), DC into the back loop of the 4th chain, and each stitch all the way across body to the end. [37 (46, 49, 52, 58, 61, 64, 70, 73) DC]
R2: Chain 2, turn. DC into the 2nd and 3rd DCs, chain 2, skip next two DCs, (cluster into the next DC, chain 2, skip next two DCs) 4x (5x, 5x, 5x, 5x, 5x, 5x, 5x, 5x), DC into the next 3 DC, chain next 2, skip next two DCs, (cluster into the next DC, chain 2, skip next two DCs) 4x (6x, 7x, 8x, 10x, 11x, 12x, 14x, 15x), DC into the last 3 DC. [9 DC + 8 (11, 12, 13, 15, 16, 17, 19, 20) Clusters]
R3: Chain 2, turn. DC into the 2nd DC, and each stitch across. [37 (46, 49, 52, 58, 61, 64, 70, 73) DC]
R4 – 11 (11, 13, 13, 15, 15, 17, 17, 19): Repeat Rows 2 + 3, ending on a DC row.
Fasten off. Proceed to next checkpoint.
Begin Left Arm, 3/4 Length Sleeves:
Chain 55 (58, 58, 58, 58, 61, 61, 64, 64), DC into the back loop of the 4th chain, and each stitch all the way across body to the end. [73 (82, 85, 88, 94, 100, 103, 112, 115) DC]
R2: Chain 2, turn. DC into the 2nd and 3rd DCs, chain 2, skip next two DCs, (cluster into the next DC, chain 2, skip next two DCs) 16x (17x, 17x, 17x, 17x, 18x, 18x, 19x, 19x), DC into the next 3 DC, chain next 2, skip next two DCs, (cluster into the next DC, chain 2, skip next two DCs) 4x (6x, 7x, 8x, 10x, 11x, 12x, 14x, 15x), DC into the last 3 DC. [9 DC + 20 (23, 24, 25, 27, 29, 30, 33, 34) Clusters]
R3: Chain 2, turn. DC into the 2nd DC, and each stitch across. [73 (82, 85, 88, 94, 100, 103, 112, 115) DC]
R4 – 11 (11, 13, 13, 15, 15, 17, 17, 19): Repeat Rows 2 + 3, ending on a DC row.
Fasten off. Proceed to next checkpoint.
Begin Left Arm, Long Sleeves:
Chain 73 (73, 73, 76, 76, 79, 79, 79, 79), DC into the back loop of the 4th chain, and each stitch all the way across body to the end. [91 (97, 100, 106, 112, 118, 121, 127, 130) DC]
R2: Chain 2, turn. DC into the 2nd and 3rd DCs, chain 2, skip next two DCs, (cluster into the next DC, chain 2, skip next two DCs) 22x (22x, 22x, 23x, 23x, 24x, 24x, 24x, 24x), DC into the next 3 DC, chain next 2, skip next two DCs, (cluster into the next DC, chain 2, skip next two DCs) 4x (6x, 7x, 8x, 10x, 11x, 12x, 14x, 15x), DC into the last 3 DC. [9 DC + 26 (28, 29, 31, 33, 35, 36, 38, 39) Clusters]
R3: Chain 2, turn. DC into the 2nd DC, and each stitch across. [91 (97, 100, 106, 112, 118, 121, 127, 130) DC]
R4 – 11 (11, 13, 13, 15, 15, 17, 17, 19): Repeat Rows 2 + 3, ending on a DC row.
Fasten off. Proceed to next checkpoint.
CHECKPOINT:
I recommend holding this front panel up to yourself from the top of your shoulder down matching up the newly added sleeves with your underarm (where it will be placed when worn). Check to see if you like this length for your armhole. If not, you can always add more repeat rows, just make sure to end on a double crochet row.
Here are the height measurements you should have (unless you’ve added or omitted any rows to/from the pattern):
Armhole Depth: 6.13″, 6.13″, 7.25″, 7.25″, 8.38″, 8.38″, 9.5″, 9.5″, 10.63″
Here are roughly the total height measurements you should have (unless you’ve added or omitted any rows to/from the pattern):
CROP Length, Total Length: 16.25″, 17.38″, 17.38″, 17.38″, 18.5″, 18.5″, 18.5″, 18.5″, 18.5″
HIP Length, Total Length: 23″, 23″, 23″, 23″, 24.13″, 24.13″, 24.13″, 24.13″, 24.13″
TUNIC Length, Total Length: 27.5″, 27.5″, 28.63″, 28.63″, 29.75″, 29.75″, 28.63″, 30.88″, 29.75″
Begin Left Arm, Short Sleeves:
Chain 2, turn. DC into the 2nd stitch, and each stitch all the way across body to the end, then FDC 17 (20, 20, 20, 20, 20, 20, 20, 20). [37 (46, 49, 52, 58, 61, 64, 70, 73) DC]
R2: Chain 2, turn. DC into the 2nd and 3rd DCs, chain 2, skip next two DCs, (cluster into the next DC, chain 2, skip next two DCs) 4x (5x, 5x, 5x, 5x, 5x, 5x, 5x, 5x), DC into the next 3 DC, chain next 2, skip next two DCs, (cluster into the next DC, chain 2, skip next two DCs) 4x (6x, 7x, 8x, 10x, 11x, 12x, 14x, 15x), DC into each of the last 3 DC. [12 DC + 8 (11, 12, 13, 15, 16, 17, 19, 20) Clusters]
R3: Chain 2, turn. DC into the 2nd DC, and each stitch across. [37 (46, 49, 52, 58, 61, 64, 70, 73) DC]
R4 – 11 (11, 13, 13, 15, 15, 17, 17, 19): Repeat Rows 2 + 3, ending on a DC row.
Do not fasten off – you can begin slip stitch joining with this same tail end.
Begin Right Arm, 3/4 Length Sleeves:
Chain 2, turn. DC into the 2nd stitch, and each stitch all the way across body to the end, then FDC 53 (56, 56, 56, 56, 59, 59, 62, 62). [73 (82, 85, 88, 94, 100, 103, 112, 115) DC]
R2: Chain 2, turn. DC into the 2nd and 3rd DCs, chain 2, skip next two DCs, (cluster into the next DC, chain 2, skip next two DCs) 16x (17x, 17x, 17x, 17x, 18x, 18x, 19x, 19x), DC into the next 3 DC, chain next 2, skip next two DCs, (cluster into the next DC, chain 2, skip next two DCs) 4x (6x, 7x, 8x, 10x, 11x, 12x, 14x, 15x), DC into each of the last 3 DC. [12 DC + 20 (23, 24, 25, 27, 29, 30, 33, 34) Clusters]
R3: Chain 2, turn. DC into the 2nd DC, and each stitch across. [73 (82, 85, 88, 94, 100, 103, 112, 115) DC]
R4 – 11 (11, 13, 13, 15, 15, 17, 17, 19): Repeat Rows 2 + 3, ending on a DC row.
Do not fasten off – you can begin slip stitch joining with this same tail end.
Begin Right Arm, Long Sleeves:
Chain 2, turn. DC into the 2nd stitch, and each stitch all the way across body to the end, then FDC 71 (71, 71, 74, 74, 77, 77, 77, 77). [91 (97, 100, 106, 112, 118, 121, 127, 130) DC]
R2: Chain 2, turn. DC into the 2nd and 3rd DCs, chain 2, skip next two DCs, (cluster into the next DC, chain 2, skip next two DCs) 22x (22x, 22x, 23x, 23x, 24x, 24x, 24x, 24x), DC into the next 3 DC, chain next 2, skip next two DCs, (cluster into the next DC, chain 2, skip next two DCs) 4x (6x, 7x, 8x, 10x, 11x, 12x, 14x, 15x), DC into each of the last 3 DC. [12 DC + 26 (28, 29, 31, 33, 35, 36, 38, 39) Clusters]
R3: Chain 2, turn. DC into the 2nd DC, and each stitch across. [91 (97, 100, 106, 112, 118, 121, 127, 130) DC]
R4 – 11 (11, 13, 13, 15, 15, 17, 17, 19): Repeat Rows 2 + 3, ending on a DC row.
Do not fasten off – you can begin slip stitch joining with this same tail end.
Assembly:

Lay back piece down with the wrong side face down, then lay the front pieces on top of it with the wrong sides facing up (so the right sides are both facing each other).

Attach yarn at the far right side through both layers. Chain 1, then slip stitch across the first shoulder. Fasten off. Turn piece, and reattach yarn at the far right side through both layers. Chain 1, then slip stitch across the second shoulder. Fasten off.
Attach yarn at corner of underarm through both layers. Chain 1, then slip stitch across underarm, and side side. Repeat for other side.
Collar:
From the right side, attach yarn to the bottom right side of the right panel. Chain 2, and evenly DC around to the same point on the other side.
R2 – 3: Chain 2, and turn. DC into the 2nd DC, and each DC back around.
You can continue to work more rows on the collar if more coverage is desired.
Fasten off, and weave in ends.
Please feel free to make and sell your own Lightweight Lucille Cardigan using this pattern, but please DO NOT claim this pattern as your own nor should you sell my pattern, and DO NOT re-publish my photos as your own. DO NOT copy and paste my pattern anywhere, link to it instead.
Join one of our awesome Facebook groups to share your creations, and see what others are up to!
– Yarn Crafts & Coffee Community
– DIY Home On Rockwood Lane
– Alexandra Lane Lifestyle
Linked Up To…
535th Inspire Me Tuesday – A Stroll Thru Life
Fabulous Party #306 – Lou Lou Girls
Turning Heads Linkup – Elegantly Dressed and Stylish
Confident Twosday Linkup – I do deClaire
Linky Ladies Party #178 – The Purple Poncho
Put Your Best Hook Forward Free Crochet Pattern Party #14 – Edyth Blayn
{Wow Me} Wednesday #441 – Ginger Snap Crafts
Hookin’ on Hump Day #208 – Moogly Blog
Your Whims Wednesday #446 – My Girlish Whims
The Wednesday Link Party 334 – The Stitchin’ Mommy
To Grandma’s House We Go 179 – Chas’ Crazy Creations
Waste Not Wednesday 192 – Faeries and Fauna
Talk of the Town #211 – My Repurposed Life
Tuesday Turn About #35 – My Wee Abode
Thursday Favorite Things #426 – An Artful Mom
Creatively Crafty Link Party #210 – Life Beyond the Kitchen
Traffic Jam Weekend #221 – My Bijou Life
Creative Compulsions Linky Party #46 – My Bijou Life
Scrappy Stitchers Link Party #60 – Stitches n Scraps
Style Six – The Queen in Between
Trendy Thursday LinkUP – Thirty Minus One
Pin Party #335 – The Pin Junkie
Best of the Month Link Party – Calypso in the Country
Home Matters Linky Party #269 – Modern on Monticello
Create, Bake, Grow and Gather Party #406 – Shabby Art Boutique
Snickerdoodle Create Bake Make Link Party 322 – EyeLoveKnots
Link Your Stuff – Annemarie’s Haakblog
Link Up – Lizzie in Lace
Craft Schooling Sunday – Creative Jewish Mom
Unlimited Monthly Link Party 9 – Grammy’s Grid
Creative Monday – Claire Justine
Handmade Monday #163 – Sum of their Stories
The Really Crafty Link Party #205 – Keeping it Real
Craftastic Monday Link Party Time – Sew Can Do
Happiness is Homemade Link Party #310 – Create with Cynthia
Ginx Woolly Linx Party February – Ginx Craft
Weekday Wear Linkup – Away from the Blue
One More Row Free Pattern Link Party #16 – Loops and Love Crochet
Craft Schooling Sunday – Creative Jewish Mom
Happiness is Homemade Link Party #317 – Create with Cynthia
Unlimited Monthly Link Party 11 – Grammy’s Grid
A Themed Linkup 14 for Spring Crafts and Decor – Grammy’s Grid
Handmade Monday #170 – Sum of their Stories
The Really Crafty Link Party #212 – Keeping it Real
Ginx Woolly Linx Party April – Ginx Craft
Craftastic Monday Link Party – Sew Can Do
Weekday Wear Linkup – Away from the Blue
Craft Schooling Sunday – Creative Jewish Mom
Happiness is Homemade Link Party – Decor Craft Design
You’re the Star Blog Hop – Decor Craft Design
Sundays on Silverado #120 – The House on Silverado
Share the Wealth Link Up #31 – Big Fat Menopausal Life
Linky Ladies Party #231 – The Purple Poncho
The Loop Scoop 51 – Moogly Blog
Weekday Wear Linkup – Away from the Blue
Spread the Kindness Link Up #303 – Shelbee on the Edge
Style with a Smile Link Up – Style Splash
Turning Heads Tuesday – Elegantly Dressed and Stylish
Confident Twosday Linkup – I do deClaire
Wow on Wednesday – Is This Mutton?
Style on the Daily – Straight A Style
Thursday Fashion Files – Doused in Pink
Chic and Stylish Link Up – Mummabstylish
Handmade Monday #304 – Sum of their Stories
The Really Crafty Link Party #341 – Keeping it Real
Craftastic Monday Link Party – Sew Can Do
You’re the Star Blog Hop – Decor Craft Design
Hello Monday – Pink Lady
664th Inspire Me Tuesday – A Stroll Thru Life
Fabulous Party 452 – Lou Lou Girls
Talent Sharing Tuesday – Scribbling Boomer
The Happy Now Blog Link- Up #349 – JENerally Informed
Link Party 479 – Oombawka Design Crochet
Team Creative Crafts Link Party #122 – Artsy-Fartsy Mama
Wonderful Wednesday – Oh My Heartsie Girl
Wednesday Link Party #324 – To Grandma’s House We Go
Thursday Favorite Things #568 – An Artful Mom
Creatively Crafty Link Party #356 – Try It – Like It – Create It
Encouraging Hearts and Home Blog Hop – My Slices of Life
Grace at Home No. 488 – Imparting Grace
Crafty Creators Link Party #45 – Life as a LEO Wife
Create, Bake, Grow & Gather Party #548 – Shabby Art Boutique
Funtastic Friday Link Party #413 – Simply Beautiful by Angela
A Morning Cup of Joe – The Cottage Market
Pink Saturday – How Sweet the Sound
One More Row – Free Crochet Link Party #49 – Loops and Love Crochet
The Sunday Showcase – Chez Mireille

Beautiful Design. Thank you very much!
So welcome, enjoy 🙂
Very cute
Thanks!
Absolutely adorable cropped cardigan!
Michelle
http://mybijoulifeonline.com
What a lovely design! I love the turqouise with the bright yellow! Perfect for lifting your spirits in this Wintery grey weather!
thanks for linking!
jess xx
http://www.elegantlydressedandstylish.com
Thank you! Yes, I am ready for Spring!
How pretty, love the color and stitches!! Thanks so much for linking up with me at my #UnlimitedMonthlyLinkParty 9 where I comment on and share on social media if share option is available, open February 1 to 26. My themed party 11 for Handcrafted Jewelry is open February 15 to 25 if you have any appropriate posts.
ooo, it’s really pretty! How small is the XS? I’m wondering if it would be ok for a little girl, 10 or 11 ish? What do you think?
I was just checking the measurements provided by the Craft Yarn Council (https://www.craftyarncouncil.com/standards/child-youth-sizes; https://www.craftyarncouncil.com/standards/woman-size). The body of the Extra Small should fit that age range perfectly (with 2″ of positive ease) and the armhole depth, but the sleeves will be a little longer than 3/4 length, and the overall finished length will be a little longer than cropped.
If you want to modified to fit just like this one is designed to, shorten the panel before the arms by about 3″ (girls cropped length in 14″). And adjust the sleeves so the arms of the “T” measure 28 7/8″ [this is equal to 6.75″ 3/4 sleeve length times two plus the 15.31″ width of the body].
I will work on a pattern for girls sizes. Thanks for reaching out! Please let me know if you need help clarifying any of the adjustments up.
It’s a beautiful pattern, and I especially love the color. Thank you for sharing at The Really crafty Link Party. Pinned.
So cute and I love the color! Thank you for sharing this on Traffic Jam Weekend! It has been chosen as a fave feature for this week’s party that went live on Thursday at 5:00 pm CST.
Thank you so much for the support and appreciation!
Very pretty! Love the color and design. Looks fun to wear.
Oh yes! I think I am most comfortable in 3/4 sleeves, so I am loving it!
Such a lovely cardigan and you wear it so well! I really like that colour on you, so nice for spring! 🙂
Thanks so much for joining the #WeekdayWearLinkup! A new link up is live on my blog now, I’d love you to join again.
Hope that your week is off to a great start 🙂
Thank you so much, Mica! I am definitely Spring ready.
What a pretty top. I love to see your crochet garments.
I’ve started this but hit a problem.
In the Front Panels section, I’ve chained 31 and then completed 8 clusters.
The next row is DCs but it says I should have 74 of them, How do i get from 8 clusters to 74 DCs?
By my reckoning, at three Dcs a cluster with 2DCs at the start and 3 DCs at the end of the row, there should be 29DCs
Please help – its driving me mad and stopping me making any more progress with your lovely pattern
You are so right! I am not sure what happened in my math to give such weirdly large stitch counts for that part! The instruction is correct, but the stitch count is off. Just make sure to keep a consistent pattern of three double crochets on the outsides, and then the pattern alternatives double crocheting across, and working clusters. When you get to the arms, there will be extra double crochets (as it instructs). I will sit down and revisit the stitch counts either later tonight or tomorrow.
Visiting again to say thanks so much for linking up with me at #AThemedLinkup 14 for Spring Crafts and Decor, open March 29 to April 10. All entries shared on social media if share buttons installed.
Visiting again to say thanks so much for linking up with me at my #UnlimitedMonthlyLinkParty 11, open April 1 to 26. All entries shared on social media if share buttons installed.
What a great little sweater pattern! So cute and I could see this in so many awesome colors. Thanks for the free pattern!
Amber Johnson
http://www.craftaboo.com
So welcome! Thank YOU for stopping by 🙂
Hey I love this pattern!! I just had a quick question..I’m making the small cardigan and I’m stuck on the instructions for row 22 for after when you do the clustering for 17x and then move on to dc into the next 3 dc’s — which dc’s are those going into? The ones that are along the top of the back panel or the dc’s that are attached to the other 53 dc chain made before?
Those DC go into the next stitch as instructed following the clusters. The 53 are a part of the final stitch count of Row 21, where we are adding in the arms. It should line up downward with the 3 DC pattern from previous rows.
Hello, Alexandra. I am working on the first sleeve. This is the first time I’ve ever tried doing foundation double crochets. If I’m understanding correctly, in row 19 for my medium cardigan, I double crochet all the way across my 58 chain stitches. Do I then turn and chain three and start foundation double crocheting across on top of my double crochet row? It doesn’t look right when I do this, and I’m not sure what I’m doing wrong.
Sorry for the confusion! My FDC instructions were copied and pasted as an in general how to work one, but looking back at that row, I see it doesn’t work that way, and will fix it in just a bit.
So you will work across the row as normal, then after working the last stitch, begin here in the FDC instructions “Looking at the stitch in your hand, you should see the top of the DC to the right, and parallel on the left side, it should look like the opposite side of the beginning foundation chain. You will be working in these stitches on the left. To create the next stitch and each stitch after, yo, insert hook under both loops of the foundation chain (left side) yo, pull through, yo, pull through first loop (this creates the foundation chain), (yo, pull through 2) 2x (this completes the DC).”
Alexandra, sorry, this just isn’t getting through to me. Thank you in advance.
So you will work across the row as normal (AS IN: dc 58 STITCHES AND ARRIVE AT THE PLACE ABOVE THE LAST PUFF STITCH BODY ROW?), then after working the last stitch, begin here in the FDC instructions “Looking at the stitch in your hand, you should see the top of the DC to the right, and parallel (WHAT???? PARALLEL ON THE LEFT? WHEN DID THAT HAPPEN?) on the left side, it should look like the opposite side of the beginning foundation chain. THE DC ROW YOU JUST DID SHOULD LOOK LIKE THE “the opposite side of the beginning foundation chain”? OR….THE PUFF STITCH BODY ROW YOU COMPLETED EARLIER SHOULD LOOK LIKE….WHAT SHOULD IT LOOK LIKE? You will be working in these stitches on the left. To create the next stitch and each stitch after, yo, insert hook under both loops of the foundation chain (left side) yo, pull through, yo, pull through first loop (this creates the foundation chain), (yo, pull through 2) 2x (this completes the DC).”
Yes, across the row as normal into each as you’ve done previously, and then when you get the end, you begin working a FDC, or Foundation Double Crochet, and the break down where you are questioning parallel to what and so on is explaining how to work a foundation double crochet. It may help you to look up a video tutorial on how to do that stitch pattern to better visual these instructions in the pattern.
I am gauge swatching now. I will be reworking this cardigan, and adding a video tutorial, but it will take some time.
Beautiful cardigan! I like that you made it in a shorter length with a close-to-the-body fit. It reminds me of a Bolero vest, and it looks great over jeans and a tee.
Thank you for sharing this post in the Talent-Sharing Tuesdays Link-Up 43.
Carol
http://www.scribblingboomer.com
Thanks, Carol! I did start it with a different fit, but I am so glad I redid it true to my style.
Nice pattern and it looks good on you!
Thank you!
What a wonderfully detailed lightweight cardigan pattern! Thank you for linking up at our weekly Link Party! You are being featured at our Wednesday
Party #480 this week. Here’s the direct link to the post in case you’d like to share your feature:
https://oombawkadesigncrochet.com/fabric-letters-lucille-cardigan-autumn-poncho-link-party-480/
Hope to see you again next week! Rhondda
Thanks so much, Rhondda! Will be by in a bit to visit 🙂