This is a free crochet pattern and video tutorial showing how to crochet a 12″ Wreath Form Cover worked in the mosaic crochet technique. Don’t let it scare you! It’s comprised of simple single crochet stitches, chains and easy double crochets.
Find the free crochet pattern instructions below, or purchase a printer-friendly, ad-free PDF on Ravelry by clicking here.
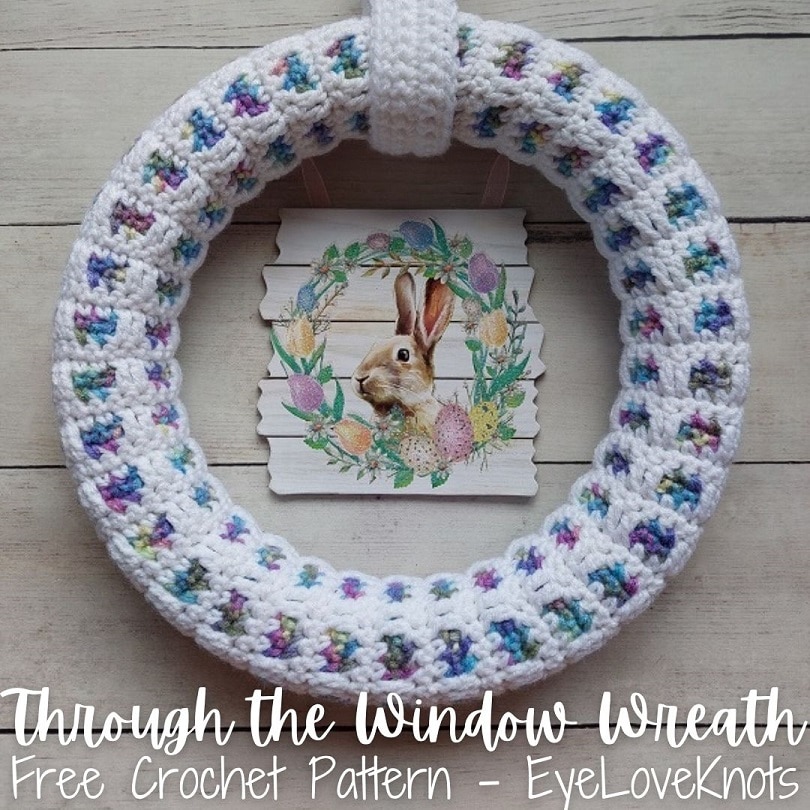
On my front door, you’ll always find a wreath. I just love coming home to a cheerful wreath – really brightens up my day. Looking at the wreath on my door right now, nearly three months after Christmas, and it’s still a natural pine wreath – haha!
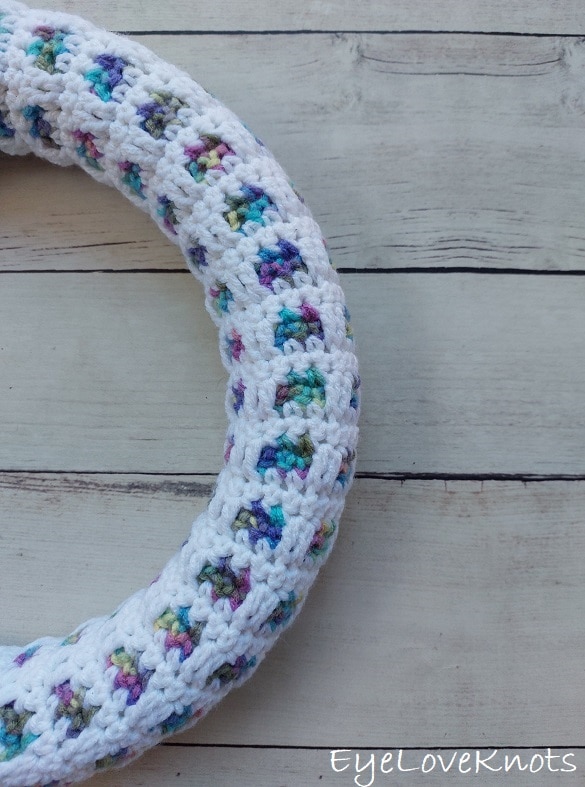
My uncle recently gifted me some yarn, and one of them was a skein of Red Heart Super Saver in the colorway, Monet. Thinking back to my Through the Window Soap Cozy, I thought it would be perfect for a Spring wreath worked in the mosaic crochet pattern I’ve labeled on my blog as “Through the Window“.
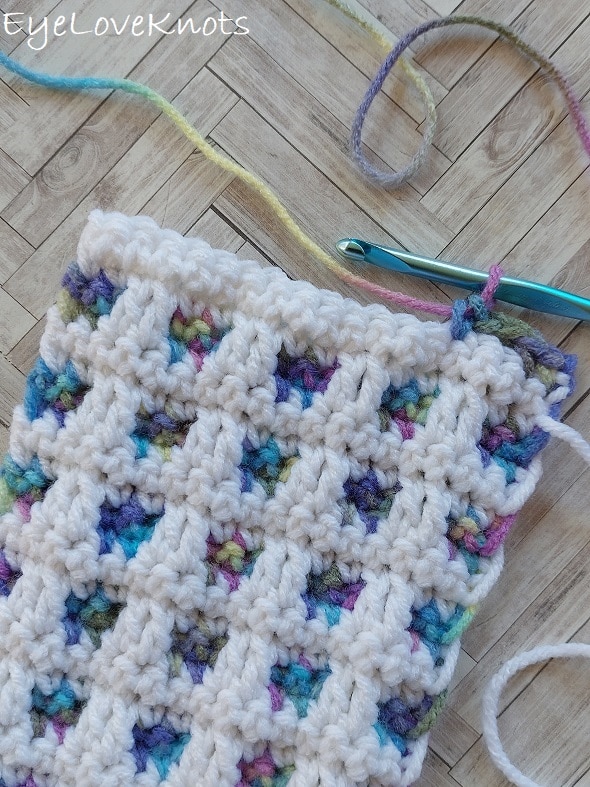
The idea of mosaic crochet may intimidate you, but please don’t let it. This wreath cover is comprised of single crochets and chains with some double crochets to create the overlap. I think a confident beginner could do this. Make sure to check the pattern notes for a photo that breaks the pattern down just a bit, and should ease your fear.
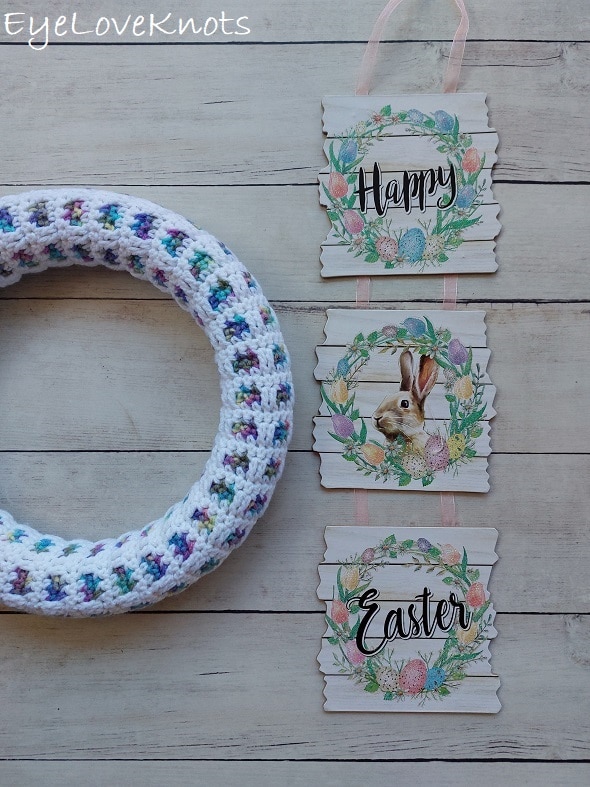
When I went to my local Dollar Tree looking for embellishments, I found the cutest little Easter sign with a bunny on it. It was the right colors, the right size and the right theme so I snagged it up for this wreath. While it still fits Spring, it leans a little more into Easter now, but that’s great because I didn’t have one for my door prior to this, and I love it!
AD-FREE, PRINTER FRIENDLY PDF:
If you would like a PDF version of this post, you may get one through either my EyeLoveKnots Etsy, LoveCrafts or Ravelry Shops for a small fee. This fee is to compensate for the views lost when you no longer need to return to the blog to for the information, as you will have your own copy. Plus! It helps fund supplies for new projects to share with you!
Shop EyeLoveKnots Etsy: 12″ Through the Window Wreath.
Shop EyeLoveKnots LoveCrafts: 12″ Through the Window Wreath.
Share your version of this project on Ravelry – 12″ Through the Window Wreath.
Save this to Your Favorites on (submitted 03/21/22): AllFreeCrochet, FaveCrafts, Cheap Thrifty Living, DIYideaCenter, Crochet Pattern Bonanza, AllFreeHolidayCrafts, Free Crochet Tutorials, The Free Crochet Family, Craftic (sub 03/24)
What Materials Will I Need to Crochet a Wreath?
- 185 Yards of Worsted Weight Yarn – I used Red Heart Super Saver in White (120 Yards) & Monet (65 Yards)
- H8/5mm Crochet Hook
- Tapestry Needle for Sewing and Weaving
- 12″ Styrofoam Form Wreath Form – I used a white Floracraft brand found at my local JoAnn’s
- Embellishment – I found my sign at my local Dollar Tree
- Sewing Pins, Optional
- Hot Glue Gun and Sticks, Optional
What Other Yarn Can I Use to Crochet a Wreath?
Bernat’s Super Value Yarn, and Caron’s One Pound are very similar to Red Heart Super Saver, and would be great alternatives. I like these yarns for wreaths because they’re more durable for home projects, and hold up well to wear and the elements.
Can I Use a Green Styrofoam Wreath Base?
Absolutely! The fabric for this wreath cover is solid so you won’t see the wreath form underneath therefore a white or green styrofoam wreath base will work well. I get my white wreath forms from JoAnn’s, and green wreath forms from Dollar Tree.
How Long Does it Take to Crochet a Wreath?
I had my wreath form cover ready in just about 3 hours, and a little longer to embellish.
Measurements:
This cover will fit a 12″ foam wreath form.
Before border, your fabric will measure 4.75″ wide by 30″ in length.
Gauge:
17 Rows In Pattern = 4.75″ Wide by 4.38″ (4 3/8″) Tall
Abbreviations (US Terms):
- SC – Single Crochet (Photo Tutorial)
- DC – Double Crochet (Photo Tutorial)
Pattern Notes:
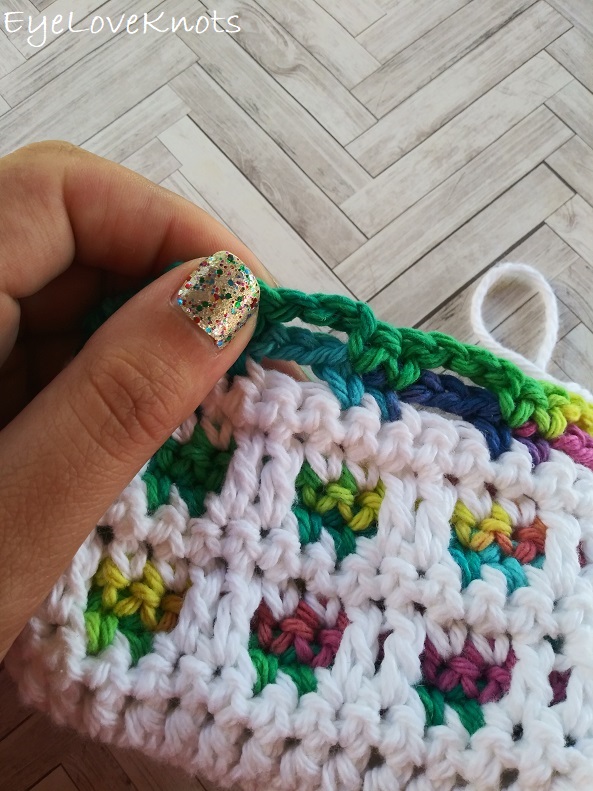
In the pattern, I will instruct to example, in Round 4 “DC into R2”. In the photo above, you can see how there is a skipped stitch in white, and two rows of chains above it. You will push those chains to the back, and work the double crochet just into that skipped stitch in white. The sample shown is my Through the Window Soap Cozy.
Chain multiple is 4 + 3. Stitch multiple is 4 + 2.
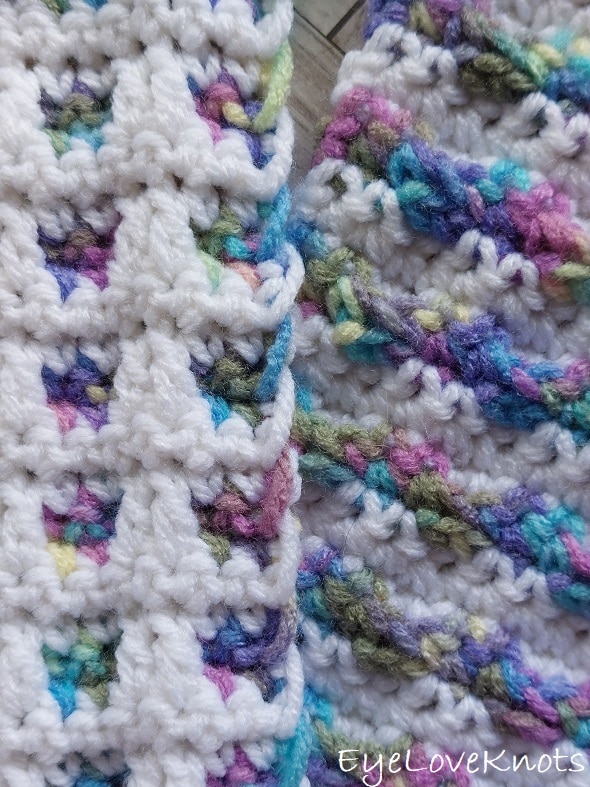
To change yarn colors, do so in the last yarn over of the previous row. If needed, see my How to Change Yarn Colors in Crochet tutorial. Drop old color to the back, and carry up on the side. When you add your border, it will cover up the carried yarn. The back can be seen on the right side of the photo.
12″ Through the Window Wreath Video Tutorial:
12″ Through the Window Wreath Written Pattern:
In White, chain 19. SC into the 2nd chain from the hook, and each across. Switch to Monet. (18 SC)
R2: In Monet, chain 1, and turn. SC into the 1st 2 SC, (chain 2, skip the next 2 SC, SC into each of the next 2 SC) 4x.
R3: Chain 1, turn. SC into the 1st 2 SC, (chain 2, skip the chain space, SC into each of the next 2 SC) 4x. Switch to White.
R4: In White, chain 1, and turn. SC into the 1st 2 SC, DC into each of the 2 open stitches from R2, (SC into each of the next 2 SC, DC into each of the next 2 stitches of R2) 4x.
R5: Chain 1, turn. SC into each stitch across. (18 SC)
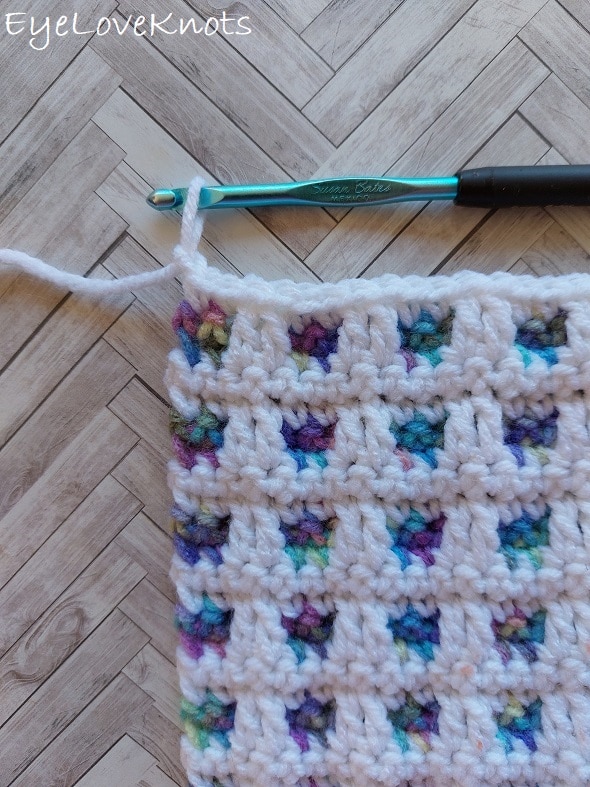
R6 – 132: Repeat Rows 2 – 5, ending on a Row 4.
Border: Chain 1. SC into the side of the last SC worked, SC evenly down the side (that’s 1 SC per row), 2 SC into the corner stitch, SC across the opposite side of the foundation chain, 2 SC into the corner stitch, SC evenly up the side (that’s 1 SC per row) working over the yarn floats to cover, 2 SC into the corner stitch, SC across the top, 1 SC into the same stitch as the first. Slip stitch join to the 1st SC.
Fasten off with a long tail (approximately 60″) for sewing. Pull up on last stitch to break.
Weave in all the ends except the long one last cut. Thread tapestry needle with long tail end, wrap the wreath form cover around the wreath with the right side facing out, and whipstitch closed lining up the stitches stretching to fit as needed.
Assembly Photos:
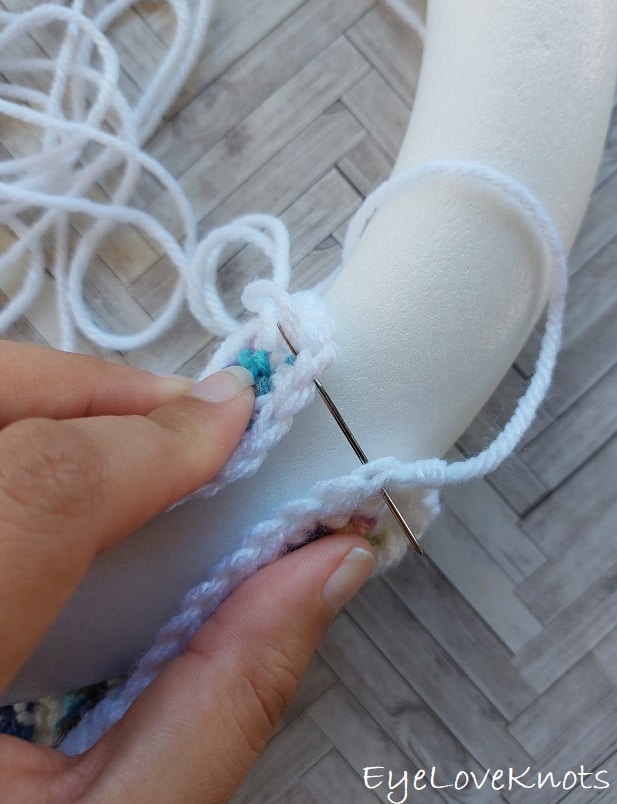
Wrap the piece around the form, line up the stitches, and sew the two layers together.
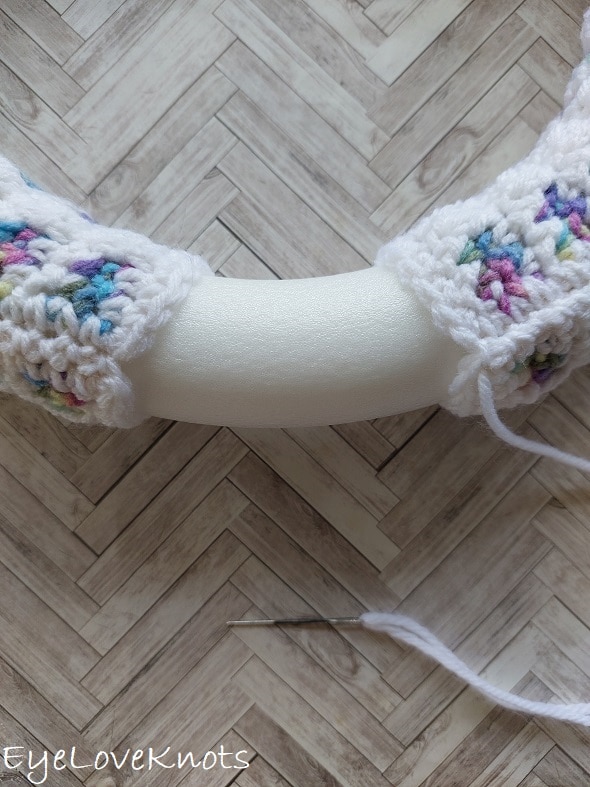
Once towards the end, it will look like it isn’t long enough to connect, but it will with a little stretching. Finish sewing the sides together, then sew the beginning foundation chain stitches to the stitches from the final row.
Weave in your tail, and your wreath form cover is complete!
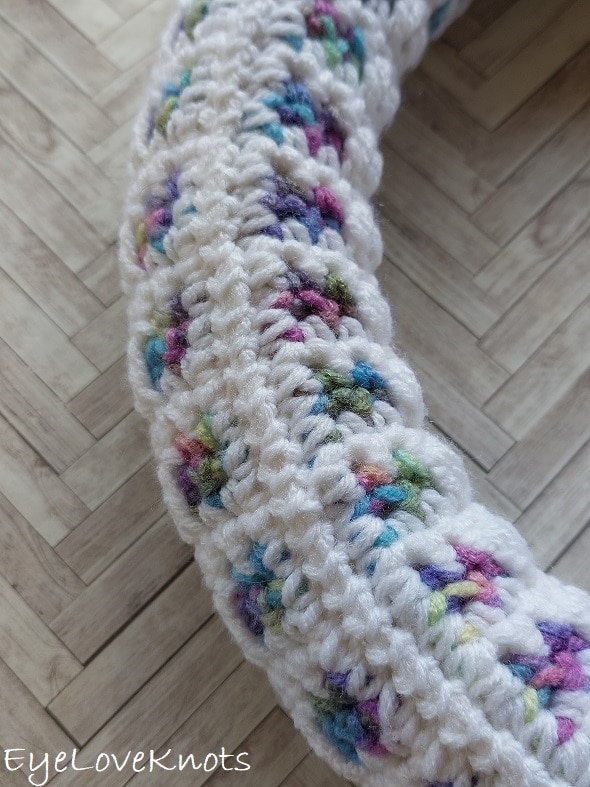
This is what the back of it looks like. You will see that the seam falls to the back. If it doesn’t, just twist your piece a little to make it so.
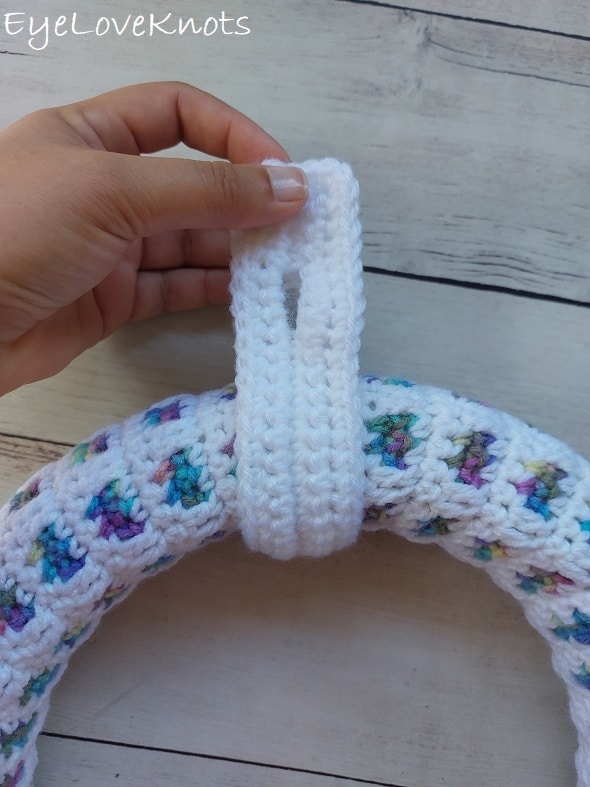
Optional Wreath Hanger:
Chain 43. SC into the 2nd chain, and each chain across. (42 SC)
R2: Chain 1, turn. SC into the 1st 4 SCs, chain 4, skip the next 4 SC, SC into the next 26 SC, chain 4, skip the next 4 SC, SC into the last 4 SC. (34 SC)
R3: Chain 1, turn. SC into the 1st 4 SCs, work 4 SC into the chain space, SC into the next 26 SC, work 4 SC into the next chain space, SC into the last 4 SC. (42 SC)
R4: Chain 1, turn. SC into the 1st SC, and each across. (42 SC)
Border: Chain 1, but don’t turn. SC into the side of Row 3 (this is the same stitch as the last), and into the side of Row 2, and then Row 1, work 3 SC into the next stitch – corner, working into the opposite side of the foundation chain, SC into the next 40 stitches, work 3 SC into the next stitch – corner, SC 3 into the next side, work 3 SC into the next stitch – corner, SC across into the next 40 stitches, work 3 SC into the next stitch – corner. Join to the first SC. (92 SC)
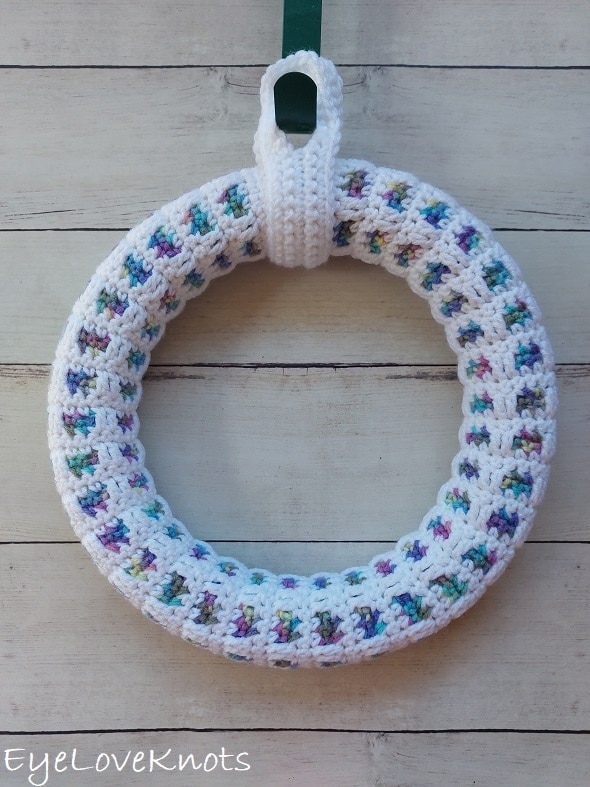
Adding Wreath Embellishment:
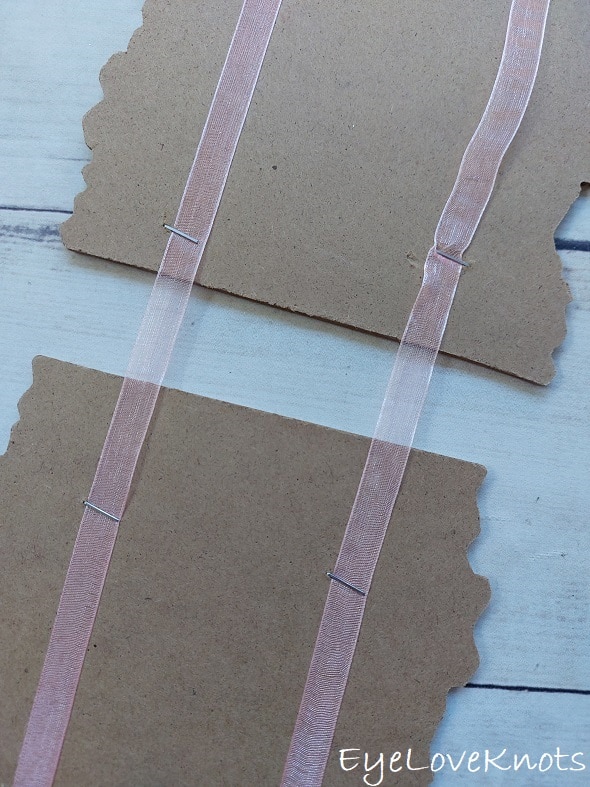
I decided that I wanted to use the pink ribbon that the sign was hanging from to hang from my sign on the wreath so the first thing to do was remove some of the staples. To do this, I used a thumb tack to lift the staple enough to be able to grab it with a staple remover. I did almost poke through the cardboard so just be careful.
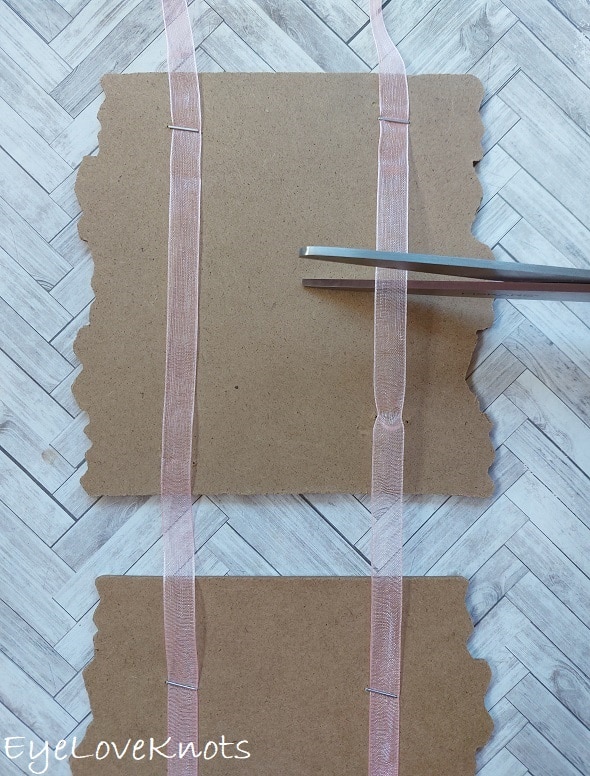
I hung the wreath up, held this sign up behind it so I could determine how much ribbon I would need to cut off for weaving, and then made the cut.
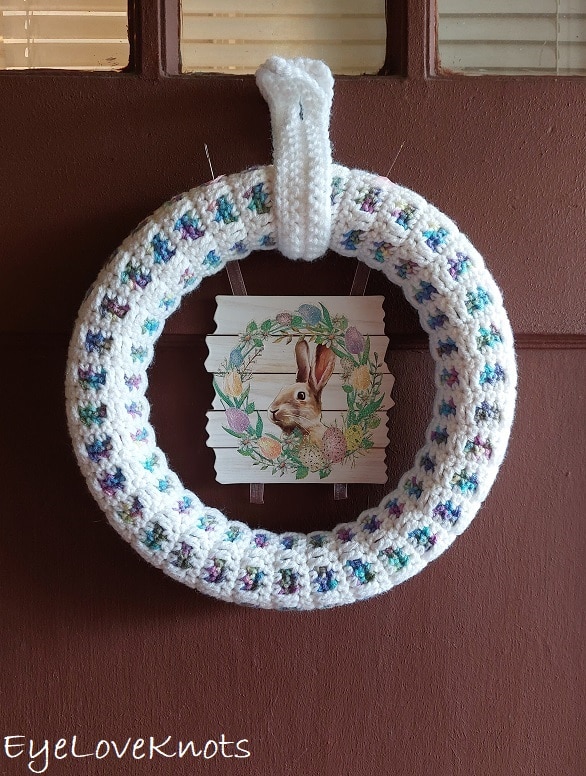
To place it, I hung the wreath again, and used pins to hold my ribbon in place.
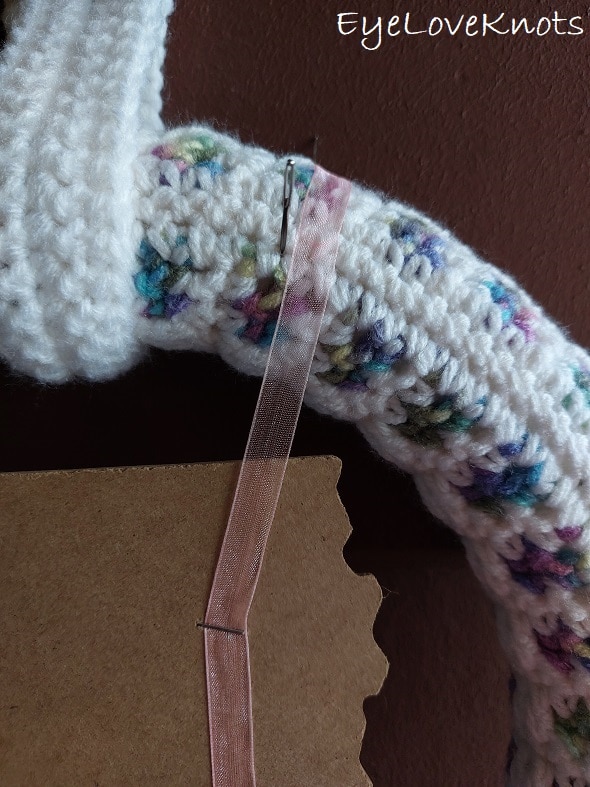
I flipped the wreath around, and placed a pin on both sides so that when I started weaving, I’d know to follow the outside of this pin.
I weaved in as normal just with the ribbon in place of yarn. I fastened off a little longer, placed a dab of hot glue where my ribbon came out last, and pressed the remaining ribbon nub onto it just to further secure it and counter the ribbon fraying.
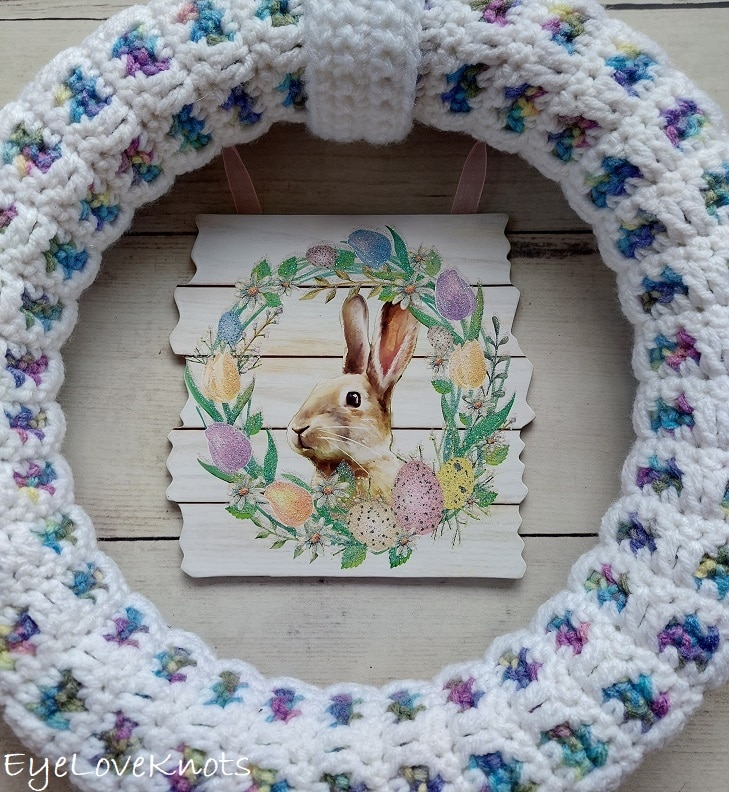
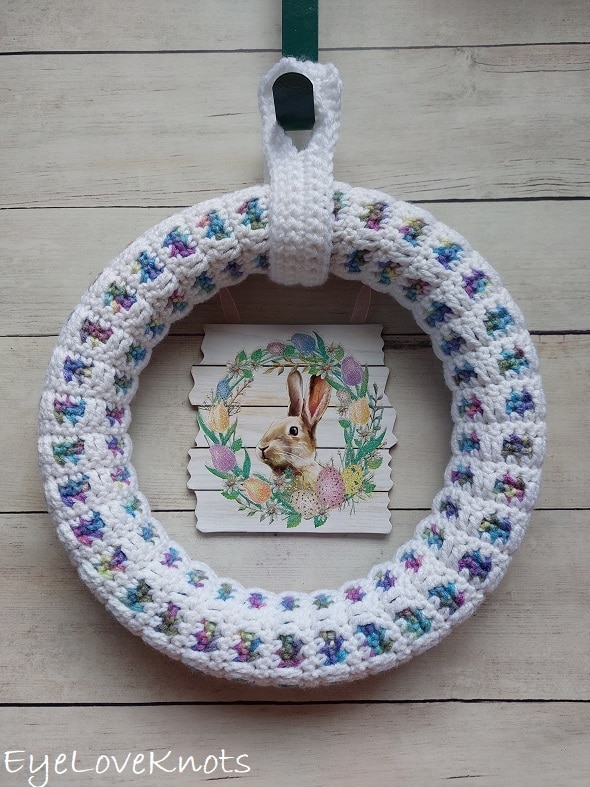
One thing I want to mention that I did not really pay attention to on this wreath is: where you start to weave in the ribbon = where the sign will hang. I weaved mine in further back, therefore, the sign leans further back than I really wanted it to.
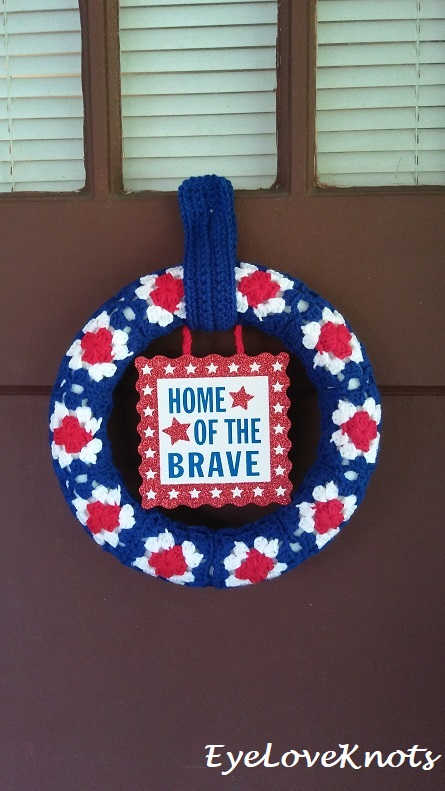
Take my Granny’s Patriotic Wreath for a different example. I weaved in in the center seam of the wreath which allowed my sign to hang more centered.
Please feel free to make and sell your own Wreaths made using this 12″ Through the Window Wreath Form Cover, but please DO NOT claim this pattern as your own nor should you sell my pattern, and DO NOT re-publish my photos as your own. DO NOT copy and paste my pattern anywhere, link to it instead.
Join one of our awesome Facebook groups to share your creations, and see what others are up to!
– EyeLoveKnots Crochet & DIY Community
– DIY Home On Rockwood Lane
– Alexandra Lane Lifestyle
Linked Up To…
Linky Ladies Party #222 – The Purple Poncho
The Loop Scoop #34 – Moogly Blog
Sundays on Silverado #85 – The House on Silverado
Beautifully Made Link Party for Home Decor 207 – Across the Blvd
Tuesday Turn About #143 – My Wee Abode
Home Matters Linky Party #372 – Modern on Monticello
Friday with Friends Link Party – My Hubbard Home
Farmhouse Friday 246 – County Road 407
Handmade Monday #271 – Sum of their Stories
Craftastic Monday – Sew Can Do
Craft Schooling Sunday – Creative Jewish Mom
Happiness is Homemade Link Party #419 – Decor Craft Design
You’re the Star Blog Hop – Decor Craft Design
Share the Wealth Link Up #15 – Big Fat Menopausal Life
The Really Crafty Link Party #308 – Keeping it Real
Link-Up Potpourri #36 – My Bijou Life
Hello Monday – Pink Lady
Anything Goes Linky #324 – My Random Musings
630th Inspire Me Tuesday – A Stroll Thru Life
Fabulous Party 416 – Lou Lou Girls
Link-Up – Scribbling Boomer
The Happy Now Blog Link-Up #313 – JENerally Informed
Spread the Kindness Link Up #267 – Shelbee on the Edge
Team Creative Crafts Link Party #86 – Artsy-Fartsy Mama
The Wednesday Link Party 443 – Oombawka Design Crochet
Wonderful Wednesday – Oh My Heartsie Girl
Wonderful Wednesday Blog Hop – My Life Abundant
Thursday Favorite Things #533 – An Artful Mom
Creatively Crafty Link Party #320 – Try It – Like It – Create It
Encouraging Hearts & Home Blog Hop – My Slices of Life
Grace at Home No. 461 – Imparting Grace
Karins Kottage Linky Party #263 – Karins Kottage
Traffic Jam Weekend Link Party #316 – My Bijou Life
Create, Bake, Grow & Gather Party #512 – Shabby Art Boutique
Funtastic Friday Link Party #370 – Simply Beautiful by Angela
Morning Cup of Joe – The Cottage Market
Saturday Sparks Link Party 507 – Pieced Pastimes
One More Row Free Crochet Link Party #42 – Loops and Love Crochet
Beautifully done. Fabulous.
Thank you, Rebecca!
This is a really pretty wreath. The colors are perfect for spring, and they coordinate with the cute bunny picture. Thank you for participating in Talent-Sharing Tuesdays Link-Up 12.
Carol
http://www.scribblingboomer.com
Thanks so much! I was a little surprised when I came across that sign – couldn’t have turned out better for matching.
Thanks for sharing at My Big Fat Menopausal LIfe’s Share the Wealth party. Hope the rest of your week is fabulous!
I love how you mix the white and the spring colorful yarn into such a beautiful wreath. That’s why I’m featuring you at this week #HomeMattersParty. Thanks for linking up!
Thanks so much, Mel! I really appreciate that! I had a lot of fun playing with this design.
Really darling crochet wreath! I don’t think I’ve seen anything like it.
Thanks for sharing at the FWF link party 🙂
Hugs,
Rachelle
Thanks so much, Rachelle! That is such a kind compliment 🙂
Hi, I have the smaller sized wreath, 9.8 inches. Is there a way to convert your beautiful pattern for the smaller sized wreath?
I am so sorry! This comment got lost – I’m just seeing it! First thing, I measured the circumference of the wreath form – mine is 36″, and I make the base about 30″-31″, so 5-6″ less then the circumference (however works best for the stitch pattern), and then I measured around the base like the thickness of it – mine measures 5.25″, and I make the base 4.75″ wide so 0.5″ less. I haven’t worked any other size bases, but the same method will get you the same results.
For this stitch pattern, you can subtract by 4 stitches to get a smaller width, and then just work less repeats widthwise, and lengthwise (making sure to end on a row 4).