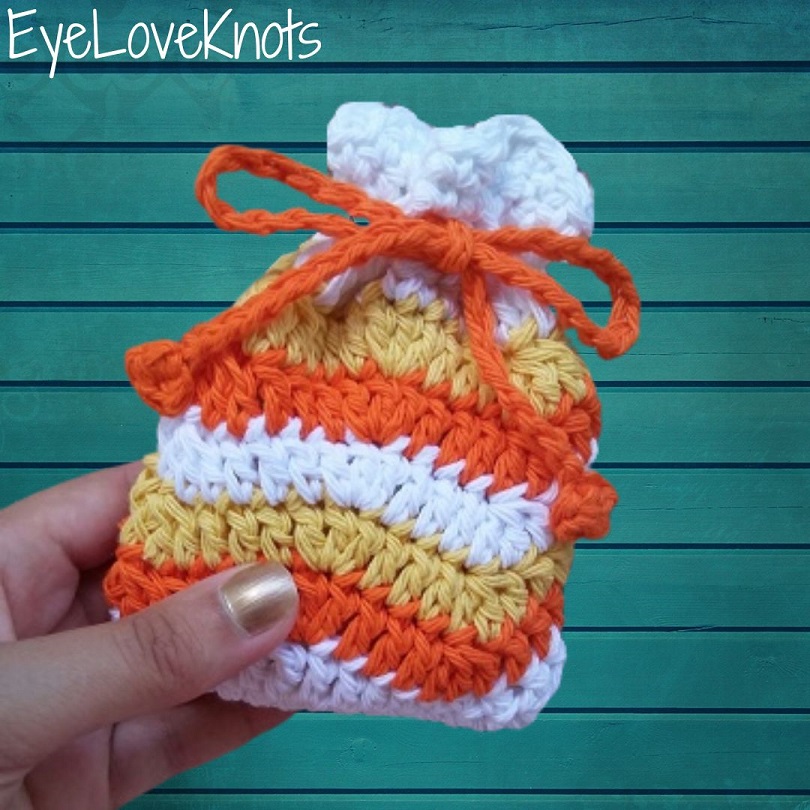
This is a free crochet pattern and video tutorial showing how to crochet a Candy Corn version of the Remi Mini Bag, a fun wavy ripple stitch mini gift bag that is perfect to gift small items or to use as a candy bag at a Halloween party.
This post contains affiliate links. If you make a purchase by clicking on them, I make a small commission at no extra cost to you. I only recommend products I love and hope you’ll love them too! Click here to find out about the different affiliate programs I am apart of. This post also contains shop links to my yarn shop and craft store, Yarn Crafts & Coffee. You can shop online or in person in Melbourne, Florida.
Find the free crochet pattern instructions below, or purchase a printer-friendly, ad-free PDF on Ravelry by clicking here.
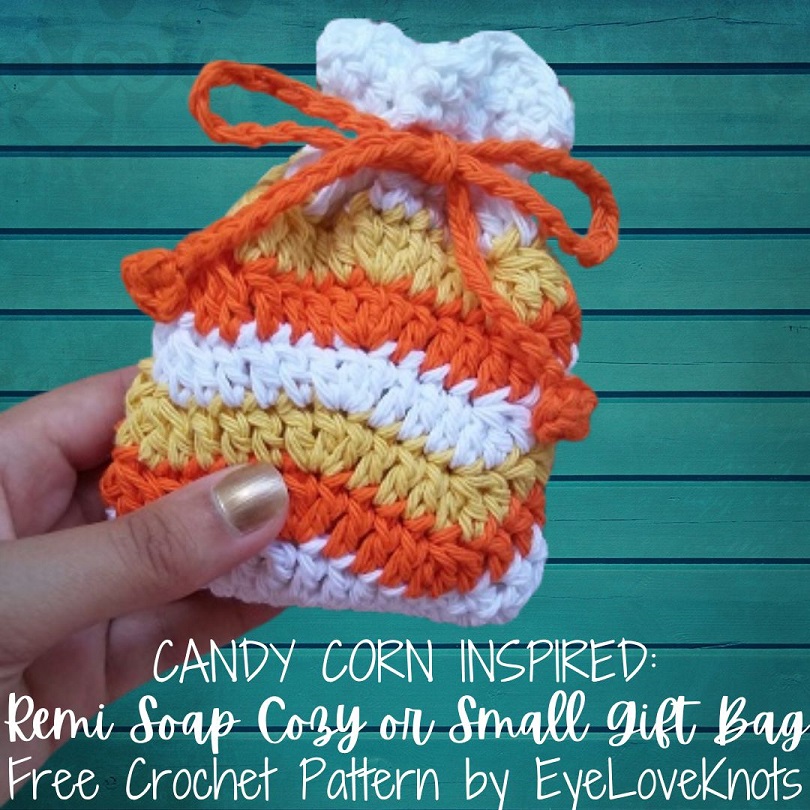
Crochet mini bags are one of my favorite things to make. They are quick to work up and so versatile!
Originally, this mini crochet bag was designed as a soap cozy, where you place a bar of soap in it and use it in the shower to exfoliate with and make your bar of soap go further, but these mini crochet bags are also perfect as candy pouches for parties, as small gift bags and even as a coin purse, so in remixing this design as part of my Spooktacular Halloween Crafting Event 2026, I decided to rename this bag as a Mini Gift Bag.
Imagine this little bag as a soap cozy gifted with a homemade soap or textured facial scrubbies. It also makes a great favor or candy pouch for students, teachers and co-workers, or fill with candy and hand out at a party or on Halloween. Lastly, it’s a sweet mini gift bag for a gift card or small items, like these Sally Skulls Earrings from Divine Debris.
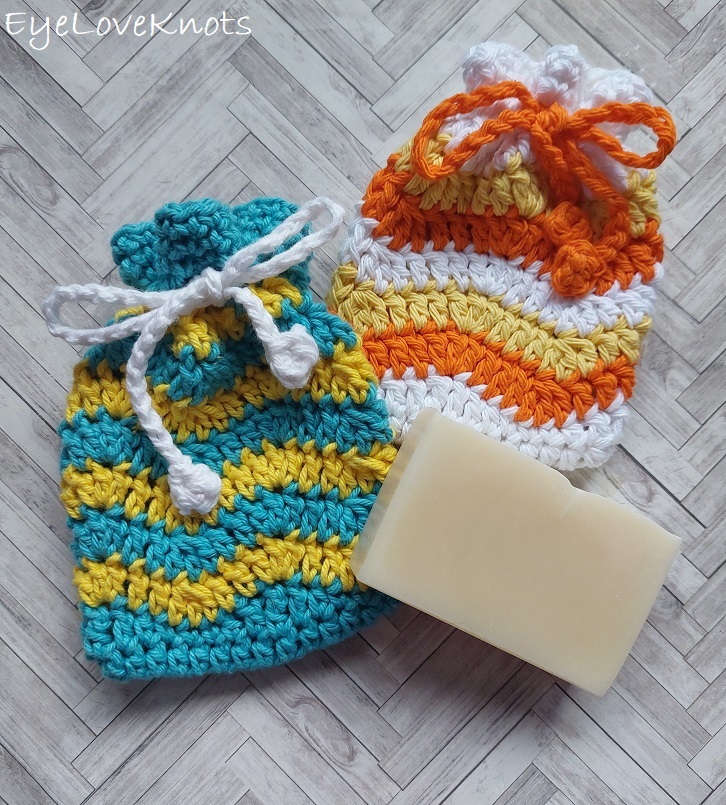
There are two versions of this bag. I originally designed and worked a candy corn version of this bag in Lily Sugar n Cream Yarn. I later went back, and reworked the design using WeCrochet Dishie Yarn. Dishie is slightly thinner, so I altered the pattern to achieve the same size in this other yarn. It’s possible to get the same size following the original pattern with a I9/5.5mm hook, but I don’t like using this size with Dishie so that’s why I altered instead. Together with this update, there is the post you are currently reading for a 3 color ripple stitch pattern as well as a separate post for a 2 color ripple stitch pattern.
Soap Cozy Note:
The feedback I’ve received for this bag as a soap cozy is that with it’s solid fabric and thicker yarn, it does take a while to dry so keep this in mind if you intend to use it this way. Perhaps, consider using a lighter weight yarn, or a cotton blend with a fast drying fiber, like bamboo.
Color Inspiration:
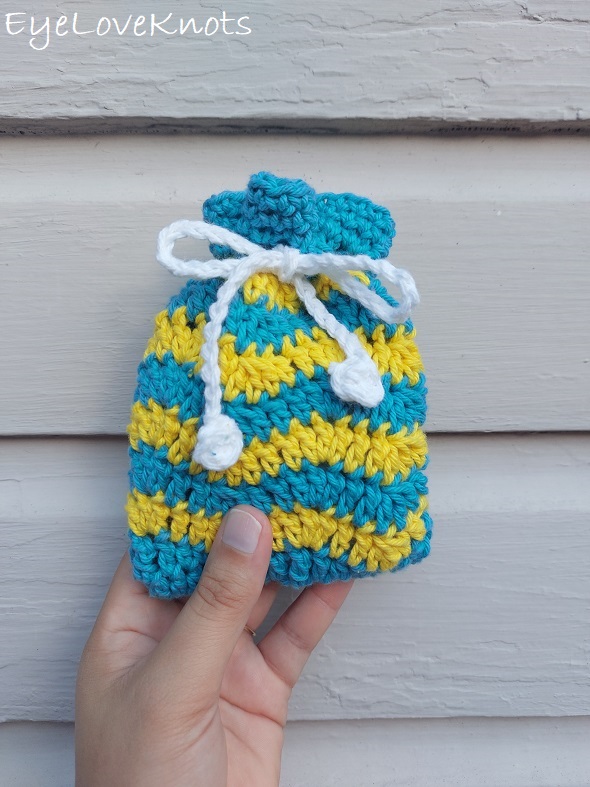
In Spring colors, this is a great bag for Easter treats or a Mother’s Day Gift.
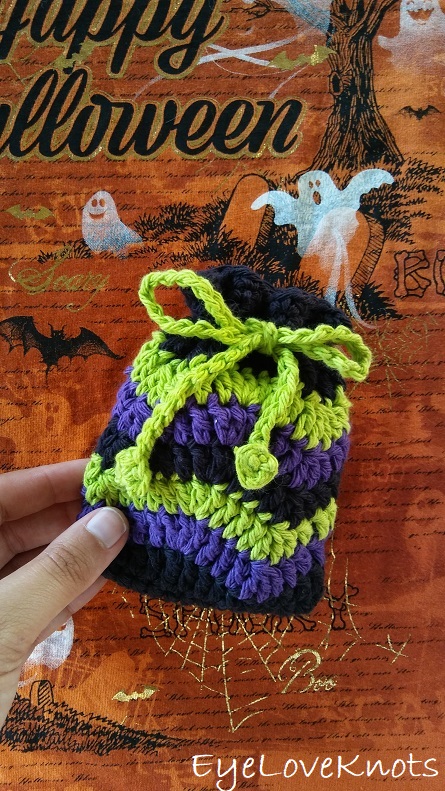
In cute, spookier colors, this is a great bag for Halloween treats.
Free Ripple Stitch Crochet Patterns:
My Remi series features fun ripple patterns worked mainly in Double Crochet stitches – there are some other stitches that help form the shape for the ripple pattern.
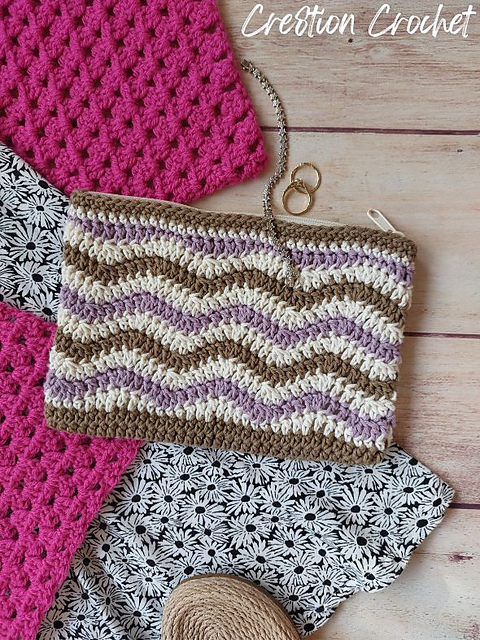
Free Remi Make Up Bag Crochet Pattern
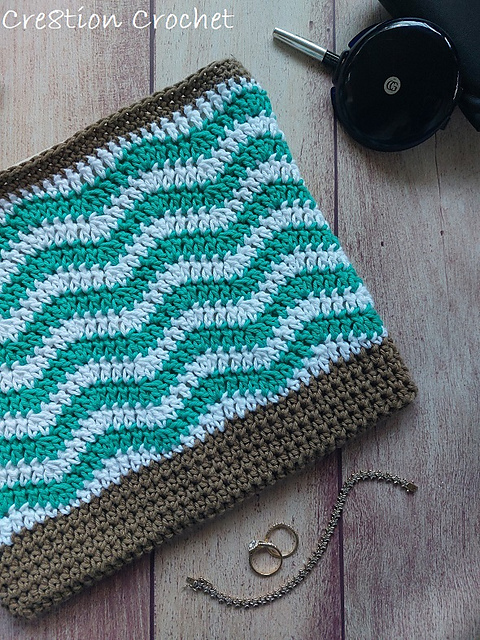
Free Remi Clutch Crochet Pattern
This mini bag is featured in the Spooktacular Halloween Crafting Event 2026 hosted on my Yarn Crafts & Coffee blog.
Ad-Free, Printer Friendly PDF:
EyeLoveKnots newsletter subscribers get access to Exclusive Subscriber Content, like the free PDF of this pattern via the Free File Library – you’ll find the tab on the top menu. The library is password protected so sign up for my newsletter and you’ll receive a Welcome email containing this month’s password, or if you are already a blog subscriber, reference your latest newsletter for this month’s password. From the library, you’ll be able to access the PDFs via Google Drive – you do not need to have a Google Drive account to view and download the PDF.
Through 07/06/26 at 11:59pm EST, you can grab a free copy of the PDF for the Remi Soap Cozy or Small Gift Bag on Ravelry using code CANDY26. I earn my income from the number of pageviews my blog sees, so please do not share the code, but instead share the link to this post so others can find it. Thank you!
After 07/06/26 or for non-subscribers, if you would like a PDF version of this post, you may get one through either my Etsy Shop, Ravelry Shop or LoveCrafts Shop for a small fee. This fee is to compensate for the views lost when you no longer need to return to the blog to for the information, as you will have your own copy. Plus! It helps fund supplies for new projects to share with you!
Save this to Your Favorites On: AllFreeCrochet, FaveCrafts, Crochet Pattern Bonanza, Cheap Thrifty Living, DIYideaCenter, AllFreeHolidayCrafts
What Do I Need to Crochet a Mini Bag?
- About 65 Yards of Worsted Weight Yarn
- H8/5mm Crochet Hook
- Tapestry Needle
- Scissors
- Optional, Jewelry Pliers
Yarn Talk:
Originally, I used Lily Sugar n Cream in White, Yellow and Hot Orange. I have since stopped using Lily Sugar n Cream Yarn because it is not colorfast, which means the colors fade and bleed when using or after washing in the project. Now, for 100% cotton yarn, I love using WeCrochet Dishie, Cascade Nifty Cotton, Circulo Natural Cotton Maxcolor 4/6 and Queensland Coastal Cotton as they’re all colorfast.
If you are going to use this bag as a soap cozy, you’ll want to use either a 100% cotton or a blend of cotton with linen, cotton with bamboo or linen with bamboo. Linen gets strong when wet, and gets softer and nicer with each wash. On it’s own, it’s on the rougher side for feel, but linen blends often combine with cotton or bamboo to add softness. Bamboo yarns have a high absorbency – even more than cotton – however, bamboo is weaker when wet, and more prone to developing mold so if bamboo is a fiber you want to use, I definitely recommend going with a blend of linen and/or cotton. Stay away from synthetic fibers, like acrylic, as they lack the absorbency needed.
I’ll share some yarns I would use to make these bags and color options that are close to my original Candy Corn and Witch bags.
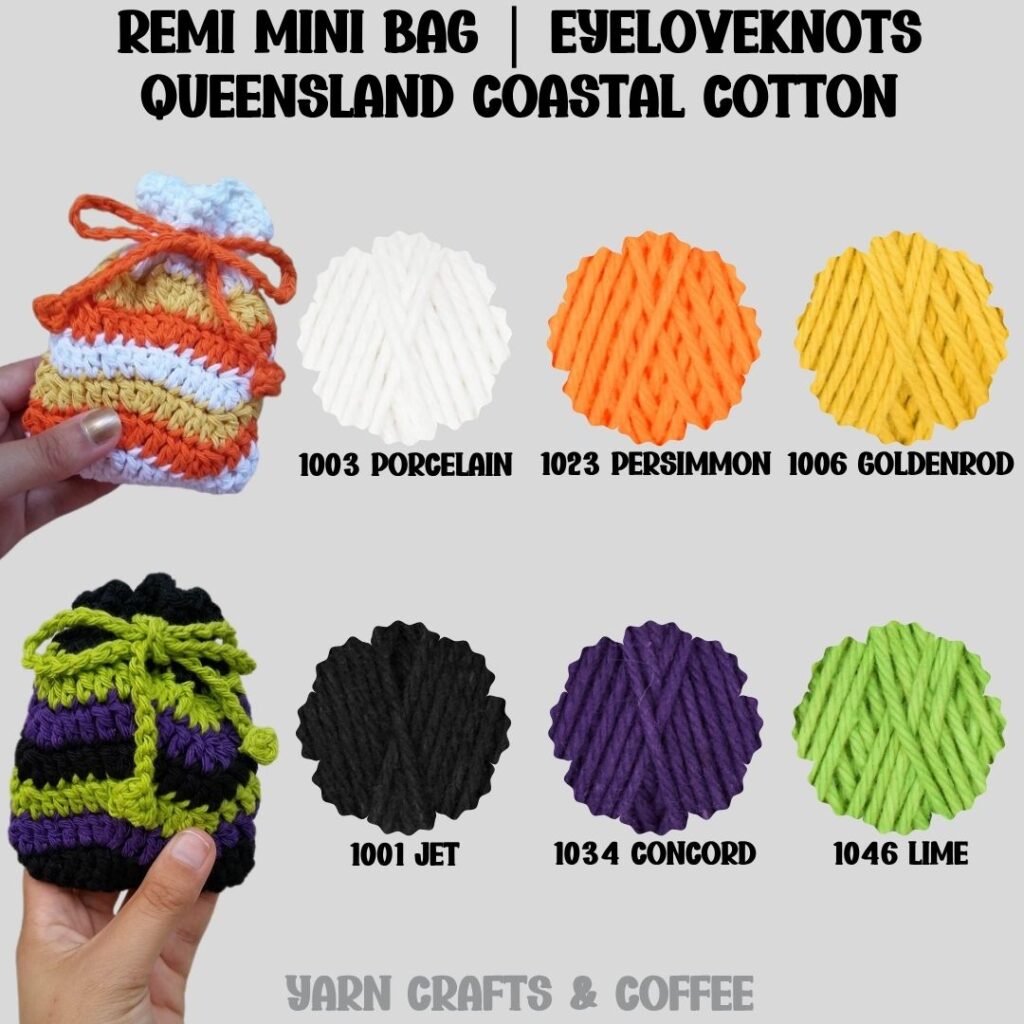
Queensland Coastal Cotton is a versatile, soft worsted weight #4 yarn made of 100% cotton. It’s on the lighter side for worsted weight working up similarly to Cascade Nifty Cotton, WeCrochet / Knit Picks Dishie and I Love This Cotton from Hobby Lobby. It’s machine washable and dryable making projects easy to care for and it’s colorfast. As of June 1st, it is available in an amazing number of colors – 64 solid colors and 39 variegated colors – as well as in Sport Weight #2.
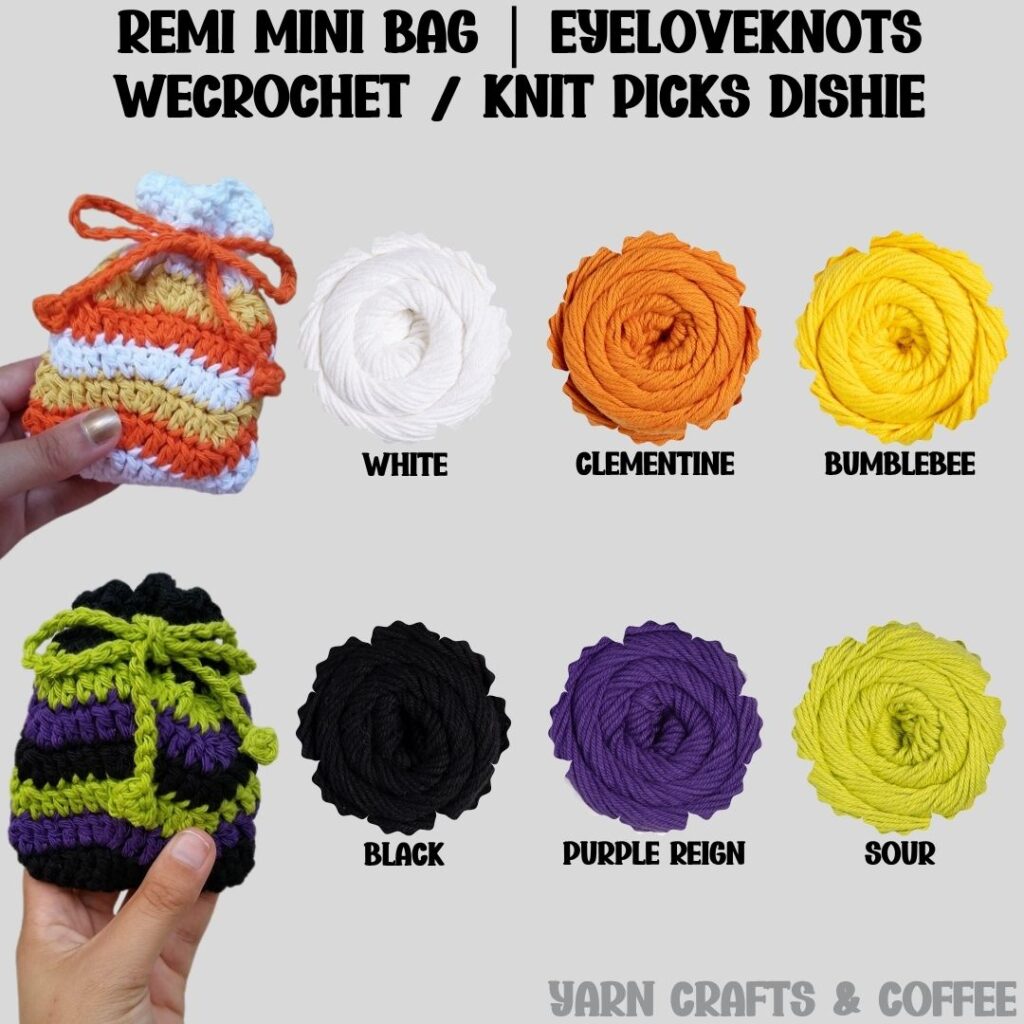
WeCrochet Dishie (aka Knit Picks Dishie) is a versatile, soft worsted weight #4 yarn made of 100% cotton. It’s on the lighter side for worsted weight working up similarly to Cascade Nifty Cotton, Queensland Coastal Cotton and I Love This Cotton from Hobby Lobby. It’s machine washable and dryable making projects easy to care for. As of June 1st of 2026, it is available in an amazing number of colors – 83 colors.
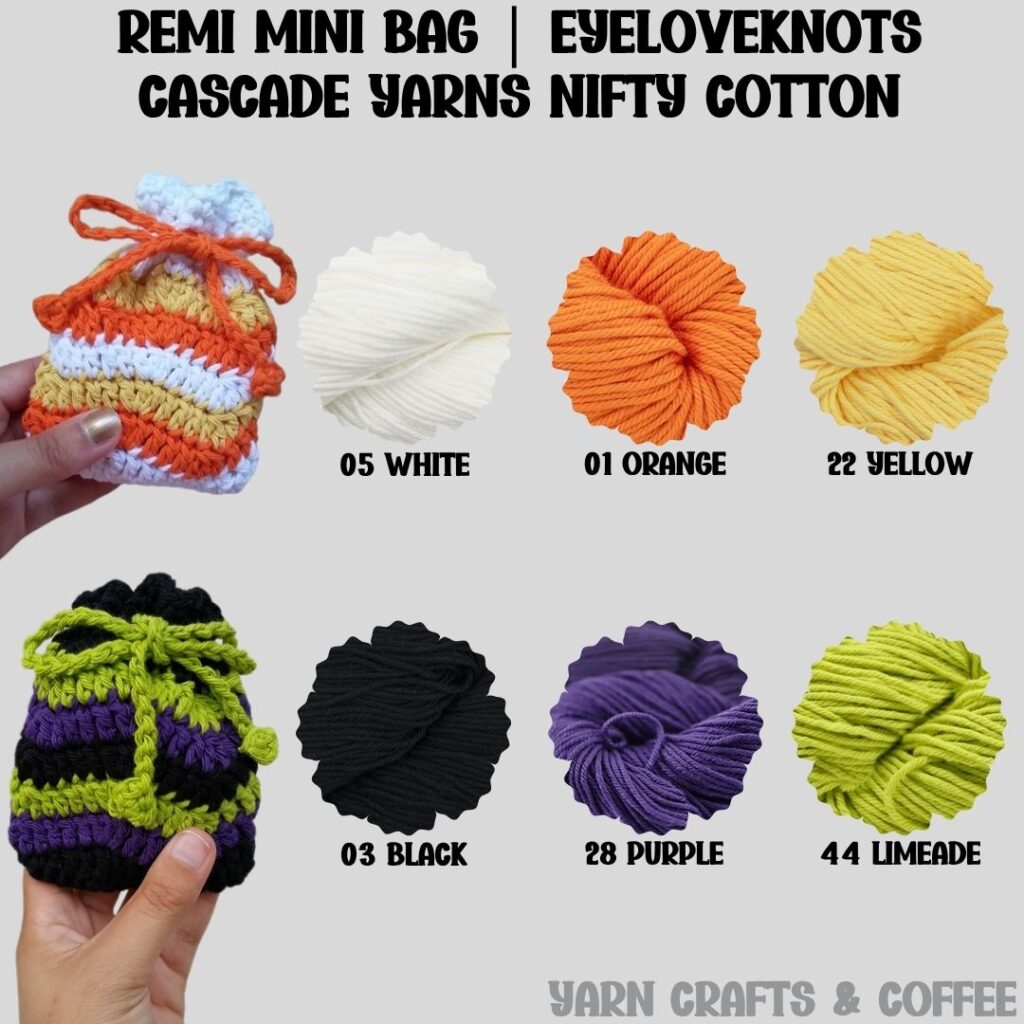
Cascade Nifty Cotton Yarn is a versatile, soft worsted weight #4 yarn made of 100% cotton. It’s on the lighter side for worsted weight working up similarly to WeCrochet Dishie, Queensland Coastal Cotton and and I Love This Cotton from Hobby Lobby. It’s machine washable and dryable making projects easy to care for. As of June 1st, it is available in an amazing number of colors – 66 colors.
Note: The feedback I’ve received for this bag as a soap cozy is that with it’s solid fabric and thicker yarn, it does take a while to dry so keep this in mind if you intend to use it this way. Perhaps, consider using a lighter weight yarn with more chains using the stitch multiple, or a cotton blend with a fast drying fiber, like bamboo.
As a gift bag, candy pouch or favor bag, you can reach for any fiber yarn desired. This pattern was written for a 100% cotton yarn, which produces a more relaxed fabric. If you choose a different fiber, such as 100% acrylic, you may want to go up a hook to achieve the same measurements.
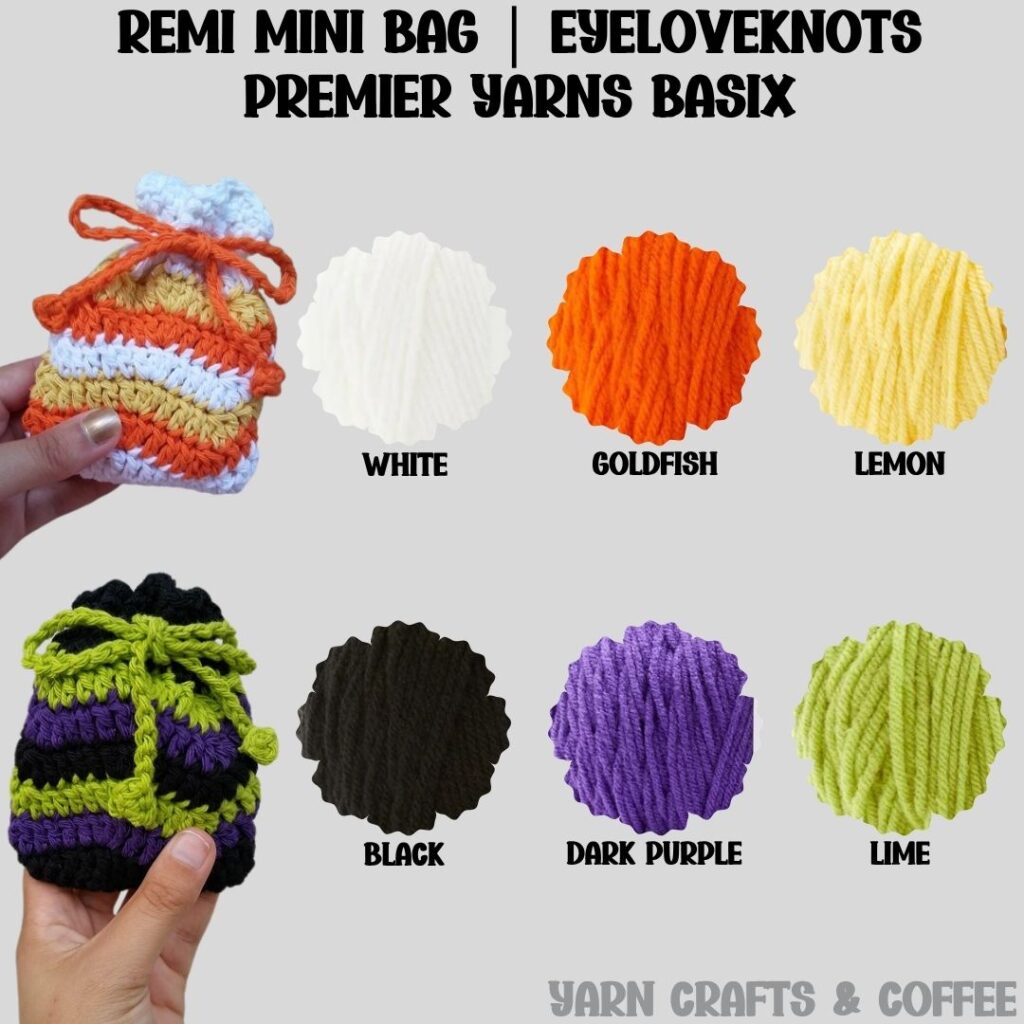
Premier Yarns Basix is a sturdy worsted weight acrylic yarn that is perfect for practically any yarn project you could dream of! It’s similar to Red Heart Super Saver and Bernat Super Value, but a little softer. It’s also machine washable and dryable making projects easy to care for. As of July 4th, 2026, it is available in an amazing number of colors – 93 solid colors – as well as 10 tweed colorways and 14 ombre colorways and in Lightweight, Chunky Weight and Super Bulky Weight.
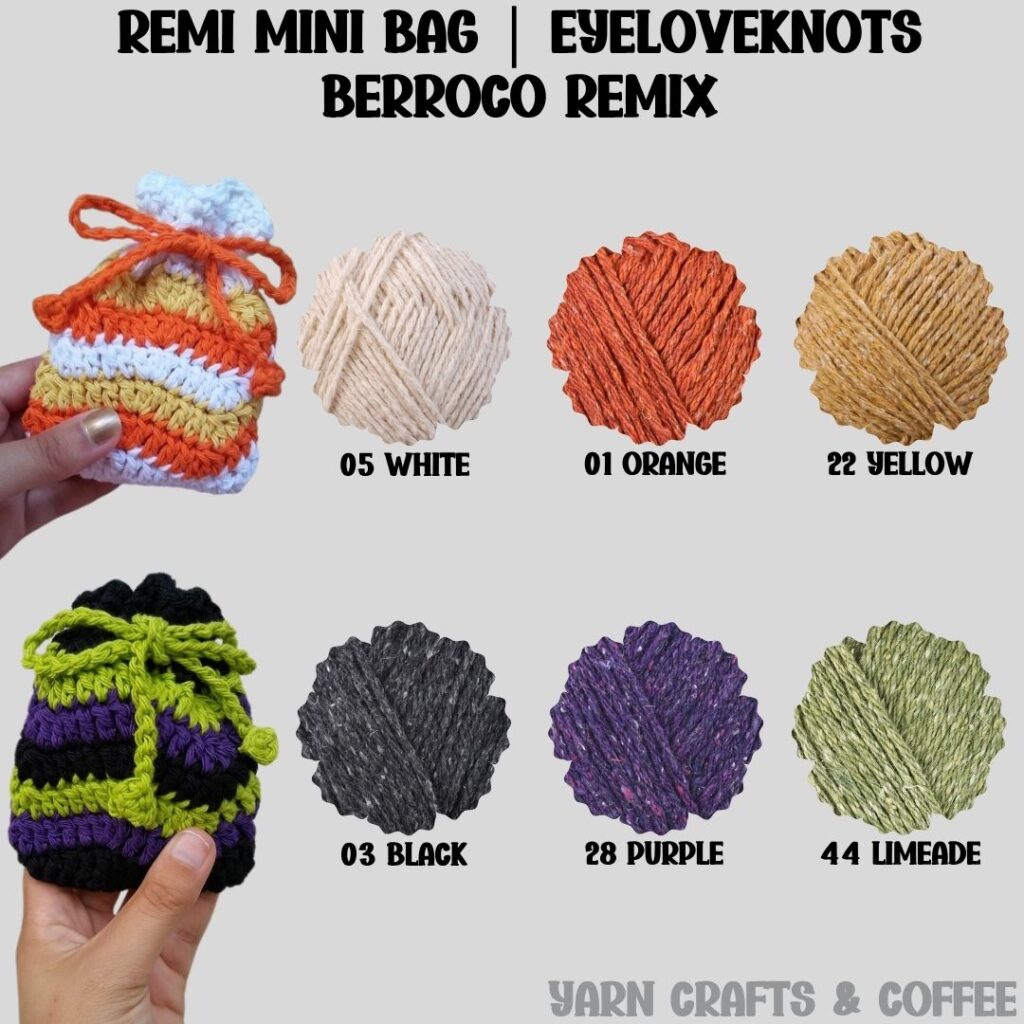
I am so in love with the way the Remix looks in this collage! I am sold. I already love using this yarn for projects, but now I must order the colorways I am missing to complete the two sets and make some matching Halloween home decor pieces for next year.
Berroco Remix Yarn is a fantastic wool-free, eco-friendly yarn that consists of 30% superfine nylon, 27% cotton, 24% acrylic, 10% silk and 9% linen all of recycled fibers from garments and other textiles. It has such a lovely texture and lightness to it! It’s machine washable and dryable making projects easy to care for and will soften with washing too. As of June 5th, it’s available in over 20 colors.
Tools & Notions:
We have lots of great crochet hooks in our Yarn Crafts and Coffee Yarn Shop. The most popular, and preferred by Candace and Emily, are the Clover Amour Crochet Hooks with the soft handles and smooth metal hook. Alexandra prefers metal crochet hooks with large, ergonomic clay handles and just loves the fun designs from SiennasBowtique and BronzeShepherdStudio! If your preference is wood, the LYKKE brand are lovely, smooth and sturdy.
Tapestry Needles with the blunt, round end are essential for sewing and finishing on a number of yarn crafts, including crocheting, knitting as well as needlepointing on fabric and plastic canvas. The blunt, rounded end allows the needle to pass easily through the fabric created by yarn and holes on canvas without snagging (or getting your fingers) in the process. More specifically for crocheting and knitting, a Bent Tip Tapestry Needle makes weaving, grafting and sewing so much easier on the hands. The long oval eye makes threading strands of yarn easier, though you may still want to use a needle threader.
Scissors are an essential tool. When I’m working on the go, I like to carry a pair of folding scissors as they fit perfectly in even the tiniest of bags. When I am working at home or have more space in my bag for a larger notions pouch, I like to use a pair of lightweight, all-purpose scissors as they are so versatile and great for a variety of things from cutting plastic canvas mesh to trimming yarn ends after weaving in to cutting out a care card to include with a handmade gift.
Jewelry Pliers are an excellent tool to use to help weave in the ends of tough yarns, such as cotton yarns and chunkier yarns, that can be quite tough on the fingers when weaving in with just fingers and a tapestry needle. Sore thumbs and frustration can be a thing of the past by simply using jewelry pliers to help pull the tapestry needle through the work. Make sure the eye of the needle is facing up so you can see directly down it and carefully pull, wiggling as needed. If it gets caught and you tug too hard, it will break the eye of your needle.
How Long Does it Take to Crochet a Soap Cozy?
I had my cozy reader in about 45 minutes.
Measurements:
In Lily Sugar n Cream: 4 1/2″ Wide by 5 5/8″ Tall; 16″ Long Tie
In Dishie Yarn: 4 1/2″ Wide by 5 3/4″ Tall
Gauge:
With Lily Sugar n Cream & H8/5mm Hook: 16 HDC by 10 Rows = 4″
Round 1 In Pattern with Dishie & H8/5mm Hook: 4″ Long by 1 1/8″ Wide
Abbreviations (US Terms):
- HDC – Half Double Crochet (Photo Tutorial | Video Tutorial)
- DC – Double Crochet (Photo Tutorial)
- SC – Single Crochet (Photo Tutorial)
- TR – Treble Crochet aka Triple Crochet [yarn over twice, insert hook into stitch, yarn over, pull through (4 loops on hook), (yarn over, pull through two loops) 3x]
- dc3tog – Double Crochet Three Stitches Together (Decrease)
Special Stitch:
To dc3tog: Yarn over, insert hook into the first stitch of the decrease, yarn over and pull through (3 loops), yarn over and pull through 2 loops, yarn over, insert hook into the next stitch, yarn over and pull through (4 loops), yarn over and pull through 2 loops, yarn over, insert hook into the next stitch, yarn over and pull through (5 loops), yarn over and pull through 2 loops, yarn over and pull through all 4 loops on hook.
Pattern Notes:
An actual candy corn is yellow on the bottom, orange in the middle and white on the top. I wanted my bottom and top to be white, so I reversed my colors. Reverse them back for a true candy corn pattern.
The beginning chain does not count as a stitch, except in the body of the bag, where it counts as a double crochet.
The stitch multiple for this bag is 10, that’s quite large so if you need to alter the width, I would recommend using a smaller crochet hook to achieve a smaller bag or a larger crochet hook to achieve a larger bag.
Join to the beginning chain for all rounds, except the first two and last two, in which you’ll join to the first stitch of the round.
The way I work my color change for a seamless change while carrying up the yarn: I work all the way around up to the join. I insert my hook into the stitch to be joined to, but before completing the slip stitch, I tighten the other color/s tail, then pull it/them up and over my hook so it will be in a better position to switch to, then I complete my slip stitch with my current color. To complete the color change, I pull the new color through the loop on my hook, pull the previous color tight so it disappears and drop it. Now I’m ready to work with my new color.
Alternatively, you can fasten off at the end of each round, work an invisible join for a seamless color change, and join your new color into the first stitch, but this will create many ends to weave in. OR, you could work all of the cozy in a solid color and not have to worry about color changes. Just join to the first stitch at the end of the round, and begin again.
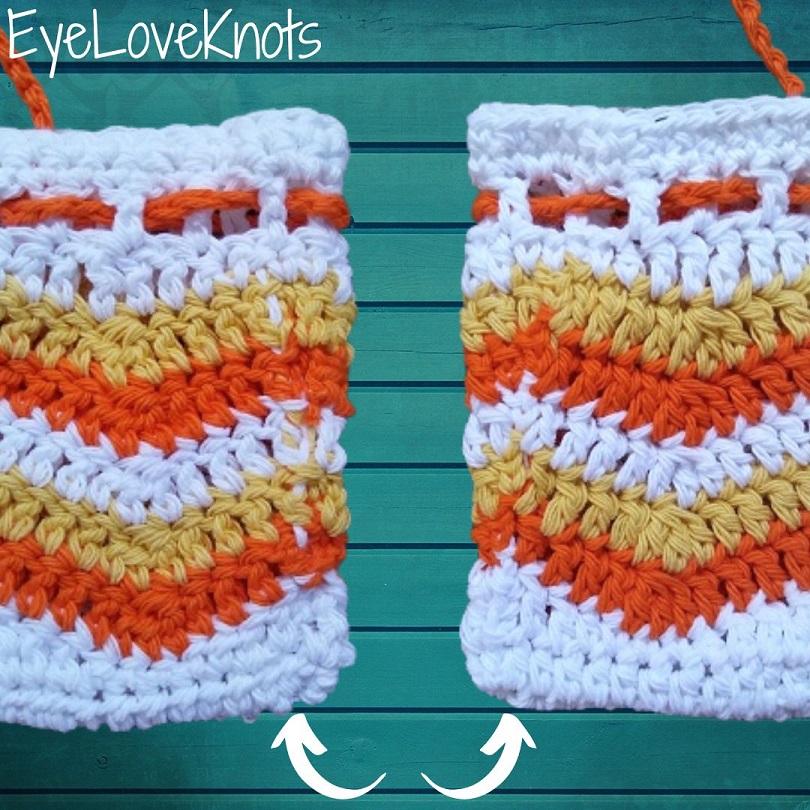
In this image, you’ll see my seam from the inside on the left, and from the outside on the right.
Crochet Pattern in Lily Sugar n Cream & H8/5mm Crochet Hook:
In White, chain 16. 2 HDC into the 3rd chain, HDC into each of the next 12 chains, 3 HDC into the last chain, HDC into each of the next 12 stitches along the opposite side of the foundation chain, HDC into the 1st stitch. Join. (30 HDC)
R2: Chain 3. TC into the 1st stitch, DC into the next 2 stitches, HDC into the next stitch, SC into each of the next 3 stitches, HDC into the next stitch, DC into the next 2 stitches, (TC into the next stitch, DC into the next 2 stitches, HDC into the next stitch, SC into each of the next 3 stitches, HDC into the next stitch, DC into the next 2 stitches) 2x. Join with Orange. (30 stitches)
R3: In Orange, Chain 2. DC into the 1st 4 stitches, dc3tog, DC into the next 3 stitches, (3 DC into the next stitch, DC into the next 3 stitches, dc3tog, DC into the next 3 stitches) 2x. DC into the 1st stitch. Join with Yellow. (30 DCs)
R4: In Yellow, Chain 2. DC into the 1st 4 stitches, dc3tog, DC into the next 3 stitches, (3 DC into the next stitch, DC into the next 3 stitches, dc3tog, DC into the next 3 stitches) 2x. DC into the 1st stitch. Join with White. (30 DCs)
R5: In White, Chain 2. DC into the 1st 4 stitches, dc3tog, DC into the next 3 stitches, (3 DC into the next stitch, DC into the next 3 stitches, dc3tog, DC into the next 3 stitches) 2x. DC into the 1st stitch. Join with Orange. (30 DCs)
R6: In Orange, Chain 2. DC into the 1st 4 stitches, dc3tog, DC into the next 3 stitches, (3 DC into the next stitch, DC into the next 3 stitches, dc3tog, DC into the next 3 stitches) 2x. DC into the 1st stitch. Join with Yellow. (30 DCs)
R7: In Yellow, Chain 2. DC into the 1st 4 stitches, dc3tog, DC into the next 3 stitches, (3 DC into the next stitch, DC into the next 3 stitches, dc3tog, DC into the next 3 stitches) 2x. DC into the 1st stitch. Join with White, and fasten off other colors. (30 DCs)
R8: In White, Chain 1. SC into the 1st 2 stitches, HDC into the next stitch, DC into the next 2 stitches, TC into the next stitch, DC into the next 2 stitches, HDC into the next stitch, (SC into the next 3 stitches, HDC into the next stitch, DC into the next 2 stitches, TC into the next stitch, DC into the next 2 stitches, HDC into the next stitch) 2x, SC into the last stitch. Join. (30 stitches)
R9: Chain 4 (counts as a DC plus chain 1). Skip the next stitch, (DC into the next stitch, chain 1, skip the next stitch) 14x. Join to the 2nd chain of the beginning chain 4. (15 DC + 15 chain spaces)
R10: Chain 1. SC into the 1st stitch, and into each chain 1 space and DC around. Join. (30 SC)
R11 – 12: Chain 1. SC into the 1st SC, and into each SC around. Join. (30 SC)
Fasten Off, and Weave in End/s.
Tie:
With Orange, chain 2. Work 4 SC into the 1st chain. Join to the 1st SC. Chain 62, 4 SCs into the 2nd to last chain. Join to the 1st SC.
Fasten Off, and Weave in Remaining Ends.
Finishing:
Weave the tie in and out of Round 9. No crochet hook needed to weave in this tie. Both of my ties came out of the center hole to keep it all even.
Video Tutorial in WeCrochet Dishie & H8/5mm Crochet Hook – shows a two color version, but stitch count and the number of rows is the same so just change to your preferred color sequence:
Crochet Pattern in WeCrochet Dishie & H8/5mm Crochet Hook:
In White, chain 16. 2 HDC into the 2nd chain, HDC into each of the next 13 chains, 3 HDC into the last chain, HDC into each of the next 13 stitches along the opposite side of the foundation chain, HDC into the 1st stitch. Join. (32 HDC)
R2: Chain 3. TC into the 1st stitch, DC into the next stitch, HDC into the next stitch, SC into each of the next 3 stitches, HDC into the next stitch, DC into the next stitch, (TC into the next stitch, DC into the next stitch, HDC into the next stitch, SC into each of the next 3 stitches, HDC into the next stitch, DC into the next stitch) 2x. Join with Orange. (32 stitches)
R3: In Orange, chain 2. DC into the 1st 3 stitches, dc3tog, DC into the next 2 stitches, (3 DC into the next stitch, DC into the next 2 stitches, dc3tog, DC into the next 2 stitches) 2x. DC into the 1st stitch. Join with Yellow. (32 DCs)
R4: In Yellow, chain 2. DC into the 1st 3 stitches, dc3tog, DC into the next 2 stitches, (3 DC into the next stitch, DC into the next 2 stitches, dc3tog, DC into the next 2 stitches) 2x. DC into the 1st stitch. Join with White. (32 DCs)
R5: In White, chain 2. DC into the 1st 3 stitches, dc3tog, DC into the next 2 stitches, (3 DC into the next stitch, DC into the next 2 stitches, dc3tog, DC into the next 2 stitches) 2x. DC into the 1st stitch. Join with Orange. (32 DCs)
R6: In Orange, chain 2. DC into the 1st 3 stitches, dc3tog, DC into the next 2 stitches, (3 DC into the next stitch, DC into the next 2 stitches, dc3tog, DC into the next 2 stitches) 2x. DC into the 1st stitch. Join with Yellow. (32 DCs)
R7: In Yellow, chain 2. DC into the 1st 3 stitches, dc3tog, DC into the next 2 stitches, (3 DC into the next stitch, DC into the next 2 stitches, dc3tog, DC into the next 2 stitches) 2x. DC into the 1st stitch. Join with White. (32 DCs)
R8: In White, chain 2. DC into the 1st 3 stitches, dc3tog, DC into the next 2 stitches, (3 DC into the next stitch, DC into the next 2 stitches, dc3tog, DC into the next 2 stitches) 2x. DC into the 1st stitch. Join with Orange. (32 DCs)
R9: In Orange, Chain 1. SC into the 1st 2 stitches, HDC into the next stitch, DC into the next 2 stitches, TC into the next stitch, DC into the next 2 stitches, HDC into the next stitch, (SC into the next 3 stitches, HDC into the next stitch, DC into the next 2 stitches, TC into the next stitch, DC into the next 2 stitches, HDC into the next stitch) 2x, SC into the last stitch. Join with Yellow, and fasten off Orange. (32 stitches)
R10: In Yellow, chain 4 (counts as a DC plus chain 1). Skip the next stitch, (DC into the next stitch, chain 1, skip the next stitch) 15x. Join to the 2nd chain of the beginning chain 4. Join with White, and fasten off Yellow. (16 DC + 16 chain spaces)
R11: In White, chain 1. SC into the 1st stitch, and into each chain 1 space and DC around. Join. (32 SC)
R12 – 13: Chain 1. SC into the 1st SC, and into each SC around. Join. (32 SC)
Fasten Off, and Weave in End/s.
Tie:
With Orange (or White would be nice too), chain 2. Work 4 SC into the 1st chain. Join to the 1st SC. Chain 62, 4 SCs into the 2nd to last chain. Join to the 1st SC.
Fasten Off, and Weave in Remaining Ends.
Finishing:
Weave the tie in and out of Round 10. No crochet hook needed to weave in this tie.
Please feel free to make and sell your own items made using this pattern, but keep in mind, this written pattern and my photos are protected by copyright. Please DO NOT claim this pattern as your own nor should you sell my pattern. DO NOT re-publish my photos as your own. DO NOT copy and paste my pattern anywhere, link to it instead so other’s can visit. Making videos providing instructions how to make my projects on any social media platform is also not permitted.
Join one of our awesome Facebook groups to share your creations, and see what others are up to!
– Yarn Crafts & Coffee Community
– DIY Home On Rockwood Lane
– Alexandra Lane Lifestyle
- Linked Up To…
- Home Matters Linky Party #157 – Domestic Deadline
- Link Your Stuff Party – Annemarie’s Haak Blog
- October 2017 Sharing Time – Raising Memories
- Sweet Inspiration Link Party #78 – The Boondocks Blog
- Craft Schooling Sunday – Creative Jewish Mom
- The Creative Corner Link Up Party 10/15/17 – Curly Crafty Mom
- Inspiration Monday Party 10.15.17 – Scattered Thoughts of a Crafty Mom
- Create Link Inspire Linky Party #203 – The Crafty Blog Stalker
- Inspire Me Monday – Week 302 – Create With Joy
- Made by you Monday – Skip to my Lou
- Creative Mondays, and Featured Blogs (16/10/2017) – Claire Justine
- Handmade Monday #47 – Sum of their Stories
- Simple Fall Decor & MM #176 – A Wonderful Thoughts
- The Really Crafty Link Party #89 – Keeping It Real
- Bee Party #35 – My Busy Beehives
- 2017 Halloween Blog Hop Giveaway – My Pinterventures
- 395th Inspire Me Tuesday – A Stroll Thru Life
- From Dream to Reality #284 – The DIY Dreamer
- Show and Tell Link Party – Flamingo Toes
- The Wednesday Link Party – Oombawka Design
- TOO Cute Tuesday Link Par-Tay! #358 – Funky Polkadot Giraffe
- Talk of the Town #94 – Sadie Seasongoods
- You’re the Star Linky Party Week 55 – Let It Shine
- Fiber Tuesday 131 – The Quilting Room with Mel
- The Linky Ladies Party #117 – The Purple Poncho
- Hookin’ on Hump Day #153 – Petals to Picots
- Your Whims Wednesday #325 – My Girlish Whims
- Pin Junkie Pin Party #237 – The Pin Junkie
- Creativity Unleashed #195 – Practically Functional
- No Rules Weekend Blog Party #257 – Sincerely, Paula
- Designing You! Link Party #10 – Designing Us
- Best of the Weekend – Hello Little Home
- Sweet Inspiration Link Party #79 – The Boondocks Blog
- Crafty Love Link Party #26 – Jessie at Home
- Link Your Stuff – Anniemarie’s Haakblog
- Scrappy Stitches Link Party #33 – Stitches ‘N’ Scraps
- Craft Schooling Sunday – Creative Jewish Mom
- 396th Inspire Me Tuesday – A Stroll Thru Life
- From Dream to Reality #285 – The DIY Dreamer
- Show and Tell Link Party – Flamingo Toes
- The Wednesday Link Party – Oombawka Design
- TOO Cute Tuesday: Linky Par-Tay! 359 – Funky Polkadot Giraffe
- Talk of the Town #95 – Sadie Seasongoods
- Fiber Tuesday 132 – The Quilting Room with Mel
Those are so cute Alexandra and would make a lovely little gift or even a stocking filler for Christmas. How I wish I knew how to crochet so I could make some
What a cute idea for a gift bag. Thanks for sharing at Snickerdoodle. Pinning.
Aww, this is such a lovely idea. Beautiful colours together too. Thanks for sharing at Creative Mondays 🙂 Hope you can join us again soon.
Thanks again for sharing at Creative Mondays last week. Pinned and featured this week at the blog hop
These are adorable!! Thanks so much for stopping by and for your kind words!! I am also now following you too!!
Hugs,
Deb
These are so lovely, such a versatile pattern too, great for little gift bags for any occasion in a different colour way. Thanks
It's lovely, and the granny square one too. Thank you for sharing them at The Really Crafty Party this week. Pinned!
What a great idea for a treat bag! Too cute! Thanks for joining out Halloween hop!
Kim
Love this! I enjoy making "quick" projects like this one!
So cute! And thanks for linking up at Friday Frenzy Link Party! I hope you link up again next week 🙂 PINNED!
Really cute, love the candy corn colors. And I was actually looking for a soap bag pattern, so bonus! It won't be Fall themed, but I'm whipping one of these up! Thank you for sharing with us at Designing You!
How cute. Thanks so much for linking up with me at #AThemedLinkup 30 for All Things Halloween.
This is super cute! And love it in the Berroco Remix!