Learn how to crochet a granny square rectangle shawl that’s perfect for wrapping up with in the Fall with this free crochet pattern.
This post contains affiliate links. If you make a purchase by clicking on them, I make a small commission at no extra cost to you. I only recommend products I love and hope you’ll love them too! Click here to find out about the different affiliate programs I am apart of. This post also contains shop links to my yarn shop and craft store, Yarn Crafts & Coffee. You can shop online or in person in Melbourne, Florida.
Find the free crochet pattern instructions below, or purchase a printer-friendly, ad-free PDF on Ravelry by clicking here.
In a hurry? Pin this for later when you have more time.
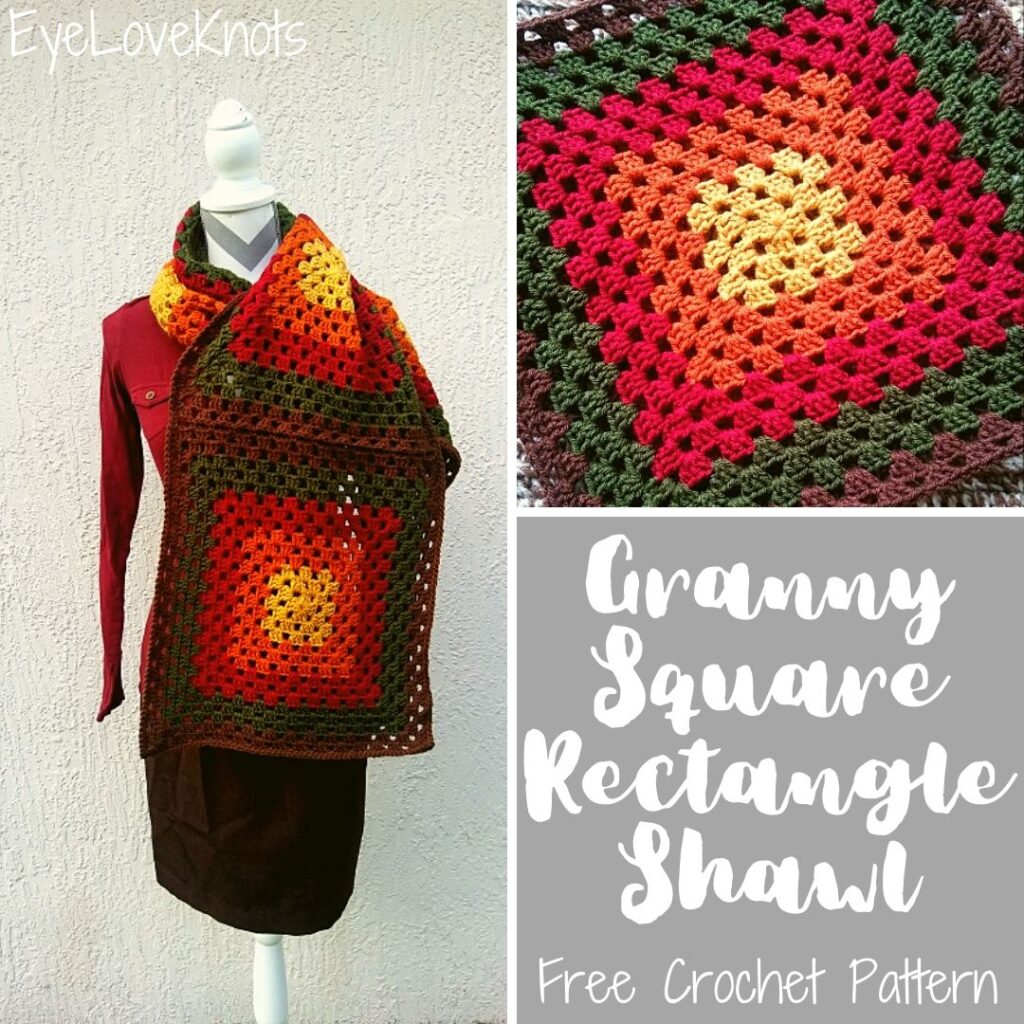
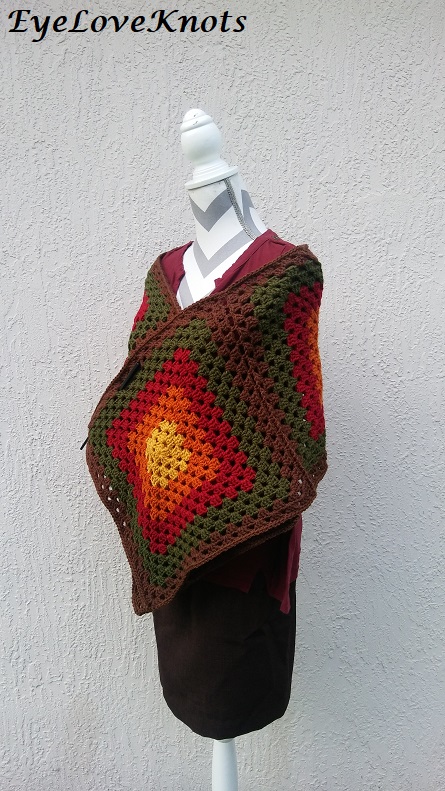
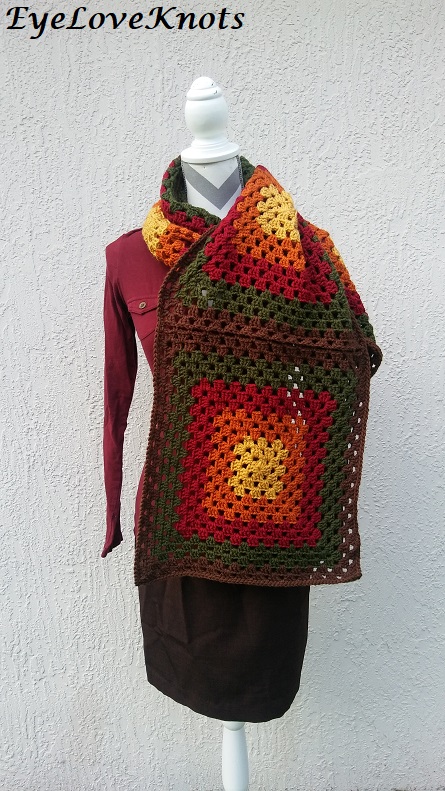
A rectangle shawl is the perfect accessory to drape over the shoulders or wrap up with for a little extra warmth and coziness. Alternatively, rectangle shawls work well as an oversized scarf.
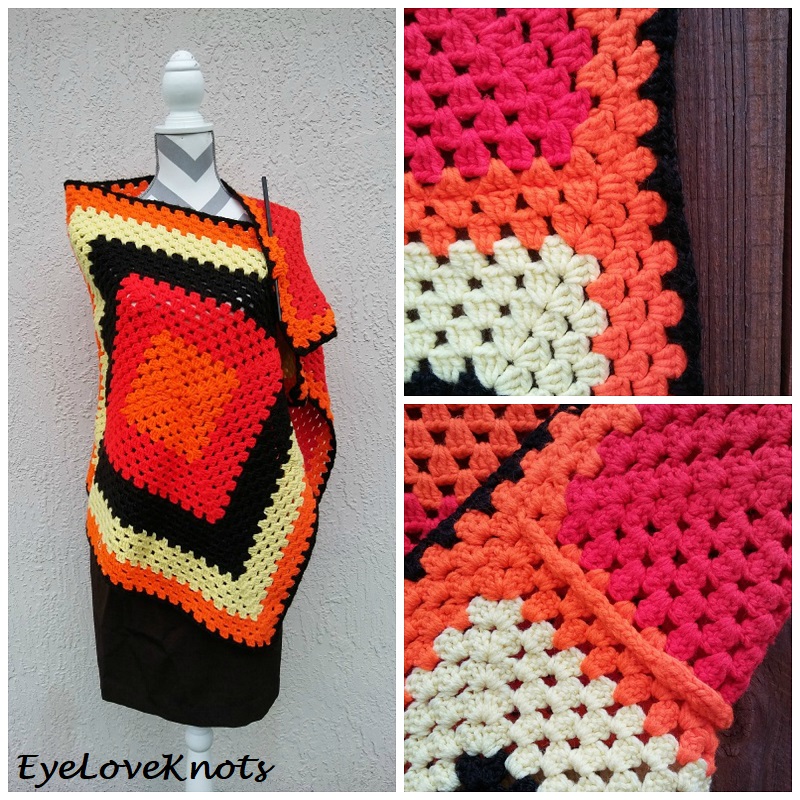
My inspiration for this shawl comes from one that I received from a friend.
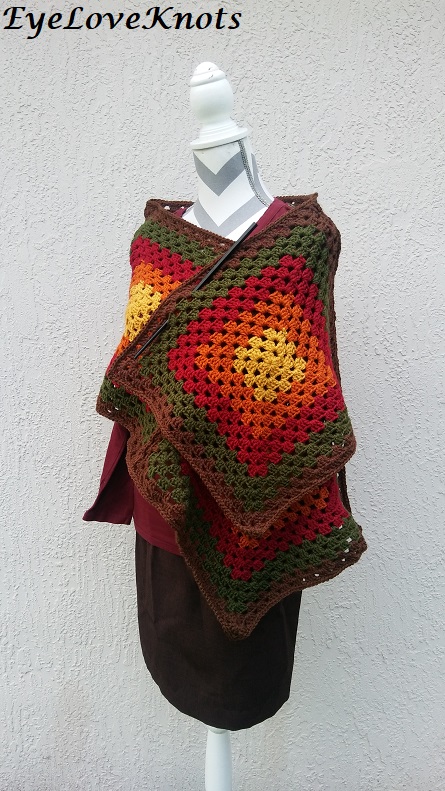
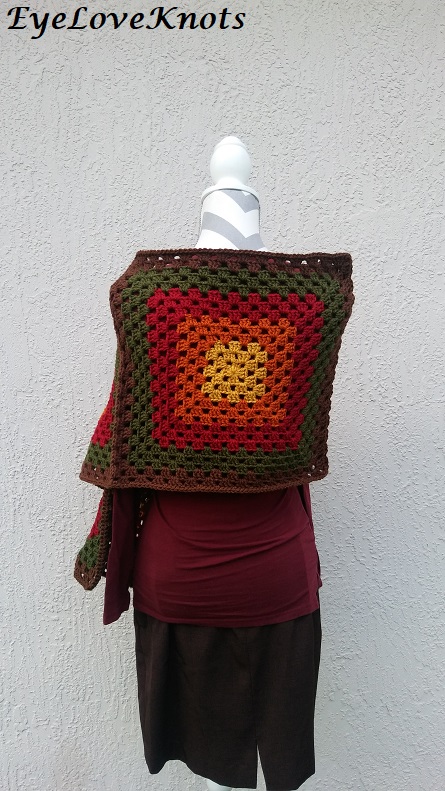
This shawl measures 46 7/8″ wide by 22 1/4″, and is comprised of two large granny squares seamed together with a single crochet join. While I was not crazy about the colors and there is paint that got on it at some point, I was in love with the idea.
This shawl is featured in the Fall for Crafting Event 2026 hosted by Yarn Crafts & Coffee.
Ad-Free, Printer Friendly PDF:
EyeLoveKnots newsletter subscribers get access to Exclusive Subscriber Content, like the free PDF of this pattern via the Free File Library – you’ll find the tab on the top menu. The library is password protected so sign up for my newsletter and you’ll receive a Welcome email containing this month’s password, or if you are already a blog subscriber, reference your latest newsletter for this month’s password. From the library, you’ll be able to access the PDFs via Google Drive – you do not need to have a Google Drive account to view and download the PDF.
Through 09/08/26 at 11:59pm EST, you can grab a free copy of the PDF for the Granny Square Rectangle Shawl on Ravelry using code FALL26. I earn my income from the number of pageviews my blog sees, so please do not share the code, but instead share the link to this post so others can find it. Thank you!
If you would like a PDF version of this post, you may get one through either my Etsy Shop, LoveCrafts Shop or Ravelry Shop for a small fee. This fee is to compensate for the views lost when you no longer need to return to the blog to for the information, as you will have your own copy. Plus! It helps fund supplies for new projects to share with you!
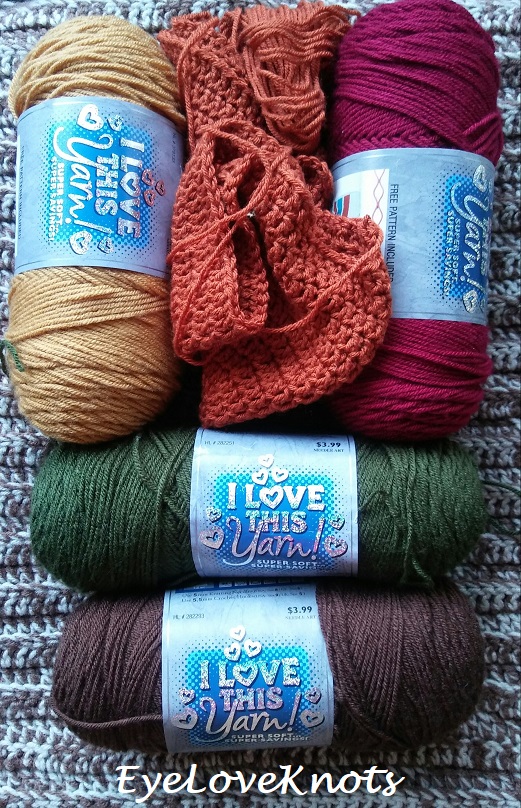
Materials:
- 606 – 808 Yards of Worsted Weight Yarn – I used Hobby Lobby’s I Love This Yarn – 150 – 200 Yards of Brown, 75 – 100 Yards of Burnt Pumpkin, 6 – 8 Yards of Sungold, 225 – 300 Yards of Cranberry, and 150 – 200 Yards of Dark Olive.
- I9/5.5mm Crochet Hook
- Tapestry Needle
- Scissors
Material Notes:
Lion Brand Wool Ease and Berroco Vintage are lovely wool blends that would add warmth. For a shawl more appropriate for warmer weather, a cotton blend like Berroco Modern Cotton or Lion Brand Made with Love would be lovely.
We have lots of great crochet hooks in our Yarn Crafts and Coffee Yarn Shop. The most popular, and preferred by Candace and Emily, are the Clover Amour Crochet Hooks with the soft handles and smooth metal hook. Alexandra prefers metal crochet hooks with large, ergonomic clay handles and just loves the fun designs from SiennasBowtique and BronzeShepherdStudio! If your preference is wood, the LYKKE brand are lovely, smooth and sturdy.
Tapestry Needles with the blunt, round end are essential for sewing and finishing on a number of yarn crafts, including crocheting, knitting as well as needlepointing on fabric and plastic canvas. The blunt, rounded end allows the needle to pass easily through the fabric created by yarn and holes on canvas without snagging (or getting your fingers) in the process. More specifically for crocheting and knitting, a Bent Tip Tapestry Needle makes weaving, grafting and sewing so much easier on the hands. The long oval eye makes threading strands of yarn easier, though you may still want to use a needle threader.
Scissors are an essential tool. When I’m working on the go, I like to carry a pair of folding scissors as they fit perfectly in even the tiniest of bags. When I am working at home or have more space in my bag for a larger notions pouch, I like to use a pair of lightweight, all-purpose scissors as they are so versatile and great for a variety of things from cutting plastic canvas mesh to trimming yarn ends after weaving in to cutting out a care card to include with a handmade gift.
Time Spent:
Each square took me about 2 hours to complete, so a three squared shawl in about 6 hours, and a four squared shawl in about 8 hours. If you have less color changes, you’ll finish even faster with less ends to weave in.
Measurements:
15″ Wide by 45″ (60″) Long
Gauge (Not Essential):
14 DC by 8 Rows = 4″ Square
Abbreviation (US Term):
- DC – Double Crochet (Photo Tutorial)
Pattern Notes:
The beginning chain counts towards the final stitch count.
The chain 2 in the last corner of the first round of granny square is intentional to keep a more even square with future rounds.
Join to the first stitch, not the beginning chain.
I wanted to use 5 colors in my granny square and I have written the pattern as such. Feel free to use only one color or more than one, but less than 5, work the color changes as you see fit. To prevent confusion in case you change the colors for your shawl, I will label the colors as Color A to represent Yellow, Color B to represent Orange, Color C to represent Red, Color D to represent Green and Color E to represent Brown.
To change yarn colors, slip stitch over twice after the join, then insert hook into the next chain space, and pull the new color through. Hold the yarn strand taught, and work the first cluster over the two tails to keep the stitches from pulling loose while you are working, and also to keep the color change even. Alternatively, you can work an invisible join, and join the new color in any chain space.
If you need a refresher on any of the techniques, I have a photo tutorial showing How to Crochet a Granny Square and also How to Join-As-You-Go Granny Squares. Alternatively, you can work all of the squares up completely, and join them using your preferred method.
Granny Square Shawl Crochet Pattern:
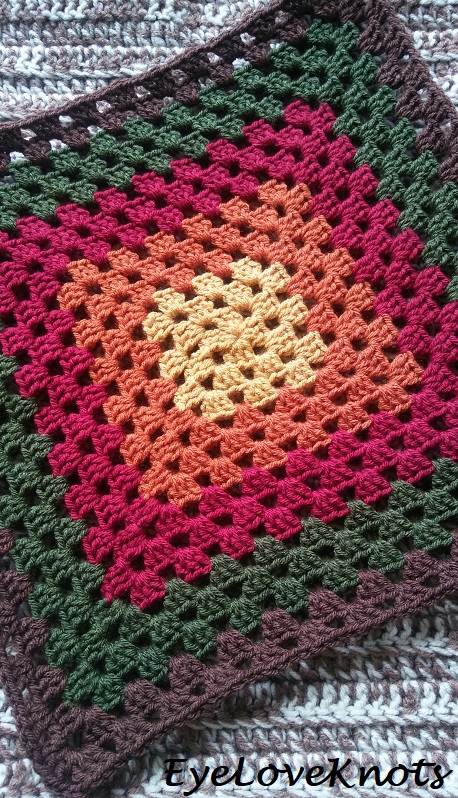
In Color A, chain 5. Join to form a ring. Chain 2, work 2 DC into the ring, chain 3, (3 DC into the ring, chain 3) 2x, 3 DC into the ring, chain 2. Join. (12 DC)
R2: Slip stitch over to the chain 3 space. Chain 2, work 2 DC into the same chain space, chain 3, 3 DC into the same chain space, chain 1, (3 DC into the next chain space, chain 3, 3 DC into the same chain space, chain 1) 3x. Join. (24 DC)
R3: Slip stitch over to the chain 3 space. Chain 2, work 2 DC into the same chain space, chain 3, 3 DC into the same chain space, chain 1, 3 DC into the next chain space, chain 1, (3 DC into the next chain space, chain 3, 3 DC into the same chain space, chain 1, 3 DC into the next chain space, chain 1) 3x. Join. (36 DC)
R4: Slip stitch over to the chain 3 space, and change to Color B. Chain 2. Work 2 DC into the same chain space, chain 3, 3 DC into the same chain space, chain 1, (3 DC into the next chain space, chain 1) 2x, [3 DC into the next chain space, chain 3, 3 DC into the same chain space, chain 1, (3 DC into the next chain space, chain 1) 2x] 3x. Join. (48 DC)
R5: Slip stitch over to the chain 3 space. Chain 2, work 2 DC into the same chain space, chain 3, 3 DC into the same chain space, chain 1, (3 DC into the next chain space, chain 1) 3x, [3 DC into the next chain space, chain 3, 3 DC into the same chain space, chain 1, (3 DC into the next chain space, chain 1) 3x] 3x. Join. (60 DC)
R6: Slip stitch over to the chain 3 space. Chain 2, work 2 DC into the same chain space, chain 3, 3 DC into the same chain space, chain 1, (3 DC into the next chain space, chain 1) 4x, [3 DC into the next chain space, chain 3, 3 DC into the same chain space, chain 1, (3 DC into the next chain space, chain 1) 4x] 3x. Join. (72 DC)
R7: Slip stitch over to the chain 3 space, and change to Color C. Chain 2, work 2 DC into the same chain space, chain 3, 3 DC into the same chain space, chain 1, (3 DC into the next chain space, chain 1) 5x, [3 DC into the next chain space, chain 3, 3 DC into the same chain space, chain 1, (3 DC into the next chain space, chain 1) 5x] 3x. Join. (84 DC)
R8: Slip stitch over to the chain 3 space. Chain 2, work 2 DC into the same chain space, chain 3, 3 DC into the same chain space, chain 1, (3 DC into the next chain space, chain 1) 6x, [3 DC into the next chain space, chain 3, 3 DC into the same chain space, chain 1, (3 DC into the next chain space, chain 1) 6x] 3x. Join. (96 DC)
R9: Slip stitch over to the chain 3 space. Chain 2, work 2 DC into the same chain space, chain 3, 3 DC into the same chain space, chain 1, (3 DC into the next chain space, chain 1) 7x, [3 DC into the next chain space, chain 3, 3 DC into the same chain space, chain 1, (3 DC into the next chain space, chain 1) 7x] 3x. Join. (108 DC)
R10: Slip stitch over to the chain 3 space, and change to Color D. Chain 2, work 2 DC into the same chain space, chain 3, 3 DC into the same chain space, chain 1, (3 DC into the next chain space, chain 1) 8x, [3 DC into the next chain space, chain 3, 3 DC into the same chain space, chain 1, (3 DC into the next chain space, chain 1) 8x] 3x. Join. (120 DC)
R11: Slip stitch over to the chain 3 space. Chain 2, work 2 DC into the same chain space, chain 3, 3 DC into the same chain space, chain 1, (3 DC into the next chain space, chain 1) 9x, [3 DC into the next chain space, chain 3, 3 DC into the same chain space, chain 1, (3 DC into the next chain space, chain 1) 9x] 3x. Join. (132 DC)
R12: Slip stitch over to the chain 3 space. Chain 2, work 2 DC into the same chain space, chain 3, 3 DC into the same chain space, chain 1, (3 DC into the next chain space, chain 1) 10x, [3 DC into the next chain space, chain 3, 3 DC into the same chain space, chain 1, (3 DC into the next chain space, chain 1) 10x] 3x. Join. (144 DC)
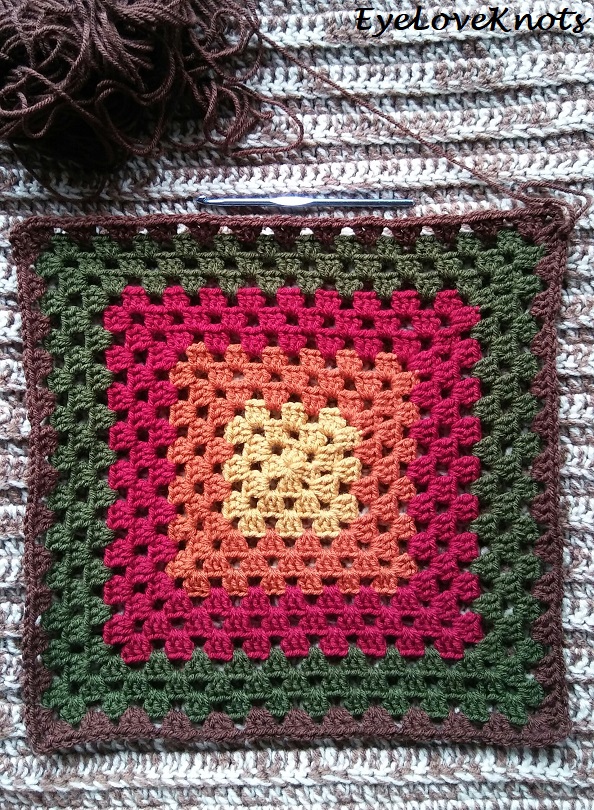
R13: Slip stitch over to the chain 3 space, and change to Color E. Chain 2, work 2 DC into the same chain space, chain 3, 3 DC into the same chain space, chain 1, (3 DC into the next chain space, chain 1) 11x, [3 DC into the next chain space, chain 3, 3 DC into the same chain space, chain 1, (3 DC into the next chain space, chain 1) 11x] 3x. Join. (156 DC)
R14, 1st Square: Slip stitch over to the chain 3 space. Chain 2, work 2 DC into the same chain space, chain 3, 3 DC into the same chain space, chain 1, (3 DC into the next chain space, chain 1) 12x, [3 DC into the next chain space, chain 3, 3 DC into the same chain space, chain 1, (3 DC into the next chain space, chain 1) 12x] 3x. Join and fasten off. (168 DC) Weave in ends.
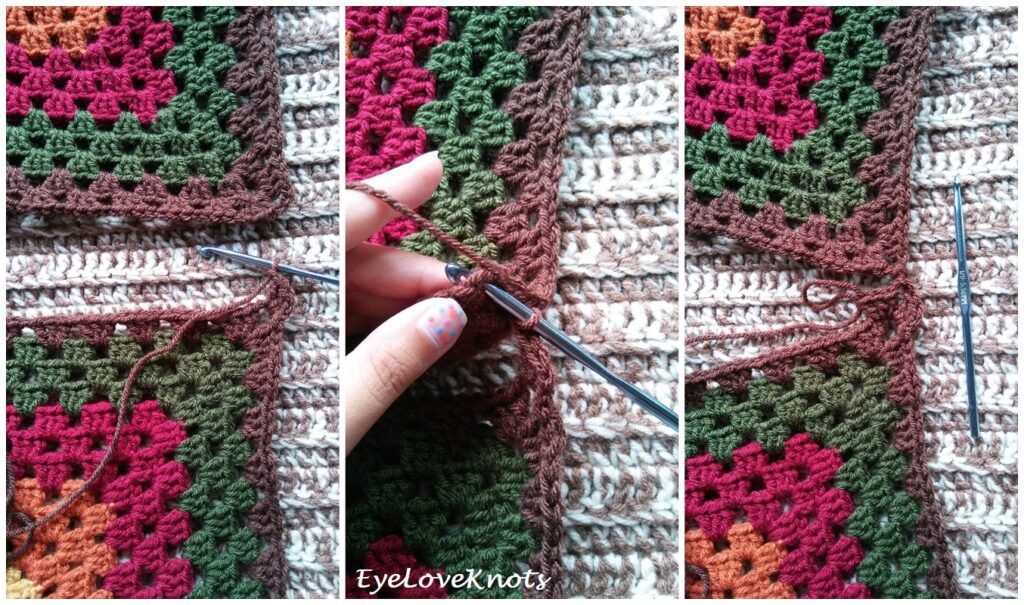
R14, Remaining Squares: Continuing in Color E, slip stitch over to the chain 3 space. Chain 2, work 2 DC into the same chain space, chain 1, from behind: single crochet into the previous square’s corner chain space, in current square: 3 DC into the same chain space, chain 1, from behind: single crochet into the previous square’s next chain space, (in current square: 3 DC into the next chain space, chain 1, from behind: single crochet into the previous square’s next chain space) 12x, in current square: 3 DC into the next corner chain space, chain 1, from behind: single crochet into the previous square’s next corner chain space, chain 1, in current square: 3 DC into the same chain space;
ALL REMAINING IN CURRENT SQUARE: chain 1, (3 DC into the next chain space, chain 1) 12x, [3 DC into the next chain space, chain 3, 3 DC into the same chain space, chain 1, (3 DC into the next chain space, chain 1) 12x] 2x. Join and fasten off. (168 DC) Weave in ends.
Please feel free to make and sell your own items made using this pattern, but keep in mind, this written pattern and my photos are protected by copyright. Please DO NOT claim this pattern as your own nor should you sell my pattern. DO NOT re-publish my photos as your own. DO NOT copy and paste my pattern anywhere, link to it instead so other’s can visit. Making videos providing instructions how to make my projects on any social media platform is also not permitted.
Join one of our awesome Facebook groups to share your creations, and see what others are up to!
– Yarn Crafts & Coffee Community
– DIY Home On Rockwood Lane
– Alexandra Lane Lifestyle
Linked Up To…
Craft Schooling Sunday – Creative Jewish Mom
Nifty Thrifty Sunday #355 – Meet Our Life
Granny-Spiration Link Up Party #10 – Atelier Marie-Lucienne
In Stitch Party #20 – Nicki’s Homemade Crafts
Creative Mondays – Claire Justine
Handmade Monday #96 – Sum of their Stories
The Really Crafty Link Party #138 – Keeping it Real
Craftastic Monday Link Party – Sew Can Do
Ginx Woolly Linx Party October – Ginx Craft
Tutorials & Tips Link Party {369} – Home Stories A to Z
The Linky Ladies #143 – The Purple Poncho
Sew It Cook It Craft It Link Party #74 – Sew Historically
The Scoop Link Party #347 – Worthing Court Blog
442nd Inspire Me Tuesday – A Stroll Thru Life
Fabulous Party #236 – Lou Lou Girls
Turning Heads Link Up – Elegantly Dressed and Stylish
Confident Twosday Linkup – I Do deClaire
Hookin’ on Hump Day #176 – Petals to Picots
Talk of the Town #144 – My Repurposed Life
Your Whims Wednesday #376 – My Girlish Whims
{Wow Me} Wednesday #372 – Ginger Snap Crafts
The Wednesday Link Party 266 – The Stitchin Mommy
Crafty Love Link Party #38 – Jessie at Home
Scrappy Stitchers Link Party #46 – Stitches N Scraps
Pin Party #286 – The Pin Junkie
Sweet Inspiration Party #128 – Purple Hues and Me
Friday Frenzy Link Party – 10/12/18 – Kelly Lynn’s Sweets and Treats
Friday Favorites Link Up – Lizzie in Lace
Weekend Wear Linkup – Mom with Style
Fashion Files Link Up #182 – Curly Crafty Mom
Best of the Weekend – Hello Little Home
Link Your Stuff – Annemarie’s Haakblog
Snickerdoodle Create Bake Make Party Link Party #253 – Across the Boulevard
Craft Schooling Sunday – Creative Jewish Mom
Happiness is Homemade Link Party #337 – Create with Cynthia
Unlimited Monthly Link Party 15 – Grammy’s Grid
Craftastic Monday – Sew Can Do
Handmade Monday #190 – Sum of their Stories
Ginx Woolly Linx Party August – Ginx Craft
Fabulous Party #334 – Lou Lou Girls
Linky Ladies Party #192 – The Purple Poncho
One More Row Free Pattern Link Party #21 – Loops and Love Crochet
Party in Your PJs #323 – The Apple Street Cottage
{Wow Me} Wednesday #469 – Ginger Snap Crafts
Your Whims Wednesday #474 – My Girlish Whims
Hookin’ on Hump Day #221 – Moogly Blog
The Wednesday Link Party 362 – The Stitchin’ Mommy
Scrappy Stitchers Link Party #66 – Stitches n Scraps
Creatively Crafty Link Party #238 – Life Beyond the Kitchen
Artsy-Fartsy Party #307 – Artsy Fartsy Mama
Creative Compulsions Linky Party #74 – My Bijou Life
Pin Party #383 – The Pin Junkie
Traffic Jam Weekend Linky Party #247 – My Bijou Life
Friday Favorites – Busy Being Jennifer
Create, Bake, Grow & Gather Party #434 – Shabby Art Boutique
Encouraging Hearts & Home Blog Hop – Apron Strings & Other Things
Thursday Favorite Things #454 – An Artful Mom
Snickerdoodle Create Bake Make Link Party 350 – EyeLoveKnots
Link Your Stuff – Annemarie’s Haakblog
A Morning Cup of Joe Linky Party – The Cottage Market
Scraptastic Saturday Party 303 – Scrapality
love it, thanks for sharing on craft schooling sunday!
I do love a good granny square project.
Thank You, I love your colors and the stitch too. This just make me feel good ??
Me too! Fall colors have a way of doing that to us, don’t they?
Love the colors in this style.
thanks for linking!
jess xx
http://www.elegantlydressedandstylish.com
Thanks, Jess!
Those large granny squares do make an original scarf.
Thank you for sharing at The Really Crafty Link Party. Pinned.
What a lovely shawl Alexandra, beautiful colours 🙂
Thanks for sharing at Creative Mondays.
Thank you, Claire!
Thanks again for sharing at Creative Mondays Alexandra, you are one of my featured blogs today 🙂
Love this idea. A simple granny square but with a great result! And looove the colors. Makes me hope for autumn to start soon. It seems to be delayed here in the Netherlands.
Today only we are having some really beautiful fall-like weather in Florida, but it never stays. So funny because cooler weather always makes me think of Christmas, as this is the only time we ever really have it. Hehe. Best wishes! Thank you for dropping me a line.
Beautiful scarf. Thanks for sharing the pattern.
Thanks, Ginny!
Well now you do it again! Next to scarves, shawls are my favorite to wrap up in during cool Fall nights. Need to show my daughter this pattern too!
So happy to hear that you like it 🙂
What gorgeous colours, so cozy and perfect for autumn
Thanks, Julie! I just love all the beautiful Autumn colors together.