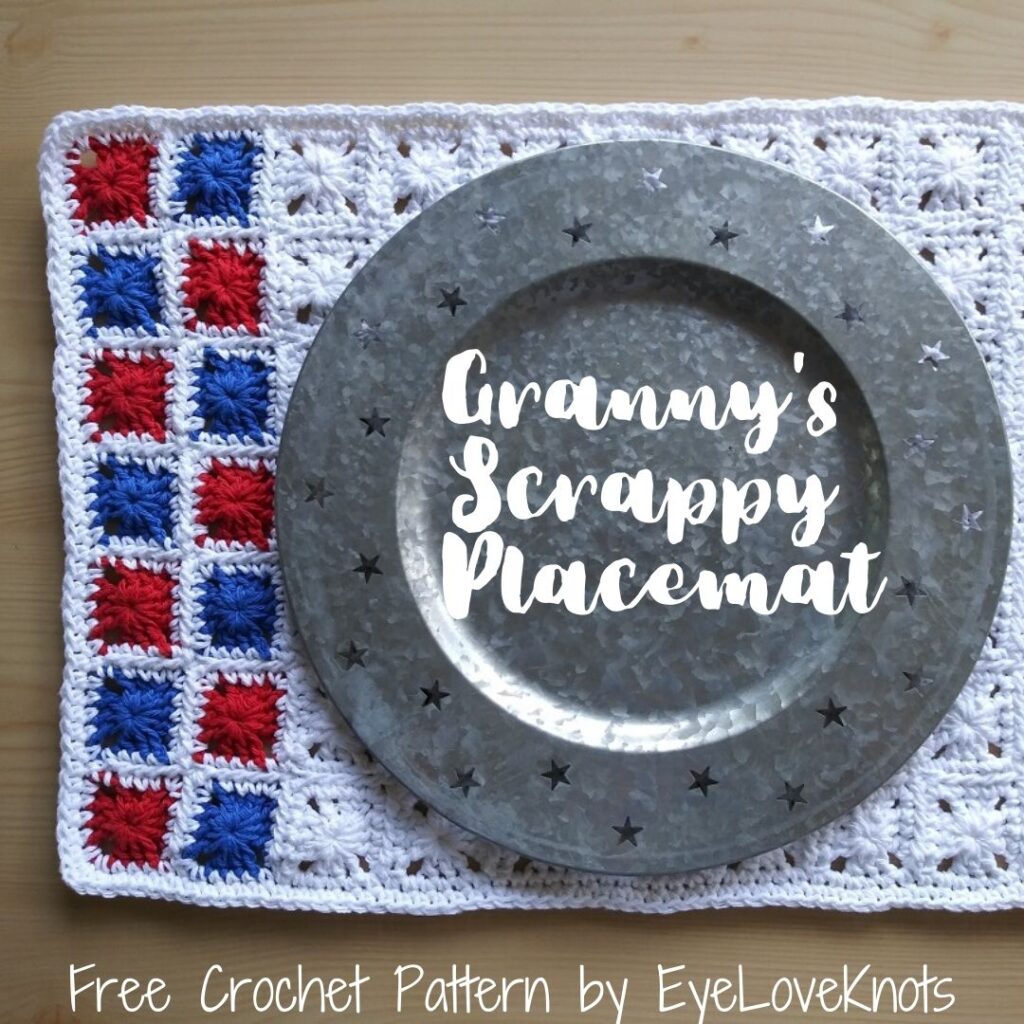
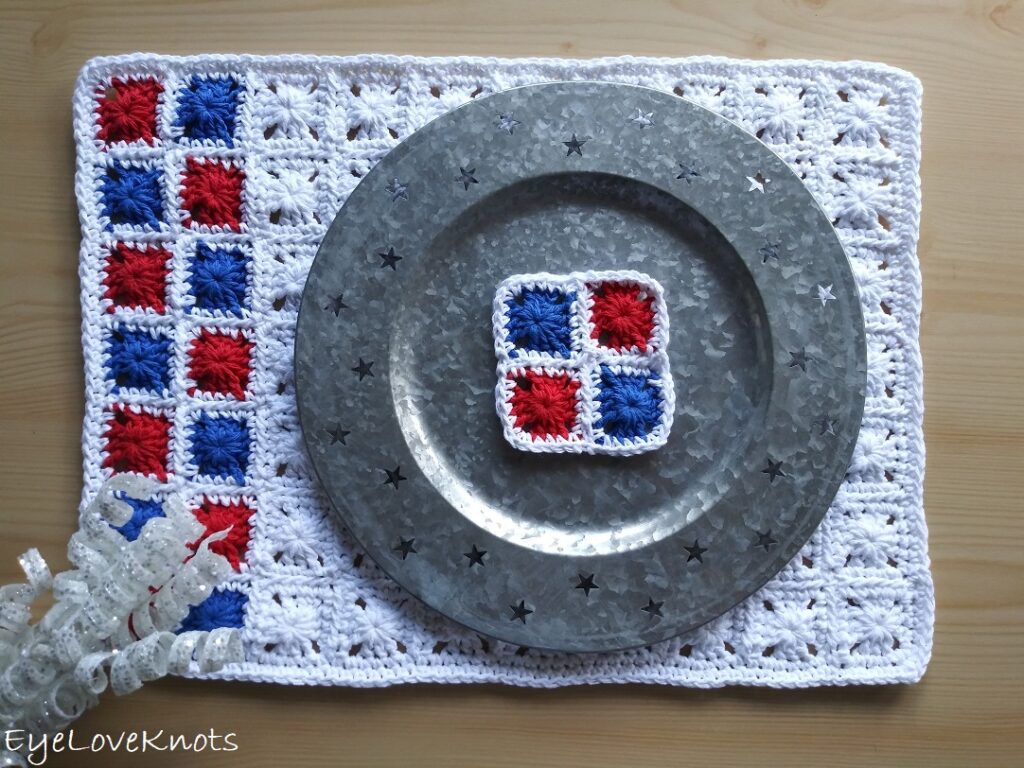
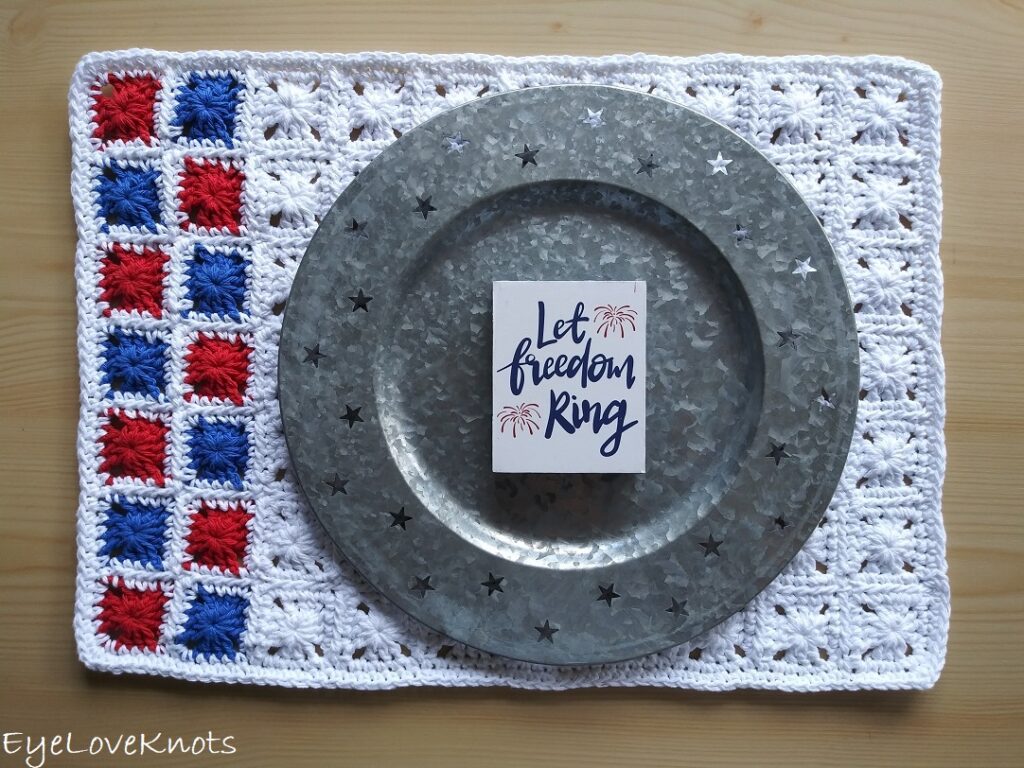
This is a free crochet pattern for how to crochet a granny square placemat.
This post contains affiliate links for LoveCrafts and WeCrochet. If you make a purchase by clicking on them, I make a small commission at no extra cost to you. Thanks for your support!
Find the free crochet pattern instructions below, or purchase a printer-friendly, ad-free PDF on Ravelry by clicking here.
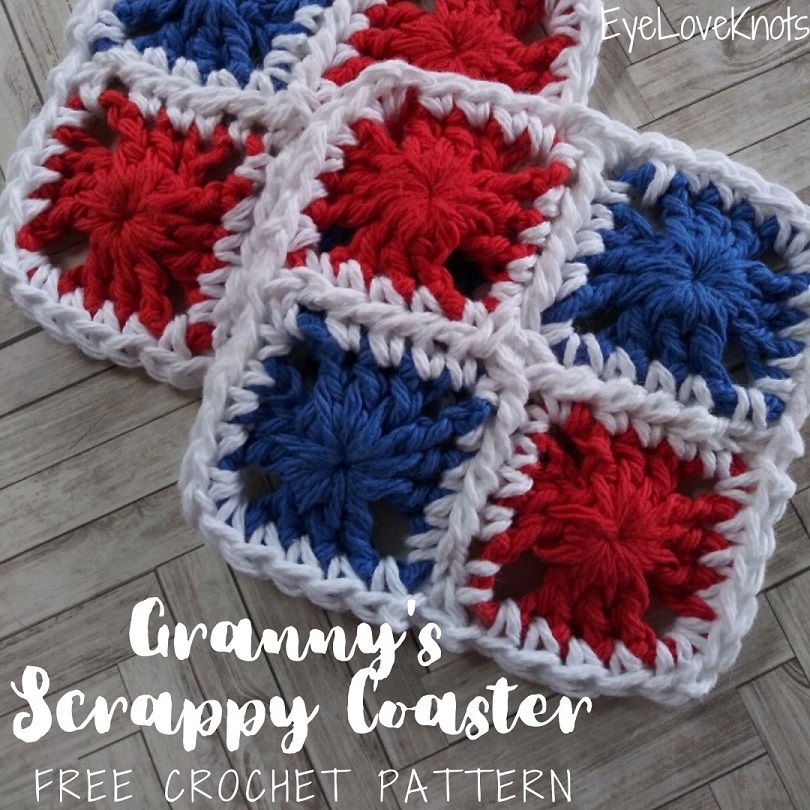
In 2018, when I originally designed Granny’s Scrappy Coaster, I wanted to make a matching placemat, and table runner. I worked up so many tiny, one round granny squares, and saved them with the idea that I would complete the runner first, but it was so many squares that I lost steam on the project entirely.
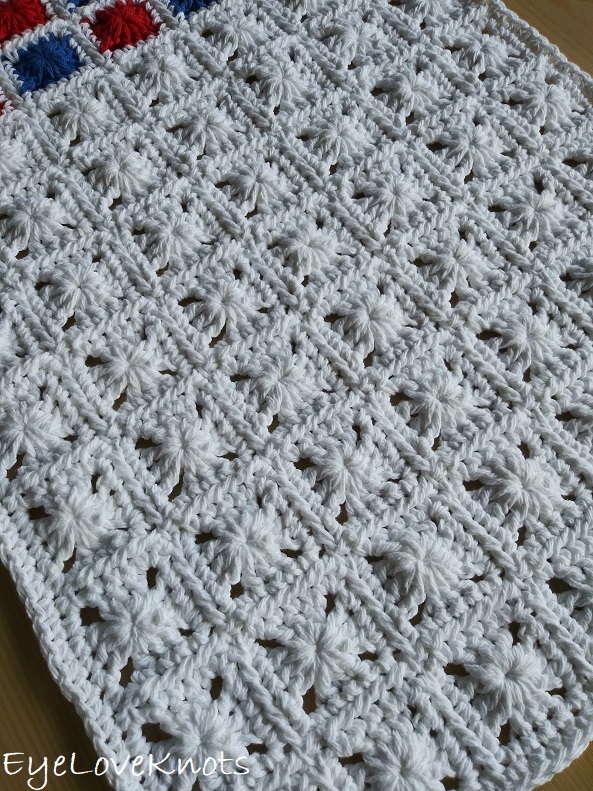
Flash forward, I was so excited to finally get Granny’s Scrappy Coaster shared this year, and was determined to get the matching placemat worked up, and I love it. My husband and I don’t sit down at our table to eat (it’s actually covered in sewing machines and yarn projects), so I have no use for a placemat, but I do plan on using it more like a doily for decorating.
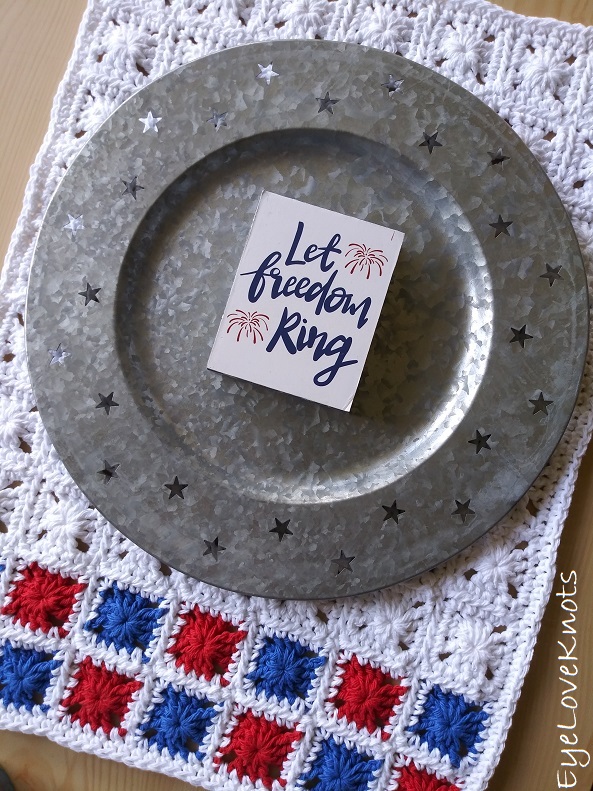
Check out other crochet projects in the “Granny’s” series, or “4th of July“.
Ad-Free, Printer-Friendly PDF:
If you would like a PDF version of this post, you may get one through either my EyeLoveKnots Etsy Shop, Ravelry or LoveCrochet Shop for a small fee. This fee is to compensate for the views lost when you no longer need to return to the blog to for the information, as you will have your own copy. Plus! It helps fund supplies for new projects to share with you!
Shop EyeLoveKnots Etsy: Granny’s Scrappy Placemat.
Shop EyeLoveKnots LoveCrochet: Granny’s Scrappy Placemat.
Share your version of this project on Ravelry – Granny’s Scrappy Placemat.
Save this to your Favorites on: AllFreeCrochet, AllFreeHolidayCrafts, FaveCrafts, Crochet Pattern Bonanza, DIYideaCenter, Cheap Thrifty Living
Materials:
- 282 Yards of Worsted Weight Cotton Yarn – I used Lily Sugar n Cream in Red (21 Yards), Royal (21 Yards) and White (240 Yards)
- H8/5mm Crochet Hook
- Tapestry Needle
- Optional, Jewelry Pliers
Material Notes:
Yarn Alternatives to Lily Sugar n Cream: Bernat’s Handicrafter, Red Heart’s Smoothie, WeCrochet Dishie
Each square requires about 3 yards of yarn.
I used cotton yarn because it’s more absorbent and durable, but really any yarn will work. If you use a synthetic, just be cautious not to put any kind of hot pot or pan on the placemat.
Jewelry pliers are an excellent tool to use to help weave in ends, as cotton yarn can be quite tough on the fingers when weaving in with just fingers and a tapestry needle.
To make a 11.75″ by 16.25″ placemat, you’ll need 20 yards each of blue and red, and about 190 yards of white; for a 14.5″ by 19.88″ placemat, you’ll need 25 yards each of blue and red, and about 300 yards of white.
Time Spent:
Just under 8 hours, 15 minutes.
Measurements:
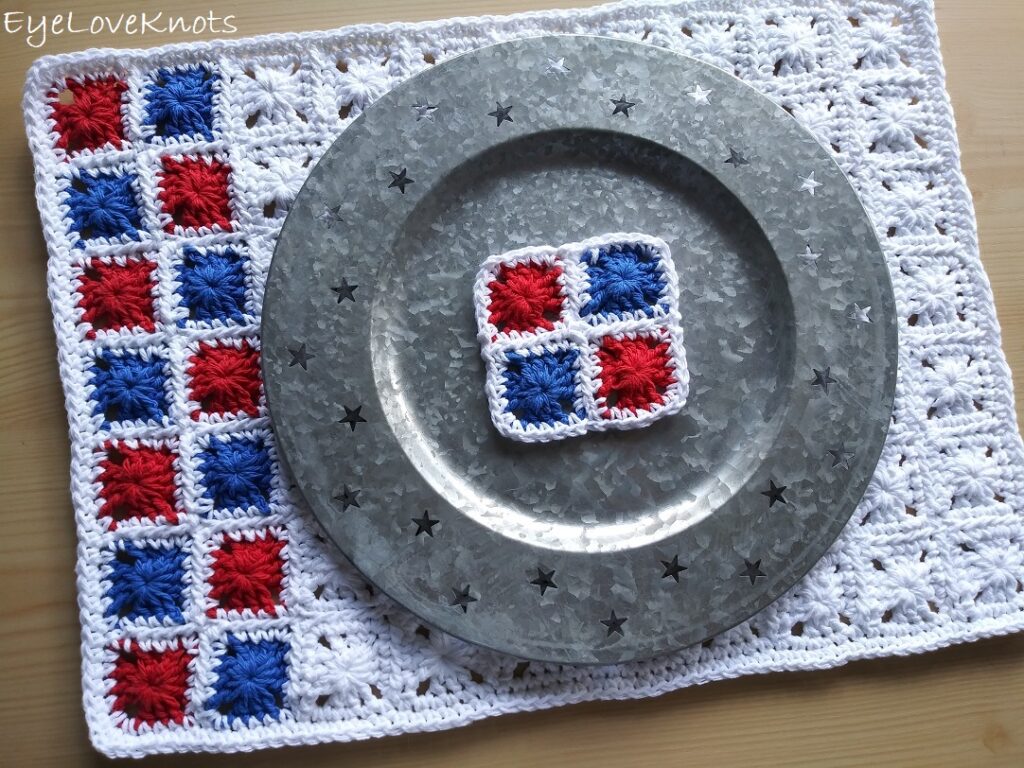
13.75″ Wide by 18.13″ Tall
See pattern notes for how to make 11.75″ by 16.25″ and 14.5″ by 19.88″ sizes.
Gauge – Not Essential:
- 16 HDC by 10 Rows = 4″
- 1 Square = 1.88″
Abbreviations (in US Terms):
- DC – Double Crochet (Photo Tutorial)
- SC – Single Crochet (Photo Tutorial)
- PLT – Pull Loop Through (Joining Method)
- To PLT: pull up on current loop (so it doesn’t fall out), insert hook from right side through corresponding stitch of previous square, grab loop with hook, tighten as normal, and pull through, then continue to work next stitch
Pattern Notes:
In researching, I found that while 13″ x 9″ is the standard size for placemats, some are also 11″ x 7″, 12″ x 18″ and 14″ x 20″, so in case you’d like a slightly smaller or larger placemat, here’s how to get that:
- For an 11.75″ x 16.25″ placemat: it will be 6 squares tall by 9 squares wide requiring 6 red, 6 blue and 42 white;
- For a 14.5″ x 19.88″ placemat: it will be 8 squares tall by 11 squares wide requiring 8 red, 8 blue and 72 blue.
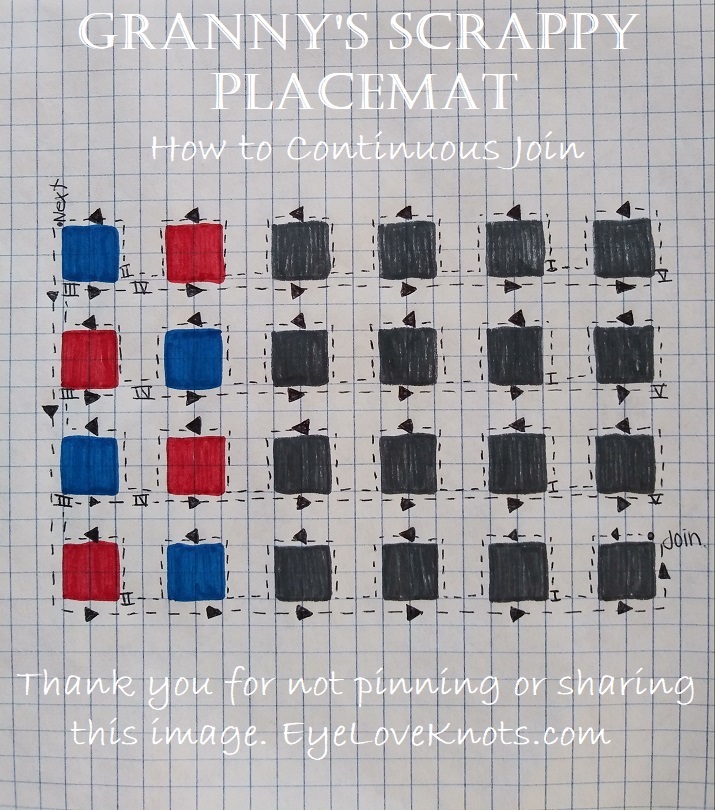
The continuous join is my go to joining method because instead of having a million more ends to weave in, with it, you tie on once, join all of the squares together, and the fasten off making for only two ends to weave in.
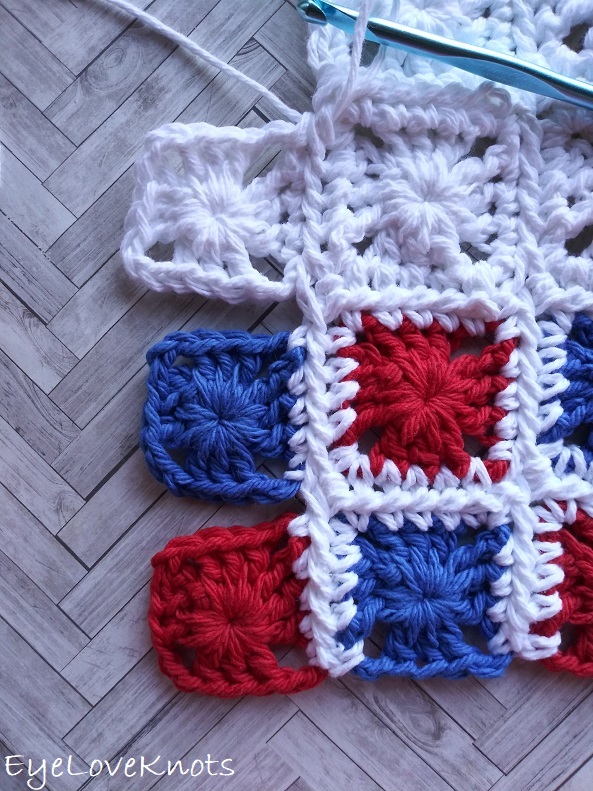
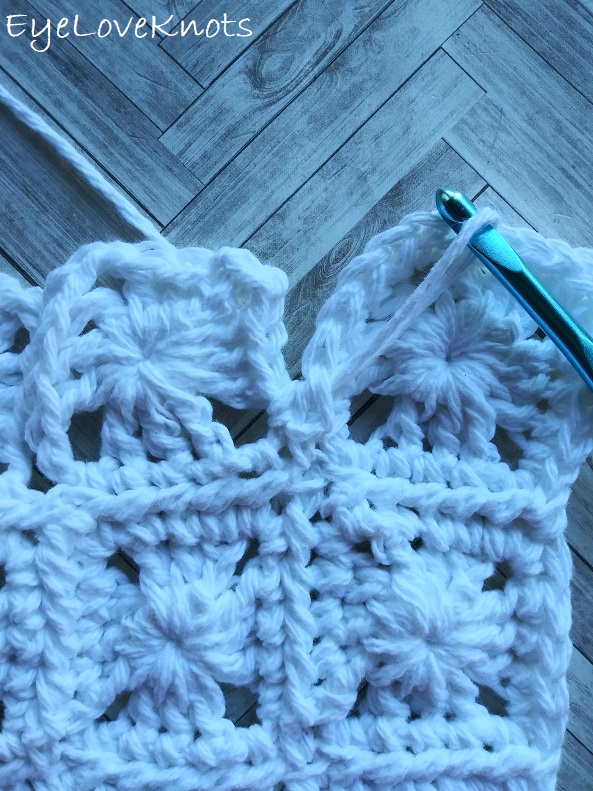
Originally, I worked the beginning of my continuous join starting from the bottom right side double crochet, and I took all my original photos for the tutorial working from this starting point. When I went to work my second granny square, I tried it a different way (the way that the pattern and tutorial are written) which makes all the center joins uniformed in appearance. So, if the first blue square looks different to you (like shown above), ignore all the stitches on the right side in the beginning. Make the first square look just like the first photo in the tutorial below.
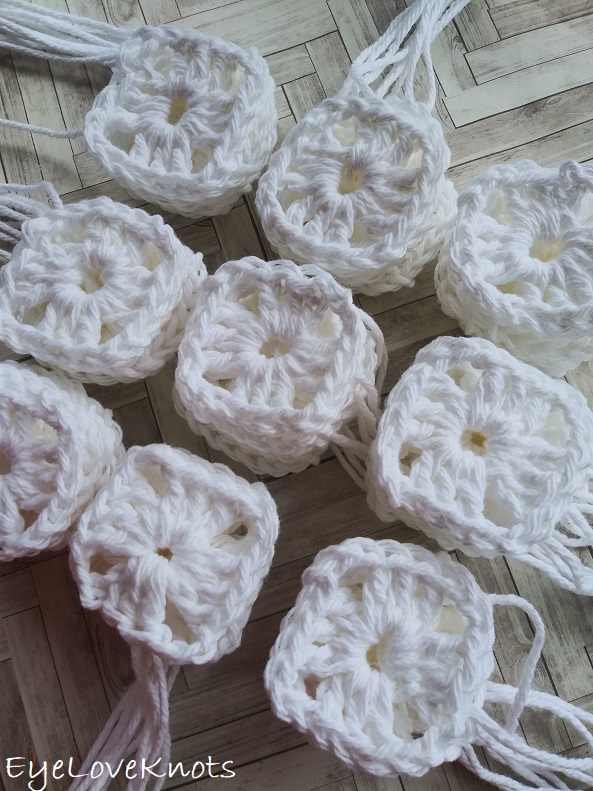
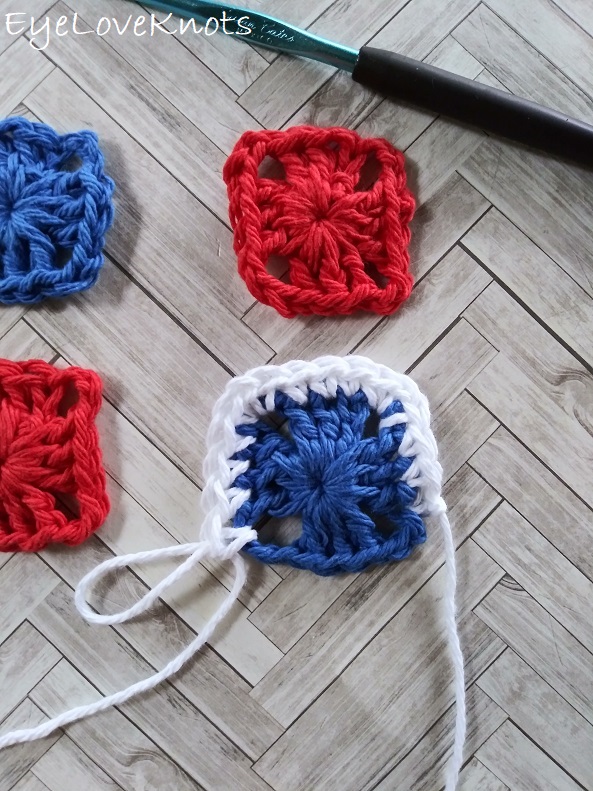
Granny Square Pattern – Make 7 Red, 7 Blue and 56 White:
Chain 5. Slip stitch join to form a ring. Chain 2, work 2 DC into the ring, (chain 3, 3 DC into the ring) 3x, chain 2. Join to the 2nd chain of the beginning chain 2.
Fasten off, and weave in the ends.
Continuous Join & Border – All one big long motion broken down in pieces to make it easier to see:
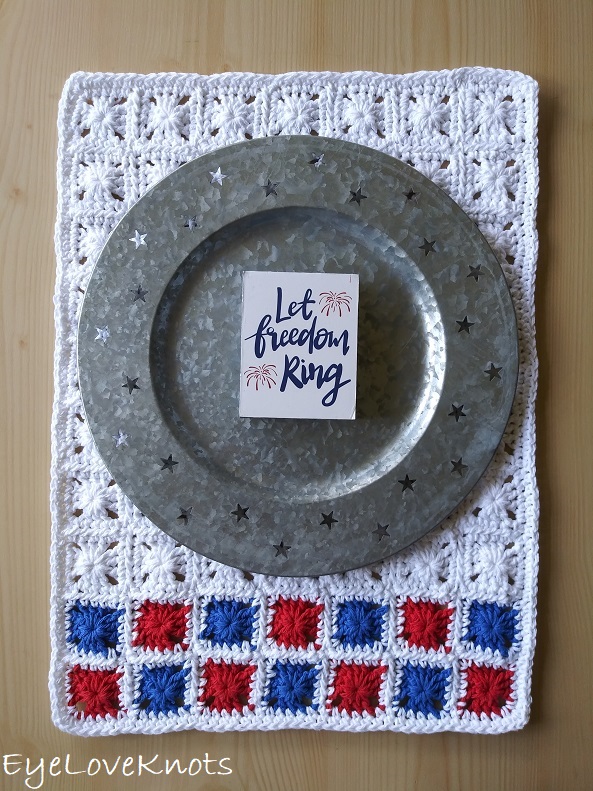
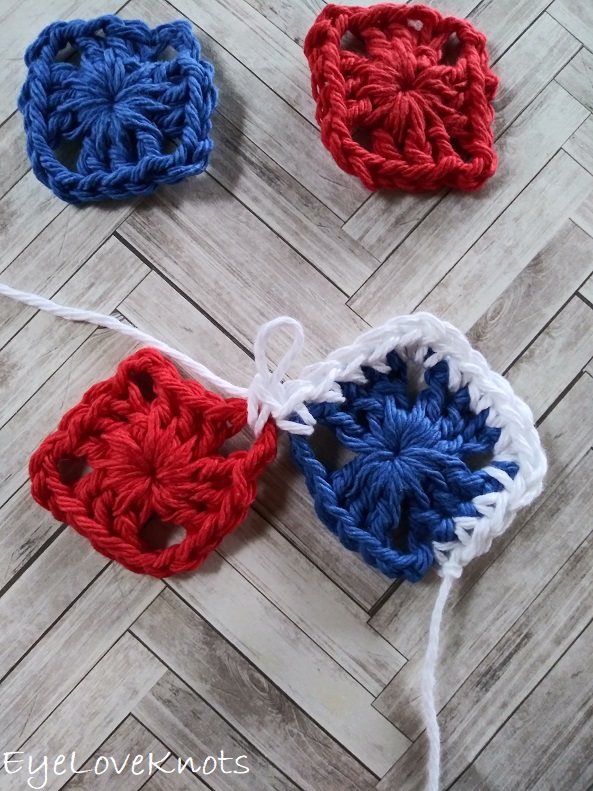
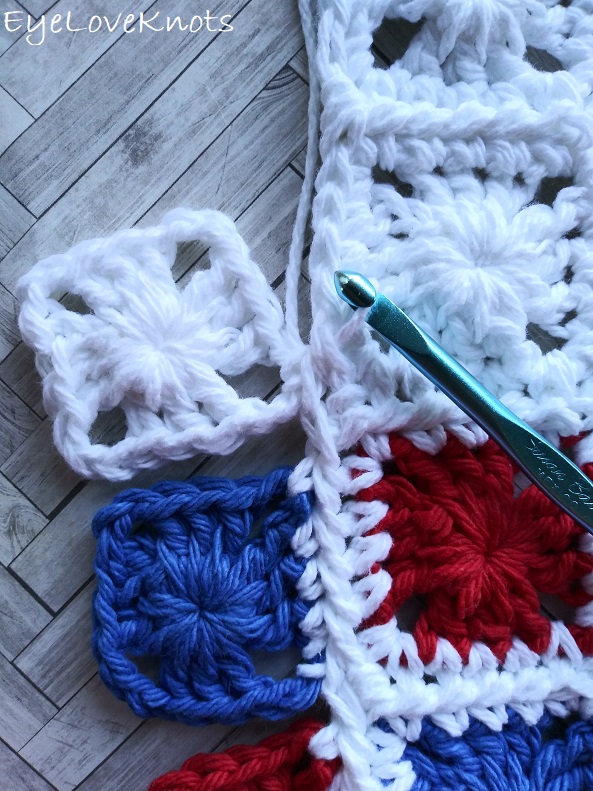
Lay the squares out how you’d like them to be on the finished placemat. For a uniformed look, make sure they are all facing the same way (example, with the beginning chain all on top).
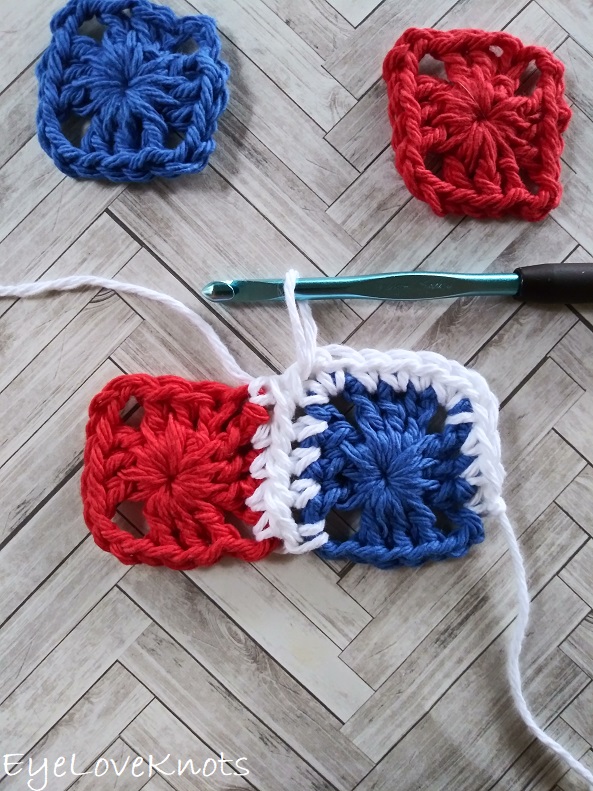
Attach yarn to the top right chain space of the bottom right square (either by tying on, chaining 1, and working a SC, or by making a slip knot, and working a SC into this space), SC into the next 3 DC, (SC, chain 1, SC) into the next chain space, SC into the next 3 DC, SC into the next chain space;
I [SC into the bottom right chain space of the next granny square, PLT, (SC into the next DC, PLT) 3x, SC into the next chain space, PLT, from behind: SC into the corresponding chain space of the previous square, in current square: SC into the same chain space, and into the next 3 stitches, (SC, chain 1, SC) into the next chain space, SC into the next 4 stitches] 8x;
II SC into the bottom right chain space of the next square, PLT, (SC into the next DC, PLT) 3x, SC into the next chain space, PLT, from behind: SC into the corresponding chain space of the previous square, in current square: SC into the same chain space, and into the next 4 stitches;
III SC into the bottom left chain space of the top left square, PLT, (SC into the next DC, PLT) 3x, SC into the next chain space, PLT;
IV [From behind: SC into the center join of the previous rows 2 squares, turn back to right side and SC into the bottom left chain space of the next square, PLT, (SC into the next DC, PLT) 3x, SC into the next chain space, PLT] 9x;
*The next portion combines section V plus I, II, III and IV. Repeat the follow 5x:
{V From behind: SC into the previous rows chain space, in current square: SC into the same chain space, and into each of the next 3 DC, (SC, chain 1, SC) into the next chain space, SC into each of the next 3 DC, (SC, chain 1, SC) into the next chain space, SC into the next 4 stitches, continuing from the right side: SC into the center of the next join,
I [SC into the bottom right chain space of the next granny square, PLT, (SC into the next DC, PLT) 3x, SC into the next chain space, PLT, from behind: SC into the corresponding chain space of the previous square, in current square: SC into the same chain space, and into the next 3 stitches, (SC, chain 1, SC) into the next chain space, SC into the next 4 stitches, SC into the center of the next join] 8x,
II SC into the bottom right chain space of the next square, PLT, (SC into the next DC, PLT) 3x, SC into the next chain space, PLT, from behind: SC into the corresponding chain space of the previous square, in current square: SC into the same chain space, and into the next 4 stitches,
III SC into the bottom left chain space of the top left square, PLT, (SC into the next DC, PLT) 3x, SC into the next chain space, PLT,
IV [From behind: SC into the center join of the previous rows 2 squares, turn back to right side and SC into the bottom left chain space of the next square, PLT, (SC into the next DC, PLT) 3x, SC into the next chain space, PLT] 9x;} 5x
V From behind: SC into the previous rows chain space, in current square: SC into the same chain space, and into each of the next 3 DC, (SC, chain 1, SC) into the next chain space, SC into each of the next 3 DC, (SC, chain 1, SC) into the next chain space, SC into the next 4 stitches, continuing from the right side: SC into the center of the next join,
I [SC into the bottom right chain space of the next granny square, PLT, (SC into the next DC, PLT) 3x, SC into the next chain space, PLT, from behind: SC into the corresponding chain space of the previous square, in current square: SC into the same chain space, and into the next 3 stitches, (SC, chain 1, SC) into the next chain space, SC into the next 4 stitches, SC into the center of the next join] 8x,
II SC into the bottom right chain space of the next square, PLT, (SC into the next DC, PLT) 3x, SC into the next chain space, PLT, from behind: SC into the corresponding chain space of the previous square, in current square: SC into the same chain space, and into the next 3 stitches.
Next: (SC, chain 1, SC) into the next chain space, SC into the next 3 DC, [SC into the next chain space, SC into the center of the next join, SC into the next 4 stitches] 6x, (SC, chain 1, SC) into the next chain space, SC into the next 3 DC, [SC into the next chain space, SC into the center of the next join, SC into the next 4 stitches] 9x, (SC, chain 1, SC) into the next chain space, SC into the next 4 stitches, SC into the center of the next join. Slip stitch join to the 1st stitch.
Next Round: Chain 1. SC into the 1st 5 stitches, (SC into the center of the next join, SC into the next 5 stitches) 5x, (SC, chain 1, SC) into the next chain space, SC into the next 5 stitches, (SC into the center of the next join, SC into the next 5 stitches) 9x, (SC, chain 1, SC) into the next chain space, SC into the next 41 stitches, (SC, chain 1, SC) into the next chain space, SC into the next 59 stitches, (SC, chain 1, SC) into the next chain space, SC into the next 6 stitches. Slip stitch join to the 1st stitch.
Fasten off, and weave in final ends.
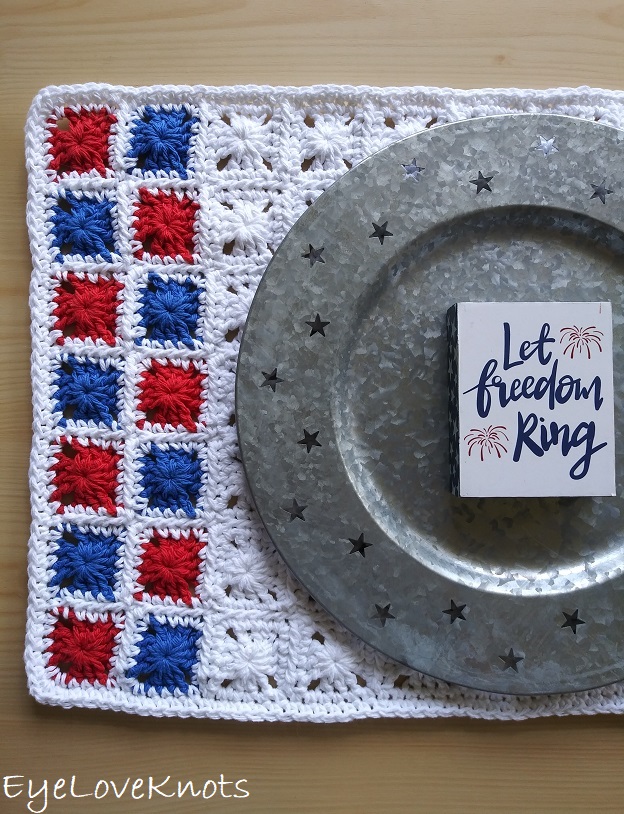
Photo Tutorial of I and II:
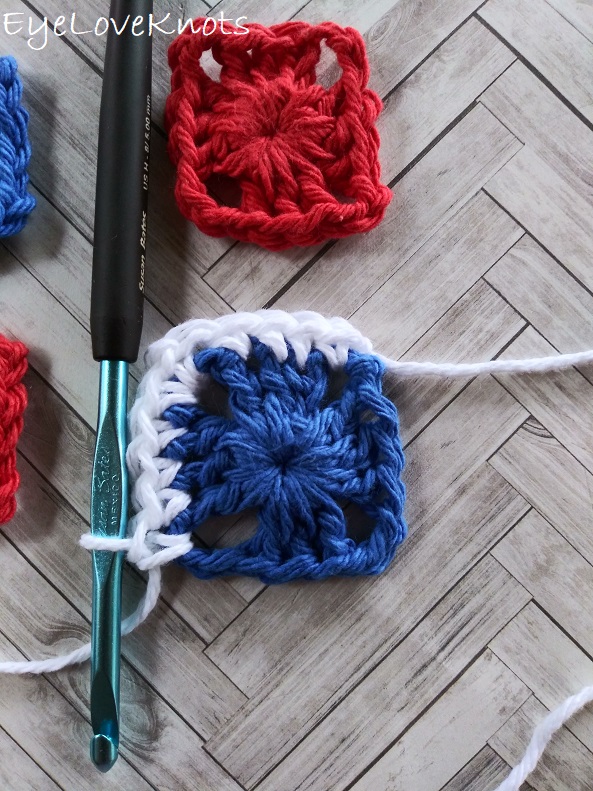
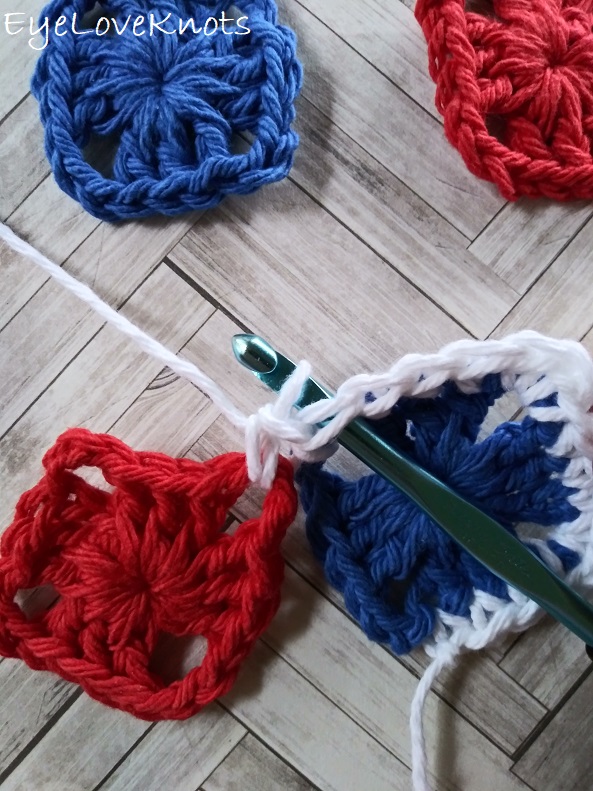
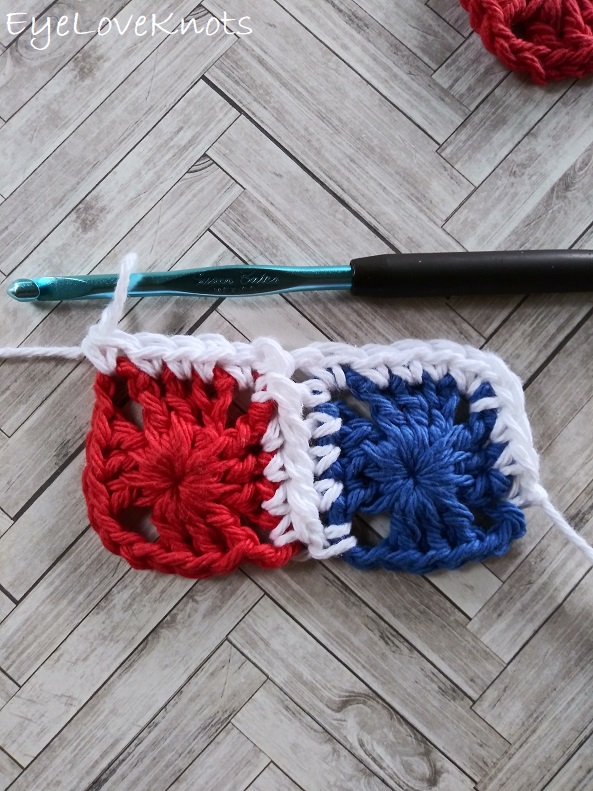
Attach yarn to the top right chain space of the bottom right square (either by tying on, chaining 1, and working a SC, or by making a slip knot, and working a SC into this space), SC into the next 3 DC, (SC, chain 1, SC) into the next chain space, SC into the next 3 DC, SC into the next chain space…
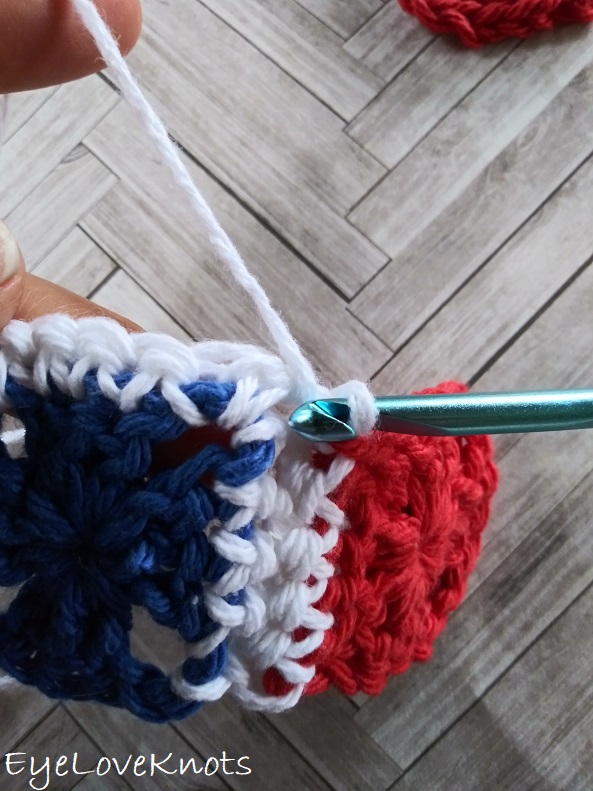
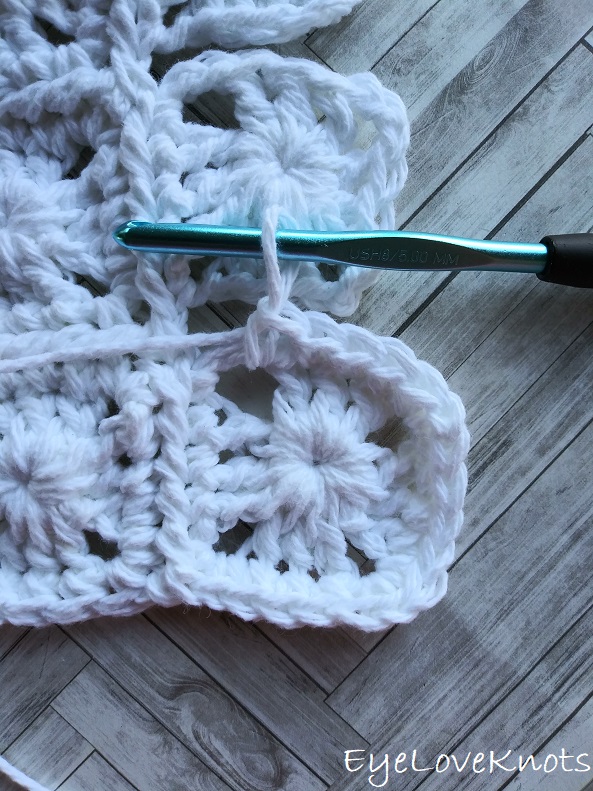
… SC into the bottom right corner of the bottom left square, pull up the loop you currently have on your hook (so it doesn’t come out), and remove crochet hook.
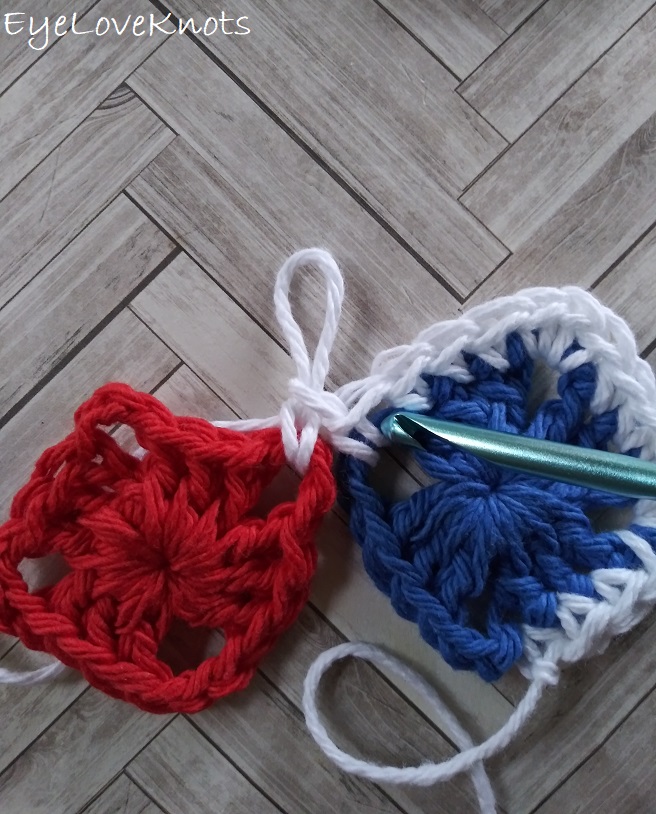
Insert hook into the corresponding SC of the first square…
… and pick the open loop back up on your hook, and tighten to normal tension…
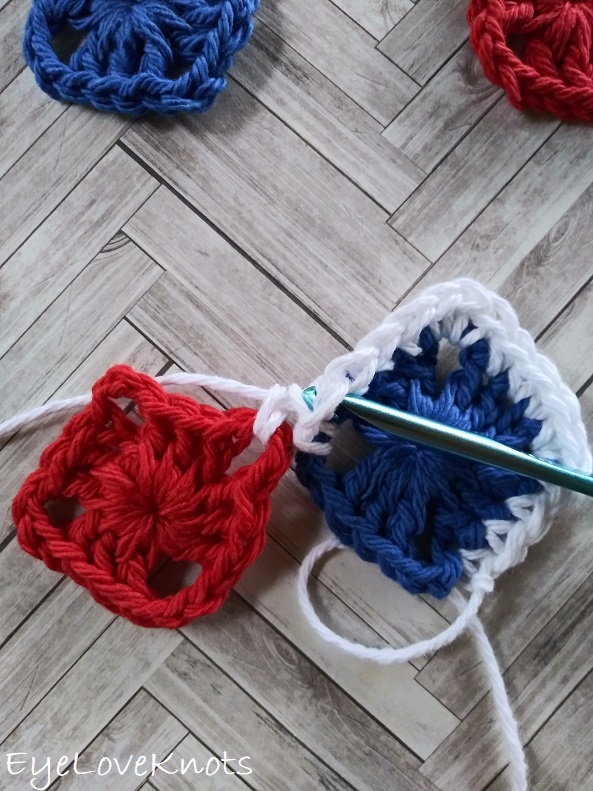
… then pull loop through.

Here’s what it looks like.
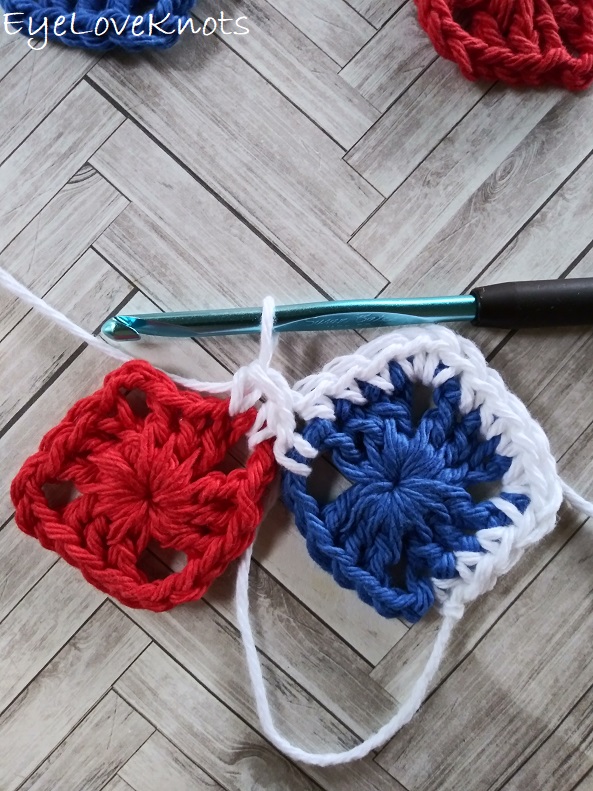
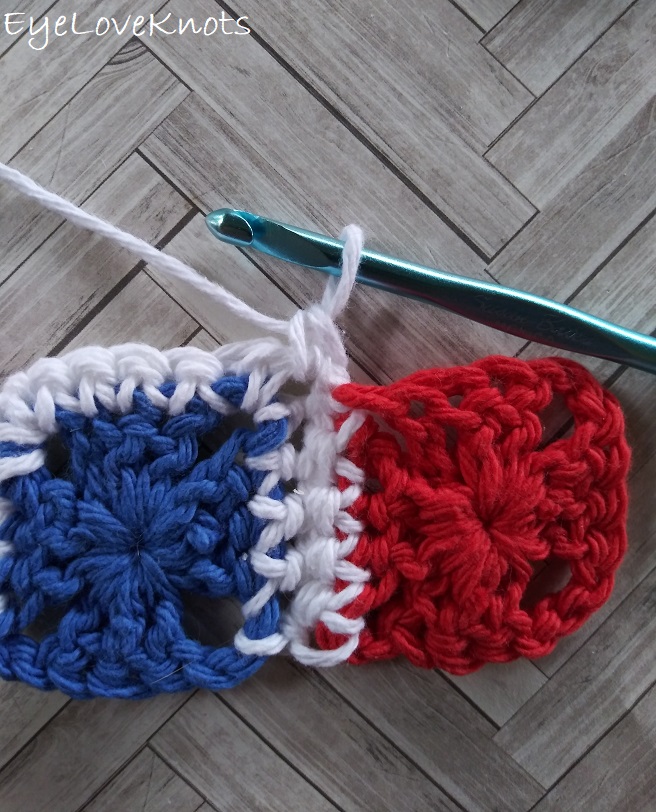
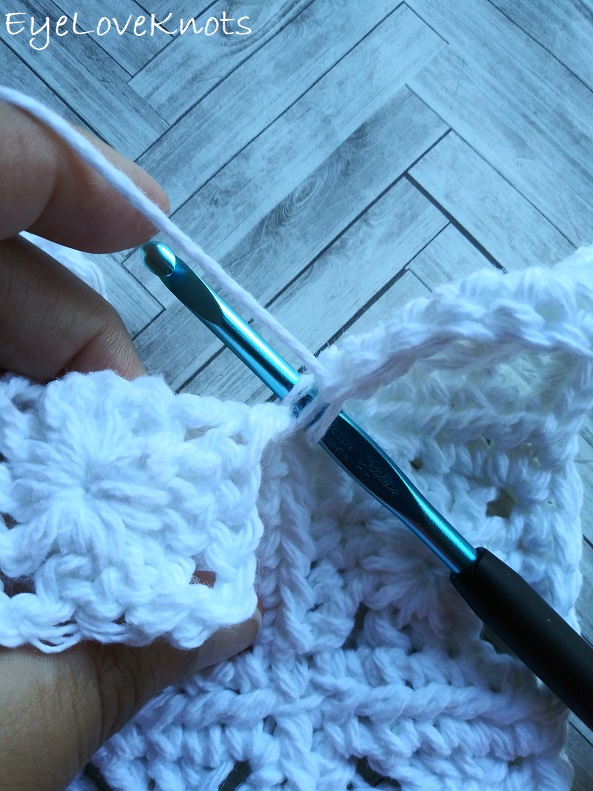
SC into the next DC on the current square, pull up loop and remove hook.
Insert crochet hook into the next corresponding stitch of the 1st square, and complete PLT join.
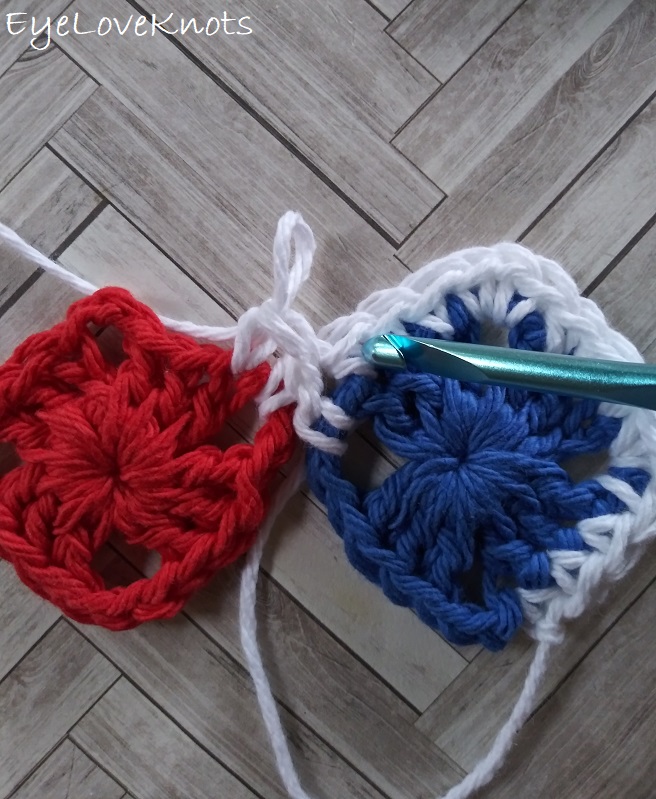
(SC into the next DC on the current square, PLT) 2x, SC into the next chain space on the current square, PLT…
… from behind, insert crochet hook into the chain space of the 1st square…
… and complete a SC.
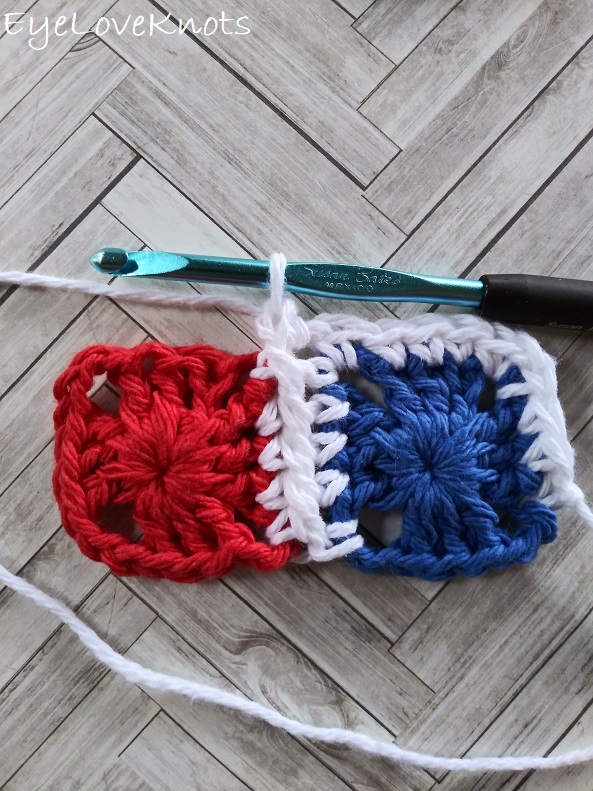
Turn back to the right side…
… working into the current square: SC into the same chain space, and each of the next 4 stitches. Continue on adding all squares for this row.
Photo Tutorial for III and IV:
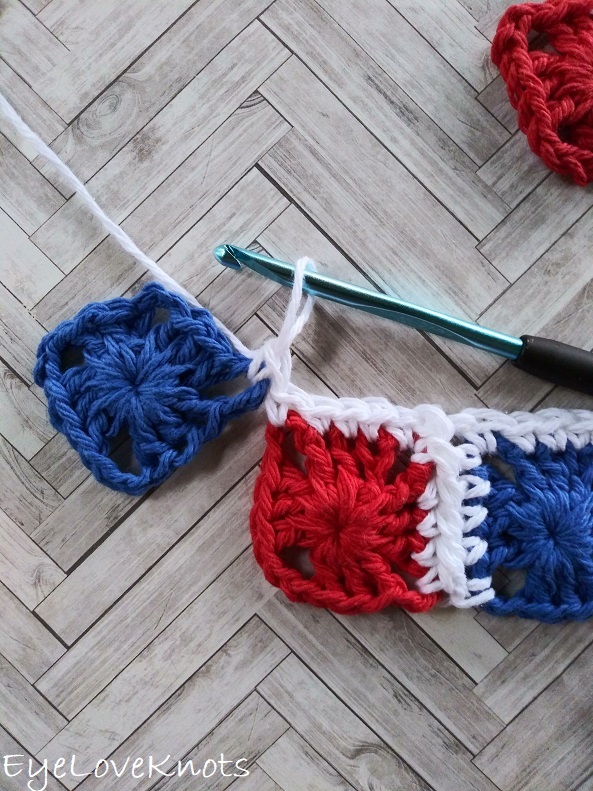
SC into the bottom left corner of the top left square…
… PLT, (SC into the next DC on the current square, PLT) 3x, SC into the next chain space on the current square, PLT.
From behind, insert hook into the center of the join from the previous rows squares, and complete a SC.
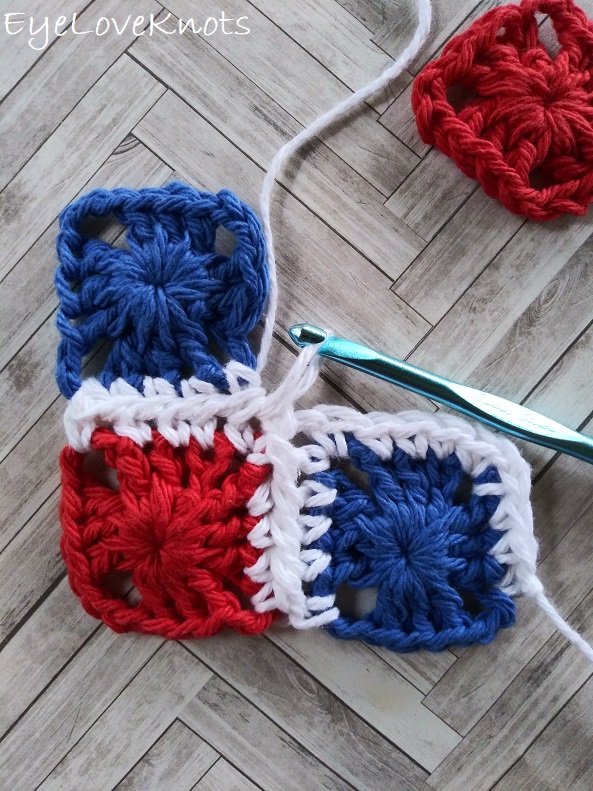
… Turn back to right side, and working into the current square: SC into the next squares chain space, PLT…
Continue on in this manner to the end of the row. Don’t forget at the very end to work from behind to SC into the previous rows chain space (as noted in the pattern).
The gaps that are in between the squares are what you’ll work into during the next row.
Photo Tutorial for V and I:
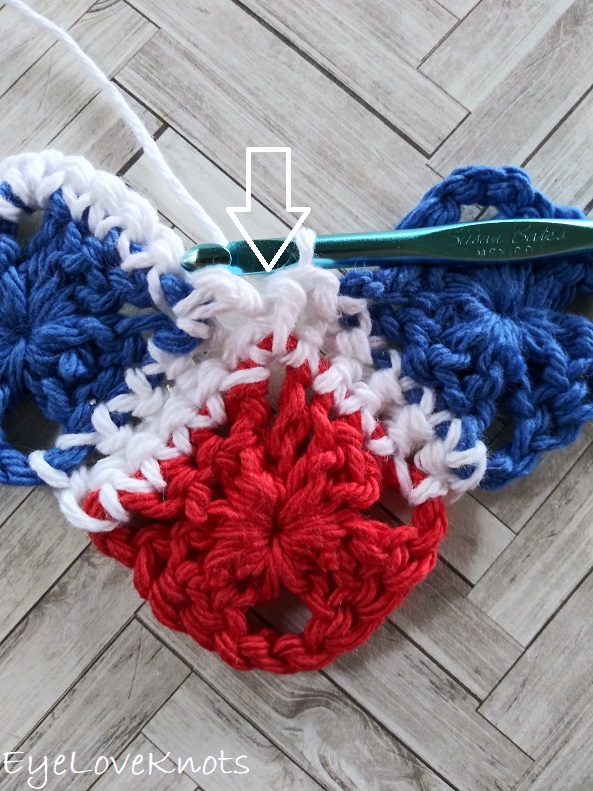
In current square: SC into the same chain space, and into each of the next 3 DC, (SC, chain 1, SC) into the next chain space, SC into each of the next 3 DC, (SC, chain 1, SC) into the next chain space, SC into the next 4 stitches…
… continuing from the right side: SC into the center of the next join…
… [SC into the bottom right chain space of the next granny square, PLT, (SC into the next DC, PLT) 3x, SC into the next chain space, PLT, from behind: SC into the corresponding chain space of the previous square, in current square: SC into the same chain space, and into the next 3 stitches, (SC, chain 1, SC) into the next chain space, SC into the next 4 stitches, SC into the center of the next join]…
Continue in the same manner working across the row. For the last square, you will follow instructions for II, and then begin the next row with IV.
Please feel free to make and sell your own of Granny’s Scrappy Placemat using this pattern, but please DO NOT claim this pattern as your own nor should you sell my pattern, and DO NOT re-publish my photos as your own. DO NOT copy and paste my pattern anywhere, link to it instead.
If you love to DIY: Join the EyeLoveKnots Crafting Community on Facebook to share your creations, and see what others are up to!
Linked Up To…
Happiness is Homemade #328 – Create with Cynthia (party post deleted)
Unlimited Monthly Link Party 13 – Grammy’s Grid (party post deleted)
Craft Schooling Sunday – Creative Jewish Mom
Creative Compulsions Linky Party #65 – My Bijou Life
Handmade Monday #181 – Sum of their Stories
The Really Crafty Link Party #223 – Keeping it Real
Ginx Woolly Linx Party June – Ginx Craft
Craftastic Monday Link Party – Sew Can Do
Little Cottage Link Party #56 – Love my Little Cottage
Linky Ladies Party #187 – The Purple Poncho
All About Home #45 – Common Ground
The Wednesday Link Party #353 – The Stitchin’ Mommy
Hookin’ on Hump Day #217 – Moogly Blog
To Grandma’s House We Go Link Party 189 – Chas’ Crazy Creations (party post deleted)
Charming Homes and Gardens Link Party 11 – Dabbling and Decorating (party post deleted)
Tuesday Turn About #54 – My Wee Abode
Waste Not Wednesday Link Party 211 – Pretty DIY Home
Scrappy Stitchers Link Party #64 – Stitches n Scraps
Creatively Crafty Link Party #229 – Life Beyond the Kitchen
552nd Inspire Me Tuesday – A Stroll Thru Life (party post deleted)
Fabulous Party #325 – Lou Lou Girls (party post deleted)
{Wow Me} Wednesday #460 – Ginger Snap Crafts
Your Whims Wednesday #465 – My Girlish Whims
Thursday Favorite Things #445 – An Artful Mom
Best of the Month – Calypso in the Country
Link Your Stuff – Annemarie’s Haakblog
Home Matters Linky Party #288 – Modern on Monticello
Create, Bake, Grow & Gather Party #425 – Shabby Art Boutique
Snickerdoodle Create Bake Make Link Party 341 – EyeLoveKnots
Really cute way to use these mini grannies! thanks so much for sharing on craft schooling sunday and for leaving comments on my blog!
I really appreciate all that you share, especially your doodles! I would love to truly make a scrappy granny project, but I don’t do too well with random colors. Maybe in only this placemat size would be an easier place to start, and make a good piece of art!
Thanks so much for linking up with me at my #UnlimitedMonthlyLinkParty 13, open June 1 to 26. All party entries shared if social media buttons installed.
Totally adorable! Pinned!
Thank you, Lora!
Just love this… reminds me of my Grandma, oh do I miss her! Perfect for the 4th!! And, I love placemats you can wash.
Carrie
curlycraftymom.com
I am all about home items that are easy to throw in the washing machine! Glad I could bring back some happy memories for you <3
How cute! Thanks so much for linking up with me at #AThemedLinkup 20 for All Things American (red, white, and blue), open June 27 to July 25. All party entries shared if social media buttons installed.
Thanks, Dee! I enjoyed this themed party. Pinned it – great resource.
This pattern is so cool, Alexandra! Love it! I’ll be sharing it on this week’s Creative Compulsions.
Michelle
https://mybijoulifeonline.com
Thanks, Michelle! I had a lot of fun putting it together. Anything with granny squares, I’m in!
As always I just love the combination of colors! And it does remind you of grandma’s house growing up. Thanks for sharing a great project this week. #HomeMattersParty
Glad I could bring back some happy memories for you 🙂 My husband and I really like the red, white and blue color and theme.
I’m amazed by all the ideas you have and create. They all look amazing!
Thank you so much, Verna!! I have a lot of fun creating.