This is a crochet pattern review of the Cliffcrest Cable Collar pattern designed by Gayle Bunn for Yarnspirations. Review done by A Stitch Shy of Normal for EyeLoveKnots.
This post contains affiliate links for Lion Brand Yarns and WeCrochet. If you make a purchase by clicking on them, I make a small commission at no extra cost to you. Thanks for your support!
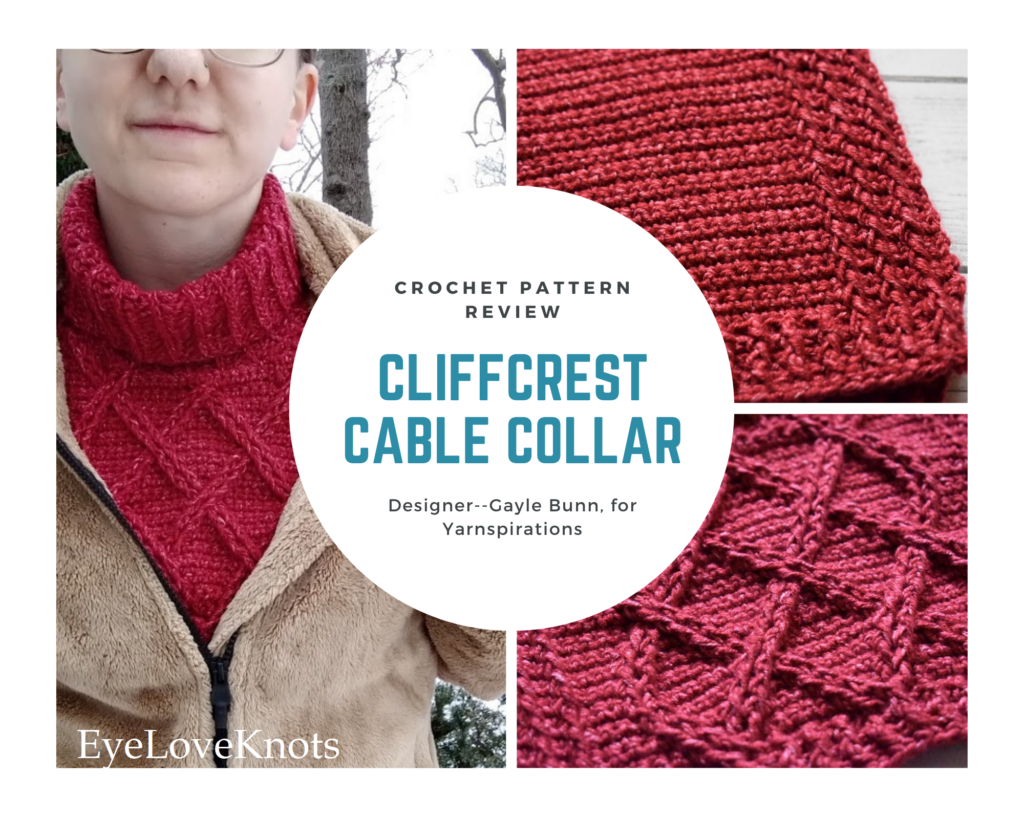
It’s me, Abigail with A Stitch Shy of Normal.
Visit with me on Instagram @astitchshyofnormal for all kinds of awesome crochet makes and inspiration.
It’s cold.
This isn’t exactly news to anyone, but somehow every year I forget just how intensely cold Michigan winters can get! And this one is relatively mild, honestly, but still a mean one. So I bundle up every time I have to step outside for anything at all. Even just walking down to the mailbox, you’ll see me with winter boots, my coat, a scarf, a hat, gloves…the whole nine yards. And underneath it all, I’m probably wearing a thick sweater too!
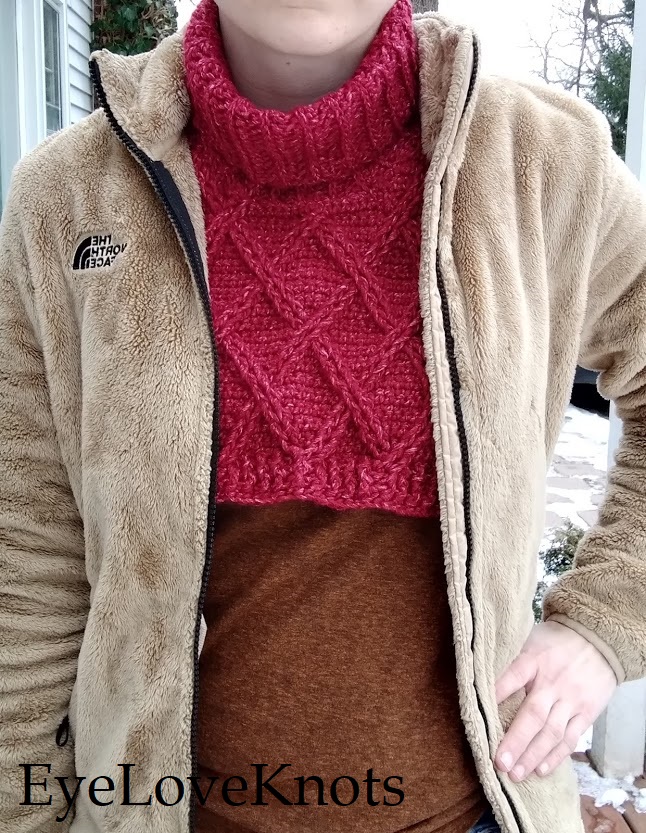
This all ends up feeling quite bulky. But you know how evil the wind can get, so you never want any bit of skin exposed ever. So when I saw this gorgeous little cable collar on Ravelry, meant to go under your coat and basically add a warm turtleneck “sweater” (top half) layer without adding the thick bulk of the full thing…I was intrigued. Most of my wardrobe is basic V-neck tees from Target, and I’d love something to cover my chest below my coat!
Can it really be as comfy as it seems? Does it look cute without adding a bulge under your coat? Is it doable without hours of struggling through complicated cable techniques? Yes, to all of the above.
This pattern is the perfect combination. It’s gorgeous, it’s interesting and stitches up relatively quickly, and it’s incredibly warm and comfortable! But you do kind of look like a dork if you keep your coat unzipped. That’s fine by me though!
Materials I Used:
- About 1.5 skeins of Lion Brand Jeans Colors in the color “Jumpsuit”, which doesn’t seem to be available anymore but many other great colors to choose from
- H8/5mm crochet hook – I like Clover Amour Ergonomic Hooks
- Yarn needle for assembly
- Cliffcrest Cable Collar, Free Crochet Pattern from Yarnspirations
- Blocking supplies–fabric steamer, pins, towel/blocking mat (these are optional but I personally strongly recommend it for this pattern!)
Material Notes:
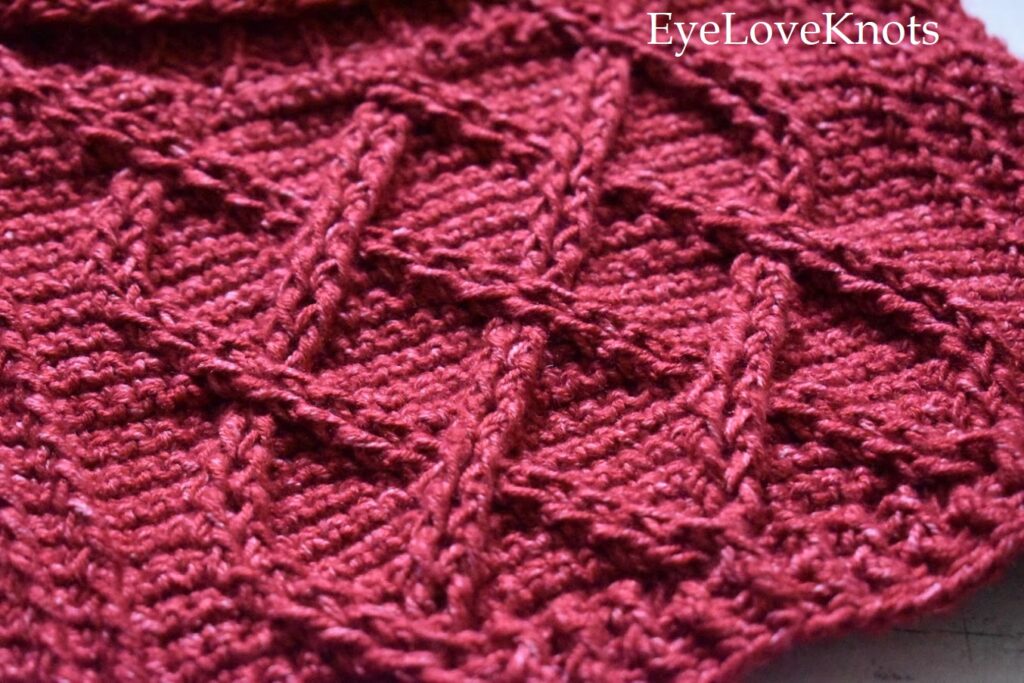
This yarn was very well suited for the pattern. I was initially worried that the speckles of the Jeans colorway would distract from the cables, but once I got a few rows in I was satisfied that the stitches were showing up fine. You can see below here just how much the cables stand out:
I’m sure with an even thicker worsted yarn, this pattern would be so warm and comfy. In the pattern, the designer suggests Patons Classic Wool Worsted and this does seem to be a bit thicker (100g/194yds versus Jeans being 100g/246yds), so it’s probably intended to be heavier than mine ended up being, but mine is still warm! The biggest reason why they would recommend wool is because one of the characteristics of the fiber (wool) is natural warmth, whereas the Jeans yarn, while still warm and cozy, is a synthetic material (plastic actually) which can let the awful winds through, and may not protect against the cold as well.
Using my usual metric, would I buy this yarn again for this same item? Definitely, and I would actually recommend the pairing. The gauge was basically perfect, the colors are adorable, and it gives gorgeous stitch definition with this pattern. It’s also warm without being heavy and sweaty. Plus, although I specifically used their “Colors” line, the classic shades of Jeans (linked in the material section) would be especially gorgeous with this design. The deep blues and grays are so well-suited for this look!
Time Spent:
I would estimate maybe 7-8 hours. It’s quicker than it looks but the back panel took me a little while, and then the neck too. The front panel with the cables was deceptively fast though!
Measurements:
The pattern lists this as being roughly 12″ wide and 10″ long in front, 8″ long in back.
Mine was 11.75″ wide and then 10″ long in front and 8.5″ long in back. Close enough for me! These differences are probably up to how mine blocked. See my notes below for more info on that.
Gauge Info:
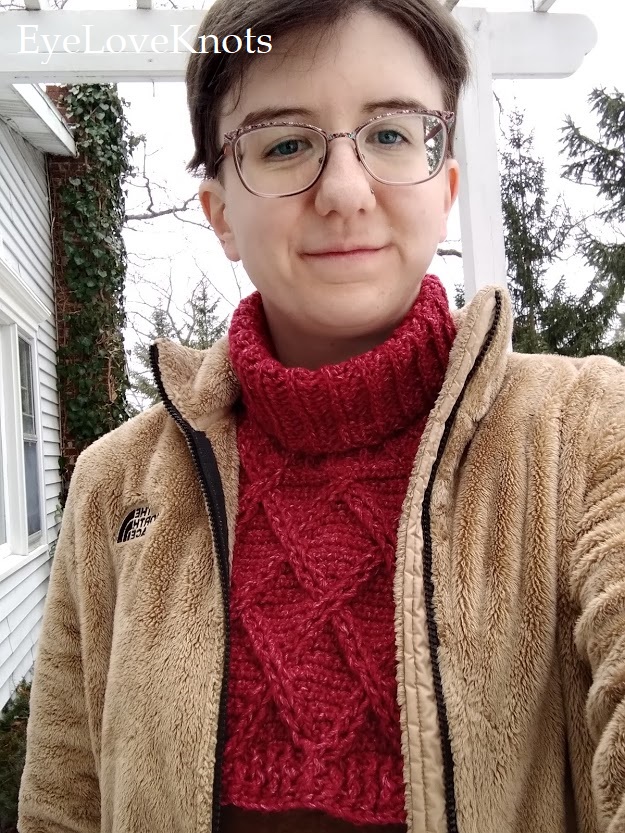
The pattern gauge says 4″ should be 14 single crochet stitches wide and 16 rows tall.
My finished project, measuring on the back, came out as 4″ being 15.5 stitches and 18 rows. This is definitely close enough for me! Different yarn and tension will often lead to slight differences like this but the pattern itself is mostly done by measurements anyway, so it barely affects the finished item.
The main thing gauge would affect here is the height of your panels (and they give repeats to customize this) and the circumference of your turtleneck (which instructs you to do as many rows as needed to fit comfortably). This is why I would say you need to get semi-close but I wouldn’t worry about perfection in gauge.
Pattern Notes:
I had a few false starts on the first couple of cable pattern rows, as I usually do when cables are involved. I really appreciate the included chart because I had to refer to it at the beginning. The instructions are clear and written correctly within the pattern, I just get overwhelmed when a single row includes about a dozen steps!
My favorite part of this is the straight edging that goes around the outside. It’s built into every row and you don’t even really notice it until you’re pretty far in and it suddenly looks nice and impressive!
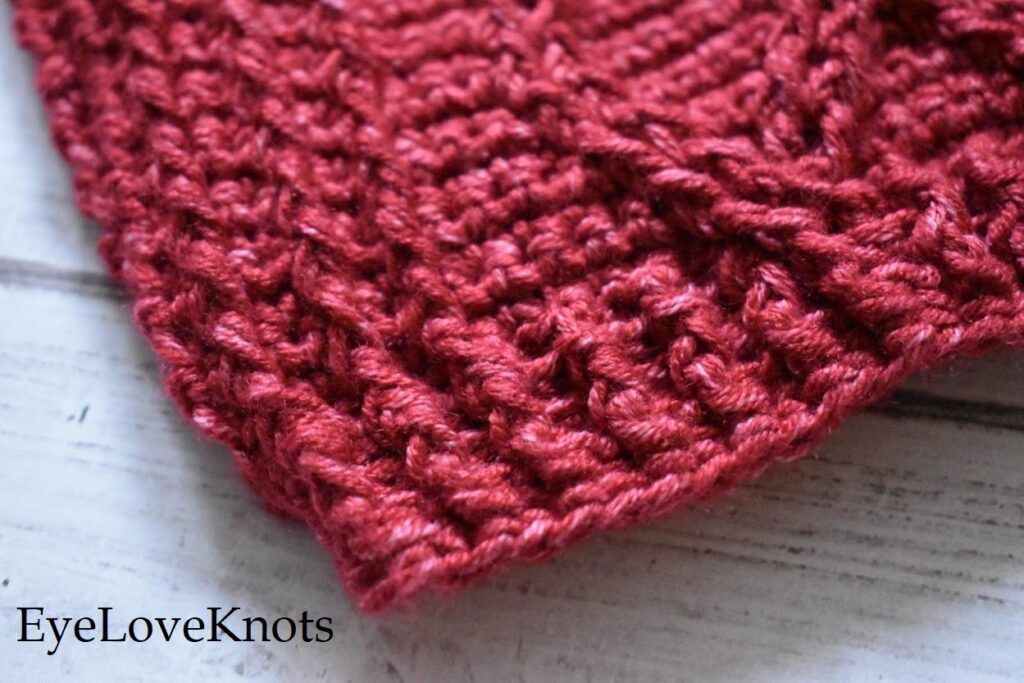
Once I got through a few rows, essentially equal to one repeat of the cable pattern, it was smooth and simple. After you figure it out, you’re just repeating what you’ve already done in different orders of stitches, so it’s not too scary! Rows 1 and 3 were slightly challenging but once I got to 5 it was easier, and got simpler from there.
Shaping the neck opening was easy, the instructions are clear and it’s a very creative strategy! I found it slightly odd that you end the opening on a cable stitch, because it sort of flopped forward (since it’s a post stitch going around a previous stitch, rather than anchored into the top of the row). But this was remedied by the assembly, you end up attaching the turtleneck all around the opening so you can tack that stitch down easily. Side note–this doesn’t happen on the other side because you end up starting by attaching to the top of a stitch to begin this section.
When I started my turtleneck (since it’s a separate piece you sew on later), I left a long tail to help with attaching later. I did find this to be pretty useful. Sewing a collar around the entire opening needs a lot of yarn, which I did with my ending tail for the majority but I ran out and would have had to reattach even more yarn for seaming if I didn’t have this bonus tail! I sewed about 80% of the way around, then used the starting tail to work backwards and meet where I ran out of yarn.
If you’re wondering how much coverage this actually has underneath a jacket, this might help a little bit. It was very warm and cozy for my pictures! And it did lay nice and flat for me once I initially smoothed it out when putting on the coat.
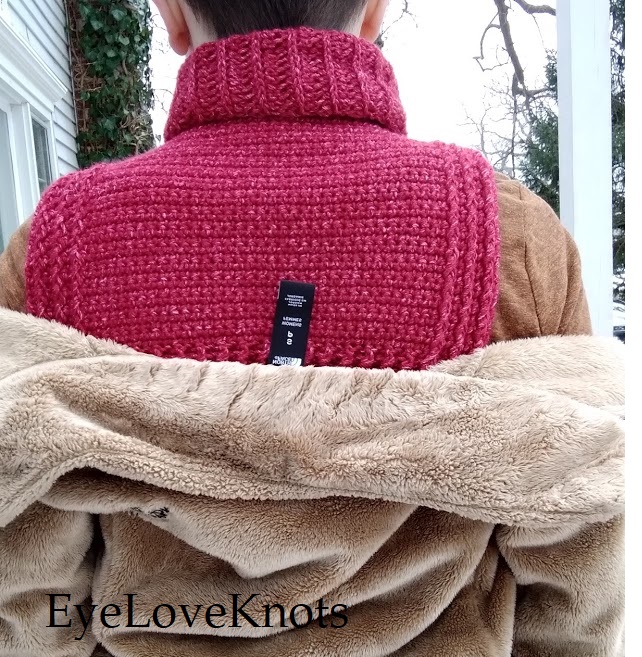
My main tip for the collar is to watch out with your final stitch of each row. Because you start with a turning chain each row, your final stitch each time will be into this chain. If you miss this, you’ll lose one stitch every row and you’ll have a slanting triangle instead of a rectangle.
Finally, after all of my assembly, I chose to block this with my fabric steamer. The pattern does not say to do this, but with cable stitches like this it tends to curl a little bit. I didn’t really need blocking for the purpose of size, only for the panels curling. Steaming worked great! I didn’t stretch them out really at all, I just made sure the edges were pretty straight and pinned it out before lightly steaming! It now lays nice and flat when worn.
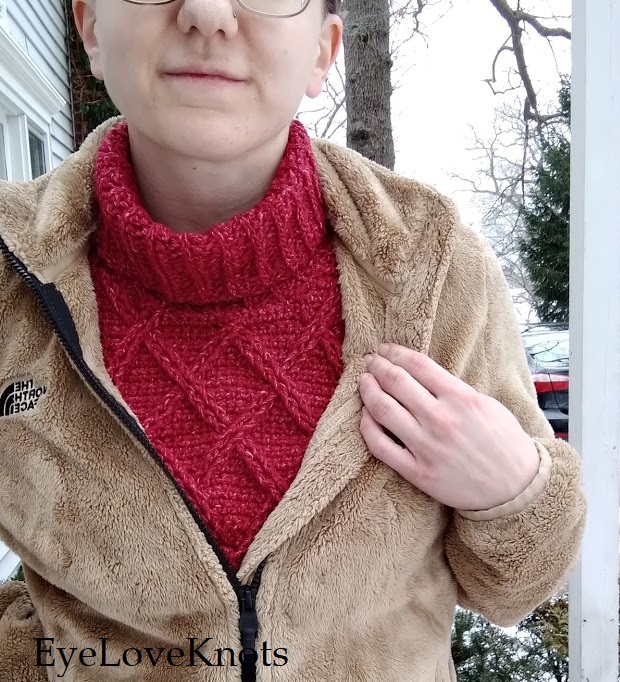
Definitely check this one out! What color would you want to make? Do you prefer neutrals to match your coat/outfit, or are you thinking a bright pop of color to add some spice to a winter day?
Don’t forget to visit with me on Instagram @astitchshyofnormal for all kinds of awesome crochet makes and inspiration.
If you love to DIY: Join the EyeLoveKnots Crochet & DIY Community on Facebook to share your creations, and see what others are up to!
If you love Fashion: Join the Alexandra Lane Lifestyle Facebook group to share, and see what others are up to!
Linked Up To…
Ginx Woolly Linx Party January – Ginx Craft
Craft Schooling Sunday – Creative Jewish Mom
Unlimited Monthly Link Party 20 – Grammy’s Grid
Happiness is Homemade 358 – Decor Craft Design
Over the Moon #260 – Marilyn’s Treats
Hearth and Soul Link Party – April, the 21st Century Housewife
Handmade Monday #211 – Sum of their Stories
Craftastic Monday Link Party – Sew Can Do
Weekly Link Up #207 – Beauty by Miss L
Weekday Wear Link Up – Away from the Blue
Turning Heads Linkup – Elegantly Dressed and Stylish
Confident Twosday Linkup – I do deClaire
Linky Ladies Party #202 – The Purple Poncho
The Really Crafty Link Party #250 – Keeping it Real
You’re the Star Blog Hop – Decor Craft Design
575th Inspire Me Tuesday – A Stroll Thru Life
Fabulous Party #355 – Lou Lou Girls
The Loop Scoop #6 – Moogly Blog
Style Six Link Up – The Queen in Between
Style on the Daily Link Up – Straight A Style
Thursday Fashion Files Link Up #289 – Curly Crafty Mom
Chic and Stylish Link Up – Mummbastylish
Party in Your PJs #342 – The Apple Street Cottage
{Wow Me} Wednesday #488 – Ginger Snap Crafts
Your Whims Wednesday #494 – My Girlish Whims
The Wednesday Link Party 382 – The Stitchin Mommy
Waste Not Wednesday 238 – Pretty DIY Home
Creative Crafts Linky Party #25 – Creatively Beth
Artsy-Fartsy Link Party #238 – Artsy-Fartsy Mama
Encouraging Hearts & Home Blog Hop – Apron Strings & Other Things
Thursday Favorite Things #472 – An Artful Mom
Trendy Thursday LinkUp – Thirty Minus One
Style Link Up – Lizzie in Lace
Fancy Friday Linkup – Nancy’s Fashion Style
Thursday Favorite Things #473 – An Artful Mom
Traffic Jam Weekend Linky Party #266 – My Bijou Life
Friday Favorites – Busy Being Jennifer
Create, Bake, Grow & Gather Party #454 – Shabby Art Boutique
Embracing Home and Family Link Party #24 – The Everyday Farmhouse
Link Your Stuff – Annemarie’s Haakblog
A Morning Cup of Joe Linky Party – The Cottage Market
Snickerdoodle Create Bake Make Link Party 369 – EyeLoveKnots
This pattern is beautiful!!! And so versatile I absolutely love it! I would either use the color posted or a tweedy white 🙂 I love both neutrals and colors that pop so I will make 2
You and I think alike, I either love basic neutrals like a deep gray (probably my next color for this collar) or something bright and fun. That way it matches any outfit, unless you want it to stand out instead!
Oh I LOVE this, Alexandra, and would wear it all the time under my winter coats. The color is so pretty too!
Isn’t it just gorgeous? I love how it adds a touch of sophistication with the cables!
Love the color and the texture.
The texture is my favorite part! Well, so is the rich red shade…I have a lot of favorite parts about this one, lol.
It looks really cozy and I love the choice of color. My hands are freezing as I sit outside typing and thinking some knitted mittens!
http://www.chezmireillefashiontravelmom.com
Anything helps to stay cozy in January! I’ve definitely been getting good use out of this collar the past few days.
Beautiful color and pattern. I’ve never tried this stitch, but some day will.
Cables are definitely fun to play around with!
What a clever idea! This would be perfect for the cold winter we are having. I love the color you choose and the texture is just heavenly!
Maureen | http://www.littlemisscasual.com
It really is a lovely texture! I love how it looks like an intricate sweater with only a fraction of the work and time investment!
Brilliant idea and love the color and yarn. So good to see you in the #WowOnWednesday link-up
The pattern is beautiful! Thank you for sharing at Party In Your PJ’s.
What a fun idea to make! the colour is so nice on you and it’s a good alternative to a scarf for keeping warm in winter if your coat doesn’t zip up all the way! 🙂
Thanks so much for joining the #WeekdayWearLinkup! Hope that you had a great weekend 🙂 We managed to spend a lot of time outdoors which was fun 🙂
I was thinking that, my previous winter coat was a gorgeous pea-coat buttoned style and I wish I’d had one of these back then!
Cute idea. It is amazing how crochet can look so like knitting sometimes. Thanks for joining in Ginx Woolly Linx Party.
That’s true, it sort of does look that way! Designers can be so creative.
That’s true, it sort of does look that way! Designers can be so creative.