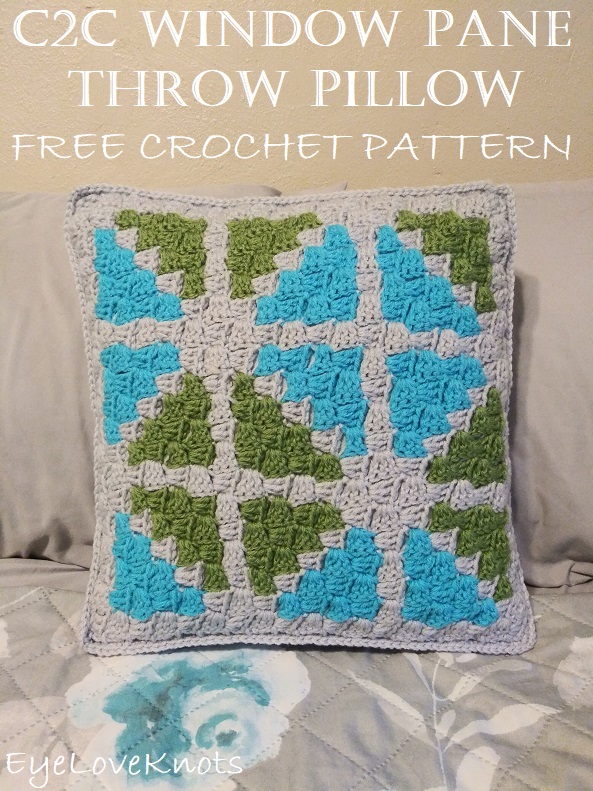
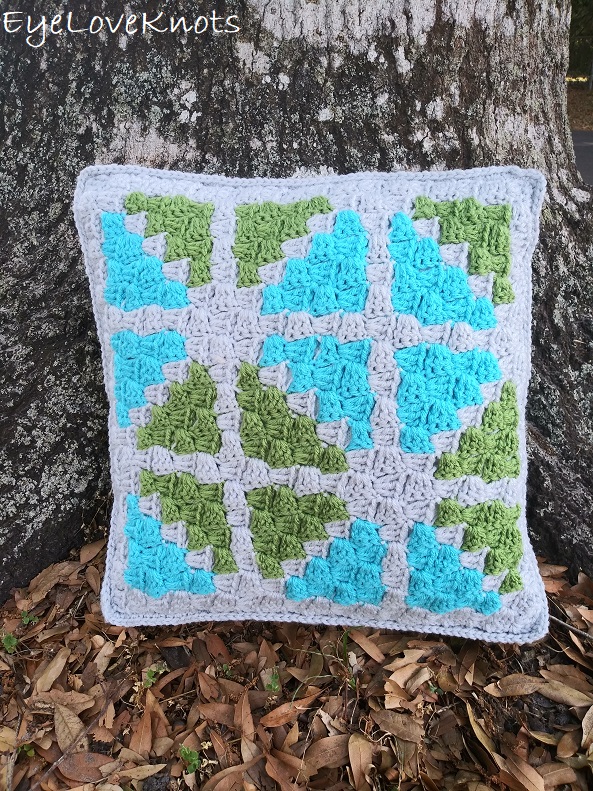
Free crochet pattern for how to crochet the C2C Window Pane Throw Pillow with 3 sizes available! Make several of the top square and attach together to make a matching throw blanket!
The actual square for this throw pillow was inspired by a quilt I saw called Prismatic – you can see a picture of my inspiration in my C2C Window Pane Square post.
I am a sucker for geometric patterns, so I turned to corner to corner (C2C), and created my own version with intentions of turning it into a throw pillow to match my Spring bedding, which you see in the title photo.
I have a simple pattern worked in three throw pillow suitable sizes. You could also use this square to work up a matching afghan.
The reason there are only 3 sizes, is because the multiple for my chosen pattern is 6 boxes + 1 box. If you need a different size, you can work up a modified chart with partial triangles (I wanted full triangles only), and/or you can try making the corner to corner in half double crochets instead.
AD-FREE, PRINTER FRIENDLY PDF:
If you would like a PDF version of this post, you may get one through either my EyeLoveKnots Etsy Shop or LoveCrochet Shop for a small fee. This fee is to compensate for the views lost when you no longer need to return to the blog to for the information, as you will have your own copy. Plus! It helps fund supplies for new projects to share with you!
Shop EyeLoveKnots Etsy: C2C Window Pane Throw Pillow.
Shop EyeLoveKnots LoveCrochet: C2C Window Pane Throw Pillow.
Share your version of this project on Ravelry – C2C Window Pane Throw Pillow.
Find this to your Favorites (Sub 04.09): AllFreeCrochet, FaveCrafts, Cheap Thrifty Living, AllFreeCrochetAfghanPatterns, Crochet Pattern Bonanza
Materials:
- Worsted Weight Yarn – I used Red Heart’s Super Saver in Turqua [Blue], Tea Leaf [Green] and Light Gray
- H8/5mm Crochet Hook
- Tapestry Needle
- Pillow Form: 14″, 22″ or 27″
- Optional, Sewing Pins (for Assembly)
Material Notes:
The 14″ pillow requires 375 yards – 95 yards each of green and blue, and 190 yards of gray. I have not tested the larger sizes, though I am estimating:
- 22″: 190 yards each of the two accent colors, and 380 yards of the main color.
- 27″: 280 yards each of the two accent colors, and 560 yards of the main color.
Yarn Alternatives: Caron’s One Pound, Bernat’s Super Value.
Time Spent:
8-9 hours for the 14″ size.
Measurements:
14″ (22″, 27″) Square
Gauge:
5 Boxes = 4.25″ Wide by 4.13″ Tall
Abbreviations (US Terms):
- C2C – Corner to Corner (Photo Tutorial for DC Boxes)
- DC – Double Crochet (Photo Tutorial)
- SC – Single Crochet (Photo Tutorial)
Pattern Notes:
Pillow grows from the bottom right corner upward.
This pattern is written with colors and boxes only. If you would like more details on how to work the corner to corner technique, and the basic shape of this washcloth – visit my Basic C2C Throw Pillow pattern, and follow the instructions for the respective size.
Beginning chain 2 counts as a double crochet.
A box is comprised of four double crochet’s.
The “space under the same chain joined to” is defined as the space between the last two double crochets of the previous rows box.
Working the final double crochet into the top of the chain from the previous row helps to keep the edge more even. After completing the first box, you may also need to lightly tug on it to keep it even as well.
Instructions for smallest size – 14″ shown with 22″ and 27″ shown in parenthesis.
Because this pillow was made for my home, I didn’t worry about carrying my yarn along the backside of my work. By doing this, I didn’t have to fasten off as much, which in turn meant less ends to weave in later. If you do this, keep in mind how tight your tension is because I didn’t, and with this square, it lacked a bit of stretch, and turned out a tiny bit smaller than other similar squares I’ve made. Though this was an easy way to get a project like this done, I think next time I will just fasten off.
I worked my original 14″ size in the colors given in the materials section and noted in the written pattern, but with the other pattern sizes, I am using the corresponding colors to those graphs. Replace the colors as needed with your own combo.
C2C Window Pane Pillow Front:
To avoid being penalized by Google for duplicate information, please see my C2C Window Pane Square, Free Crochet Pattern for the Front of the Pillow.
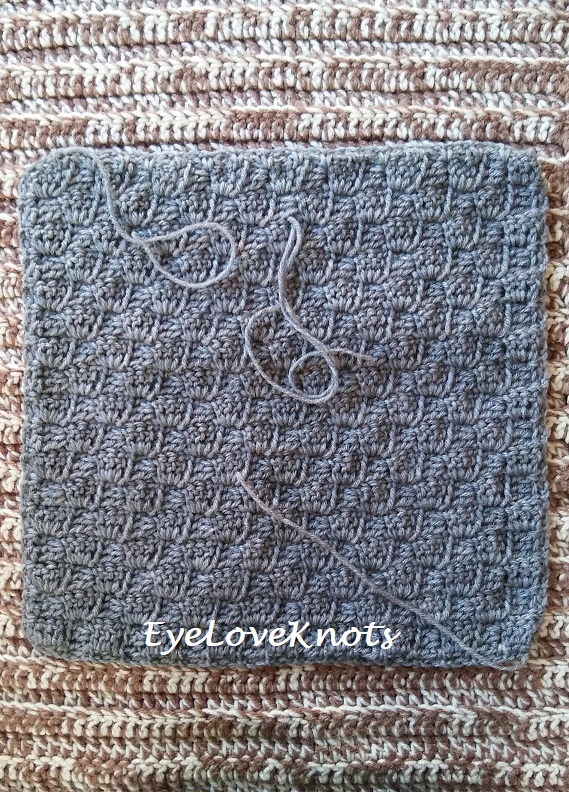
C2C Window Pane Pillow Back, Bottom Piece:
Chain 6. DC into the 4th chain, and into each of the next 2. (1 Box)
Row 2: Chain 6, and turn. DC into the 4th chain, and into each of the next 2, slip stitch into the top of the next chain 2. Chain 2, work 2 DC into the space under the same chain joined to, DC into the top of the last stitch. (2 Boxes)
Row 3: (I) Chain 6, and turn. DC into the 4th chain and into each of the next 2, slip stitch into the top of the next chain 2;
(II) Chain 2, work 3 DC into the space under the same chain joined to, skip the next 3 DC, slip stitch into the top of the next chain;
(III) Chain 2, work 2 DC into the space under the same chain joined to, DC into the top of the last stitch. (3 Boxes)
Rows 4 – 9 (14, 17): Using Row 3 as a base, you will continue working in the same manner repeating (II) one extra time each row to increase the number of boxes by one each row. At the end, you will have the same number of boxes as rows.
Row 10 (15, 18): Turn. Slip stitch into the 2nd stitch, and each of the next 2. Chain 2, work 3 DC into the space under the same chain joined to, skip the next 3 DC, slip stitch into the top of the next chain;
(chain 2, work 3 DC into the space under the same chain joined to, skip the next 3 DC, slip stitch into the top of the next chain) 7x (12x, 15x);
Chain 2, work 2 DC into the space under the same chain joined to, skip the next 3 DC, DC into the top of the last stitch. [9 (14, 17) Boxes]
Row 11 (16, 19): Chain 6, and turn. DC into the 4th chain, and into each of the next 2, slip stitch into the top of the next chain 2;
(chain 2, work 3 DC into the space under the same chain joined to, skip the next 3 DC, slip stitch into the top of the next chain) 7x (12x, 15x);
Chain 2, work 2 DC into the space under the same chain joined to, skip the next 3 DC, DC into the top of the last stitch. [9 (14, 17) Boxes]
In Even Rows (no increasing or decreasing): Repeat the last two rows until you have 18 (27, 33) boxes wide.
1st Decrease Row: Turn. Slip stitch into the 2nd stitch, and each of the next 2. Chain 2, work 3 DC into the space under the same chain joined to, skip the next 3 DC, slip stitch into the top of the next chain;
(IV) (chain 2, work 3 DC into the space under the same chain joined to, skip the next 3 DC, slip stitch into the top of the next chain) 6x (11x, 14x);
Chain 2, work 2 DC into the space under the same chain joined to, skip the next 3 DC, slip stitch into the top of the last stitch. [8 (13, 16) Boxes]
Next Decrease Row – 3 Boxes Left: Using the previous row as a base, you will continue working in the same manner repeating (IV) one less time each row to decrease the number of boxes by one each row. Continue working until you have 3 boxes left.
2 Boxes: Turn. Slip stitch into the 2nd stitch, and each of the next 2. Chain 2, work 3 DC into the space under the same chain joined to, skip the next 3 DC, slip stitch into the top of the next chain, chain 2, work 2 DC into the space under the same chain joined to, skip the next 3 DC, slip stitch into the top of the last stitch. (2 Boxes)
1 Box: Turn. Slip stitch into the 2nd stitch, and each of the next 2. Chain 2, work 3 DC into the space under the same chain joined to. Skip the next 3 DC, slip stitch into the top of the last stitch. (1 Box)
Border: Chain 1. SC into the space just to the right, in between two boxes, (chain 2, SC into the next space in between boxes) around, working a single SC into each corner. When back around, work final chain 2, and then join to the 1st SC, and fasten off.
C2C Window Pane Pillow Back, Top Piece:
Chain 6. DC into the 4th chain, and into each of the next 2. (1 Box)
Row 2: Chain 6, and turn. DC into the 4th chain, and into each of the next 2, slip stitch into the top of the next chain 2. Chain 2, work 2 DC into the space under the same chain joined to, DC into the top of the last stitch. (2 Boxes)
Row 3: (I) Chain 6, and turn. DC into the 4th chain and into each of the next 2, slip stitch into the top of the next chain 2;
(II) Chain 2, work 3 DC into the space under the same chain joined to, skip the next 3 DC, slip stitch into the top of the next chain;
(III) Chain 2, work 2 DC into the space under the same chain joined to, DC into the top of the last stitch. (3 Boxes)
Rows 4 – 14 (19, 23): Using Row 3 as a base, you will continue working in the same manner repeating (II) one extra time each row to increase the number of boxes by one each row. At the end, you will have the same number of boxes as rows.
Row 15 (20, 24): Turn. Slip stitch into the 2nd stitch, and each of the next 2. Chain 2, work 3 DC into the space under the same chain joined to, skip the next 3 DC, slip stitch into the top of the next chain;
(chain 2, work 3 DC into the space under the same chain joined to, skip the next 3 DC, slip stitch into the top of the next chain) 12x (17x, 21x);
Chain 2, work 2 DC into the space under the same chain joined to, skip the next 3 DC, DC into the top of the last stitch. [14 (19, 23) Boxes]
Row 16 (21, 25): Chain 6, and turn. DC into the 4th chain, and into each of the next 2, slip stitch into the top of the next chain 2;
(chain 2, work 3 DC into the space under the same chain joined to, skip the next 3 DC, slip stitch into the top of the next chain) 12x (17x, 21x);
Chain 2, work 2 DC into the space under the same chain joined to, skip the next 3 DC, DC into the top of the last stitch. [14 (19, 23) Boxes]
In Even Rows (no increasing or decreasing): Repeat the last two rows until you have 18 (27, 33) boxes wide.
1st Decrease Row: Turn. Slip stitch into the 2nd stitch, and each of the next 2. Chain 2, work 3 DC into the space under the same chain joined to, skip the next 3 DC, slip stitch into the top of the next chain;
(IV) (chain 2, work 3 DC into the space under the same chain joined to, skip the next 3 DC, slip stitch into the top of the next chain) 11x (16x, 20x);
Chain 2, work 2 DC into the space under the same chain joined to, skip the next 3 DC, slip stitch into the top of the last stitch. [13 (18, 22) Boxes]
Next Decrease Row – 3 Boxes Left: Using the previous row as a base, you will continue working in the same manner repeating (IV) one less time each row to decrease the number of boxes by one each row. Continue working until you have 3 boxes left.
2 Boxes: Turn. Slip stitch into the 2nd stitch, and each of the next 2. Chain 2, work 3 DC into the space under the same chain joined to, skip the next 3 DC, slip stitch into the top of the next chain, chain 2, work 2 DC into the space under the same chain joined to, skip the next 3 DC, slip stitch into the top of the last stitch. (2 Boxes)
1 Box: Turn. Slip stitch into the 2nd stitch, and each of the next 2. Chain 2, work 3 DC into the space under the same chain joined to. Skip the next 3 DC, slip stitch into the top of the last stitch. (1 Box)
Border: Chain 1. SC into the space just to the right, in between two boxes, (chain 2, SC into the next space in between boxes) around, working a single SC into each corner. When back around, work final chain 2, and then join to the 1st SC, and fasten off.
Weave in ends now.
How to Assemble C2C Window Pane Throw Pillow:
Lay the pillow front (biggest) piece down, wrong side facing up.
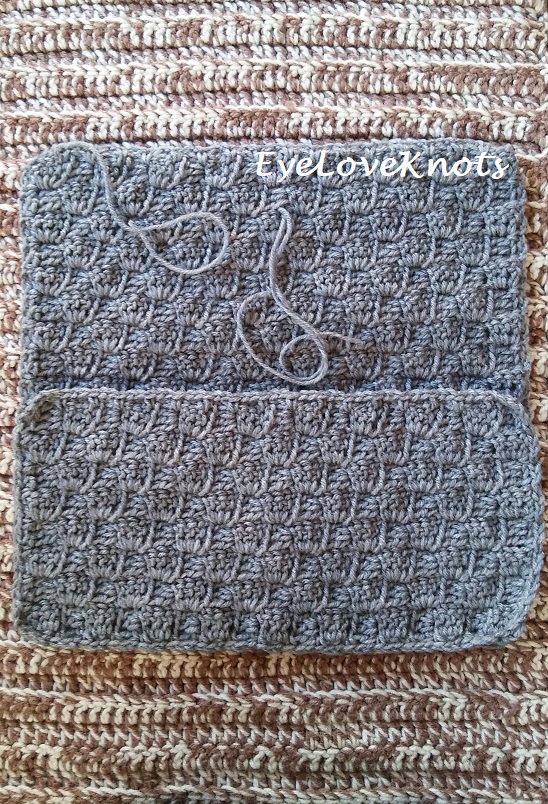
Lay the back bottom (smallest) piece down on top of the front with right side facing up. The bottom edges of both pieces should be aligned.
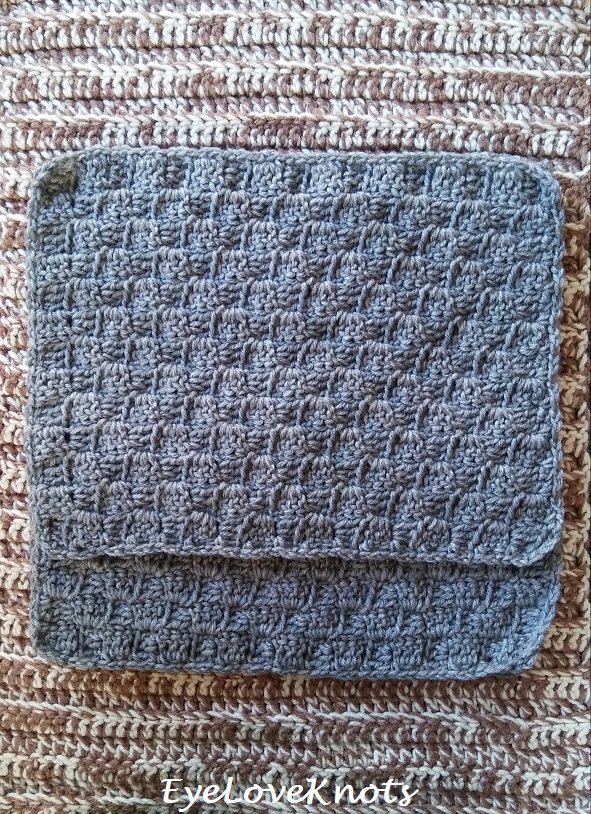
Lay the back top piece down on top of the front with right side facing up. The top edges of both pieces should be aligned, and it should overlap the back bottom piece.
Now, either pin in place, and just carefully flip over so the pillow front piece is facing you.
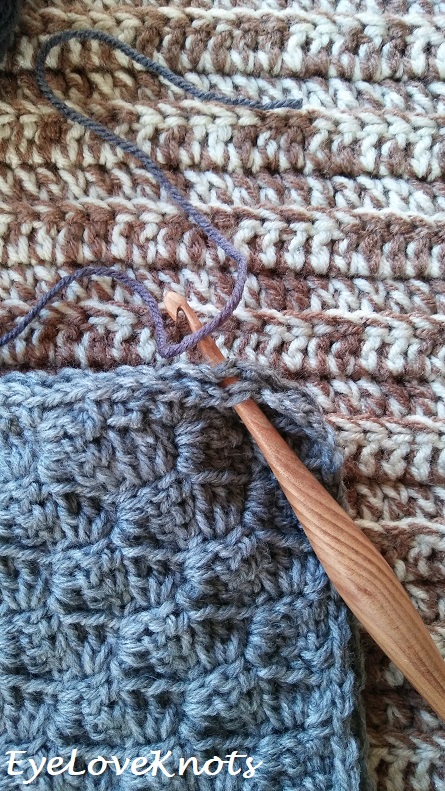
Working through both layers, insert hook into any single crochet – I did so at the top right, after the corner.
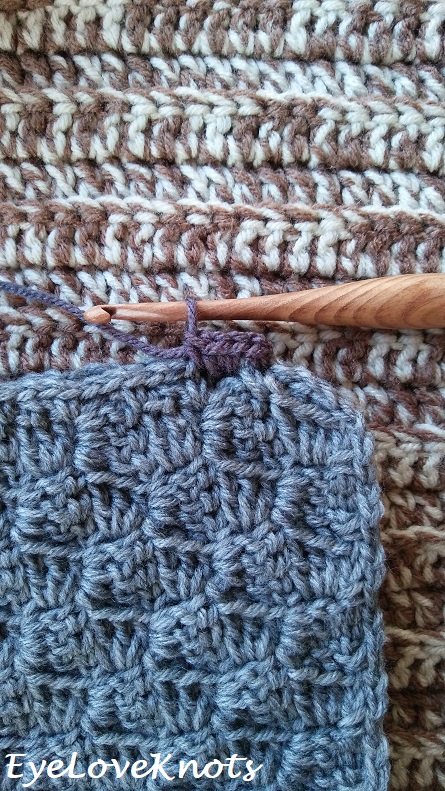
Working through both layers: Chain 1. (SC into the SC, 2 SC into the next chain space) across…
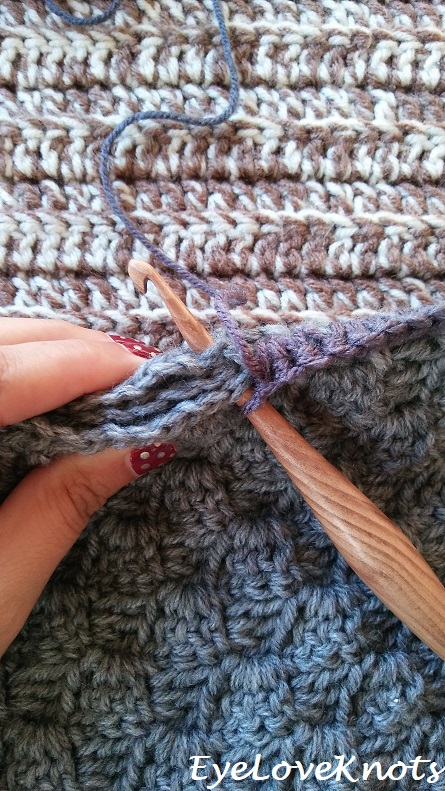
When you get to the overlapped part, you will continue working in the same pattern, but through all three layers.
Continue in the same manner as the last two steps all the way around. When back to the beginning, slip stitch join to the 1st SC, and fasten off, then weave in final ends.
Please feel free to make and sell your own C2C Window Pane Throw Pillow using this pattern, but please DO NOT claim this pattern as your own nor should you sell my pattern, and DO NOT re-publish my photos as your own. DO NOT copy and paste my pattern anywhere, link to it instead.

Join one of our awesome Facebook groups to share your creations, and see what others are up to!
– EyeLoveKnots Crochet & DIY Community
– DIY Home On Rockwood Lane
– Alexandra Lane Lifestyle
Linked Up To…
Craftastic Monday Link Party – Sew Can Do
All About Home #87 – Common Ground
{Wow Me} Wednesday #500 – Ginger Snap Crafts
Creative Crafts Linky Party #37 – Creatively Beth
Linky Ladies Party #208 – The Purple Poncho
The Loop Scoop #11 – Moogly
Home Matters Link Party #327 – Modern on Monticello
Farmhouse Friday Link Party #200 – County Road 407
Ginx Woolly Linx Party April – Ginx Craft
Happiness is Homemade #370 – Decor Craft Design
Craft Schooling Sunday – Creative Jewish Mom
Handmade Monday #223 – Sum of their Stories
The Really Crafty Link Party #262 – Keeping it Real
You’re the Star Blog Hop – Decor Craft Design
Party in Your PJs #354 – The Apple Street Cottage
Creatively Crafty Link Party #271 – Life Beyond the Kitchen
Artsy-Fartsy Party #340 – Artsy-Fartsy Mama
Create, Bake, Grow & Gather Party #465 – Shabby Art Boutique
Link Your Stuff – Annemarie’s Haakblog
Snickerdoodle Create Bake Make Link Party 381 – EyeLoveKnots
Unlimited Monthly Link Party 23 – Grammy’s Grid
Heart and Soul Link Party – April, the 21st Century Housewife
Over the Moon 272 – Marilyn’s Treats
586th Inspire Me Tuesday – A Stroll Thru Life
Fabulous Party 367 – Lou Lou Girls
Your Whims Wednesday #507 – My Girlish Whims
Thursday Favorite Things #485 – An Artful Mom
Encouraging Hearts & Home – Scratch Made Food
Traffic Jam Weekend Link Party #277 – My Bijou Life
Friday Favorites – Busy Being Jennifer
Funtastic Friday Link Party #328 – Simply Beautiful by Angela
A Morning Cup of Joe – The Cottage Market
One More Row – Free Crochet Link Party #32 – Loops and Love Crochet
Oh, it looks amazing Alexandra! I have tried C2C only once and wasn’t quite into it. Maybe I should reconsider and give it a go?
Thanks so much, Maya! I will say, when C2C first became popular, I was hesitant to join in on what everyone else was doing. I caved to submit to a magazine where the theme was C2C, and I used it to make a poncho, and I was hooked. Perhaps you can try it with your boho fashion twist, and you’ll enjoy it a little more – maybe a cuff bracelet with one of your pretty embellishments on it.
I love that this can be a pillow or you can make several pieces to turn into a matching throw. The colours you have used are beautiful too. I still haven’t learned to crochet, but projects like this make me feel like I definitely need to! Thank you for sharing and for being a part of the Hearth and Soul Link Party Community. I’m featuring this post at the party this week. Hope to ‘see’ you there! Take care, and I wish you a wonderful week!
I really appreciate the feature! I enjoy partying with you and seeing all that you have been up to, especially the baking. I like as you say that this square is very versatile. So many ideas floating around in my mind for it
My great aunts used to crochet, and this reminds me of the beautiful afghans they used to create. I still have one in my home today, it is over 50 years old.
That is heartwarming! So awesome that you still have those pieces today
I like this pattern. It is not only very modern looking but colorful too. Thanks for sharing the pillow tutorial. #HomeMattersParty
Really nice! Hello, this is one of my personal favorites for last week’s Encouraging Hearts and Home. I hope you stop by and say hello, this post has also been pinned to the Encouraging Hearts and Home board! Thank you for being a part of Encouraging Hearts and Home, we appreciate all that you share. Have a great week ahead!
I really appreciate this! Thanks so much! I enjoy partying with you.