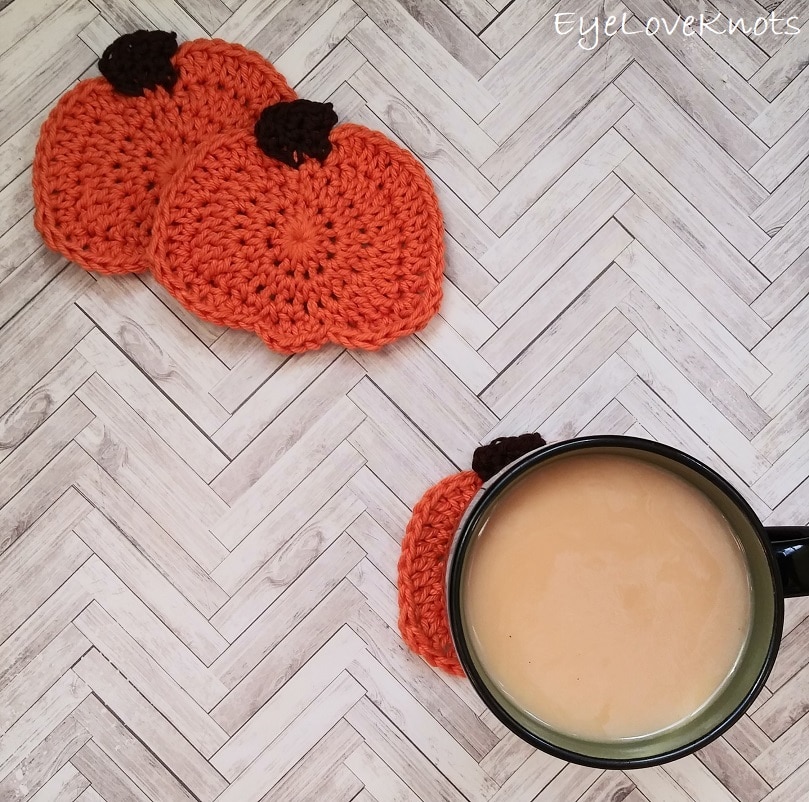
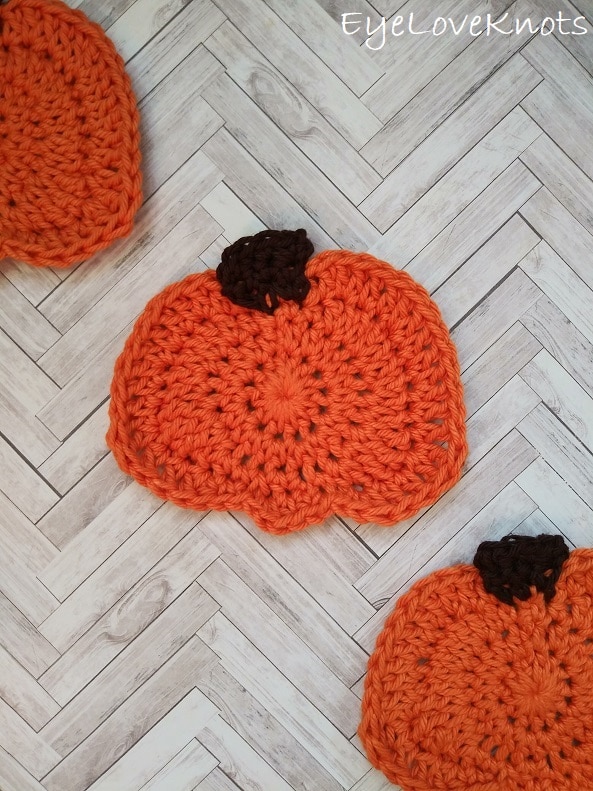
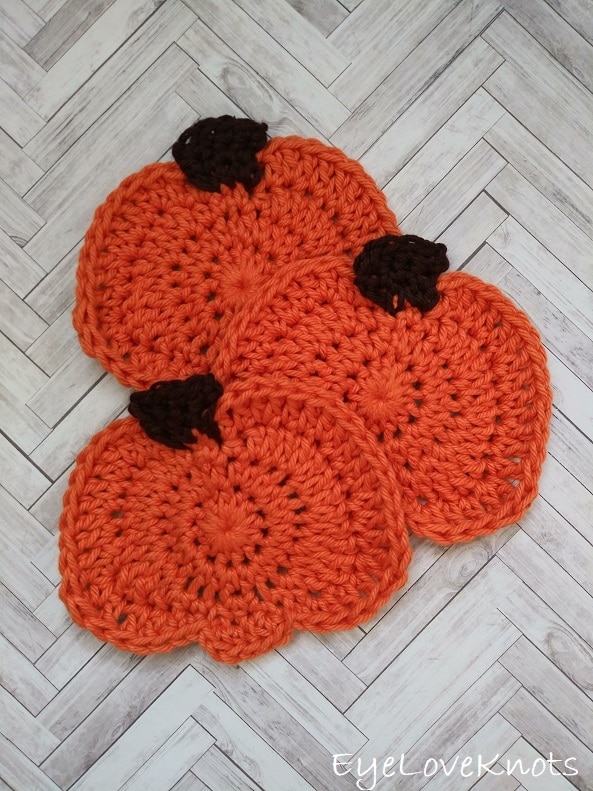
This is a free crochet pattern for how to crochet a whimsical pumpkin coaster that is perfect for Fall decorating or on the Thanksgiving table under some Pumpkin Spice coffee.
Find the free crochet pattern instructions below, or purchase a printer-friendly, ad-free PDF on Ravelry by clicking here.
This post contains affiliate links for WeCrochet. If you make a purchase by clicking on them, I make a small commission at no extra cost to you. Thanks for your support!
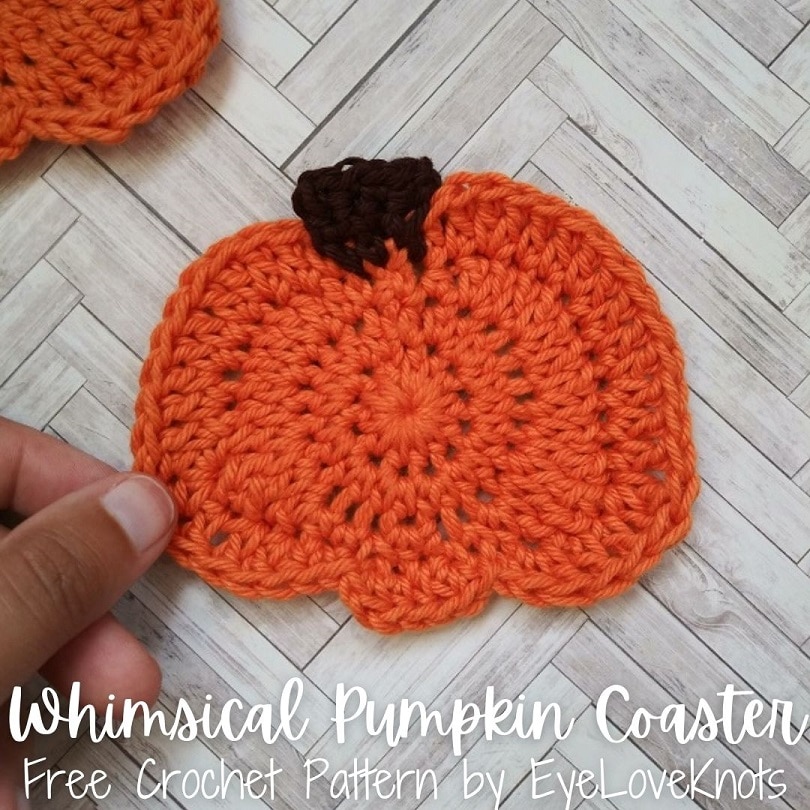
In August, I shared a round up of 20 free apple crochet patterns. While I was working on this round up, I was feeling inspired by the bottom shaping on some of the apples. It made me think about how pumpkins have the ridges that create different sections so I set out to create a pumpkin with bottom shaping, and it turned out cuter than I could have imagined.
It was a happy accident that the pumpkin is a little shorter on the left side than the right, but it gave it a beautiful, whimsical shape that I just love.
AD-FREE, PRINTER FRIENDLY PDF:
If you would like a PDF version of this post, you may get one through either my EyeLoveKnots Etsy Shop, Ravelry or LoveCrafts Shop for a small fee. This fee is to compensate for the views lost when you no longer need to return to the blog to for the information, as you will have your own copy. Plus! It helps fund supplies for new projects to share with you!
Shop EyeLoveKnots Etsy Shop – Whimsical Pumpkin Coaster.
Shop EyeLoveKnots LoveCrafts Shop – Whimsical Pumpkin Coaster.
Share your version of this project on Ravelry – Whimsical Pumpkin Coaster.
Save this to Your Favorites On: AllFreeCrochet, FaveCrafts, Crochet Pattern Bonanza, Cheap Thrifty Living, DIYideaCenter, AllFreeHolidayCrafts
Materials:
- 20 Yards of Worsted Weight Cotton Yarn Per Coaster – I used WeCrochet Dishie in Clementine (16 Yards) and Coffee (4 Yards)
- H8/5mm Crochet Hook
- Tapestry Needle
- Optional, Jewelry Pliers
Material Notes:
Yarn Alternatives: Lily Sugar n Cream, Red Heart’s Smoothie
If you are only making a coaster that will house a cold or hot beverage, you can use acrylic as an alternative with an I9/5.5mm hook – just do not put anything fresh from the oven on the acrylic coaster, or you will melt the fibers and risk burning yourself.
Other Recommended Yarns (with I9/5.5mm Hook): Red Heart’s Super Saver, Caron’s One Pound, Bernat’s Super Value
Weaving in ends of a tough yarn, like cotton yarn, can be hard on the fingers. Sore thumbs and frustration can be a thing of the past by simply using jewelry pliers to [carefully] help pull the tapestry needle through the work.
Time Spent:
I worked up one coaster in just over 15 minutes.
Measurements:
A little shy of 4.38″ (4 3/8″) Wide at widest point by 3.75″ Tall down center
Gauge:
In the round starting with 12 HDC, after Round 2 = 2.25″ diameter
Abbreviations (US Terms):
- HDC – Half Double Crochet (Photo Tutorial)
- SC – Single Crochet (Photo Tutorial)
- DC – Double Crochet (Photo Tutorial)
- TR – Treble Crochet -> Yarn over 2 times, insert hook into the indicated stitch, yarn over and pull through two loops) 3x
Pattern Notes:
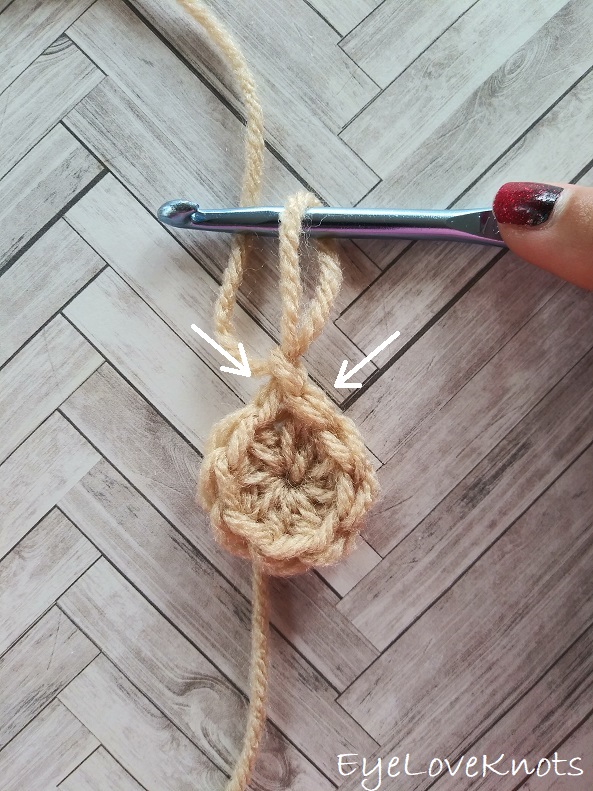
I work my increases differently than most to help keep my seam straight, and that is that the first stitch from the first set of increases is done in the first stitch of the round, which will appear just to left of the beginning chain, then the round will be worked as normal, and the final stitch of the round will be the second stitch of the first set of increases, and it will be worked into the same stitch as the first, and appear just to the right of the beginning chain. The photo above shows where the first and last stitch are worked, and I have a photo tutorial of this technique in my How to Keep a Straight Seam post. You can work in your preferred increase method as long as we end up with the same stitches at the end of the round.
Join to the first stitch, not the beginning chain 2.
Whimsical Pumpkin Coaster Video Tutorial:
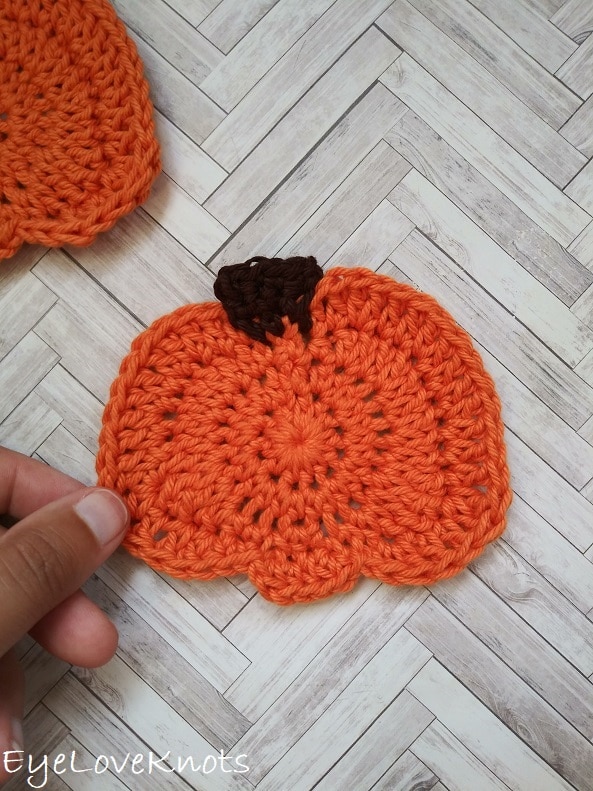
Whimsical Pumpkin Crochet Pattern:
With Orange, chain 5. Slip stitch join to form a ring. Chain 1. 12 HDC into the ring. Join. (12 HDC)
R2: Chain 1. HDC into the 1st HDC, 2 HDC into each of the next 11 HDC, HDC into the same stitch as the 1st. Join. (24 HDC)
R3: Chain 1. SC into the 1st stitch, HDC into the next stitch, (2 DC into the next stitch, DC into the next stitch) 2x, 2 TR into the next stitch, TR into the next stitch, (DC, HDC) into the next stitch, SC into the next stitch, (slip stitch, SC) into the next stitch, HDC into the next stitch, (SC, slip stitch) into the next stitch, SC into the next stitch, (HDC, DC) into the next stitch, TR into the next stitch, 2 TR into the next stitch, (DC into the next stitch, 2 DC into the next stitch) 3x, HDC into the next stitch, SC into the same stitch as the first. Join. (36 stitches)
R4: Chain 1. Skip the 1st stitch, HDC into the next stitch, DC into the next stitch, (2 DC into the next stitch, DC into each of the next 2 stitches) 2x, 2 TR into the next stitch, DC into each of the next 2 stitches, (DC, HDC) into the next stitch, SC into the next stitch, slip stitch into the next stitch, (SC, HDC) into the next stitch, HDC into each of the next 2 stitches, (SC, slip stitch) into the next stitch, SC into the next stitch, (HDC, DC) into the next stitch, DC into each of the next 2 stitches, 2 TR into the next stitch, DC into each of the next 2 stitches, (2 DC into the next stitch, DC into each of the next 2 stitches) 2x, 2 DC into the next stitch, DC into the next stitch, HDC into the next stitch, chain 1, skip the last stitch. Join to beginning chain 1. Fasten off Orange.
R5, Written: Starting on the top right side of the pumpkin, insert hook into the skipped stitch from Round 4 and come back out of the space so you are working around the stitch itself. Grab Brown yarn. Chain 1. SC around this stitch, SC into the next stitch of Round 4 working over the initial chain 1, insert hook into the 1st stitch from Round 4 and come back out of the space so you are working around the stitch itself and complete a SC. (3 SC)
R5, Photo Tutorial
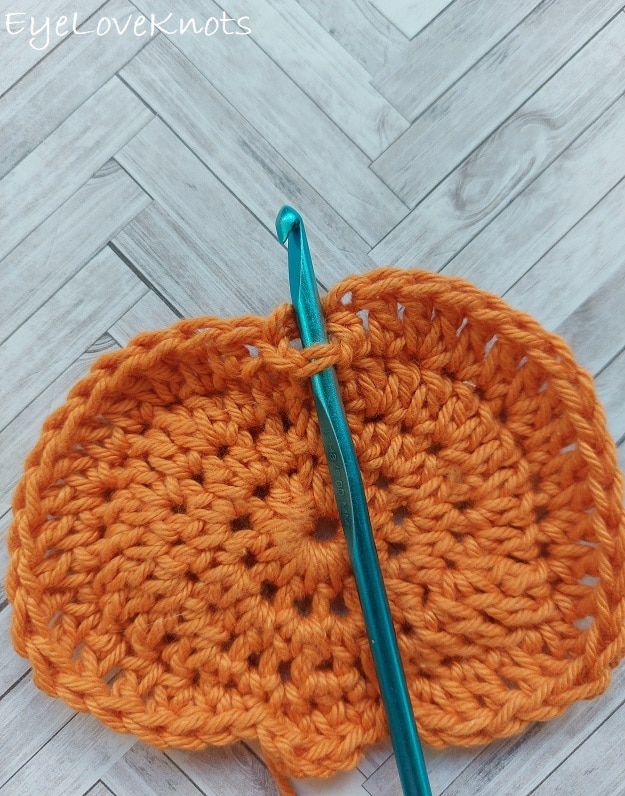
Starting on the top right side of the pumpkin, insert hook into the skipped stitch from Round 4 and come back out of the space so you are working around the stitch itself.
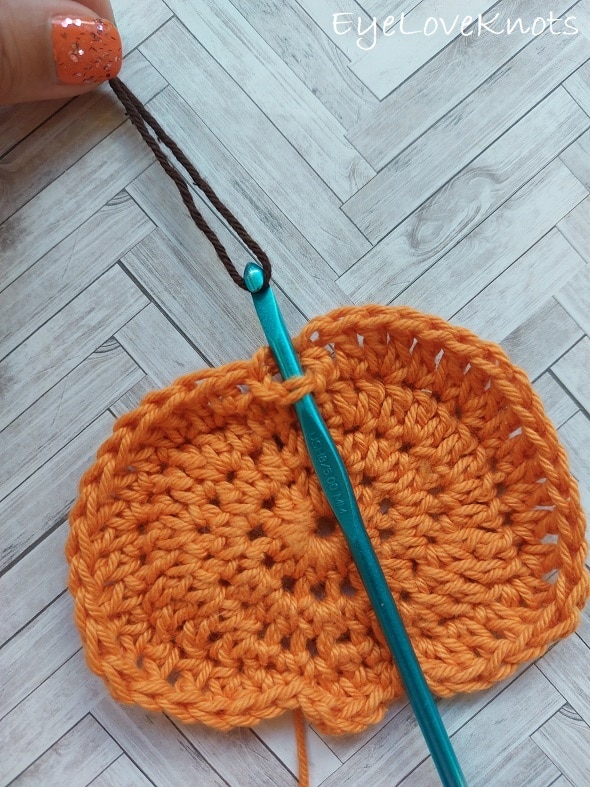
Grab Brown yarn. Chain 1. SC around this stitch,
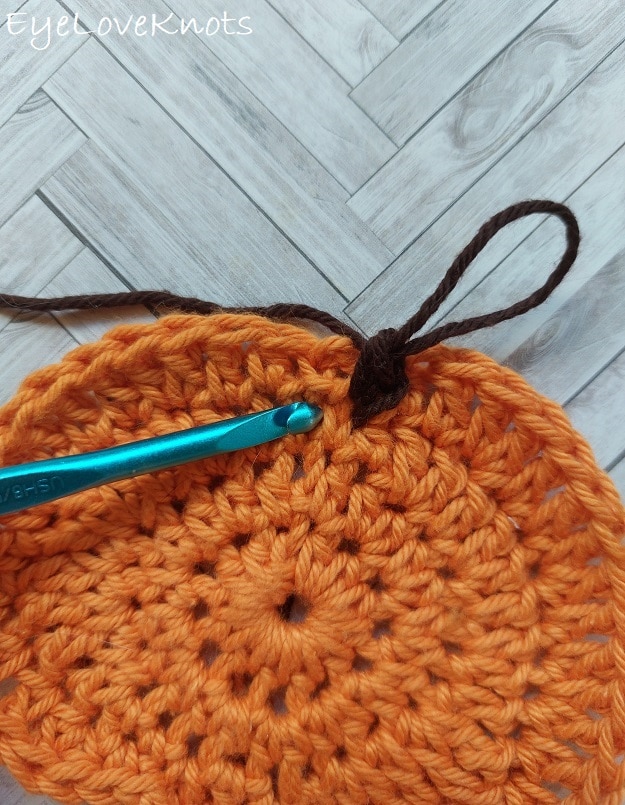
SC into the next stitch of Round 4 working over the initial chain 1,
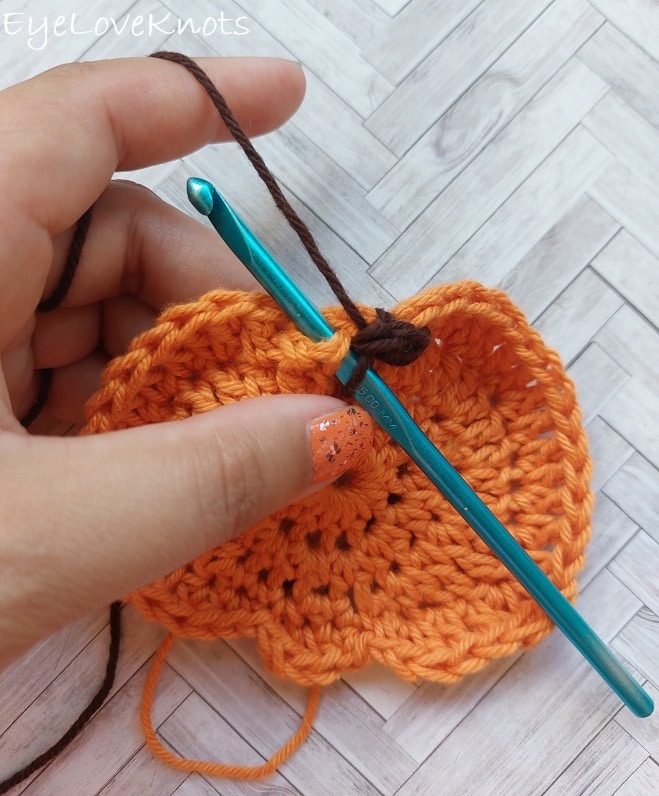
insert hook into the 1st stitch from Round 4 and come back out of the space so you are working around the stitch itself and complete a SC. (3 SC)
R6, Written: Chain 1, and turn. Insert hook into the corresponding chain space stitch from the pumpkin and also into the 1st stitch from the stem and complete a SC, 2 SC into the next stitch, insert hook into the next corresponding chain space stitch from the pumpkin and also into the last stitch from the stem and complete a SC. (4 SC)
R6, Photo Tutorial:
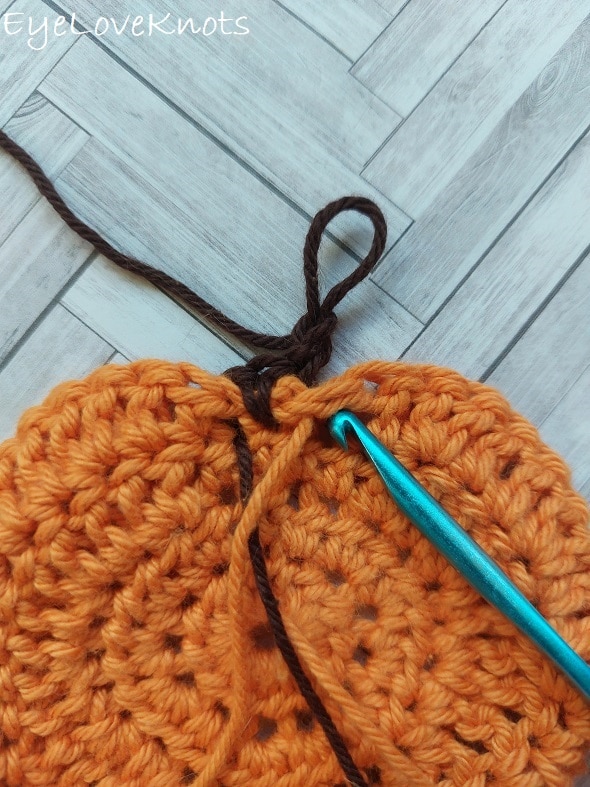
Chain 1, and turn. Insert hook into the corresponding chain space stitch from the pumpkin
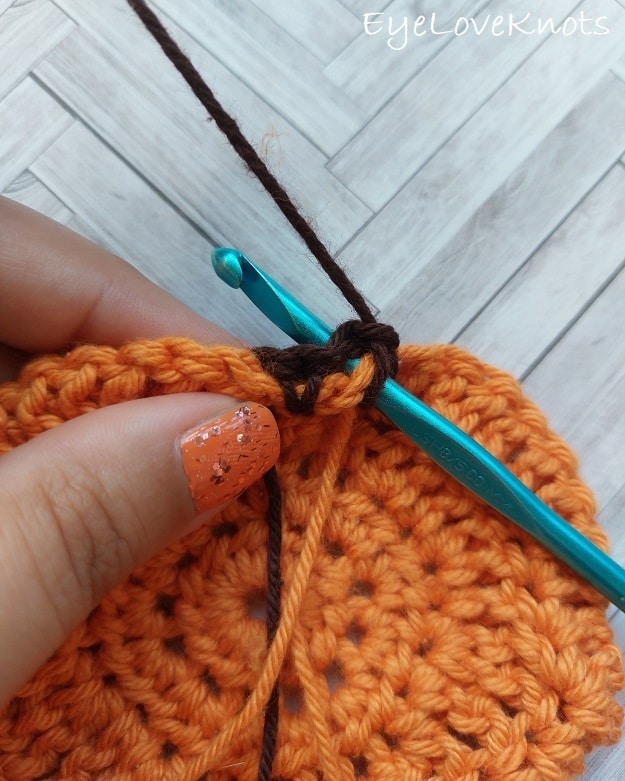
and also into the 1st stitch from the stem and complete a SC, 2 SC into the next stitch,
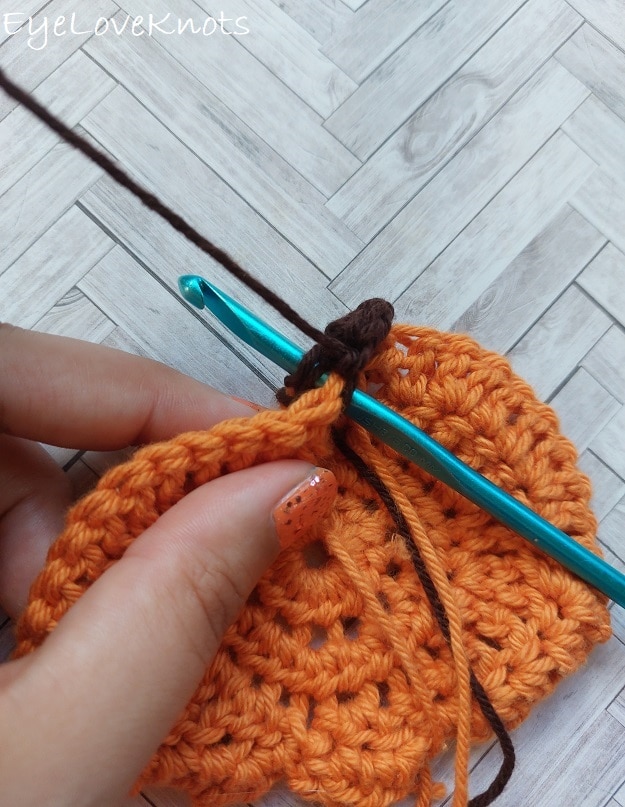
insert hook into the next corresponding chain space stitch from the pumpkin and also into the last stitch from the stem and complete a SC. (4 SC)
R7: Chain 1, and turn. SC across. (4 SC)
Fasten off, and weave in ends.
Please feel free to make and sell your own Whimsical Pumpkin Coaster using this pattern, but please DO NOT claim this pattern as your own nor should you sell my pattern, and DO NOT re-publish my photos as your own. DO NOT copy and paste my pattern anywhere, link to it instead.
Join one of our awesome Facebook groups to share your creations, and see what others are up to!
– EyeLoveKnots Crochet & DIY Community
– DIY Home On Rockwood Lane
– Alexandra Lane Lifestyle
Linked Up To…
Party in Your PJs #382 – The Apple Street Cottage
Unlimited Link Party 36 – Grammy’s Grid
Tuesday Turn About #123 – My Wee Abode
Home Matters Linky Party #354 – Modern on Monticello
Funtastic Friday Link Party #366 – Simply Beautiful by Angela
Link Your Stuff – Annemarie’s Haakblog
Handmade Monday #251 – Sum of their Stories
The Really Crafty Link Party #287 – Keeping it Real
Link Up Potpourri #15 – My Bijou Life
Ginx Woolly Linx Party October – Ginx Craft
Craftastic Monday Link Party – Sew Can Do
You’re the Star Blog Hop – Decor Craft Design
Happiness is Homemade Link Party #398 – Decor Craft Design
Craft Schooling Sunday – Creative Jewish Mom
611th Inspire Me Tuesay – A Stroll Thru Life
Fabulous Party 395 – Lou Lou Girls
Linky Ladies Party #217 – The Purple Poncho
Spread the Kindness Link Up #246 – Shelbee on the Edge
{Wow Me} Wednesday #528 – Ginger Snap Crafts
The Loop Scoop #24 – Moogly Blog
The Wednesday Link Party 422 – Oombawka Design Crochet
Team Creative Crafts Linky Party #65 – Artsy-Fartsy Mama
Wonderful Wednesday – Oh My Heartsie Girl
Thursday Favorite Things – An Artful Mom
Grace at Home No. 444 – Imparting Grace
Traffic Jam Weekend Link Party #300 – My Bijou Life
Create, Bake, Grow & Gather Party #492 – Shabby Art Boutique
Encouraging Hearts & Home Blog Hop – Slices of Life
Morning Cup of Joe – The Cottage Market
One More Row Free Crochet Pattern Link Party #36 – Loops and Love Crochet
Oh, this little pumpkin is simply adorable! I crochet and will have to try this! Thank you, too for popping over to see me! It’s always nice to meet a crafty girl, especially one who crochets!
Be a sweetie,
Shelia 😉
Thank you so much! Pleasure to meet you 🙂
This is such a cute idea for a coaster! it looks really cute, you designed the pumpkin perfectly! 🙂
Hope your week is going well 🙂
Thank you so much, Mica! I had a lot of fun designing these, and now have all kinds of ideas for ways to use them. So little time left this year though.
So cute, Alexandra! Your nail color is the same as mine. 😄
Michelle
https://mybijoulifeonline.com,
Yes! I was thinking that when I saw your photo. Great minds think alike 🙂
I am currently sitting here with a new crochet book! After 18 months of crocheting in a straight line and making quite a few blankets, I need to branch out now and try new designs but am a tad scared that I will get it completely wrong! This is a lovely pattern for me to try and get learning a new design, thank you! Sim x #TrafficJamWeekend
You will do great! Just take it one step at a time. Reach out if you have any questions 🙂