This is a free crochet pattern for how to crochet a green floral St Patrick’s Day wreath.
This post contains affiliate links. If you make a purchase by clicking on them, I make a small commission at no extra cost to you. I only recommend products I love and hope you’ll love them too! Click here to find out about the different affiliate programs I am apart of. This post also contains shop links to my yarn shop and craft store, Yarn Crafts & Coffee. You can shop online or in person in Melbourne, Florida.
Find the free crochet pattern instructions below, or purchase a printer-friendly, ad-free PDF on Ravelry by clicking here.
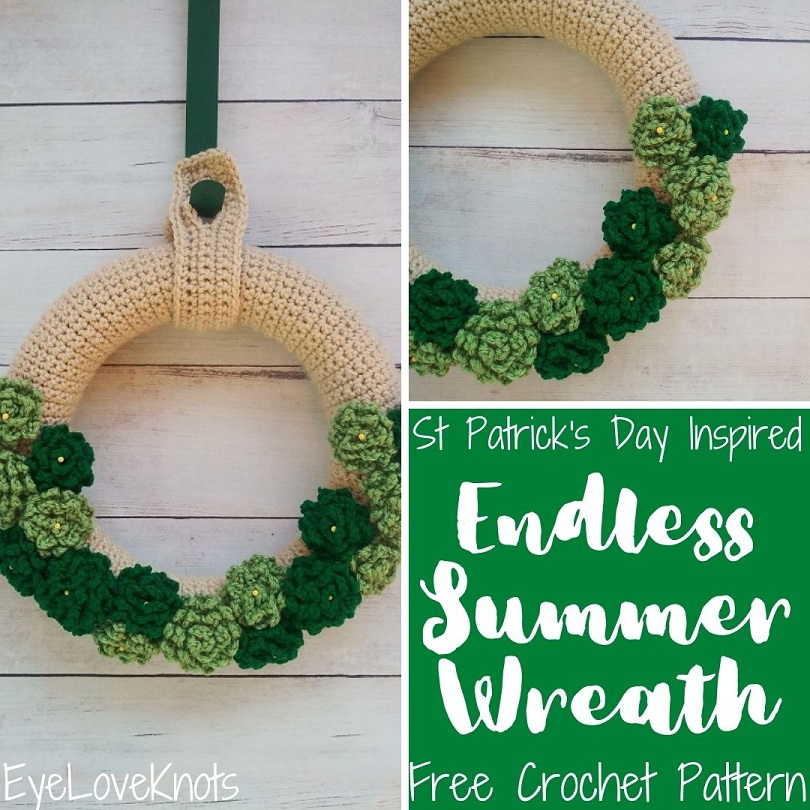
I’ve never decorated my home for St. Patrick’s Day before. Usually I go straight from Christmas to Spring and skip everything in between, but this year, I’ve been working on changing that up a little bit by sharing my C2C Two Enamored Hearts Washcloth and XO Throw Pillows for Valentine’s Day and my C2C Leprechaun Hat Washcloth. This fun wreath will be joining the St Patrick’s Day mix.
If you’re a regular around here, you already know that I love the Hydrangea flower so I decided to take the idea of my Frilly Flower but make smaller versions so I could mush a bunch of them together on a wreath in various shades of green. I pulled out three shades, but later dropped it down to just two.
I have really been trying to not buy new supplies, but use up what I already have. I am pretty proud to say that all my supplies came from my stash, so this project did not cost me a thing! Score!
I will say this is a project post, but the actual patterns have been previously published on my blog, so I will be linking to them (so Google doesn’t penalize me for duplicate information).
AD-FREE, PRINTER FRIENDLY PDF:
If you would like a PDF version of this post, you may get one through either my EyeLoveKnots Etsy Shop, Ravelry or LoveCrafts Shop for a small fee. This fee is to compensate for the views lost when you no longer need to return to the blog to for the information, as you will have your own copy. Plus! It helps fund supplies for new projects to share with you!
Shop EyeLoveKnots Etsy: St Patrick’s Day Endless Summer Wreath.
Shop EyeLoveKnots LoveCrafts: St Patrick’s Day Endless Summer Wreath.
Share your version of this project on Ravelry – Endless Summer Wreath.
Save this to your Favorites: AllFreeCrochet, FaveCrafts, AllFreeHolidayCrafts, Cheap Thrifty Living, Crochet Pattern Bonanza
Materials:
- 395 Yards of Worsted Weight Yarn
- H8/5mm Crochet Hook
- Tapestry Needle
- Tape Measure (Gauge is essential)
- Scissors
- Optional, Stitch Markers
- Optional, Jewelry Pliers
- 12″ Foam Wreath Base
- Glue OR Sewing Pins
Yarn Talk:
I used Red Heart’s Super Saver in Buff (base) – 192 Yards (cover), 11 Yards (hanger), and Tea Leaf and Paddy Green (flowers) – 192 Yards in total.
My favorite yarns for crocheting a wreath are going to be 100% acrylic yarns, but specifically, I like Premier Yarns Basix Worsted, Lion Brand Pound of Love and Red Heart Super Saver. These yarns hold up well to wear and tear, and while they will fade over time, I feel that these yarns hold their color the best over other yarns I’ve tried, as well as the shaping of embellishments. If the wreath will be inside only, you could go with cotton blends and embellishments, but for outdoor wreaths, cottons fade quickly and begin to fall apart.
Premier Yarns Basix is a sturdy worsted weight acrylic yarn that is perfect for practically any yarn project you could dream of! It’s similar to Red Heart Super Saver and Bernat Super Value, but a little softer. It’s also machine washable and dryable making projects easy to care for. As of July 4th, 2026, it is available in an amazing number of colors – 93 solid colors – as well as 10 tweed colorways and 14 ombre colorways and in Lightweight, Chunky Weight and Super Bulky Weight.
Lion Brand Pound of Love Yarn is a soft, acrylic yarn that comes in a one pound ball. One pound means you won’t need many skeins to get projects done and even after big projects, like baby blankets, you’ll usually have some yarn leftover for smaller projects. It’s machine washable and dryable making projects easy to care for. As of June 5th, it is available in a 35 colors.
Tools & Notions:
We have lots of great crochet hooks in our Yarn Crafts and Coffee Yarn Shop. The most popular, and preferred by Candace and Emily, are the Clover Amour Crochet Hooks with the soft handles and smooth metal hook. Alexandra prefers metal crochet hooks with large, ergonomic clay handles and just loves the fun designs from SiennasBowtique and BronzeShepherdStudio! If your preference is wood, the LYKKE brand are lovely, smooth and sturdy.
Tapestry Needles with the blunt, round end are essential for sewing and finishing on a number of yarn crafts, including crocheting, knitting as well as needlepointing on fabric and plastic canvas. The blunt, rounded end allows the needle to pass easily through the fabric created by yarn and holes on canvas without snagging (or getting your fingers) in the process. More specifically for crocheting and knitting, a Bent Tip Tapestry Needle makes weaving, grafting and sewing so much easier on the hands. The long oval eye makes threading strands of yarn easier, though you may still want to use a needle threader.
A tape measure is an essential tool in a multitude of crafts, including crocheting, knitting and needlepoint to name a few, especially if you are cutting material to finish a project or trying to meet gauge.
Scissors are an essential tool. When I’m working on the go, I like to carry a pair of folding scissors as they fit perfectly in even the tiniest of bags. When I am working at home or have more space in my bag for a larger notions pouch, I like to use a pair of lightweight, all-purpose scissors as they are so versatile and great for a variety of things from cutting plastic canvas mesh to trimming yarn ends after weaving in to cutting out a care card to include with a handmade gift.
Stitch Markers are really helpful to use when it comes to marking the first stitch of the round so you can easily find it when it comes time to join, especially when working in a continuous round, as well as marking where to add increases in making top down garments or where change the stitch pattern within a pattern, which is more common in knitting, but they’re also really helpful when it comes to holding the layers of your fabric together, such as what you would use sewing pins for with fabric, so you can try garments and accessories on as you go or to keep all the rows and stitches lined up when you are ready to seam. You’ll find there are a variety of Stitch Markers available depending on what you’ll use them for, but plastic Locking Stitch Markers are among the most popular as they come in kits and are the cheaper option to grab off the shelf at the craft store, but my favorite are Lever Back Stitch Markers. Scrap yarn, paper clips and safety pins work too!
Jewelry Pliers are an excellent tool to use to help weave in the ends of tough yarns, such as cotton yarns and chunkier yarns, that can be quite tough on the fingers when weaving in with just fingers and a tapestry needle. Sore thumbs and frustration can be a thing of the past by simply using jewelry pliers to help pull the tapestry needle through the work. Make sure the eye of the needle is facing up so you can see directly down it and carefully pull, wiggling as needed. If it gets caught and you tug too hard, it will break the eye of your needle.
Foam wreath form bases come in green and white. It does not particularly matter which color you use for a crocheted wreath that is made of a solid fabric. Even as it stretches, the fabric is typically still solid enough that you don’t see your stitches through, but this is not always true so you will definitely want to test it before whipstitching closed. Personally, I always try to match light colored yarns with a white base, and darker colored yarns with a green base just so I don’t have to worry about it.
If you don’t have a foam wreath base, you could use a straw wreath or a pool noodle with the two ends attached together with a strong tape. These tend to be thicker so you may need to add stitches to the beginning chain to get a wider fabric. While I have not tested wire wreath forms, I think they would work about the same, but may be thinner around and require less stitches.
Usually, I hot glue all of my wreath embellishments down, but I was using some sewing pins to map out where I would plan my flowers, and I fell in love with the look of the little yellow dot in the center of the flowers so I left it with the pins in place. I also like the idea of the flowers being removable so I can easily use the wreath form base again. If I were going to sell this wreath or gift it, I would definitely have glued the flowers in place, and probably a yellow bead in the center if I really liked the look.
45mm sewing pins that are 1 3/4″ long are handy to keep the pieces in place. The size of the sewing pins is flexible for this project, since the crocheted fabric is very easy to pin through, but generally 45mm is a good size to use with thick fabrics as it’s a sturdy pin and 1 3/4″ is a good length for thicker fabrics as well.
Hot glue works well for several years, but it can look a little messy, especially if it’s hot where you are, and the embellishments start to loosen over time. I prefer using Titebond Quick and Thick Multi-Surface to glue embellishments in place.
Time Spent:
This wreath came together in around five hours.
The wreath base cover itself took just over two hours. The smaller flower takes about 9 minutes, and the larger flowers about 12 minutes to stitch and sew up.
Measurements:
This cover will fit a 12″ foam wreath form.
Before seaming, your fabric should measure anywhere from 5 1/2″ wide to 6 1/8″ wide by about 30 7/8″ in length.
Gauge:
- 20 SC by 14 Rows = 6 1/8″ Wide by 3 7/8″ Tall
The most important thing is to measure the width of your fabric after at least 8 rows – this will be the finished width, and you’ll want that to be 5 1/2″ to 5 3/4″ wide, though it does work all the way up to 6 1/8″ with a little looser of a fit. Anything less or more, I recommend going up or down a hook size or adding or taking away stitches in any multiple.
Abbreviations (US Terms):
- SC – Single Crochet (Photo Tutorial)
Tutorial:
First, you will need to gather your wreath base color (I used Buff), and styrofoam wreath form, and head over to my Basic 12″ Wreath Form Cover Free Crochet Pattern. Don’t forget the wreath hanger if you need one.
Once finished, time to start your flowers! I used my Frilly Flowers Free Crochet Pattern to work up 17 flowers. I modified the pattern slightly to make smaller flowers than my original Frilly Flowers. I made 5 flowers that started with a chain 39 (3 in Tea Leaf and 2 in Paddy Green), and 12 flowers that started with a chain 24 (6 in Tea Leaf and 6 in Paddy Green).
Assembly:
Your wreath base should already be sewn closed on the styrofoam base.
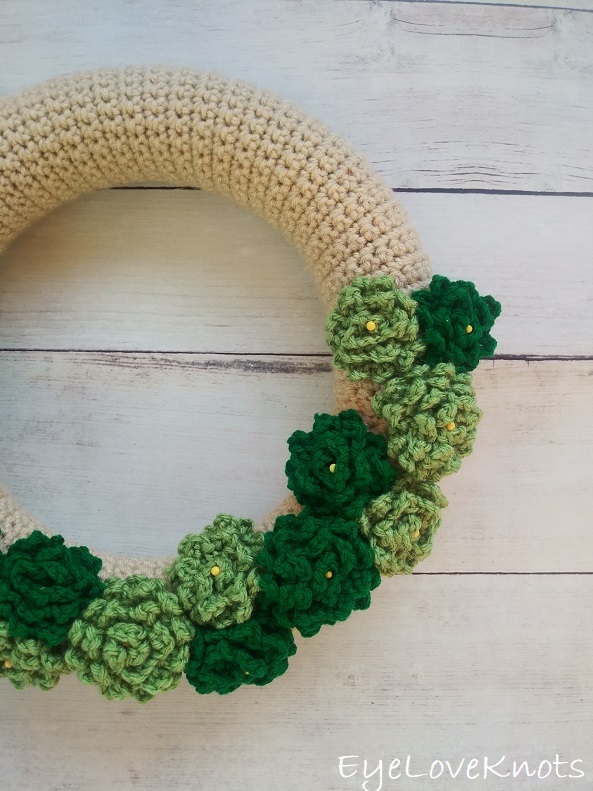
Decide where to place your flowers. I used sewing pins to help me map out where I wanted them to be, and ended up using this method to secure the flowers, but I usually hot glue them down. When placing the flowers, I suggest using them to cover up the seam from sewing the two ends together of the wreath form cover (or you can use your wreath hanger to cover the seam up).
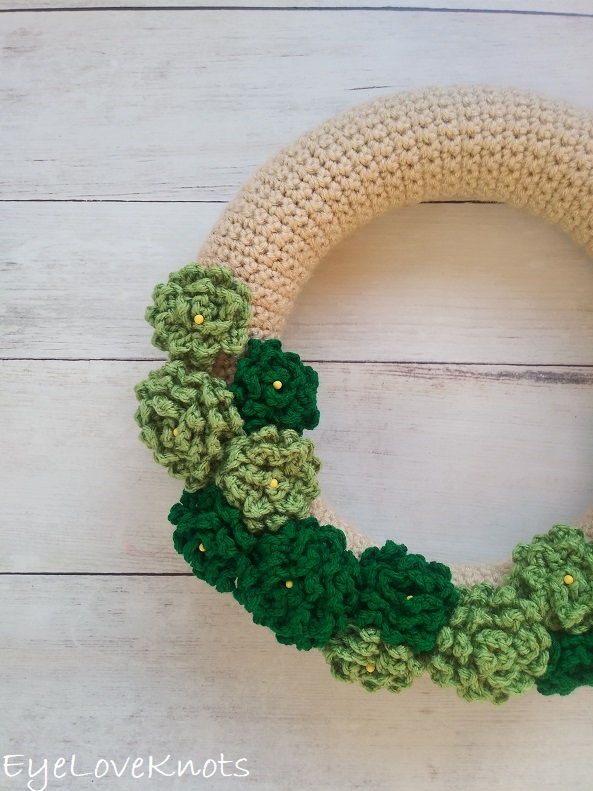
Enjoy your beautiful Endless Summer Wreath! While this one is perfect for St Patrick’s Day and Spring, with a simple color change, it’s perfect for any time of year!
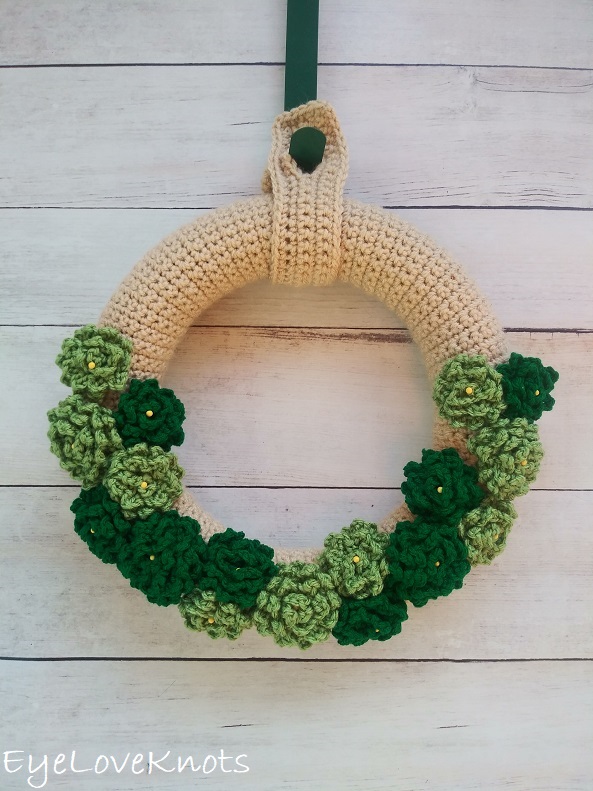
Please feel free to make and sell your own Endless Summer Wreath using this pattern, but please DO NOT claim this pattern as your own nor should you sell my pattern, and DO NOT re-publish my photos as your own. DO NOT copy and paste my pattern anywhere, link to it instead.
Join one of our awesome Facebook groups to share your creations, and see what others are up to!
– EyeLoveKnots Crochet & DIY Community
– DIY Home On Rockwood Lane
– Alexandra Lane Lifestyle
Linked Up To…
Unlimited Monthly Link Party 22 – Grammy’s Grid
You’re the Star Blog Hop – Decor Craft Design
Happiness is Homemade 364 – Decor Craft Design
Craft Schooling Sunday – Creative Jewish Mom
Fabulous Party #361 – Lou Lou Girls
581st Inspire Me Tuesday – A Stroll Thru Life
Little Cottage Link Party #92 – Love my Little Cottage
The Really Crafty Link Party #256 – Keeping it Real
Over the Moon 266 – Marilyn’s Treats
Hearth and Soul Link Party – April, The 21st Century Housewife
Party in Your PJs #348 – The Apple Street Cottage
Your Whims Wednesday #500 – My Girlish Whims
Thursday Favorite Things #479 – An Artful Mom
Artsy-Fartsy Party #334 – Artsy-Fartsy Mama
Encouraging Hearts & Home Blog Hop – Apron Strings and Other Things
All About Home #81 – Common Ground
Waste Not Wednesday 244 – Pretty DIY Home
Creatively Crafty Link Party #265 – Life Beyond the Kitchen
Home Matters Linky Party #321 – Modern on Monticello
Traffic Jam Weekend Linky Party #272 – My Bijou Life
Create, Bake, Grow & Gather Party #460 – Shabby Art Boutique
Friday Favorites – Busy Being Jennifer
Link Your Stuff – Annemarie’s Haakblog
A Morning Cup of Joe – The Cottage Market
Snickerdoodle Create Bake Make Link Party 375 – EyeLoveKnots
Craftastic Monday Link Party – Sew Can Do
Handmade Monday #217 – Sum of their Stories
Tuesday Turn About #89 – My Wee Abode
{Wow Me} Wednesday #494 – Ginger Snap Crafts
Wednesday Link Party 388 – Oombawka Design Crochet
Creative Crafts Linky Party #31 – Creatively Beth
Farmhouse Friday Link Party #194 – County Road 407
Linky Ladies Party #205 – The Purple Poncho
Ginx Woolly Linx Party March – Ginx Craft
The Loop Scoop #9 – Moogly Blog
One More Row Free Crochet Pattern Link Party #29 – Loops and Love Crochet
How cute….As I was reading your creation, I had a thought of using the pearl pins (or whatever they are called) as a temporary placement of the flowers, and with every holiday/season/event, change the color of flowers. Use it all year round with a simple change!
Yes!! I always tack my embellishments down so I can see what it looks like before I make it permanent, but this time I was thinking why didn’t I already have a wreath like this that I could easily change the embellishments on it, and not have to remake the whole thing each time! Silly me – excellent idea!
This is a really unique St. Patrick’s day wreath idea – love it!
Thanks so much, Marie! I am a big fan of Hydrangea wreaths. This is inspired by it.
Your wreath is just darling! Another project that makes me want to learn to crochet. Thanks so much for sharing every week. I look forward to what you are making each week. #HomeMattersParty
Thanks, Donna!
This is awesome! I can think of a variety of ways to decorate this with various textiles. Thanks for sharing with us at Creatively Crafty #ccbg
Yes! I love that there are so many possibilities! Thanks, Lydia!