This post contains affiliate links for Amazon. If you make a purchase by clicking on them, I make a small commission at no extra cost to you. Thanks for your support!
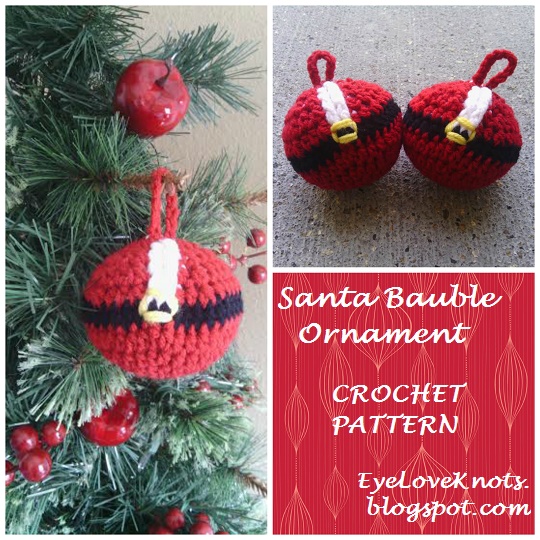
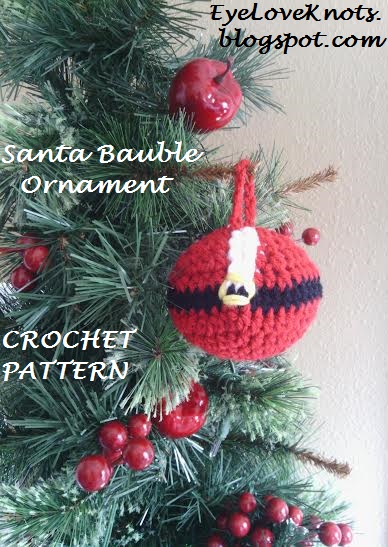
I signed up for a few ornament exchanges this year, and decided on crocheting up a Santa Bauble. I debated on whether or not I wanted to add arms to this bauble, but I figured that if I added arms then it would look weird without a head and I knew I didn’t want to add a head to it. Hehe.
After a few minutes of brainstorming, here’s what I came up with! I am very happy with it, and plan on making a bunch more to give as gifts this year.
Materials:
– Small Amount of Worsted Weight Yarn in White, Red, Black and Gold/Yellow – I used Hobby Lobby’s I Love This Yarn (colors links above)
– I9/5.5mm Crochet Hook
– #18 or #20 Tapestry Needle
– PolyFil to Stuff (I stock up on mine from JoAnn’s when it’s on sale)
Material Notes:
Yarn Alternatives: Red Heart’s With Love.
PolyFil is very affordable and comes with a lot. Alternatively you can use cotton balls or yarn scraps. If using cotton balls, your baubles will come out more stiff, take more time for shaping and I caution you to watch how much you put into your bauble because it’s very easy to overstuff.
Time Spent:
I was able to complete my Santa Bauble in about 30 minutes.
Measurements:
When stuffed, my finished bauble measures 10.25″ around by about 3.25″ in height, excluding hanger.
Gauge:
With I Love This Yarn and an I9/5.5mm Hook = 4″ x 4″
Chain 16, DC in the 4th stitch, and in each stitch across. (14 DC)
R2 – R8: Chain 2, turn. DC in the 2nd stitch, and each stitch across.
Fasten Off.
Abbreviations:
HDC – Half Double Crochet
HDC2tog – Half Double Crochet Decrease Over Two Stitches
*To work, yarn over, insert hook into first stitch, yarn over, pull up a loop, insert hook into next stitch, yarn over, pull up a loop, yarn over, pull through all 3 loops on hook.
HDC3tog – Half Double Crochet Decrease Over Three Stitches
*To work, yarn over, insert hook into first stitch, yarn over, pull up a loop, insert hook into next stitch, yarn over, pull up a loop, insert hook into next stitch, yarn over, pull up a loop, yarn over, pull through all 4 loops on hook.
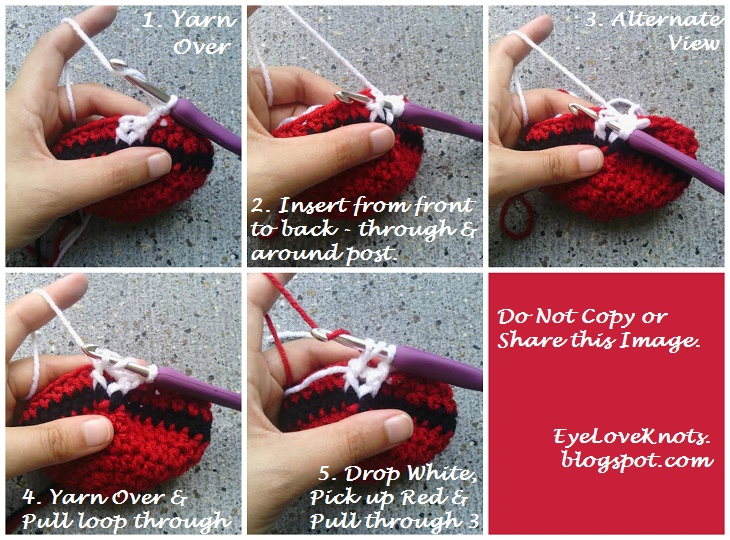
FPDC – Front Post Double Crochet
*To work, see image below. Click on it to make larger.
Pattern Notes:
Join to the first stitch, not beginning chain.
Beginning chain one does not count as a stitch.
Working the increases in the format I have listed them below helps to keep your seam straight and barely noticeable.
Watch for decrease instructions – these rows are worked differently than normal!
Work over all tails to minimize the number of tails to weave in.
In Rows 7 through 9, I state to “pick up White…pick up Red”. There are only two stitches you will work with White in these rows, and the rest will be worked in Red. Change colors accordingly.
To change colors, work them in last part of stitch. For assistance, see my How to Change Colors in Crochet the EyeLoveKnots Way post.
I worked over the white tails for three or four stitches, pulling the initial white tail over too, and then fastened off with about a tail. Just make sure when you pull over the initial tail piece that you don’t pull too tight, otherwise it will make the front post area bunch up.
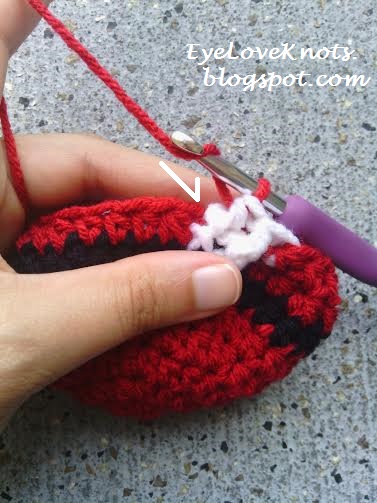
Sometimes it’s hard to tell where to put your next stitch after working a post stitch. The image above shows where to start the first half double crochet decrease after the second front post double crochet. If you end up with one less stitch in your round, recheck this stitch placement.
Pattern:
With Red, chain 4. Join to form a ring. Chain 1. Work 8 HDC into the ring. Join. (8 HDC)
R2: Chain 1. HDC into the first HDC, 2 HDC into each of the next 7 HDCs, HDC into the last HDC. Join. (16 HDC)
R3: Chain 1. HDC into the first 2 HDCs, (2 HDC into the next HDC, HDC into the next HDC) 7x, HDC into the last HDC. Join. (24 HDC)
R4: Chain 1. HDC into the first 3 HDCs, (2 HDC into the next HDC, HDC into the next 2 HDCs) 7x, HDC into the last HDC. Join. (32 HDC)
R5: Chain 1. HDC into the first 4 HDCs, (2 HDC into the next HDC, HDC into the next 3 HDCs) 7x, HDC into the last HDC. Join with Black. (40 HDC)
R6: With Black, Chain 1. HDC into the second HDC, HDC into the next 38 HDCs around, HDC into the last HDC. Join with Red.
R7: With Red, Chain 1. (HDC2tog, HDC into the next 3 HDCs) 3x, HDC2tog, HDC into the next 2 HDCs and pick up White, FPDC around the next post, FPDC around the next post and pick up Red, HDC2tog, HDC into the next 2 HDCs, (HDC2tog, HDC into the next 3 HDC) 3x. Join. (32 stitches)
R8: Chain 1. (HDC2tog, HDC into the next 2 HDCS) 3x, HDC2tog, HDC into the next HDC and pick up White, FPDC around the next post, FPDC around the next post and pick up Red, HDC2tog, HDC into the next HDC, (HDC2tog, HDC into the next 2 HDCs) 3x. Join. (24 stitches)
R9: Chain 1. (HDC2tog, HDC in the HDC) 3x, HDC2tog and pick up White, FPDC around the next post, FPDC around the next post and pick up Red, HDC2tog, (HDC2tog, HDC into the next HDC) 3x. Join. (16 stitches)
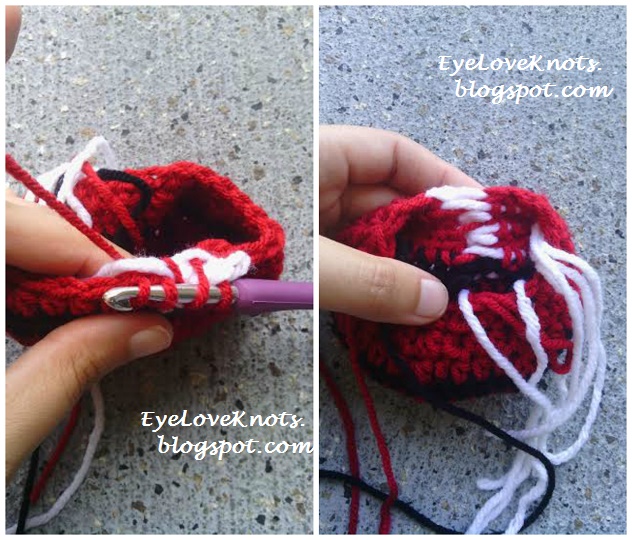
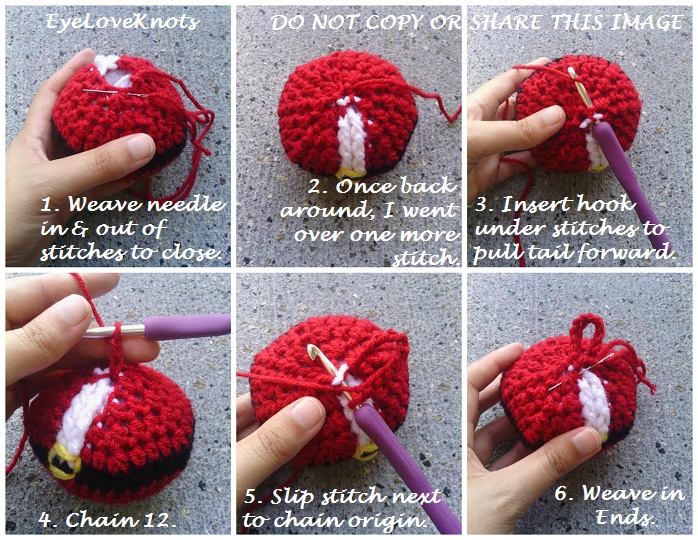
*At this point, I turned my piece inside out and weaved in my beginning tail (just a few passes to secure the hole).
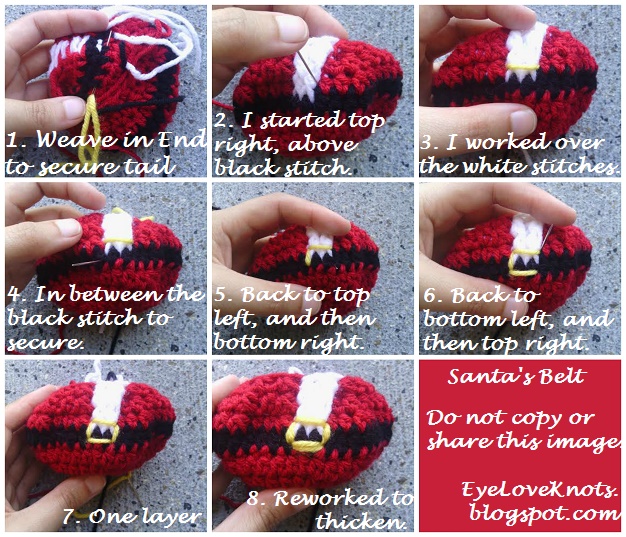
Afterwards, I turned my piece right side out, and began on my belt. You can find the steps in the image above. Click to enlarge. Make sure you are only weaving through the top part (to you) so your tail won’t be visible on the other side. The gold will stick out.

Please feel free to make and sell your own Santa Bauble Ornaments using this pattern, but please DO NOT claim this pattern as your own nor should you sell my pattern, and DO NOT re-publish my photos as your own. DO NOT copy and paste my pattern anywhere, link to it instead.
*If you would like a PDF version of this post, you may get one through my EyeLoveKnots Etsy Shop or EyeLoveKnots Craftsy Shop for a small fee. This fee is to compensate for the view/s lost once you no longer need to return to the blog for the information, as you will have your own copy. Plus! It helps fund supplies for new projects to share with you! There are two versions available, one with main photos and one with all photos.
Shop EyeLoveKnots Etsy – Santa Bauble Ornament;
or EyeLoveKnots Craftsy – Santa Bauble Ornament.
With so many size, yarn type and color options, I would love to see them! Please share your photos on my EyeLoveKnots Facebook page!
Don’t miss out on new crochet patterns, reviews, jewelry tutorials and more! Subscribe to EyeLoveKnots by using the box on the right side toolbar, or follow me via Bloglovin
You May Also Like…
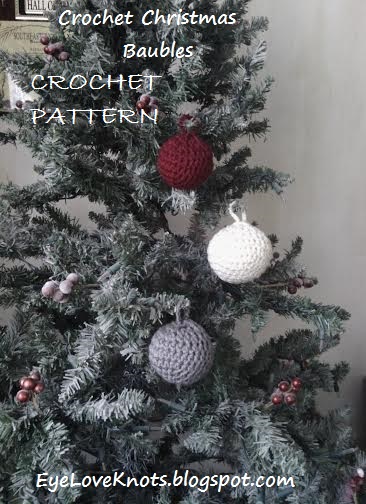
Your Christmas Baubles are looking great. Thanks for sharing the pattern.
Have a nice day, Margaret
Thanks! They were fun to make. Happy Holidays Margaret!
I would like to print the patten. How do I get it?
You can get the PDF on Etsy: https://www.etsy.com/listing/258976744/crochet-pattern-santa-bauble-ornament