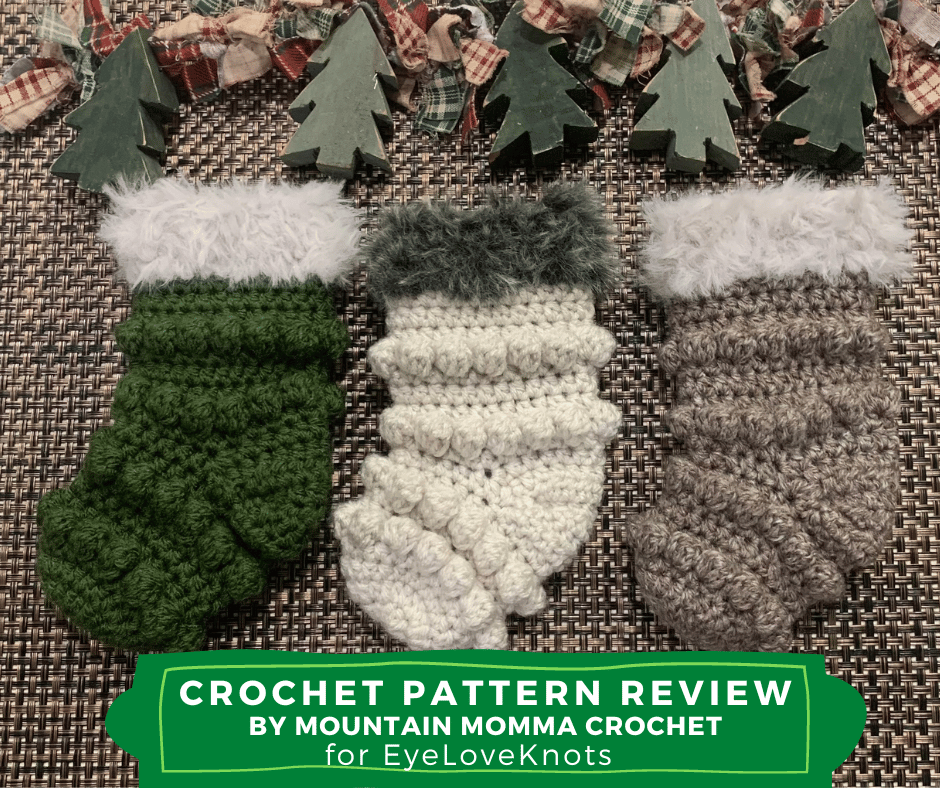
This is a crochet pattern review of the Mini Christmas Stocking designed by Ashley of A Crafty Concept. Reviewed by Carrie of Mountain Momma Crochet for EyeLoveKnots.
This post contains affiliate links for Etsy and Amazon. If you make a purchase by clicking on them, I make a small commission at no extra cost to you. Thanks for your support!
Find the crochet pattern review below, find the free pattern on A Crafty Concept Blog or buy an ad-free printable of the pdf on Etsy.
In a hurry? Pin this for later.
Carrie from Mountain Momma Crochet here! I appreciate you coming to check out my assessment of one of my latest makes for an upcoming holiday market.
Sometimes I look at a fellow maker’s picture of a finished item and feel defeated before I even pick up a hook.
If you are like me, sometimes you get in your own way. A staged photo or the mere thought of the complexity of an item can often lead me to ‘pin it and walk away’ focusing on something else to make. The number of ends to weave, number of squares to make, complex cables, etc. If we were to stop and talk about the amount of ‘pins’ or patterns waiting in the wings, that would need to be an entirely different blog post as there’s lots to say there.
What do you need to take on something that might intimidate you? Sure, you are interested in making something new. Maybe a friend or relative has sent the “dreaded photo from online” with the tagged message “Can you make this?”. Maybe you are fresh out of ideas of things you can make your coworkers or relatives. Is it faux pa to gift someone a beanie five years in a row? Now, please don’t take offense if that is your plan. No judging here, I promise.
This holiday season, I purposed to make something new. Enter the pressure of participating in yet ANOTHER market with my crochet makes. A few reasons behind adding to my accomplished stock of items to offer. (1) If locals made it to my other shows, I’d like a few new items versus only the ones I’ve presented before. (2) Some people come to markets during the holidays looking for Christmas-themed items. (3) I had yarn and fur in my stash, so why not!?
Read number 3 again. Why not!? At some point in your crochet journey, whether a personal or professional one, you should ask yourself that question. What is stopping you? If you like the look of something that’s been made in the crochet community, pick up your hook and give it a try.
In one of the previous paragraph
s, I mentioned “pressure”. Type in “crochet stocking pattern” on Pinterest or Google and check out the search results. There are cables, alpine stitch, bean stitch, puff stitch, multi-stitch, bulky yarn, sock yarn, and anything else you can come up with. Add in the thought of making the heel. Ashley from A Crafty Concept to the rescue!After checking out the video tutorial on YouTube, I was ready to go. It was very helpful regarding the placement of the heel stitches, which was definitely on my list of things to understand before I began the stocking. The best thing about a good video tutorial is the ability to pause and go back if you need to.
What Supplies Do I Need to Crochet the Mini Stocking?
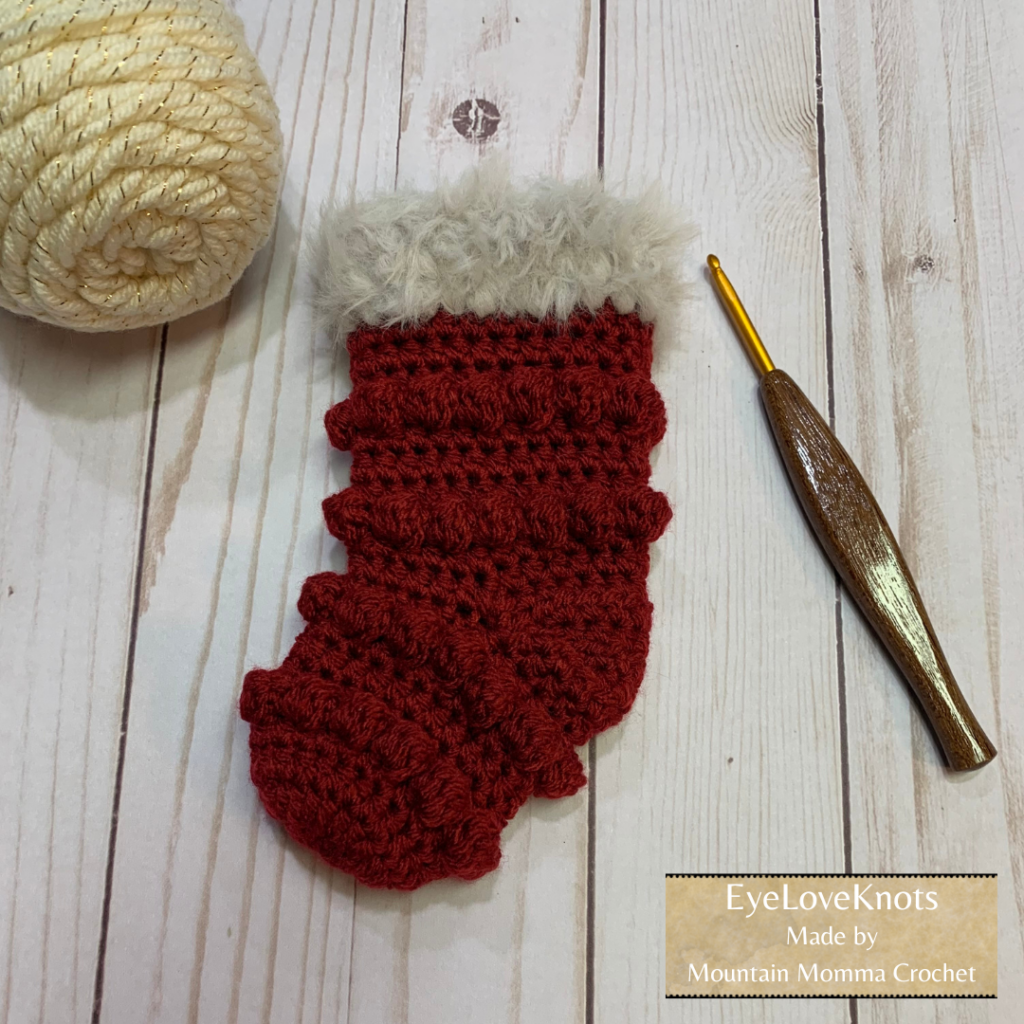
- Worsted Weight #4 Yarn – I used I Love This Yarn (from Hobby Lobby) in Linen (#240), Dark Olive (#130), Cranberry (#50) – pictured above. Also consider using I Love This Yarn Metallic in Ivory (#732) – pictured above, Red (#736), or Jelly Bean (#744); 1-2 ounces per stocking
- Super Bulky #6 Yarn – I used Yarn Bee – Fur the Moment (from Hobby Lobby) in Wolf (#15), Frosted Mauve (#32), and Mink (#13); 1-2 ounce per stocking
- Size E4/3.5mm crochet hook
- Size G6/4mm crochet hook
- Scissors
- Needle for weaving in ends
- Optional, Fancy S hook for hanging on a tree – I used this one
- Mini Stocking, Crochet Pattern (Free Version) or (Paid Version) from A Crafty Concept
Material Notes:
If planning on creating the mini stocking as an ornament, consider the options for the loop to hang on a tree. Some choose leather or faux leather sew-on tags. I opted for a simpler option, where I created my own loop, using the same yarn used for the stocking, and purchased the ‘S’ hooks detailed above in the supply list.
How Long Does it Take to Crochet the Mini Stocking?
Less than an hour. This assessment depends completely on your skill level and how comfortable you are with the pattern and working with faux fur.
Gauge/Measurement:
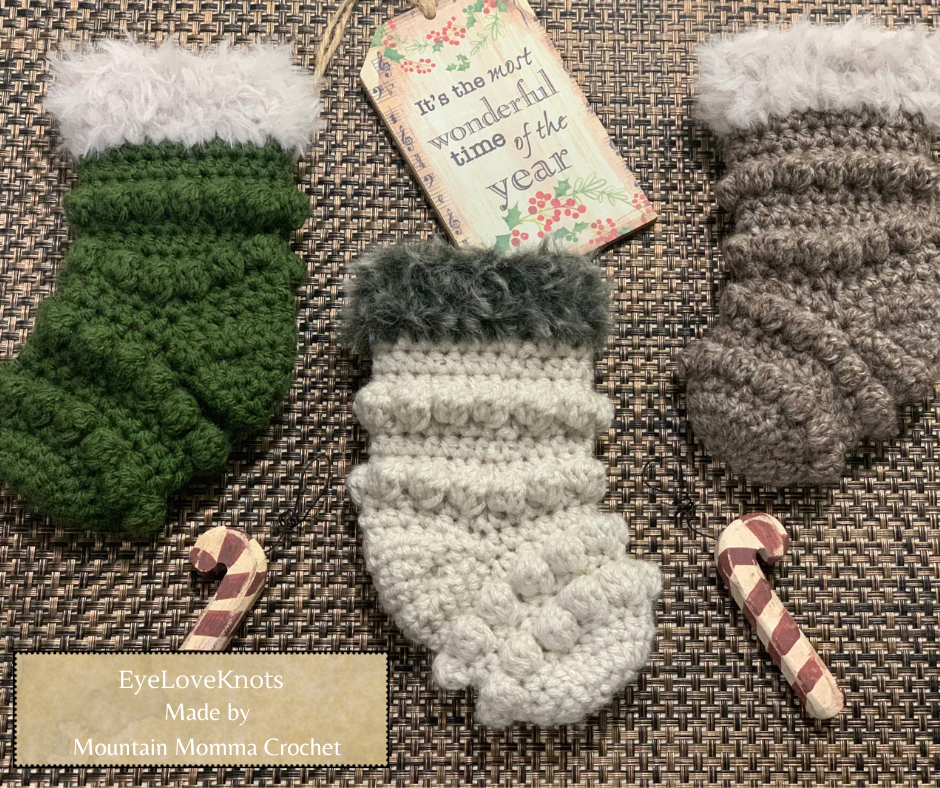
There is no specific gauge mentioned. However, please note you can make this mini stocking larger. I used a size 4mm (G6 hook) for the ones I created. I worked them up as ornaments but they are also wide enough to use as a gift card holder.
Additionally, Ashley has a pattern for a full-size stocking, which can be found for free here. It is called the Crafty Boho Stocking. There is also a video tutorial, or if you prefer the purchased PDF, it can be found here.
Pattern Notes:
Special stitches to understand:
- Bobble Stitch
- Half Double Crochet
- Slip stitch; each round is joined versus working in the round
This item starts with a magic ring. Make sure to understand when to TURN! This part is important. If you are familiar with bobble stitches, you know that it is worked from the “wrong side” in order to have the bobbles “pop” out on the right side. When you are working the bobble stitches, you should be able to look at the inside of the stocking when working your rounds. When you are working the HDC (Half Double Crochet) rounds, you should be able to look at the outside of the stocking.
I recommend watching the video tutorial in its entirety and revisiting when making the heel. The written pattern is on the blog. I read over the written instructions but also reviewed the video so I would be familiar with each part before I began. The heel can be a bit tricky, but Ashley walks you through that part in the video.
Some of you might also find working with faux fur to be a little tricky. I’ll tell you what others have told me. “Feel for your stitches.” It works. And – this pattern is very forgiving. If you have trouble, try using a 7/4.5mm hook to work the faux fur in the rounds above the regular yarn.
As for the loop, for hanging as an ornament, I used this simple method:
Join yarn (same yarn as the body of the stocking) to the inside corner, one row below the faux fur. Chain 12. Join in the stitch beside where the yarn was attached with a slip stitch, fasten off. Weave in your ends. As a little extra security, I tied those two ends together, cinching tight to hide the tie (but not too tight), then I wove in the ends. This created the perfect loop for hanging; doesn’t show too much of the yarn above the fur rows but is long enough to attach to a metal hook or the “S’ hooks referenced in the materials section.
I hope you’ve enjoyed my thoughts about this pattern. You can find me on Facebook, Instagram, and TikTok (mountainmommacrochet). Feel free to check me out and give me a follow. If you try this pattern based off of my review, please tag me on social media, I’d love to see your make!
I’d like to thank EyeLoveKnots for the opportunity to reach out to a larger audience and for the experience of getting to place some thoughts onto digital paper.
Happy hooking!
Carrie of Mountain Momma Crochet
Don’t forget to visit with me on Instagram for all kinds of awesome crochet makes and inspiration.
Join one of our awesome Facebook groups to share your creations, and see what others are up to!
– Yarn Crafts & Coffee Community
– DIY Home On Rockwood Lane
– Alexandra Lane Lifestyle
Linked Up To…
Craftastic Monday Link Party – Sew Can Do
Beautifully Made Home Decor Link Party 242 – Across the Boulevard
Linky Ladies Party #231 – The Purple Poncho
All About Home #173 – Common Ground
Tuesday Turn About #180 – My Wee Abode
The Wednesday Link Party 480 – Oombawka Design Crochet
Team Creative Crafts Link Party #123 – Artsy-Fartsy Mama
The Loop Scoop 51 – Moogly Blog
Creatively Crafty Link Party #357 – Try It – Like It – Create It
Saturday Sparks Link Party 543 – Pieced Pastimes
Home Matters Linky Party #409 – Modern on Monticello
Happiness is Homemade Link Party – Decor Craft Design
Sundays on Silverado #122 – The House on Silverado
Handmade Monday #305 – Sum of their Stories
The Really Crafty Link Party #342 – Keeping it Real
You’re the Star Blog Hop -Decor Craft Design
Hello Monday – Pink Lady
Anything Goes Linky 357 – My Random Musings
Fabulous Party 453 – Lou Lou Girls
The Happy Now Blog Link-Up #350 – JENerally Informed
Wonderful Wednesday – Oh My Heartsie Girl
Wonderful Wednesday Blog Hop – My Life Abundant
The Wednesday Link Party #325 – Grandma’s House We Go
Crafty Creators Link Party #46 – Life as a LEO Wife
Linky Party – Karins Kottage
Grace at Home No 489 – Imparting Grace
Encouraging Hearts and Home Blog Hop – My Slices of Life
Thursday Favorite Things #569 – An Artful Mom
Create, Bake, Grow & Gather Party #549 – Shabby Art Boutique
Funtastic Friday Link Party #414 – Simply Beautiful by Angela
A Morning Cup of Joe – The Cottage Market
Pink Saturday – How Sweet the Sound
These are so CUTE! I love the furry tops!
Thank you, Laura. The fur definitely takes it up a notch! Super soft.
Those are lovely! I love the fur trim on top and that texture is amazing.
Thank you, Joanne. The fur gives it a true Christmas stocking feel, even though it is miniature!
These are super cute, what a lovely pattern.
Thanks Julie! They are really cute gifts and are pretty popular at markets. Makes me feel productive to be able to work them up so quickly!
These mini Christmas stockings turned out beautifully! What a great recommendation for A Crafty Concept’s pattern 🙂 Thank you for linking up at our weekly Link Party! You are being featured at our Wednesday
Party #481 this week. Here’s the direct link to the post in case you’d like to share your feature:
https://oombawkadesigncrochet.com/christmas-stockings-crochet-mistletoe-link-party-481/
Hope to see you again next week! Rhondda
So cute and great for a gift topper!