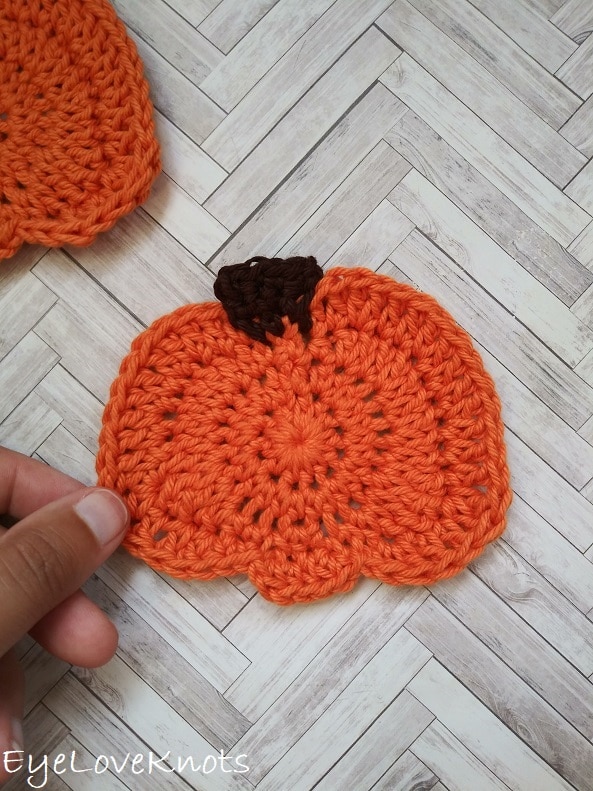
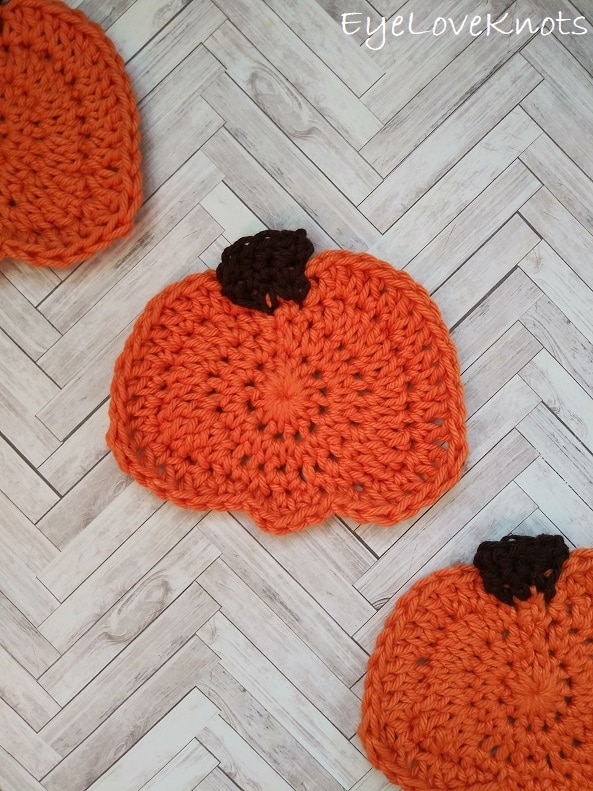
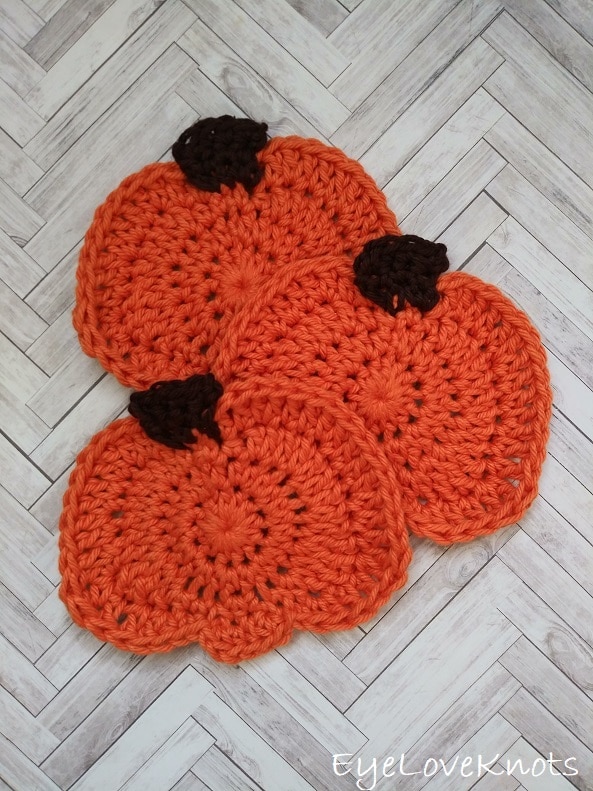
This is a free crochet pattern for how to crochet a whimsical pumpkin coaster that is perfect for Fall decorating or on the Thanksgiving table under some Pumpkin Spice coffee.
This post contains affiliate links. If you make a purchase by clicking on them, I make a small commission at no extra cost to you. I only recommend products I love and hope you’ll love them too! Click here to find out about the different affiliate programs I am apart of. This post also contains shop links to my yarn shop and craft store, Yarn Crafts & Coffee. You can shop online or in person in Melbourne, Florida.
Find the free crochet pattern instructions below, or purchase a printer-friendly, ad-free PDF on Ravelry by clicking here.
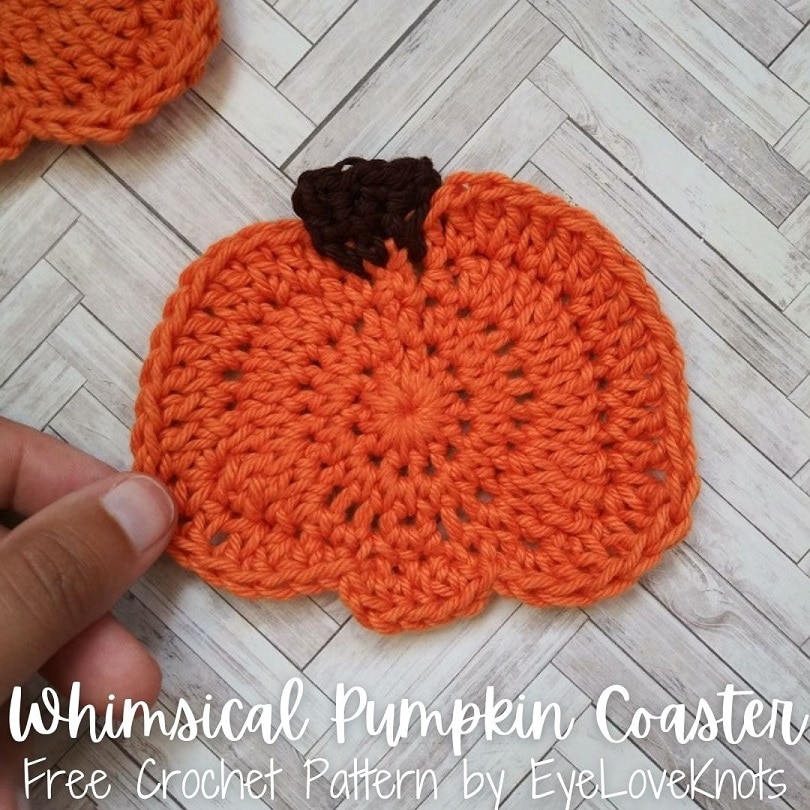
In August, I shared a round up of 20 free apple crochet patterns. While I was working on this round up, I was feeling inspired by the bottom shaping on some of the apples. It made me think about how pumpkins have the ridges that create different sections so I set out to create a pumpkin with bottom shaping, and it turned out cuter than I could have imagined.
It was a happy accident that the pumpkin is a little shorter on the left side than the right, but it gave it a beautiful, whimsical shape that I just love.
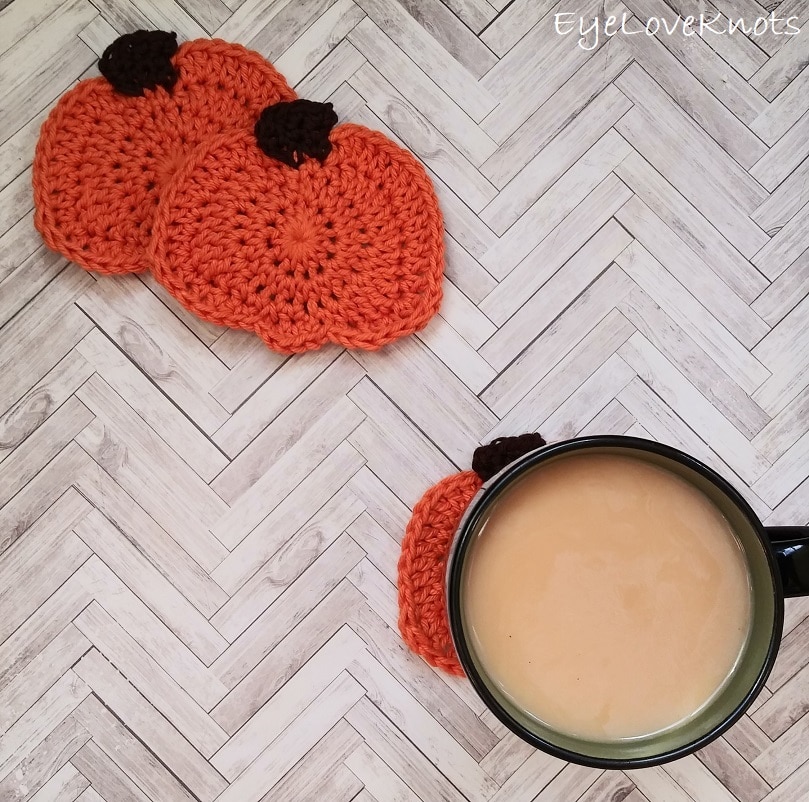
These coasters are featured in my Pumpkin Patch Crafting Event 2026 hosted on my Yarn Crafts & Coffee blog with my friends Emily of Crochet Aweigh and Candace of T&C Crafters.
Ad-Free, Printer Friendly PDF:
From 6:00pm EST 10/01/26 through 10/06/26 at 11:59pm EST, you can grab a free copy of the PDF for the Whimsical Pumpkin Coaster on Ravelry using code WHIMSY26. I earn my income from the number of pageviews my blog sees, so please do not share the code, but instead share the link to this post so others can find it. Thank you!
After 10/06/26 or for non-subscribers, if you would like a PDF version of this post, you may get one through either my Etsy Shop, Ravelry Shop or LoveCrafts Shop for a small fee. This fee is to compensate for the views lost when you no longer need to return to the blog to for the information, as you will have your own copy. Plus! It helps fund supplies for new projects to share with you!
Save this to Your Favorites On: AllFreeCrochet, FaveCrafts, Crochet Pattern Bonanza, Cheap Thrifty Living, DIYideaCenter, AllFreeHolidayCrafts
Materials:
- 20 Yards Total of Worsted Weight Cotton Yarn Per Coaster – that’s 16 Yards of an Orange and 4 Yards of a Brown
- H8/5mm Crochet Hook
- Tapestry Needle
- Scissors
- Optional, Jewelry Pliers
Material Notes:
My favorite cotton yarns are WeCrochet Dishie, Queensland Coastal Cotton and Cascade Nifty Cotton because they’re colorfast, which means the colors are set so you don’t have to worry about the colors fading or bleeding when used or washed. Cotton yarn is more durable and absorbent, but really you can use any worsted weight yarn out of your stash!
I used WeCrochet Dishie in the Clementine and Coffee colorways for my samples.
WeCrochet Dishie (aka Knit Picks Dishie) is a versatile, soft worsted weight #4 yarn made of 100% cotton. It’s on the lighter side for worsted weight working up similarly to Cascade Nifty Cotton, Queensland Coastal Cotton and I Love This Cotton from Hobby Lobby. It’s machine washable and dryable making projects easy to care for. As of June 1st of 2026, it is available in an amazing number of colors – 83 colors.
Queensland Coastal Cotton is a versatile, soft worsted weight #4 yarn made of 100% cotton. It’s on the lighter side for worsted weight working up similarly to Cascade Nifty Cotton, WeCrochet / Knit Picks Dishie and I Love This Cotton from Hobby Lobby. It’s machine washable and dryable making projects easy to care for and it’s colorfast. As of June 1st, it is available in an amazing number of colors – 64 solid colors and 39 variegated colors – as well as in Sport Weight #2.
Cascade Nifty Cotton Yarn is a versatile, soft worsted weight #4 yarn made of 100% cotton. It’s on the lighter side for worsted weight working up similarly to WeCrochet Dishie, Queensland Coastal Cotton and and I Love This Cotton from Hobby Lobby. It’s machine washable and dryable making projects easy to care for. As of June 1st, it is available in an amazing number of colors – 66 colors.
I have a few coasters I’ve made myself using Red Heart Super Saver, which is a 100% acrylic yarn. A hot cup of coffee is not hot enough to melt synthetic fibers, and while it doesn’t quite absorb the same way with cold beverages, it still holds the water and does not seep through to the surface. Lion Brand Wool Ease is another lovely yarn for coasters that I have used for some in my personal collection, and the wool adds to the durability and absorbency.
Synthetic yarns, like Red Heart Super Saver, usually produce a tighter and smaller fabric, so you may want to go up to an I9/5.5mm crochet hook.
Are Crocheted Coasters Washable?
Though hand washing and laying flat to dry is always best to preserve your crocheted items, I prefer using yarns that I can easily throw into the washing machine with other things. With the yarns I mentioned above, I have tested all of them and know I can pop the coasters into the washing machine (on gentle and in cold water) and then into the dryer (on low heat) when it’s time to clean them. For the best results, keep the coasters in a mesh lingerie bag so they don’t rub against other items in the wash, as it will wear the yarn, but also other items could potentially snag one of the cross stitches and pull it.
Tools & Notions:
We have lots of great crochet hooks in our Yarn Crafts and Coffee Yarn Shop. The most popular, and preferred by Candace and Emily, are the Clover Amour Crochet Hooks with the soft handles and smooth metal hook. Alexandra prefers metal crochet hooks with large, ergonomic clay handles and just loves the fun designs from SiennasBowtique and BronzeShepherdStudio! If your preference is wood, the LYKKE brand are lovely, smooth and sturdy.
Tapestry Needles with the blunt, round end are essential for sewing and finishing on a number of yarn crafts, including crocheting, knitting as well as needlepointing on fabric and plastic canvas. The blunt, rounded end allows the needle to pass easily through the fabric created by yarn and holes on canvas without snagging (or getting your fingers) in the process. More specifically for crocheting and knitting, a Bent Tip Tapestry Needle makes weaving, grafting and sewing so much easier on the hands. The long oval eye makes threading strands of yarn easier, though you may still want to use a needle threader.
Scissors are an essential tool. When I’m working on the go, I like to carry a pair of folding scissors as they fit perfectly in even the tiniest of bags. When I am working at home or have more space in my bag for a larger notions pouch, I like to use a pair of lightweight, all-purpose scissors as they are so versatile and great for a variety of things from cutting plastic canvas mesh to trimming yarn ends after weaving in to cutting out a care card to include with a handmade gift.
Jewelry Pliers are an excellent tool to use to help weave in the ends of tough yarns, such as cotton yarns and chunkier yarns, that can be quite tough on the fingers when weaving in with just fingers and a tapestry needle. Sore thumbs and frustration can be a thing of the past by simply using jewelry pliers to help pull the tapestry needle through the work. Make sure the eye of the needle is facing up so you can see directly down it and carefully pull, wiggling as needed. If it gets caught and you tug too hard, it will break the eye of your needle.
Time Spent:
I worked up one coaster in just over 15 minutes.
Measurements:
A little shy of 4 3/8″ Wide at widest point by 3 3/4″ Tall down center
Gauge (Not Essential):
Work in Pattern. After Round 2 = 2 1/4″ diameter
Abbreviations (US Terms):
- HDC – Half Double Crochet (Photo Tutorial | Video Tutorial)
- SC – Single Crochet (Photo Tutorial)
- DC – Double Crochet (Photo Tutorial)
- TR – Treble Crochet aka Triple Crochet [yarn over twice, insert hook into stitch, yarn over, pull through (4 loops on hook), (yarn over, pull through two loops) 3x]
Pattern Notes:
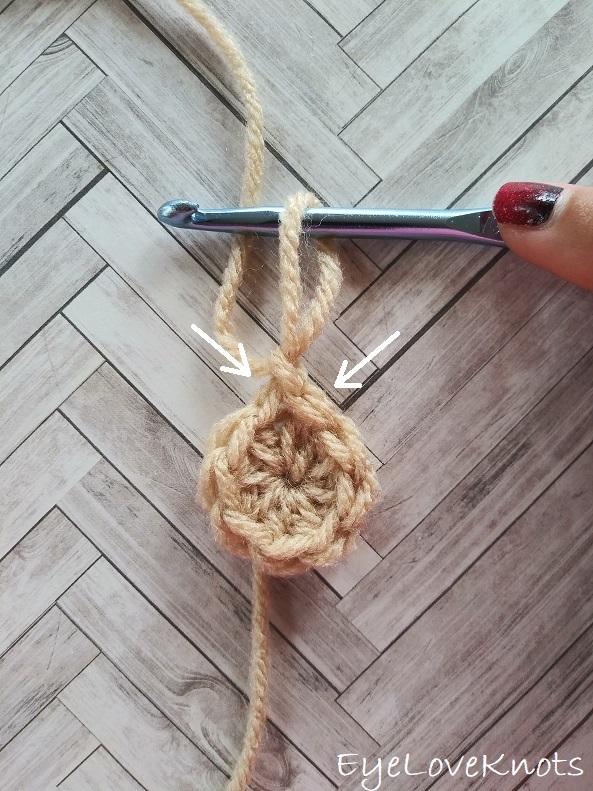
I work my increases differently than most to help keep my seam straight, and that is that the first stitch from the first set of increases is done in the first stitch of the round, which will appear just to left of the beginning chain, then the round will be worked as normal, and the final stitch of the round will be the second stitch of the first set of increases, and it will be worked into the same stitch as the first, and appear just to the right of the beginning chain. The photo above shows where the first and last stitch are worked, and I have a photo tutorial of this technique in my How to Keep a Straight Seam post. You can work in your preferred increase method as long as we end up with the same stitches at the end of the round.
Slip stitch join to the first stitch, not the beginning chain, except where indicated.
Whimsical Pumpkin Coaster Video Tutorial:
Whimsical Pumpkin Crochet Pattern:
With Orange, chain 5. Slip stitch join to form a ring. Chain 1. 12 HDC into the ring. Join. (12 HDC)
R2: Chain 1. HDC into the 1st HDC, 2 HDC into each of the next 11 HDC, HDC into the same stitch as the 1st. Join. (24 HDC)
R3: Chain 1. SC into the 1st stitch, HDC into the next stitch, (2 DC into the next stitch, DC into the next stitch) 2x, 2 TR into the next stitch, TR into the next stitch, (DC, HDC) into the next stitch, SC into the next stitch, (slip stitch, SC) into the next stitch, HDC into the next stitch, (SC, slip stitch) into the next stitch, SC into the next stitch, (HDC, DC) into the next stitch, TR into the next stitch, 2 TR into the next stitch, (DC into the next stitch, 2 DC into the next stitch) 3x, HDC into the next stitch, SC into the same stitch as the first. Join. (36 stitches)
R4: Chain 1. Skip the 1st stitch, HDC into the next stitch, DC into the next stitch, (2 DC into the next stitch, DC into each of the next 2 stitches) 2x, 2 TR into the next stitch, DC into each of the next 2 stitches, (DC, HDC) into the next stitch, SC into the next stitch, slip stitch into the next stitch, (SC, HDC) into the next stitch, HDC into each of the next 2 stitches, (SC, slip stitch) into the next stitch, SC into the next stitch, (HDC, DC) into the next stitch, DC into each of the next 2 stitches, 2 TR into the next stitch, DC into each of the next 2 stitches, (2 DC into the next stitch, DC into each of the next 2 stitches) 2x, 2 DC into the next stitch, DC into the next stitch, HDC into the next stitch, chain 1, skip the last stitch. Join to beginning chain 1. Fasten off the Orange.
R5, Written: Starting on the top right side of the pumpkin, insert hook into the skipped stitch from Round 4 and come back out of the space so you are working around the stitch itself. Grab the Brown yarn. Chain 1. SC around this stitch, SC into the next stitch of Round 4 working over the initial chain 1, insert hook into the 1st stitch from Round 4 and come back out of the space so you are working around the stitch itself and complete a SC. (3 SC)
R5, Photo Tutorial
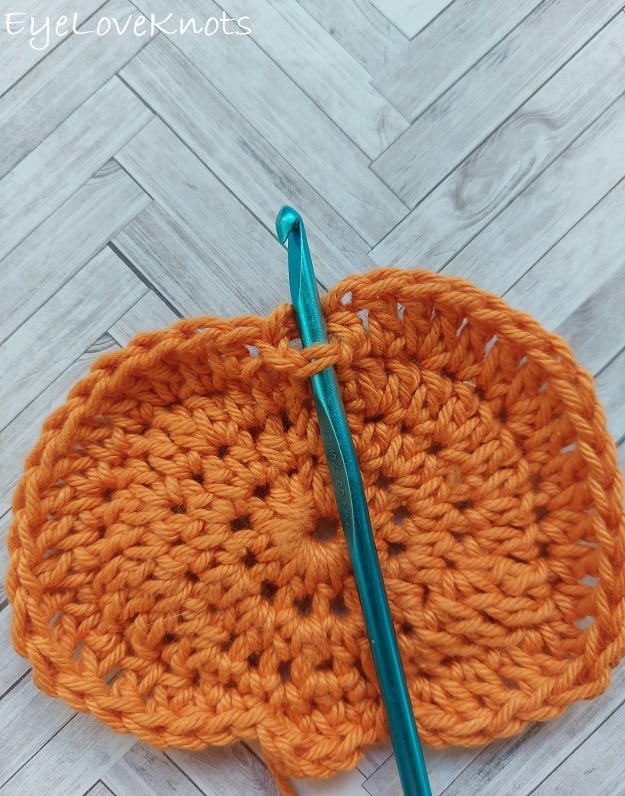
Starting on the top right side of the pumpkin, insert hook into the skipped stitch from Round 4 and come back out of the space so you are working around the stitch itself.
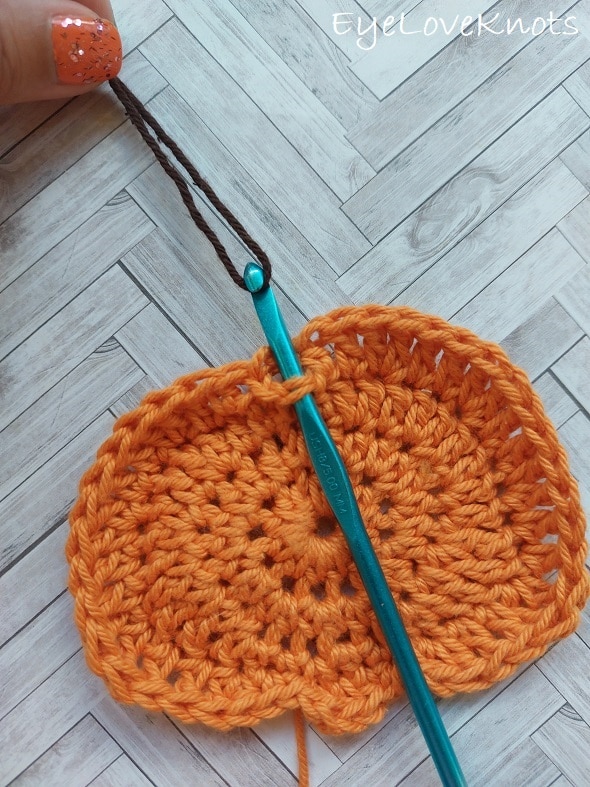
Grab the Brown yarn. Chain 1. SC around this stitch,
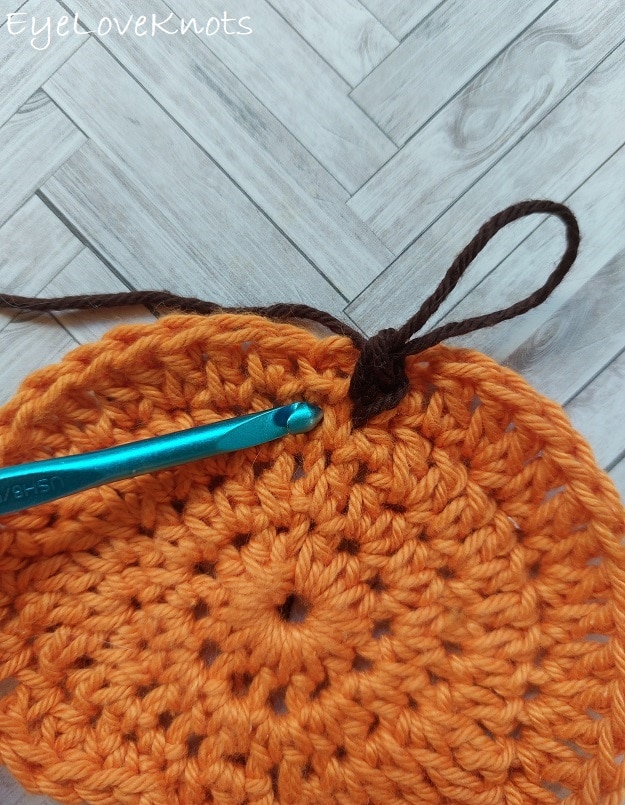
SC into the next stitch of Round 4 working over the initial chain 1,
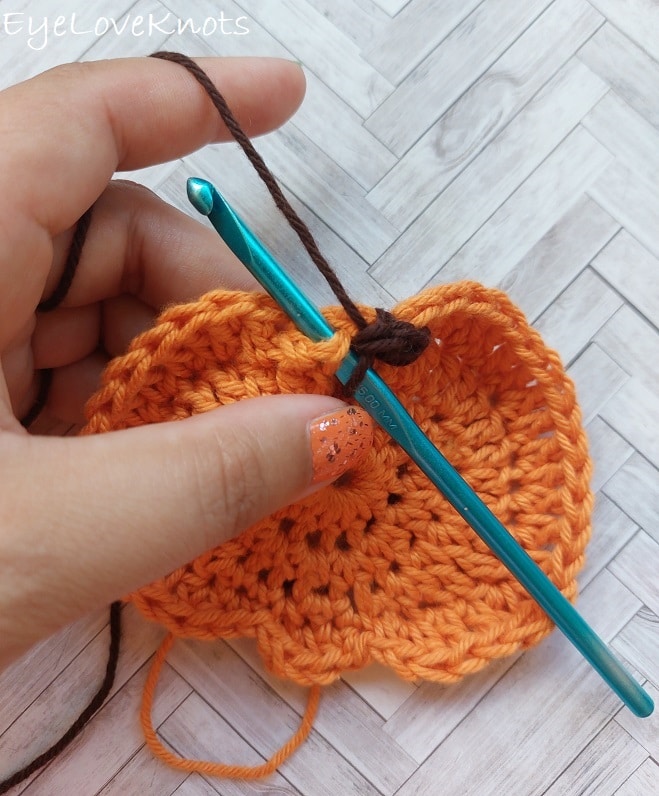
insert hook into the 1st stitch from Round 4 and come back out of the space so you are working around the stitch itself and complete a SC. (3 SC)
R6, Written: Chain 1, and turn. Insert hook into the corresponding chain space stitch from the pumpkin and also into the 1st stitch from the stem and complete a SC, 2 SC into the next stitch, insert hook into the next corresponding chain space stitch from the pumpkin and also into the last stitch from the stem and complete a SC. (4 SC)
R6, Photo Tutorial:
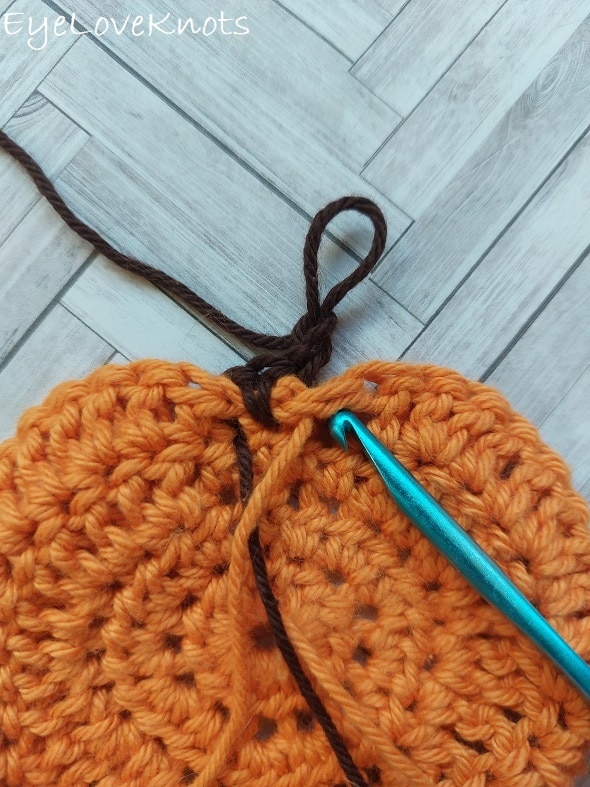
Chain 1, and turn. Insert hook into the corresponding chain space stitch from the pumpkin
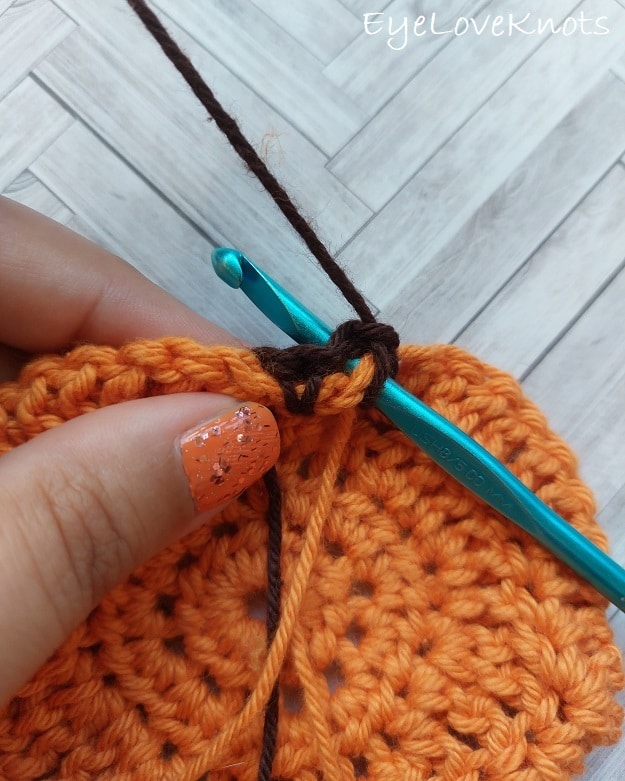
and also into the 1st stitch from the stem and complete a SC, 2 SC into the next stitch,
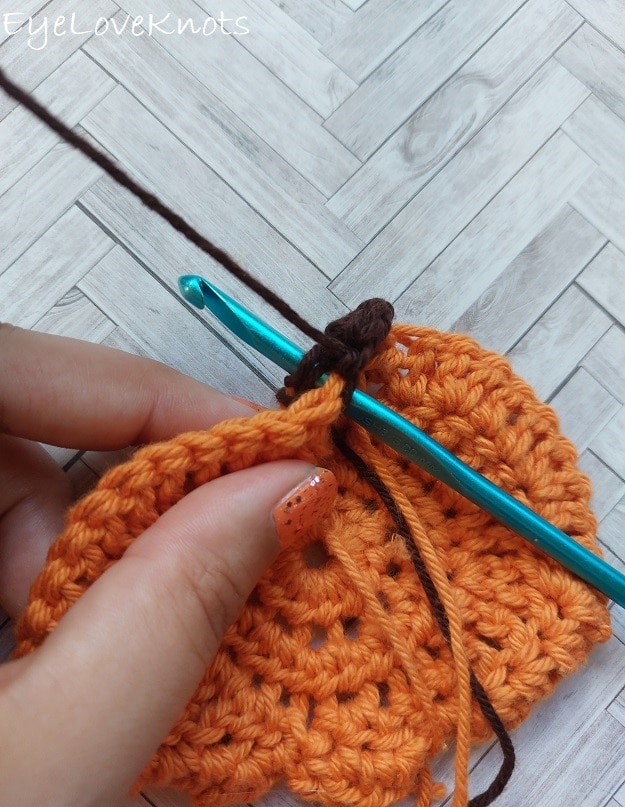
insert hook into the next corresponding chain space stitch from the pumpkin and also into the last stitch from the stem and complete a SC. (4 SC)
R7: Chain 1, and turn. SC across. (4 SC)
Fasten off, and weave in ends.
Please feel free to make and sell your own items made using this pattern, but keep in mind, this written pattern and my photos are protected by copyright. Please DO NOT claim this pattern as your own nor should you sell my pattern. DO NOT re-publish my photos as your own. DO NOT copy and paste my pattern anywhere, link to it instead so other’s can visit. Making videos providing instructions how to make my projects on any social media platform is also not permitted.
Join one of our awesome Facebook groups to share your creations, and see what others are up to!
– Yarn Crafts & Coffee Community
– DIY Home On Rockwood Lane
– Alexandra Lane Lifestyle
Oh, this little pumpkin is simply adorable! I crochet and will have to try this! Thank you, too for popping over to see me! It’s always nice to meet a crafty girl, especially one who crochets!
Be a sweetie,
Shelia 😉
Thank you so much! Pleasure to meet you 🙂
This is such a cute idea for a coaster! it looks really cute, you designed the pumpkin perfectly! 🙂
Hope your week is going well 🙂
Thank you so much, Mica! I had a lot of fun designing these, and now have all kinds of ideas for ways to use them. So little time left this year though.
So cute, Alexandra! Your nail color is the same as mine. 😄
Michelle
https://mybijoulifeonline.com,
Yes! I was thinking that when I saw your photo. Great minds think alike 🙂
I am currently sitting here with a new crochet book! After 18 months of crocheting in a straight line and making quite a few blankets, I need to branch out now and try new designs but am a tad scared that I will get it completely wrong! This is a lovely pattern for me to try and get learning a new design, thank you! Sim x #TrafficJamWeekend
You will do great! Just take it one step at a time. Reach out if you have any questions 🙂