This is a free crochet pattern and video tutorial showing how to crochet a granny square blanket worked in one large continuous manner. It is suitable for beginners, and has 8 sizes included!
This post contains affiliate links for Etsy, WeCrochet & Lion Brand Yarn. If you make a purchase by clicking on them, I make a small commission at no extra cost to you. Thanks for your support!
Find the free crochet pattern instructions below, or purchase a printer-friendly, ad-free PDF on Ravelry by clicking here.
In a hurry? Pin this for later when you have more time.
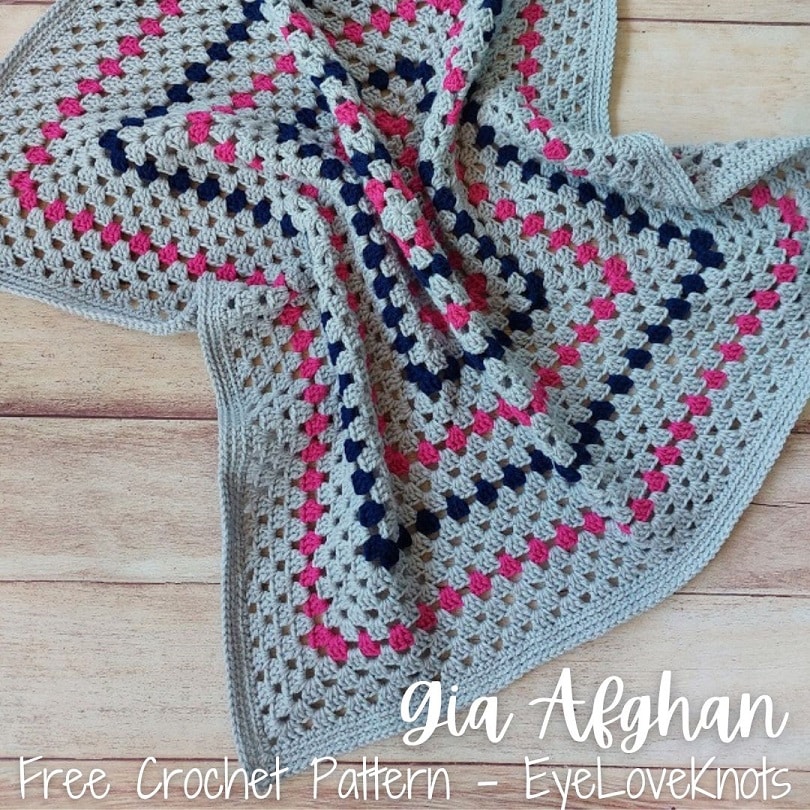
There is something special about the classic, traditional granny square that always warms my heart! I love it worked in a solid color, color blocks, or stripes, and it’s so versatile being that you can stop at the end of any round, and you basically have a finished project that can then be used in so many different ways.
I worked this afghan up in the Newborn size, and am actually working 12 of them to sew together as part of a larger afghan for a wedding gift. My larger afghan will simply be worked without the border as I will add one once all the squares are joined.
Before I went too far, I wanted to share with you how to work an easy, granny square afghan worked in just one continuous manner. This beginner friendly granny square afghan is a great on the go project, or to pair with watching your favorite TV show or movie. You don’t even need to count rounds if you don’t want to, just use a soft tape measure to measure as you go, and stop at the desired size.
What is the Difference Between a Blanket and an Afghan?
While Blankets and Afghans are both used to cover ourselves to keep warm, Blankets are typically made of sewn fabric, while Afghans are typically knit or crocheted.
What is the Best Yarn to Use for a Crocheted Afghan?
I’ve used Red Heart Super Saver for my afghan because I love the durability for wear and tear and machine washing and drying, plus the wide range of colors and how affordable it is, but you can use any worsted weight yarn from your stash – pick your favorite! If the finished size is essential to you, then check your gauge, but if not, then just start crocheting. Worked from the center out, and being that you can stop after any round, you can easily change up your yarn to any weight, and just work more or less rounds.
Another favorite worsted weight yarn of mine that would be perfect for an afghan is Lion Brand Wool Ease – it’s a soft, squishy wool and acrylic blend that also holds up well to wear and tear and machine washing and drying.
Do I Have to Add a Border to my Granny Square Afghan?
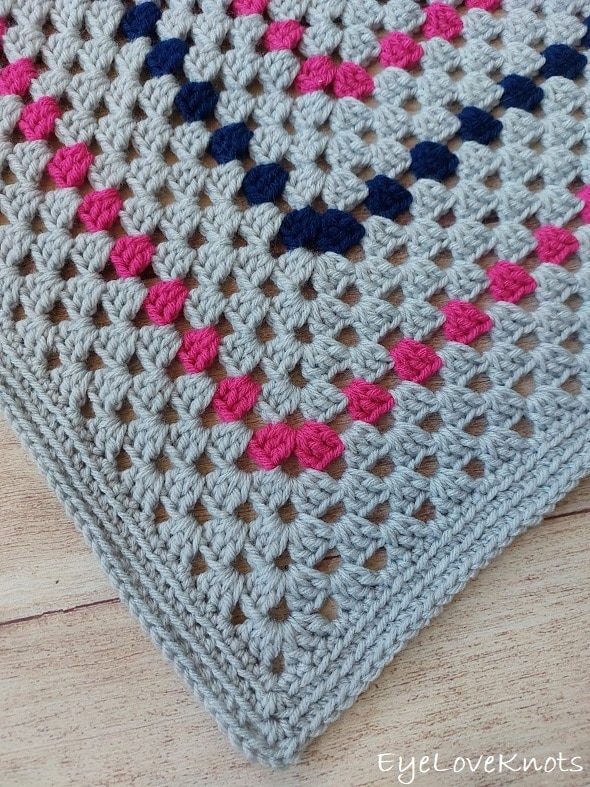
I have worked my afghan up with a 2″ border comprised of 3 rounds with rounds 2 & 3 worked into the back loop only – one of my favorites! The beauty of this project is it looks great without a border, with a small border as I’ve done and with a thicker border, as well as in a variety of stitch patterns, and is so easy to change up as you go. If you decide not to add a border, you can work additional rounds of the granny square pattern to add height and width to your afghan.
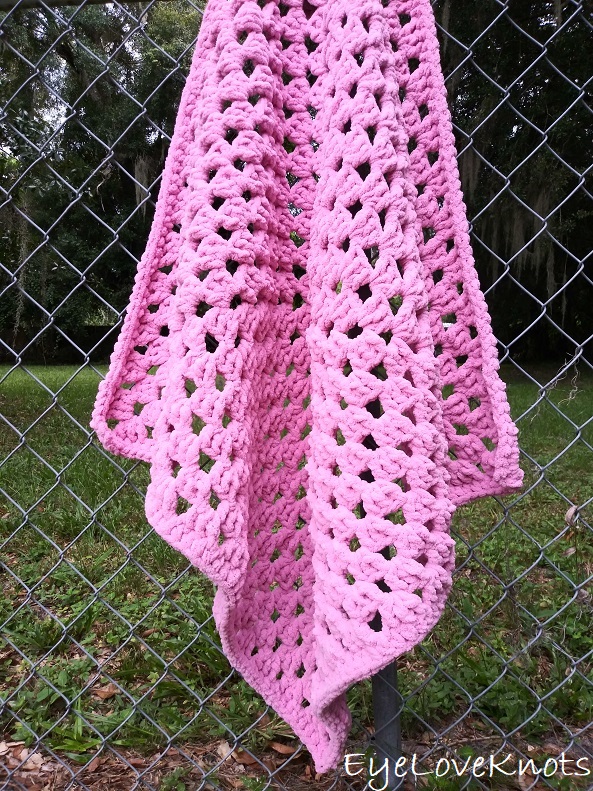
Prefer using Super Bulky/Chunky yarn? The free crochet pattern for the Super Chunky Gia Afghan is available in 7 sizes.
If you would like to grab a free copy of the PDF for this pattern, make sure to check out the Pattern Notes section below.
Behind the Scenes:
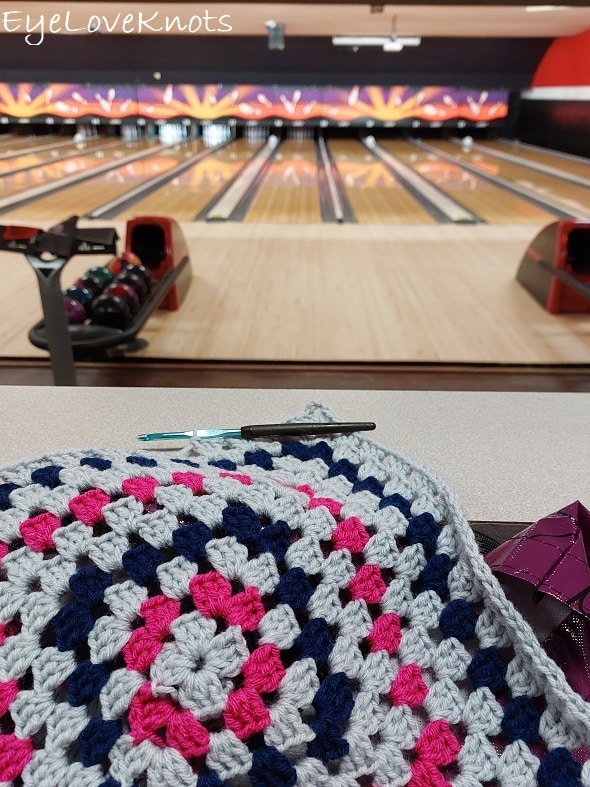
This was a great on the go project. I stitched, and cheered on my husband at the same time.
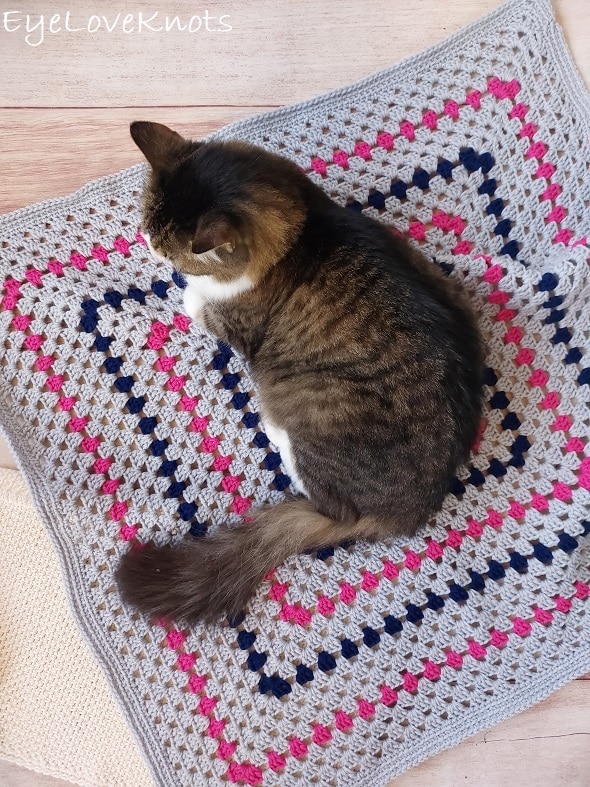
And of course, it’s cat approved by my supervisor.
The white crocheted piece at the bottom left is my Landon Table Runner.
Ad-Free Printer Friendly PDF:

If you would like a PDF version of this post, you may get one through either my Etsy Shop, Ravelry Shop or LoveCrafts Shop for a small fee. This fee is to compensate for the views lost when you no longer need to return to the blog to for the information, as you will have your own copy. In a hurry? Pin this for later when you have more time!
Save this to your Favorites on: AllFreeCrochet, FaveCrafts, AllFreeCrochetAfghanPatterns, Crochet Pattern Bonanza, DIYideaCenter, Cheap Thrifty Living, AllFreeHolidayCrafts, Free Crochet Tutorials
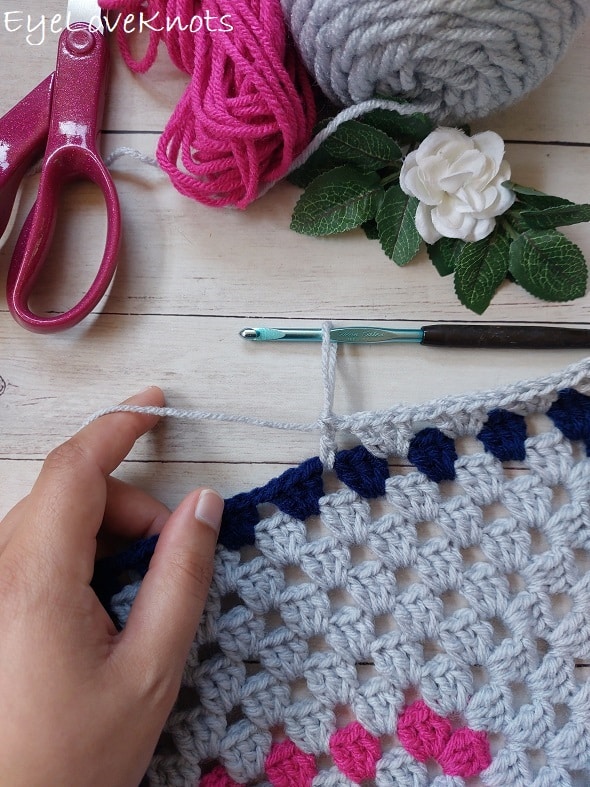
What Supplies Do I Need to Crochet a Granny Square Afghan?
- 70 (100, 280, 630, 860, 1130, 1430, 2550) Yards of Worsted Weight #4 Yarn – I used Red Heart Super Yarn in Light Gray, Soft Navy and Shocking Pink
- H8/5mm Crochet Hook – I love this Koi Fish Ergonomic Clay one from SiennasBowtique on Etsy that I ordered right after I started this project. It helped a ton!
- Tapestry Needle to weave in ends
- Soft Tape Measure if gauge is essential
Material Notes:
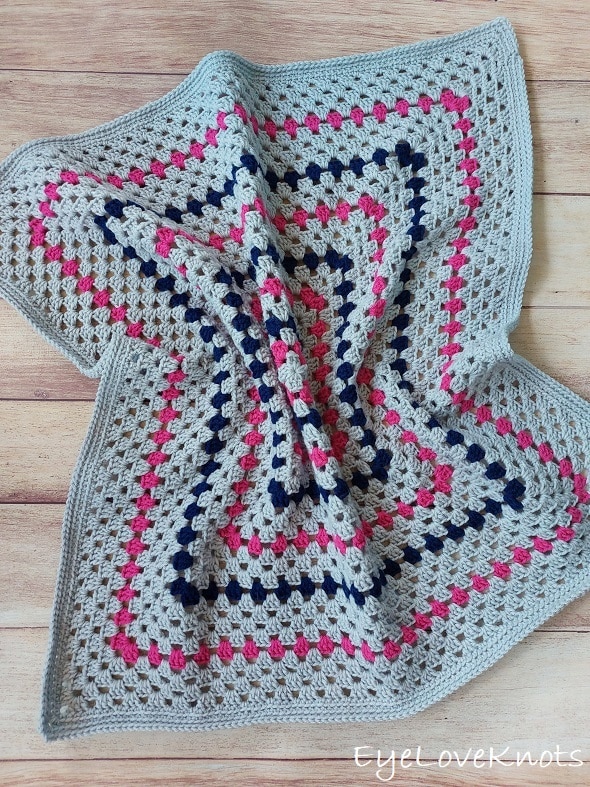
My sample is the Newborn size. I did list yardage as a whole, but in my sample, I used 3 colors together. For the afghan shown in the images, without the border, I used 467 yards of Light Gray, 22 yards of Shocking Pink and 52 yards of Soft Navy. The border took an additional 86 yards of Light Gray.
Use your favorite worsted weight yarn for this afghan! Some great yarn alternatives I recommend are {wools} WeCrochet Swish, Lion Brand Wool Ease, {non-wool} WeCrochet Brava, Bernat Super Value.
If you have concerns about using Red Heart Super Saver and similar because of the roughness and stiffness of the fabric, I have a couple tips!
- If the yarn is too rough for your hands to crochet with, remove the skein wrapper, place the skein into a mesh lingerie bag (I bought mine at JoAnn’s), then machine wash it by itself on the gentle cycle in cold water with a mild detergent. Once it’s finished, toss it into the dryer on low heat – you may need to run it through 2 – 3 times to get the center dry.
- To add softness and better drape to the finished piece, crochet in it’s entirety and weave in the ends, then wash and dry in the same manner (with or without the lingerie bag) or simply dry once with a dryer sheet.
How Long Does It Take to Crochet a Granny Square Afghan?
This newborn blanket took me just under 6 and a half hours.
Measurements:
- Newborn Photography Layering Blanket: 10″ Square
- Lovey Blanket: 12″ Square
- Newborn Photography Blanket: 20″ Square
- Newborn Blanket: 30″ Square
- Lapghan: 35″ Square
- Toddler: 40″ Square
- Child: 45″ Square
- Throw: 60″ Square
Photography sized afghans are meant to be used as photo props. Typically, the base is the blanket, and then the layering blanket is laid in a different direction on top, and then baby. Sometimes the newborn size is also used in photography.
Lovey blankets are perfect for babies and toddlers to cuddle. They are often square in shape, and range from 10-14″ in size. I’ve gone with 12″ for my size, which seems to be the most common.
Gauge – Not Essential:
Round 3 = 4″ in diameter
Abbreviations (US Terms):
- DC – Double Crochet (Photo Tutorial)
- HDC – Half Double Crochet (Photo Tutorial)
- SC – Single Crochet (Photo Tutorial)
- BLO – Back Loop Only (Photo Tutorial)
Pattern Notes:
This afghan is worked in one continuous granny square. Need help getting started? Check out my photo tutorial on How to Crochet a Granny Square.
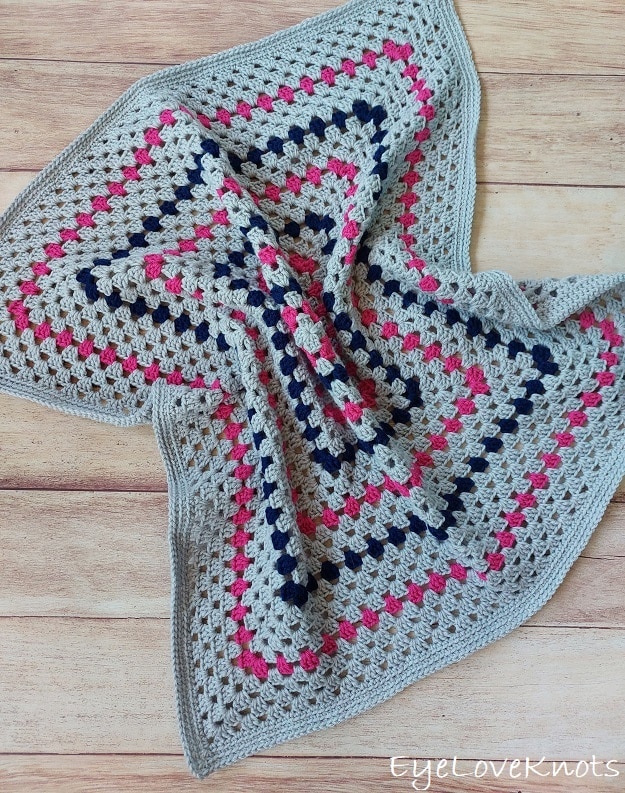
For this color sequence, for the Newborn size, I worked:
- 1 Gray, 1 Pink, 1 Gray, 1 Blue, then
- 2 Gray, 1 Pink, 2 Gray, 1 Blue, then
- 3 Gray, 1 Pink, 3 Gray, 1 Blue, and finally
- 4 Gray, 1 Pink, 4 Gray = 27 Rounds
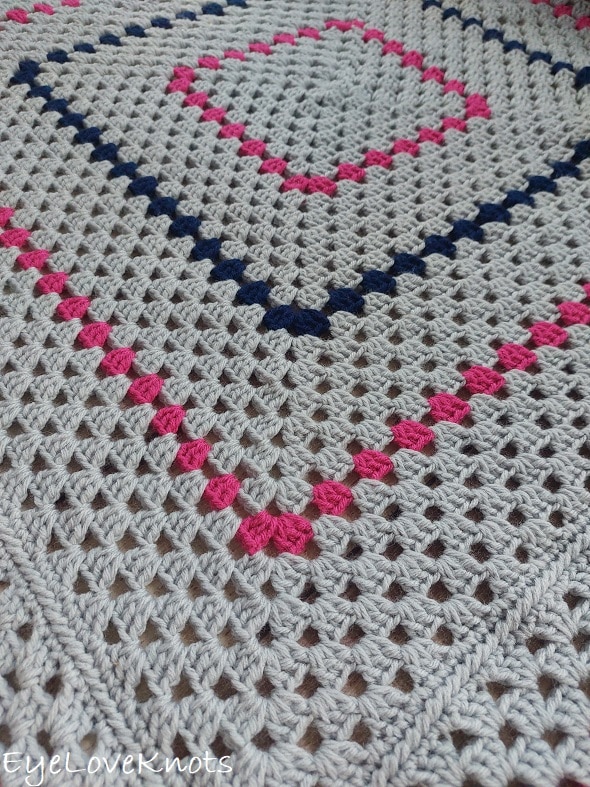
I also worked a different color sequence for the larger afghan I mentioned. This is the same Newborn size of 27 rounds, and I worked: 6 Gray, 1 Pink, 6 Gray, 1 Blue, 6 Gray, 1 Pink, 6 Gray.
If you would like to change colors to create blocks or stripes, I highly recommend fastening off after joining the round, and joining the new color over in the next corner chain space, rather than carrying your yarn up, unless you’ll be using the same colors every other round – then I would carry. Take it from me – do not make my mistake!
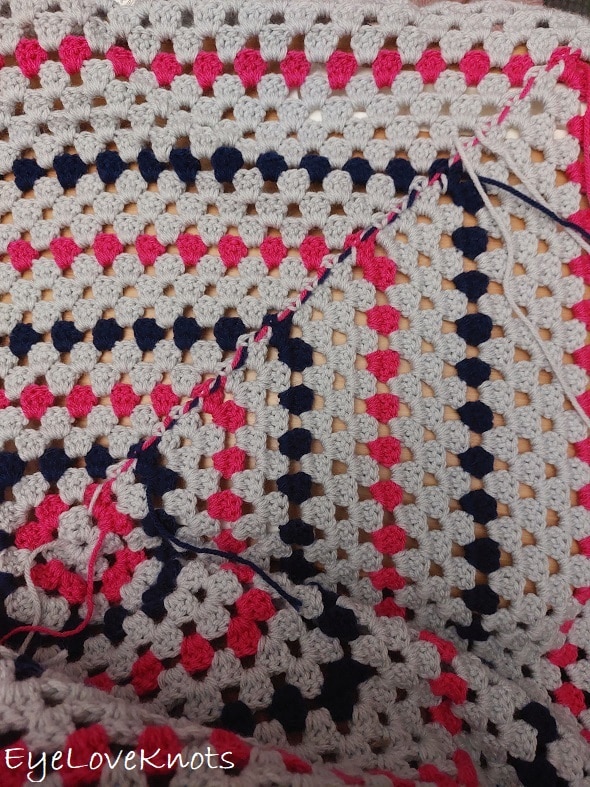
I did not want to have to weave in a bunch of ends, so I carried my yarn strands up, and it created an ugly float on the back of my blanket. At first, it bothered me, but not enough to redo 8 newborn blankets that I had done this way, but my husband pointed it out, and then I reached out to Candace of T & C Crafters to ask her opinion, and she also agreed. She also mentioned something to the effect of if someone was sitting on the couch, and just grabbed the blanket, you don’t know which side will be facing up so it would be better if both looked nice. 100% agreed! I had no plans of reworking the ones I had already finished though, so I planned on lining the larger afghan once finished. For the remaining blankets, I fastened off after joining, and re-attached my yarn in the next corner chain space.

In the end, I sent my 12 newborn blankets off to Candace to have her weave in all the ends for me. Before I go into this photo, if you dislike weaving in the ends on your projects, and often have finished projects end up in your WIP bin because all it needs is the ends to be woven in, I highly recommend having someone else do it for you – it is a game changer! I don’t do it that often, but it has been extremely helpful, and honestly, better for my mental health. Candace is amazing! I highly recommend her for finishing services and custom orders!
Alright, now let’s talk about this photo. Guys, this is the wrong side of the same exact square! You can still see small floats here and there, but this finish was nice enough that I did not end up needing to line the finished afghan, and that made me cry happy tears. So if you need to hide ugly floats, the way she did it was by wrapping scrap yarn around the floats matching the colors to the sections. You can barely notice!
Slip stitch join to the beginning chain 2.
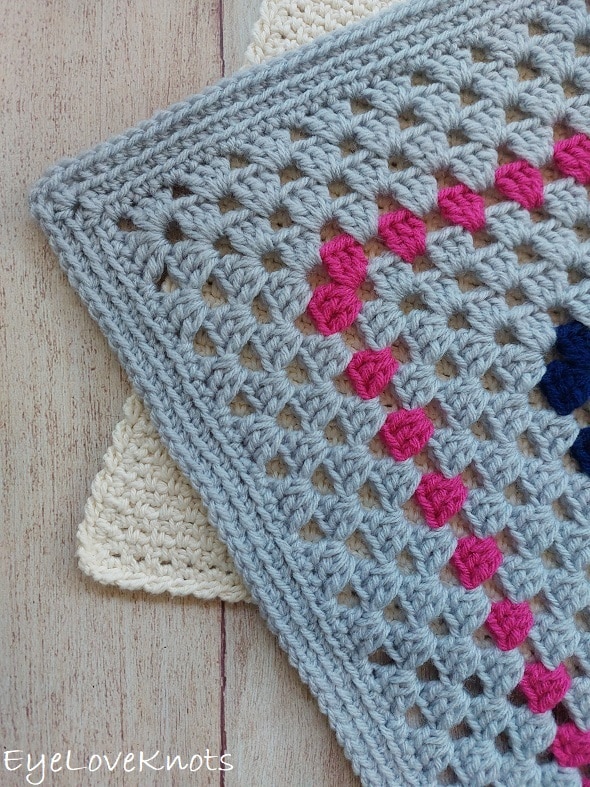
I have worked my afghan up with a 2″ border comprised of 3 rounds with rounds 2 & 3 worked into the back loop only. The total number of rounds ends with 2″ to spare from the finished measurement. If you want a thicker border, subtract 1 round of granny stitch for each additional inch added to border which is about 2 rounds of single crochet. Keep in mind that working in regular single crochets will result in a slightly larger finish than those worked into the back loop only.
Border notes included in the Border section of the pattern.
Through 05/31/23 at 11:59pm EST, you can grab a free copy of the PDF for the Gia Afghan on Ravelry using code FREECROCHET202310. I earn my income from the number of pageviews my blog sees, so please do not share the code, but instead share the link to this post so others can find it. Thank you!
If you’re viewing this after 05/31/23, you can still get a copy of the PDF on sale 50% off on Ravelry or on Etsy using code NEWCROCHET202308 until 06/04/23 at 11:59pm EST.
Gia Afghan, Video Tutorial:
Gia Afghan, Written Pattern:
Chain 5. Slip stitch join to form a ring. Chain 2, work 2 DC into the ring, (chain 3, 3 DC into the ring) 3x, chain 2. Join. (12 DC)
R2: Slip stitch into the next 2 DC, then into the next chain space. Chain 2, 2 DC, chain 3, 3 DC into the same chain space, chain 1, [(3 DC, chain 3, 3 DC) into the next chain space, chain 1] 3x. Join. (24 DC)
R3: Slip stitch into the next 2 DC, then into the next chain space. Chain 2, 2 DC, chain 3, 3 DC into the same chain space, chain 1, [(3 DC, chain 3, 3 DC) into the next chain space, chain 1, 3 DC into the next chain space, chain 1] 3x. Join. (36 DC)
R4: Slip stitch into the next 2 DC, then into the next chain space. Chain 2, 2 DC, chain 3, 3 DC into the same chain space, chain 1, [(3 DC, chain 3, 3 DC) into the next chain space, chain 1, (3 DC into the next chain space, chain 1) 2x] 3x. Join. (48 DC)
R5: Slip stitch into the next 2 DC, then into the next chain space. Chain 2, 2 DC, chain 3, 3 DC into the same chain space, chain 1, [(3 DC, chain 3, 3 DC) into the next chain space, chain 1, (3 DC into the next chain space, chain 1) 3x] 3x. Join. (60 DC)
You will continue in this same manner increasing the center of each side by one cluster.
R6: Slip stitch into the next 2 DC, then into the next chain space. Chain 2, 2 DC, chain 3, 3 DC into the same chain space, chain 1, [(3 DC, chain 3, 3 DC) into the next chain space, chain 1, (3 DC into the next chain space, chain 1) 4x] 3x. Join. (72 DC)
R7: Slip stitch into the next 2 DC, then into the next chain space. Chain 2, 2 DC, chain 3, 3 DC into the same chain space, chain 1, [(3 DC, chain 3, 3 DC) into the next chain space, chain 1, (3 DC into the next chain space, chain 1) 5x] 3x. Join. (84 DC) Stop here for layering blanket, and proceed to border.
R8: Slip stitch into the next 2 DC, then into the next chain space. Chain 2, 2 DC, chain 3, 3 DC into the same chain space, chain 1, [(3 DC, chain 3, 3 DC) into the next chain space, chain 1, (3 DC into the next chain space, chain 1) 6x] 3x. Join. (96 DC)
R9: Slip stitch into the next 2 DC, then into the next chain space. Chain 2, 2 DC, chain 3, 3 DC into the same chain space, chain 1, [(3 DC, chain 3, 3 DC) into the next chain space, chain 1, (3 DC into the next chain space, chain 1) 7x] 3x. Join. (108 DC) Stop here for lovey, and proceed to border.
R10: Slip stitch into the next 2 DC, then into the next chain space. Chain 2, 2 DC, chain 3, 3 DC into the same chain space, chain 1, [(3 DC, chain 3, 3 DC) into the next chain space, chain 1, (3 DC into the next chain space, chain 1) 8x] 3x. Join. (120 DC)
R11: Slip stitch into the next 2 DC, then into the next chain space. Chain 2, 2 DC, chain 3, 3 DC into the same chain space, chain 1, [(3 DC, chain 3, 3 DC) into the next chain space, chain 1, (3 DC into the next chain space, chain 1) 9x] 3x. Join. (132 DC)
R12: Slip stitch into the next 2 DC, then into the next chain space. Chain 2, 2 DC, chain 3, 3 DC into the same chain space, chain 1, [(3 DC, chain 3, 3 DC) into the next chain space, chain 1, (3 DC into the next chain space, chain 1) 10x] 3x. Join. (144 DC)
R13: Slip stitch into the next 2 DC, then into the next chain space. Chain 2, 2 DC, chain 3, 3 DC into the same chain space, chain 1, [(3 DC, chain 3, 3 DC) into the next chain space, chain 1, (3 DC into the next chain space, chain 1) 11x] 3x. Join. (156 DC)
R14: Slip stitch into the next 2 DC, then into the next chain space. Chain 2, 2 DC, chain 3, 3 DC into the same chain space, chain 1, [(3 DC, chain 3, 3 DC) into the next chain space, chain 1, (3 DC into the next chain space, chain 1) 12x] 3x. Join. (168 DC)
R15: Slip stitch into the next 2 DC, then into the next chain space. Chain 2, 2 DC, chain 3, 3 DC into the same chain space, chain 1, [(3 DC, chain 3, 3 DC) into the next chain space, chain 1, (3 DC into the next chain space, chain 1) 13x] 3x. Join. (180 DC)
R16: Slip stitch into the next 2 DC, then into the next chain space. Chain 2, 2 DC, chain 3, 3 DC into the same chain space, chain 1, [(3 DC, chain 3, 3 DC) into the next chain space, chain 1, (3 DC into the next chain space, chain 1) 14x] 3x. Join. (192 DC)
R17: Slip stitch into the next 2 DC, then into the next chain space. Chain 2, 2 DC, chain 3, 3 DC into the same chain space, chain 1, [(3 DC, chain 3, 3 DC) into the next chain space, chain 1, (3 DC into the next chain space, chain 1) 15x] 3x. Join. (204 DC) Stop here for photography blanket, and proceed to border.
R18: Slip stitch into the next 2 DC, then into the next chain space. Chain 2, 2 DC, chain 3, 3 DC into the same chain space, chain 1, [(3 DC, chain 3, 3 DC) into the next chain space, chain 1, (3 DC into the next chain space, chain 1) 16x] 3x. Join. (216 DC)
R19: Slip stitch into the next 2 DC, then into the next chain space. Chain 2, 2 DC, chain 3, 3 DC into the same chain space, chain 1, [(3 DC, chain 3, 3 DC) into the next chain space, chain 1, (3 DC into the next chain space, chain 1) 17x] 3x. Join. (228 DC)
R20: Slip stitch into the next 2 DC, then into the next chain space. Chain 2, 2 DC, chain 3, 3 DC into the same chain space, chain 1, [(3 DC, chain 3, 3 DC) into the next chain space, chain 1, (3 DC into the next chain space, chain 1) 18x] 3x. Join. (240 DC)
R21: Slip stitch into the next 2 DC, then into the next chain space. Chain 2, 2 DC, chain 3, 3 DC into the same chain space, chain 1, [(3 DC, chain 3, 3 DC) into the next chain space, chain 1, (3 DC into the next chain space, chain 1) 19x] 3x. Join. (252 DC)
R22: Slip stitch into the next 2 DC, then into the next chain space. Chain 2, 2 DC, chain 3, 3 DC into the same chain space, chain 1, [(3 DC, chain 3, 3 DC) into the next chain space, chain 1, (3 DC into the next chain space, chain 1) 20x] 3x. Join. (264 DC)
R23: Slip stitch into the next 2 DC, then into the next chain space. Chain 2, 2 DC, chain 3, 3 DC into the same chain space, chain 1, [(3 DC, chain 3, 3 DC) into the next chain space, chain 1, (3 DC into the next chain space, chain 1) 21x] 3x. Join. (276 DC)
R24: Slip stitch into the next 2 DC, then into the next chain space. Chain 2, 2 DC, chain 3, 3 DC into the same chain space, chain 1, [(3 DC, chain 3, 3 DC) into the next chain space, chain 1, (3 DC into the next chain space, chain 1) 22x] 3x. Join. (288 DC)
R25: Slip stitch into the next 2 DC, then into the next chain space. Chain 2, 2 DC, chain 3, 3 DC into the same chain space, chain 1, [(3 DC, chain 3, 3 DC) into the next chain space, chain 1, (3 DC into the next chain space, chain 1) 23x] 3x. Join. (300 DC)
R26: Slip stitch into the next 2 DC, then into the next chain space. Chain 2, 2 DC, chain 3, 3 DC into the same chain space, chain 1, [(3 DC, chain 3, 3 DC) into the next chain space, chain 1, (3 DC into the next chain space, chain 1) 24x] 3x. Join. (312 DC)
R27: Slip stitch into the next 2 DC, then into the next chain space. Chain 2, 2 DC, chain 3, 3 DC into the same chain space, chain 1, [(3 DC, chain 3, 3 DC) into the next chain space, chain 1, (3 DC into the next chain space, chain 1) 25x] 3x. Join. (324 DC) Stop here for newborn blanket, and proceed to border.
R28: Slip stitch into the next 2 DC, then into the next chain space. Chain 2, 2 DC, chain 3, 3 DC into the same chain space, chain 1, [(3 DC, chain 3, 3 DC) into the next chain space, chain 1, (3 DC into the next chain space, chain 1) 26x] 3x. Join. (336 DC)
R29: Slip stitch into the next 2 DC, then into the next chain space. Chain 2, 2 DC, chain 3, 3 DC into the same chain space, chain 1, [(3 DC, chain 3, 3 DC) into the next chain space, chain 1, (3 DC into the next chain space, chain 1) 27x] 3x. Join. (348 DC)
R30: Slip stitch into the next 2 DC, then into the next chain space. Chain 2, 2 DC, chain 3, 3 DC into the same chain space, chain 1, [(3 DC, chain 3, 3 DC) into the next chain space, chain 1, (3 DC into the next chain space, chain 1) 28x] 3x. Join. (360 DC)
R31: Slip stitch into the next 2 DC, then into the next chain space. Chain 2, 2 DC, chain 3, 3 DC into the same chain space, chain 1, [(3 DC, chain 3, 3 DC) into the next chain space, chain 1, (3 DC into the next chain space, chain 1) 29x] 3x. Join. (372 DC)
R32: Slip stitch into the next 2 DC, then into the next chain space. Chain 2, 2 DC, chain 3, 3 DC into the same chain space, chain 1, [(3 DC, chain 3, 3 DC) into the next chain space, chain 1, (3 DC into the next chain space, chain 1) 30x] 3x. Join. (384 DC) Stop here for lapghan blanket, and proceed to border.
R33: Slip stitch into the next 2 DC, then into the next chain space. Chain 2, 2 DC, chain 3, 3 DC into the same chain space, chain 1, [(3 DC, chain 3, 3 DC) into the next chain space, chain 1, (3 DC into the next chain space, chain 1) 31x] 3x. Join. (396 DC)
R34: Slip stitch into the next 2 DC, then into the next chain space. Chain 2, 2 DC, chain 3, 3 DC into the same chain space, chain 1, [(3 DC, chain 3, 3 DC) into the next chain space, chain 1, (3 DC into the next chain space, chain 1) 32x] 3x. Join. (408 DC)
R35: Slip stitch into the next 2 DC, then into the next chain space. Chain 2, 2 DC, chain 3, 3 DC into the same chain space, chain 1, [(3 DC, chain 3, 3 DC) into the next chain space, chain 1, (3 DC into the next chain space, chain 1) 33x] 3x. Join. (420 DC)
R36: Slip stitch into the next 2 DC, then into the next chain space. Chain 2, 2 DC, chain 3, 3 DC into the same chain space, chain 1, [(3 DC, chain 3, 3 DC) into the next chain space, chain 1, (3 DC into the next chain space, chain 1) 34x] 3x. Join. (432 DC)
R37: Slip stitch into the next 2 DC, then into the next chain space. Chain 2, 2 DC, chain 3, 3 DC into the same chain space, chain 1, [(3 DC, chain 3, 3 DC) into the next chain space, chain 1, (3 DC into the next chain space, chain 1) 35x] 3x. Join. (444 DC) Stop here for toddler blanket, and proceed to border.
R38: Slip stitch into the next 2 DC, then into the next chain space. Chain 2, 2 DC, chain 3, 3 DC into the same chain space, chain 1, [(3 DC, chain 3, 3 DC) into the next chain space, chain 1, (3 DC into the next chain space, chain 1) 36x] 3x. Join. (456 DC)
R39: Slip stitch into the next 2 DC, then into the next chain space. Chain 2, 2 DC, chain 3, 3 DC into the same chain space, chain 1, [(3 DC, chain 3, 3 DC) into the next chain space, chain 1, (3 DC into the next chain space, chain 1) 37x] 3x. Join. (468 DC)
R40: Slip stitch into the next 2 DC, then into the next chain space. Chain 2, 2 DC, chain 3, 3 DC into the same chain space, chain 1, [(3 DC, chain 3, 3 DC) into the next chain space, chain 1, (3 DC into the next chain space, chain 1) 38x] 3x. Join. (480 DC)
R41: Slip stitch into the next 2 DC, then into the next chain space. Chain 2, 2 DC, chain 3, 3 DC into the same chain space, chain 1, [(3 DC, chain 3, 3 DC) into the next chain space, chain 1, (3 DC into the next chain space, chain 1) 39x] 3x. Join. (492 DC)
R42: Slip stitch into the next 2 DC, then into the next chain space. Chain 2, 2 DC, chain 3, 3 DC into the same chain space, chain 1, [(3 DC, chain 3, 3 DC) into the next chain space, chain 1, (3 DC into the next chain space, chain 1) 40x] 3x. Join. (504 DC) Stop here for child blanket, and proceed to border.
R43: Slip stitch into the next 2 DC, then into the next chain space. Chain 2, 2 DC, chain 3, 3 DC into the same chain space, chain 1, [(3 DC, chain 3, 3 DC) into the next chain space, chain 1, (3 DC into the next chain space, chain 1) 41x] 3x. Join. (516 DC)
R44: Slip stitch into the next 2 DC, then into the next chain space. Chain 2, 2 DC, chain 3, 3 DC into the same chain space, chain 1, [(3 DC, chain 3, 3 DC) into the next chain space, chain 1, (3 DC into the next chain space, chain 1) 42x] 3x. Join. (528 DC)
R45: Slip stitch into the next 2 DC, then into the next chain space. Chain 2, 2 DC, chain 3, 3 DC into the same chain space, chain 1, [(3 DC, chain 3, 3 DC) into the next chain space, chain 1, (3 DC into the next chain space, chain 1) 43x] 3x. Join. (540 DC)
R46: Slip stitch into the next 2 DC, then into the next chain space. Chain 2, 2 DC, chain 3, 3 DC into the same chain space, chain 1, [(3 DC, chain 3, 3 DC) into the next chain space, chain 1, (3 DC into the next chain space, chain 1) 44x] 3x. Join. (552 DC)
R47: Slip stitch into the next 2 DC, then into the next chain space. Chain 2, 2 DC, chain 3, 3 DC into the same chain space, chain 1, [(3 DC, chain 3, 3 DC) into the next chain space, chain 1, (3 DC into the next chain space, chain 1) 45x] 3x. Join. (564 DC)
R48: Slip stitch into the next 2 DC, then into the next chain space. Chain 2, 2 DC, chain 3, 3 DC into the same chain space, chain 1, [(3 DC, chain 3, 3 DC) into the next chain space, chain 1, (3 DC into the next chain space, chain 1) 46x] 3x. Join. (576 DC)
R49: Slip stitch into the next 2 DC, then into the next chain space. Chain 2, 2 DC, chain 3, 3 DC into the same chain space, chain 1, [(3 DC, chain 3, 3 DC) into the next chain space, chain 1, (3 DC into the next chain space, chain 1) 47x] 3x. Join. (588 DC)
R50: Slip stitch into the next 2 DC, then into the next chain space. Chain 2, 2 DC, chain 3, 3 DC into the same chain space, chain 1, [(3 DC, chain 3, 3 DC) into the next chain space, chain 1, (3 DC into the next chain space, chain 1) 48x] 3x. Join. (600 DC)
R51: Slip stitch into the next 2 DC, then into the next chain space. Chain 2, 2 DC, chain 3, 3 DC into the same chain space, chain 1, [(3 DC, chain 3, 3 DC) into the next chain space, chain 1, (3 DC into the next chain space, chain 1) 49x] 3x. Join. (612 DC)
R52: Slip stitch into the next 2 DC, then into the next chain space. Chain 2, 2 DC, chain 3, 3 DC into the same chain space, chain 1, [(3 DC, chain 3, 3 DC) into the next chain space, chain 1, (3 DC into the next chain space, chain 1) 50x] 3x. Join. (624 DC)
R53: Slip stitch into the next 2 DC, then into the next chain space. Chain 2, 2 DC, chain 3, 3 DC into the same chain space, chain 1, [(3 DC, chain 3, 3 DC) into the next chain space, chain 1, (3 DC into the next chain space, chain 1) 51x] 3x. Join. (636 DC)
R54: Slip stitch into the next 2 DC, then into the next chain space. Chain 2, 2 DC, chain 3, 3 DC into the same chain space, chain 1, [(3 DC, chain 3, 3 DC) into the next chain space, chain 1, (3 DC into the next chain space, chain 1) 52x] 3x. Join. (648 DC)
R55: Slip stitch into the next 2 DC, then into the next chain space. Chain 2, 2 DC, chain 3, 3 DC into the same chain space, chain 1, [(3 DC, chain 3, 3 DC) into the next chain space, chain 1, (3 DC into the next chain space, chain 1) 53x] 3x. Join. (660 DC)
R56: Slip stitch into the next 2 DC, then into the next chain space. Chain 2, 2 DC, chain 3, 3 DC into the same chain space, chain 1, [(3 DC, chain 3, 3 DC) into the next chain space, chain 1, (3 DC into the next chain space, chain 1) 54x] 3x. Join. (672 DC)
R57: Slip stitch into the next 2 DC, then into the next chain space. Chain 2, 2 DC, chain 3, 3 DC into the same chain space, chain 1, [(3 DC, chain 3, 3 DC) into the next chain space, chain 1, (3 DC into the next chain space, chain 1) 55x] 3x. Join. (684 DC) Stop here for throw blanket, and proceed to border.
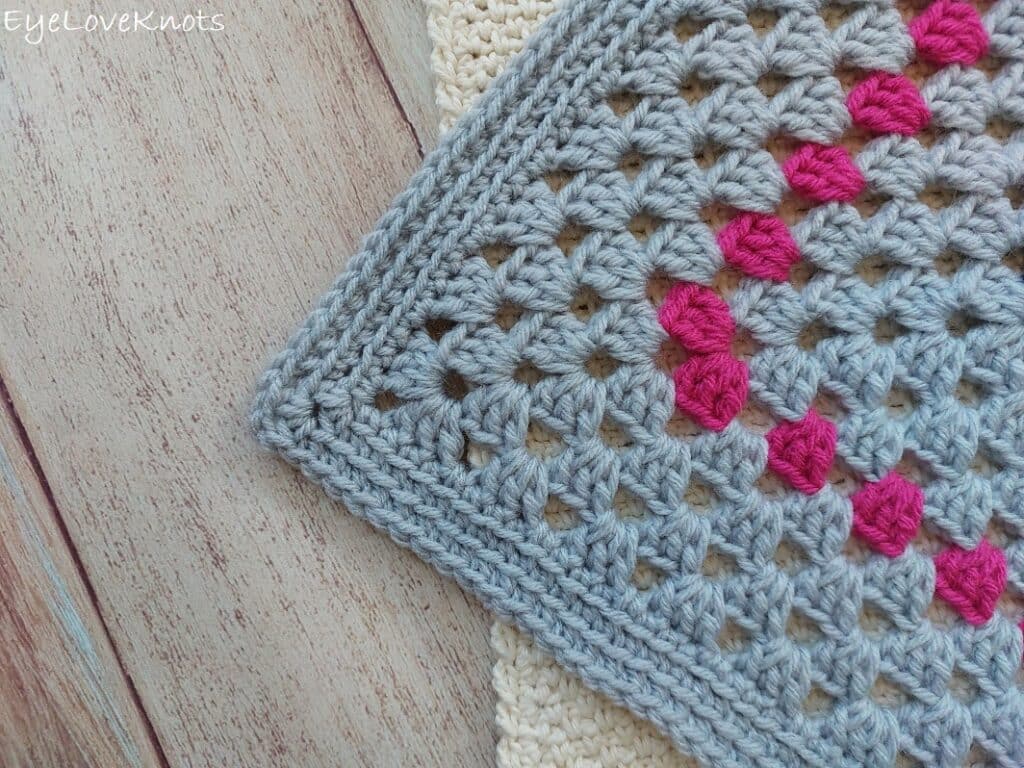
Border Notes:
I started out thinking I wanted to do simple rounds of single crochet for my border. After working up a couple, I decided I wanted to work into the back loop only, or BLO, for mine instead. I’ll include both instructions as I’ve also done in the video tutorial.
For regular single crochet, the corners will be worked in single crochet, and you’ll join as normal to the first stitch, and for working in the back loop, the corners will be worked in half double crochet to achieve the same height, and you’ll join in the back loop as well to keep it consistent.

For this afghan, I just started my border where I finished working the granny stitch pattern, and the border pattern is written in this manner. This does leave behind a seam, as shown above. If you do not want to have this seam, but still want to continue in the same color, I recommend slip stitching over into the corner chain space, and then beginning from there. Slip stitch over using the same method that your stitches are worked in ie regular single crochet, slip stitch through both loops of the stitch, and single crochets in the back loop only, as I’ve done, slip stitch over in the back loop only.
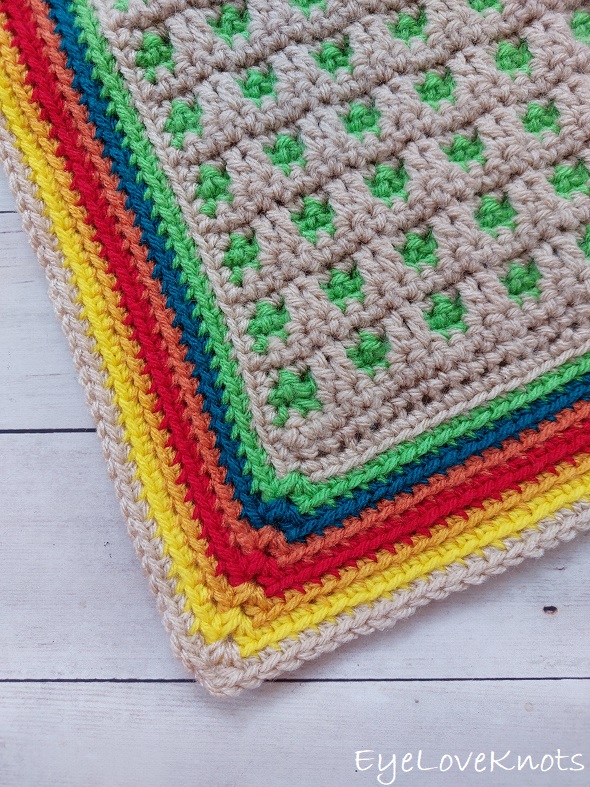
If you don’t want the seam, and want to change colors, then I recommend fastening off after each round’s join, and then reattaching the new color into the next corner chain space. As shown on my Through the Window Afghan, the seam is invisible!
ROW 1 OF BORDER, WRITTEN PATTERN:
Chain 1, turn. SC into the first stitch, and each of the next 2 DC, (SC, chain 2, SC) into the next corner chain space, [SC into each DC and each chain space across to the next corner chain space, (SC, chain 2, SC) into the next corner chain space] 3x, SC into each DC and each chain space across to the beginning. Join to the first SC.
REGULAR SINGLE CROCHET, WRITTEN PATTERN:
R2 – 3: Chain 1. SC into the first stitch, and each stitch across to the next corner chain space, (SC, chain 2, SC) into the next corner chain space, [SC into each stitch across to the next corner chain space, (SC, chain 2, SC) into the next corner chain space] 3x, SC into each stitch across to the beginning. Join to the first SC.
Fasten off, and weave in ends.
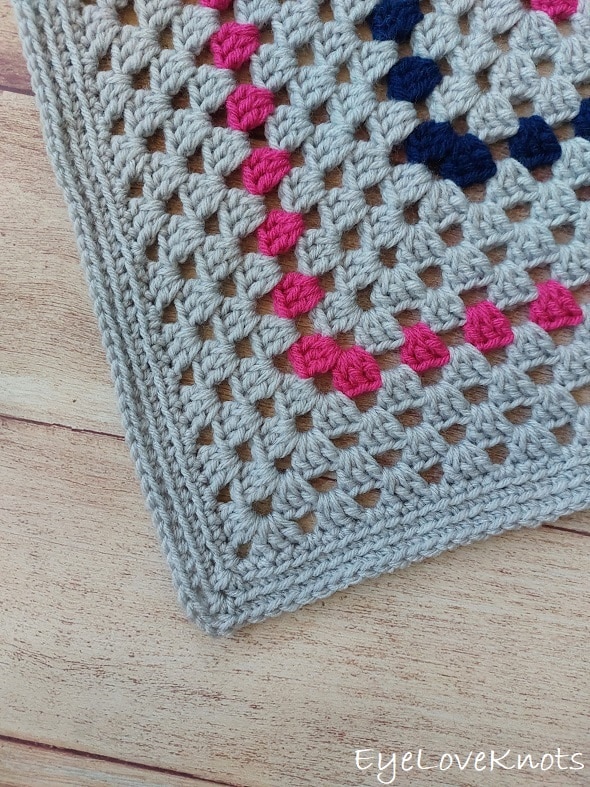
SINGLE CROCHET IN BACK LOOP ONLY, WRITTEN PATTERN:
R2 – 3: Chain 1. In the BLO SC into the first stitch, and each stitch across to the next corner chain space, (HDC, chain 2, HDC) into the next corner chain space, [in the BLO SC into each stitch across to the next corner chain space, (HDC, chain 2, HDC) into the next corner chain space] 3x, in the BLO SC into each stitch across to the beginning. Join to the first SC.
Fasten off, and weave in ends.

Please feel free to make and sell your own items made using this pattern, but keep in mind, this written pattern and my photos are protected by copyright. Please DO NOT claim this pattern as your own nor should you sell my pattern. DO NOT re-publish my photos as your own. DO NOT copy and paste my pattern anywhere, link to it instead so other’s can visit. Making videos providing instructions how to make my projects on any social media platform is also not permitted.
Join one of our awesome Facebook groups to share your creations, and see what others are up to!
– Yarn Crafts & Coffee Community
– DIY Home On Rockwood Lane
– Alexandra Lane Lifestyle
Linked Up To…
Tuesday Turn About #209 – My Wee Abode
Farmhouse Friday 307 – County Road 407
All About Home #203 – Common Ground
Home Matters Linky Party #437 – Modern on Monticello
Linky Ladies Party #238 – The Purple Poncho
Loop Scoop 65 – Moogly Blog
Grace at Home No. 511 – Imparting Grace
Craftastic Monday Link Party – Sew Can Do
Wednesday Link Party 510 – Oombawka Design Crochet
Team Creative Crafts Link Party #153 – Artsy-Fartsy Mama
Creatively Crafty Link Party #387 – Try it – Like it – Create it
Saturday Sparks Link Party 572 – Pieced Pastimes
Craft Schooling Sunday – Creative Jewish Mom
Sundays of Silverado #151 – The House on Silverado
Happiness is Homemade – Decor Craft Design
Handmade Monday #333 – Sum of their Stories
The Really Crafty Link Party #372 – Keeping it Real
You’re the Star Blog Hop – Decor Craft Design
688th Inspire Me Tuesday – A Stroll Thru Life
Fabulous Party 482 – Lou Lou Girls
The Happy Now Blog Link Up #380 – JENerally Informed
268 Senior Salon Pit Stop – Esme Salon
Vintage Charm Party 396 – My Thrift Store Addiction
Wonderful Wednesday Blog Hop – My Life Abundant
Wednesday Link Party #355 – Grandma’s House DIY
Anything Goes Linky 383 – My Random Musings
Thursday Favorite Things #616 – An Artful Mom
Encouraging Home Blog Hop – My Slices of Life
Crafty Creators Link Party #73 – Life as a LEO Wife
Pink Saturday – How Sweet the Sound
Create, Bake, Grow & Gather Party #579 – Shabby Art Boutique
Funtastic Friday Link Party #444 – Simply Beautiful by Angela
A Morning Cup of Joe – The Cottage Market
Home Imagined Link Party #22 – Sky Lark House


Thank you so much for the shout-out and kind words! I’m so grateful for the opportunity to help you with this gorgeous project! I can’t believe how huge this blanket turned out! This would be an amazing gift for anyone that loves to cuddle up in a nice, soft, warm blanket!
I am grateful to YOU! Team work makes the dream work.
This is so pretty, Maybe I should start again
Thank you from your SSPS Team and Esme for sharing your various links with us at #268 SSPS Linky. I am busy designing and creating an access database of IG and FB links and handles as you share your links with SSPS.
If you have an account please let me know your IG and FB information then I can add and easily tag you when you’re in the top 5 and I promote your post. Feel free to email me at [email protected] or in the comments.
Thank you, Esmé! I definitely recommend it. It’s so therapeutic for me.
Granny Squares bring back good memories. Enjoy your week.
So glad I could do that 🙂
I always enjoy seeing what you make. Thanks for sharing again. This post will be a feature this week. #HomeMattersParty
Thanks so much, Donna! I really appreciate you 🙂
I love this kind of afghan, Alexandra! This is pretty much the only way I know how to crochet an afghan (well, other than straight lines of double crochet!) I used to make little ones for gifts, when I was young and my friend were having babies. I’m happy to say I’ll be featuring this tomorrow at Thursday Favorite Things. 🙂
Thanks so much, Pam – I really appreciate the feature! I think granny square blankets are classic and perfect anytime so a great technique to have down.