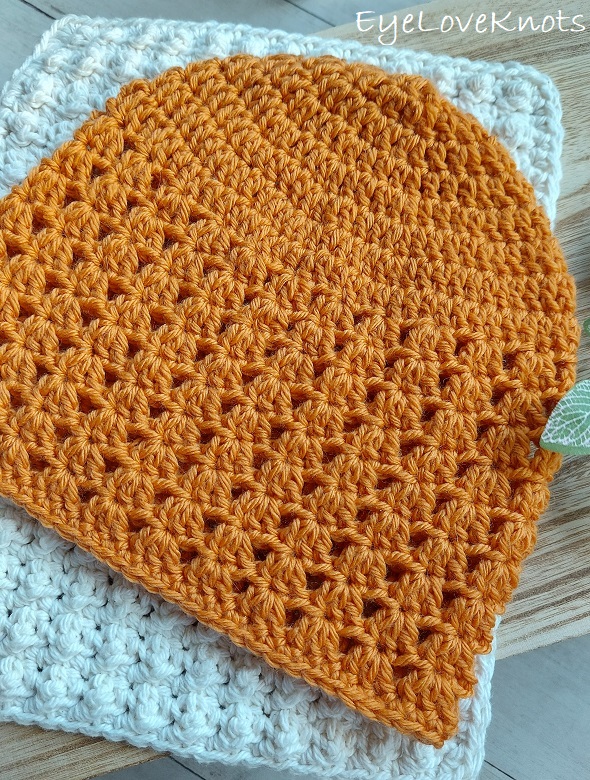
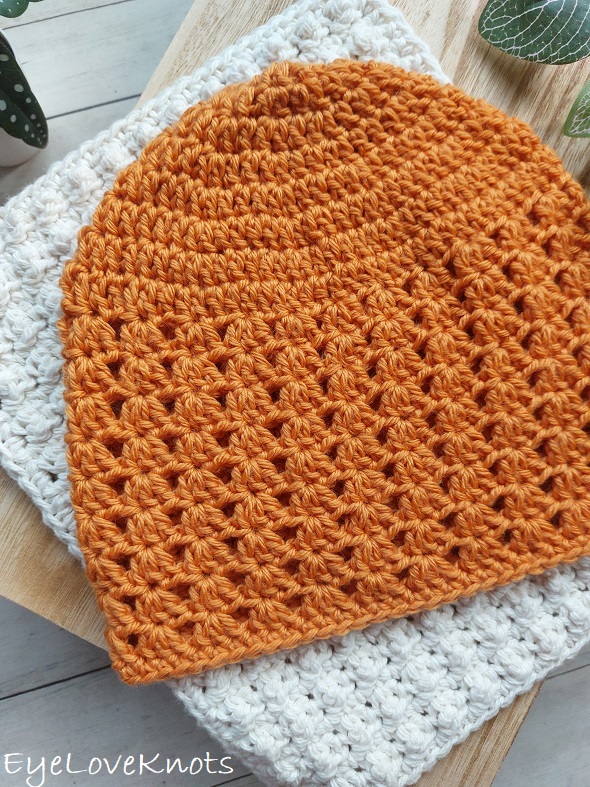
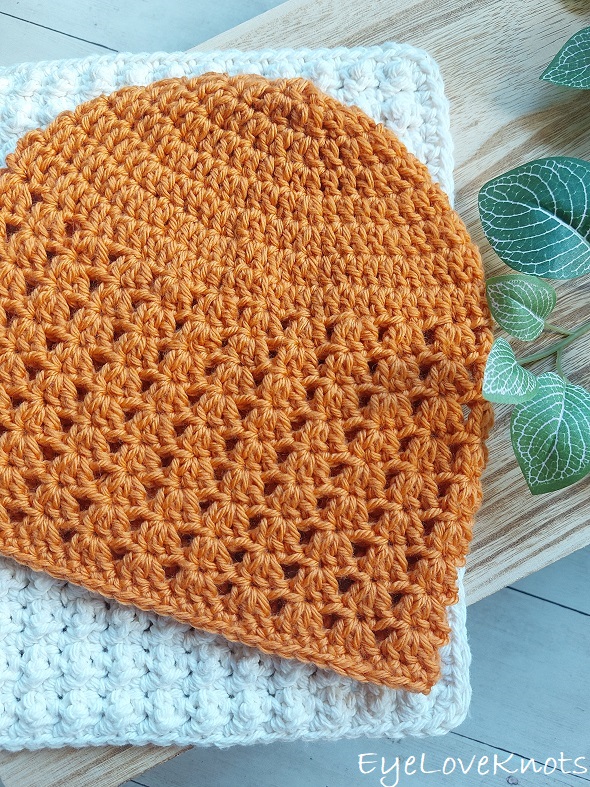
This is a free crochet pattern and video tutorial showing how to crochet the Selene Beanie, an easy crochet pattern worked in an easy shell stitch pattern and your favorite worsted weight yarn, and available in 7 sizes.
This post contains affiliate links for WeCrochet, Etsy and Lion Brand Yarn. If you make a purchase by clicking on them, I make a small commission at no extra cost to you. Thanks for your support!
Find the free crochet pattern instructions below, or purchase a printer-friendly, ad-free PDF on Ravelry by clicking here.
In a hurry? Pin this for later when you have more time.
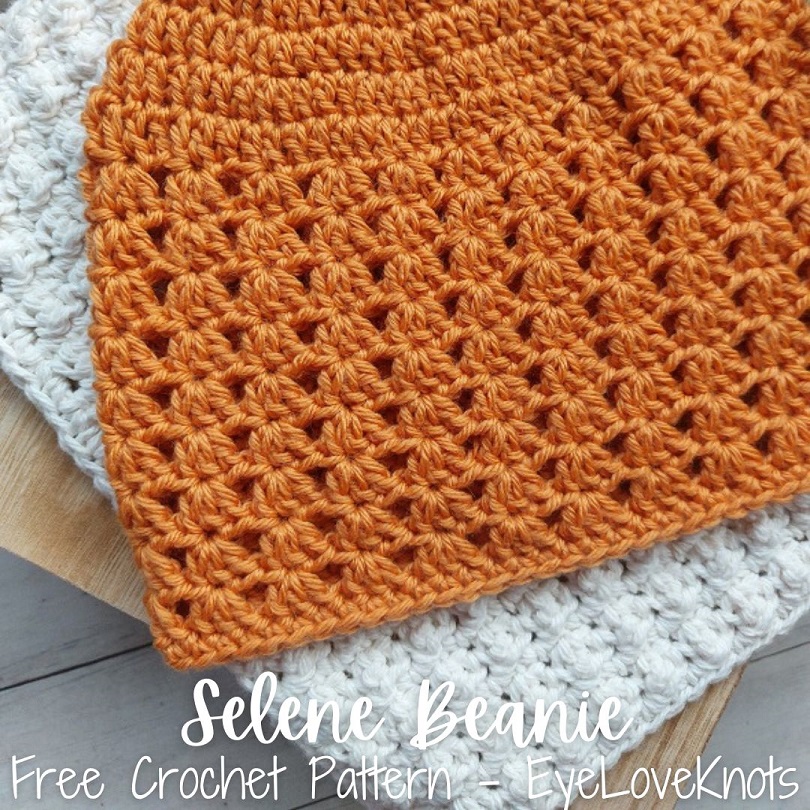
This beanie comes with a story that began in February of 2014.
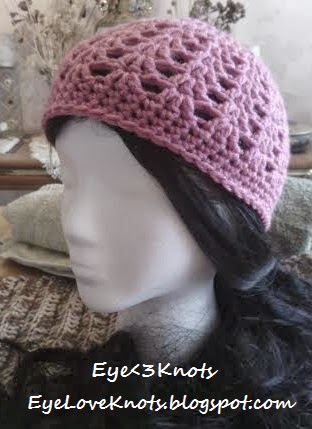
Here is the original hat that I made in Lion Brand Yarn’s Vanna’s Choice in the Pink Poodle colorway.
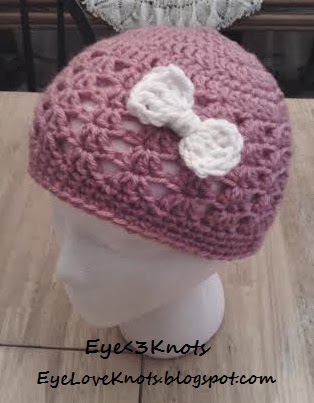
At the time, I only had a child size published because I made it for my 5 year old niece as a Valentine’s Day gift.
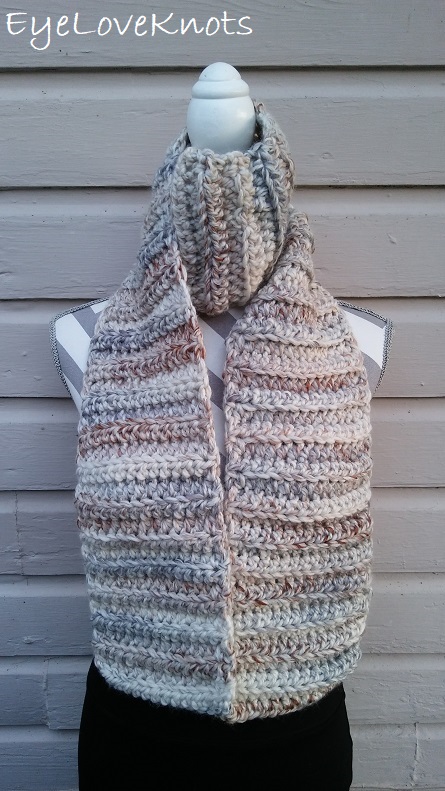
I’ve been working to update some of my older designs, like my Super Chunky Brett Haylee Scarf.
This beanie was the next one in line – it was my second published pattern on this blog back in 2014! In this update, I’ve renamed the pattern, added 6 other sizes ranging from Newborn through Adult Large, and added a video tutorial.
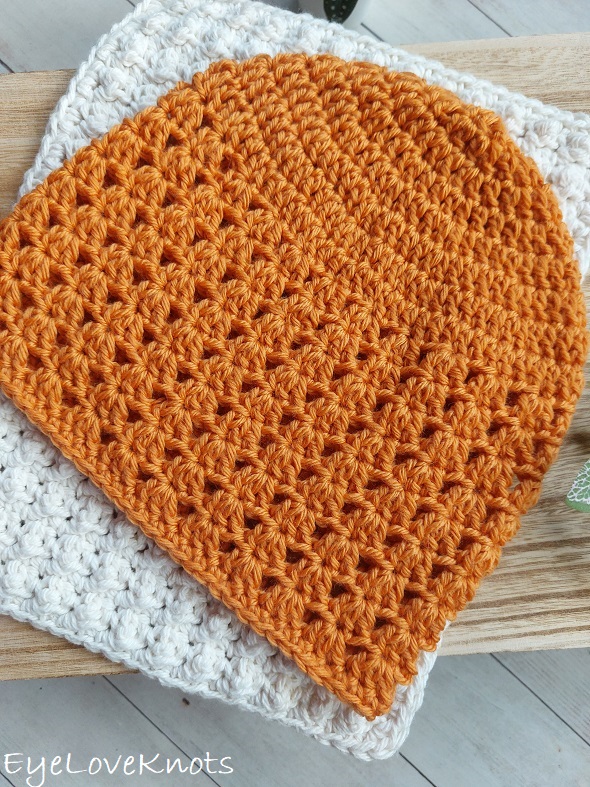
This beanie is worked in an easy shell stitch pattern similar to that of the classic granny stitch pattern. It’s worked in simple double crochet clusters, and the lacy pattern comes from skipping a few stitches.
My original beanie was worked in Lion Brand Yarn’s Vanna’s Choice, and I’ve worked the new version in WeCrochet Swish (100% superwash merino wool) from out of my stash. You can use your favorite worsted weight yarn for this beanie! Just check gauge to ensure the finished beanie will fit correctly.
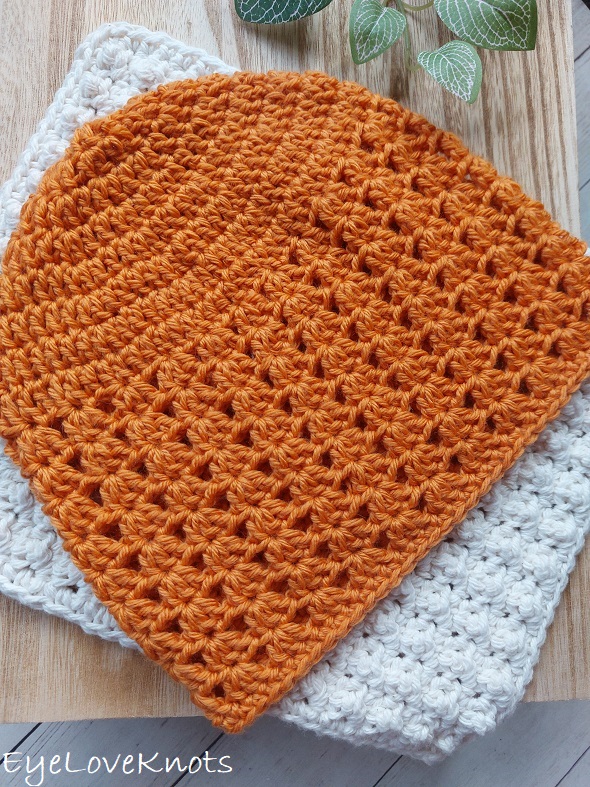
I love that WeCrochet Swish is soft, squishy, and warm. It’s like wearing a hug. Plus wool holds up to the wind better than acrylic yarns, and this one (and the other two I’m about to mention) is not itchy. Some other favorites of mine for beanies include Lion Brand Wool Ease (wool and acrylic blend) and Emma’s Yarn Washable Worsted (100% superwash merino wool).
I contemplated working the crown in a shell stitch pattern, and started working it out, but there are a few things I like about working the crown in solid stitches first, like all double crochet’s here. It still provides great warmth, which I especially like if you’re making beanies to donate. It’s also really easy to work up, meet gauge and adjust the stitch count if needed.
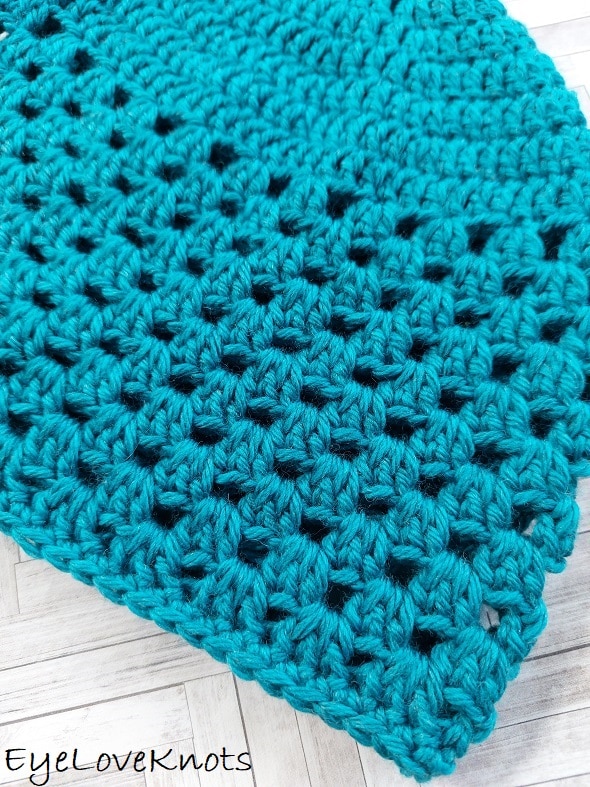
You may also like my Grace Tinley Beanie, which is worked in the granny stitch pattern, and also available in 7 sizes.
If you would like to grab a free copy of the PDF for this pattern, make sure to check out the Pattern Notes section below.
Ad-Free Printer Friendly PDF:

If you would like a PDF version of this post, you may get one through either my Etsy Shop, Ravelry Shop or LoveCrafts Shop for a small fee. This fee is to compensate for the views lost when you no longer need to return to the blog to for the information, as you will have your own copy. In a hurry? Pin this for later when you have more time!

Save this to Your Favorites On: AllFreeCrochet, FaveCrafts, Crochet Pattern Bonanza, Cheap Thrifty Living, DIYideaCenter, AllFreeHolidayCrafts, Free Crochet Tutorials
Materials:
- 50 (60, 75, 85, 100, 125, 155) Yards of Worsted Weight Yarn – I used WeCrochet Swish in Clementine
- H8/5mm Crochet Hook – I love this Koi Fish Ergonomic Clay one from SiennasBowtique on Etsy
- Tapestry Needle
- Soft Tape Measure (gauge is essential)
Time Spent:
Just under 30 minutes to 3 hours, depending on size.
Measurements:
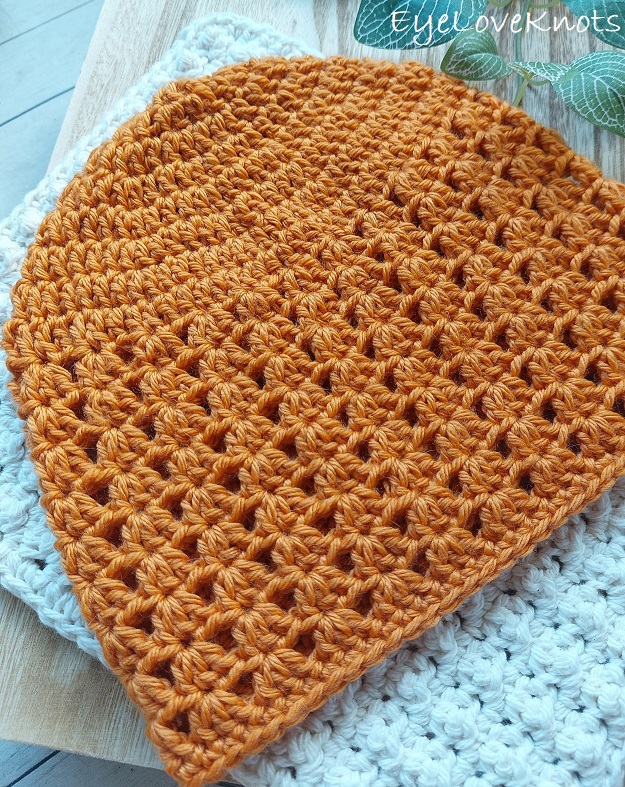
The Newborn Size has a crown of 4″ in diameter, a circumference of about 12 1/2″ to fit a head size of 13″-14″, and is 5″ in length.
The 3-6 Month Size has a crown of 4 5/8″ – 4 3/4″ in diameter, a circumference of about 14 1/2″ – 15″ to fit a head size of 14″-16″, and is 5 1/4″ in length.
The 6-12 Month Size has a crown of 5 3/8″ – 5 1/2″ in diameter, a circumference of about 17″ – 17 1/4″ to fit a head size of 17″-19″, and is 5 3/4″ in length.
The Toddler Size has a crown of 5 3/8″ – 5 1/2″ in diameter, a circumference of about 17″ – 17 1/4″ to fit a head size of 18″ – 20″, and is 6 1/2″ in length.
The Child Size Size has a crown of 6 1/4″ – 6 3/8″ in diameter, a circumference of about 19 5/8″ – 20″ to fit a head size of 20″ – 22″, and is 7″ in length.
The Teen/Adult Small Size has a crown of 6 1/4″ – 6 3/8″ in diameter, a circumference of about 19 5/8″ – 20″ to fit a head size of 20″ – 22″, and is 8 1/2″ in length.
The Adult Large Size has a crown of 6 1/2″ in diameter, a circumference of about 20 3/8″ to fit a head size of 22″ – 23″, and is about 8 1/2″ (or 9 1/2″) in length.
*If you are concerned with the size (or want to make a different size), take your tape measure out and measure around your head just above your eyebrows. The distance around is the circumference. You will need to use this equation to figure out what size diameter you will need: Your Circumference – 2” / 3.14 (pi) = crown diameter. 2” is the amount of stretch for acrylic, wool, and similar
Gauge:
In the round in pattern starting with:
- 10 DC. Round 4 = 3 3/4″ (up to 3 7/8″)
- 11 DC. Round 4 = 4″
Abbreviations (US Terms)
- DC – Double Crochet (Photo Tutorial)
- SC – Single Crochet (Photo Tutorial)
Pattern Notes:
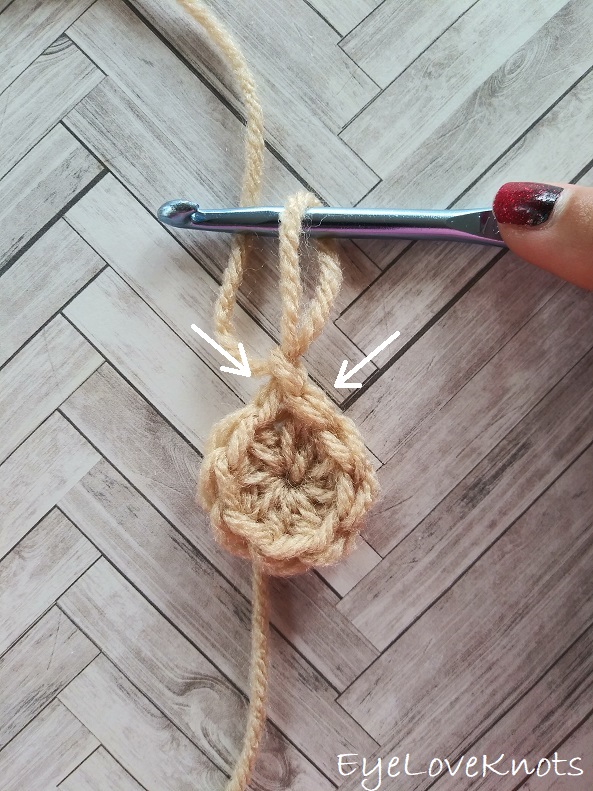
I work my crown and body differently than most to help keep my seam straight, and that is that the first stitch from the first set of increases is done in the first stitch of the round, which will appear just to left of the beginning chain, then the round will be worked as normal, and the final stitch of the round will be the second stitch of the first set of increases, and it will be worked into the same stitch as the first, and appear just to the right of the beginning chain. The photo above shows where the first and last stitch are worked, and I have a photo tutorial of this technique in my How to Keep a Straight Seam post. You can work in your preferred increase method as long as we end up with the same stitches at the end of the round.
In the crown, the beginning chain 2 does not count as a stitch, but in the body, the chain 2 does count.
In the crown, join to the first stitch. In the body, join to the beginning chain.
The original beanie has 3 rounds of single crochet around the end. If you like this look, you can achieve it by replacing the last shell stitch round with two rounds of single crochet.
I’m ending each size with single crochet because I love the polished, finished look it gives. This round adds 1/4″ to the total length. If you don’t want a round of single crochet, you can omit it for less length, or work another round of the shell stitch in it’s place for a little bit more length.
If you are a tight crocheter, I recommend working the shell stitch pattern and single crochet round in an I9/5.5mm crochet hook to help keep it looser so there is no restriction in the final beanie.

Through 08/09/23 at 11:59pm EST, you can grab a free copy of the PDF for the Selene Beanie on Ravelry using code FREECROCHET202317. I earn my income from the number of pageviews my blog sees, so please do not share the code, but instead share the link to this post so others can find it. Thank you!
If you’re viewing this after 08/09/23, you can still get a copy of the PDF on sale 50% off on Ravelry or on Etsy using code NEWCROCHET202316 until 08/13/23 at 11:59pm EST.
Selene Beanie, Video Tutorial:
Selene Beanie Written Pattern, Newborn Size:
Chain 4. Join to form a ring. Chain 2. 11 DC into the ring. Join. (11 DC)
R2: Chain 2. Work 1 DC into the first stitch, 2 DC in each of the next 10 DCs, and 1 DC into the last stitch. Join. (22 DC)
R3: Chain 2. Work 1 DC into the first two stitches, (2 DC into the next stitch, 1 DC into the next stitch) 10x, 1 DC into the last stitch. Join. (33 DC)
R4: Chain 2. Work 1 DC into the first three stitches, (2 DC into the next stitch, 1 DC into each of the next 2 stitches) 10x, 1 DC into the last stitch. Join. (44 DC)
R5: Chain 2 (counts as a DC). Work 1 DC into the 1st DC, and into each DC around. Join to the top of the beginning chain 2. (45 DC)
R6: Chain 2. Work 1 DC into the first stitch, skip 2 DC, (3 DCs into the next DC, skip 2 DC) around, 1 DC into the first stitch to complete the first shell. Join. (15 shell clusters)
R7 – 10: Chain 2. Work 1 DC into the first stitch, skip 2 DC, (3 DCs into the next DC [which is the center DC of the next cluster], skip 2 DC) around, 1 DC into the first stitch to complete the first shell. Join. (15 shell clusters)
R11: Chain 1, SC in the 1st DC, and in each DC around. Join. (45 SC)
Fasten off, and weave in ends.
Selene Beanie Written Pattern, 3-6 Month Size:
Chain 4. Join to form a ring. Chain 2. 10 DC into the ring. Join. (10 DC)
R2: Chain 2. Work 1 DC into the first stitch, 2 DC in each of the next 9 DCs, and 1 DC into the last stitch. Join. (20 DC)
R3: Chain 2. Work 1 DC into the first two stitches, (2 DC into the next stitch, 1 DC into the next stitch) 9x, 1 DC into the last stitch. Join. (30 DC)
R4: Chain 2. Work 1 DC into the first three stitches, (2 DC into the next stitch, 1 DC into each of the next 2 stitches) 9x, 1 DC into the last stitch. Join. (40 DC)
R5: Chain 2. Work 1 DC into the first four stitches, (2 DC into the next stitch, 1 DC into each of the next 3 stitches) 9x, 1 DC into the last stitch. Join. (50 DC)
R6: Chain 2 (counts as a DC). Work 1 DC into the 1st DC, and into each DC around. Join to the top of the beginning chain 2. (51 DC)
R7: Chain 2. Work 1 DC into the first stitch, skip 2 DC, (3 DCs into the next DC, skip 2 DC) around, 1 DC into the first stitch to complete the first shell. Join. (17 shell clusters)
R8 – 11: Chain 2. Work 1 DC into the first stitch, skip 2 DC, (3 DCs into the next DC [which is the center DC of the next cluster], skip 2 DC) around, 1 DC into the first stitch to complete the first shell. Join. (17 shell clusters)
R12: Chain 1, SC in the 1st DC, and in each DC around. Join. (51 SC)
Fasten off, and weave in ends.
Selene Beanie Written Pattern, 6-12 Month Size:
Chain 4. Join to form a ring. Chain 2. 10 DC into the ring. Join. (10 DC)
R2: Chain 2. Work 1 DC into the first stitch, 2 DC in each of the next 9 DCs, and 1 DC into the last stitch. Join. (20 DC)
R3: Chain 2. Work 1 DC into the first two stitches, (2 DC into the next stitch, 1 DC into the next stitch) 9x, 1 DC into the last stitch. Join. (30 DC)
R4: Chain 2. Work 1 DC into the first three stitches, (2 DC into the next stitch, 1 DC into each of the next 2 stitches) 9x, 1 DC into the last stitch. Join. (40 DC)
R5: Chain 2. Work 1 DC into the first four stitches, (2 DC into the next stitch, 1 DC into each of the next 3 stitches) 9x, 1 DC into the last stitch. Join. (50 DC)
R6: Chain 2. Work 1 DC into the first five stitches, (2 DC into the next stitch, 1 DC into each of the next 4 stitches) 9x, 1 DC into the last stitch. Join. (60 DC)
R7: Chain 2 (counts as a DC). Work 1 DC into the 2nd DC, and into each DC around. Join to the top of the beginning chain 2. (60 DC)
R8: Chain 2. Work 1 DC into the first stitch, skip 2 DC, (3 DCs into the next DC, skip 2 DC) around, 1 DC into the first stitch to complete the first shell. Join. (20 shell clusters)
R9 – 12: Chain 2. Work 1 DC into the first stitch, skip 2 DC, (3 DCs into the next DC [which is the center DC of the next cluster], skip 2 DC) around, 1 DC into the first stitch to complete the first shell. Join. (20 shell clusters)
R13: Chain 1, SC in the 1st DC, and in each DC around. Join. (60 SC)
Fasten off, and weave in ends.
Selene Beanie Written Pattern, Toddler Size:
Chain 4. Join to form a ring. Chain 2. 10 DC into the ring. Join. (10 DC)
R2: Chain 2. Work 1 DC into the first stitch, 2 DC in each of the next 9 DCs, and 1 DC into the last stitch. Join. (20 DC)
R3: Chain 2. Work 1 DC into the first two stitches, (2 DC into the next stitch, 1 DC into the next stitch) 9x, 1 DC into the last stitch. Join. (30 DC)
R4: Chain 2. Work 1 DC into the first three stitches, (2 DC into the next stitch, 1 DC into each of the next 2 stitches) 9x, 1 DC into the last stitch. Join. (40 DC)
R5: Chain 2. Work 1 DC into the first four stitches, (2 DC into the next stitch, 1 DC into each of the next 3 stitches) 9x, 1 DC into the last stitch. Join. (50 DC)
R6: Chain 2. Work 1 DC into the first five stitches, (2 DC into the next stitch, 1 DC into each of the next 4 stitches) 9x, 1 DC into the last stitch. Join. (60 DC)
R7: Chain 2 (counts as a DC). Work 1 DC into the 2nd DC, and into each DC around. Join to the top of the beginning chain 2. (60 DC)
R8: Chain 2. Work 1 DC into the first stitch, skip 2 DC, (3 DCs into the next DC, skip 2 DC) around, 1 DC into the first stitch to complete the first shell. Join. (20 shell clusters)
R9 – 13: Chain 2. Work 1 DC into the first stitch, skip 2 DC, (3 DCs into the next DC [which is the center DC of the next cluster], skip 2 DC) around, 1 DC into the first stitch to complete the first shell. Join. (20 shell clusters)
R14 – 15: Chain 1, SC in the 1st stitch, and in each stitch around. Join. (60 SC)
Fasten off, and weave in ends.
Selene Beanie Written Pattern, Child Size:
Chain 4. Join to form a ring. Chain 2. 10 DC into the ring. Join. (10 DC)
R2: Chain 2. Work 1 DC into the first stitch, 2 DC in each of the next 9 DCs, and 1 DC into the last stitch. Join. (20 DC)
R3: Chain 2. Work 1 DC into the first two stitches, (2 DC into the next stitch, 1 DC into the next stitch) 9x, 1 DC into the last stitch. Join. (30 DC)
R4: Chain 2. Work 1 DC into the first three stitches, (2 DC into the next stitch, 1 DC into each of the next 2 stitches) 9x, 1 DC into the last stitch. Join. (40 DC)
R5: Chain 2. Work 1 DC into the first four stitches, (2 DC into the next stitch, 1 DC into each of the next 3 stitches) 9x, 1 DC into the last stitch. Join. (50 DC)
R6: Chain 2. Work 1 DC into the first five stitches, (2 DC into the next stitch, 1 DC into each of the next 4 stitches) 9x, 1 DC into the last stitch. Join. (60 DC)
R7: Chain 2. Work 1 DC into the first 6 stitches, (2 DC into the next stitch, 1 DC into each of the next 5 stitches) 9x. Join. (69 DC)
R8: Chain 2 (counts as a DC). Work 1 DC into the 2nd DC, and into each DC around. Join to the top of the beginning chain 2. (69 DC)
R9: Chain 2. Work 1 DC into the first stitch, skip 2 DC, (3 DCs into the next DC, skip 2 DC) around, 1 DC into the first stitch to complete the first shell. Join. (23 shell clusters)
R10 – 14: Chain 2. Work 1 DC into the first stitch, skip 2 DC, (3 DCs into the next DC [which is the center DC of the next cluster], skip 2 DC) around, 1 DC into the first stitch to complete the first shell. Join. (23 shell clusters)
R15 – 16: Chain 1, SC in the 1st stitch, and in each stitch around. Join. (69 SC)
Fasten off, and weave in ends.
Selene Beanie Written Pattern, Adult Small Size:
Chain 4. Join to form a ring. Chain 2. 10 DC into the ring. Join. (10 DC)
R2: Chain 2. Work 1 DC into the first stitch, 2 DC in each of the next 9 DCs, and 1 DC into the last stitch. Join. (20 DC)
R3: Chain 2. Work 1 DC into the first two stitches, (2 DC into the next stitch, 1 DC into the next stitch) 9x, 1 DC into the last stitch. Join. (30 DC)
R4: Chain 2. Work 1 DC into the first three stitches, (2 DC into the next stitch, 1 DC into each of the next 2 stitches) 9x, 1 DC into the last stitch. Join. (40 DC)
R5: Chain 2. Work 1 DC into the first four stitches, (2 DC into the next stitch, 1 DC into each of the next 3 stitches) 9x, 1 DC into the last stitch. Join. (50 DC)
R6: Chain 2. Work 1 DC into the first five stitches, (2 DC into the next stitch, 1 DC into each of the next 4 stitches) 9x, 1 DC into the last stitch. Join. (60 DC)
R7: Chain 2. Work 1 DC into the first 6 stitches, (2 DC into the next stitch, 1 DC into each of the next 5 stitches) 9x. Join. (69 DC)
R8: Chain 2 (counts as a DC). Work 1 DC into the 2nd DC, and into each DC around. Join to the top of the beginning chain 2. (69 DC)
R9: Chain 2. Work 1 DC into the first stitch, skip 2 DC, (3 DCs into the next DC, skip 2 DC) around, 1 DC into the first stitch to complete the first shell. Join. (23 shell clusters)
R10 – 17: Chain 2. Work 1 DC into the first stitch, skip 2 DC, (3 DCs into the next DC [which is the center DC of the next cluster], skip 2 DC) around, 1 DC into the first stitch to complete the first shell. Join. (23 shell clusters)
R18 – 19: Chain 1, SC in the 1st stitch, and in each stitch around. Join. (69 SC)
Fasten off, and weave in ends.
Selene Beanie Written Pattern, Adult Large Size:
Chain 4. Join to form a ring. Chain 2. 11 DC into the ring. Join. (11 DC)
R2: Chain 2. Work 1 DC into the first stitch, 2 DC in each of the next 10 DCs, and 1 DC into the last stitch. Join. (22 DC)
R3: Chain 2. Work 1 DC into the first two stitches, (2 DC into the next stitch, 1 DC into the next stitch) 10x, 1 DC into the last stitch. Join. (33 DC)
R4: Chain 2. Work 1 DC into the first three stitches, (2 DC into the next stitch, 1 DC into each of the next 2 stitches) 10x, 1 DC into the last stitch. Join. (44 DC)
R5: Chain 2. Work 1 DC into the first four stitches, (2 DC into the next stitch, 1 DC into each of the next 3 stitches) 10x, 1 DC into the last stitch. Join. (55 DC)
R6: Chain 2. Work 1 DC into the first five stitches, (2 DC into the next stitch, 1 DC into each of the next 4 stitches) 10x, 1 DC into the last stitch. Join. (66 DC)
R7: Chain 2. Work 1 DC into the first six stitches, (2 DC into the next stitch, 1 DC into each of the next 5 stitches) 10x, 1 DC into the last stitch. Join. (77 DC)
R8: Chain 2 (counts as a DC). Work 1 DC into the 1st DC, and into each DC around. Join to the top of the beginning chain 2. (78 DC)
R9: Chain 2. Work 1 DC into the first stitch, skip 2 DC, (3 DCs into the next DC, skip 2 DC) around, 1 DC into the first stitch to complete the first shell. Join. (26 shell clusters)
R10 – 17 (19): Chain 2. Work 1 DC into the first stitch, skip 2 DC, (3 DCs into the next DC [which is the center DC of the next cluster], skip 2 DC) around, 1 DC into the first stitch to complete the first shell. Join. (26 shell clusters)
R18 (20): Chain 1, SC in the 1st stitch, and in each stitch around. Join. (78 SC)
Fasten off, and weave in ends.
Please feel free to make and sell your own items made using this pattern, but keep in mind, this written pattern and my photos are protected by copyright. Please DO NOT claim this pattern as your own nor should you sell my pattern. DO NOT re-publish my photos as your own. DO NOT copy and paste my pattern anywhere, link to it instead so other’s can visit. Making videos providing instructions how to make my projects on any social media platform is also not permitted.
Join one of our awesome Facebook groups to share your creations, and see what others are up to!
– Yarn Crafts & Coffee Community
– DIY Home On Rockwood Lane
– Alexandra Lane Lifestyle


I did my magic ring with 10 dc in the ring, I’m working the crown, and it doesn’t seem the number of stitches I should have at the end of the round are adding up. Round 2 I ended up with 18 stitches instead of 20. Should there be twelve dc in the magic ring instead of 10?
Working the magic ring is just an alternative to working a chain and joining to form a ring. It doesn’t have an effect on the stitch count because at the end of forming a magic ring, you still need to start with a beginning chain, and then work the number of stitches stated in the pattern to complete the first round.
If you are ending up with less than double the amount of stitches for Round 2 then you are missing a stitch when working around in Round 2 – it may be the very first one that the beginning chain is coming out of, or it could be the very last one if the increases are not done all the way to the end.
There is also a video tutorial in the post if you’d like to check it out. It doesn’t start with a magic ring, but after the beginning chain is joined it will equal where you will be after you form your magic ring, and you can follow along beginning with the chain 2.