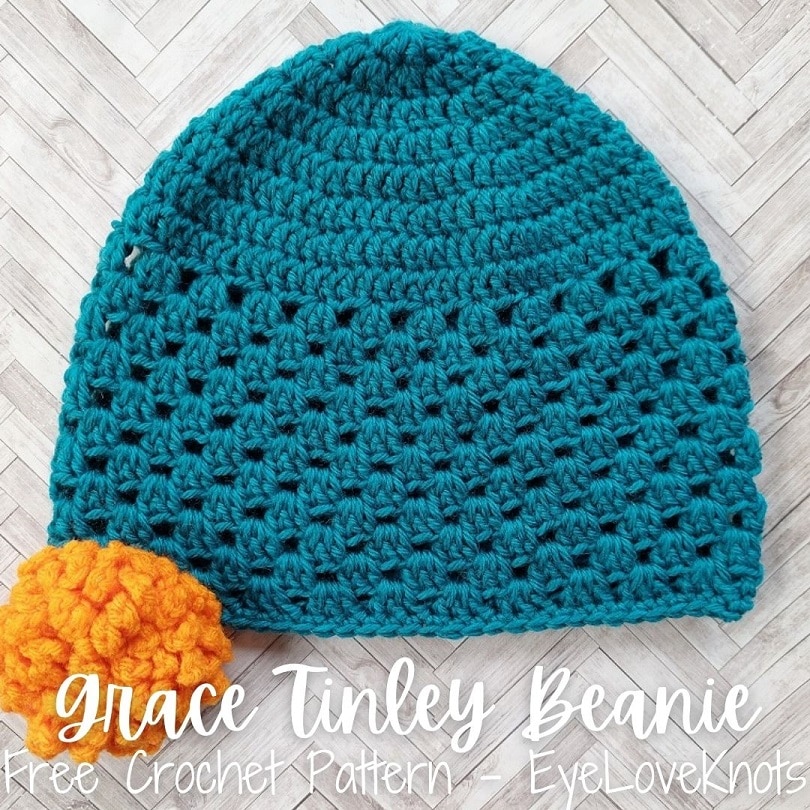
This is a free crochet pattern and video tutorial showing how to crochet the Grace Tinley Beanie, an easy crochet pattern worked in the classic granny stitch pattern, and available in 7 sizes.
This post contains affiliate links for WeCrochet & Etsy. If you make a purchase by clicking on them, I make a small commission at no extra cost to you. Thanks for your support!
Find the free crochet pattern instructions below, or purchase a printer-friendly, ad-free PDF on Ravelry by clicking here.
In a hurry? Pin this for later when you have more time.
This beanie comes with a story that began in March of 2014.
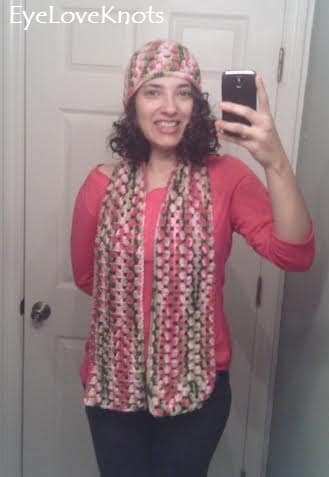
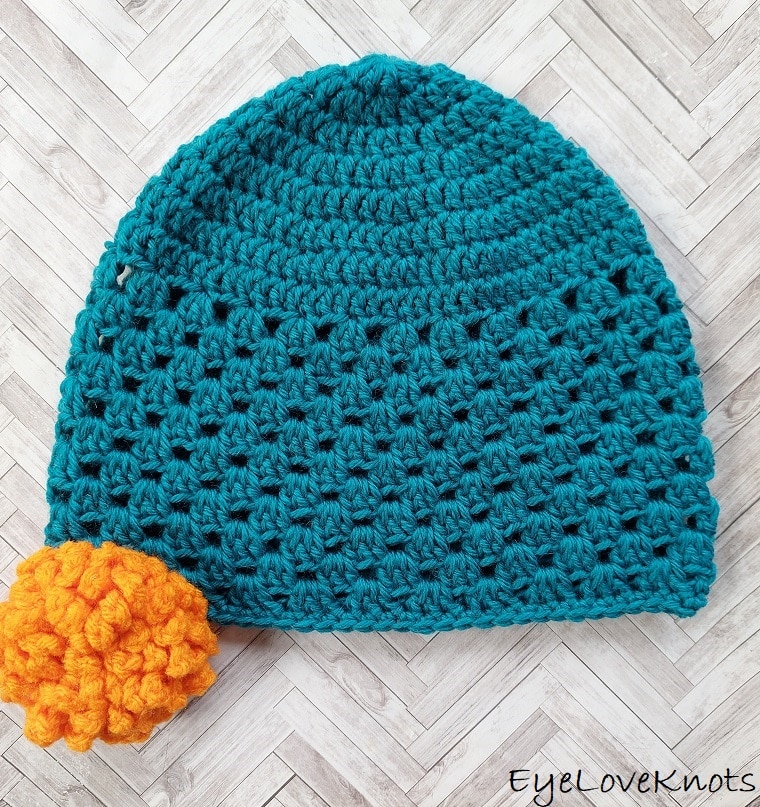
Here is my original hat with matching Grace Tinley Scarf that I originally made in Hobby Lobby’s I Love This Yarn.
At the time, I only had an adult small size published, though I later went back in 2017 and added the adult large size.
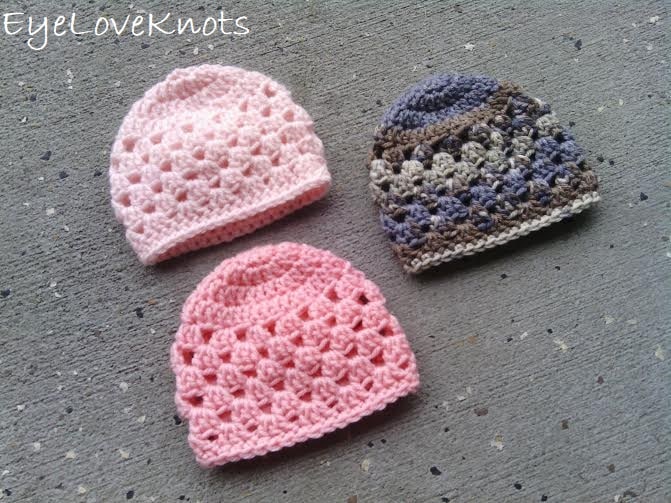
In October of 2015, three baby sizes (Newborn, 3-6 Months, and 6-12 Months) were published in a separate post. They are so adorable! These were worked in Deborah Norville’s Everyday Soft, which has been renamed Premier Yarns Everyday.
Over the years, I’ve gotten a lot of requests to add more sizes so as I revisit this post, I’ve combined the posts, added Toddler and Child sizes and video tutorials for each of the 7 sizes.
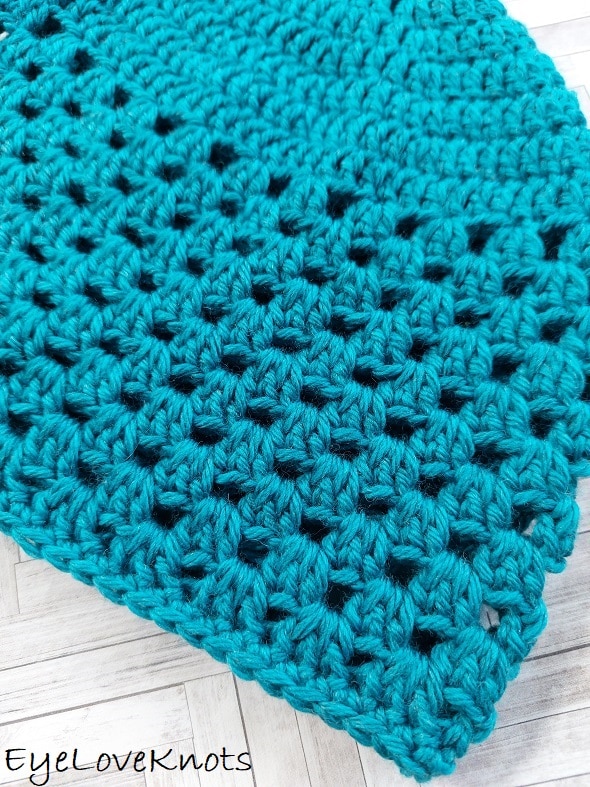
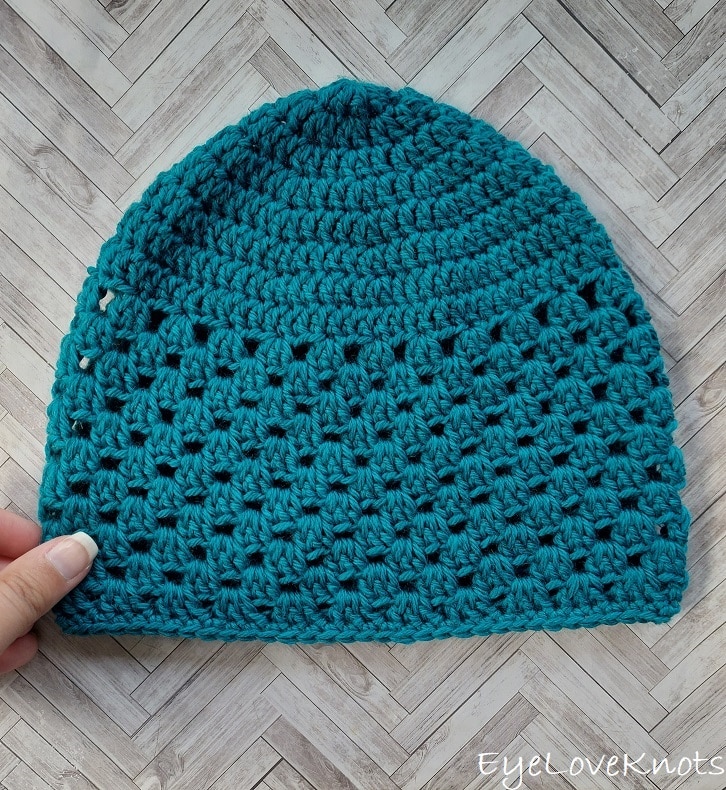
This beanie is worked in the classic granny stitch pattern, which is created by skipping a few stitches, and then working double crochet clusters into that skipped space. This has been one of my favorites from the start.
I need to give a big shout out to WeCrochet for supplying me with the yarn to complete this project. I picked WeCrochet Swish Yarn. It’s 100% superwash merino wool, but it’s so soft, not itchy, and it’s so cozy, it feels like it’s giving you a big hug. If you can’t do wool, WeCrochet Brava is a good alternative.
AD-FREE, PRINTER FRIENDLY PDF:
If you would like a PDF version of this post, you may get one through either my EyeLoveKnots Etsy Shop, Ravelry or LoveCrochet Shop for a small fee. This fee is to compensate for the views lost when you no longer need to return to the blog to for the information, as you will have your own copy. Plus! It helps fund supplies for new projects to share with you!
Shop EyeLoveKnots Etsy: Grace Tinley Beanie.
Shop EyeLoveKnots LoveCrochet: Grace Tinley Beanie.
Share your version of this project on Ravelry – Grace Tinley Beanie.
Save this to your Favorites: AllFreeCrochet, FaveCrafts, Cheap Thrifty Living, DIYideaCenter and Crochet Pattern Bonanza
Materials:
- 42 (50, 62, 74, 90, 116, 148) Yards of Worsted Weight Yarn – I used WeCrochet Swish in Voyage Heather
- H8/5mm Crochet Hook – I love this Koi Fish Ergonomic Clay one from SiennasBowtique on Etsy
- Tapestry Needle
- Soft Tape Measure (gauge is essential)
Time Spent:
I worked up the newborn size in just under 30 minutes, the 3-6 month size in just about 30 minutes and the 6-12 month size in just over 30 minutes.
Up to 3 hours, depending on size.
Measurements:
The Newborn Size has a crown of 4″ in diameter, a circumference of about 12 1/2″ to fit a head size of 13″-14″, and is 5″ in length.
The 3-6 Month Size has a crown of 4 5/8″ – 4 3/4″ in diameter, a circumference of about 14 1/2″ – 15″ to fit a head size of 14″-16″, and is 5 1/4″ in length.
The 6-12 Month Size has a crown of 5 3/8″ – 5 1/2″ in diameter, a circumference of about 17″ – 17 1/4″ to fit a head size of 17″-19″, and is 5 3/4″ in length.
The Toddler Size has a crown of 5 3/8″ – 5 1/2″ in diameter, a circumference of about 17″ – 17 1/4″ to fit a head size of 18″ – 20″, and is 6 1/2″ in length.
The Child Size Size has a crown of 6 1/4″ – 6 3/8″ in diameter, a circumference of about 19 5/8″ – 20″ to fit a head size of 20″ – 22″, and is 7″ in length.
The Teen/Adult Small Size has a crown of 6 1/4″ – 6 3/8″ in diameter, a circumference of about 19 5/8″ – 20″ to fit a head size of 20″ – 22″, and is 8 1/2″ in length.
The Adult Large Size has a crown of 6 1/2″ in diameter, a circumference of about 20 3/8″ to fit a head size of 22″ – 23″, and is about 8 1/2″ (or 9 1/2″) in length.
*If you are concerned with the size (or want to make a different size), take your tape measure out and measure around your head just above your eyebrows. The distance around is the circumference. You will need to use this equation to figure out what size diameter you will need: Your Circumference – 2” / 3.14 (pi) = crown diameter. 2” is the amount of stretch for acrylic, wool, and similar
Gauge:
In the round in pattern starting with:
- 10 DC. Round 4 = 3 3/4″ (up to 3 7/8″)
- 11 DC. Round 4 = 4″
Abbreviations (US Terms)
- DC – Double Crochet (Photo Tutorial)
- SC – Single Crochet (Photo Tutorial)
Pattern Notes:
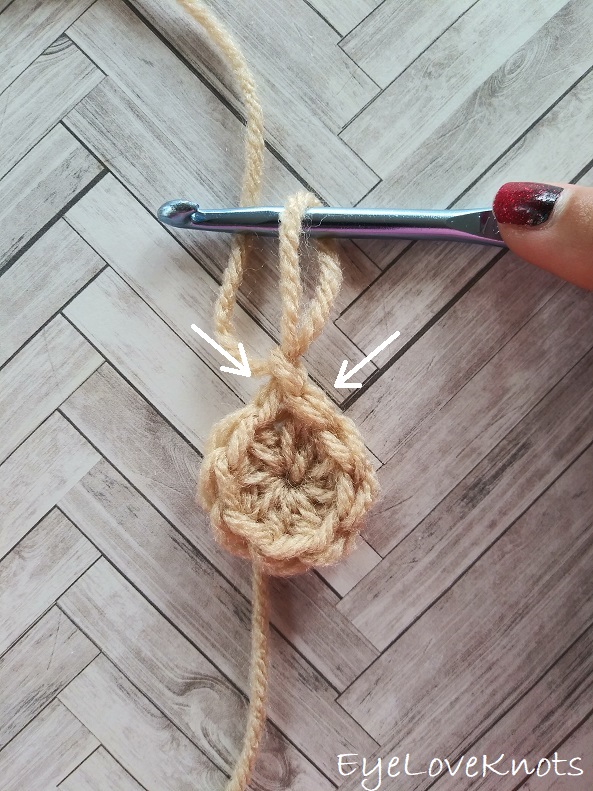
I work my crown and body differently than most to help keep my seam straight, and that is that the first stitch from the first set of increases is done in the first stitch of the round, which will appear just to left of the beginning chain, then the round will be worked as normal, and the final stitch of the round will be the second stitch of the first set of increases, and it will be worked into the same stitch as the first, and appear just to the right of the beginning chain. The photo above shows where the first and last stitch are worked, and I have a photo tutorial of this technique in my How to Keep a Straight Seam post. You can work in your preferred increase method as long as we end up with the same stitches at the end of the round.
In the crown, the beginning chain 2 does not count as a stitch, but in the body, the chain 2 does count.
Join to the first stitch, not the beginning chain (unless otherwise directed).
I’m ending each size with a round of single crochet because I love the polished, finished look it gives. This round adds 1/4″ to the total length. If you don’t want a round of single crochet, you can omit it for less length, or work another round of the granny stitch in it’s place for a little bit more length.
If you are a tight crocheter, I recommend working the granny stitch pattern and single crochet round in an I9/5.5mm crochet hook to help keep it looser so there is no restriction in the final beanie.
Grace Tinley Beanie Video Tutorial, Newborn Size:
Grace Tinley Beanie Written Pattern, Newborn Size:
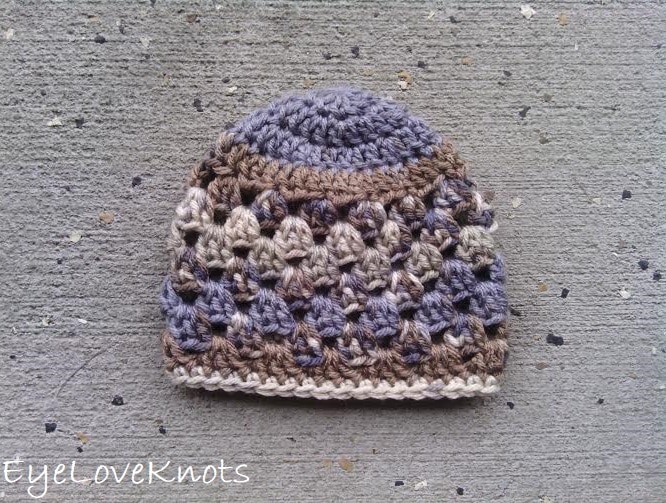
Chain 4. Join to form a ring. Chain 2. 11 DC into the ring. Join. (11 DC)
R2: Chain 2. Work 1 DC into the first stitch, 2 DC in each of the next 10 DCs, and 1 DC into the last stitch. Join. (22 DC)
R3: Chain 2. Work 1 DC into the first two stitches, (2 DC into the next stitch, 1 DC into the next stitch) 10x, 1 DC into the last stitch. Join. (33 DC)
R4: Chain 2. Work 1 DC into the first three stitches, (2 DC into the next stitch, 1 DC into each of the next 2 stitches) 10x, 1 DC into the last stitch. Join. (44 DC)
R5: Chain 2 (counts as a DC). Work 1 DC into the 1st DC, and into each DC around. Join to the top of the beginning chain 2. (45 DC)
R6: Chain 2. Work 2 DC into the same DC, skip 2 DC, (3 DCs into the next DC, skip 2 DC) around. Join. (15 clusters)
R7 – 10: Slip stitch over 1 DC, then slip stitch underneath the next DC into the space created by skipped stitches. Chain 2. Work 2 DC into the same space, skip the next cluster, (3 DC into the next space in between clusters, skip the next cluster) around. Join to the 1st DC in each round except for the last round, join to the beginning chain 2. (15 clusters)
R11: Chain 1, SC in the 1st DC, and in each DC around. Join. (45 SC)
Fasten Off, and Weave in Ends.
Grace Tinley Beanie Video Tutorial, 3-6 Months:
Grace Tinley Beanie Written Pattern, 3-6 Months:
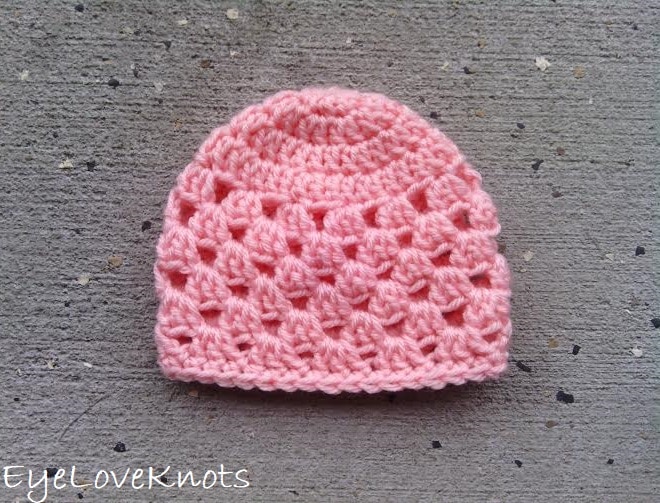
Chain 4. Join to form a ring. Chain 2. 10 DC into the ring. Join. (10 DC)
R2: Chain 2. Work 1 DC into the first stitch, 2 DC in each of the next 9 DCs, and 1 DC into the last stitch. Join. (20 DC)
R3: Chain 2. Work 1 DC into the first two stitches, (2 DC into the next stitch, 1 DC into the next stitch) 9x, 1 DC into the last stitch. Join. (30 DC)
R4: Chain 2. Work 1 DC into the first three stitches, (2 DC into the next stitch, 1 DC into each of the next 2 stitches) 9x, 1 DC into the last stitch. Join. (40 DC)
R5: Chain 2. Work 1 DC into the first four stitches, (2 DC into the next stitch, 1 DC into each of the next 3 stitches) 9x, 1 DC into the last stitch. Join. (50 DC)
R6: Chain 2 (counts as a DC). Work 1 DC into the 1st DC, and into each DC around. Join to the top of the beginning chain 2. (51 DC)
R7: Chain 2. Work 2 DC into the same DC, skip 2 DC, (3 DCs into the next DC, skip 2 DC) around. Join. (17 clusters)
R8 – 11: Slip stitch over 1 DC, then slip stitch underneath the next DC into the space created by skipped stitches. Chain 2. Work 2 DC into the same space, skip the next cluster, (3 DC into the next space in between clusters, skip the next cluster) around. Join to the 1st DC in each round except for the last round, join to the beginning chain 2. (17 clusters)
R12: Chain 1, SC in the 1st DC, and in each DC around. Join. (51 SC)
Fasten Off, and Weave in Ends.
Grace Tinley Beanie Video Tutorial, 6-12 Months:
Grace Tinley Beanie Written Pattern, 6 – 12 Months:
Chain 4. Join to form a ring. Chain 2. 10 DC into the ring. Join. (10 DC)
R2: Chain 2. Work 1 DC into the first stitch, 2 DC in each of the next 9 DCs, and 1 DC into the last stitch. Join. (20 DC)
R3: Chain 2. Work 1 DC into the first 2 stitches, (2 DC into the next stitch, 1 DC into the next stitch) 9x, 1 DC into the last stitch. Join. (30 DC)
R4: Chain 2. Work 1 DC into the first 3 stitches, (2 DC into the next stitch, 1 DC into each of the next 2 stitches) 9x, 1 DC into the last stitch. Join. (40 DC)
R5: Chain 2. Work 1 DC into the first 4 stitches, (2 DC into the next stitch, 1 DC into each of the next 3 stitches) 9x, 1 DC into the last stitch. Join. (50 DC)
R6: Chain 2. Work 1 DC into the first 5 stitches, (2 DC into the next stitch, 1 DC into each of the next 4 stitches) 9x, 1 DC into the last stitch. Join. (60 DC)
R7: Chain 2 (counts as a DC). Work 1 DC into the 2nd DC, and into each DC around. Join to the top of the beginning chain 2. (60 DC)
R8: Chain 2. Work 2 DC into the same DC, skip 2 DC, (3 DCs into the next DC, skip 2 DC) around. Join. (20 clusters)
R9 – 12: Slip stitch over 1 DC, then slip stitch underneath the next DC into the space created by skipped stitches. Chain 2. Work 2 DC into the same space, skip the next cluster, (3 DC into the next space in between clusters, skip the next cluster) around. Join to the 1st DC in each round except for the last round, join to the beginning chain 2. (20 clusters)
R13: Chain 1, SC in the 1st DC, and in each DC around. Join. (60 SC)
Fasten Off, and Weave in Ends.
Grace Tinley Beanie Video Tutorial, Toddler Size:
Grace Tinley Beanie Written Pattern, Toddler Size:
Chain 4. Join to form a ring. Chain 2. 10 DC into the ring. Join. (10 DC)
R2: Chain 2. Work 1 DC into the first stitch, 2 DC in each of the next 9 DCs, and 1 DC into the last stitch. Join. (20 DC)
R3: Chain 2. Work 1 DC into the first 2 stitches, (2 DC into the next stitch, 1 DC into the next stitch) 9x, 1 DC into the last stitch. Join. (30 DC)
R4: Chain 2. Work 1 DC into the first 3 stitches, (2 DC into the next stitch, 1 DC into each of the next 2 stitches) 9x, 1 DC into the last stitch. Join. (40 DC)
R5: Chain 2. Work 1 DC into the first 4 stitches, (2 DC into the next stitch, 1 DC into each of the next 3 stitches) 9x, 1 DC into the last stitch. Join. (50 DC)
R6: Chain 2. Work 1 DC into the first 5 stitches, (2 DC into the next stitch, 1 DC into each of the next 4 stitches) 9x, 1 DC into the last stitch. Join. (60 DC)
R7: Chain 2 (counts as a DC). Work 1 DC into the 2nd DC, and into each DC around. Join to the top of the beginning chain 2. (60 DC)
R8: Chain 2. Work 2 DC into the same DC, skip 2 DC, (3 DCs into the next DC, skip 2 DC) around. Join. (20 clusters)
R9 – 14: Slip stitch over 1 DC, then slip stitch underneath the next DC into the space created by skipped stitches. Chain 2. Work 2 DC into the same space, skip the next cluster, (3 DC into the next space in between clusters, skip the next cluster) around. Join to the 1st DC in each round except for the last round, join to the beginning chain 2. (20 clusters)
R15: Chain 1, SC in the 1st DC, and in each DC around. Join. (60 SC)
Fasten Off, and Weave in Ends.
Grace Tinley Beanie Video Tutorial, Child Size:
Grace Tinley Beanie Written Pattern, Child Size:
Chain 4. Join to form a ring. Chain 2. 10 DC into the ring. Join. (10 DC)
R2: Chain 2. Work 1 DC into the first stitch, 2 DC in each of the next 9 DCs, and 1 DC into the last stitch. Join. (20 DC)
R3: Chain 2. Work 1 DC into the first 2 stitches, (2 DC into the next stitch, 1 DC into the next stitch) 9x, 1 DC into the last stitch. Join. (30 DC)
R4: Chain 2. Work 1 DC into the first 3 stitches, (2 DC into the next stitch, 1 DC into each of the next 2 stitches) 9x, 1 DC into the last stitch. Join. (40 DC)
R5: Chain 2. Work 1 DC into the first 4 stitches, (2 DC into the next stitch, 1 DC into each of the next 3 stitches) 9x, 1 DC into the last stitch. Join. (50 DC)
R6: Chain 2. Work 1 DC into the first 5 stitches, (2 DC into the next stitch, 1 DC into each of the next 4 stitches) 9x, 1 DC into the last stitch. Join. (60 DC)
R7: Chain 2. Work 1 DC into the first 6 stitches, (2 DC into the next stitch, 1 DC into each of the next 5 stitches) 9x. Join. (69 DC)
R8: Chain 2 (counts as a DC). Work 1 DC into the 2nd DC, and into each DC around. Join to the top of the beginning chain 2. (69 DC)
R9: Chain 2. Work 2 DC into the same DC, skip 2 DC, (3 DCs into the next DC, skip 2 DC) around. Join. (23 clusters)
R10 – 15: Slip stitch over 1 DC, then slip stitch underneath the next DC into the space created by skipped stitches. Chain 2. Work 2 DC into the same space, skip the next cluster, (3 DC into the next space in between clusters, skip the next cluster) around. Join to the 1st DC in each round except for the last round, join to the beginning chain 2. (23 clusters)
R16: Chain 1, SC in the 1st DC, and in each DC around. Join. (69 SC)
Fasten Off, and Weave in Ends.
Grace Tinley Beanie Video Tutorial, Adult Small Size:
Grace Tinley Beanie Written Pattern, Adult Small Size:
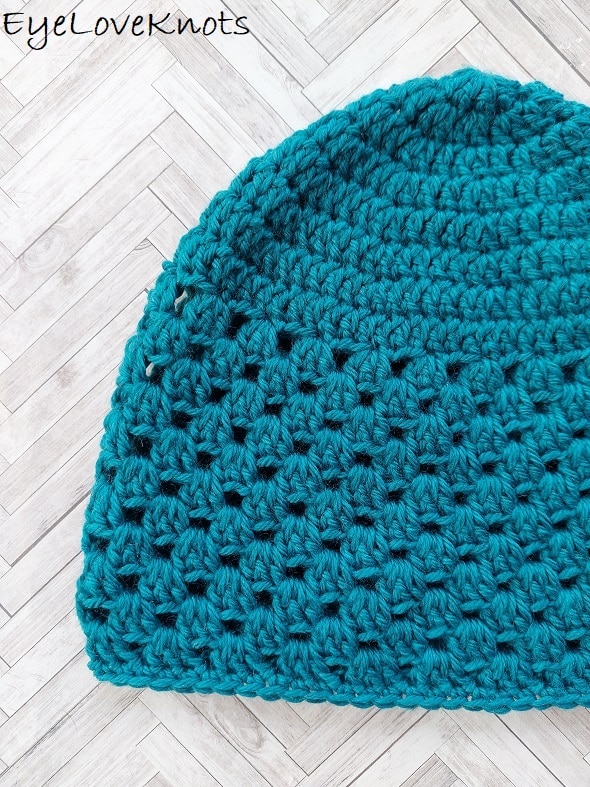
Chain 4. Join to form a ring. Chain 2. 10 DC into the ring. Join. (10 DC)
R2: Chain 2. Work 1 DC into the first stitch, 2 DC in each of the next 9 DCs, and 1 DC into the last stitch. Join. (20 DC)
R3: Chain 2. Work 1 DC into the first 2 stitches, (2 DC into the next stitch, 1 DC into the next stitch) 9x, 1 DC into the last stitch. Join. (30 DC)
R4: Chain 2. Work 1 DC into the first 3 stitches, (2 DC into the next stitch, 1 DC into each of the next 2 stitches) 9x, 1 DC into the last stitch. Join. (40 DC)
R5: Chain 2. Work 1 DC into the first 4 stitches, (2 DC into the next stitch, 1 DC into each of the next 3 stitches) 9x, 1 DC into the last stitch. Join. (50 DC)
R6: Chain 2. Work 1 DC into the first 5 stitches, (2 DC into the next stitch, 1 DC into each of the next 4 stitches) 9x, 1 DC into the last stitch. Join. (60 DC)
R7: Chain 2. Work 1 DC into the first 6 stitches, (2 DC into the next stitch, 1 DC into each of the next 5 stitches) 9x. Join. (69 DC)
R8: Chain 2 (counts as a DC). Work 1 DC into the 2nd DC, and into each DC around. Join to the top of the beginning chain 2. (69 DC)
R9: Chain 2. Work 2 DC into the same DC, skip 2 DC, (3 DCs into the next DC, skip 2 DC) around. Join. (23 clusters)
R10 – 19: Slip stitch over 1 DC, then slip stitch underneath the next DC into the space created by skipped stitches. Chain 2. Work 2 DC into the same space, skip the next cluster, (3 DC into the next space in between clusters, skip the next cluster) around. Join to the 1st DC in each round except for the last round, join to the beginning chain 2. (23 clusters)
R20: Chain 1, SC in the 1st DC, and in each DC around. Join. (69 SC)
Fasten Off, and Weave in Ends.
Grace Tinley Beanie Video Tutorial, Adult Large Size:
Grace Tinley Beanie Written Pattern, Adult Large Size:
Chain 4. Join to form a ring. Chain 2. 11 DC into the ring. Join. (11 DC)
R2: Chain 2. Work 1 DC into the first stitch, 2 DC in each of the next 10 DCs, and 1 DC into the last stitch. Join. (22 DC)
R3: Chain 2. Work 1 DC into the first two stitches, (2 DC into the next stitch, 1 DC into the next stitch) 10x, 1 DC into the last stitch. Join. (33 DC)
R4: Chain 2. Work 1 DC into the first three stitches, (2 DC into the next stitch, 1 DC into each of the next 2 stitches) 10x, 1 DC into the last stitch. Join. (44 DC)
R5: Chain 2. Work 1 DC into the first four stitches, (2 DC into the next stitch, 1 DC into each of the next 3 stitches) 10x, 1 DC into the last stitch. Join. (55 DC)
R6: Chain 2. Work 1 DC into the first five stitches, (2 DC into the next stitch, 1 DC into each of the next 4 stitches) 10x, 1 DC into the last stitch. Join. (66 DC)
R7: Chain 2. Work 1 DC into the first six stitches, (2 DC into the next stitch, 1 DC into each of the next 5 stitches) 10x, 1 DC into the last stitch. Join. (77 DC)
R8: Chain 2 (counts as a DC). Work 1 DC into the 1st DC, and into each DC around. Join to the top of the beginning chain 2. (78 DC)
R9: Chain 2. Work 2 DC into the same DC, skip 2 DC, (3 DCs into the next DC, skip 2 DC) around. Join. (26 clusters)
R10 – 19 (22): Slip stitch over 1 DC, then slip stitch underneath the next DC into the space created by skipped stitches. Chain 2. Work 2 DC into the same space, skip the next cluster, (3 DC into the next space in between clusters, skip the next cluster) around. Join to the 1st DC in each round except for the last round, join to the beginning chain 2. (26 clusters)
R20 (23): Chain 1, SC in the 1st DC, and in each DC around. Join. (78 SC)
Fasten Off, and Weave in Ends.
Please feel free to make and sell your own Grace Tinley Beanie, but please DO NOT claim this pattern as your own nor should you sell my pattern, and DO NOT re-publish my photos as your own. DO NOT copy and paste my pattern anywhere, link to it instead.
Join one of our awesome Facebook groups to share your creations, and see what others are up to!
– EyeLoveKnots Crochet & DIY Community
– DIY Home On Rockwood Lane
– Alexandra Lane Lifestyle
Linked Up To…
Ginx Woolly Linx Party May – Ginx Craft
Loop Scoop #14 – Moogly Blog
Craftastic Monday Link Party – Sew Can Do
{Wow Me} Wednesday #505 – Ginger Snap Crafts
Creative Crafts #42 – Creatively Beth
The Wednesday Link Party – Oombawka Design
Craft Schooling Sunday – Creative Jewish Mom
Happiness is Homemade #375 – Decor Craft Design
Handmade Monday #228 – Sum of their Stories
The Really Crafty Link Party #267 – Keeping it Real
Creatively Crafty Link Party #276 – Life Beyond the Kitchen
Artsy-Fartsy Party #345 – Artsy-Fartsy Mama
You’re the Star Blog Hop – Decor Craft Design
Unlimited Link Party 26 – Grammy’s Grid
The Hearth and Soul Link Party – April, the 21st Century Housewife
590th Inspire Me Tuesday – A Stroll Thru Life
Fabulous Party 372 – Lou Lou Girls
Your Whims Wednesday #512 – My Girlish Whims
Thursday Favorite Things #490 – An Artful Mom
Encouraging Hearts & Home Blog Hop – Scratch Made Food
Traffic Jam Weekend Linky Party #282 – My Bijou Life
Friday Favorites – Busy Being Jennifer
Funtastic Friday Link Party #333 – Simply Beautiful by Angela
A Morning Cup of Joe – The Cottage Market
Snickerdoodle Create Bake Make Link Party 386 – EyeLoveKnots
Linky Ladies Party #218 – The Purple Poncho
The Loop Scoop #26 – Moogly Blog
Craftastic Monday Link Party – Sew Can Do
{Wow Me} Wednesday #531 – Ginger Snap Crafts
The Wednesday Link Party 425 – Oombawka Design
Saturday Sparks Link Party 449 – Pieced Pastimes
Team Creative Crafts Linky Party #68 – Artsy-Fartsy Mama
Grace at Home No. 446 – Imparting Grace
Create, Bake, Grow & Gather Party #495 – Shabby Art Boutique
Craft Schooling Sunday – Creative Jewish Mom
Ginx Woolly Linx Party November – Ginx Craft
Handmade Monday #254 – Sum of their Stories
The Really Crafty Link Party #290 – Keeping it Real
Creatively Crafty Link Party #302 – Life Beyond the Kitchen
Funtastic Friday Link Party #359 – Simply Beautiful by Angela
Happiness is Homemade #401 – Decor Craft Design
Unlimited Link Party 61 – Grammy’s Grid
You’re the Star Blog Hop – Decor Craft Design
Link-Up Potpourri #18 – My Bijou Life
614th Inspire Me Tuesday – A Stroll Thru Life
Fabulous Party 398 – Lou Lou Girls
Spread the Kindness Link Up #249 – Shelbee on the Edge
Wonderful Wednesday – Oh My Heartsie Girl
Thursday Favorite Things Link Party #516 – An Artful Mom
Encouraging Hearts and Home Blog Hop – Slices of Life
Traffic Jam Weekend Link Party #302 – My Bijou Life
One More Row Free Crochet Link Party #39 – Loops and Love Crochet
What's the min number of stitches for the repeat I want. To make this adult sized
I made one for myself with a crown of 6.75". Following the same gauge and using the same hook and yarn, I began with 12 DC in the beginning ring, and increased up to 72 before beginning the granny square pattern. I did work it a touch differently. I have my updated adult size hat pattern in draft to share this week 🙂
Do you offer an adult sizes pattern for this hat?
I have not yet shared it on my blog, but do have it available in my Craftsy and Etsy shops.
https://www.etsy.com/listing/261432946/crochet-pattern-womens-granny-square
You can also find notes in the comment above for starting an adult size.
Do you have a child size pattern for this hat? I want to make it for my 5 year old.
Are you on Ravelry? If so, please send me your info either here or email – [email protected]. 🙂
I don’t understand how to do row six can you help me?
Sure, what part is giving you trouble?
Hello,
I am making a mistake on the granny baby hat 3 to 6 months. i have 48 stitches on round 4, but
have 18 clusters on round 5. Any help on this is appreciated.
Somewhere you are adding two extra clusters, which either means you have more than 48 stitches, or maybe you aren’t skipping enough stitches when working the stitch pattern. The granny stitch pattern is in groups of three (cluster in one stitch, skip next two) so maybe visually go around the hat, and check placement before working the stitches. Also counting out loud helps me sometimes when I am having trouble with stitch placement.
I used Alpaca. No allergies using this fiber. Thank you for the pattern and clear instructions.
Happy you enjoyed it! Alpaca is a lovely fiber too.
Those are so adorable, Alexandra. I’ll be featuring them tomorrow at TFT. Congrats!
That’s awesome! Thanks so much!!
Can you make this in a preemie size?
You can make any beanie in a preemie size by adjusting the crown to meet the diameter that you need, and then begin the body of the hat, and work to your desired length. There are 4 preemie sizes so I definitely checking the size you need.
Thank you for your reply! Our prayer shawl group was just asked if we would make hats and blankets to be used by a photographer for the families of babies that are stillborn. They’ll be anywhere from preemie to fullterm. I don’t know where to start but this looks like a good pattern to pair with a granny square blanket.
This warms my heart to hear! I used to make hats for an organization called The Preemie Project – they no longer take donations, and I’ve had trouble finding hospitals that would be interested in donations. I have a few hat patterns I designed using the measurements they had once provided based on what hospitals requested, including a worsted weight granny stitch beanie. Preemie hats are made based on the weight of the baby with the largest size here being for a newborn.
– Granny Stitch Beanie: https://eyeloveknots.com/2017/02/chunky-like-preemie-granny-square.html
– DC Beanie: https://eyeloveknots.com/2017/03/chunky-like-preemie-baby-beanies-4.html
– DK Weight V Stitch Beanie: https://eyeloveknots.com/2018/03/lightweight-v-stitch-preemie-beanies.html
Thanks, very good instruction swill be my next project.
So glad you like it! Happy crocheting 🙂
Thank you xx
So welcome 🙂
The Grace Tinley Beanie is really pretty and using the Granny Stitch gives it a vintage crochet feel (I love vintage!). Thank you for linking up at our weekly Link Party! You are being featured at our Wednesday Party #426 this week. Here’s the direct link to the post in case you’d like to share your feature:
https://oombawkadesigncrochet.com/2021/11/scandinavian-gnomes-grace-tinley-beanie-christmas-creatures-party-426.html
Hope to see you again next week! Rhondda
Yes! There is something special about working in the granny stitch pattern. Thanks so much! Just linked up 🙂
I can hardly wait to try this pattern. My 8 year old granddaughter is named Tinley Grace.
That’s awesome! What a beautiful name. I would love to see your beanie if you get a chance to work it up, and feedback on the Pattern is always appreciated.
I actually made 3 beanies. One for Tinley Grace. One for her newborn cousin, Alice. And animal for her next newborn cousin, Sarah. I wanted to send you a picture I took of Tinley and Alice at Christmas with their matching pink beanies. Not sure how.
Just sent you an email 🙂
I’ve had trouble with each, they end up to large. I look at the three month, and it looks like 3rows to start, then tge granny stitch starts, which is not what the written pattern is. All end up to big. Top to bottom, and the circumference to.
Not sure what to do.
The samples are made in newborn and adult small. They’re just examples in the post, follow the written instructions for the correct pattern.
Gauge is essential for beanies, did you take gauge? There are also checkpoints in the measurements section for the crown diameter. If you aren’t meeting this diameter, the finished size will not be correct.
Hi! I just made myself the Adult Large size and it turned out perfectly! Thank you for the pattern. I’d like to crochet another one in Adult Small and noticed that it’s the same size as the Child size? Is this correct?
If I wanted to make the Adult Small a tad bigger (maybe 72 or 75 stitches before the granny stitches), how would I increase after round 7? I’m not too gifted at math! Thank you.
I’m so happy to hear! Child (age 3 and up) and Adult Small size are the same head circumference, but different lengths. There is only 1″ different in the head circumference from this size and the Adult Large, and with the 2″ of stretch from the yarn, I wouldn’t change anything. If you really want to, increase as normal in Round 7 to get 70 stitches, then increase two times in Round 8 to add two more stitches to get 72 – once in the beginning, and once halfway.
I need to know the finished dimensions of the crown and of the hat from top to bottom, please.
Definitely! You’ll find that information in the Measurements section.