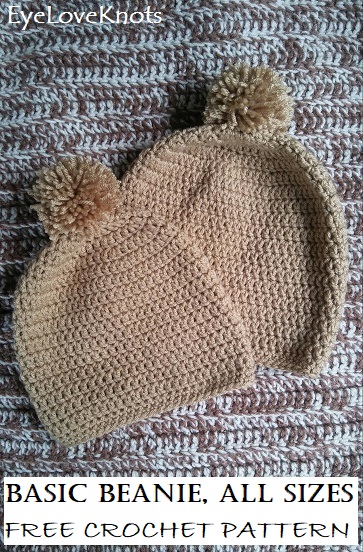
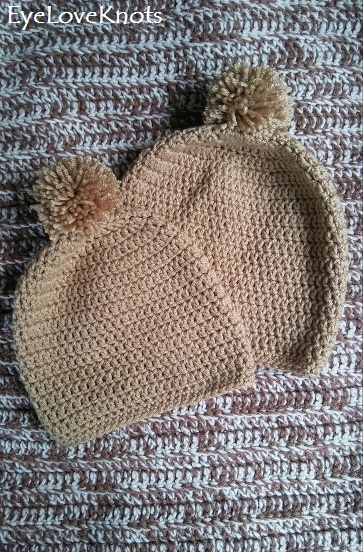
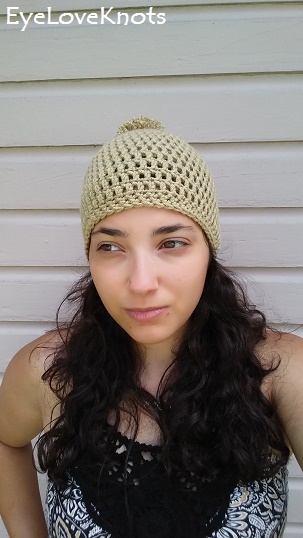
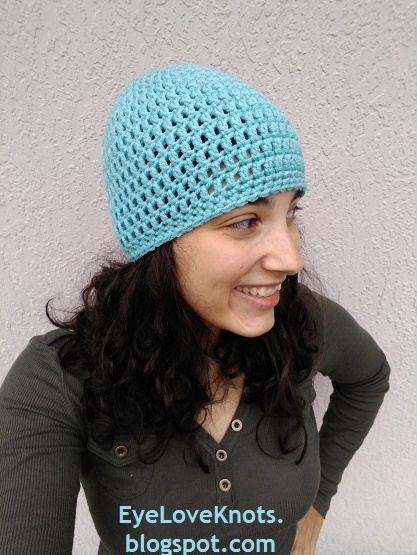
This is a free crochet pattern for how-to crochet my Basic Beanie in 7 sizes from Newborn through Adult Large!
This post contains affiliate links for LoveCrafts & Lion Brand Yarns. If you make a purchase by clicking on them, I make a small commission at no extra cost to you. Thanks for your support!

07.27.17 Complete Update: I originally posted this back in October of 2014, and have since gotten a better hold on working beanies, and have come with a better set pattern for each size. There are a lot of other great patterns out there, but this is my own, created over many hours and seatings, worked and settled with my own tension and gauge. Everyone crochets a little bit differently, but the great thing about acrylic yarn, and these beanies though is that the sizes will stretch to fit a range of sizes. Another great thing I’ve discovered is that with the I9/5.5mm hook, each round worked increases by 1″ in size, so it’s easy to determine ahead of time if the crown size works out – Check after Round 3 to see if you are on the right path.
Keep in mind that different yarns will work up a little bit differently in the sizing. This particular pattern was written using all Hobby Lobby’s I Love This Yarns because this is one of the yarns that I use the most. Working with other worsted weight yarns could produce a slightly smaller or larger product so make sure to check your gauge! And if you need to make an adjustment to better meet the crown size, I would recommend starting by simply adding or subtracting one stitch from the first round.
If you would like a PDF version of this post, you may get one through either my EyeLoveKnots Etsy Shop, Ravelry or LoveCrafts Shop for a small fee. This fee is to compensate for the views lost when you no longer need to return to the blog to for the information, as you will have your own copy. Plus! It helps fund supplies for new projects to share with you!
Shop EyeLoveKnots Etsy: Basic Beanie, All Sizes.
Shop EyeLoveKnots LoveCrafts: Basic Beanie, All Sizes.
Are you a Raveler? Share your version of this project on Ravelry – Basic Beanie, All Sizes.

Want to add a fun Pom Pom to the top of your beanie? Visit my Women’s Basic Beanie Pattern to see how!
Materials:
- 75 – 195 Yards of Worsted Weight Yarn – I used Hobby Lobby’s I Love This Yarn in Taupe
- I9/5.5mm Crochet Hook
- Tapestry Needle for Weaving in Ends
Material Notes:
Yarn Alternatives: Berroco’s Vintage Yarn, Lion Brand’s Wool Ease or Red Heart’s With Love.
With one 7 oz (355 yards) skein of I Love This Yarn, I was able to work up a Toddler, Child, Adult Small and Large size with one pom pom on the top, and still had a small amount left.
Time Spent:
Times range from 30 minutes to two hours.
Sizes/Measurements:
The Newborn Size has a crown of 4.25″ in diameter, a circumference of nearly 13.5″ to fit a head size of 13″-14″, and is 5″ in length.
The 3-6 Month Size has a crown of 4.75″ in diameter, a circumference of nearly 15″ to fit a head size of 15″-16″, and is 5.25″ in length.
The 6-12 Month Size has a crown of 5.5″ in diameter, a circumference of nearly 17.5″ to fit a head size of 17″-19″, and is 5.75″ in length.
The Toddler Size has a crown of 5.75″ in diameter, a circumference of 18″ to fit a head size of 18-20″, and is 6.5″ in length.
The Child Size – Teen/Adult Small Size has a crown of 6.25″ in diameter, a circumference of nearly 19.75″ to fit a head size of 20-22″, and is 7″ – 8.5″ in length.
The Adult Large Size has a crown of 6.75″ in diameter, a circumference of nearly 21.25″ to fit a head size of 22-23″, and is about 8.5″ – 9.5″ in length.
*If you are concerned with the size (or want to make a different size), take your tape measure out and measure around your head just above your eyebrows. The distance around is the circumference. If it does not fall in the circumference range of [Example: 20-22″ for Adult Small], you will need to use this equation to figure out what size diameter you will need: Your Circumference / 3.14 (pi) = crown diameter
Gauge:
14 DC by 8 Rows = 4″
Abbreviations:
- SC – Single Crochet
- HDC – Half Double Crochet
- DC – Double Crochet
Pattern Notes:
I work my crown and body differently than most to help keep my seam straight, and it will be written as such.
In the crown, the beginning chain 2 does not count as a stitch, but in the body, the chain 2 does count.
Join to the first stitch, not the beginning chain 2.
If you need some help working one of these beanies, I have a step by step photo tutorial in my Women’s Basic Beanie post, and I even explain how to make a fun pom pom to embellish the top of the beanie with!
Patterns:
Newborn:
Chain 4. Join to form a ring. Chain 1. 9 HDC into the ring. Join. (9 HDC)
R2: Chain 2. Work 1 DC into the first stitch, 2 DC in each of the next 8 DCs, and 1 DC into the last stitch. Join. (18 DC)
R3: Chain 2. Work 1 DC into the first two stitches, (2 DC into the next stitch, 1 DC into the next stitch) 8x, 1 DC into the last stitch. Join. (27 DC)
R4: Chain 2. Work 1 DC into the first three stitches, (2 DC into the next stitch, 1 DC into each of the next 2 stitches) 8x, 1 DC into the last stitch. Join. (36 DC)
R5: Chain 2. Work 1 DC into the second DC, and each DC around. Join. (36 DC)
R6: Chain 2. Work 1 DC into the first DC, and each DC around. Join. (36 DC)
R7: Chain 2. Work 1 DC into the second DC, and each DC around. Join. (36 DC)
R8 – 10: Repeat Rounds 6 and 7, ending with a Round 6.
R11: Chain 1. 1 SC into the first stitch, & each stitch around. Join. (36 SC)
3 – 6 Months:
Chain 5. Join to form a ring. Chain 2. 11 DC into the ring. Join. (11 DC)
R2: Chain 2. Work 1 DC into the first stitch, 2 DC in each of the next 10 DCs, and 1 DC into the last stitch. Join. (22 DC)
R3: Chain 2. Work 1 DC into the first two stitches, (2 DC into the next stitch, 1 DC into the next stitch) 10x, 1 DC into the last stitch. Join. (33 DC)
R4: Chain 2. Work 1 DC into the first three stitches, (2 DC into the next stitch, 1 DC into each of the next 2 stitches) 10x, 1 DC into the last stitch. Join. (44 DC)
R5: Chain 2. Work 1 DC into the second DC, and each DC around. Join. (44 DC)
R6: Chain 2. Work 1 DC into the first DC, and each DC around. Join. (44 DC)
R7: Chain 2. Work 1 DC into the second DC, and each DC around. Join. (44 DC)
R8 – 10: Repeat Rounds 6 and 7.
R11: Chain 1. 1 SC into the first stitch, & each stitch around. Join. (44 SC)
6 – 12 Months:
Chain 4. Join to form a ring. Chain 2. 10 DC into the ring. Join. (10 DC)
R2: Chain 2. Work 1 DC into the first stitch, 2 DC in each of the next 9 DCs, and 1 DC into the last stitch. Join. (20 DC)
R3: Chain 2. Work 1 DC into the first two stitches, (2 DC into the next stitch, 1 DC into the next stitch) 9x, 1 DC into the last stitch. Join. (30 DC)
R4: Chain 2. Work 1 DC into the first three stitches, (2 DC into the next stitch, 1 DC into each of the next 2 stitches) 9x, 1 DC into the last stitch. Join. (40 DC)
R5: Chain 2. Work 1 DC into the first four stitches, (2 DC into the next stitch, 1 DC into each of the next 3 stitches) 9x, 1 DC into the last stitch. Join. (50 DC)
R6: Chain 2. Work 1 DC into the second DC, and each DC around. Join. (50 DC)
R7: Chain 2. Work 1 DC into the first DC, and each DC around. Join. (50 DC)
R8: Chain 2. Work 1 DC into the second DC, and each DC around. Join. (50 DC)
R9 – 11: Repeat Rounds 7 and 8, ending with a Round 7.
R12: Chain 1. 1 SC into the first stitch, & each stitch around. Join. (50 SC)
Toddler, 1 – 3 Years:
Chain 5. Join to form a ring. Chain 2. 11 DC into the ring. Join. (11 DC)
R2: Chain 2. Work 1 DC into the first stitch, 2 DC in each of the next 10 DCs, and 1 DC into the last stitch. Join. (22 DC)
R3: Chain 2. Work 1 DC into the first two stitches, (2 DC into the next stitch, 1 DC into the next stitch) 10x, 1 DC into the last stitch. Join. (33 DC)
R4: Chain 2. Work 1 DC into the first three stitches, (2 DC into the next stitch, 1 DC into each of the next 2 stitches) 10x, 1 DC into the last stitch. Join. (44 DC)
R5: Chain 2. Work 1 DC into the first four stitches, (2 DC into the next stitch, 1 DC into each of the next 3 stitches) 10x, 1 DC into the last stitch. Join. (55 DC)
R6: Chain 2. Work 1 DC into the second DC, and each DC around. Join. (55 DC)
R7: Chain 2. Work 1 DC into the first DC, and each DC around. Join. (55 DC)
R8: Chain 2. Work 1 DC into the second DC, and each DC around. Join. (55 DC)
R9 – 12: Repeat Rounds 7 and 8.
R13 – 14: Chain 1. 1 SC into the first stitch, & each stitch around. Join. (55 SC)
Child, 4 – 12 Years:
Chain 4. Join to form a ring. Chain 2. 9 HDC into the ring. Join. (9 HDC)
R2: Chain 2. Work 1 DC into the first stitch, 2 DC in each of the next 8 DCs, and 1 DC into the last stitch. Join. (18 DC)
R3: Chain 2. Work 1 DC into the first two stitches, (2 DC into the next stitch, 1 DC into the next stitch) 8x, 1 DC into the last stitch. Join. (27 DC)
R4: Chain 2. Work 1 DC into the first three stitches, (2 DC into the next stitch, 1 DC into each of the next 2 stitches) 8x, 1 DC into the last stitch. Join. (36 DC)
R5: Chain 2. Work 1 DC into the first four stitches, (2 DC into the next stitch, 1 DC into each of the next 3 stitches) 8x, 1 DC into the last stitch. Join. (45 DC)
R6: Chain 2. Work 1 DC into the first five stitches, (2 DC into the next stitch, 1 DC into each of the next 4 stitches) 8x, 1 DC into the last stitch. Join. (54 DC)
R7: Chain 2. Work 1 DC into the second DC, and each DC around. Join. (54 DC)
R8: Chain 2. Work 1 DC into the first DC, and each DC around. Join. (54 DC)
R9: Chain 2. Work 1 DC into the second DC, and each DC around. Join. (54 DC)
R10 – 13: Repeat Rounds 8 and 9.
R14 – 15: Chain 1. 1 SC into the first stitch, & each stitch around. Join. (54 SC)

Teen/Adult Small:
Chain 4. Join to form a ring. Chain 2. 9 HDC into the ring. Join. (9 HDC)
R2: Chain 2. Work 1 DC into the first stitch, 2 DC in each of the next 8 DCs, and 1 DC into the last stitch. Join. (18 DC)
R3: Chain 2. Work 1 DC into the first two stitches, (2 DC into the next stitch, 1 DC into the next stitch) 8x, 1 DC into the last stitch. Join. (27 DC)
R4: Chain 2. Work 1 DC into the first three stitches, (2 DC into the next stitch, 1 DC into each of the next 2 stitches) 8x, 1 DC into the last stitch. Join. (36 DC)
R5: Chain 2. Work 1 DC into the first four stitches, (2 DC into the next stitch, 1 DC into each of the next 3 stitches) 8x, 1 DC into the last stitch. Join. (45 DC)
R6: Chain 2. Work 1 DC into the first five stitches, (2 DC into the next stitch, 1 DC into each of the next 4 stitches) 8x, 1 DC into the last stitch. Join. (54 DC)
R7: Chain 2. Work 1 DC into the second DC, and each DC around. Join. (54 DC)
R8: Chain 2. Work 1 DC into the first DC, and each DC around. Join. (54 DC)
R9: Chain 2. Work 1 DC into the second DC, and each DC around. Join. (54 DC)
R10 – 16: Repeat Rounds 8 and 9, ending with a Round 8.
R17 – 18: Chain 1. 1 SC into the first stitch, & each stitch around. Join. (54 SC)
Adult Large:
Chain 5. Join to form a ring. Chain 2. 11 DC into the ring. Join. 11 DC)
R2: Chain 2. Work 1 DC into the first stitch, 2 DC in each of the next 10 DCs, and 1 DC into the last stitch. Join. (22 DC)
R3: Chain 2. Work 1 DC into the first two stitches, (2 DC into the next stitch, 1 DC into the next stitch) 10x, 1 DC into the last stitch. Join. (33 DC)
R4: Chain 2. Work 1 DC into the first three stitches, (2 DC into the next stitch, 1 DC into each of the next 2 stitches) 10x, 1 DC into the last stitch. Join. (44 DC)
R5: Chain 2. Work 1 DC into the first four stitches, (2 DC into the next stitch, 1 DC into each of the next 3 stitches) 10x, 1 DC into the last stitch. Join. (55 DC)
R6: Chain 2. Work 1 DC into the first five stitches, (2 DC into the next stitch, 1 DC into each of the next 4 stitches) 10x, 1 DC into the last stitch. Join. (66 DC)
R7: Chain 2. Work 1 DC into the second DC, and each DC around. Join. (66 DC)
R8: Chain 2. Work 1 DC into the first DC, and each DC around. Join. (66 DC)
R9: Chain 2. Work 1 DC into the second DC, and each DC around. Join. (66 DC)
R10 – 18: Repeat Rounds 8 and 9, ending with a Round 8.
R19 – 20: Chain 1. 1 SC into the first stitch, & each stitch around. Join. (66 SC)

Please feel free to make and sell your own Basic Beanies using this pattern, but please DO NOT claim this pattern as your own nor should you sell my pattern, and DO NOT re-publish my photos as your own. DO NOT copy and paste my pattern anywhere, link to it instead.
Join the EyeLoveKnots Crafting Community on Facebook to share your creations, and see what others are up to!
Linked Up To…
Creative Collection Link Party – The Cards We Drew / Blooming Homestead
Kitchen Fun and Crafty Friday #136 – Kitchen Fun with my 3 Sons
Craft Schooling Sunday – Creative Jewish Mom
Your Whims Wednesday #184 – My Girlish Whims
Think Pink Sunday #187 – Flamingo Toes
Creative Pumpkin Crafts I’m Lovin’ It – Tidy Mom
The Handmade Hangout #18 – Too Much Time on my Hands
I wanted to let you know, your 3-6 month pattern has a typo with the stitch count starting at round 5!! It should say 55 and not 44. I thought I was doing something wrong, but i counted again! 🙂
Thanks so much for letting me know! Just fixed. Sorry to have confused you.