Learn how to crochet an easy patriotic hand towel using simple half double crochet stitches, and red, white and blue stars that is perfect for an Americana themed house or Farmhouse 4th of July, or change the colors of the stars for Christmas and New Years!
This post contains affiliate links. If you make a purchase by clicking on them, I make a small commission at no extra cost to you. I only recommend products I love and hope you’ll love them too! Click here to find out about the different affiliate programs I am apart of. This post also contains shop links to my yarn shop and craft store, Yarn Crafts & Coffee. You can shop online or in person in Melbourne, Florida.
Find the free crochet pattern instructions below, or purchase a printer-friendly, ad-free PDF on Ravelry by clicking here.
In a hurry? Pin this for later.

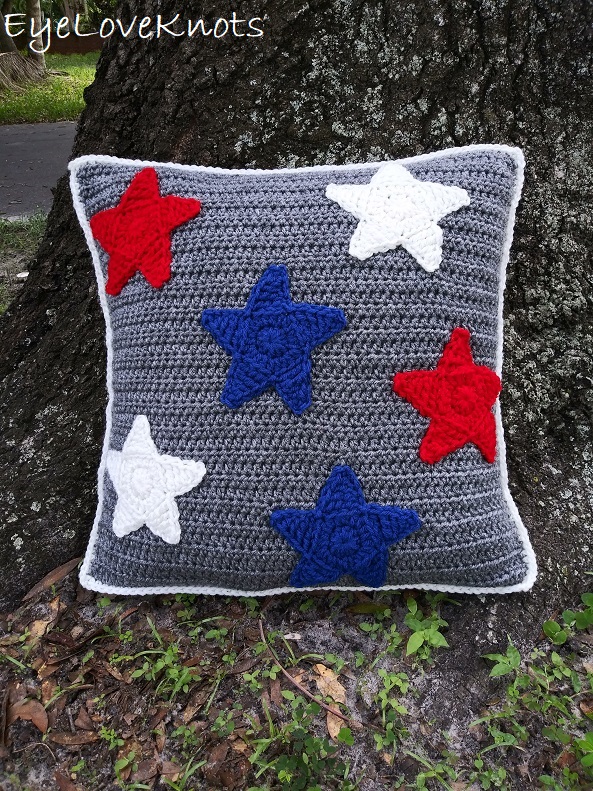
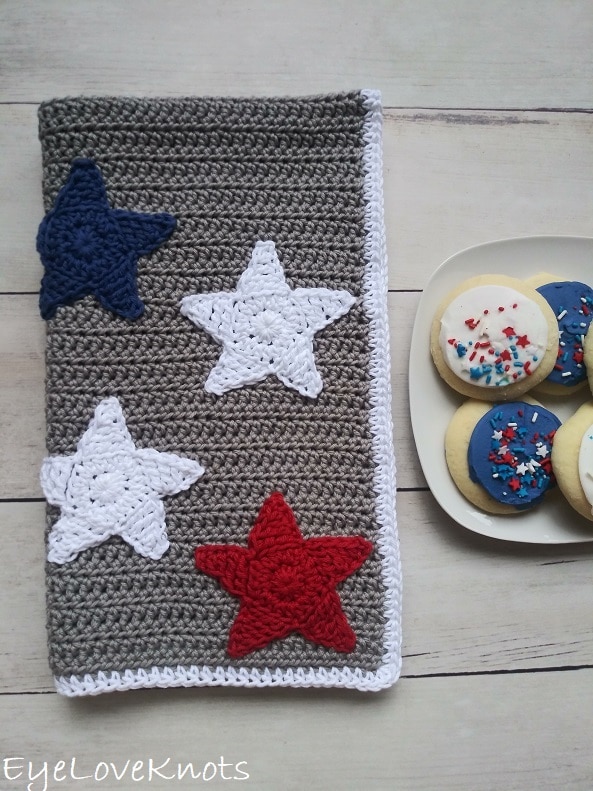
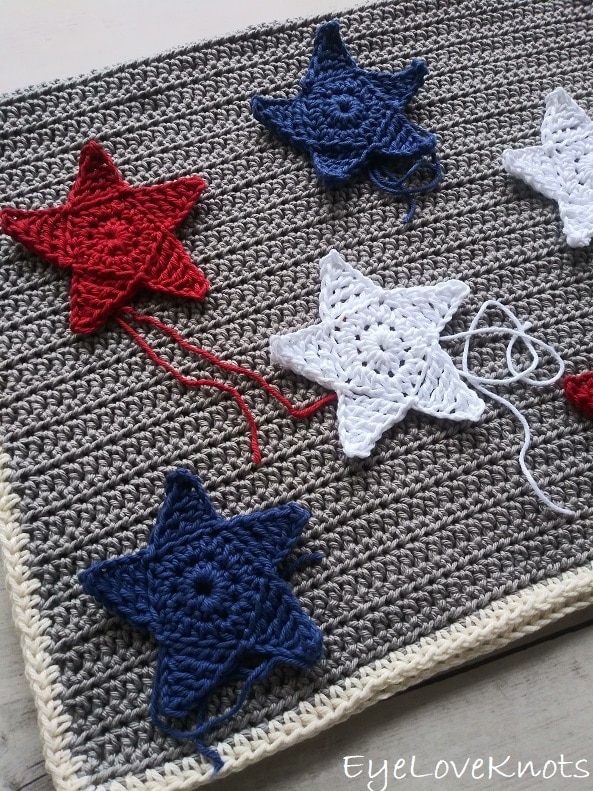
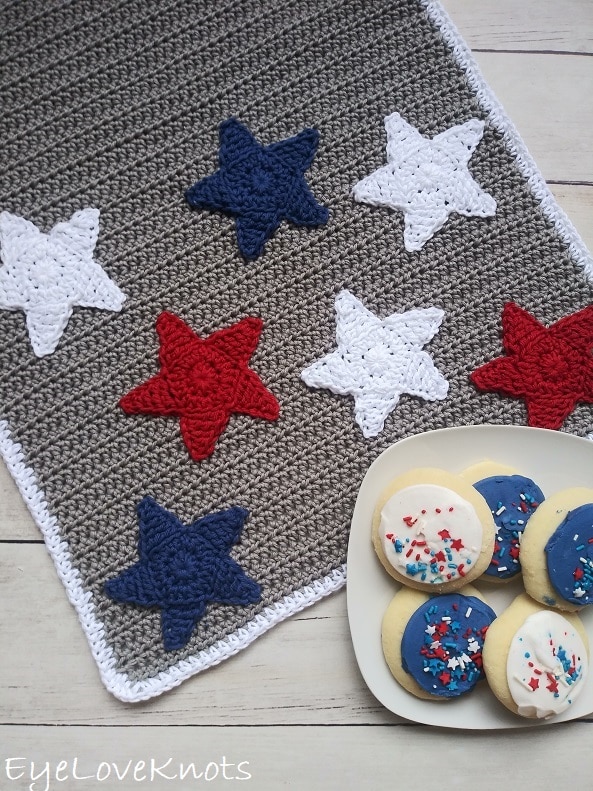
I like to share a few 4th of July projects in June. This year, I’m sharing a hand towel inspired by the Seeing Stars Throw Pillow I shared last year.
Like the throw pillow, this hand towel starts with an easy base of simple half double crochets, but you could make the hand towel in any stitch pattern, and sew stars on.
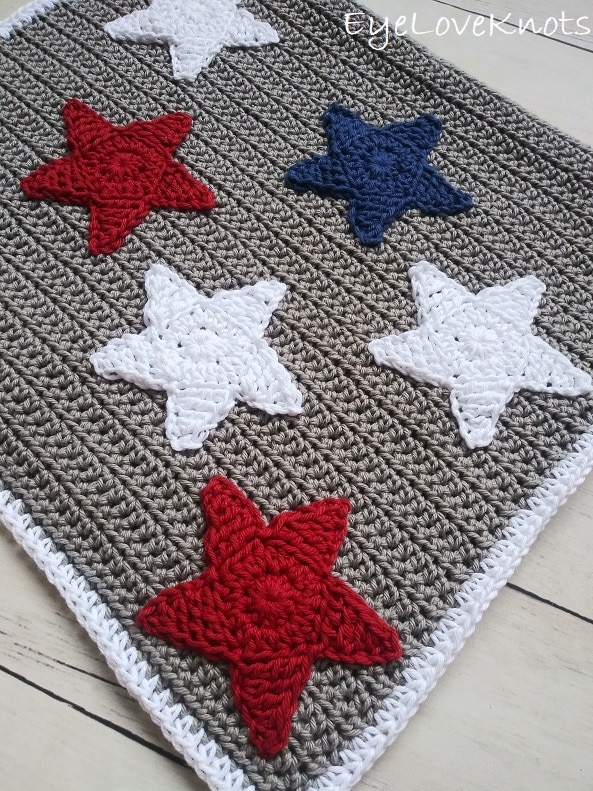
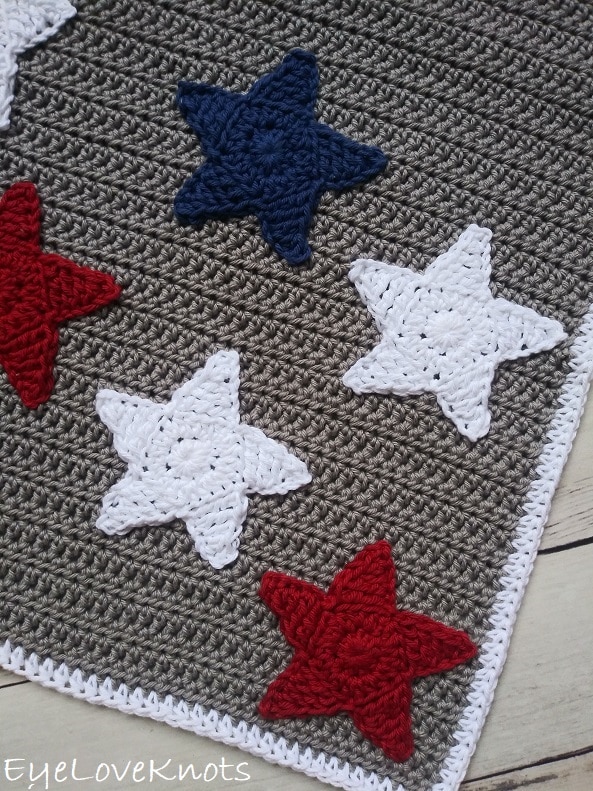
I only attached stars on half of the hand towel though so it could be reversible.
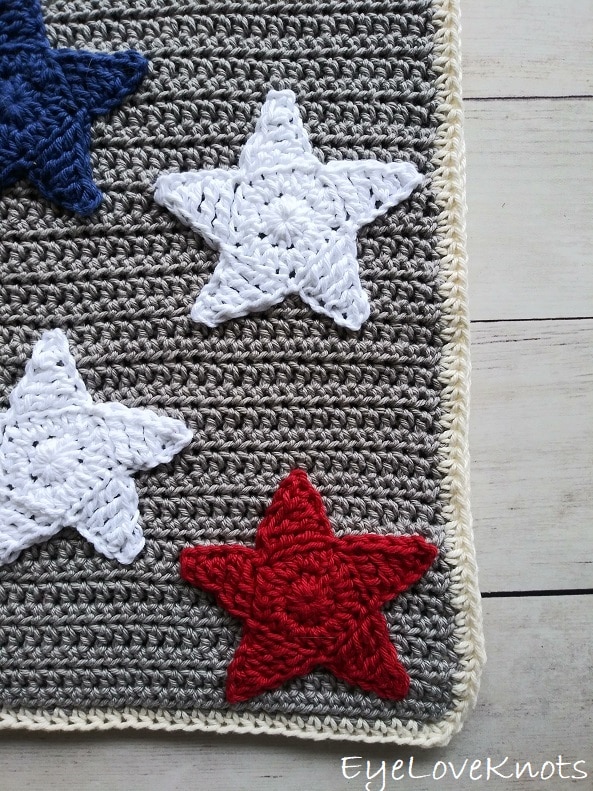
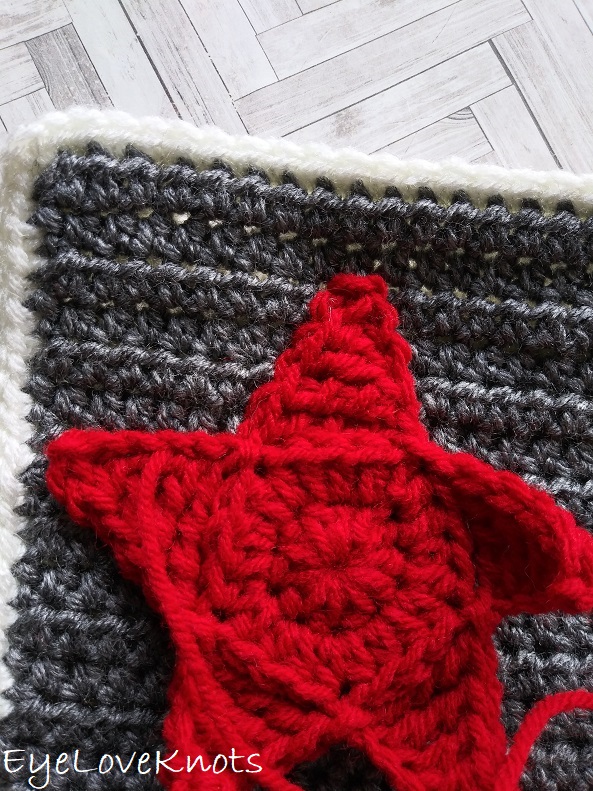
One mistake I made was working my original Haylee Hand Towel in gray with a CREAM border. When I went to sew on one of the white stars, I realized the clash of colors, so I ended up redoing the border.

So much better!
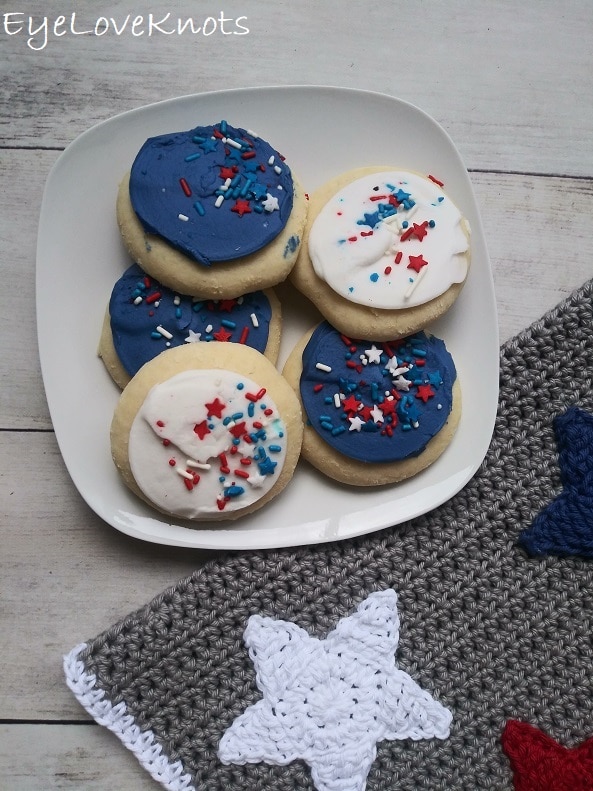
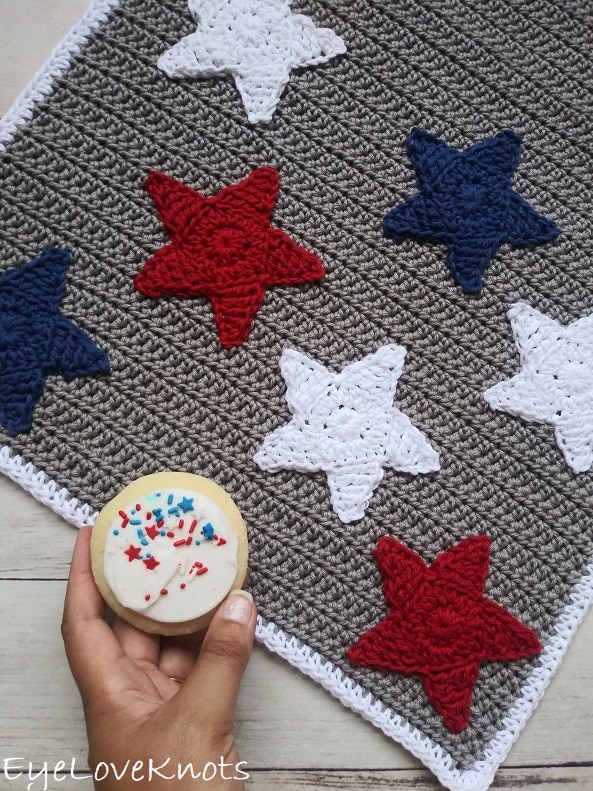
Saw these delicious Lofthouse cookies, and thought they were fitting.
You Might Like These 4th of July Crochet Patterns:
Ad-Free, Printer Friendly PDF:

05/07/26 at 10am EST through 05/08/26 at 11:59pm EST, you can grab a free copy of the PDF for the Seeing Stars Hand Towel on Ravelry using code DISHTOWEL26 I earn my income from the number of pageviews my blog sees, so please do not share the code, but instead share the link to this post so others can find it. Thank you!
After or for non-subscribers, if you would like a PDF version of this post, you may get one through either my Etsy Shop, LoveCrafts Shop or Ravelry Shop for a small fee. This fee is to compensate for the views lost when you no longer need to return to the blog to for the information, as you will have your own copy. Make sure to pin this for later.


Save this to your Favorites On: AllFreeCrochet, FaveCrafts, AllFreeHolidayCrafts, Cheap Thrifty Living, DIYideaCenter and Crochet Pattern Bonanza
Materials:
- Worsted Weight (#4) Cotton Yarn – I used WeCrochet Dishie: 380 Yards of Silver, 42 Yards of White, 11 Yards of Fiesta Red and 11 Yards of Blue
- H8/5mm Crochet Hook
- Tapestry Needle and Scissors
- Optional, Jewelry Pliers and Sewing Pins
Material Notes:
I love using Circulo Natural Cotton Maxcolor 4/6, WeCrochet Dishie and Queensland Coastal Cotton because they’re colorfast, which means the colors are set so I don’t have to worry about the colors fading or bleeding when using or washing the project.
We have lots of great crochet hooks in our Yarn Crafts and Coffee Yarn Shop. The most popular, and preferred by Candace and Emily, are the Clover Amour Crochet Hooks with the soft handles and smooth metal hook. Alexandra prefers metal crochet hooks with large, ergonomic clay handles and just loves the fun designs from SiennasBowtique and BronzeShepherdStudio! If your preference is wood, the LYKKE brand are lovely, smooth and sturdy.
Tapestry Needles with the blunt, round end are essential for sewing and finishing on a number of yarn crafts, including crocheting, knitting as well as needlepointing on fabric and plastic canvas. The blunt, rounded end allows the needle to pass easily through the fabric created by yarn and holes on canvas without snagging (or getting your fingers) in the process. More specifically for crocheting and knitting, a Bent Tip Tapestry Needle makes weaving, grafting and sewing so much easier on the hands. The long oval eye makes threading strands of yarn easier, though you may still want to use a needle threader.
Scissors are an essential tool. When I’m working on the go, I like to carry a pair of folding scissors as they fit perfectly in even the tiniest of bags. When I am working at home or have more space in my bag for a larger notions pouch, I like to use a pair of lightweight, all-purpose scissors as they are so versatile and great for a variety of things from cutting plastic canvas mesh to trimming yarn ends after weaving in to cutting out a care card to include with a handmade gift.
Jewelry Pliers are an excellent tool to use to help weave in the ends of tough yarns, such as cotton yarns and chunkier yarns, that can be quite tough on the fingers when weaving in with just fingers and a tapestry needle. Sore thumbs and frustration can be a thing of the past by simply using jewelry pliers to help pull the tapestry needle through the work. Make sure the eye of the needle is facing up so you can see directly down it and carefully pull, wiggling as needed. If it gets caught and you tug too hard, it will break the eye of your needle.
45mm sewing pins that are 1 3/4″ long are handy to keep the pieces in place. The size of the sewing pins is flexible for this project, since the crocheted fabric is very easy to pin through, but generally 45mm is a good size to use with thick fabrics as it’s a sturdy pin and 1 3/4″ is a good length for thicker fabrics as well.
Time Spent:
- Total Hand Towel: 7 hours.
- Hand Towel Before Stars: About 4 1/2 hours.
- Each Star: About 10 minutes + 10 minutes (or less) to sew in place.
Measurements:
- Hand Towel: 15 3/4″ Wide by 26 1/2″ in Length
- Star: 4″ from one point across to another
Gauge:
15 HDC by 11 Rows = 4″ by 3 3/4″
Abbreviations (US Terms):
- SC – Single Crochet (Photo Tutorial)
- HDC – Half Double Crochet (Photo Tutorial | Video Tutorial)
- DC – Double Crochet (Photo Tutorial)
- TR – Treble Crochet aka Triple Crochet [yarn over twice, insert hook into stitch, yarn over, pull through (4 loops on hook), (yarn over, pull through two loops) 3x]
- DTR – Double Treble Crochet aka Quadruple Crochet [yarn over three times, insert hook into stitch, yarn over, pull through (5 loops on hook), (yarn over, pull through two loops) 4x]
Crochet Pattern Overview:
First, you’ll crochet a hand towel following a basic half double crochet hand towel pattern, my Haylee Hand Towel (instructions included below). If you preferred working in a different stitch pattern, you could easily change this base to your favorite hand towel pattern.
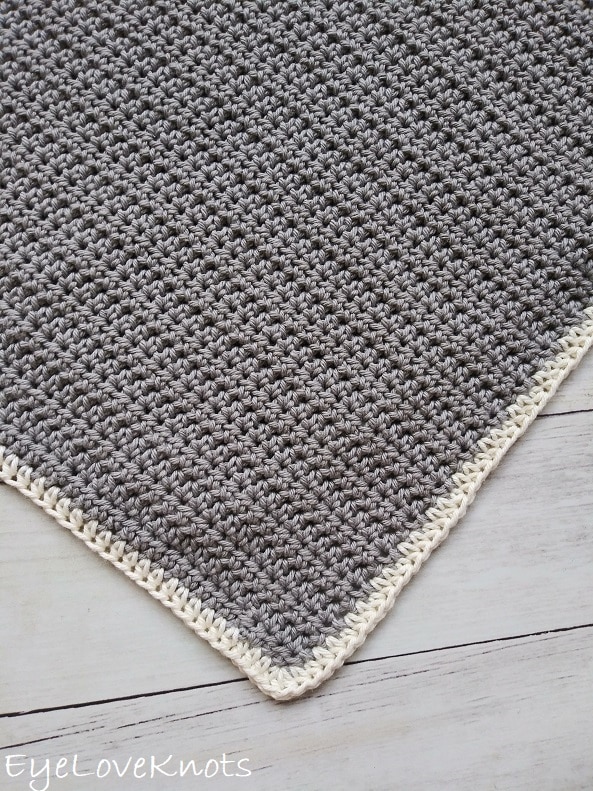
The hand towel is finished with a simple one round single crochet border, but you could easily add additional rounds of single crochet, or finish with something more decorative, like a pom pom border or reverse single crochet.
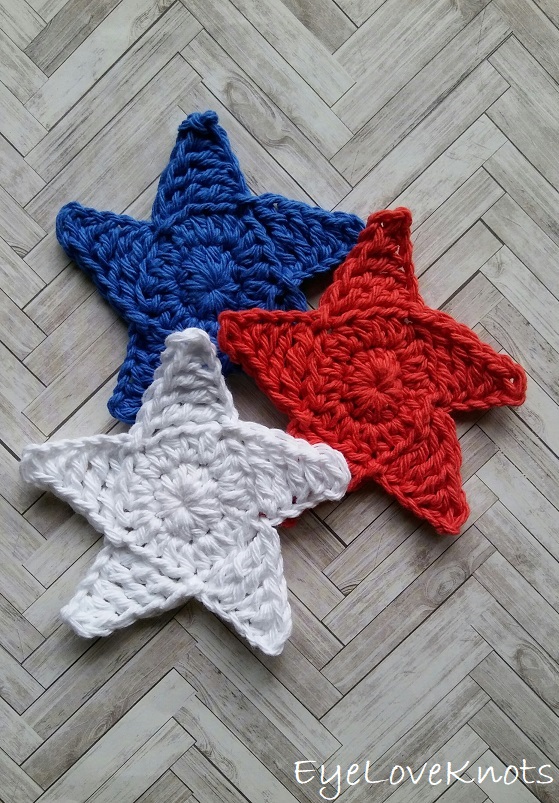
Then, crochet 7 stars (or as many or as little as you’d like) using a Quick Star Applique (instructions included below), leaving a long tail after the final join to sew them on. Alternatively, you could try a fabric glue if you didn’t want to sew them on, but I haven’t tried this so I can’t provide any recommendations.
Hand Towel Crochet Pattern:
In Silver, chain 57. HDC into the 3rd chain (skipped chains count as a stitch), and into each chain across. (56 HDC)
R2 – 74: Chain 1, turn. HDC into the 1st HDC, and into each HDC across. (56 HDC)
R75: Chain 1, turn. HDC into the 1st HDC, and into each HDC across, switching to White in the last yarn over of the last HDC of the row. Fasten off Silver. (56 HDC)
Border: In White, chain 1 and turn. HDC into the 1st 55 HDC, 3 HDC into the next HDC, evenly HDC 112 down the side of the hand towel (that’s 3 HDC per 2 rows), 3 HDC into the next stitch, HDC 54 along the opposite side of the foundation chain, 3 HDC into the next stitch, evenly HDC 112 up the side of the hand towel (that’s 3 HDC per 2 rows), 1 HDC into the same as the first HDC. Slip stitch join to the 1st HDC.
Fasten off, and weave in ends.
Star Video Tutorial:
Star Notes:
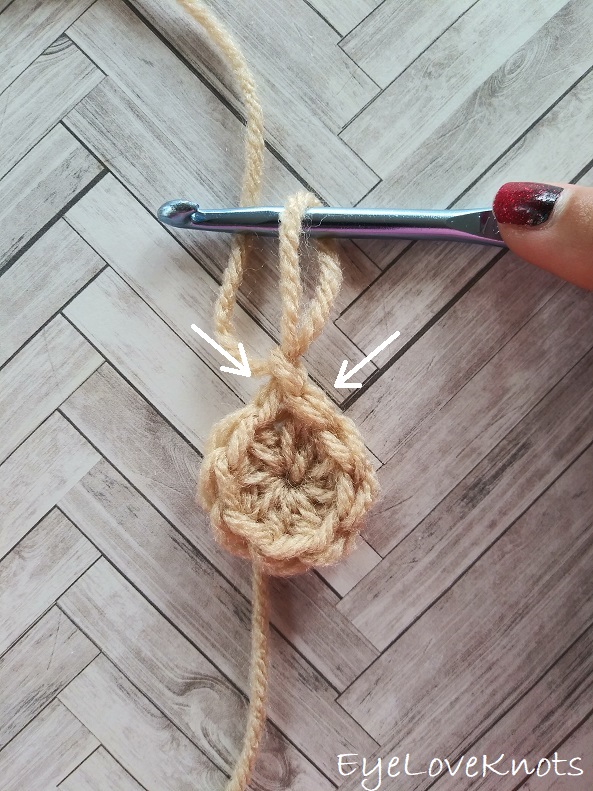
I work my crown and body differently than most to help keep my seam straight, and that is that the first stitch from the first set of increases is done in the first stitch of the round, which will appear just to left of the beginning chain, then the round will be worked as normal, and the final stitch of the round will be the second stitch of the first set of increases, and it will be worked into the same stitch as the first, and appear just to the right of the beginning chain. The photo above shows where the first and last stitch are worked, and I have a photo tutorial of this technique in my How to Keep a Straight Seam post. You can work in your preferred increase method as long as we end up with the same stitches at the end of the round.
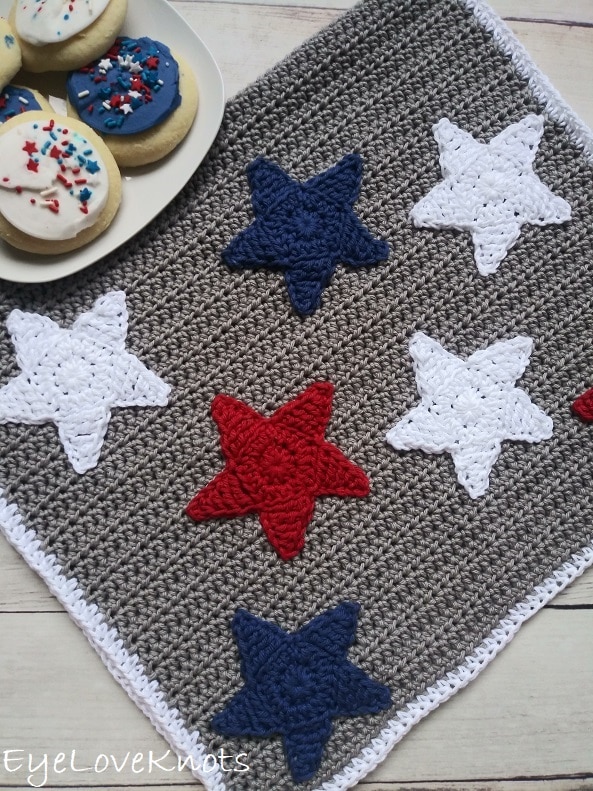
I made 7 stars: 2 in red, 2 in blue and 3 in white, and I placed them so they would only be on half of the hand towel – the side that would be visible once the hand towel was hanging from the oven door, which makes this a reversible hand towel if you leave the other half without appliques, or you could sew on a different applique to use that side of the hand towel for a different holiday or season. Feel free to make as little or as many stars as desired and in any color combination.
Star Applique Crochet Pattern – Make 7:
Chain 5. Join to form a ring. Chain 1, work 10 HDC into the ring. Join to the 1st HDC. (10 HDC)
R2: Chain 1, HDC in the 1st HDC, 2 HDC in each of the next 9 HDCs, HDC in the last HDC. Join to the 1st HDC. (20 HDC)
Note: This is a great time to weave in the beginning tail end as it’s the easiest to get to.
R3: (Chain 6 and work down the chain, SC in the 2nd chain, HDC in the 3rd chain, DC in the 4th chain, TR in the 5th chain and DTR in the 6th chain; Back to the circle, skip the first stitch that the chain 6 is coming out of, and next three HDCs, slip stitch in the 5th stitch) 5x, ending with a slip stitch joined in the same stitch as you began the round.
Fasten off with a long tail end for sewing, and weave in the initial tail end only.
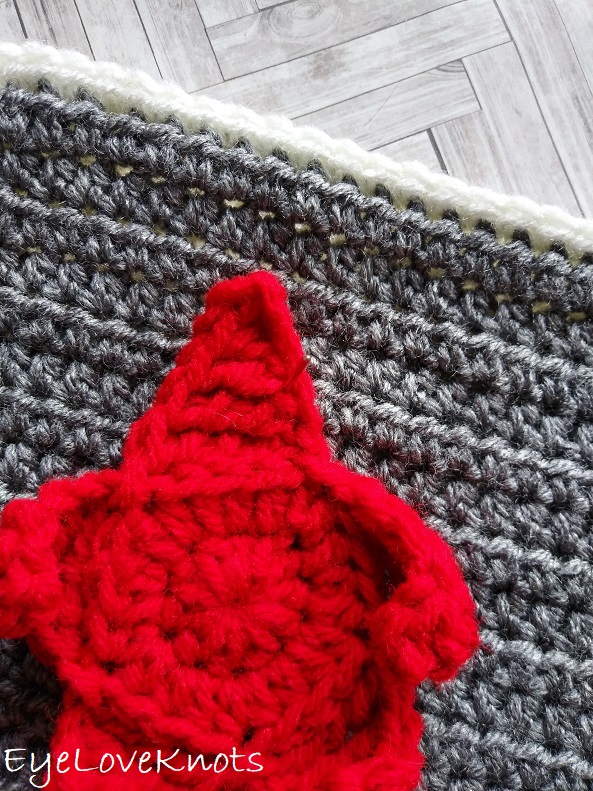
Sew on the Stars:
Lay the hand towel flat on a surface with the right side, or front side, facing up.
Lay out the stars in your desired pattern – I did so only on the bottom half of the hand towel, this being the side that would be visible once the hand towel was hanging from my oven door.
Once the placement is determined, use sewing pins to keep the stars in place as you work.
Thread the long tail end into the tapestry needle and use it to sew the star onto the hand towel.
How to Sew on the Stars (Shown on the Seeing Stars Throw Pillow):
Note: Following my instructions, the hand stitching is visible from the back side of the hand towel. If you prefer the hand towel be reversible with a solid back, make sure to keep your tapestry needle to the top layer as you work. If you can see your needle through the fabric when you flip it to the back, you’ll see the thread as well after you complete the stitch so you may want to check your stitches periodically.

Thread yarn tail into tapestry needle.
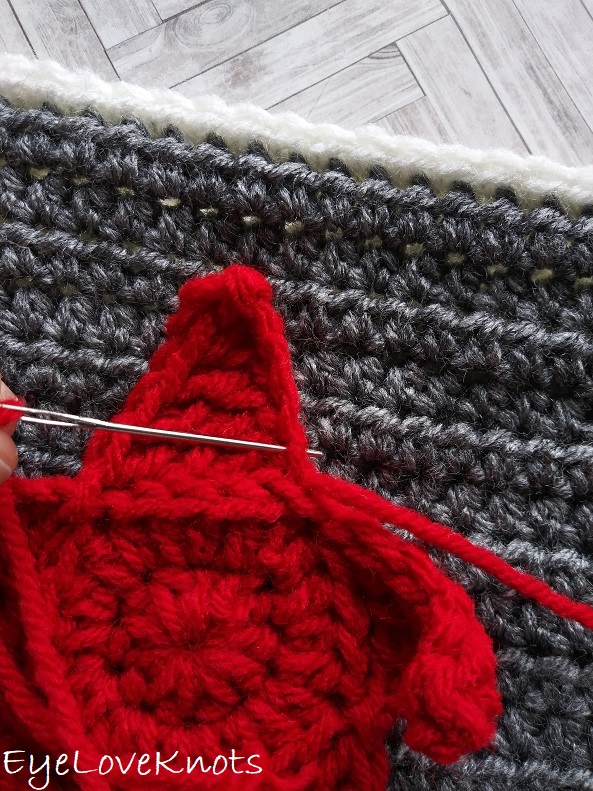
Sew in…
… and out through the middle of the top of the stitches (middle of what looks like a “V”).
You’ll barely notice the stitches. Once you’re back to the beginning, take the needle down, and weave in on the wrong side.
Please feel free to make and sell your own items made using this pattern, but keep in mind, this written pattern and my photos are protected by copyright. Please DO NOT claim this pattern as your own nor should you sell my pattern. DO NOT re-publish my photos as your own. DO NOT copy and paste my pattern anywhere, link to it instead so other’s can visit. Making videos providing instructions how to make my projects on any social media platform is also not permitted.
Join one of our awesome Facebook groups to share your creations, and see what others are up to!
– Yarn Crafts & Coffee Community
– DIY Home On Rockwood Lane
– Alexandra Lane Lifestyle
Linked Up To…
Ginx Woolly Linx Party June – Ginx Craft
Linky Ladies Party #214 – The Purple Poncho
The Loop Scoop #17 – Moogly Blog
Farmhouse Friday #211 – County Road 407
Craftastic Monday – Sew Can Do
Beautifully Made Link Party 169 – Across the Blvd
Tuesday Turn About #107 – My Wee Abode
Home Matters Linky Party #338 – Modern on Monticello
{Wow Me} Wednesday #511 – Ginger Snap Crafts
The Wednesday Link Party 405 – Oombawka Design
Creative Crafts Linky Party #48 – Creatively Beth
Creatively Crafty Link Party #282 – Life Beyond the Kitchen
Saturday Sparks Link Party 430 – Pieced Pastimes
Craft Schooling Sunday – Creative Jewish Mom
Happiness is Homemade #381 – Decor Craft Design
Hearth and Soul Link Party – April, the 21st Century Housewife
Handmade Monday #234 – Sum of their Stories
Unlimited Link Party 29 – Grammy’s Grid
You’re the Star Blog Hop – Decor Craft Design
The Really Crafty Link Party #273 – Keeping it Real
595th Inspire Me Tuesday – A Stroll Thru Life
Fabulous Party 378 – Lou Lou Girls
All About Home #98 – Common Ground
Party in Your PJs #365 – The Apple Street Cottage
Your Whims Wednesday #518 – My Girlish Whims
Wonderful Wednesday – Oh My Heartsie Girl
Artsy-Fartsy Party #351 – Artsy-Fartsy Mama
Encouraging Hearts and Home Blog Hop – Scratch Made Food
Thursday Favorite Things #496 – An Artful Mom
Friday Favorites – Busy Being Jennifer
Home Matters Linky Party #337 – Modern on Monticello
Create, Bake, Grow & Gather Party #475 – Shabby Art Boutique
Funtastic Friday Link Party #339 – Simply Beautiful by Angela
Grace at Home No 429 – Imparting Grace
Link Your Stuff – Annemarie’s Haakblog
A Morning Cup of Joe – The Cottage Market
Such a cute towel, the white border does work so well with the stars too! it’s lovely! 🙂
Hope you had a good weekend! It was a quiet one here 🙂
Thank you! I am glad I changed it from cream to white. I’m so happy with it. Glad you stopped by 🙂
Ahh this is absolutely lovely! Thanks for the pattern!
CottonNutty
Homemade Monday Linkup
Thank YOU! Going to come check out the site!
That is such a lovely towel. Thank you for sharing with us; Pinned.
Thank YOU!
Lovely pattern.
Patriotic projects are always a favorite of mine. Love how this one turned out! #HomeMattersParty
Thanks, Donna! I really enjoy decorating and creating things that are patriotic.